楼主 #1 2021-02-25 11:56:08 分享评论
- raspberryman
- 会员
- 注册时间: 2019-12-27
- 已发帖子: 503
- 积分: 465
试一试 搭建 OpenCV 入门环境
Ubuntu版本:
sudo apt-get install libopencv-devtest.cpp
#include <opencv2/core/core.hpp>
#include <opencv2/highgui/highgui.hpp>
#include <iostream>

using namespace cv;
using namespace std;

int main( int argc, char** argv )
{
    if( argc != 2)
    {
     cout <<" Usage: display_image ImageToLoadAndDisplay" << endl;
     return -1;
    }

    Mat image;
    image = imread(argv[1], CV_LOAD_IMAGE_COLOR);   // Read the file

    if(! image.data )                              // Check for invalid input
    {
        cout <<  "Could not open or find the image" << std::endl ;
        return -1;
    }

    namedWindow( "Display window", WINDOW_AUTOSIZE );// Create a window for display.
    imshow( "Display window", image );                   // Show our image inside it.

    waitKey(0);                                          // Wait for a keystroke in the window
    return 0;
}
编译命令行:
g++ -o test test.cpp -lopencv_core -lopencv_imgproc -lopencv_ximgproc -lopencv_highgui -lopencv_stitching -lopencv_imgcodecs运行:
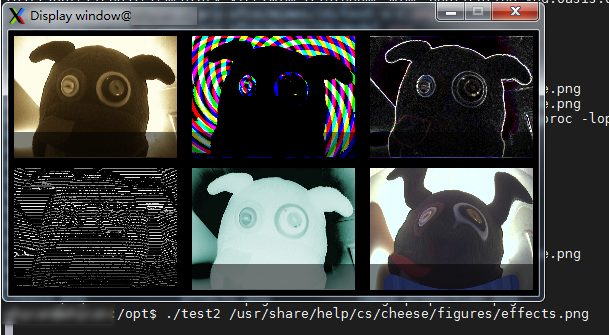
./test2 /usr/share/help/cs/cheese/figures/cheese.png参考: https://docs.opencv.org/2.4/doc/tutorials/introduction/display_image/display_image.html

最近编辑记录 raspberryman (2021-02-25 12:00:32)
离线
楼主 #2 2021-02-25 13:58:52 分享评论
- raspberryman
- 会员
- 注册时间: 2019-12-27
- 已发帖子: 503
- 积分: 465
Re: 试一试 搭建 OpenCV 入门环境
VC2017 版本:
-------------------------------------------
1. 安装 VC2017
2. OpenCV官网下载 https://opencv.org/releases/ 预编译版本 opencv-4.5.1-vc14_vc15.exe
解压到 D盘
3. 把 D:\opencv\build\x64\vc15\bin 添加到系统PATH
4. 新建工程, 把 D:\opencv\build\include 添加到头文件目录, 把 D:\opencv\build\x64\vc15\lib 添加到库文件目录, 并且把 opencv_world451.lib / opencv_world451d.lib 添加到链接库
工程文件 test.cpp 代码在一楼,
5. 编译运行, 结果和一楼一样。
离线
楼主 #3 2021-02-25 14:01:01 分享评论
- raspberryman
- 会员
- 注册时间: 2019-12-27
- 已发帖子: 503
- 积分: 465
Re: 试一试 搭建 OpenCV 入门环境
Qt 版本
----------------------------------------
1. 安装 VC2017
2. OpenCV官网下载 https://opencv.org/releases/ 预编译版本 opencv-4.5.1-vc14_vc15.exe
3. 下载安装 qt-opensource-windows-x86-5.12.3.exe 勾选 VC2017 x64 方案。
4. test.pro 工程文件添加以下代码:
INCLUDEPATH += D:\opencv\build\include

CONFIG(debug, debug|release) {
    LIBS += -LD:\opencv\build\x64\vc15\lib -lopencv_world451d
} else {
    LIBS += -LD:\opencv\build\x64\vc15\lib -lopencv_world451
}
5. 添加 test.cpp 代码到工程, 编译运行, 结果与一楼一样。
离线
楼主 #4 2021-09-20 10:46:12 分享评论
- raspberryman
- 会员
- 注册时间: 2019-12-27
- 已发帖子: 503
- 积分: 465
Re: 试一试 搭建 OpenCV 入门环境
#include <opencv2/core/core.hpp>
#include <opencv2/highgui/highgui.hpp>
#include <opencv2/imgproc.hpp>
#include <iostream>

using namespace cv;
using namespace std;

int main( int argc, char** argv )
{
    if( argc != 2)
    {
     cout <<" Usage: display_image ImageToLoadAndDisplay" << endl;
     return -1;
    }

    Mat image, image2;
    //image = imread(argv[1], CV_LOAD_IMAGE_COLOR);   // Read the file
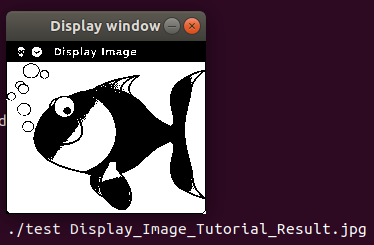
    image = imread(argv[1], IMREAD_GRAYSCALE);   // Read the file

    threshold(image, image2, 128, 255, THRESH_BINARY | THRESH_OTSU);

    if(! image2.data )                              // Check for invalid input
    {
        cout <<  "Could not open or find the image" << std::endl ;
        return -1;
    }

    namedWindow( "Display window", WINDOW_AUTOSIZE);// Create a window for display.
    imshow( "Display window", image2);                   // Show our image inside it.

    waitKey(0);                                          // Wait for a keystroke in the window
    return 0;
}
离线
太原小智科技有限责任公司 - 东莞哇酷科技有限公司联合开发