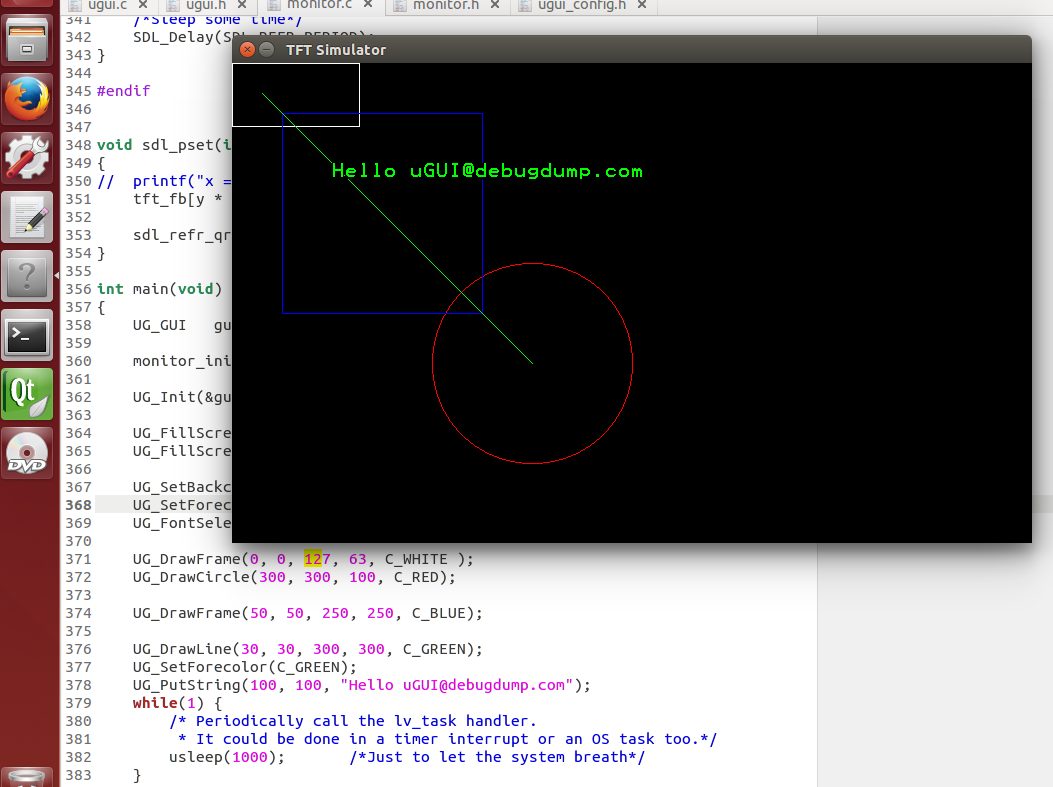
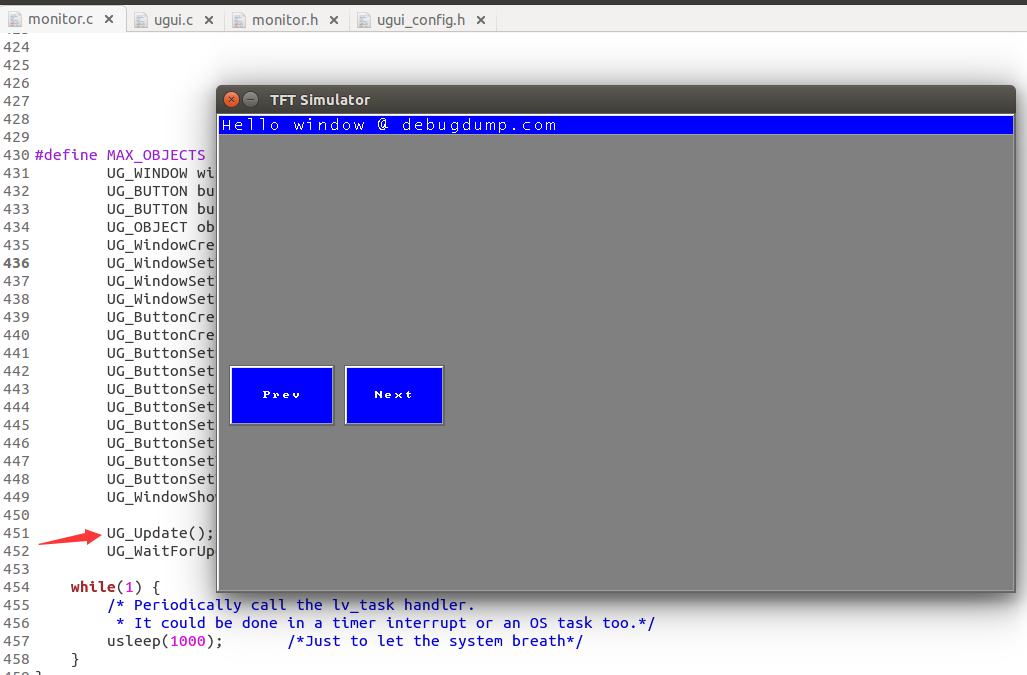
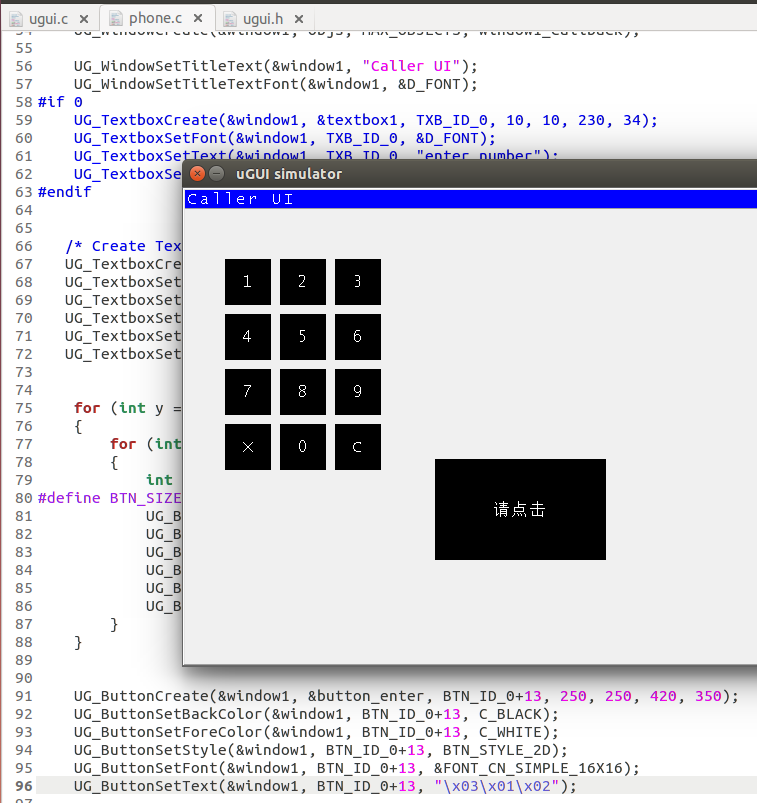
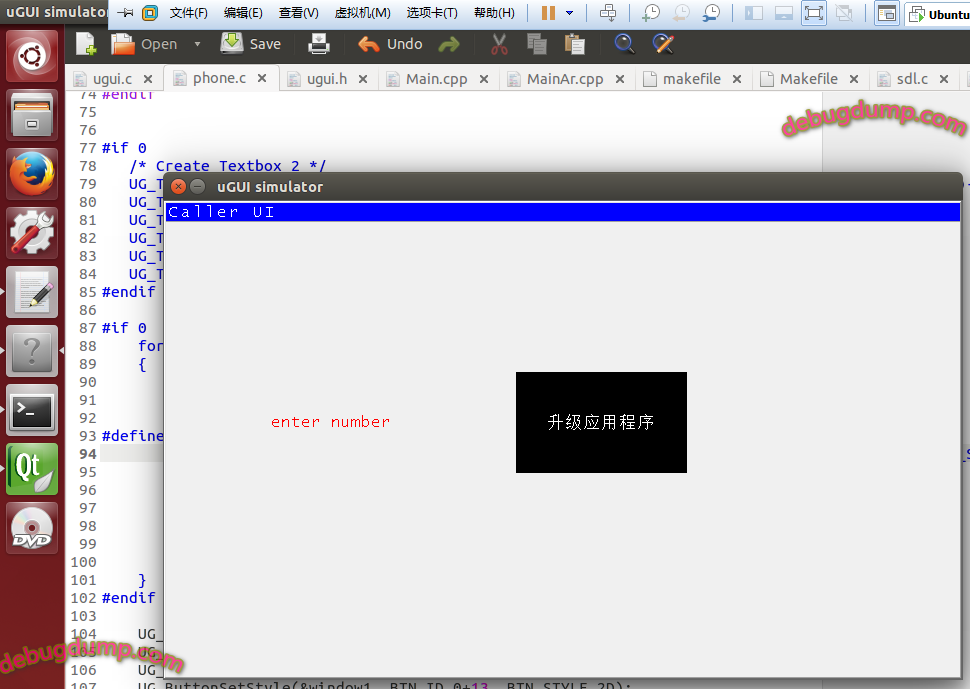
楼主 #1 2017-09-07 16:29:19 分享评论
- admin
- 管理员
- 注册时间: 2017-09-06
- 已发帖子: 20
- 积分: 20

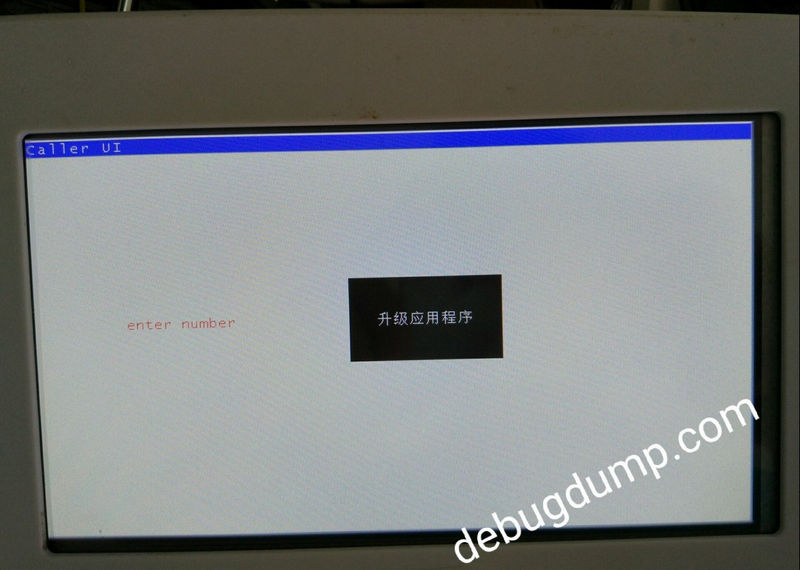
发现一个轻量级UI, 移植到 STM32/STM8 不错 ----- µGUI/uGUI
离线
楼主 #2 2017-09-07 16:29:38 分享评论
- admin
- 管理员
- 注册时间: 2017-09-06
- 已发帖子: 20
- 积分: 20
Re: 发现一个轻量级UI, 移植到 STM32/STM8 不错 ----- µGUI/uGUI
Introduction
What is µGUI?
µGUI is a free and open source graphic library for embedded systems. It is platform-independent and can be easily ported to almost any microcontroller system. As long as the display is capable of showing graphics, µGUI is not restricted to a certain display technology. Therefore, display technologies such as LCD, TFT, E-Paper, LED or OLED are supported. The whole module consists of three files: ugui.c, ugui.h and ugui_config.h.
µGUI Features
µGUI supports any color, grayscale or monochrome display
µGUI supports any display resolution
µGUI supports multiple different displays
µGUI supports any touch screen technology (e.g. AR, PCAP)
µGUI supports windows and objects (e.g. button, textbox)
µGUI supports platform-specific hardware acceleration
16 different fonts available
cyrillic fonts supported
TrueType font converter available (https://github.com/AriZuu)
integrated and free scalable system console
basic geometric functions (e.g. line, circle, frame etc.)
can be easily ported to almost any microcontroller system
no risky dynamic memory allocation required
µGUI Requirements
µGUI is platform-independent, so there is no need to use a certain embedded system. In order to use µGUI, only two requirements are necessary:
a C-function which is able to control pixels of the target display.
integer types for the target platform have to be adjusted in ugui_config.h.
离线
楼主 #3 2017-09-07 16:33:54 分享评论
- admin
- 管理员
- 注册时间: 2017-09-06
- 已发帖子: 20
- 积分: 20
Re: 发现一个轻量级UI, 移植到 STM32/STM8 不错 ----- µGUI/uGUI
那么小的µGUI, 居然还支持 TrueType Font (ttf字体)
离线
#4 2018-03-23 14:36:44 分享评论
- chaoking
- 会员
- 注册时间: 2018-03-23
- 已发帖子: 6
- 积分: 6
Re: 发现一个轻量级UI, 移植到 STM32/STM8 不错 ----- µGUI/uGUI
厉害了,感谢作者的无私奉献,正在移植中
离线
#6 2018-04-18 08:19:21 分享评论
- xinxiaoci
- 会员
- 注册时间: 2018-04-18
- 已发帖子: 71
- 积分: 71
Re: 发现一个轻量级UI, 移植到 STM32/STM8 不错 ----- µGUI/uGUI
厉害了,感谢作者的无私奉献,正在移植中
移植好了没有?
最近编辑记录 xinxiaoci (2018-04-18 08:20:23)
离线
#7 2018-04-18 09:49:26 分享评论
- kgp0213
- 会员
- 注册时间: 2018-01-15
- 已发帖子: 149
- 积分: 149
Re: 发现一个轻量级UI, 移植到 STM32/STM8 不错 ----- µGUI/uGUI
移植好了没有?
离线
#9 2018-04-18 10:27:09 分享评论
- qwert1213131
- 会员
- 注册时间: 2018-01-08
- 已发帖子: 57
- 积分: 50.5
Re: 发现一个轻量级UI, 移植到 STM32/STM8 不错 ----- µGUI/uGUI
移植好了没有?
只需要把画点函数提供给uGUI调用就可以,然后使用内部的API进行使用,
/* uGUI */
void pset(UG_U16 x, UG_U16 y, UG_COLOR c)
{
LCD_WriteBuffer(x,y,c);
}
/* GUI structure */
UG_GUI gui;
函数中直接调用下面:
UG_Init(&gui,(void(*)(UG_S16,UG_S16,UG_COLOR))pset,128,128);
最近编辑记录 qwert1213131 (2018-04-18 10:31:14)
离线
#10 2018-04-18 11:09:07 分享评论
- daydayup
- 会员
- 注册时间: 2017-10-09
- 已发帖子: 343
- 积分: 343
Re: 发现一个轻量级UI, 移植到 STM32/STM8 不错 ----- µGUI/uGUI
kgp0213 说:移植好了没有?
只需要把画点函数提供给uGUI调用就可以,然后使用内部的API进行使用,
/* uGUI */
void pset(UG_U16 x, UG_U16 y, UG_COLOR c)
{
LCD_WriteBuffer(x,y,c);}
/* GUI structure */
UG_GUI gui;函数中直接调用下面:
UG_Init(&gui,(void(*)(UG_S16,UG_S16,UG_COLOR))pset,128,128);
厉害了老铁,学习!
离线
#11 2018-04-18 11:44:45 分享评论
- qwert1213131
- 会员
- 注册时间: 2018-01-08
- 已发帖子: 57
- 积分: 50.5
Re: 发现一个轻量级UI, 移植到 STM32/STM8 不错 ----- µGUI/uGUI
qwert1213131 说:kgp0213 说:移植好了没有?
只需要把画点函数提供给uGUI调用就可以,然后使用内部的API进行使用,
/* uGUI */
void pset(UG_U16 x, UG_U16 y, UG_COLOR c)
{
LCD_WriteBuffer(x,y,c);}
/* GUI structure */
UG_GUI gui;函数中直接调用下面:
UG_Init(&gui,(void(*)(UG_S16,UG_S16,UG_COLOR))pset,128,128);厉害了老铁,学习!
有硬件加速的选项,但是这ui的控件太少了,我还是去玩LittleVGL了
离线
#12 2018-04-19 14:48:38 分享评论
- lcfmax
- 会员
- 注册时间: 2018-04-13
- 已发帖子: 329
- 积分: 272.5
Re: 发现一个轻量级UI, 移植到 STM32/STM8 不错 ----- µGUI/uGUI
这个挺不错的,有没有移植运行的效果图看看
离线
#13 2018-04-19 17:15:44 分享评论
- qwert1213131
- 会员
- 注册时间: 2018-01-08
- 已发帖子: 57
- 积分: 50.5
Re: 发现一个轻量级UI, 移植到 STM32/STM8 不错 ----- µGUI/uGUI
这个挺不错的,有没有移植运行的效果图看看
去油管可以看到很多的,
建议试试这个https://littlevgl.com/
离线
#15 2018-04-20 09:01:23 分享评论
- qwert1213131
- 会员
- 注册时间: 2018-01-08
- 已发帖子: 57
- 积分: 50.5
Re: 发现一个轻量级UI, 移植到 STM32/STM8 不错 ----- µGUI/uGUI
nuklear不知道能不能用到普通的单片机里去
离线
#16 2018-04-25 16:43:14 分享评论
- chaoking
- 会员
- 注册时间: 2018-03-23
- 已发帖子: 6
- 积分: 6
Re: 发现一个轻量级UI, 移植到 STM32/STM8 不错 ----- µGUI/uGUI
交作业,移植不难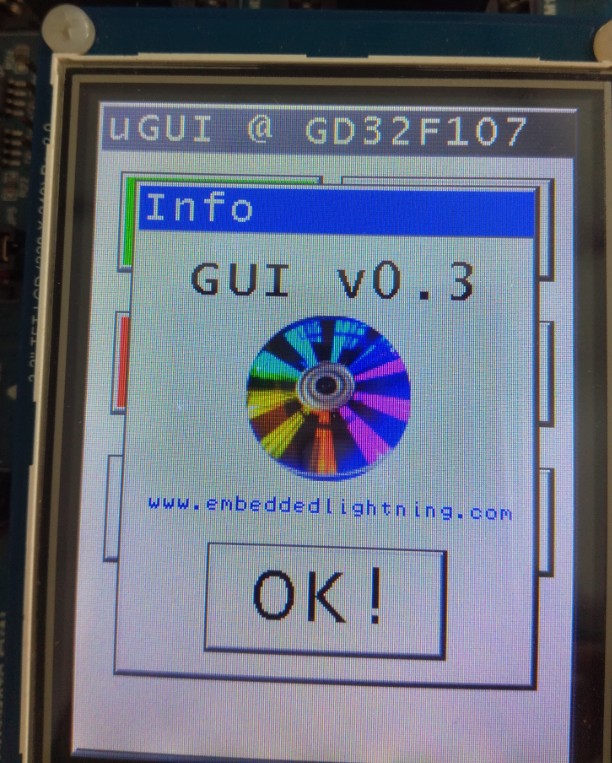
离线
#17 2018-05-04 11:19:12 分享评论
- LAQ
- 会员
- 注册时间: 2017-09-20
- 已发帖子: 38
- 积分: 38
Re: 发现一个轻量级UI, 移植到 STM32/STM8 不错 ----- µGUI/uGUI
可以移植到ESP32里面不
离线
#18 2018-05-04 11:30:26 分享评论
- cityf
- 会员
- 注册时间: 2017-11-03
- 已发帖子: 195
- 积分: 195
Re: 发现一个轻量级UI, 移植到 STM32/STM8 不错 ----- µGUI/uGUI
当然可以, ESP32 RAM那么多.
离线
#19 2018-05-04 11:55:21 分享评论
- LAQ
- 会员
- 注册时间: 2017-09-20
- 已发帖子: 38
- 积分: 38
Re: 发现一个轻量级UI, 移植到 STM32/STM8 不错 ----- µGUI/uGUI
有例程可以提供下不
离线
#20 2018-05-04 12:33:42 分享评论
- xinxiaoci
- 会员
- 注册时间: 2018-04-18
- 已发帖子: 71
- 积分: 71
Re: 发现一个轻量级UI, 移植到 STM32/STM8 不错 ----- µGUI/uGUI
我来检查作业,不错!100分!
离线
#21 2018-05-04 14:07:34 分享评论
- 晕哥
- 管理员
- 所在地: wechat: whycan_cn
- 注册时间: 2017-09-06
- 已发帖子: 9,423
- 积分: 9202
Re: 发现一个轻量级UI, 移植到 STM32/STM8 不错 ----- µGUI/uGUI
http://embeddedlightning.com/wp-content/uploads/2015/12/ssd1325.c
#include    "system.h"
#include    "ugui.h"

/* -------------------------------------------------- */
/* SOFTWARE SPI                                       */
/* -------------------------------------------------- */
#define OLED_PORT  GPIOB
#define OLED_SCK   GPIO_Pin_0
#define OLED_SDA   GPIO_Pin_1
#define OLED_DC    GPIO_Pin_2
#define OLED_RES   GPIO_Pin_3
#define OLED_CS    GPIO_Pin_4

void write_cmd(unsigned char b)
{
   unsigned char i;
   GPIO_WriteBit(OLED_PORT, OLED_CS, Bit_RESET);
   GPIO_WriteBit(OLED_PORT, OLED_DC, Bit_RESET);
   for (i=0x80; i; i>>=1)
   {
      GPIO_WriteBit(OLED_PORT, OLED_SCK, Bit_RESET);
      GPIO_WriteBit(OLED_PORT, OLED_SDA, (b&i)?Bit_SET:Bit_RESET);
      GPIO_WriteBit(OLED_PORT, OLED_SCK, Bit_SET);
   }
   GPIO_WriteBit(OLED_PORT, OLED_DC, Bit_SET);
   GPIO_WriteBit(OLED_PORT, OLED_CS, Bit_SET);
}

void write_data(unsigned char b)
{
   unsigned char i;
   GPIO_WriteBit(OLED_PORT, OLED_CS, Bit_RESET);
   GPIO_WriteBit(OLED_PORT, OLED_DC, Bit_SET);
   for (i=0x80; i; i>>=1)
   {
      GPIO_WriteBit(OLED_PORT, OLED_SCK, Bit_RESET);
      GPIO_WriteBit(OLED_PORT, OLED_SDA, (b&i)?Bit_SET:Bit_RESET);
      GPIO_WriteBit(OLED_PORT, OLED_SCK, Bit_SET);
   }
   GPIO_WriteBit(OLED_PORT, OLED_DC, Bit_SET);
   GPIO_WriteBit(OLED_PORT, OLED_CS, Bit_SET);
}

/* -------------------------------------------------- */
/* FRAMEBUFFER                                        */
/* -------------------------------------------------- */
unsigned char buff[128*32]; // 128x64 4BPP OLED

/* -------------------------------------------------- */
/* SSD1325 PSET-FUNCTION                              */
/* -------------------------------------------------- */
void ssd1325_pset ( UG_S16 x , UG_S16 y , UG_COLOR c )
{
   unsigned int n;
   unsigned char b;
   unsigned char col;

   col = c & 0x0F;

   n = (x >> 1) + 64 * y;
   b = buff[n];

   switch ( x%2 )
   {
      case 0: b &= 0xF0; b |= col; break;
      case 1: b &= 0x0F; b |= col<<4; break;
   }
   buff[n] = b;
}

/* -------------------------------------------------- */
/* SSD1325 INIT-FUNCTION                              */
/* -------------------------------------------------- */
void ssd1325_init( void )
{
   GPIO_WriteBit(OLED_PORT, OLED_RES, Bit_RESET);
   delay_ms(100);
   GPIO_WriteBit(OLED_PORT, OLED_RES, Bit_SET);
   delay_ms(100);

   write_cmd(0xAE|0x00);
   delay_ms(10);
   write_cmd(0xB3);         // Display Clock Divider/Osciallator Frequency
   write_cmd(0x91);         //   Default => 0x41
   delay_ms(10);
   write_cmd(0xA8);         // Set Multiplex Ratio
   write_cmd(0x3F);         //   Default => 0x5F
   delay_ms(10);
   write_cmd(0xA2);         // Set Display Offset
   write_cmd(0x4C);         //   Default => 0x00
   delay_ms(10);
   write_cmd(0xA1);         // Set Display Start Line
   write_cmd(0x00);         //   Default => 0x00
   delay_ms(10);
   write_cmd(0xAD);         // Set Master Configuration
   write_cmd(0x02|0x00);   //   Default => 0x03
   delay_ms(10);
   write_cmd(0xA0);         // Set Re-Map & Data Format
   write_cmd(0x50);         //   Default => 0x00
   delay_ms(10);
   write_cmd(0x84|0x02);   // Set Current Range
   delay_ms(10);
   write_cmd(0xB8);         // Set Gray Scale Table
   write_cmd(0x01);         //   Gray Scale Level 1
   write_cmd(0x11);         //   Gray Scale Level 3 & 2
   write_cmd(0x22);         //   Gray Scale Level 5 & 4
   write_cmd(0x32);         //   Gray Scale Level 7 & 6
   write_cmd(0x43);         //   Gray Scale Level 9 & 8
   write_cmd(0x54);         //   Gray Scale Level 11 & 10
   write_cmd(0x65);         //   Gray Scale Level 13 & 12
   write_cmd(0x76);         //   Gray Scale Level 15 & 14
   delay_ms(10);
   write_cmd(0x81);         // Set Contrast Value
   write_cmd(0x7F);         //   Default => 0x40
   delay_ms(10);
   write_cmd(0xB2);         // Set Frame Frequency (Row Period)
   write_cmd(0x46);         //   Default => 0x25 (37 Display Clocks)
   delay_ms(10);
   write_cmd(0xB1);         // Phase 1 & 2 Period Adjustment
   write_cmd(0x22);         //   Default => 0x53 (5 Display Clocks [Phase 2] / 3 Display Clocks [Phase 1])
   delay_ms(10);
   write_cmd(0xBC);         // Set Pre-Charge Voltage Level
   write_cmd(0x10);         //   Default => 0x10 (Connect to VCOMH)
   delay_ms(10);
   write_cmd(0xB4);         // Set Pre-Charge Compensation Level
   write_cmd(0x07);         //   Default => 0x00 (No Compensation)
   write_cmd(0xB0);       // Set Pre-Charge Compensation Enable
   write_cmd(0x08|0x20);   //   Default => 0x08
   delay_ms(10);
   write_cmd(0xBE);         // Set Output Level High Voltage for COM Signal
   write_cmd(0x02);         //   Default => 0x1D (0.81*VREF)
   delay_ms(10);
   write_cmd(0xBF);         // Set Segment Low Voltage Level
   write_cmd(0x02|0x0C);   //   Default => 0x0E
   delay_ms(10);
   write_cmd(0xA4|0x00);   // Set Display Mode
   delay_ms(10);
   write_cmd(0xAE|0x01);   // Set Display On/Off
   delay_ms(10);
}

/* -------------------------------------------------- */
/* SSD1325 UPDATE-FUNCTION                            */
/* -------------------------------------------------- */
void ssd1325_update( void )
{
   unsigned int i;
   unsigned char* p;
   p = &buff[0];

   write_cmd(0x15);      // Set Column Address
   write_cmd(0);         //   Default => 0x00
   write_cmd(0x3F);      //   Default => 0x3F (Total Columns Devided by 2)
   write_cmd(0x75);      // Set Row Address
   write_cmd(0);         //   Default => 0x00
   write_cmd(0x3F);      //   Default => 0x4F

   for(i=0;i<128*32;i++)
   {
      write_data(*p++);
   }
}


UG_GUI   gui;

int main(void)
{

   //...
   //...

   /* OLED init */
   ssd1325_init();

   /* 碌GUI init */
   UG_Init(&gui,ssd1325_pset,128,64);

   UG_FillScreen( C_BLACK );
   UG_DrawFrame( 0, 0, 127, 63, C_WHITE );

   ssd1325_update();

   while(1)
   {

   }
}
这里有一个移植demo, poring 到esp32 问题不大。
http://embeddedlightning.com/forums/topic/pset-function-examples/
离线
#22 2018-06-19 18:43:49 分享评论
- 19697805
- 会员
- 注册时间: 2018-06-19
- 已发帖子: 77
- 积分: 72
Re: 发现一个轻量级UI, 移植到 STM32/STM8 不错 ----- µGUI/uGUI
谢谢分享
离线
#23 2018-07-31 22:33:16 分享评论
- abc3240660
- 会员
- 注册时间: 2018-07-31
- 已发帖子: 100
- 积分: 100
Re: 发现一个轻量级UI, 移植到 STM32/STM8 不错 ----- µGUI/uGUI
看起来还不错啊
离线
#26 2018-11-07 21:28:22 分享评论
- 晕哥
- 管理员
- 所在地: wechat: whycan_cn
- 注册时间: 2017-09-06
- 已发帖子: 9,423
- 积分: 9202
Re: 发现一个轻量级UI, 移植到 STM32/STM8 不错 ----- µGUI/uGUI
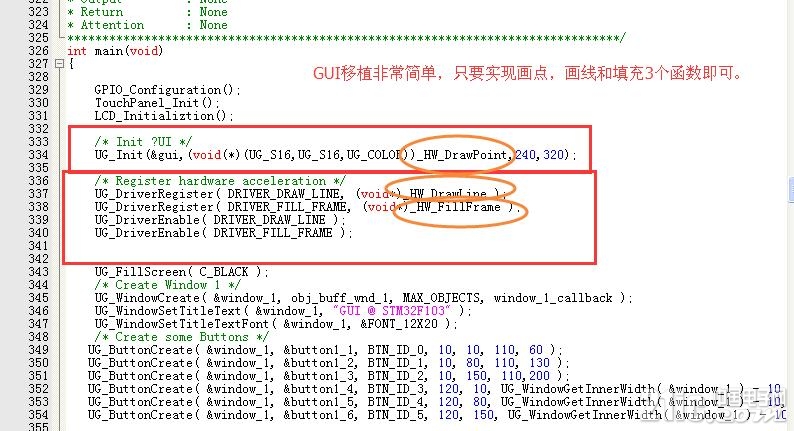
一个开源小型GUI移植到STM32F103上: http://bbs.21ic.com/blog-1849938-170836.html
默认支持3种 2D 硬件加速:
/* Supported drivers */
#define NUMBER_OF_DRIVERS 3
#define DRIVER_DRAW_LINE 0
#define DRIVER_FILL_FRAME 1
#define DRIVER_FILL_AREA 2
离线
#27 2018-11-07 22:00:48 分享评论
离线
#28 2018-11-07 22:11:25 分享评论
- 晕哥
- 管理员
- 所在地: wechat: whycan_cn
- 注册时间: 2017-09-06
- 已发帖子: 9,423
- 积分: 9202
Re: 发现一个轻量级UI, 移植到 STM32/STM8 不错 ----- µGUI/uGUI
https://github.com/AndresNavas/PSoC5_uGUI_Sample
https://github.com/AndresNavas/PSoC5_uGUI_Sample/blob/master/TFT_SSD1963/TFT_test.cydsn/main.c
Sample and Test project of uGUI library v.0.31 for a PSoC5-LP Kit using a SSD1963 Solomon LCD controller and XPT2046 Touch Controller.
Developed for CY8CKIT-050 PSoC5-LP Kit with a CY8C5868AXI-LP035 device using PSoC Creator 4.2
Folder with LCD Datasheets.
Folder with Picture and Video sample.
Folder with PSoC Creator Project (Inside Folder with Drivers and uGUI Library)
离线
#30 2018-11-09 12:00:27 分享评论
- 晕哥
- 管理员
- 所在地: wechat: whycan_cn
- 注册时间: 2017-09-06
- 已发帖子: 9,423
- 积分: 9202
离线
#33 2019-11-15 08:25:34 分享评论
- 我思故我在
- 会员
- 注册时间: 2019-09-03
- 已发帖子: 244
- 积分: 243.5
Re: 发现一个轻量级UI, 移植到 STM32/STM8 不错 ----- µGUI/uGUI
ugui 这个好, 看了一下代码确实简洁,资源占用少, 用在单片机不错。
离线
#34 2019-11-16 21:48:35 分享评论
- KeyMove
- 会员
- 注册时间: 2019-11-15
- 已发帖子: 7
- 积分: 7
Re: 发现一个轻量级UI, 移植到 STM32/STM8 不错 ----- µGUI/uGUI
挺好用的,呈现的效果也不错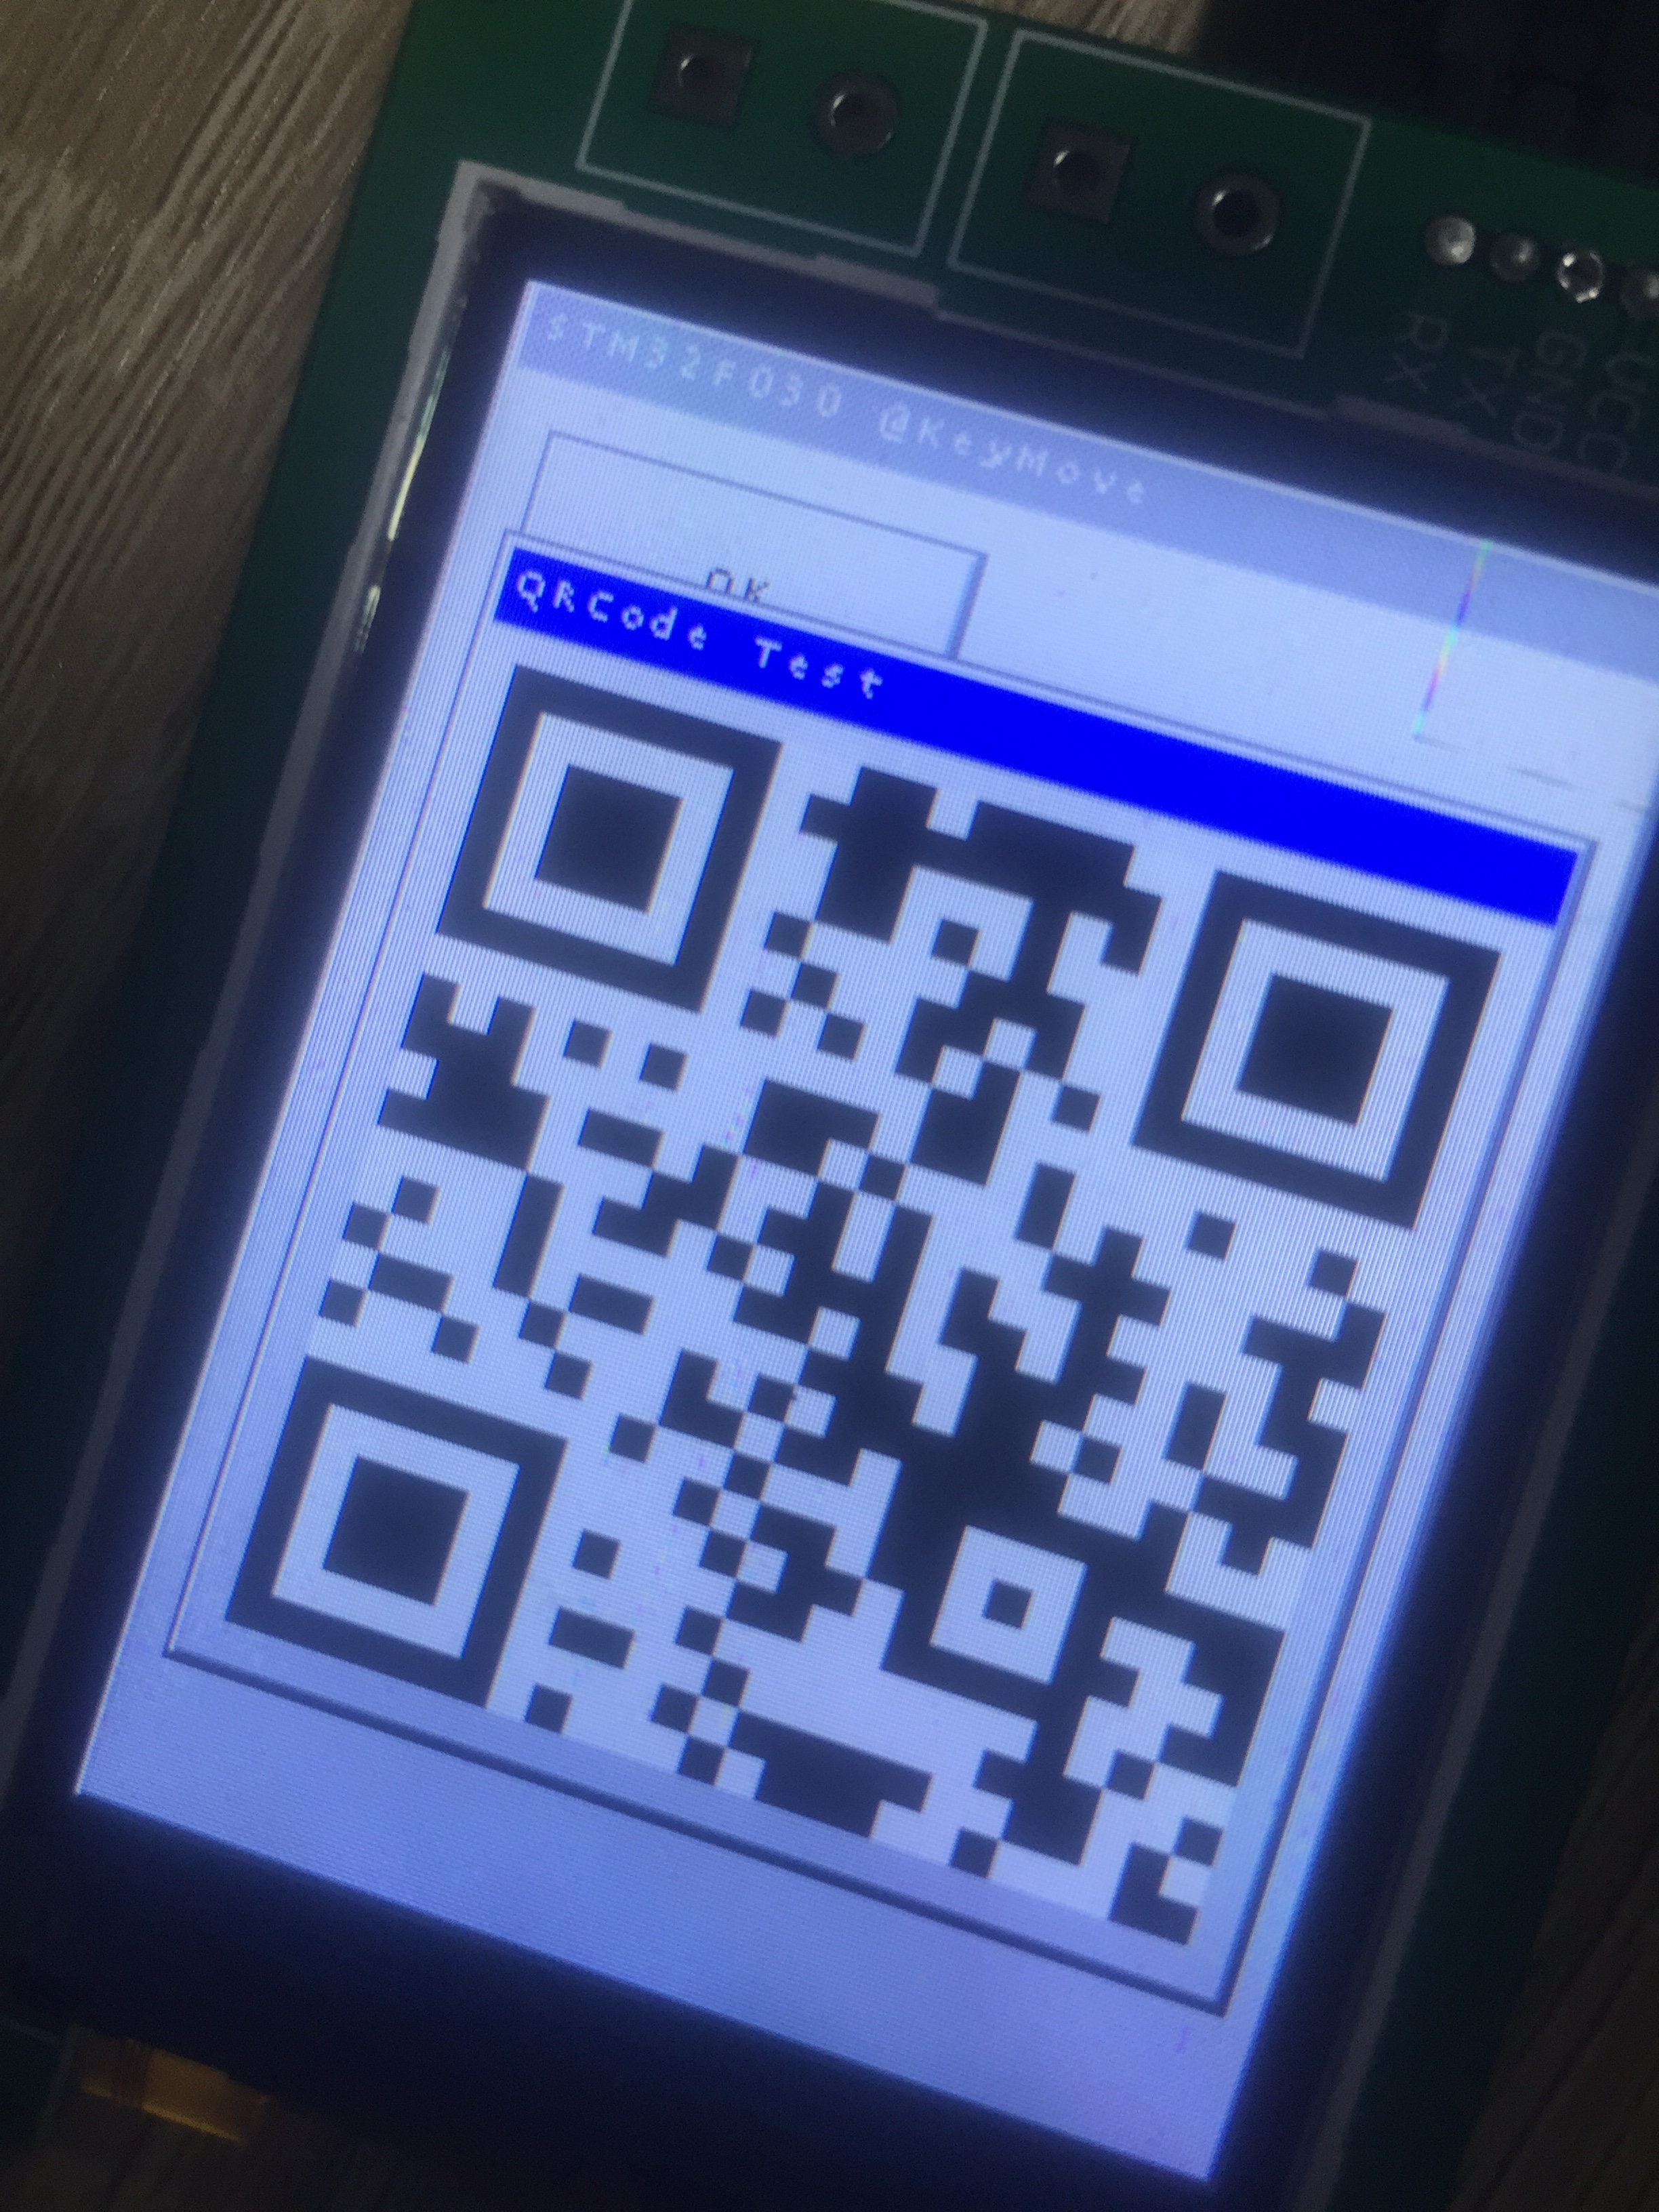
离线
#36 2019-12-21 20:55:44 分享评论
- WangLY_Snot
- 会员
- 注册时间: 2019-12-21
- 已发帖子: 19
- 积分: 3
Re: 发现一个轻量级UI, 移植到 STM32/STM8 不错 ----- µGUI/uGUI
离线
#38 2019-12-23 15:58:48 分享评论
- szchen2006
- 会员
- 注册时间: 2019-10-09
- 已发帖子: 216
- 积分: 166.5
Re: 发现一个轻量级UI, 移植到 STM32/STM8 不错 ----- µGUI/uGUI
学习了,顶!
离线
#39 2020-02-16 20:08:17 分享评论
- citroen988
- 会员
- 注册时间: 2020-02-15
- 已发帖子: 8
- 积分: 3
Re: 发现一个轻量级UI, 移植到 STM32/STM8 不错 ----- µGUI/uGUI
控件很少!
离线
#40 2020-04-05 21:37:20 分享评论
- liuchangyin
- 会员
- 注册时间: 2020-03-17
- 已发帖子: 204
- 积分: 199
Re: 发现一个轻量级UI, 移植到 STM32/STM8 不错 ----- µGUI/uGUI
适合资源不太充裕的单片机
离线
#41 2020-04-18 00:45:56 分享评论
- gmfzk2008
- 会员
- 注册时间: 2020-04-01
- 已发帖子: 9
- 积分: 1
Re: 发现一个轻量级UI, 移植到 STM32/STM8 不错 ----- µGUI/uGUI
作者真是劳模,呵呵,谢谢分享。。
离线
#42 2020-04-18 00:48:56 分享评论
- gmfzk2008
- 会员
- 注册时间: 2020-04-01
- 已发帖子: 9
- 积分: 1
Re: 发现一个轻量级UI, 移植到 STM32/STM8 不错 ----- µGUI/uGUI
奇怪,我这里GIT上不去。。
离线
#43 2020-04-18 14:07:55 分享评论
- 村民
- 会员
- 注册时间: 2019-03-06
- 已发帖子: 43
- 积分: 13
Re: 发现一个轻量级UI, 移植到 STM32/STM8 不错 ----- µGUI/uGUI
用了,资源消耗少,功能也少。如果不做复杂的UI还是不错的
离线
#44 2020-04-27 11:50:08 分享评论
- 路人甲
- 会员
- 注册时间: 2017-09-07
- 已发帖子: 202
- 积分: 199.5
Re: 发现一个轻量级UI, 移植到 STM32/STM8 不错 ----- µGUI/uGUI
这个GUI果然够简,对于不复杂的系统值得一试。
离线
#45 2020-04-28 13:34:08 分享评论
- 9990
- 会员
- 注册时间: 2020-04-28
- 已发帖子: 3
- 积分: 3
Re: 发现一个轻量级UI, 移植到 STM32/STM8 不错 ----- µGUI/uGUI
好帖好帖, mark学习
离线
#46 2020-04-28 13:47:03 分享评论
- 9990
- 会员
- 注册时间: 2020-04-28
- 已发帖子: 3
- 积分: 3
Re: 发现一个轻量级UI, 移植到 STM32/STM8 不错 ----- µGUI/uGUI
有没有好用的字模提取工具
离线
#47 2020-05-12 21:16:17 分享评论
- Paul
- 会员
- 注册时间: 2020-05-12
- 已发帖子: 5
- 积分: 5
Re: 发现一个轻量级UI, 移植到 STM32/STM8 不错 ----- µGUI/uGUI
能不能在OS下跑?
离线
#48 2020-07-03 11:22:31 分享评论
- wangjun110
- 会员
- 注册时间: 2020-07-03
- 已发帖子: 16
- 积分: 2
Re: 发现一个轻量级UI, 移植到 STM32/STM8 不错 ----- µGUI/uGUI
好用吗
离线
#49 2020-07-05 00:46:16 分享评论
- a_Cylinder
- 会员
- 注册时间: 2020-07-05
- 已发帖子: 3
- 积分: 3
Re: 发现一个轻量级UI, 移植到 STM32/STM8 不错 ----- µGUI/uGUI
这个东西不错,值得仔细研究一下.
另外支持汉字的话全字库肯定不可取,太大了,字模提取软件用起来也不太方便,是否有什么程序可以直接将操作系统中的对应字库信息提取出来的?
离线
#50 2020-07-15 18:03:21 分享评论
- ccheng-ppppp
- 会员
- 注册时间: 2020-07-15
- 已发帖子: 2
- 积分: 2
Re: 发现一个轻量级UI, 移植到 STM32/STM8 不错 ----- µGUI/uGUI
超小资源消耗 不错 mark下
离线
#51 2022-01-19 17:49:17 分享评论
- wojiaoguogai
- 会员
- 注册时间: 2022-01-19
- 已发帖子: 7
- 积分: 7
Re: 发现一个轻量级UI, 移植到 STM32/STM8 不错 ----- µGUI/uGUI
这个会不会有版权问题
离线
#54 2022-07-06 18:17:25 分享评论
- Marco
- 会员
- 所在地: liu7312@sina.com
- 注册时间: 2022-05-24
- 已发帖子: 14
- 积分: 9
Re: 发现一个轻量级UI, 移植到 STM32/STM8 不错 ----- µGUI/uGUI
速度比较慢
离线
#55 2022-07-07 20:15:18 分享评论
- dykxjh
- 会员
- 注册时间: 2020-03-25
- 已发帖子: 186
- 积分: 146
Re: 发现一个轻量级UI, 移植到 STM32/STM8 不错 ----- µGUI/uGUI
nuklear不知道能不能用到普通的单片机里去
我觉得不能。
离线
#56 2022-12-29 14:30:36 分享评论
- Zona
- 会员
- 注册时间: 2020-06-26
- 已发帖子: 35
- 积分: 31
Re: 发现一个轻量级UI, 移植到 STM32/STM8 不错 ----- µGUI/uGUI
qwert1213131 说:nuklear不知道能不能用到普通的单片机里去
我觉得不能。
看了代码感觉应该是能的,问题貌似在内存管理上。具体没有深入。
言归正传,这个ugui有个0x333的 fork加强,增强了很多。
废话不多说,5,4,3,2,1,上链接! https://github.com/0x3333/UGUI
https://github.com/0x3333/UGUI/raw/master/.github/simulator-rgb888-x2.jpg?raw=true
离线
#57 2023-04-11 16:52:40 分享评论
- marshallemon
- 会员
- 注册时间: 2023-03-18
- 已发帖子: 2
- 积分: 2
Re: 发现一个轻量级UI, 移植到 STM32/STM8 不错 ----- µGUI/uGUI
这个GUI编译,运行对MCU的要求是什么?
离线
#58 2023-05-24 15:18:03 分享评论
- krainwb
- 会员
- 注册时间: 2023-05-24
- 已发帖子: 2
- 积分: 2
Re: 发现一个轻量级UI, 移植到 STM32/STM8 不错 ----- µGUI/uGUI
移植成功了吗
离线
#59 2023-09-03 22:04:09 分享评论
- little_player
- 会员
- 注册时间: 2023-09-01
- 已发帖子: 6
- 积分: 1
Re: 发现一个轻量级UI, 移植到 STM32/STM8 不错 ----- µGUI/uGUI
最近也在搞类似的,速度快吗?
离线
#60 2023-09-05 16:53:46 分享评论
- Iven
- 会员
- 注册时间: 2018-04-10
- 已发帖子: 61
- 积分: 1
Re: 发现一个轻量级UI, 移植到 STM32/STM8 不错 ----- µGUI/uGUI
现在比较牛的是scgui和ldgui
离线
#61 2023-09-06 09:03:30 分享评论
- Gentlepig
- 会员
- 注册时间: 2018-10-24
- 已发帖子: 1,409
- 积分: 1373.5
Re: 发现一个轻量级UI, 移植到 STM32/STM8 不错 ----- µGUI/uGUI
离线
#62 2023-09-06 10:18:40 分享评论
- zhangyizheng
- 会员
- 注册时间: 2023-09-06
- 已发帖子: 1
- 积分: 1
Re: 发现一个轻量级UI, 移植到 STM32/STM8 不错 ----- µGUI/uGUI
与LVGL轻量级 GUI对比,哪个好一些?
离线
#63 2023-09-06 11:00:57 分享评论
- Gentlepig
- 会员
- 注册时间: 2018-10-24
- 已发帖子: 1,409
- 积分: 1373.5
Re: 发现一个轻量级UI, 移植到 STM32/STM8 不错 ----- µGUI/uGUI
lvgl所需资源更多吧。
离线
#64 2023-09-06 19:15:15 分享评论
- Iven
- 会员
- 注册时间: 2018-04-10
- 已发帖子: 61
- 积分: 1
Re: 发现一个轻量级UI, 移植到 STM32/STM8 不错 ----- µGUI/uGUI
离线
#65 2024-03-26 15:13:21 分享评论
- banzhangzzw
- 会员
- 注册时间: 2020-12-17
- 已发帖子: 8
- 积分: 7.5
Re: 发现一个轻量级UI, 移植到 STM32/STM8 不错 ----- µGUI/uGUI
这个gui只适合玩玩,组件太少,还不如uGFX
离线
#66 2025-09-06 17:55:20 分享评论
- 成成
- 会员
- 注册时间: 2025-09-06
- 已发帖子: 3
- 积分: 3
Re: 发现一个轻量级UI, 移植到 STM32/STM8 不错 ----- µGUI/uGUI
有运行成功的吗
离线
#67 2025-10-16 17:04:38 分享评论
- CCC_play
- 会员
- 注册时间: 2025-09-11
- 已发帖子: 3
- 积分: 3
Re: 发现一个轻量级UI, 移植到 STM32/STM8 不错 ----- µGUI/uGUI
感谢楼主提供的思路,这样在tft屏幕上能做出更好的UI了。
离线
太原小智科技有限责任公司 - 东莞哇酷科技有限公司联合开发
