- 首页
- » 搜索
- » phpweb 发表的帖子
页次: 1
#1 Php/Nodejs/Web/HTML5/Javascript/微信开发/Python » 轻松理解:正向代理、反向代理、负载均衡 » 2022-01-28 19:13:41
- phpweb
- 回复: 0
轻松理解:正向代理、反向代理、负载均衡
1. 什么是正向代理?
正向代理发生在 client 端,用户能感知到的,并且是用户主动发起的代理。
比如:番茄。
我们不能访问外网,但是可以访问代理服务器,然后代理服务器帮我们从外网中获取数据。但是在使用之前,用户往往需要主动在client端配置代理。
黑客为了隐藏身份,用的就是正向代理。
|客户端+代理服务器|-->|目标服务器|
2. 什么是反向代理?
反向代理发生在 server端,从用户角度看是不知道发生了代理的(这个只有服务器工程师才知道)。
比如:
用户访问 服务器A,服务器A就给用户返回了数据。
但是服务器A上其实并没有数据,它是偷偷从服务器B上获取数据,然后再返回给用户的。
这个过程是在 server 端发生的,用户并不知道(只有服务器运维人员才知道)。
|客户端|-->|代理服务器+目标服务器|
3. 什么是负载均衡?
负载均衡是反向代理的一种运用。
客户端访问服务器,服务器会把请求分发给其它多个不同的服务器(即反向代理),从而减轻了单个服务器处理海量请求的压力,不会出现崩溃。
做了反向代理才能实现负载均衡。负载均衡是做反向代理的目的之一。
反向代理,是有把请求转发的能力,这个是基础
负载均衡,是把请求转发到不同的服务器上,均衡各个服务器
#2 Re: 全志 SOC » v3s 连接st7789屏显示闪屏,显示更新不正常 » 2020-08-11 18:29:01
#3 Re: VMWare/Linux/Ubuntu/Fedora/CentOS/U-BOOT » 分享Ubuntu下开机启动脚本 » 2020-06-12 15:52:28
找资料发现的, 这个ubuntu手册排版真赞: https://wiki.ubuntu-tw.org/index.php?title=Grub2
#4 Re: VMWare/Linux/Ubuntu/Fedora/CentOS/U-BOOT » 分享Ubuntu下开机启动脚本 » 2020-06-12 15:05:52
总结, 只要在这个文件 /lib/systemd/system/rc-local.service 末尾添加:
[Install]
WantedBy=multi-user.target
Alias=rc-local.service
漏了这一步, 白白折腾一小时。
/etc/rc.local
#!/bin/bash
/usr/sbin/run_frpc.sh &
/usr/sbin/run_frpc.sh
#!/bin/bash
declare -i run_count=0
while [ true ]; do
let run_count++if [ $run_count -gt 100000 ]; then
break
fiecho "try frp connect $run_count _____" >> /tmp/frpc.log
/usr/sbin/frpc -c /etc/frpc.inisleep 5
done;
搞定Ubuntu开机启动 frp了。
#5 VMWare/Linux/Ubuntu/Fedora/CentOS/U-BOOT » 请教大家,如何编译Ubuntu Kernel » 2020-06-12 11:57:26
- phpweb
- 回复: 3
用网上搜来的这些方法: https://askubuntu.com/questions/1056598/trying-to-build-kernel-on-18-04-no-editconfigs-option
连源码都没下载到
然后我直接下载源码包编译 https://cdn.kernel.org/pub/linux/kernel/v5.x/linux-5.7.tar.xz
一顿骚操作
make menuconfig -> 保存
make
make modules install
之后发现 /lib/modules/5.7.0/ 目录好几G
导致 sudo update-initramfs -c -k 5.7.0 更新 initramfs 根本无法动弹。
请问大家, 我到底哪一步出错了呢?
#6 Re: 全志 SOC » 嵌入式系统可以链接 libcurl 库 post 数据给服务器 » 2020-05-05 20:53:14
把错误号打印出来, 是6,
https://curl.haxx.se/libcurl/c/libcurl-errors.html
CURLE_COULDNT_RESOLVE_HOST (6)
Couldn't resolve host. The given remote host was not resolved.
晕, 原来是没有联网噢.
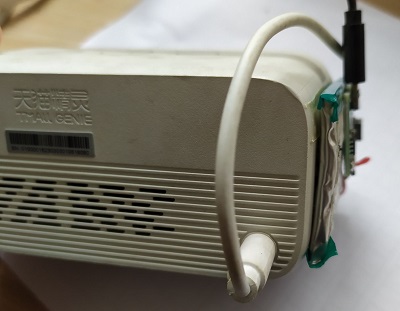
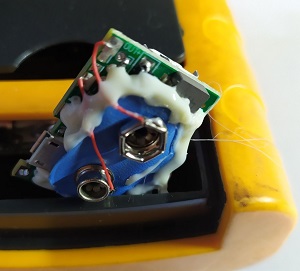
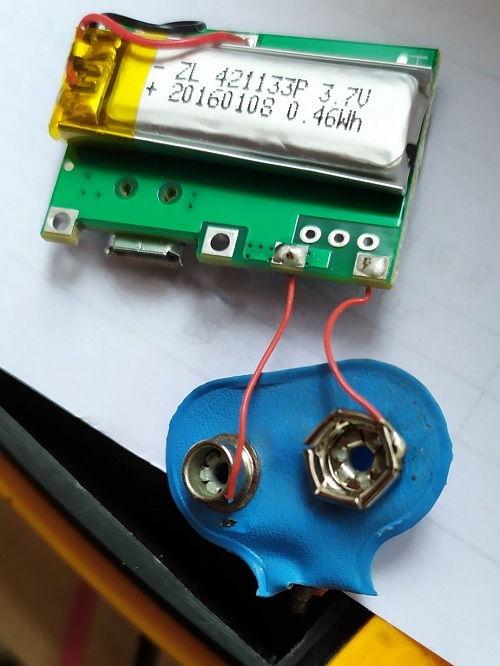
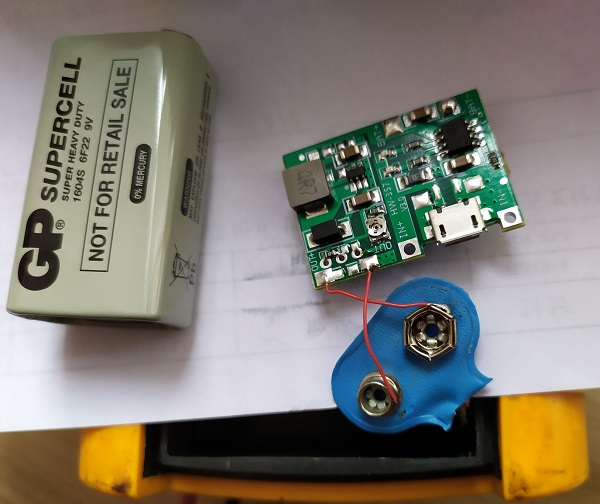
#7 Re: 全志 SOC » 嵌入式系统可以链接 libcurl 库 post 数据给服务器 » 2020-05-05 20:32:00
ubuntu 执行正常, 但是到嵌入式板子出错:
# CURL_CA_BUNDLE=/etc/ssl/certs/ca-certificates.crt test2
curl_easy_perform() failed: Error
一脸懵逼
#9 Re: VMWare/Linux/Ubuntu/Fedora/CentOS/U-BOOT » 用 mail 命令在我的电脑Ubuntu电脑死活发不出邮件,但是bwh主机可以发出去, 求围观。 » 2020-04-24 16:35:52
再配合 crontab 终于搞定了定时发送带附件(公司项目源码)的email 到老板邮箱:
#10 Re: VMWare/Linux/Ubuntu/Fedora/CentOS/U-BOOT » 用 mail 命令在我的电脑Ubuntu电脑死活发不出邮件,但是bwh主机可以发出去, 求围观。 » 2020-04-24 13:55:32
https://stackoverflow.com/questions/2491475/phpmailer-character-encoding-issues
如果邮件有中文, 一定记得加下面这行代码:
$mail->CharSet = 'UTF-8';
#11 Re: VMWare/Linux/Ubuntu/Fedora/CentOS/U-BOOT » 用 mail 命令在我的电脑Ubuntu电脑死活发不出邮件,但是bwh主机可以发出去, 求围观。 » 2020-04-24 10:05:53
生命的意义在于折腾, 今天继续折腾 php 发送 email, 居然搜到一个牛逼的开源库:
https://github.com/PHPMailer/PHPMailer
首先用composer安装PHPMailer: composer require phpmailer/phpmailer
<?php
// Import PHPMailer classes into the global namespace
// These must be at the top of your script, not inside a function
use PHPMailer\PHPMailer\PHPMailer;
use PHPMailer\PHPMailer\SMTP;
use PHPMailer\PHPMailer\Exception;

// Load Composer's autoloader
require 'vendor/autoload.php';

// Instantiation and passing `true` enables exceptions
$mail = new PHPMailer(true);

try {
    //Server settings
    $mail->SMTPDebug = SMTP::DEBUG_SERVER;                      // Enable verbose debug output
    $mail->isSMTP();                                            // Send using SMTP
    $mail->Host       = 'smtp1.example.com';                    // Set the SMTP server to send through
    $mail->SMTPAuth   = true;                                   // Enable SMTP authentication
    $mail->Username   = 'user@example.com';                     // SMTP username
    $mail->Password   = 'secret';                               // SMTP password
    $mail->SMTPSecure = PHPMailer::ENCRYPTION_STARTTLS;         // Enable TLS encryption; `PHPMailer::ENCRYPTION_SMTPS` encouraged
    $mail->Port       = 587;                                    // TCP port to connect to, use 465 for `PHPMailer::ENCRYPTION_SMTPS` above

    //Recipients
    $mail->setFrom('from@example.com', 'Mailer');
    $mail->addAddress('joe@example.net', 'Joe User');     // Add a recipient
    $mail->addAddress('ellen@example.com');               // Name is optional
    $mail->addReplyTo('info@example.com', 'Information');
    $mail->addCC('cc@example.com');
    $mail->addBCC('bcc@example.com');

    // Attachments
    $mail->addAttachment('/var/tmp/file.tar.gz');         // Add attachments
    $mail->addAttachment('/tmp/image.jpg', 'new.jpg');    // Optional name

    // Content
    $mail->isHTML(true);                                  // Set email format to HTML
    $mail->Subject = 'Here is the subject';
    $mail->Body    = 'This is the HTML message body <b>in bold!</b>';
    $mail->AltBody = 'This is the body in plain text for non-HTML mail clients';

    $mail->send();
    echo 'Message has been sent';
} catch (Exception $e) {
    echo "Message could not be sent. Mailer Error: {$mail->ErrorInfo}";
}
这是测试代码, 如果用 163/qq 邮箱 465 加密端口发送,
$mail->SMTPSecure = PHPMailer::ENCRYPTION_STARTTLS;
这里得改成:
$mail->SMTPSecure = PHPMailer::ENCRYPTION_SMTPS;
#12 Re: VMWare/Linux/Ubuntu/Fedora/CentOS/U-BOOT » 用 mail 命令在我的电脑Ubuntu电脑死活发不出邮件,但是bwh主机可以发出去, 求围观。 » 2020-04-23 18:12:29
前面那个 demo 不支持发送附件, 又找到了一个支持发送附件的代码:
http://www.nomadcf.com/scripting/phpsocketssendauthemailgmail
function SendMail($ServerName, $Port, $Username, $Password, $ToEmail, $FromEmail, $Subject, $Body, $Attachments='' ) {
 /* Attachments work like this array('Attachment Name'=>'ATTACHMENT AS A STRING','Next Attachment Name'=>'ATTACHMENT 2 AS A STRING') */

 $smtp = fsockopen($ServerName, $Port);
 $InputBuffer = fgets($smtp, 1024);
 $ErrorCode = 220;
 if(substr($InputBuffer,0,3) != "$ErrorCode") return "Failed Connect";

 fputs($smtp, "HELO $ServerName\r\n");
 $InputBuffer = fgets($smtp, 1024);
 $ErrorCode = 250;
 if(substr($InputBuffer,0,3) != "$ErrorCode") return "Failed Helo";

 fputs($smtp, "AUTH LOGIN\r\n");
 $InputBuffer = fgets($smtp, 1024);
 $ErrorCode = 334;
 if(substr($InputBuffer,0,3) != "$ErrorCode") return "Failed AUTH";

 fputs($smtp, base64_encode($Username)."\r\n");
 $InputBuffer = fgets($smtp, 1024);
 $ErrorCode = 334;
 if(substr($InputBuffer,0,3) != "$ErrorCode") return "Failed Username";

 fputs($smtp, base64_encode($Password)."\r\n");
 $InputBuffer = fgets($smtp, 1024);
 $ErrorCode = 235;
 if(substr($InputBuffer,0,3) != "$ErrorCode") return "Failed Password";

 fputs($smtp, "MAIL From:<$FromEmail>\r\n");
 $InputBuffer = fgets($smtp, 1024);
 $ErrorCode = 250;
 if(substr($InputBuffer,0,3) != "$ErrorCode") return "Failed MAIL";

 fputs($smtp, "RCPT To:<$ToEmail>\r\n");
 $InputBuffer = fgets($smtp, 1024);
 $ErrorCode = 250;
 if(substr($InputBuffer,0,3) != "$ErrorCode") return "Failed RCPT";

 fputs($smtp, "DATA\r\n");
 $InputBuffer = fgets($smtp, 1024);
 $ErrorCode = 354;
 if(substr($InputBuffer,0,3) != "$ErrorCode") return "Failed DATA";

 fputs($smtp, "From: $FromEmail\r\n");
 fputs($smtp, "To: $ToEmail\r\n");
 if ($Attachments != '') {
  $ContentBoundry = '----=_NextPart_'.md5(date('U').uniqid('NCF',TRUE));
  fputs($smtp, "MIME-Version: 1.0\r\n");
  fputs($smtp, 'Content-Type: multipart/mixed; boundary="'.$ContentBoundry.'"'."\r\n");
 }
 fputs($smtp, "Subject: $Subject\r\n\r\n");

 if ($Attachments == '') {
  fputs($smtp, "$Body\r\n.\r\n");
 } else {
  $NewBody  = "\r\n";
  $NewBody .= '--'.$ContentBoundry."\r\n";
  $NewBody .= 'Content-Type: text/plain; charset="UTF-8"'."\r\n";
  $NewBody .= 'Content-Transfer-Encoding: 8bit'."\r\n\r\n";
  $NewBody .= $Body."\r\n";
  foreach ($Attachments as $Filename => $Attachment) {
   $NewBody .= '--'.$ContentBoundry."\r\n";
   $NewBody .= 'Content-Type: application/octet-stream; name="'.$Filename.'"'."\r\n";
   $NewBody .= 'Content-Transfer-Encoding: base64'."\r\n";
   $NewBody .= 'Content-Disposition: attachment; filename="'.$Filename.'"'."\r\n\r\n";
   $NewBody .= chunk_split(base64_encode($Attachment));
   $NewBody .= "\r\n";
  }
  $NewBody .= $ContentBoundry."--\r\n\r\n";
  fputs($smtp, $NewBody."\r\n.\r\n");
 }

 $InputBuffer = fgets($smtp, 1024);
 $ErrorCode = 250;
 if(substr($InputBuffer,0,3) != "$ErrorCode") return "Failed BODY";

 fputs($smtp, "QUIT\n");
 $InputBuffer = fgets($smtp, 1024);
 $ErrorCode = 221;
 if(substr($InputBuffer,0,3) != "$ErrorCode") return "Failed QUIT";

 fclose($smtp);

 return TRUE;
}

$TheAttachments = array('CurriculumReviewCycle.pdf'=>file_get_contents('/var/www/html/CurriculumReviewCycle.pdf'));

//  SendMail($ServerName, $Port, $Username, $Password, $ToEmail, $FromEmail, $Subject, $Body, $Attachments='' )

SendMail('smtp.gmail.com', 25, 'franklinc@fromdomain', 'Password', 'cfranklin@todomain', 'franklinc@fromdomain', 'Attach - Test - subject', 'What up dog! - the body', $TheAttachments);
我试一试看效果如何.
#13 Re: VMWare/Linux/Ubuntu/Fedora/CentOS/U-BOOT » 用 mail 命令在我的电脑Ubuntu电脑死活发不出邮件,但是bwh主机可以发出去, 求围观。 » 2020-04-22 09:11:42
实在折腾不出来,感觉很可能IP被 smtp服务器封杀,
实在不行只能用 php 脚本编程 调用 fsockopen 搞定邮件发送了:
https://schoudhury.com/blog/articles/send-email-using-gmail-from-php-with-fsockopen/
终于用上面的搞定, php fsockopen 连接 smtp.qq.com 或者 smtp.163.com 的 465 端口,
然后用交互式命令登录并发送邮件即可,
发完之后会出现在你qq/163邮箱的发件箱里面。
#14 Re: VMWare/Linux/Ubuntu/Fedora/CentOS/U-BOOT » 用 mail 命令在我的电脑Ubuntu电脑死活发不出邮件,但是bwh主机可以发出去, 求围观。 » 2020-04-21 15:20:21
实在折腾不出来,感觉很可能IP被 smtp服务器封杀,
实在不行只能用 php 脚本编程 调用 fsockopen 搞定邮件发送了:
https://schoudhury.com/blog/articles/send-email-using-gmail-from-php-with-fsockopen/
#15 Re: VMWare/Linux/Ubuntu/Fedora/CentOS/U-BOOT » 用 mail 命令在我的电脑Ubuntu电脑死活发不出邮件,但是bwh主机可以发出去, 求围观。 » 2020-04-21 09:32:33
bwh的日志:
# cat /var/log/mail.log
Apr 21 09:19:13 LLLLLL sendmail[25209]: 03L1JD4o025209: from=root, size=247, class=0, nrcpts=1, msgid=<202004210119.03L1JD4o025209@LLLLLL.com>, relay=root@localhost
Apr 21 09:19:13 LLLLLL sm-mta[25210]: 03L1JD34025210: from=<root@LLLLLL.com>, size=481, class=0, nrcpts=1, msgid=<202004210119.03L1JD4o025209@LLLLLL.com>, proto=ESMTP, daemon=MTA-v4, relay=localhost [127.0.0.1]
Apr 21 09:19:13 LLLLLL sendmail[25209]: 03L1JD4o025209: to=xxxx@qq.com, ctladdr=root (0/0), delay=00:00:00, xdelay=00:00:00, mailer=relay, pri=30247, relay=[127.0.0.1] [127.0.0.1], dsn=2.0.0, stat=Sent (03L1JD34025210 Message accepted for delivery)
Apr 21 09:19:14 LLLLLL sm-mta[25212]: STARTTLS=client, relay=mx3.qq.com., version=TLSv1/SSLv3, verify=FAIL, cipher=ECDHE-RSA-AES128-GCM-SHA256, bits=128/128
Apr 21 09:19:16 LLLLLL sm-mta[25212]: 03L1JD34025210: to=<xxxx@qq.com>, ctladdr=<root@LLLLLL.com> (0/0), delay=00:00:03, xdelay=00:00:03, mailer=esmtp, pri=120481, relay=mx3.qq.com. [203.205.219.57], dsn=2.0.0, stat=Sent (Ok: queued as )
这个日志是正常的: dsn=2.0.0, stat=Sent
相当于 http 的 200 OK 状态, 已妥投的意思吧。
#16 Re: VMWare/Linux/Ubuntu/Fedora/CentOS/U-BOOT » 用 mail 命令在我的电脑Ubuntu电脑死活发不出邮件,但是bwh主机可以发出去, 求围观。 » 2020-04-21 09:12:21
根据DSN: Service unavailable关键字,搜到这个:
https://www.centos.bz/2012/06/dsn-service-unavailable/
自从换了vps,博客的评论邮件提醒功能一直有问题,今天有空,我们来解决它。
无法发送邮件的日志如下:Jun 26 07:24:23 MyVPS1976 sendmail[31760]: q5PNOMeP031760: from=<www@MyVPS1976>, size=1393, class=0, nrcpts=1, msgid=<101f67a320c3f53ec88cb43d5c74631f@www.centos.bz>, proto=SMTP, daemon=MTA, relay=MyVPS [127.0.0.1]
Jun 26 07:24:25 MyVPS1976 sendmail[31762]: q5PNOMeP031760: to=<admin@centos.bz>, ctladdr=<www@MyVPS1976> (501/501), delay=00:00:02, xdelay=00:00:02, mailer=esmtp, pri=121393, relay=mxdomain.qq.com. [64.71.138.90], dsn=5.0.0,stat=Service unavailable
Jun 26 07:24:25 MyVPS1976 sendmail[31762]: q5PNOMeP031760: q5PNOPeP031762: DSN: Service unavailable
Jun 26 07:24:25 MyVPS1976 sendmail[31762]: q5PNOPeP031762: to=root, delay=00:00:00, xdelay=00:00:00, mailer=local, pri=32578, dsn=2.0.0, stat=Sent
根据relay=mxdomain.qq.com. [64.71.138.90], dsn=5.0.0,stat=Service unavailable这一段,我们知道邮件已经发送出去,但由于某种原因邮件被拒绝,于是更换hostname,重启sendmail,解决问题。
更换hostname方法:
1、编辑/etc/sysconfig/network,更换文件中的hostnmae。
2、把hostname写入/etc/hosts
3、执行hostname www.centos.bz立即生效
1 在我的ubuntu18.04没找到, 2,3都做了,然而还是没x用。
#17 Re: VMWare/Linux/Ubuntu/Fedora/CentOS/U-BOOT » 用 mail 命令在我的电脑Ubuntu电脑死活发不出邮件,但是bwh主机可以发出去, 求围观。 » 2020-04-21 09:09:30
查看发送日志 /var/log/mail.log
$ cat /var/log/mail.log
Apr 21 09:07:34 ubuntu sendmail[62831]: 03L17YMG062831: from=yyyy@yyyy.cn, size=100, class=0, nrcpts=1, msgid=<202004210107.03L17YMG062831@yyyy.cn>, relay=yyyy@localhost
Apr 21 09:07:34 ubuntu sm-mta[62832]: 03L17YDB062832: from=<yyyy@yyyy.cn>, size=345, class=0, nrcpts=1, msgid=<202004210107.03L17YMG062831@yyyy.cn>, proto=ESMTP, daemon=MTA-v4, relay=localhost [127.0.0.1]
Apr 21 09:07:34 ubuntu sendmail[62831]: 03L17YMG062831: to=<xxxx@qq.com>, ctladdr=yyyy@yyyy.cn (1000/1000), delay=00:00:00, xdelay=00:00:00, mailer=relay, pri=30100, relay=[127.0.0.1] [127.0.0.1], dsn=2.0.0, stat=Sent (03L17YDB062832 Message accepted for delivery)
Apr 21 09:07:39 ubuntu sm-mta[62834]: STARTTLS=client, relay=mx3.qq.com., version=TLSv1.2, verify=FAIL, cipher=ECDHE-RSA-AES128-GCM-SHA256, bits=128/128
Apr 21 09:07:39 ubuntu sm-mta[62834]: 03L17YDB062832: to=<xxxx@qq.com>, ctladdr=<yyyy@yyyy.cn> (1000/1000), delay=00:00:05, xdelay=00:00:05, mailer=esmtp, pri=120345, relay=mx3.qq.com. [183.232.93.177], dsn=5.0.0, stat=Service unavailable###4秒后出现这个 DSN: Service unavailable ###
Apr 21 09:07:39 ubuntu sm-mta[62834]: 03L17YDB062832: 03L17dDB062834: DSN: Service unavailable
Apr 21 09:07:39 ubuntu sm-mta[62834]: 03L17dDB062834: to=<yyyy@yyyy.cn>, delay=00:00:00, xdelay=00:00:00, mailer=local, pri=30000, dsn=2.0.0, stat=Sent
###4秒后出现这个 DSN: Service unavailable ###
#18 VMWare/Linux/Ubuntu/Fedora/CentOS/U-BOOT » 用 mail 命令在我的电脑Ubuntu电脑死活发不出邮件,但是bwh主机可以发出去, 求围观。 » 2020-04-21 09:05:00
#19 Re: Php/Nodejs/Web/HTML5/Javascript/微信开发/Python » OSS 下载文件重命名(aliyun php sdk) 转载 » 2020-03-25 17:20:33
#20 Php/Nodejs/Web/HTML5/Javascript/微信开发/Python » OSS 下载文件重命名(aliyun php sdk) 转载 » 2020-03-25 17:19:14
- phpweb
- 回复: 1
转载自: https://www.okcode.net/article/91595
从OSS下载文件属于远程下载,文件重名命一般有3种方案:
方案一
下载到服务器本地,然后服务器重命名rename一下就可以了,下载方法文档已经写得很清楚了
缺点:占用服务器空间,而且等待时间慢(需要先下载到服务器,然后重命名,然后再把文件内容返回给用户,如果文件很大,严重影响用户体验)
方案二
下载到服务器内存,然后服务器直接设置头部返回文件数据给用户
<?php
$ossClient = new OssClient($accessKeyId, $accessKeySecret, $endpoint);
$content = $ossClient->getObject($bucket, $object);
header('Content-Type: application/octet-stream');
header('Content-Disposition: attachment; filename=demo.txt');
exit($content);
?>
缺点:占用服务器内存,如果文件较大,会导致内存溢出!!
而且等待时间也慢(也是需要本地服务器将文件内容下载到内存中才能输出给用户)
方案三
直接用SDK生成下载的签名URL,然后跳转到该URL,用户直接从OSS服务器下载文件,
速度极快,不受本地服务器带宽、空间、内存大小影响,可以说是非常完美的。
但是!官方没给出一个生成下载URL时重命名的功能!!!
研究了一大轮SDK的源码和文档,终于发现在OSS的API文档里,有一篇**
访问控制 / 在Header中包含签名 / 构建CanonicalizedResource的方法
** 的说明文档,这个参数提供在生成URL时能自定义构建响应头部,
其中一个备注说明有写到能自定义response-content-disposition这个关键的子资源。
经过试验能完美解决使用signUrl重命名的问题,代码如下:
/*阿里云主账号AccessKey拥有所有API的访问权限,风险很高。
强烈建议您创建并使用RAM账号进行API访问或日常运维,
请登录 https://ram.console.aliyun.com 创建RAM账号。
*/

$accessKeyId = "<yourAccessKeyId>";
$accessKeySecret = "<yourAccessKeySecret>";

// Endpoint以杭州为例,其它Region请按实际情况填写。
$endpoint = "http://oss-cn-hangzhou.aliyuncs.com";
$bucket= "<yourBucketName>";
$object = "<yourObjectName>";
$securityToken = "<yourSecurityToken>";

// 设置URL的有效期为3600秒。
$timeout = 3600;
$ossClient = new OssClient($accessKeyId, $accessKeySecret, $endpoint, false, $securityToken);
$new_file_name = '123.txt';
$oss_config = array(
	$ossClient::OSS_SUB_RESOURCE => 'response-content-disposition=attachment%3Bfilename%3D'.$new_file_name);

// 生成GetObject的签名URL。
$signedUrl = $ossClient->signUrl($bucket, $object, $timeout, $ossClient::OSS_HTTP_GET, $oss_config);
这样,用户跳转到生成的$signedUrl后,下载的文件就是重命名的文件,完美解决。
希望能帮助到遇到这个问题的人。
#21 Re: Php/Nodejs/Web/HTML5/Javascript/微信开发/Python » 用 php 测试 阿里云的 oss 对象存储云服务 » 2020-03-25 14:47:18
谢谢楼主, 测试代码可以用
<?php

require_once __DIR__ . '/../vendor/autoload.php';

use OSS\OssClient;
use OSS\Core\OssException;

$accessKeyId = "你的key";
$accessKeySecret = "你的Secret";
$endpoint = "oss-cn-shanghai.aliyuncs.com";

try {
    $ossClient = new OssClient($accessKeyId, $accessKeySecret, $endpoint);
} catch (OssException $e) {
    print $e->getMessage();
}

//新建一个bucket(桶), 相当于文件夹, 所有的文件都存这里面,
//bucket名必须全局唯一,不能和自己的bucket name冲突, 也不能和别人的bucket name冲突。
$ossClient->createBucket('phpweb');

$bucket= "phpweb"; //刚刚建好的bucket
$object = "filename.txt";//文件名
$content = "Hello, OSS!"; //内容

try {
    //写文件
    $ossClient->putObject($bucket, $object, $content);
} catch (OssException $e) {
    print $e->getMessage();
}

//读文件内容
print_r($ossClient->getObject('whycan', "filename.txt"));

//删除 bucket
$ossClient->deleteBucket('phpweb');
?>
OssClient.php: https://github.com/aliyun/aliyun-oss-php-sdk/blob/master/src/OSS/OssClient.php
#22 Re: Php/Nodejs/Web/HTML5/Javascript/微信开发/Python » php & aliyun oss & sts » 2020-03-24 09:31:22
看起来接口和亚马逊云几乎相同, 怪不得有人质疑: 阿里云涉嫌抄袭亚马逊,你怎么看?
#23 Php/Nodejs/Web/HTML5/Javascript/微信开发/Python » php & aliyun oss & sts » 2020-03-24 09:21:01
- phpweb
- 回复: 1
0. aliyun sts 官方代码: https://github.com/aliyun/aliyun-openapi-php-sdk/tree/master/aliyun-php-sdk-sts
1. 关于aliyun sts的官方文档:
http://aliyun_portal_storage.oss.aliyuncs.com/oss_api/oss_phphtml/quickstart.html
https://help.aliyun.com/document_detail/28758.html
https://help.aliyun.com/document_detail/57114.html
https://help.aliyun.com/document_detail/85111.html
https://help.aliyun.com/document_detail/31980.html
2. composer 方式安装 aliyun sts sdk: composer require jiajialu/aliyun-sdk-sts
https://packagist.org/packages/jiajialu/aliyun-sdk-sts
3. gitee aliyun sts sdk: https://gitee.com/jiajialu/aliyun-sdk-sts
4. sts 测试代码: https://packagist.org/packages/jiajialu/aliyun-sdk-sts
<?php

require "vendor/autoload.php";

use AliCloud\Core\Profile\DefaultProfile;
use AliCloud\Core\DefaultAcsClient;
use AliCloud\Core\Exception\ServerException;
use AliCloud\Core\Exception\ClientException;
use AliCloud\STS\AssumeRoleRequest;

define("REGION_ID", "cn-shanghai");
define("ENDPOINT", "sts.cn-shanghai.aliyuncs.com"); //根据实际情况更改配置

// 只允许子用户使用角色
DefaultProfile::addEndpoint(REGION_ID, REGION_ID, "Sts", ENDPOINT);
$profile = DefaultProfile::getProfile(REGION_ID, "<acccess-key-id>", "<access-key-secret>");
$client = new DefaultAcsClient($profile);

// 角色资源描述符,在RAM的控制台的资源详情页上可以获取
$roleArn = "<role-arn>";

// 在扮演角色(AssumeRole)时,可以附加一个授权策略,进一步限制角色的权限;
// 详情请参考《RAM使用指南》
// 此授权策略表示读取所有OSS的只读权限
$policy=<<<POLICY
{
  "Statement": [
    {
      "Action": [
        "oss:Get*",
        "oss:List*"
      ],
      "Effect": "Allow",
      "Resource": "*"
    }
  ],
  "Version": "1"
}
POLICY;

$request = new AssumeRoleRequest();

// RoleSessionName即临时身份的会话名称,用于区分不同的临时身份
// 您可以使用您的客户的ID作为会话名称
$request->setRoleSessionName("client_name");
$request->setRoleArn($roleArn);
$request->setPolicy($policy);
$request->setDurationSeconds(3600);

try {
    $response = $client->getAcsResponse($request);
    print_r($response);
} catch(ServerException $e) {
    print "Error: " . $e->getErrorCode() . " Message: " . $e->getMessage() . "\n";
} catch(ClientException $e) {
    print "Error: " . $e->getErrorCode() . " Message: " . $e->getMessage() . "\n";
}#25 Re: Php/Nodejs/Web/HTML5/Javascript/微信开发/Python » 终于,g.widora.cn 服务代码开源,欢迎star » 2020-03-24 09:14:48
#26 Re: Php/Nodejs/Web/HTML5/Javascript/微信开发/Python » 用 php 测试 阿里云的 oss 对象存储云服务 » 2020-03-18 11:19:58
#27 Re: 全志 SOC » 要做这样的一个东西,全志那个cpu比较合适?V3s? » 2020-03-13 14:55:12
肯定需要啊,freeswich这类的。我习惯用linphone ,可能有更好的
收下了,感谢大佬推荐. 搜了一下freeswitch是服务器(软交换机), linphone是客户端。
#28 Re: 全志 SOC » 求助 arm linux busybox 制作的文件系统怎样移植包管理器? » 2020-03-13 14:24:44
我看看去, 感谢大佬分享!
#30 Re: DIY/综合/Arduino/写字机/3D打印机/智能小车/平衡车/四轴飞行/MQTT/物联网 » 编译阿里云的link kit sdk有警告,找不到gawk,但是明明安装了。 » 2020-03-13 14:05:59
https://help.aliyun.com/product/93051.html
刚看了一下阿里云 link kit 确实很优秀, 有空我也试一试。
#31 Re: 全志 SOC » 要做这样的一个东西,全志那个cpu比较合适?V3s? » 2020-03-13 14:03:25
#32 Re: Php/Nodejs/Web/HTML5/Javascript/微信开发/Python » 推荐5款可用于github的chrome插件 / 浏览Github必备的5款神器级别的Chrome插件 » 2020-03-03 09:26:14
#33 Re: Php/Nodejs/Web/HTML5/Javascript/微信开发/Python » 推荐5款可用于github的chrome插件 / 浏览Github必备的5款神器级别的Chrome插件 » 2020-03-03 09:23:36
#34 Re: Php/Nodejs/Web/HTML5/Javascript/微信开发/Python » 推荐5款可用于github的chrome插件 / 浏览Github必备的5款神器级别的Chrome插件 » 2020-03-03 09:18:55
#35 Php/Nodejs/Web/HTML5/Javascript/微信开发/Python » 推荐5款可用于github的chrome插件 / 浏览Github必备的5款神器级别的Chrome插件 » 2020-03-03 09:18:13
#36 技术人生/软件使用技巧/破解经验/技术吐槽/灌水 » 水一帖,突然发现我的左右手食指指纹都可以打开手机, 只要注册一个食指指纹就行。但是大拇指就不能注一送一. » 2020-02-22 15:49:59
#37 Re: Qt/MSVC/MINGW/C++/MFC/GTK+/Delphi/BCB » PyQt5与PySide2:两个Python Qt库之间有什么区别? (转载) » 2020-02-22 09:33:56
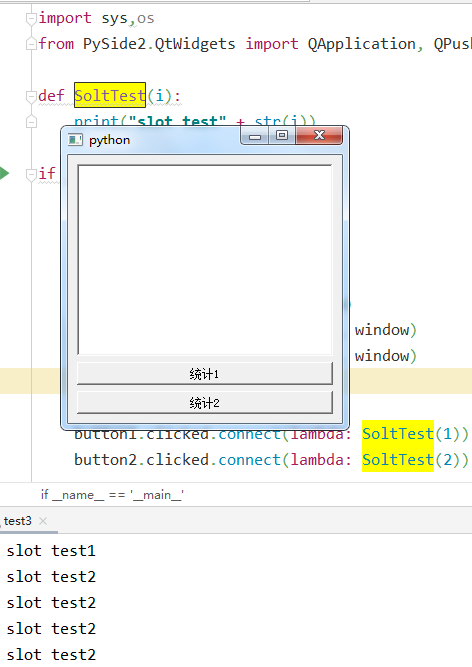
import sys,os
from PySide2.QtWidgets import QApplication, QPushButton, QTextEdit, QMainWindow, QVBoxLayout, QWidget

def SoltTest(i):
    print("slot test" + str(i))

if __name__ == '__main__':
    app = QApplication(sys.argv)

    window = QMainWindow()

    boxlayout = QVBoxLayout(window)
    button1 = QPushButton("统计1", window)
    button2 = QPushButton("统计2", window)
    textedit1 = QTextEdit(window)

    button1.clicked.connect(lambda: SoltTest(1))
    button2.clicked.connect(lambda: SoltTest(2))

    boxlayout.addWidget(textedit1)
    boxlayout.addWidget(button1)
    boxlayout.addWidget(button2)

    mainwidget = QWidget()
    mainwidget.setLayout(boxlayout)

    window.setCentralWidget(mainwidget)
    window.show()

    sys.exit(app.exec_())
感谢楼主分享, 我也写了一个很简单的槽函数测试程序。
#38 Re: Qt/MSVC/MINGW/C++/MFC/GTK+/Delphi/BCB » python3.7 运行 nodz ---- 免费的基于节点的图形生成器 » 2020-02-19 16:48:55
#39 Re: Qt/MSVC/MINGW/C++/MFC/GTK+/Delphi/BCB » python3.7 使用 pip 命令安装 PyQt5 软件包了, 也可以手动安装. » 2020-02-19 12:24:52
#40 Re: Php/Nodejs/Web/HTML5/Javascript/微信开发/Python » Python pygame 推星星(推箱子)游戏 » 2020-02-17 11:13:54
#42 Re: Php/Nodejs/Web/HTML5/Javascript/微信开发/Python » php7 处理 bbcode » 2020-02-14 16:21:30
找到一个不错的php bbcode解析库,
源码地址: https://github.com/s9e/TextFormatter/
演示地址: http://s9e.github.io/TextFormatter/demo.html
composer地址: https://packagist.org/packages/s9e/text-formatter
安装方法: composer require s9e/text-formatter
官方文档: https://s9etextformatter.readthedocs.io/
演示代码:
require __DIR__ . '/../vendor/autoload.php';

use s9e\TextFormatter\Bundles\Forum as TextFormatter;

$text = 'To-do list:
[list=1]
  [*] Say hello to the world :)
  [*] Go to http://example.com
  [*] Try to trip the parser with [b]mis[i]nes[/b]ted[u] tags[/i][/u]
  [*] Watch this video: [media]http://www.youtube.com/watch?v=QH2-TGUlwu4[/media]
[/list]

[code]
#include <stdio.h>
int main()
{
}
[/code]


[quote]
asdfasdfasdfasdfasdfa
asdfasdf
asdf
asdfasdf
a3453
[/quote]
';

// Parse the original text
$xml = TextFormatter::parse($text);

// Here you should save $xml to your database
// $db->query('INSERT INTO ...');

// Render and output the HTML result
echo TextFormatter::render($xml);

// You can "unparse" the XML to get the original text back
assert(TextFormatter::unparse($xml) === $text);
php test.php 运行结果:
To-do list:
<ol style="list-style-type:decimal">
<li> Say hello to the world <img alt=":)" class="emoji" draggable="false" src="https://twemoji.maxcdn.com/2/svg/1f642.svg"></li>
<li> Go to <a href="http://example.com">http://example.com</a></li>
<li> Try to trip the parser with <b>mis<i>nes</i></b><i>ted<u> tags</u></i></li>
<li> Watch this video: <span data-s9e-mediaembed="youtube" style="display:inline-block;width:100%;max-width:640px"><span style="display:block;overflow:hidden;position:relative;padding-bottom:56.25%"><iframe allowfullscreen="" scrolling="no" style="background:url(https://i.ytimg.com/vi/QH2-TGUlwu4/hqdefault.jpg) 50% 50% / cover;border:0;height:100%;left:0;position:absolute;width:100%" src="https://www.youtube.com/embed/QH2-TGUlwu4"></iframe></span></span></li>
</ol>
<pre><code>#include <stdio.h>
int main()
{
}
</code></pre><script async="" crossorigin="anonymous" data-hljs-style="github-gist" integrity="sha384-zmUXofHyFIwgOUqZ7LgJySh3+QxRXTN5r9PV86t5Wu1m8yixc2x3UyDkFTmKH5L1" src="https://cdn.jsdelivr.net/gh/s9e/hljs-loader@1.0.6/loader.min.js"></script>
<blockquote class="uncited"><div>
asdfasdfasdfasdfasdfa<br>
asdfasdf<br>
asdf<br>
asdfasdf<br>
a3453
</div></blockquote>#44 Php/Nodejs/Web/HTML5/Javascript/微信开发/Python » php7 处理 bbcode » 2020-02-14 10:55:35
- phpweb
- 回复: 3
平台 ubuntu 18.04
1. 安装依赖包:
sudo apt-get install php php-dev php-pear -y
2. 克隆bbcode c 代码:
git clone https://github.com/esminis/php_pecl_bbcode
3. 编译:
cd php_pecl_bbcode
phpize --clean
phpize
./configure
make
make install
参考: https://pear.php.net/manual/en/pyrus.commands.build.php
4. 修改 php.ini 配置文件:
/etc/php/7.4/cli/php.ini (cgi)
/etc/php/7.4/apache2/php.ini (apache2)
添加:
extension=bbcode
5. 测试:
<?php
$arrayBBCode=array(
    ''=>         array('type'=>BBCODE_TYPE_ROOT,  'childs'=>'!i'),
    'i'=>        array('type'=>BBCODE_TYPE_NOARG, 'open_tag'=>'<i>',
                    'close_tag'=>'</i>', 'childs'=>'b'),
    'url'=>      array('type'=>BBCODE_TYPE_OPTARG,
                    'open_tag'=>'<a href="{PARAM}">', 'close_tag'=>'</a>',
                    'default_arg'=>'{CONTENT}',
                    'childs'=>'b,i'),
    'img'=>      array('type'=>BBCODE_TYPE_NOARG,
                    'open_tag'=>'<img src="', 'close_tag'=>'" />',
                    'childs'=>''),
    'b'=>        array('type'=>BBCODE_TYPE_NOARG, 'open_tag'=>'<b>',
                    'close_tag'=>'</b>'),
);
$text=<<<EOF
[b]Bold Text[/b]
[i]Italic Text[/i]
[url]http://www.php.net/[/url]
[url=http://pecl.php.net/][b]Content Text[/b][/url]
[img]http://static.php.net/www.php.net/images/php.gif[/img]
[url=http://www.php.net/]
[img]http://static.php.net/www.php.net/images/php.gif[/img]
[/url]
EOF;
$BBHandler=bbcode_create($arrayBBCode);
echo bbcode_parse($BBHandler,$text);
输出:
<b>Bold Text</b>
[i]Italic Text[/i]
<a href="http://www.php.net/">http://www.php.net/</a>
<a href="http://pecl.php.net/"><b>Content Text</b></a>
<img src="http://static.php.net/www.php.net/images/php.gif" />
<a href="http://www.php.net/">
[img]http://static.php.net/www.php.net/images/php.gif[/img]
</a>
以上可以用 php命令行测试, 也可以用apache2网页服务器测试.
参考: http://www.zhaiqianfeng.com/2016/08/php-pecl-bbcode.html
#45 Re: 全志 SOC » 跟风画了个F1C200S的小板 【开源PCB】 » 2020-02-11 21:53:08
#46 Re: Php/Nodejs/Web/HTML5/Javascript/微信开发/Python » thinkphp 只能用 Composer 才能安装成功吗?我用git装貌似缺文件, 不知道为什么. » 2020-02-11 17:14:01
sudo composer create-project topthink/think  ./ 6.0.2

sudo composer create-project topthink/think  ./ 5.1.39
装上 php7之后, 就可以装 thinkphp6了, 最后一个参数指定版本.
感谢分享, 原来创建项目一定要这个命令哦。
sudo composer create-project topthink/think ./ 6.0.2
然后多应用模式用下面的命令安装:
composer require topthink/think-multi-app
#47 Re: Php/Nodejs/Web/HTML5/Javascript/微信开发/Python » 试一试thinkphp的模板引擎 ---- ThinkTemplate » 2020-02-11 14:58:49
#48 Re: DIY/综合/Arduino/写字机/3D打印机/智能小车/平衡车/四轴飞行/MQTT/物联网 » 嫌全字库ttf文件太肥的朋友,可以进来看看了,按需剪裁, 减肥/瘦身/不留赘肉 » 2020-02-11 11:54:35
#49 Re: 技术人生/软件使用技巧/破解经验/技术吐槽/灌水 » 受站长和kekemuyu启发,开发了Github加速服务Beta版(g.widora.io) » 2020-02-11 11:06:14
#50 Re: Php/Nodejs/Web/HTML5/Javascript/微信开发/Python » 推荐一个php平台下绚丽的图表组件 ---- pChart » 2020-02-11 09:30:38
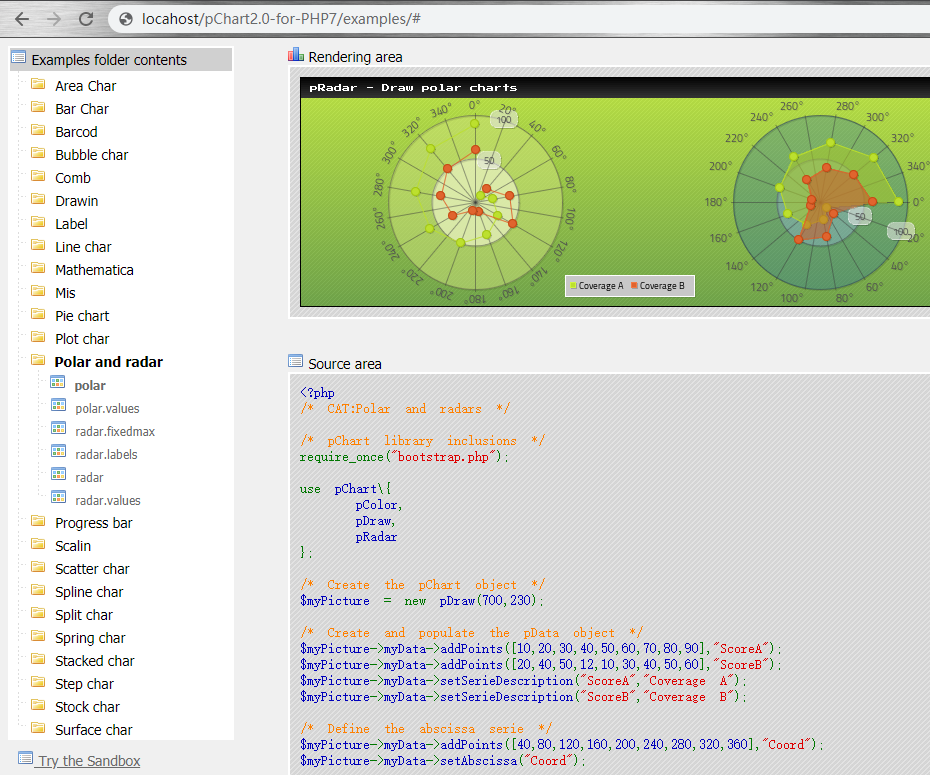
/* 极地和雷达图 */

//引入 pChart 库
include("../class/pData.class.php");
include("../class/pDraw.class.php");
include("../class/pRadar.class.php");
include("../class/pImage.class.php");

//图像大小
$width = 500;
$height = 500;
//绘制位置
$x = 100;
$y = 100;
//分数
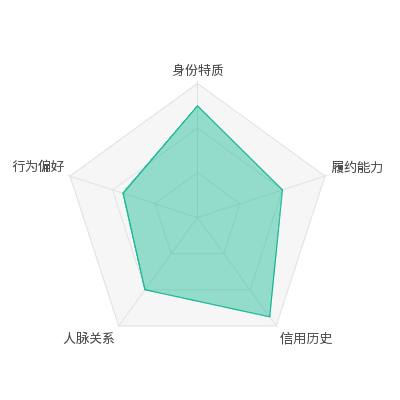
$scores = array(
    "身份特质"=>5,
    "履约能力"=>4,
    "信用历史"=>5.5,
    "人脉关系"=>4,
    "行为偏好"=>3.5
);

//创建并赋值 pData 对象
$MyData = new pData();
$MyData->addPoints(array_values($scores), "Score");
$MyData->setSerieDescription("Score", "Application A");
$MyData->setPalette("Score", array("R" => 0, "G" => 180, "B" => 138));

//定义 absissa
$MyData->addPoints(array_keys($scores), "Labels");
$MyData->setAbscissa("Labels", array("R" => 10, "G" => 170, "B" => 133));

//创建 pChart 对象
$myPicture = new pImage($width, $height, $MyData);

//设置默认字体属性(这里我使用开源的字体:思源黑体)
$myPicture->setFontProperties(array("FontName" => "../fonts/SOURCEHANSANSCN-MEDIUM.OTF", "FontSize" => 10, "R" => 80, "G" => 80, "B" => 80));

//创建 pRadar 对象
$SplitChart = new pRadar();

//绘制雷达图
$myPicture->setGraphArea($x, $y, $width-$x, $height-$y);        //设置雷达图区域位开始位置和结束位置
$Options = array(
    "Layout" => RADAR_LAYOUT_STAR,            //雷达布局 RADAR_LAYOUT_STAR=>尖角雷达图,RADAR_LAYOUT_CIRCLE=>圆角雷达图
    "LabelPos" => RADAR_LABELS_HORIZONTAL,    //类型标签 RADAR_LABELS_HORIZONTAL=>水平,RADAR_LABELS_ROTATED=>旋转
    "BackgroundGradient" => array(            //背景梯度渐变
        "StartR" => 246,
        "StartG" => 246,
        "StartB" => 246,
        "StartAlpha" => 100,
        "EndR" => 246,
        "EndG" => 246,
        "EndB" => 246,
        "EndAlpha" => 100
    ),
    'AxisR' => 225,
    'AxisG' => 225,
    'AxisB' => 225,
    'AxisAlpha' => 100,
    'AxisRotation' => -90,                //旋转轴(角度)
    'DrawAxisValues' => false,        //画坐标轴的值
    'DrawPoly' => true,                //区域阴影
    "ValueFontSize" => 8,                //在坐标轴顶点标注数值字体大小
    'WriteValues' => false,            //在坐标轴顶点标注数值
    'WriteValuesInBubble' => false,    //在顶点气泡中标注
    'ValuePadding' => 0,                //在顶点气泡中标注大小
    'OuterBubbleRadius' => 0,            //顶点气泡颜色
    'DrawPoints' => false,                //画坐标顶点的小圆点
    'PointRadius' => 5,                    //坐标顶点的小圆点大小
    'DrawLines' => true,                //画坐标点连接线(首尾点不连接 适用于xy坐标轴)
    'LineLoopStart' => true,            //链接首尾的点
    'SegmentHeight' => 2,                //设置每个坐标格大小
    'Segments' => 3,                    //设置雷达图显示几个坐标格
);
$SplitChart->drawRadar($myPicture, $MyData, $Options);

//渲染图片(选择最佳方式)
$myPicture->autoOutput("pictures/example.radar.values.png");#51 Re: Php/Nodejs/Web/HTML5/Javascript/微信开发/Python » 推荐一个php平台下绚丽的图表组件 ---- pChart » 2020-02-11 09:03:41
#52 Re: Php/Nodejs/Web/HTML5/Javascript/微信开发/Python » 推荐一个php平台下绚丽的图表组件 ---- pChart » 2020-02-10 22:45:11
#53 Php/Nodejs/Web/HTML5/Javascript/微信开发/Python » 推荐一个php平台下绚丽的图表组件 ---- pChart » 2020-02-10 22:43:19
- phpweb
- 回复: 3
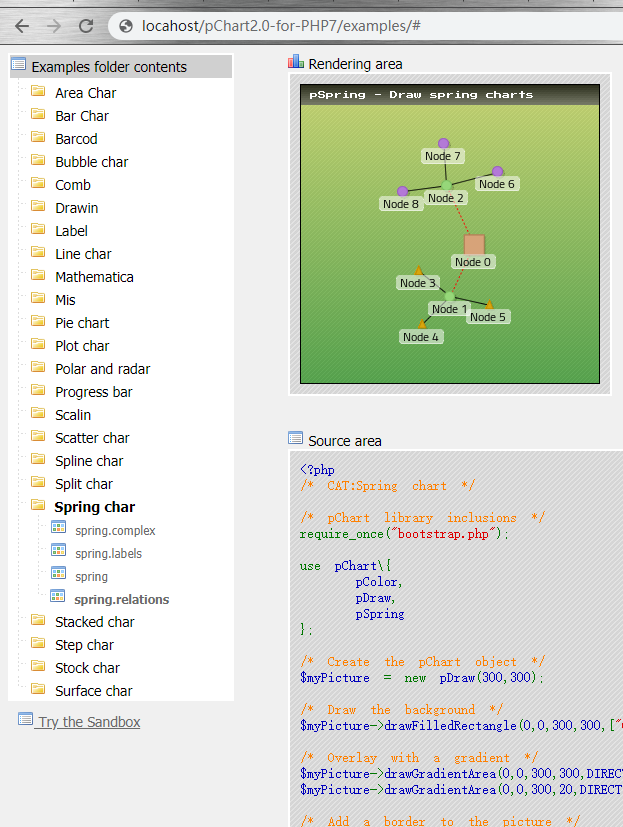
项目地址: https://github.com/bozhinov/pChart2.0-for-PHP7
thinkphp + pChar 使用视频: https://www.bilibili.com/video/av78285655
#54 Re: 技术人生/软件使用技巧/破解经验/技术吐槽/灌水 » 受站长和kekemuyu启发,开发了Github加速服务Beta版(g.widora.io) » 2020-02-10 22:10:13
不错, 但是发现一个bug, 输入这个地址: https://github.com/bozhinov/pChart2.0-for-PHP7.git
提示错误.
#56 Re: 计算机图形/GUI/RTOS/FileSystem/OpenGL/DirectX/SDL2 » AWTK win10 编译报错求助各位大神 g++: error: /EHsc: No such file or directory » 2020-02-10 15:13:54
要不看下这个有没有参考价值:
https://whycan.cn/t_2118.html
#57 Php/Nodejs/Web/HTML5/Javascript/微信开发/Python » 试一试thinkphp的模板引擎 ---- ThinkTemplate » 2020-02-10 15:02:22
- phpweb
- 回复: 2
项目地址: https://github.com/top-think/think-template
开发指南: https://www.kancloud.cn/manual/think-template/1286406
1. 安装 composer 包管理器
sudo apt-get update
sudo apt-get install curl php7.4-cli -y
curl -sS https://getcomposer.org/installer | sudo php -- --install-dir=/usr/local/bin --filename=composer
composer create-project topthink/think tp
2. 设置阿里云镜像:
sudo composer config -g repo.packagist composer https://mirrors.aliyun.com/composer/
参考: https://developer.aliyun.com/composer
3. 下载代码:
sudo composer require topthink/think-template
4. 创建用户文件:
#创建 public 目录, 网页服务器根目录指向此目录
sudo mkdir public/ -p
sudo mkdir template runtime -p
sudo chmod o+rwx runtime/#入口文件
sudo touch public/index.php#模板文件
sudo touch template/index.html
public/index.php
<?php
namespace think;

require __DIR__.'/../vendor/autoload.php';

// 设置模板引擎参数
$config = [
        'view_path'     =>      './template/',
        'cache_path'    =>      './runtime/',
        'view_suffix'   =>      'html',
];

$template = new Template($config);
// 模板变量赋值
$template->assign(['name' => 'think']);
// 读取模板文件渲染输出
$template->fetch('index');

?>
模板文件 template/index.html
你的名字: {$name}#58 Re: DIY/综合/Arduino/写字机/3D打印机/智能小车/平衡车/四轴飞行/MQTT/物联网 » 灾年给万用表DIY一块续命电池, 快递停了挺不方便的, 凑合用吧 » 2020-02-10 14:46:11
#60 Re: DIY/综合/Arduino/写字机/3D打印机/智能小车/平衡车/四轴飞行/MQTT/物联网 » 灾年给万用表DIY一块续命电池, 快递停了挺不方便的, 凑合用吧 » 2020-02-09 13:39:32
#61 Re: DIY/综合/Arduino/写字机/3D打印机/智能小车/平衡车/四轴飞行/MQTT/物联网 » 灾年给万用表DIY一块续命电池, 快递停了挺不方便的, 凑合用吧 » 2020-02-09 11:37:49
#62 Re: DIY/综合/Arduino/写字机/3D打印机/智能小车/平衡车/四轴飞行/MQTT/物联网 » 灾年给万用表DIY一块续命电池, 快递停了挺不方便的, 凑合用吧 » 2020-02-09 11:29:13
#63 Re: DIY/综合/Arduino/写字机/3D打印机/智能小车/平衡车/四轴飞行/MQTT/物联网 » 灾年给万用表DIY一块续命电池, 快递停了挺不方便的, 凑合用吧 » 2020-02-09 00:22:10
#64 Re: DIY/综合/Arduino/写字机/3D打印机/智能小车/平衡车/四轴飞行/MQTT/物联网 » 灾年给万用表DIY一块续命电池, 快递停了挺不方便的, 凑合用吧 » 2020-02-08 23:54:34
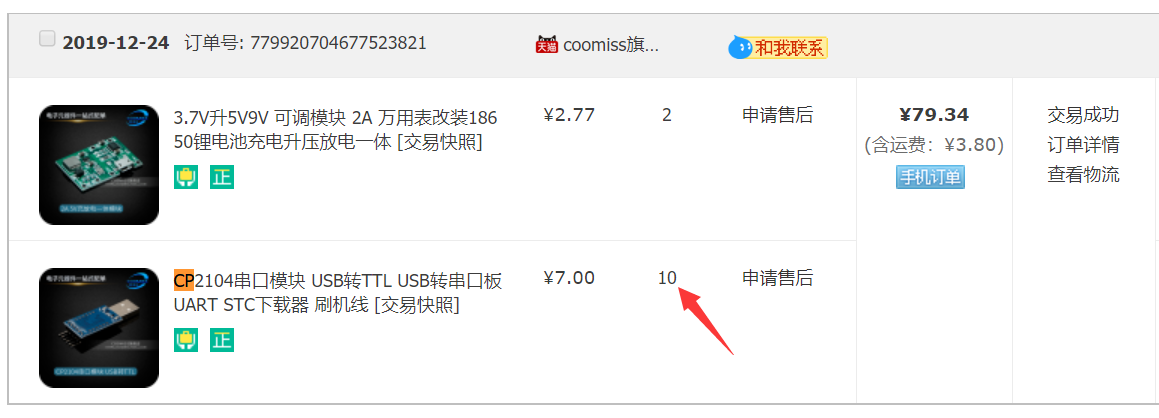
升压芯片激光刻字b6289y, 我查了手册, shutdown current < 1uA, 这样是不是说 待机电流<1uA呢?
应该是 MT3608 系列的, 手册上面这个型号的丝印是: b628dc
https://prom-electric.ru/media/MT3608.pdf
后记:
------------------------------------------------
应该是这家西安航天民芯的MT36xx: https://item.szlcsc.com/85988.html
但不一定是这个芯片, 因为后缀还是对不上.
#66 Re: DIY/综合/Arduino/写字机/3D打印机/智能小车/平衡车/四轴飞行/MQTT/物联网 » 灾年给万用表DIY一块续命电池, 快递停了挺不方便的, 凑合用吧 » 2020-02-07 22:17:59
#67 Re: DIY/综合/Arduino/写字机/3D打印机/智能小车/平衡车/四轴飞行/MQTT/物联网 » 灾年给万用表DIY一块续命电池, 快递停了挺不方便的, 凑合用吧 » 2020-02-07 15:48:55
#68 DIY/综合/Arduino/写字机/3D打印机/智能小车/平衡车/四轴飞行/MQTT/物联网 » 灾年给万用表DIY一块续命电池, 快递停了挺不方便的, 凑合用吧 » 2020-02-07 15:44:58
- phpweb
- 回复: 23
#69 Re: 全志 SOC » f1c100s使用uart1 » 2020-02-07 13:34:02
#70 Re: Php/Nodejs/Web/HTML5/Javascript/微信开发/Python » Windows thinkphp 开发. composer & wamp & phpstorm » 2020-02-06 23:27:55
感谢楼主分享.
#0 [0]InvalidArgumentException in Manager.php line 103
Driver [Think] not supported.
    {
        if ($this->namespace || false !== strpos($type, '\\')) {
            $class = false !== strpos($type, '\\') ? $type : $this->namespace . Str::studly($type);

            if (class_exists($class)) {
                return $class;
            }
        }

        throw new InvalidArgumentException("Driver [$type] not supported.");
    }

    /**
     * 获取驱动参数
     * @param $name
     * @return array
     */
    protected function resolveParams($name): array
    {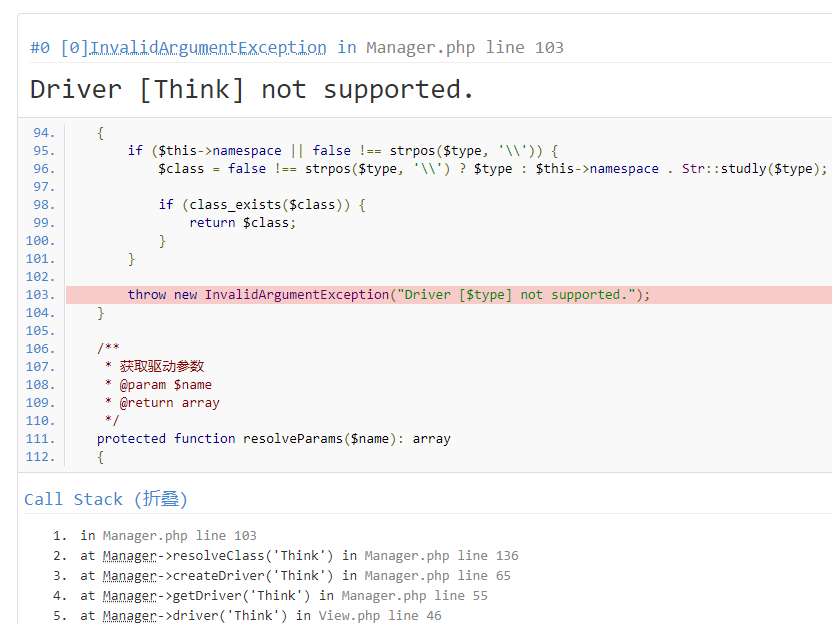
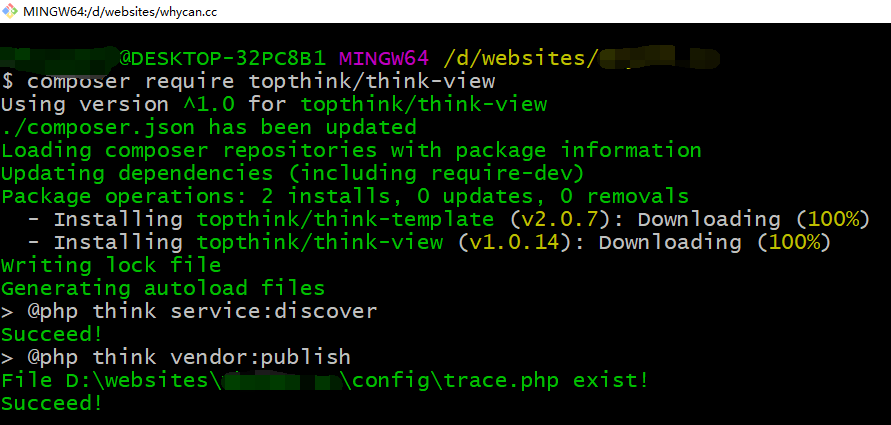
运行命令:
composer require topthink/think-view
解决上面的驱动问题.
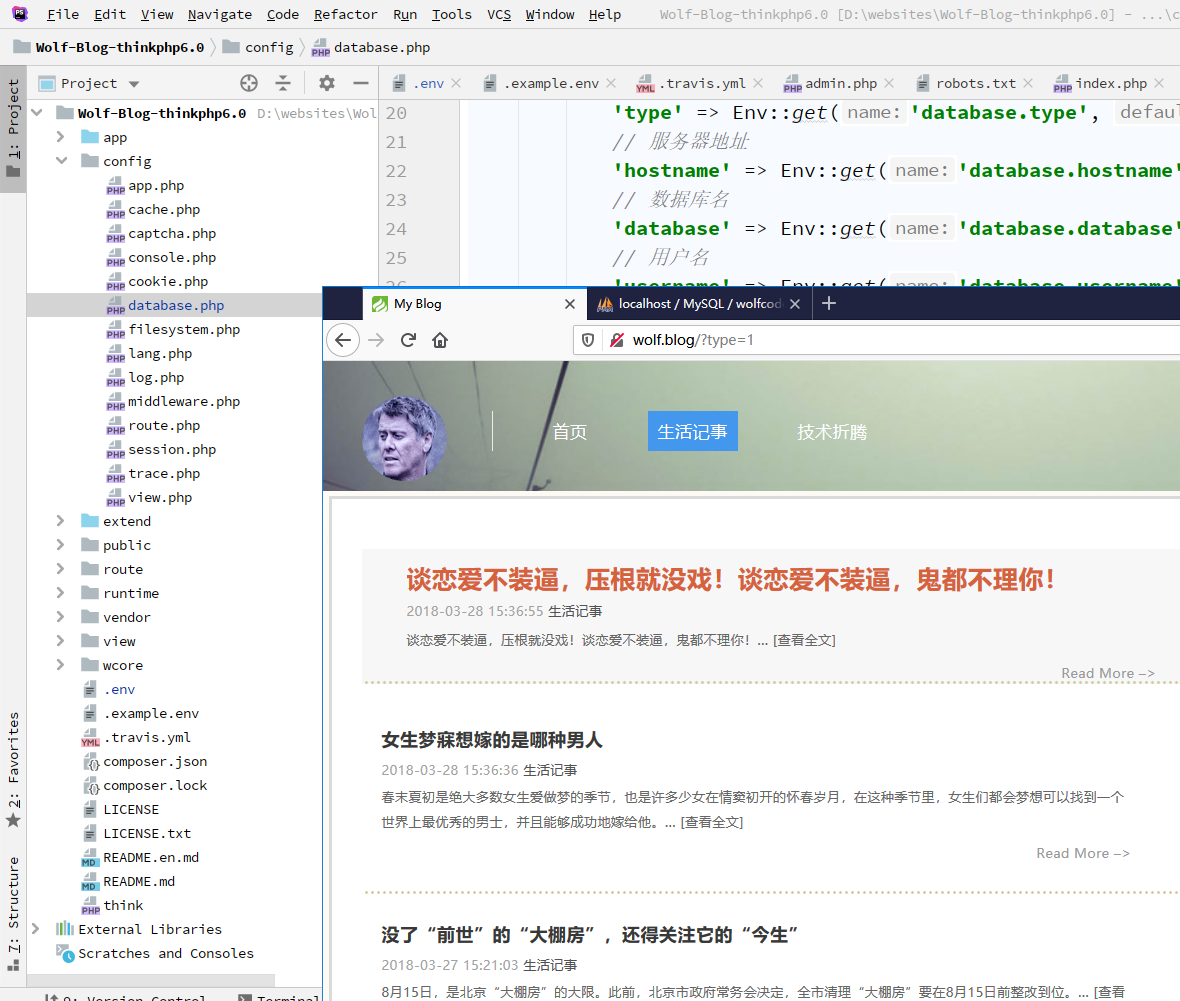
#71 Re: Php/Nodejs/Web/HTML5/Javascript/微信开发/Python » 围观 thinkphp6 做的 开源blog ---- Wolf-Blog » 2020-02-06 13:29:29
#72 Php/Nodejs/Web/HTML5/Javascript/微信开发/Python » 围观 thinkphp6 做的 开源blog ---- Wolf-Blog » 2020-02-06 13:28:47
#73 Re: Php/Nodejs/Web/HTML5/Javascript/微信开发/Python » 微软基于新版edge浏览器体验还真不错, 基于google开源chromium内核,真是应验那句老话----打不过你就加入你! » 2020-02-06 12:30:39
#75 Re: 华芯微特 » SWM181串口如何支持1.5停止位 » 2020-02-05 23:00:57
#76 Re: Php/Nodejs/Web/HTML5/Javascript/微信开发/Python » 推荐一个好用的 windows php + apache + mysqlserver 开发软件 ---- Wampserver3 » 2020-02-05 19:37:11
#77 Re: Php/Nodejs/Web/HTML5/Javascript/微信开发/Python » 推荐一个好用的 windows php + apache + mysqlserver 开发软件 ---- Wampserver3 » 2020-02-05 19:25:03
#78 Re: Php/Nodejs/Web/HTML5/Javascript/微信开发/Python » 推荐一个好用的 windows php + apache + mysqlserver 开发软件 ---- Wampserver3 » 2020-02-05 14:21:24
#79 Re: Php/Nodejs/Web/HTML5/Javascript/微信开发/Python » 推荐一个好用的 windows php + apache + mysqlserver 开发软件 ---- Wampserver3 » 2020-02-05 14:15:35
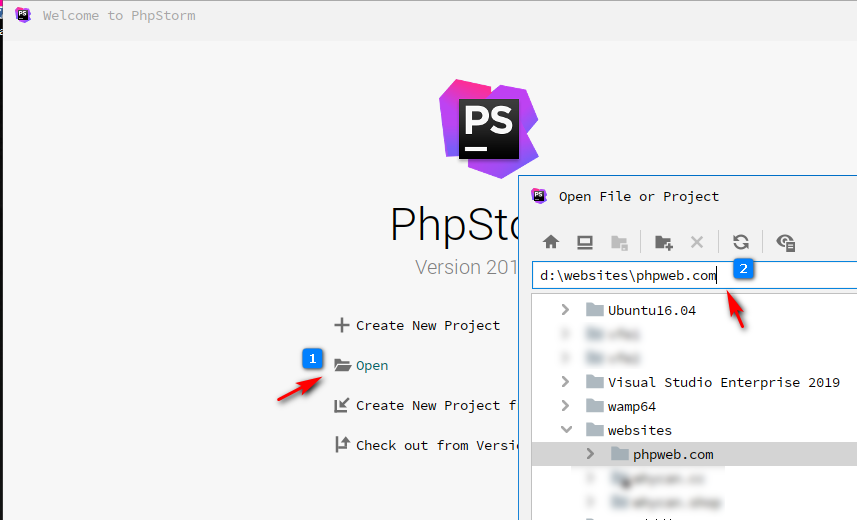
php 开发工具建议用 phpstorm: https://whycan.cn/t_3619.html
#80 Re: Php/Nodejs/Web/HTML5/Javascript/微信开发/Python » 推荐一个好用的 windows php + apache + mysqlserver 开发软件 ---- Wampserver3 » 2020-02-05 14:12:44
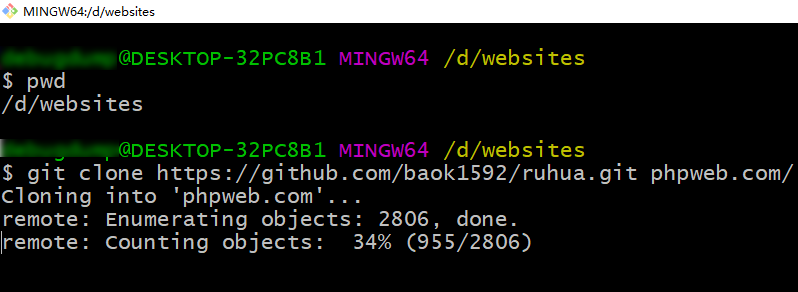
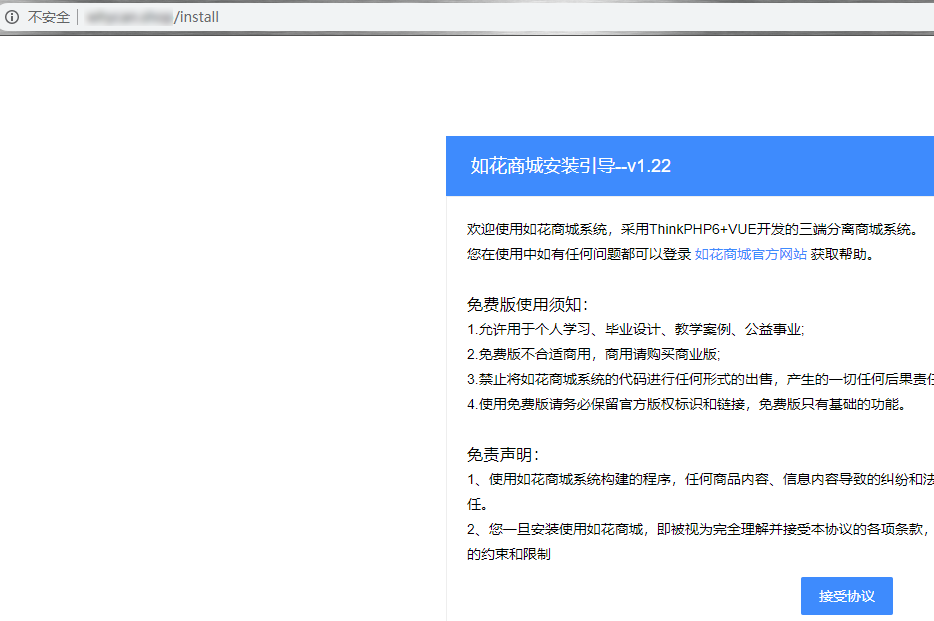
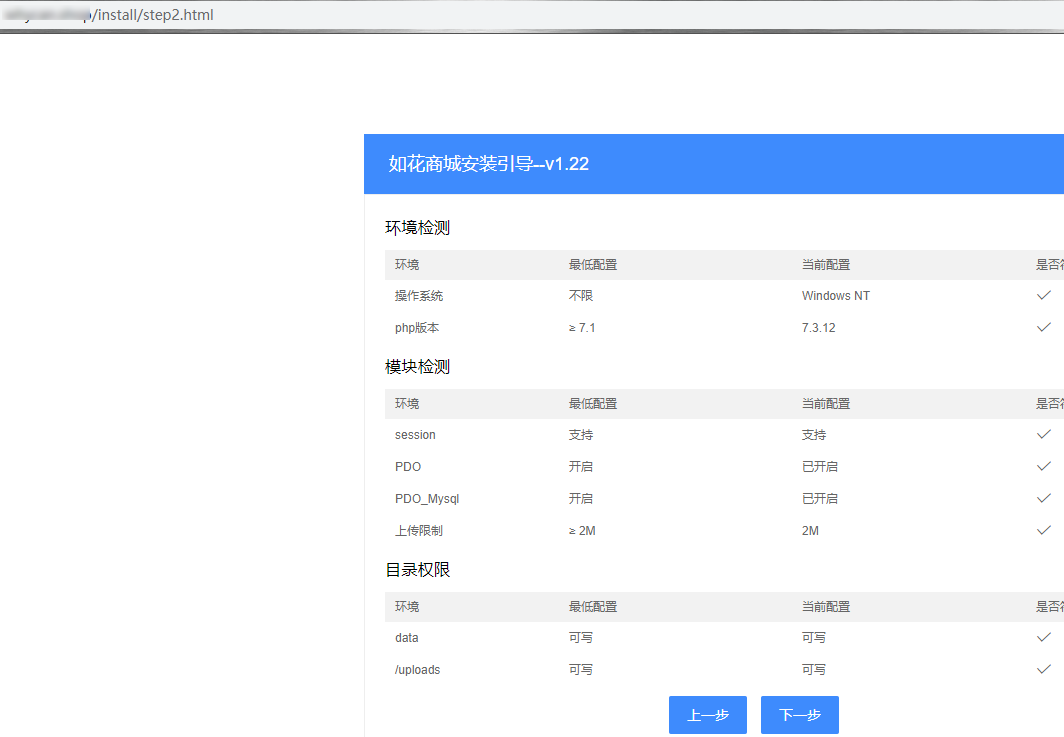
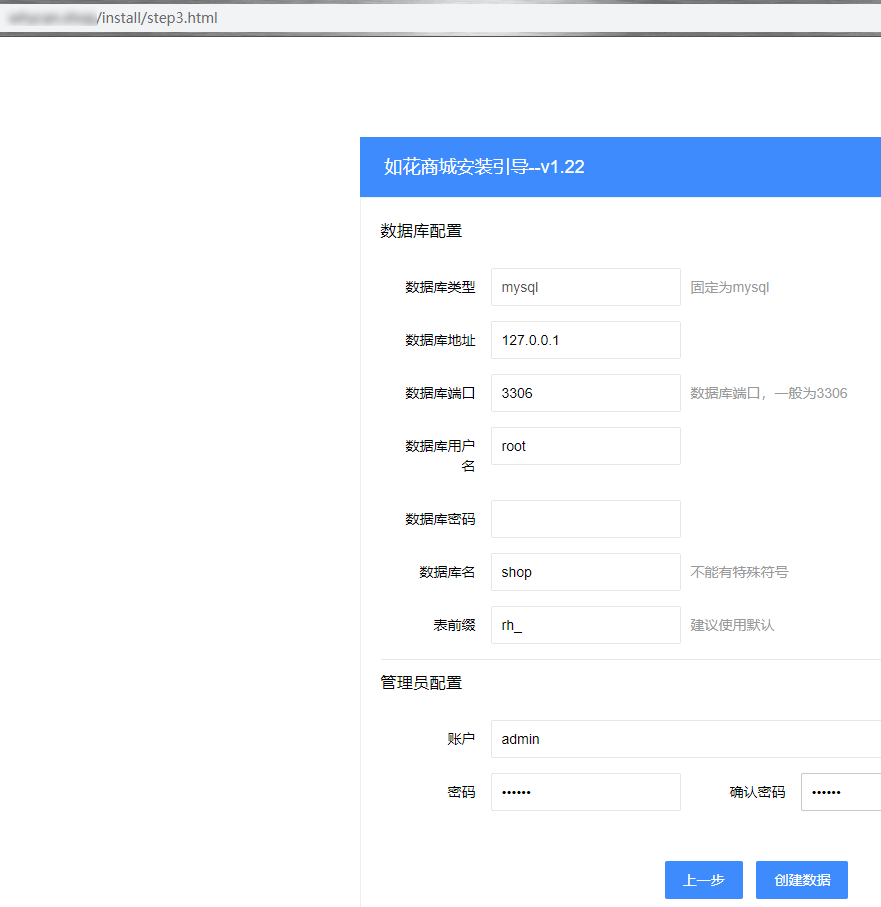
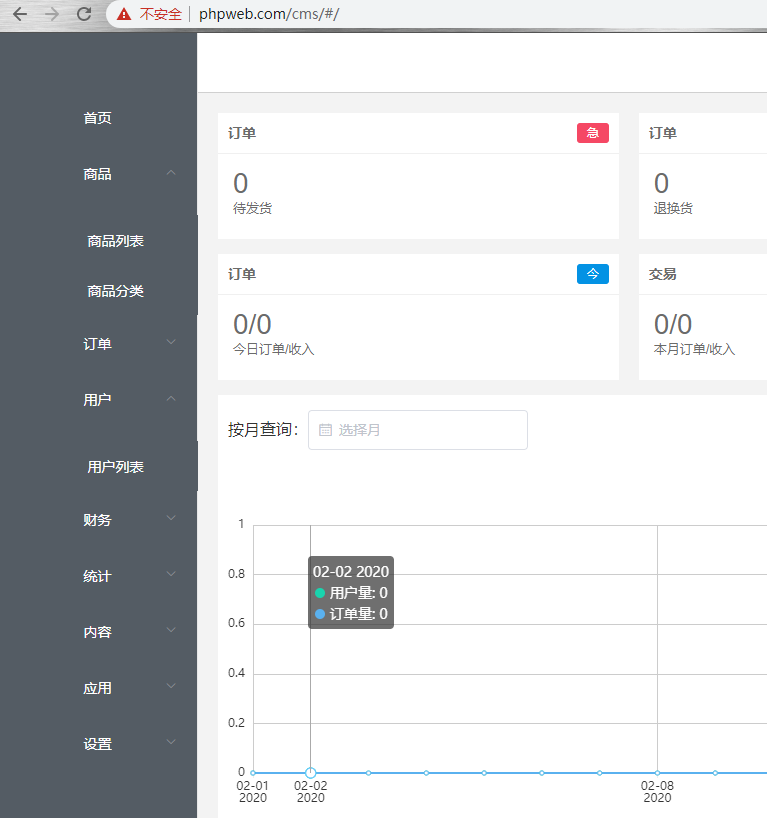
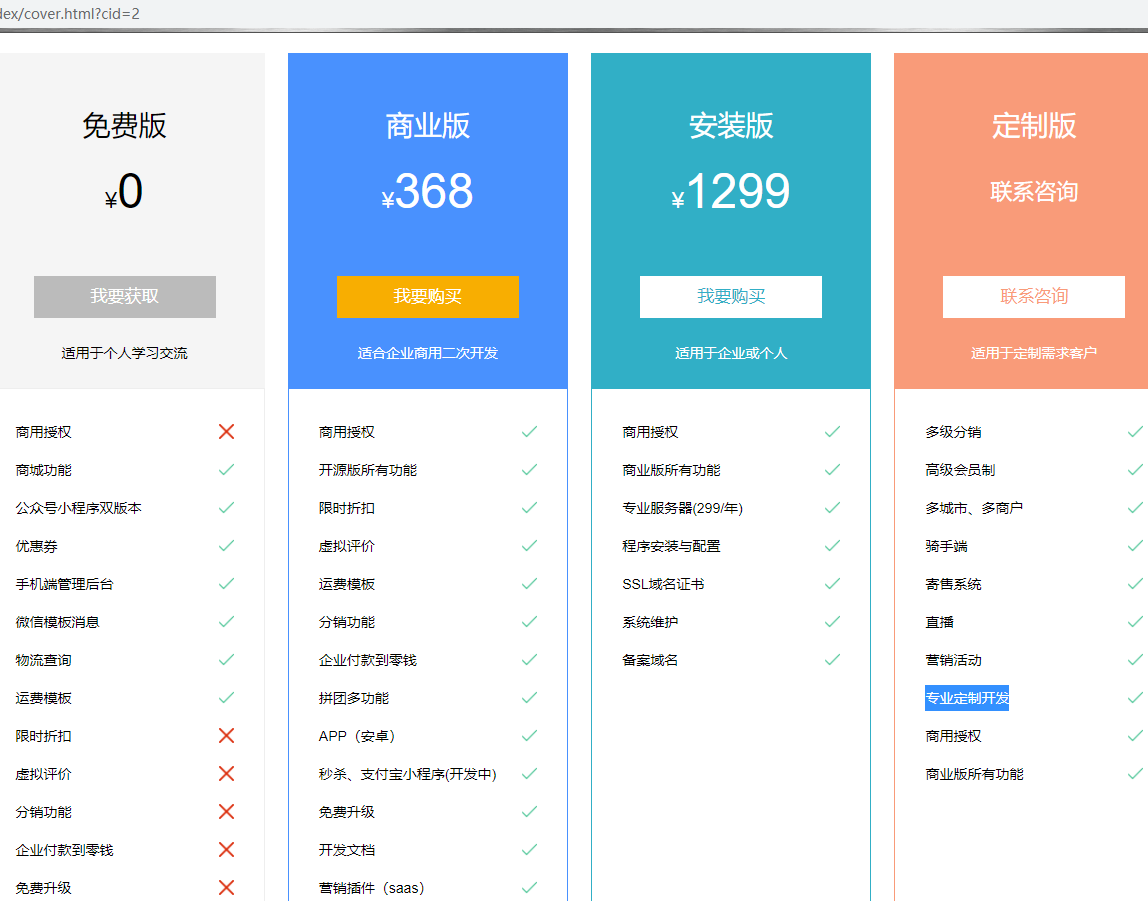
下载如花商城的代码跑一跑: https://github.com/baok1592/ruhua
介绍
如花商城是基于Thinkphp6+uniapp+element开发的一套新零售移动电商系统,采用三端分离。

功能包含商城、优惠券、分销、拼团、限时折扣、积分等功能,更适合企业二次开发;

微信小程序端,微信公众号端,APP端。

匆匆上线,还有很多不完善,疯狂迭代中...

手册: https://www.yuque.com/u158056/bek6g2
官网: http://www.ruhuashop.com
QQ群: 728615087
安装与使用教程
安装包约12MB,由于包含thinkphp核心包与后台CMS文件,所以较大。

访问:域名/install 进行一键安装
访问:域名/cms 直接进入后台
访问:域名/h5 进入前端 -> 未打包,自行下载:https://github.com/baok1592/ruhua_vue#81 Re: Php/Nodejs/Web/HTML5/Javascript/微信开发/Python » 推荐一个好用的 windows php + apache + mysqlserver 开发软件 ---- Wampserver3 » 2020-02-05 14:01:28
#82 Re: Php/Nodejs/Web/HTML5/Javascript/微信开发/Python » 推荐一个好用的 windows php + apache + mysqlserver 开发软件 ---- Wampserver3 » 2020-02-05 13:57:59
#83 Re: Php/Nodejs/Web/HTML5/Javascript/微信开发/Python » 推荐一个好用的 windows php + apache + mysqlserver 开发软件 ---- Wampserver3 » 2020-02-05 13:44:11
#84 Re: Php/Nodejs/Web/HTML5/Javascript/微信开发/Python » 推荐一个好用的 windows php + apache + mysqlserver 开发软件 ---- Wampserver3 » 2020-02-05 13:30:08
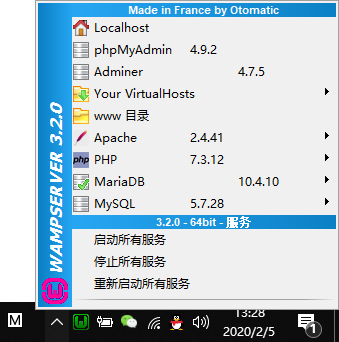
#85 Php/Nodejs/Web/HTML5/Javascript/微信开发/Python » 推荐一个好用的 windows php + apache + mysqlserver 开发软件 ---- Wampserver3 » 2020-02-05 13:23:37
- phpweb
- 回复: 12
# 官方下载地址, 选择64位的版本 wampserver3.2.0_x64.exe
https://sourceforge.net/projects/wampserver/files/WampServer%203/WampServer%203.0.0/
# 百度网盘下载
链接: https://pan.baidu.com/s/1BhEhlVSVljISTTmjfHQdLg
提取码:jg55
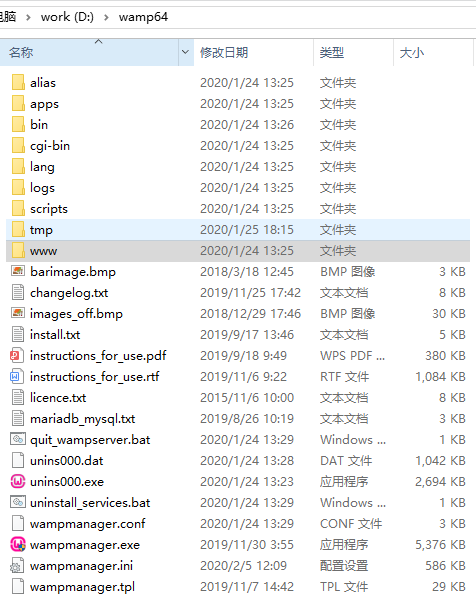
我的安装位置是: d:\wamp64
页次: 1
- 首页
- » 搜索
- » phpweb 发表的帖子
太原小智科技有限责任公司 - 东莞哇酷科技有限公司联合开发
