楼主 #1 2018-07-10 22:37:02 分享评论
- 晕哥
- 管理员

- 所在地: wechat: whycan_cn
- 注册时间: 2017-09-06
- 已发帖子: 9,492
- 积分: 9207

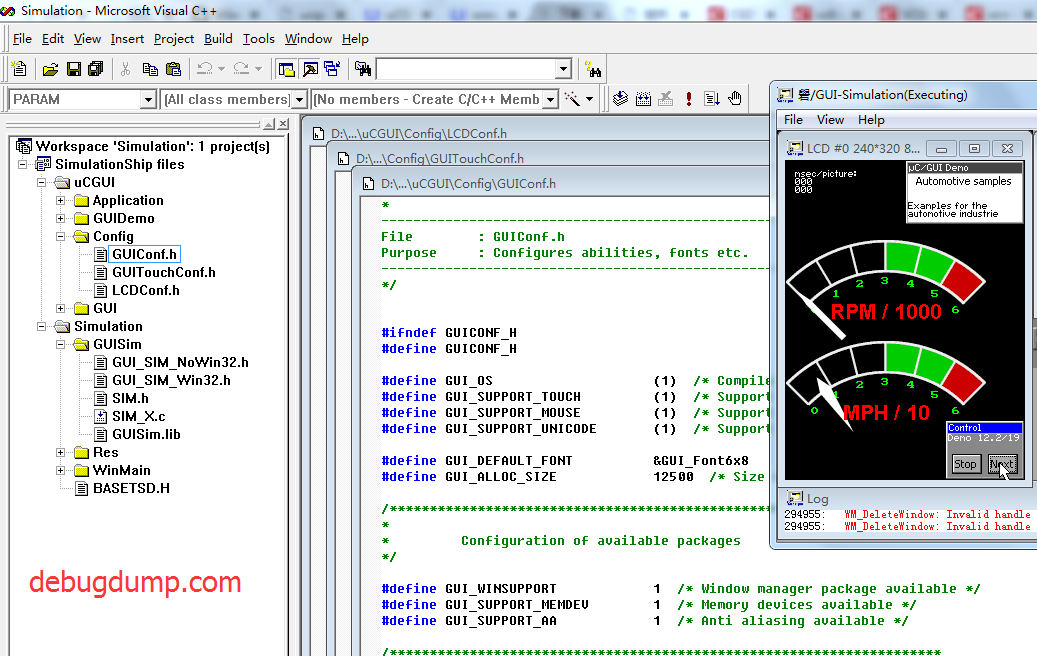
权威 ucgui 学习资料, µC/GUI3.98源码下载, VC6.0绿色版下载
uCGUI 简介.pdf
uCGUI的性能与资源占用.pdf
第01章 uCGUI的介绍.pdf
第02章 入门指南.pdf
第03章 仿真器.pdf
第04章 文本显示.pdf
第05章 显示数值.pdf
第06章 2-D图形库.pdf
第07章 字体.pdf
第08章 位图转换器.pdf
第09章 颜色.pdf
第10章 存储设备.pdf
第11章 运行模式:单、多任务.pdf
第12章 视窗管理器(WM).pdf
第13章 窗口对象(控件).pdf
第14章 对话框.pdf
第15章 抗锯齿.pdf
第16章 Unicode.pdf
第17章 Shift-JIS支持.pdf
第18章 输入设备.pdf
第19章 与时间相关的函数.pdf
第20章 底层配置.pdf
第21章 高层次配置.pdf
第22章 LCD驱动程序.pdf
第23章 LCD驱动API函数.pdf
第24章 性能和资源占用.pdf
ucgui 3.98源码 带 memdev(内存设备):uCGUI3_98_with_memdev.rar
VC6绿色版下载: vc++6.0_green.7z
上面这个ucgui3.98代码用 VC2015打开直接奔溃,所以上传一个VC6绿色版本给大家下载.
2018-08-06:
-----------------------------------
VC2015奔溃原因是VS的插件导致, 卸载就解决了奔溃问题,但是VC2015打开项目之后也要折腾很久才能正常编译、链接、运行。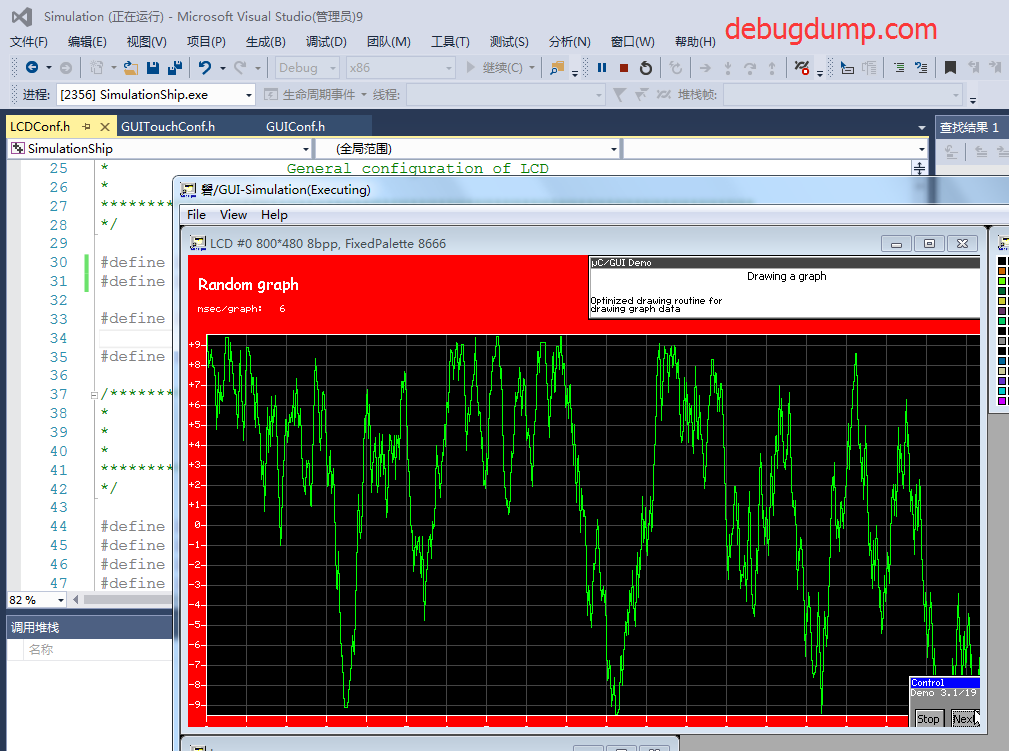
2018-08-07:
-----------------------------------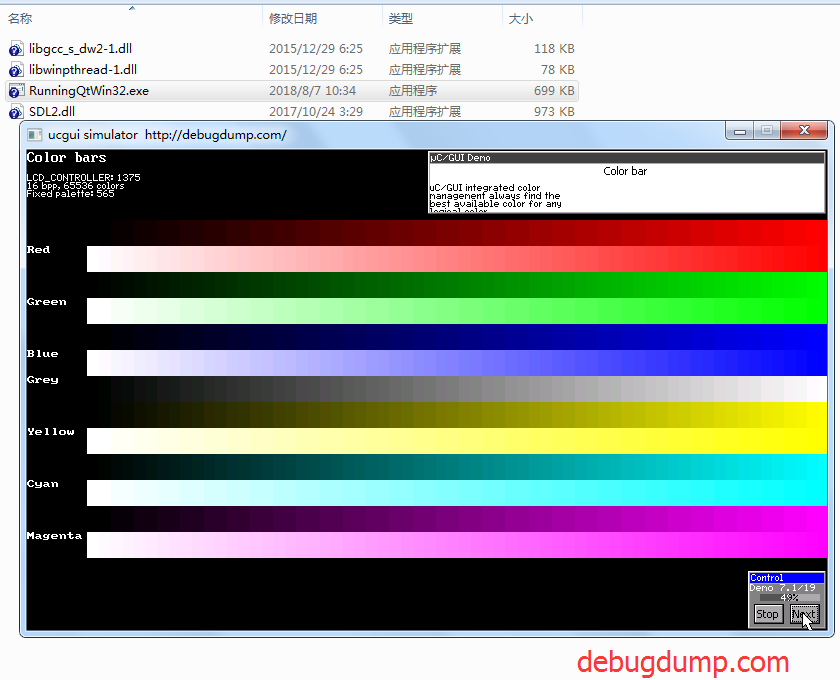
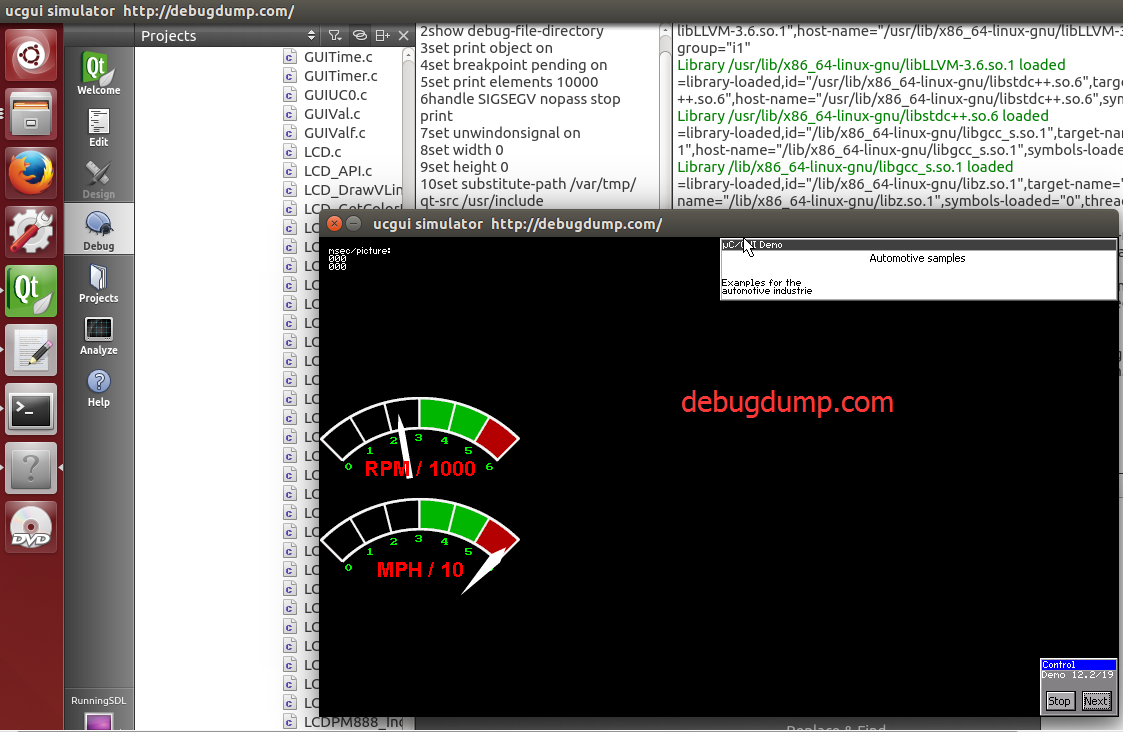
SDL版本 ucgui3.98可执行程序下载: ucgui398_memdev.7z
2018-08-10:
-----------------------------------
超级酷界面 ucgui3.90a 源码下载: uCGUI_V390a_demo_very_nice.rar
离线
#2 2018-07-11 13:51:58 分享评论
- xujun
- 会员
- 注册时间: 2018-03-21
- 已发帖子: 33
- 积分: 28
Re: 权威 ucgui 学习资料, µC/GUI3.98源码下载, VC6.0绿色版下载
整齐
离线
#3 2018-07-12 07:01:31 分享评论
- jianfengxixi
- 会员
- 注册时间: 2018-06-14
- 已发帖子: 11
- 积分: 11
Re: 权威 ucgui 学习资料, µC/GUI3.98源码下载, VC6.0绿色版下载
谢谢分享。。。。。。。。。
离线
#4 2018-07-12 09:49:46 分享评论
- awfans
- 会员
- 注册时间: 2018-04-03
- 已发帖子: 264
- 积分: 264
Re: 权威 ucgui 学习资料, µC/GUI3.98源码下载, VC6.0绿色版下载
请教大神们, emwin/ucgui的内存设备(memdev)可以用来干嘛?
离线
楼主 #5 2018-07-12 09:50:53 分享评论
- 晕哥
- 管理员
- 所在地: wechat: whycan_cn
- 注册时间: 2017-09-06
- 已发帖子: 9,492
- 积分: 9207
Re: 权威 ucgui 学习资料, µC/GUI3.98源码下载, VC6.0绿色版下载
内存设备
内存设备是绘图操作中独立于硬件的目标设备。
若已创建内存设备 (通过调用 GUI_MEMDEV_Create())并生效 (通过调用
GUI_MEMDEV_Select())则所有的绘图操作均在内存中执行。仅当完成所有操作之后,才
会在画面上显示最终结果。该动作通过调用 GUI_MEMDEV_CopyToLCD() 来完成。
内存设备可用于:
• 避免 (向显示器直接绘图而产生的)闪烁效果,
• 作为解压图像的容器,
• 用于旋转操作 (GUI_MEMDEV_Rotate())和缩放操作 (图 7),
• 用于淡入淡出效果,
• 用于窗口动画,
• 用于透明效果。
由于内存设备需要使用大量内存空间 (参见 表 7 中的 “ 内存设备 ” 组件,如果有条件的话建
议使用外部存储器。
离线
#6 2018-07-13 15:06:05 分享评论
- basicdev
- 会员
- 注册时间: 2017-10-02
- 已发帖子: 159
- 积分: 159
Re: 权威 ucgui 学习资料, µC/GUI3.98源码下载, VC6.0绿色版下载
学习学习,果然权威。
离线
#7 2018-07-25 20:37:41 分享评论
- egsen
- 会员
- 注册时间: 2018-07-25
- 已发帖子: 31
- 积分: 31
Re: 权威 ucgui 学习资料, µC/GUI3.98源码下载, VC6.0绿色版下载
请问ucGUI在NANO上用Linux移植,是怎么移植?
离线
#8 2018-07-25 20:41:54 分享评论
- egsen
- 会员
- 注册时间: 2018-07-25
- 已发帖子: 31
- 积分: 31
Re: 权威 ucgui 学习资料, µC/GUI3.98源码下载, VC6.0绿色版下载
有这样的例子可以照搬照样来学习?
离线
#9 2018-07-25 20:44:17 分享评论
- egsen
- 会员
- 注册时间: 2018-07-25
- 已发帖子: 31
- 积分: 31
Re: 权威 ucgui 学习资料, µC/GUI3.98源码下载, VC6.0绿色版下载
不久把ucgui-3.90a移植到了Linux下,还是写个总结吧。。。
ucgui的可移植性很高,只需要做很少的改动就可以移植到各个平台,移植到Linux下也一样。
首先编辑GUIConf.h这个文件:
#ifndef GUICONF_H
#define GUICONF_H
#define GUI_OS (1) / Compile with multitasking support /
#define GUI_SUPPORT_TOUCH (0) / Support a touch screen (req. win-manager), for linux /
#define GUI_SUPPORT_UNICODE (1) / Support mixed ASCII/UNICODE strings, for linux /
#define GUI_DEFAULT_FONT &GUI_Font6x8
#define GUI_ALLOC_SIZE 251024 / Size of dynamic memory */
#define GUI_SUPPORT_CURSOR (1) / for linux/
#define GUI_WINSUPPORT 1 / Window manager package available /
#define GUI_SUPPORT_MEMDEV 1 / Memory devices available /
#define GUI_SUPPORT_AA 1 / Anti aliasing available /
#endif / Avoid multiple inclusion /
接着修改LCDConf.h文件,因为我们直接使用framebuffer设备,所以只需要修改LCDConf.h文件的前面部分即可:
#define LCD_XSIZE (720) / X-resolution of LCD, Logical coor. for linux /
#define LCD_YSIZE (576) / Y-resolution of LCD, Logical coor. for linux /
#define LCD_BITSPERPIXEL (16) / for linux /
#define LCD_SWAP_RB (1) / for linux, actually 1555 format /
#define LCD_FIXEDPALETTE (555) / for linux, actually 1555 format /
#define LCD_CONTROLLER (-1) / for linux /
接下来修改LCDDummy.c,添加对framebuffer的支持:
/ for linux framebuffer /
#include <unistd.h>
#include <stdio.h>
#include <fcntl.h>
#include <linux/fb.h>
#include <sys/mman.h>
#include <sys/ioctl.h>
static struct fb_var_screeninfo vinfo;
static struct fb_fix_screeninfo finfo;
static char *pFrameBuffer = NULL;
........................................................
void LCD_L0_SetPixelIndex(int x, int y, int PixelIndex)
{
/ Convert logical into physical coordinates (Dep. on LCDConf.h) /
#if LCD_SWAP_XY | LCD_MIRROR_X| LCD_MIRROR_Y
int xPhys = LOG2PHYS_X(x, y);
int yPhys = LOG2PHYS_Y(x, y);
#else
#define xPhys x
#define yPhys y
#endif
int location = 0;
location = (x + vinfo.xoffset) (vinfo.bits_per_pixel >> 3) + (y+vinfo.yoffset) finfo.line_length;
(short)(pFrameBuffer + location) = (short)PixelIndex; / 16bpp /
return;
}
unsigned int LCD_L0_GetPixelIndex(int x, int y)
{
LCD_PIXELINDEX PixelIndex;
/ Convert logical into physical coordinates (Dep. on LCDConf.h) /
#if LCD_SWAP_XY | LCD_MIRROR_X| LCD_MIRROR_Y
int xPhys = LOG2PHYS_X(x, y);
int yPhys = LOG2PHYS_Y(x, y);
#else
#define xPhys x
#define yPhys y
#endif
/ Read from hardware ... Adapt to your system /
{
int location = 0;
location = (x + vinfo.xoffset) (vinfo.bits_per_pixel >> 3) + (y+vinfo.yoffset) finfo.line_length;
PixelIndex = (short)(pFrameBuffer + location); / 16bpp /
}
return PixelIndex;
}
....................................................
int LCD_L0_Init(void)
{
int f_fbDev;
int ScreenSize;
static struct fb_bitfield g_r16 = {10, 5, 0};
static struct fb_bitfield g_g16 = {5, 5, 0};
static struct fb_bitfield g_b16 = {0, 5, 0};
static struct fb_bitfield g_a16 = {15, 1, 0};
f_fbDev = open("/dev/fb0", O_RDWR);
if (f_fbDev <= 0)
{
printf("Error: cannot open framebuffer device.\n");
return (-1);
}
if (ioctl(f_fbDev, FBIOGET_VSCREENINFO, &vinfo) < 0)
{
printf("Error reading variable information.\n");
close(f_fbDev);
return (-1);
}
vinfo.xres = vinfo.xres_virtual = 720;
vinfo.yres = 576;
vinfo.yres_virtual = 576*2;
vinfo.transp= g_a16;
vinfo.red = g_r16;
vinfo.green = g_g16;
vinfo.blue = g_b16;
vinfo.bits_per_pixel = 16;
if (ioctl(f_fbDev, FBIOPUT_VSCREENINFO, &vinfo) < 0)
{
printf("Put variable screen info failed!\n");
close(f_fbDev);
return -1;
}
if (ioctl(f_fbDev, FBIOGET_FSCREENINFO, &finfo))
{
printf("Error reading fixed information.\n");
return -1;
}
printf("xres is %d\n, yres is %d\n", vinfo.xres, vinfo.yres);
ScreenSize = vinfo.xres vinfo.yres (vinfo.bits_per_pixel >> 3);
pFrameBuffer =(char *)mmap(0, ScreenSize, PROT_READ | PROT_WRITE, MAP_SHARED,f_fbDev, 0);
if ((long)pFrameBuffer == -1)
{
printf("Error: failed to map framebuffer device to memory.\n");
close(f_fbDev);
return (-1);
}
return 0;
}
至此,LCDDummy.c修改完毕。
接下来添加鼠标支持,新建一个GUI_MOUSE_DriverLinux.c代替原来的GUI_MOUSE_DriverPS2.c,这里的思路是用一个线程来读取鼠标设备:
.................................................
void *ThreadReamMouse(void)
{
int ret;
int fd;
fd_set readfs;
int maxfd = 0;
char temp[3];
fd = open ("/dev/mouse0",O_RDWR);
if (fd < 0)
{
printf ("%s open failed\n", "/dev/mouse0");
return NULL;
}
printf("open %s success, fd is %d\n", "/dev/mouse0", fd);
maxfd = fd + 1;
for (; ;)
{
FD_ZERO(&readfs);
FD_SET(fd, &readfs);
ret = select(maxfd, &readfs, NULL, NULL, NULL);
if (ret < 0)
{
printf("select failure!\n");
return NULL;
}
if (FD_ISSET(fd, &readfs))
{
/*
读取鼠标
*/
_NumBytesInBuffer = read(fd, _abInBuffer, sizeof(_abInBuffer));
if ((_NumBytesInBuffer == 3) && ((_abInBuffer[0] & 0x0c) == 0x08))
{
_EvaPacket();
//printf("Get mouse data!\n");
}
}
}
}
void GUI_MOUSE_DRIVER_PS2_Init(void)
{
pthread_t pidReadMouse;
_NumBytesInBuffer = 0;
pthread_create(&pidReadMouse, NULL, (void *)ThreadReamMouse, NULL);
printf("Create thread sucess!\n");
}
GUI_MOUSE_DRIVER_PS2_Init()函数需要在哪里调用呢?不调用的话,鼠标没法用啊。增加GUI_X_Linux.c文件:
.............................................................
pthread_mutex_t mutex = PTHREAD_MUTEX_INITIALIZER;
..............................................................
void GUI_X_ExecIdle(void)
{
usleep(1000);
return;
}
int GUI_X_GetTime(void)
{
struct timeval tv;
int tm;
gettimeofday(&tv, NULL);
tm = tv.tv_sec*1024 + tv.tv_usec/1024;
return tm;
}
void GUI_X_Delay(int Period)
{
while(Period--)
{
usleep(1000);
}
return;
}
void GUI_X_Unlock(void)
{
pthread_mutex_unlock(&mutex);
return;
}
void GUI_X_Lock(void)
{
pthread_mutex_lock(&mutex);
return;
}
U32 GUI_X_GetTaskId(void)
{
pthread_t id;
id = pthread_self();
printf("GUI_X_GetTaskId %d \n", (U32)id);
return ((U32)id);
}
void GUI_X_InitOS(void)
{
printf("GUI_X_InitOS\n");
GUI_MOUSE_DRIVER_PS2_Init(); / create read mouse thread for linux /
return;
}
.....................................................
至此,该修改的文件都修改完毕了,可以开始编译了。但是ucgui的工程一般是在windows下编译的,在Linux下交叉编译需要写Makefile,按照Linux的惯例,在每个文件夹下增加Makefile,如下:
CC = arm-linux-gcc
CFLAGS=-I../Core -I../../Config/ -I../WM/
#all c files at current directory
SRCS:=$(wildcard *.c)
#replace .c to .o in SRCS
OBJS:=$(SRCS:%.c=%.o)
all:$(OBJS)
%.o : %.c
$(CC) $(CFLAGS) -c $< -o $@
.PHONY : clean
clean:
rm *.o
再增加一个编译gui库的Makefile:
SUBDIRS=AntiAlias ConvertMono Font LCDDriver MemDev Widget ConvertColor Core JPEG MultiLayer WM
LIBOBJS=
LIBOBJS+=$(wildcard AntiAlias/*.o)
LIBOBJS+=$(wildcard ConvertMono/*.o)
LIBOBJS+=$(wildcard Font/*.o)
LIBOBJS+=$(wildcard LCDDriver/*.o)
LIBOBJS+=$(wildcard MemDev/*.o)
LIBOBJS+=$(wildcard ConvertColor/*.o)
LIBOBJS+=$(wildcard Core/*.o)
LIBOBJS+=$(wildcard JPEG/*.o)
LIBOBJS+=$(wildcard MultiLayer/*.o)
LIBOBJS+=$(wildcard WM/*.o)
LIBOBJS+=$(wildcard Widget/*.o)
all:
for name in $(SUBDIRS); do (cd $$name && make && cd ../) done
make guilib
.PHONY:guilib
guilib:
arm-linux-ar rv libucgui.a $(LIBOBJS)
.PHONY:clean
clean:
@rm -f libucgui.a
@for name in $(SUBDIRS); do (cd $$name && make clean && cd ../) done
至此,整个移植过程就告一段落,直接make 就可以了。。。
这样正确吗
离线
楼主 #10 2018-07-25 20:50:21 分享评论
#11 2018-07-25 20:53:01 分享评论
- egsen
- 会员
- 注册时间: 2018-07-25
- 已发帖子: 31
- 积分: 31
Re: 权威 ucgui 学习资料, µC/GUI3.98源码下载, VC6.0绿色版下载
在nano怎么下载
离线
#12 2018-07-25 20:54:56 分享评论
- egsen
- 会员
- 注册时间: 2018-07-25
- 已发帖子: 31
- 积分: 31
Re: 权威 ucgui 学习资料, µC/GUI3.98源码下载, VC6.0绿色版下载
Linux下放在哪个目录?
离线
楼主 #13 2018-07-25 21:05:13 分享评论
- 晕哥
- 管理员
- 所在地: wechat: whycan_cn
- 注册时间: 2017-09-06
- 已发帖子: 9,492
- 积分: 9207
离线
#14 2018-07-26 08:39:03 分享评论
- lcfmax
- 会员
- 注册时间: 2018-04-13
- 已发帖子: 329
- 积分: 272.5
Re: 权威 ucgui 学习资料, µC/GUI3.98源码下载, VC6.0绿色版下载
谢谢分享了,不错
离线
楼主 #15 2018-07-26 08:42:09 分享评论
#16 2018-07-28 21:15:30 分享评论
- egsen
- 会员
- 注册时间: 2018-07-25
- 已发帖子: 31
- 积分: 31
Re: 权威 ucgui 学习资料, µC/GUI3.98源码下载, VC6.0绿色版下载
ucgui在Linux需要下载安装吗?
离线
楼主 #17 2018-07-28 21:25:20 分享评论
楼主 #18 2018-07-28 21:26:15 分享评论
#19 2018-07-31 22:35:37 分享评论
- abc3240660
- 会员
- 注册时间: 2018-07-31
- 已发帖子: 100
- 积分: 100
Re: 权威 ucgui 学习资料, µC/GUI3.98源码下载, VC6.0绿色版下载
现在都是emwin啦
离线
#20 2018-08-07 14:52:41 分享评论
- 超级萌新
- 会员
- 注册时间: 2018-05-04
- 已发帖子: 408
- 积分: 407
Re: 权威 ucgui 学习资料, µC/GUI3.98源码下载, VC6.0绿色版下载
我在 pudn 下载的版本不支持 memdev, 试一试楼主的版本。
离线
#21 2018-08-08 18:16:31 分享评论
- dgtg
- 会员
- 注册时间: 2017-11-08
- 已发帖子: 275
- 积分: 229.5
Re: 权威 ucgui 学习资料, µC/GUI3.98源码下载, VC6.0绿色版下载
好资料!
离线
#22 2018-08-10 10:07:25 分享评论
- 超级萌新
- 会员
- 注册时间: 2018-05-04
- 已发帖子: 408
- 积分: 407
Re: 权威 ucgui 学习资料, µC/GUI3.98源码下载, VC6.0绿色版下载
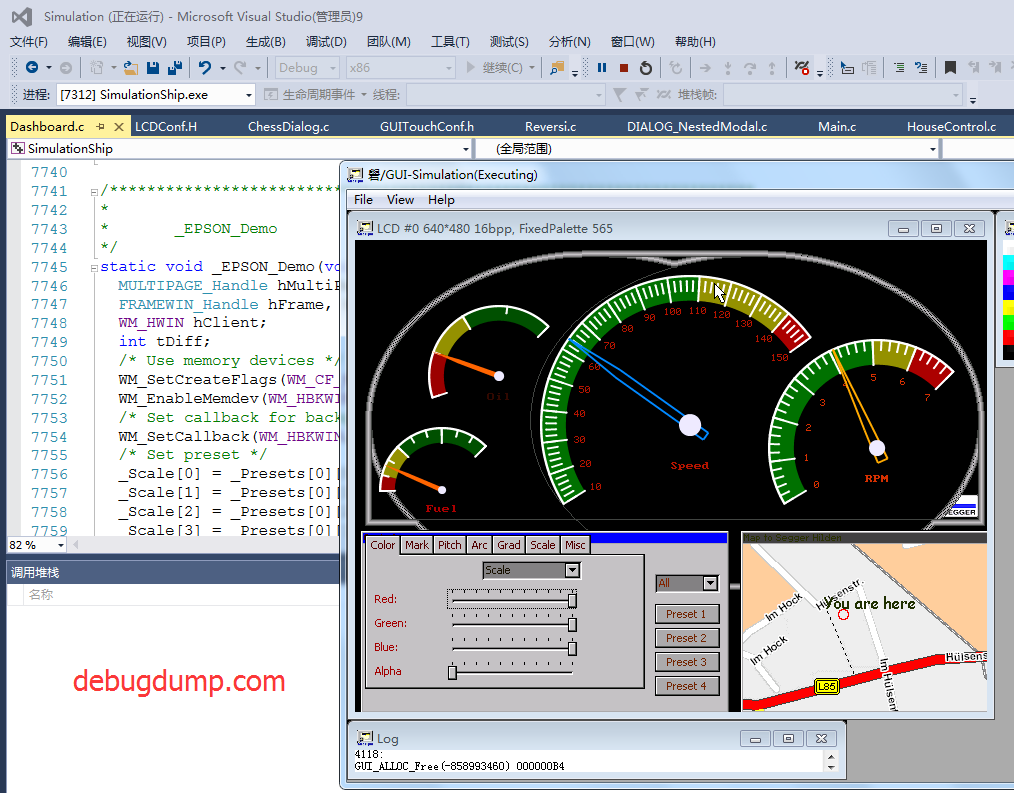
酷炫汽车仪表盘!
离线
#23 2018-08-10 10:09:03 分享评论
- 落雁
- 会员
- 注册时间: 2017-09-06
- 已发帖子: 62
- 积分: 62
Re: 权威 ucgui 学习资料, µC/GUI3.98源码下载, VC6.0绿色版下载
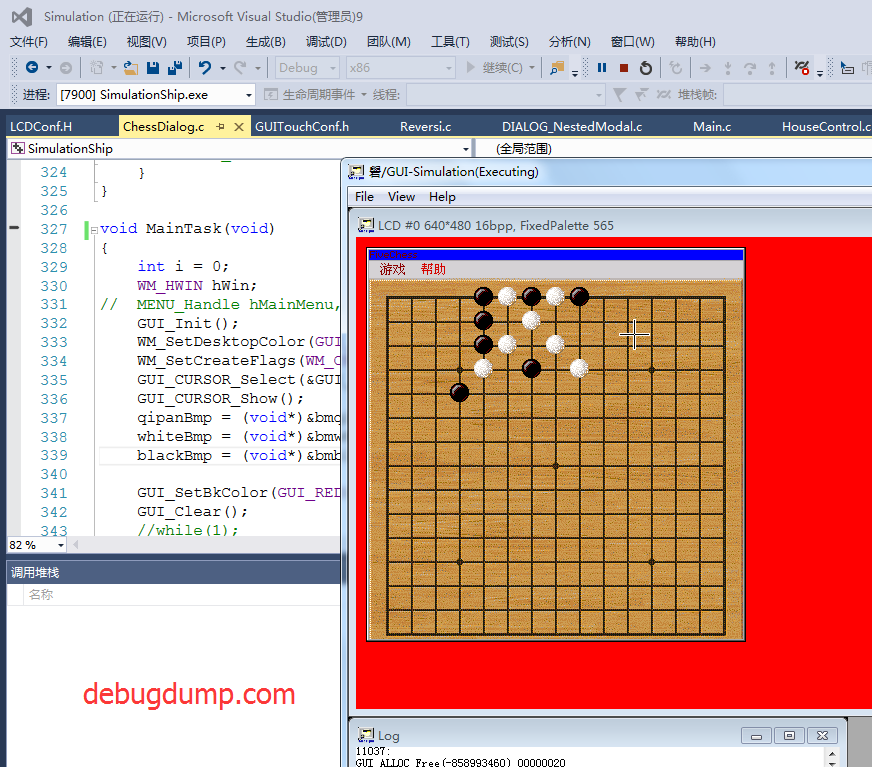
终于找到五指棋的 ucgui demo 了,感谢楼主.
离线
#24 2018-08-10 11:28:08 分享评论
- 落雁
- 会员
- 注册时间: 2017-09-06
- 已发帖子: 62
- 积分: 62
Re: 权威 ucgui 学习资料, µC/GUI3.98源码下载, VC6.0绿色版下载
请问大家如何去掉 ucgui 串口的标题条?
离线
#25 2018-08-10 11:29:42 分享评论
- 超级萌新
- 会员
- 注册时间: 2018-05-04
- 已发帖子: 408
- 积分: 407
Re: 权威 ucgui 学习资料, µC/GUI3.98源码下载, VC6.0绿色版下载
在窗口回调函数中:
WM_INIT_DIALOG 消息中执行 FRAMEWIN_SetTitleVis
static void _cbCallBack(WM_MESSAGE* pMsg)
{
    WM_HWIN hWin = pMsg->hWin;

    switch(pMsg->MsgId)
    {
    case WM_INIT_DIALOG:
        FRAMEWIN_SetTitleVis(hWin, 0);
离线
#26 2018-08-13 08:35:27 分享评论
- 三哥
- 会员
- 注册时间: 2018-08-03
- 已发帖子: 72
- 积分: 44.5
Re: 权威 ucgui 学习资料, µC/GUI3.98源码下载, VC6.0绿色版下载
好贴,好网站
离线
#27 2019-10-23 16:46:01 分享评论
- 27bao
- 会员
- 注册时间: 2019-10-23
- 已发帖子: 1
- 积分: 1
Re: 权威 ucgui 学习资料, µC/GUI3.98源码下载, VC6.0绿色版下载
谢谢分享!!!
离线
#28 2019-10-31 09:45:34 分享评论
- Aysi
- 会员
- 注册时间: 2019-04-03
- 已发帖子: 15
- 积分: 34.5
Re: 权威 ucgui 学习资料, µC/GUI3.98源码下载, VC6.0绿色版下载
好东西,谢谢分享d=====( ̄▽ ̄*)b
离线
#29 2020-04-17 15:52:08 分享评论
- whsj215294062
- 会员
- 注册时间: 2020-04-17
- 已发帖子: 2
- 积分: 2
Re: 权威 ucgui 学习资料, µC/GUI3.98源码下载, VC6.0绿色版下载
有这样的例子可以照搬照样来学习?
离线
#30 2020-04-17 19:10:32 分享评论
- gdfsli
- 会员
- 注册时间: 2018-07-11
- 已发帖子: 28
- 积分: 28
Re: 权威 ucgui 学习资料, µC/GUI3.98源码下载, VC6.0绿色版下载
vc++6.0文件失效了吗?
离线
#31 2020-04-17 21:40:01 分享评论
- liuchangyin
- 会员
- 注册时间: 2020-03-17
- 已发帖子: 204
- 积分: 199
Re: 权威 ucgui 学习资料, µC/GUI3.98源码下载, VC6.0绿色版下载
ucgui 3.9.8是经典版本,之后好像就不开源了
离线
楼主 #32 2020-04-17 22:44:17 分享评论
#33 2020-04-17 22:52:44 分享评论
- mark
- 会员
- 注册时间: 2020-01-11
- 已发帖子: 22
- 积分: 16.5
Re: 权威 ucgui 学习资料, µC/GUI3.98源码下载, VC6.0绿色版下载
谢谢分享, rtt上可以用下
离线
#34 2020-04-17 23:18:54 分享评论
- gdfsli
- 会员
- 注册时间: 2018-07-11
- 已发帖子: 28
- 积分: 28
Re: 权威 ucgui 学习资料, µC/GUI3.98源码下载, VC6.0绿色版下载
可以下载了,没想到vc6竟然这么小
离线
#35 2020-04-18 21:03:56 分享评论
- Bison
- 会员
- 注册时间: 2020-02-01
- 已发帖子: 7
- 积分: 7
Re: 权威 ucgui 学习资料, µC/GUI3.98源码下载, VC6.0绿色版下载
谢谢分享,还是VC6经典
离线
#36 2020-04-18 22:08:43 分享评论
- qw_yj@163.com
- 会员
- 注册时间: 2020-02-19
- 已发帖子: 2
- 积分: 2
Re: 权威 ucgui 学习资料, µC/GUI3.98源码下载, VC6.0绿色版下载
谢谢分享
离线
#37 2020-04-18 22:40:05 分享评论
- fane
- 会员
- 注册时间: 2020-03-20
- 已发帖子: 24
- 积分: 3
Re: 权威 ucgui 学习资料, µC/GUI3.98源码下载, VC6.0绿色版下载
谢谢分享,好资料!
离线

#39 2020-07-28 22:50:07 分享评论
- xiaoerge
- 会员
- 注册时间: 2020-07-16
- 已发帖子: 9
- 积分: 9
Re: 权威 ucgui 学习资料, µC/GUI3.98源码下载, VC6.0绿色版下载
研究研究,看看字库,UCGUI和emwin同源?
离线
#40 2021-05-10 17:11:11 分享评论
- szchen2006
- 会员
- 注册时间: 2019-10-09
- 已发帖子: 216
- 积分: 166.5
Re: 权威 ucgui 学习资料, µC/GUI3.98源码下载, VC6.0绿色版下载
离线
- 不通过:与技术无关
#41 2021-05-10 17:13:08 分享评论
- john78
- 会员
- 注册时间: 2018-07-19
- 已发帖子: 223
- 积分: 146
Re: 权威 ucgui 学习资料, µC/GUI3.98源码下载, VC6.0绿色版下载
VC6绿色版下载,哪还能下?
离线
#43 2022-02-19 19:03:30 分享评论
- dykxjh
- 会员
- 注册时间: 2020-03-25
- 已发帖子: 190
- 积分: 150
Re: 权威 ucgui 学习资料, µC/GUI3.98源码下载, VC6.0绿色版下载
谢谢分享,一直想学习ucgui的,占楼怕以后找不到了
离线
#45 2024-03-22 22:09:25 分享评论
- banzhangzzw
- 会员
- 注册时间: 2020-12-17
- 已发帖子: 8
- 积分: 7.5
Re: 权威 ucgui 学习资料, µC/GUI3.98源码下载, VC6.0绿色版下载
vc++6.0太难用了,代码跳转不方便,没有相同项高亮功能。
离线
东莞哇酷科技有限公司开发