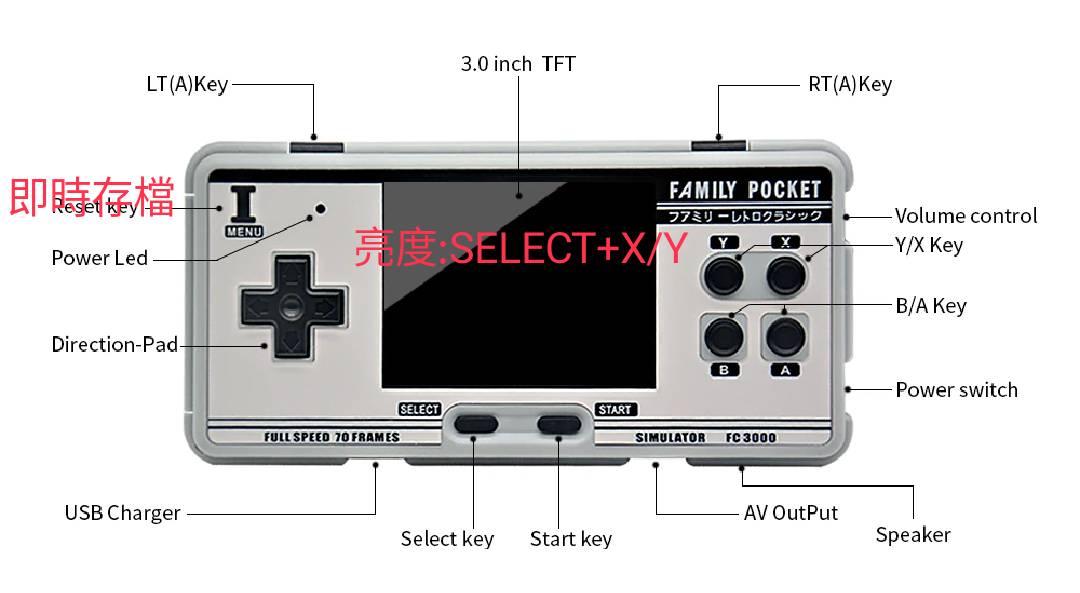
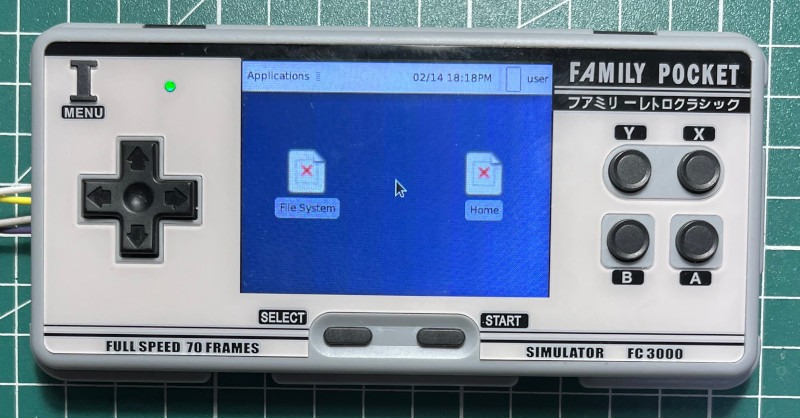
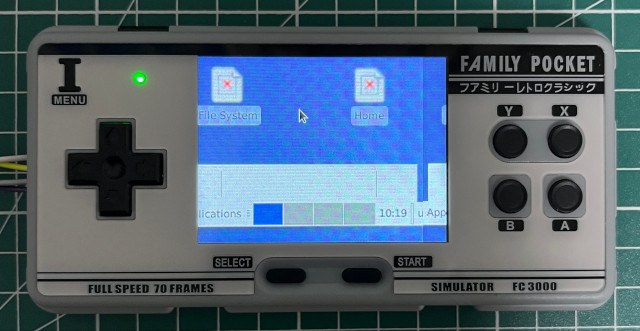
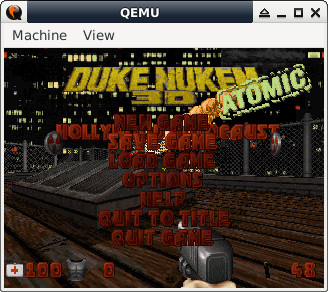
#1 Re: 司徒开源 » 研究FC3000掌機的開源可行性 » 2023-07-11 21:19:57
8 個月沒來了~竟然還有後續留言, 感謝各位的支持, 如果還想跟司徒繼續惡搞掌機, 可以關注 Gaviar Handheld (小志掌機)
https://bbs.aw-ol.com/topic/3650/gaviar-handheld-%E5%B0%8F%E5%BF%97%E6%8E%8C%E6%A9%9F
感謝~
#2 Re: 司徒开源 » 开源精神值得敬佩,但是你司徒公开po 解FC3000的加密芯片就是可耻,做技术要有底线 » 2022-10-29 21:06:09
這是司徒在挖坑網最後留下的紀錄~
相當感謝暈哥以及支持司徒的所有朋友, 司徒在此跟大家說聲感謝 !
從RetroGame、Miyoo、FC3000一路走來, 得罪相當多的方案商,
我都只想讓掌機可以跑上更多的遊戲或者模擬器, 從來就沒有想要斷人財路的想法,
如果因此得罪, 在此說聲抱歉!
司徒相當感謝周哥、怀旧堂兩位恩人, 成功把司徒從國內圈子送走, 司徒之後不再碰觸任何寨機 !
馬沙機將會在司徒的網站繼續完善, 如果有興趣, 歡迎關注!
日後, 對於有興趣的掌機, 司徒將轉往discord參與討論, 司徒心想那或許是一個比較適合的地方~
感謝大家的支持~
@mstempin
Thanks for supporting me. I think we don't need waste time to discuss this topic further. As I known, FunKey S is preparing the next generation handheld. I would like to see more detailed information about this handheld. Do you have any discord channel for this handheld. If yes, please send invitation to my email (steward.fu@gmail.com). Thanks ~
#3 Re: 司徒开源 » 研究馬沙機的開源可行性 » 2022-10-25 14:31:18
#5 Re: 司徒开源 » 研究FC3000掌機的開源可行性 » 2022-10-25 14:26:53
#6 Re: 司徒开源 » 研究Game Gear Micro掌機的開源可行性 » 2022-10-24 08:31:14
#7 Re: 司徒开源 » 研究FC3000掌機的開源可行性 » 2022-10-22 00:11:13
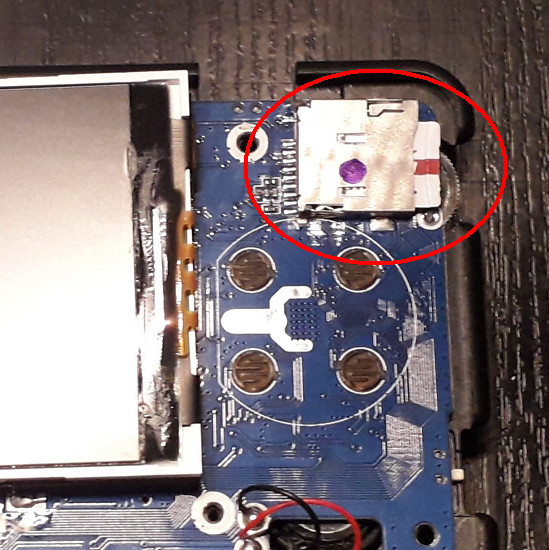
由於FC3000的MicroSD控制方式是使用SPI介面,因此,缺少幾根JTAG腳位,不然就可以很方便的透過JTAG除錯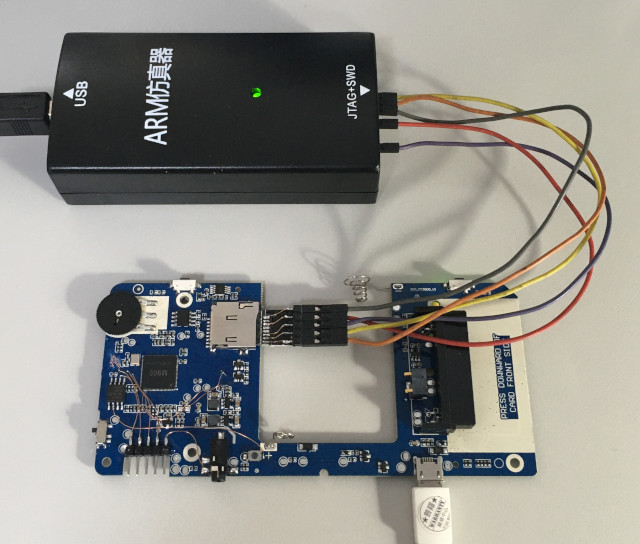
司徒在之前的測試當中,有把對應的JTAG腳位找出來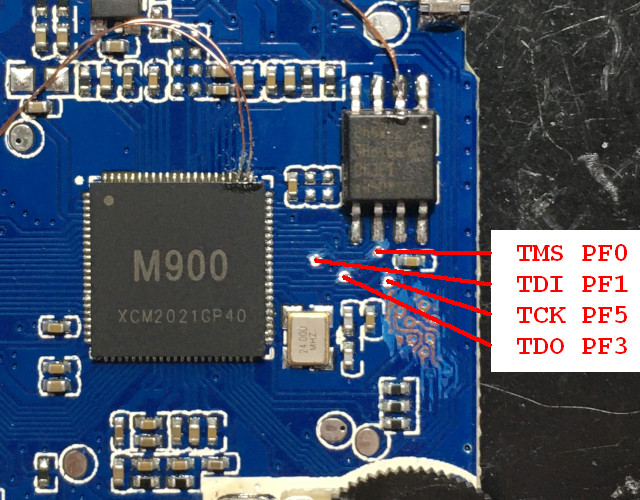
拉出一個專屬的JTAG排針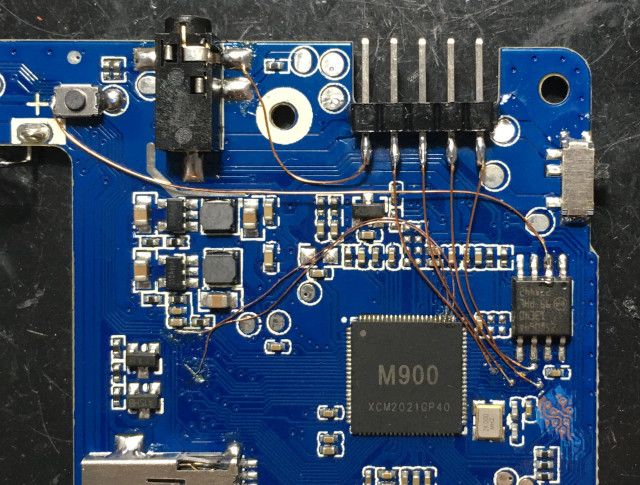
可惜,這樣的方式相當容易跑飛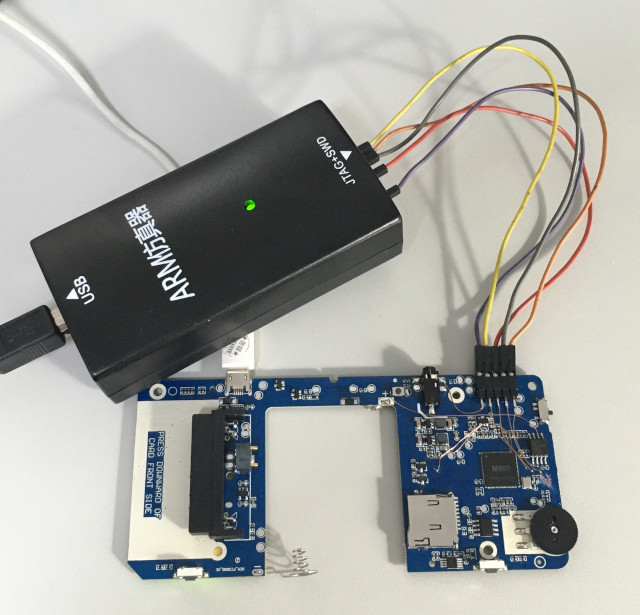
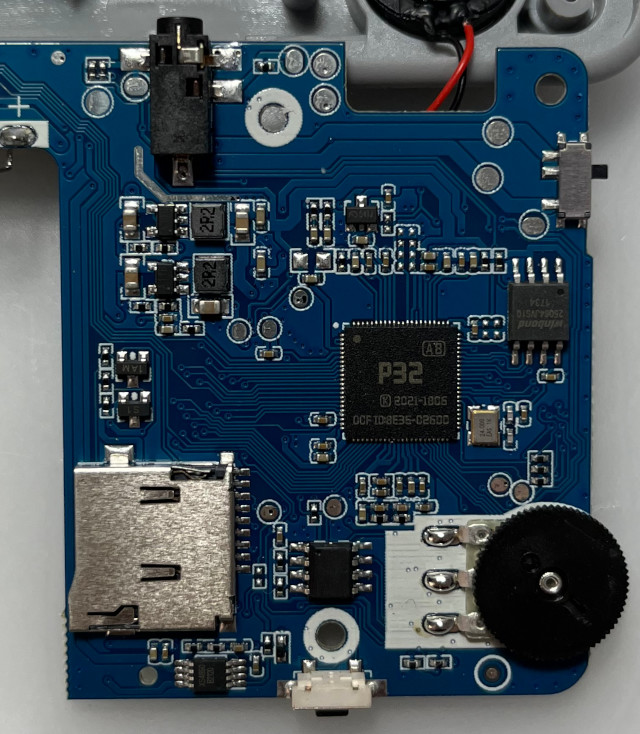
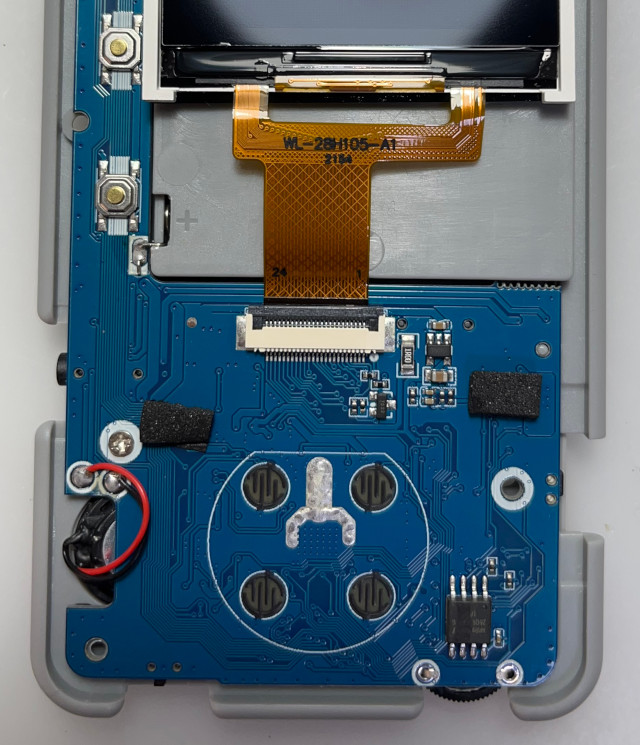
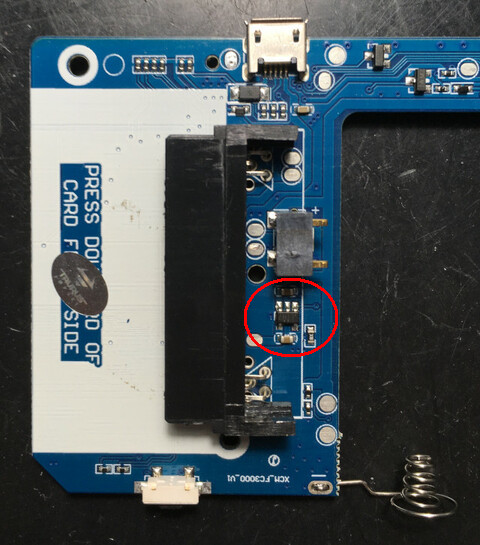
司徒這次並沒有打算在FC3000上面做除錯的動作,而是想找一個完美軀體做借屍還魂測試,因此,首要任務就是需要把加密IC的腳位找出來,加密IC位置如下: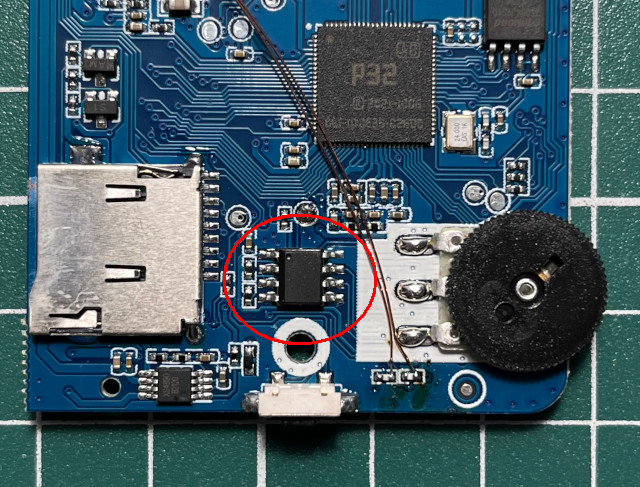
解焊後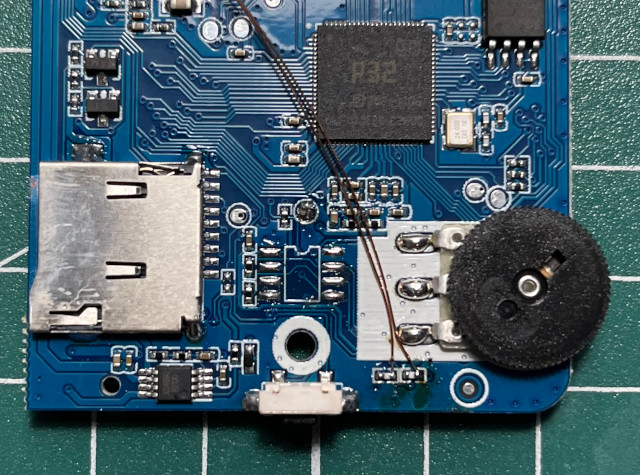
查了一下電路,腳位如下: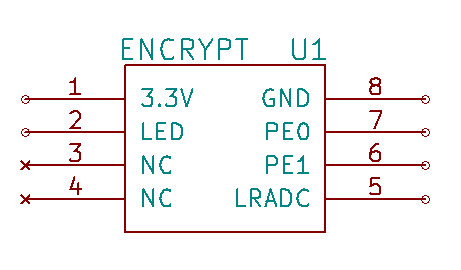
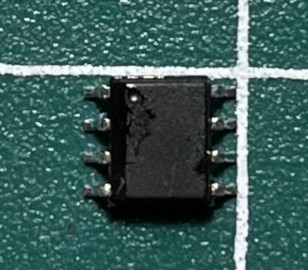
可以看出,現今加密IC競爭激烈,連電池電量指示都需要包進去,真是一個相當辛苦的行業~
為了尋找完美的軀體,司徒再度來到芒果三兄弟的家裡,芒果三兄弟在上次超頻事件中,損失慘重,目前只剩下芒果大哥一人,大哥似乎知道司徒來訪的目的,輕聲細語跟司徒說:不要超頻,其餘都可以~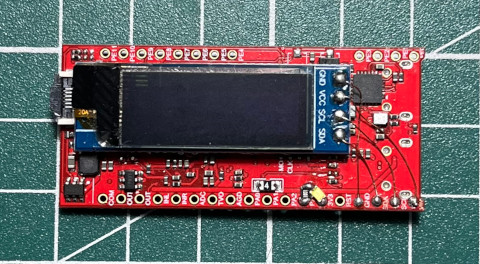
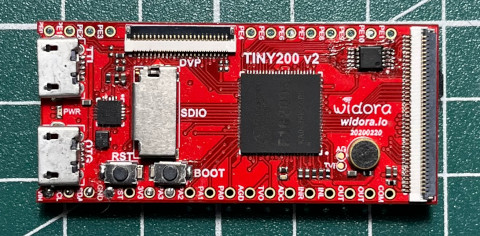
首先拆掉NAND Flash,換成FC3000的W25Q64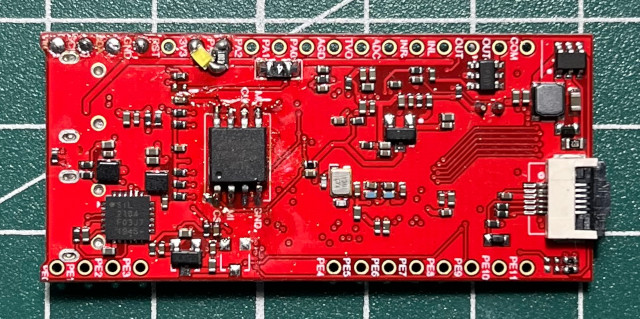
接著接上加密IC、喇叭、按鍵(PE2, 按鍵RIGHT),透過按鍵跟喇叭的測試,可以知道目前是否正常啟動官方系統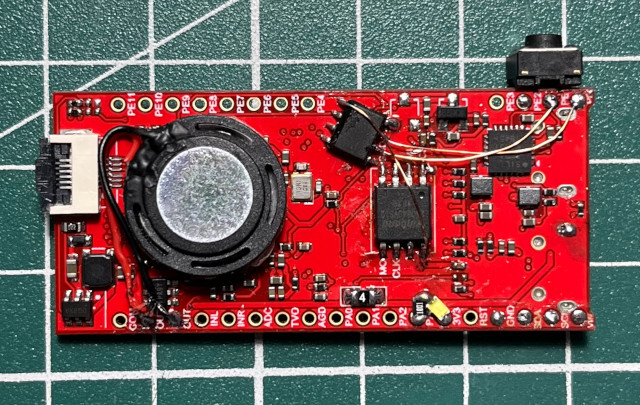
MicroSD就可以接上JTAG進行除錯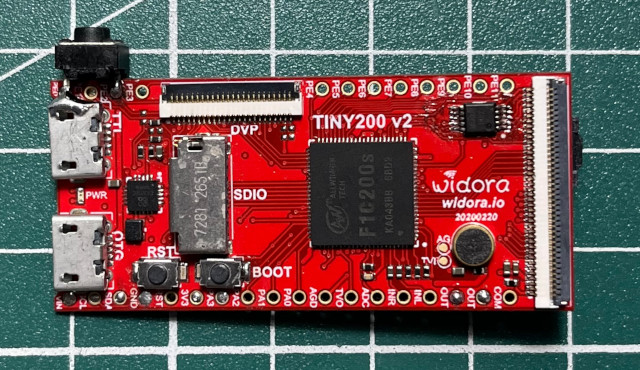
#8 Re: 司徒开源 » 研究FC3000掌機的開源可行性 » 2022-10-20 22:09:48
司徒收到許多網友的來信,信中主要的問題,幾乎都是想要在舊版機器(8個模擬器)刷入新版的系統(10個模擬器),因此,發生許多變磚的情況,雖然事後幾乎都有補救回來,不過,這也讓司徒更加好奇並且想要一探官方系統的奧秘,雖然逆向破解需要花費很多時間跟精力,而且失敗機率很高,司徒也不確定是否可以勝任,因此,司徒訂了兩個逆向目標:
1. 找出LCD初始化的地方
2. 繞過加密IC,不需要加密IC也可以進入官方系統
司徒給自己的時間是三個月,三個月後,如果還是無法破解,則以失敗收場,當然,這應該是司徒幫FC3000進行的最後一個實驗項目了,司徒還是希望可以漂亮收場,這樣就可以讓新系統可以刷入舊版的機器!
司徒使用黑箱測試手法測試,發現加密IC有三個使用時機點,分別是:
1. 開機時檢查,如果沒有加密IC,則無限迴圈
2. 進入模擬器時檢查,如果沒有加密IC,則無限迴圈
3. 退出模擬器時檢查,如果沒有加密IC,則等待到加密IC出現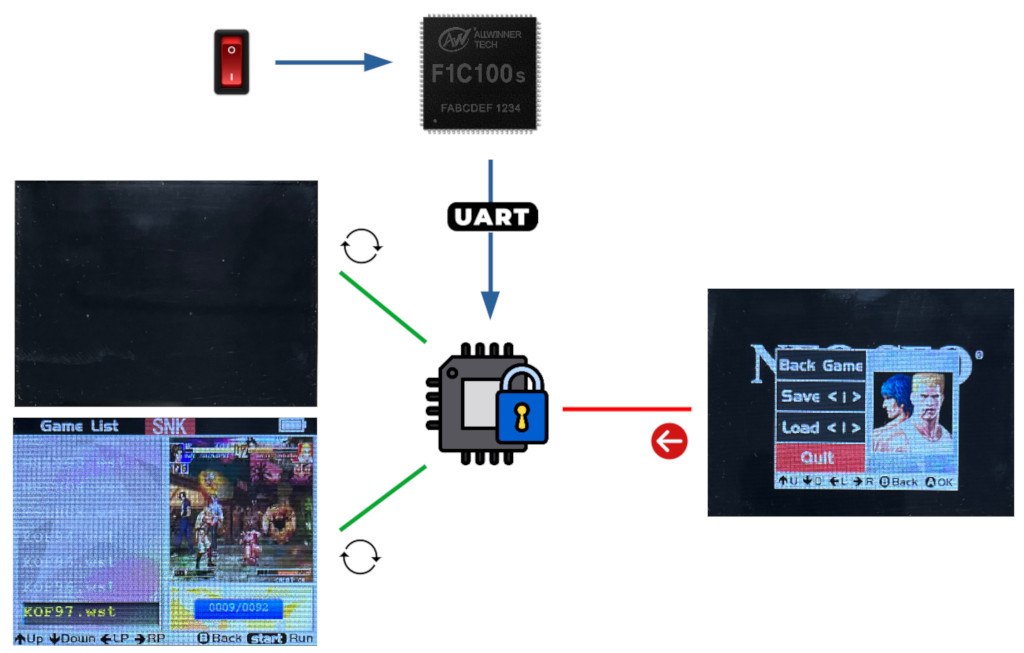
司徒使用黑箱測試後,發現最舊的TFT v1系統和最新的IPS v2系統都是使用同一種加密IC,因此,合理猜測全部的FC3000都是使用同一套加密算法,廠家真是相當貼心~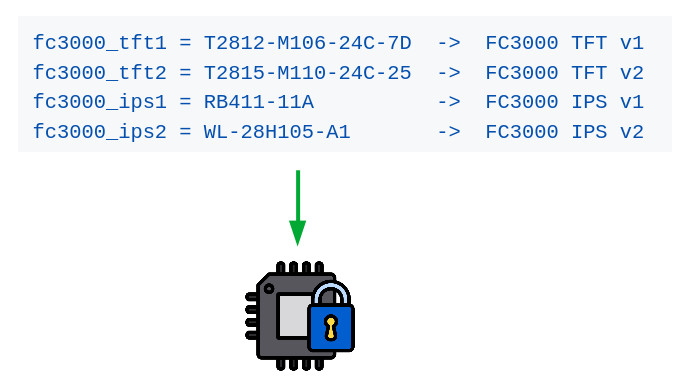
#9 Re: 司徒开源 » 研究Game Gear Micro掌機的開源可行性 » 2022-10-20 07:27:59
@hsinyuwang
不好意思, 之前的訊息沒有看到, 我一起回覆~
key_map的部份, 位於conf.c
 69 #if defined(GP2X) || defined(WIZ)
 70 static char * default_p1control = "UP=J0B0,DOWN=J0B4,LEFT=J0B2,RIGHT=J0B6,A=J0B14,B=J0B13,C=J0B12,D=J0B15,COIN=J0B9,START=J0B8,HOTKEY1=J0B10,HOTKEY2=J0B11";
 71 static char * default_p2control = "";
 72 #elif defined(PANDORA)
 73 static char * default_p1control = "A=K281,B=K279,C=K278,D=K280,START=K308,COIN=K306,UP=K273,DOWN=K274,LEFT=K276,RIGHT=K275,MENU=K32";
 74 static char * default_p2control = "";
 75 #elif defined (DINGUX)
 76 static char * default_p1control = "A=K308,B=K306,C=K304,D=K32,START=K13,COIN=K9,UP=K273,DOWN=K274,LEFT=K276,RIGHT=K275,MENU=K113";
 77 static char * default_p2control = "";
 78 #elif defined (WII)
 79 static char *default_p1control = "A=J0B9,B=J0B10,C=J0B11,D=J0B12,START=J0B18,COIN=J0B17,UPDOWN=J0A1,LEFTRIGHT=J0A0,JOY=J0H0";
 80 static char *default_p2control = "....";
 81 #else
 82 //static char * default_p1control = "A=K119,B=K120,C=K113,D=K115,START=K38,COIN=K34,UP=K273,DOWN=K274,LEFT=K276,RIGHT=K275,MENU=K27";
 83 static char * default_p1control = "A=K306,B=K308,C=K32,D=K304,START=K13,COIN=K27,UP=K273,DOWN=K274,LEFT=K276,RIGHT=K275,MENU=K305";
 84 static char * default_p2control = "";
 85 #endif
P.S. 如果你不知道你的按鍵對應的數值, 你可以在收到SDL_PollEvent()後, 把數值列印出來
關於GL問題, 你可以從config.h直接關閉
 47 /* Define to 1 if you have the <GL/gl.h> header file. */
48 #define HAVE_GL_GL_H 1#10 Re: 司徒开源 » 研究FC3000掌機的開源可行性 » 2022-10-18 22:05:38
#11 Re: 司徒开源 » 研究FC3000掌機的開源可行性 » 2022-10-18 12:58:04
@neotendo
Recently, I got the dumpped firmware from Kike for FC3000 TFT v1 handheld. His FC3000 is bricked due to flashing wrong firmware. Fortunately, he has another FC3000 that is the same spec as the bricked FC3000. According to the information I got from Kike, his FC3000 should be the same as yours. Here is the way how to restore your FC3000, you can try it:
Step 1: download https://github.com/steward-fu/fc3000/releases/download/v1.0/T2812-M106-24C-7D_restore.img
Step 2: flash T2812-M106-24C-7D_restore.img into new MicroSD
Step 3: insert MicroSD into the bricked FC3000 and then power on (white screen or black screen)
Step 4: wait for 10 mins and then power off FC3000
Step 5: remove MicroSD and then power on FC3000
Thanks Kike's help to dump the firmware to us ~
#12 Re: 司徒开源 » 研究FC3000掌機的開源可行性 » 2022-10-17 16:10:54
#13 Re: 司徒开源 » 研究FC3000掌機的開源可行性 » 2022-10-16 14:35:14
#14 Re: 司徒开源 » 研究FC3000掌機的開源可行性 » 2022-10-14 20:40:01
Here is the invitation link for FC3000 handheld: https://discord.gg/cqpK2XjXfv
#15 Re: 司徒开源 » 研究FC3000掌機的開源可行性 » 2022-10-14 19:42:10
Discord for FC3000 handheld: https://discord.com/channels/529983248114122762/1030443921601462272
If you have any question or problem, you can post on whycan forum or go to discord.
如果有問題要討論, 可以貼在此帖或者去Discord討論~
#16 Re: 司徒开源 » 研究FC3000掌機的開源可行性 » 2022-10-14 14:37:48
#17 Re: 司徒开源 » 研究FC3000掌機的開源可行性 » 2022-10-14 14:35:17
#18 Re: 司徒开源 » 研究FC3000掌機的開源可行性 » 2022-10-14 08:48:10
#19 Re: 司徒开源 » 研究FC3000掌機的開源可行性 » 2022-10-14 08:47:01
#20 Re: 司徒开源 » 研究FC3000掌機的開源可行性 » 2022-10-14 08:43:46
Tool for keypad testing
Source code: https://github.com/steward-fu/goodies
Run on PC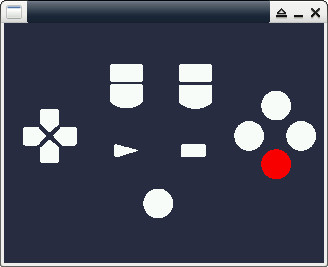
Run on FC3000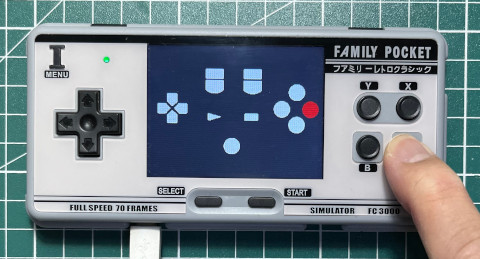
prebuilt binary: keytest_20221014.zip
#21 Re: 司徒开源 » 研究FC3000掌機的開源可行性 » 2022-10-13 15:58:50
#22 Re: 司徒开源 » 研究FC3000掌機的開源可行性 » 2022-10-13 07:17:20
@neotendo
Yes, this tool is only for dumping stock rom.
Here is the dump tool you can use to dump firmware from another FC3000:
https://github.com/steward-fu/fc3000/releases/download/v1.0/ips_fc3000_dump_0627_1.img.7z
Step 1: extract ips_fc3000_dump_0627_1.img.7z
Step 2: flash image into MicroSD as the following command
$ sudo dd if=ips_fc3000_dump_0627_1.img of=/dev/sdX bs=1MStep 3: put this MicroSD into another FC3000 and then power on
Step 4: wait for 10 minutes and then power off
Step 5: provide v1rom.img back to me and I will create restore tool for you
#23 Re: 司徒开源 » 研究FC3000掌機的開源可行性 » 2022-10-12 09:22:01
#24 Re: 司徒开源 » 研究FC3000掌機的開源可行性 » 2022-10-11 15:21:07
#25 Re: 司徒开源 » 研究FC3000掌機的開源可行性 » 2022-10-11 10:26:32
@neotendo
Thanks for your efftors and welcome all of friends from the 4PDA.RU forum ![]()
Here is the new commit for testing
https://github.com/steward-fu/bootloader/commit/4a4a286c35db6e1ab2dba0a791912dd100f74c3d
The provided image works on my FC3000, thanks neotendo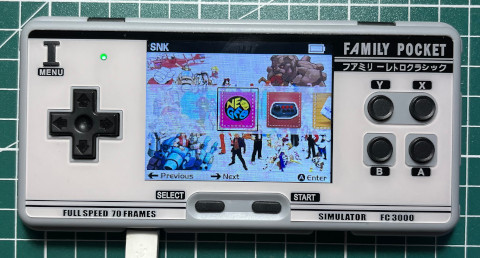
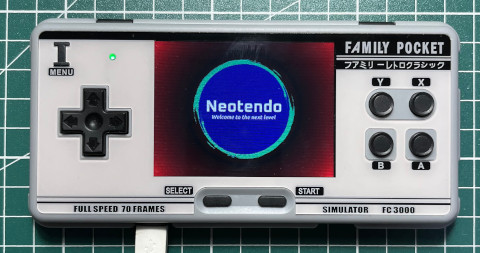
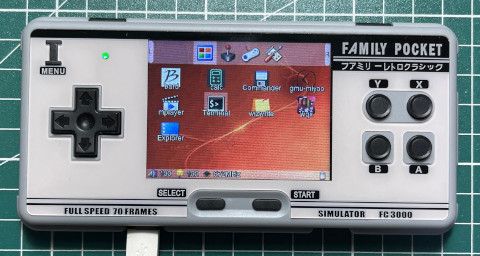
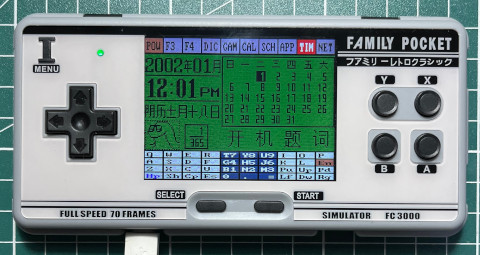
#26 Re: 司徒开源 » 研究FC3000掌機的開源可行性 » 2022-10-09 21:50:26
#27 Re: 司徒开源 » 研究FC3000掌機的開源可行性 » 2022-10-09 12:45:48
Debian 7 (Wheezy) on FC3000 Handheld
司徒最後決定使用 Debian 7 (Wheezy),因為跑在 F1C100S ARM9 CPU:486MHz, RAM:32MB, SWAP:512MB 下,速度算是可以接受,當然,如果更換成 F1C200S(RAM 64MB) 會更好,CPU超頻後,整體運作速度應該也會更順暢,司徒把製作步驟寫下來,如果玩家想更換成 Debian 10 (Buster) 系統就可以自己更換,當然,可以在 FC3000 掌機上編譯、執行程式,是司徒重新購買 FC3000 的主要目標,很高興這個目標可以達成,因此,在此分享成果給大家~
Kernel: https://github.com/steward-fu/kernel/tree/f1c100s_fc3000_linux-4.14.0_debian
Bootloader: https://github.com/steward-fu/bootloader/tree/f1c100s_fc3000_uboot-2018.01
製作好的燒錄檔案(root:root, user:user): https://github.com/steward-fu/fc3000/releases/download/v1.0/fc3000_ips2_debian7.img.7z
製作Debian系統:
$ cd
$ sudo apt-get install binfmt-support qemu qemu-user-static debootstrap
$ sudo debootstrap --arch armel --foreign wheezy wheezy http://archive.debian.org/debian/
$ sudo chroot wheezy /debootstrap/debootstrap --second-stage

$ sudo mount -o bind /dev wheezy/dev
$ sudo mount -o bind /sys wheezy/sys
$ sudo mount -o bind /proc wheezy/proc

$ sudo chroot wheezy
# passwd
# adduser user
# nano /etc/apt/sources.list
    deb http://deb.debian.org/debian buster main contrib non-free
    deb http://deb.debian.org/debian buster-updates main contrib non-free
    deb http://deb.debian.org/debian buster-backports main contrib non-free
    deb http://deb.debian.org/debian-debug/ buster-debug main contrib non-free

# apt-get update
# apt-get install lxde obconf openbox lxdm lxde-common xbindkeys xdotool -y
# nano home/user/.xbindkeysrc
    "xdotool mousemove_relative 10 0"
        Right
    "xdotool mousemove_relative -- -10 0"
        Left
    "xdotool mousemove_relative 0 -10"
        Up
    "xdotool mousemove_relative 0 10"
        Down

    "xdotool click 1"
        m:0x0 + c:65

    "xdotool click 3"
        m:0x1 + c:50

# nano /etc/lightdm/lightdm.conf
    autologin-user=user

# nano /etc/inittab
    1:2345:respawn:/sbin/getty -L ttyS0 115200 vt100

# nano /etc/rc.local
    /usr/bin/xbindkeys -f /home/user/.xbindkeysrc

# nano /etc/fstab
    /swap.img none  swap  sw  0  0

# dd if=/dev/swap.img of=/swap.img bs=1M count=512
# mkswap /swap.img
# exit

$ sudo umount wheezy/dev
$ sudo umount wheezy/sys
$ sudo umount wheezy/proc
編譯Kernel
$ cd
$ wget https://github.com/steward-fu/miyoo/releases/download/v1.0/toolchain.7z
$ 7za x toolchain.7z
$ sudo mv miyoo /opt

$ git clone https://github.com/steward-fu/kernel
$ cd kernel
$ git checkout f1c100s_fc3000_linux-4.14.0_debian
$ ARCH=arm make suniv-debian_defconfig
$ ./tools/make_suniv.sh fc3000_ips2
準備一張MicroSD並分割成如下: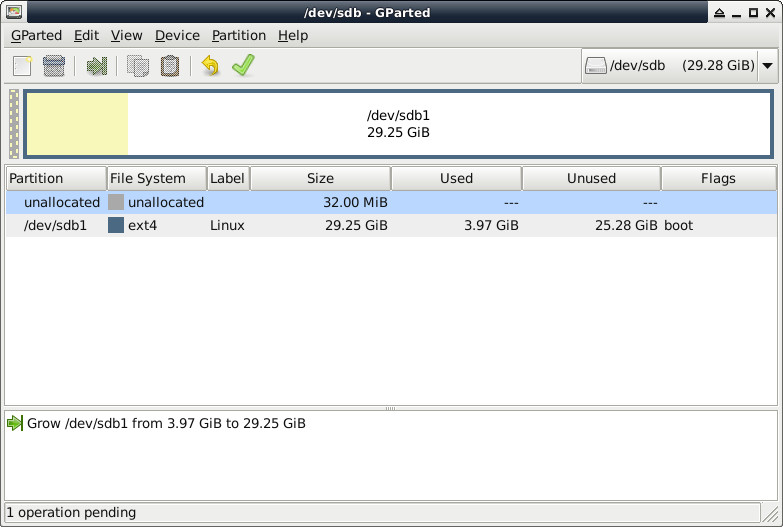
編譯Bootloader並且燒錄到MicroSD
$ cd
$ git clone https://github.com/steward-fu/bootloader
$ cd bootloader
$ git checkout f1c100s_fc3000_uboot-2018.01
$ ARCH=arm make suniv_defconfig
$ ./tools/make_suniv.sh /dev/sdX fc3000
P.S. 如果不想手動自己安裝,可以使用司徒打包好的燒錄檔案(fc3000_ips2_debian7.img.7z, root:root, user:user)
系統穩定時間大約需要三分鐘(F1C100S CPU:486MHz, RAM:32MB, SWAP:512MB)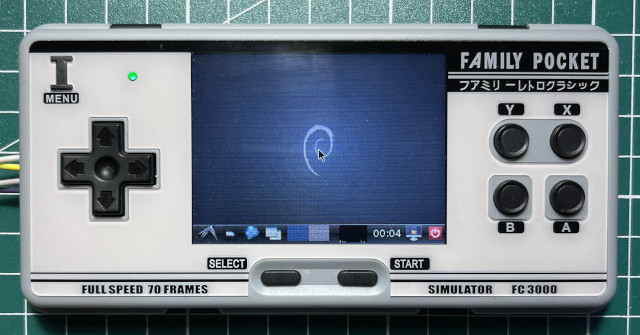
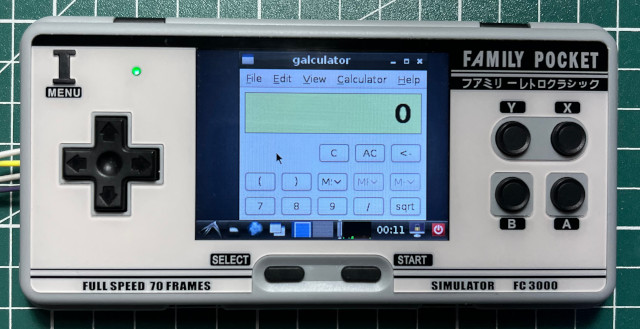
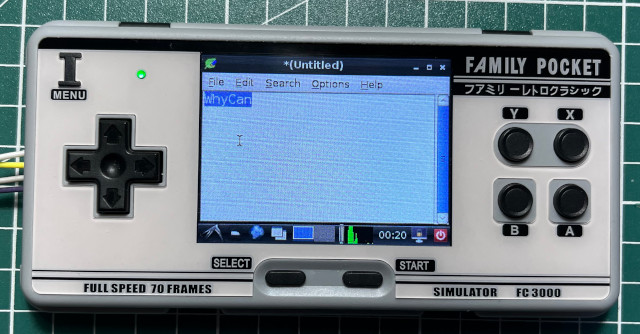
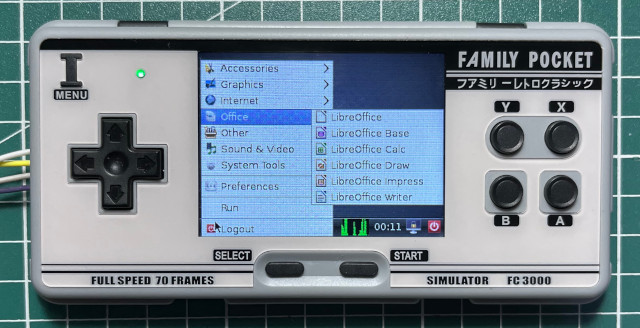
記得連接FC3000 UART,這樣就可以有Terminal操作的功能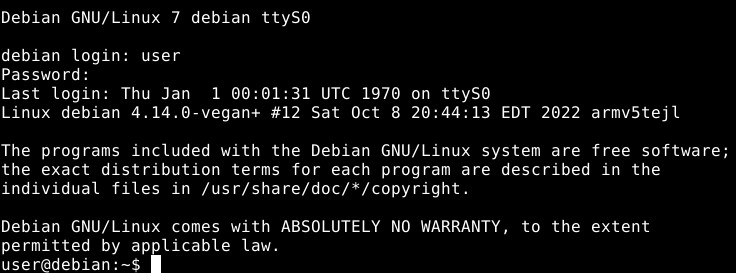
按鍵映射(滑鼠左、右鍵需要長按大約3秒再放開)
司徒打包的燒錄檔案有包含許多編譯器套件,這樣就可以直接在FC3000上面做開發的工作,首先,試試Hello, world!
$ cd
$ gcc hello.c -o hello
$ ./hello
    hello, world!
接著試試SDL 1.2(sdl.c)
#include <stdio.h>
#include <stdlib.h>
#include <SDL.h>

int main(int argc, char** argv)
{
    SDL_Rect rt={0};
    SDL_Surface* screen;

    SDL_Init(SDL_INIT_VIDEO);
    screen = SDL_SetVideoMode(150, 150, 16, SDL_HWSURFACE);

    SDL_FillRect(screen, &screen->clip_rect, SDL_MapRGB(screen->format, 0xff, 0x00, 0x00));

    rt.x = 0;
    rt.y = 0;
    rt.w = 30;
    rt.h = 30;
    SDL_FillRect(screen, &rt, SDL_MapRGB(screen->format, 0x00, 0xff, 0x00));

    rt.x = 50;
    rt.y = 50;
    rt.w = 30;
    rt.h = 40;
    SDL_FillRect(screen, &rt, SDL_MapRGB(screen->format, 0x00, 0x00, 0xff));

    SDL_Flip(screen);
    SDL_Delay(3000);
    SDL_Quit();
    return 0;
}
編譯SDL 1.2並且執行
$ export DISPLAY=:0
$ gcc sdl.c -o sdl -lSDL -I/usr/include/SDL
$ ./sdl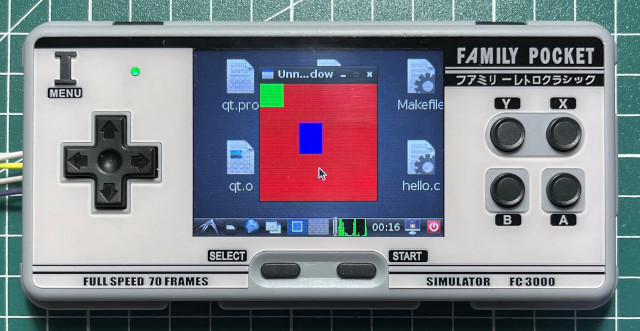
接著試試GTK(gtk.c)
#include <gtk/gtk.h>

int main(int argc, char** argv)
{
    GtkWidget *win;
    GtkWidget *label;

    gtk_init(&argc, &argv);
    win = gtk_window_new(GTK_WINDOW_TOPLEVEL);

    label = gtk_label_new("Hello, world!");
    gtk_container_add(GTK_CONTAINER(win), label);

    gtk_widget_show_all(win);
    g_signal_connect(win, "destroy", G_CALLBACK(gtk_main_quit), NULL);
    gtk_main();
    return 0;
}
編譯GTK並且執行
$ export DISPLAY=:0
$ gcc -o gtk gtk.c `pkg-config --libs --cflags gtk+-2.0`
$ ./gtk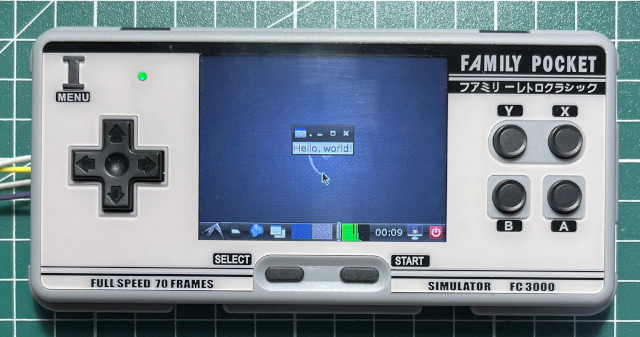
接著試試QT(qt.cpp)
#include <QApplication>
#include <QWidget>
#include <QLabel>

int main(int argc, char** argv)
{
    QApplication app(argc, argv);
    QWidget *win;
    QLabel *label;

    win = new QWidget;
    label = new QLabel("Hello, world!", win);
    win->show();
    return app.exec();
}
qt.pro
TARGET = qt
SOURCES = qt.cpp
編譯QT並且執行
$ export DISPLAY=:0
$ qmake
$ make
$ ./qt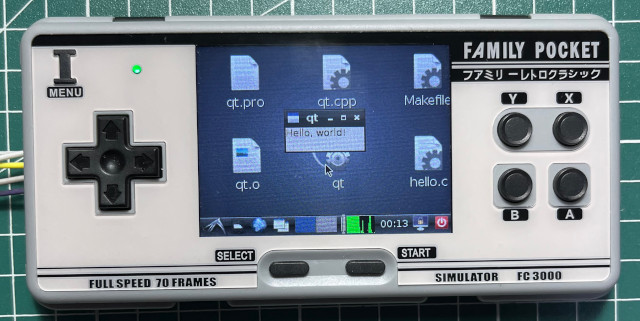
#28 Re: 司徒开源 » 研究FC3000掌機的開源可行性 » 2022-10-09 00:06:42
#29 Re: 司徒开源 » 研究FC3000掌機的開源可行性 » 2022-10-08 22:48:06
#30 Re: 司徒开源 » 研究FC3000掌機的開源可行性 » 2022-10-08 19:24:17
#31 Re: 司徒开源 » 研究FC3000掌機的開源可行性 » 2022-10-07 21:00:43
@zjzixuan
你需要先知道屏的參數規格,接著才知道如何做下一步,屏的驅動在這邊:https://github.com/steward-fu/kernel/blob/f1c100s_fc3000_linux-4.14.0/drivers/video/fbdev/sunivfb.c
#32 Re: 司徒开源 » 研究FC3000掌機的開源可行性 » 2022-10-07 08:20:50
@neotendo
Thanks for your testing. It is different with other FC3000
660     // FC3000 V1 TFT (Old Version)
661     //
662     else if(suniv_variant == 3) {
663         I_UP    = ((32 * 5) + 0);
664         I_DOWN  = ((32 * 5) + 5);
665         I_LEFT  = ((32 * 5) + 4);
666         I_RIGHT = ((32 * 4) + 2);
667         //(32*4) 0,1,(2=RIGHT),(3=SELECT),(4=START),(5=A),(7=B),(8=Y),(9=X),(6=hangboot)
668         //(32*0) 1,2 = Shutdown menu!?, (3=MENU)
669         I_START = ((32 * 4) + 4);
670         I_SELECT = ((32 * 4) + 3);
TFT 1 => SELECT button, PE3
Others => SELECT button, (PE12=0) PA1
Here is the commit: https://github.com/steward-fu/bootloader/commit/123766b9e1b6639cfd9fe0fff16ae0a21d0172f6
#33 Re: 司徒开源 » 研究FC3000掌機的開源可行性 » 2022-10-07 08:17:07
@neotendo
Since the post message MUST be reviewed by administrator before display on this forum, so, some messages were overlooked and disorder. ![]() For SaveGame/LoadGame, I will check these issues later. For your solutions (remount, one partition, dirty bit), I think it is okay except dirty bit because we don't need check it. To check dirty bit causes long time waiting for boot. Even if dirty bit turns on, it is not easy to recovery because MicroSD is not a safe storage device. I mean it is hard to recovery back if data is corrupted. For one partiton, in some bootloaders that don't fully implement FAT32 file system, it only reads the first 32 files from FAT32 Table. So, copy order is very important. This is why I prefer 2 partitons in MicroSD. It is just for compatible problem. For RW, in general, we put important system files in first partition and mount as read only in order to prevent data from damaging because MicroSD is not safy storage device. For X11, the progress is 0% so far.
For SaveGame/LoadGame, I will check these issues later. For your solutions (remount, one partition, dirty bit), I think it is okay except dirty bit because we don't need check it. To check dirty bit causes long time waiting for boot. Even if dirty bit turns on, it is not easy to recovery because MicroSD is not a safe storage device. I mean it is hard to recovery back if data is corrupted. For one partiton, in some bootloaders that don't fully implement FAT32 file system, it only reads the first 32 files from FAT32 Table. So, copy order is very important. This is why I prefer 2 partitons in MicroSD. It is just for compatible problem. For RW, in general, we put important system files in first partition and mount as read only in order to prevent data from damaging because MicroSD is not safy storage device. For X11, the progress is 0% so far. ![]() For TVout, I have no idea but there are some related settings in U-Boot source code. Maybe, it is a good reference for you.
For TVout, I have no idea but there are some related settings in U-Boot source code. Maybe, it is a good reference for you.
#34 Re: 司徒开源 » 研究FC3000掌機的開源可行性 » 2022-10-06 19:11:29
@neotendo
Yes, user prefer flashing image over unzipping these files. I will not create any tool for this purpose because it is a little more complex and depends on many binary files we need upload upto another repo. So far, it seems eduke32 is running pretty well on FC3000 after build with new source code. I think it is time to study something I am interested on. If you have any question and would like to discuss with us, it is very welome. And thanks for your contributions on FC3000 ! ![]()
#35 Re: 司徒开源 » 研究FC3000掌機的開源可行性 » 2022-10-06 10:48:22
@ZOMBIE
感謝分享~
@neotendo
Yes, I repacked the files you provided as fc3000_ips2_dualboot.img.7z, which also include stock games.
fc3000_ips2_dualboot.img.7z: https://drive.google.com/file/d/1O_4df4wM6qx2zPaP7eXzVJiqDsXbPa9T/view?usp=sharing
May I know where I can download the source code of eduke32_20131102-4128 ? By the way, after tried the eduke32.7z you provided on FC3000, it seems all of issues got fixed except for SaveGame and LoadGame ?
#36 Re: 司徒开源 » 研究FC3000掌機的開源可行性 » 2022-10-04 22:04:51
@neotendo
Thanks for your efforts to share this image to us !
Here are the backtrace logs
// #define ZOFFSET (1 << 8)
// vm.g_sp->z = actor[vm.g_i].floorz - ZOFFSET;  <= at source/gameexec.c:1160
(gdb) p vm.g_i
$13 = 448

(gdb) p vm.g_sp->z
$2 = -8448

(gdb) p actor[vm.g_i].floorz
$3 = -469696513

(gdb) n
1162    in source/gameexec.c

(gdb) p vm.g_sp->z
$4 = -469696769

#0  VM_Execute (once=0) at source/gameexec.c:1160
#0  VM_Execute (once=0) at source/gameexec.c:1402
#0  VM_Execute (once=0) at source/gameexec.c:1402
#0  VM_Execute (once=0) at source/gameexec.c:695
#0  A_Execute (iActor=448, iPlayer=0, lDist=12586) at source/gameexec.c:4930
#0  G_MoveActors () at source/actors.c:4774

(gdb) p sprite[448]
$1 = {x = 384, y = 44608, z = -8448, cstat = 257, picnum = 1680,
  shade = 4 '\004', pal = 22 '\026', clipdist = 80 'P', filler = 0 '\000',
  xrepeat = 40 '(', yrepeat = 40 '(', xoffset = 0 '\000', yoffset = 0 '\000',
  sectnum = 258, statnum = 1, ang = 1920, owner = 448, xvel = 0, yvel = 0,
  zvel = 0, lotag = 0, hitag = 0, extra = 30}

#0  G_MoveActors () at source/actors.c:3415     <= trace from here (i == 448)
#0  G_MoveWorld () at source/actors.c:7901
#0  G_DoMoveThings () at source/game.c:10447
#0  G_MoveLoop () at source/game.c:10312
#0  app_main (argc=1, argv=0x7fffffffe128) at source/game.c:10229
#0  main (argc=1, argv=0x7fffffffe128) at src/sdlayer.c:235
I don't know when the variable "actor[vm.g_i].floorz" is set as 0xe400ffff (-469696513). So, after subtract, the value of Z position becomes as invalid (-469696769). As you mentioned before, besides Z, XY are also affected. This issue doesn't happen on QEMU and x64 PC environments but on FC3000 handheld. Interesting ![]()
![]()
Here is the table for reference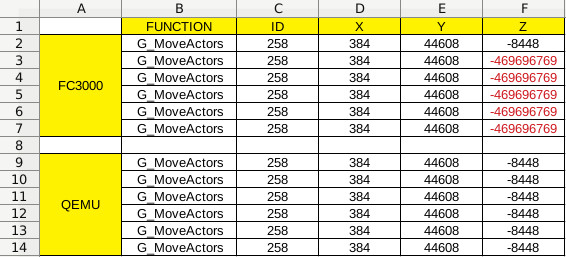
According to the testing, Z position is affected firstly and then X postion.
#37 Re: 司徒开源 » 研究FC3000掌機的開源可行性 » 2022-10-04 10:32:18
#38 Re: 司徒开源 » 研究FC3000掌機的開源可行性 » 2022-10-03 21:18:42
When the monster is walking towards the player, the value of X position should be in order of increasing.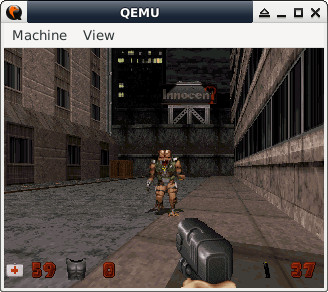
XYZ mapping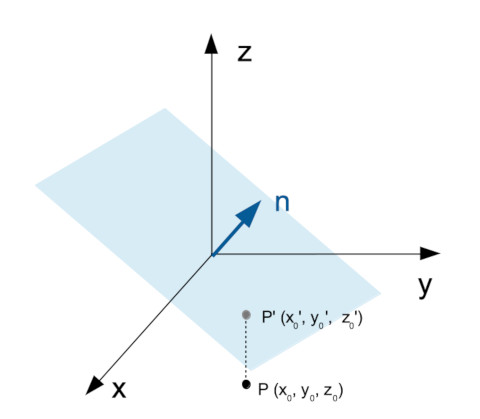
According to the raw data got from QEMU and FC3000, the results show that it is correct in QEMU environment but incorrect in FC3000.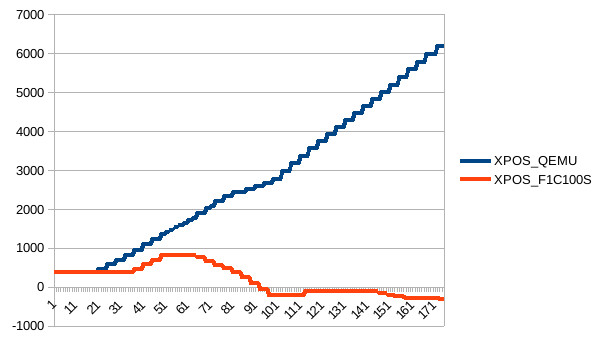
Raw Data
 FUNCTION	X_QEMU	Y_QEMU	X_F1	Y_F1
 G_MoveActors	384	44608	384	44608
 G_MoveActors	384	44608	384	44608
 G_MoveActors	384	44608	384	44608
 G_MoveActors	384	44608	384	44608
 G_MoveActors	384	44608	384	44608
 G_MoveActors	384	44608	384	44608
 G_MoveActors	384	44608	384	44608
 G_MoveActors	384	44608	384	44608
 G_MoveActors	384	44608	384	44608
 G_MoveActors	384	44608	384	44608
 G_MoveActors	384	44608	384	44608
 G_MoveActors	384	44608	384	44608
 G_MoveActors	384	44608	384	44608
 G_MoveActors	384	44608	384	44608
 G_MoveActors	384	44608	384	44608
 G_MoveActors	384	44608	384	44608
 G_MoveActors	384	44608	384	44608
 G_MoveActors	384	44608	384	44608
 G_MoveActors	384	44608	384	44608
 G_MoveActors	384	44608	384	44608
 G_MoveActors	462	44584	384	44608
 G_MoveActors	462	44584	384	44608
 G_MoveActors	462	44584	384	44608
 G_MoveActors	462	44584	384	44608
 G_MoveActors	574	44549	384	44608
 G_MoveActors	574	44549	384	44608
 G_MoveActors	574	44549	384	44608
 G_MoveActors	574	44549	384	44608
 G_MoveActors	698	44511	384	44608
 G_MoveActors	698	44511	384	44608
 G_MoveActors	698	44511	384	44608
 G_MoveActors	698	44511	384	44608
 G_MoveActors	828	44471	384	44608
 G_MoveActors	828	44471	384	44608
 G_MoveActors	828	44471	384	44608
 G_MoveActors	828	44471	384	44608
 G_MoveActors	958	44432	462	44584
 G_MoveActors	958	44432	462	44584
 G_MoveActors	958	44432	462	44584
 G_MoveActors	958	44432	462	44584
 G_MoveActors	1088	44393	574	44549
 G_MoveActors	1088	44393	574	44549
 G_MoveActors	1088	44393	574	44549
 G_MoveActors	1088	44393	574	44549
 G_MoveActors	1218	44354	698	44511
 G_MoveActors	1218	44354	698	44511
 G_MoveActors	1218	44354	698	44511
 G_MoveActors	1218	44354	698	44511
 G_MoveActors	1353	44368	828	44471
 G_MoveActors	1353	44368	828	44471
 G_MoveActors	1412	44400	828	44471
 G_MoveActors	1412	44400	828	44471
 G_MoveActors	1471	44432	826	44335
 G_MoveActors	1471	44432	826	44335
 G_MoveActors	1530	44464	826	44335
 G_MoveActors	1530	44464	826	44335
 G_MoveActors	1589	44496	824	44199
 G_MoveActors	1589	44496	824	44199
 G_MoveActors	1648	44528	824	44199
 G_MoveActors	1648	44528	824	44199
 G_MoveActors	1707	44560	822	44063
 G_MoveActors	1707	44560	822	44063
 G_MoveActors	1766	44592	822	44063
 G_MoveActors	1766	44592	822	44063
 G_MoveActors	1885	44657	768	43938
 G_MoveActors	1885	44657	768	43938
 G_MoveActors	1885	44657	768	43938
 G_MoveActors	1885	44657	768	43938
 G_MoveActors	2012	44610	670	43843
 G_MoveActors	2012	44610	670	43843
 G_MoveActors	2075	44586	670	43843
 G_MoveActors	2075	44586	670	43843
 G_MoveActors	2202	44539	572	43748
 G_MoveActors	2202	44539	572	43748
 G_MoveActors	2202	44539	572	43748
 G_MoveActors	2202	44539	572	43748
 G_MoveActors	2329	44492	474	43653
 G_MoveActors	2329	44492	474	43653
 G_MoveActors	2329	44492	474	43653
 G_MoveActors	2329	44492	474	43653
 G_MoveActors	2429	44400	376	43558
 G_MoveActors	2429	44400	376	43558
 G_MoveActors	2429	44400	376	43558
 G_MoveActors	2429	44400	376	43558
 G_MoveActors	2429	44400	245	43430
 G_MoveActors	2429	44400	245	43430
 G_MoveActors	2506	44235	245	43430
 G_MoveActors	2506	44235	245	43430
 G_MoveActors	2506	44235	101	43290
 G_MoveActors	2506	44235	101	43290
 G_MoveActors	2590	44053	101	43290
 G_MoveActors	2590	44053	101	43290
 G_MoveActors	2590	44053	-48	43144
 G_MoveActors	2590	44053	-48	43144
 G_MoveActors	2678	43864	-48	43144
 G_MoveActors	2678	43864	-48	43144
 G_MoveActors	2678	43864	-197	42998
 G_MoveActors	2678	43864	-197	42998
 G_MoveActors	2766	43675	-197	42998
 G_MoveActors	2766	43675	-197	42998
 G_MoveActors	2766	43675	-197	42790
 G_MoveActors	2766	43675	-197	42790
 G_MoveActors	2967	43622	-197	42790
 G_MoveActors	2967	43622	-197	42790
 G_MoveActors	2967	43622	-197	42582
 G_MoveActors	2967	43622	-197	42582
 G_MoveActors	3168	43569	-197	42582
 G_MoveActors	3168	43569	-197	42582
 G_MoveActors	3168	43569	-197	42374
 G_MoveActors	3168	43569	-197	42374
 G_MoveActors	3369	43516	-197	42374
 G_MoveActors	3369	43516	-197	42374
 G_MoveActors	3369	43516	-117	42182
 G_MoveActors	3369	43516	-117	42182
 G_MoveActors	3575	43544	-117	42182
 G_MoveActors	3575	43544	-117	42182
 G_MoveActors	3575	43544	-117	41974
 G_MoveActors	3575	43544	-117	41974
 G_MoveActors	3754	43649	-117	41974
 G_MoveActors	3754	43649	-117	41974
 G_MoveActors	3754	43649	-117	41766
 G_MoveActors	3754	43649	-117	41766
 G_MoveActors	3933	43754	-117	41766
 G_MoveActors	3933	43754	-117	41766
 G_MoveActors	3933	43754	-117	41558
 G_MoveActors	3933	43754	-117	41558
 G_MoveActors	4112	43859	-117	41558
 G_MoveActors	4112	43859	-117	41558
 G_MoveActors	4112	43859	-117	41350
 G_MoveActors	4112	43859	-117	41350
 G_MoveActors	4291	43964	-117	41350
 G_MoveActors	4291	43964	-117	41350
 G_MoveActors	4291	43964	-117	41142
 G_MoveActors	4291	43964	-117	41142
 G_MoveActors	4470	44069	-117	41142
 G_MoveActors	4470	44069	-117	41142
 G_MoveActors	4470	44069	-117	40934
 G_MoveActors	4470	44069	-117	40934
 G_MoveActors	4649	44174	-117	40934
 G_MoveActors	4649	44174	-117	40934
 G_MoveActors	4649	44174	-117	40726
 G_MoveActors	4649	44174	-117	40726
 G_MoveActors	4828	44279	-117	40726
 G_MoveActors	4828	44279	-117	40726
 G_MoveActors	4828	44279	-117	40726
 G_MoveActors	4828	44279	-157	40629
 G_MoveActors	5012	44183	-157	40629
 G_MoveActors	5012	44183	-157	40629
 G_MoveActors	5012	44183	-157	40629
 G_MoveActors	5012	44183	-197	40532
 G_MoveActors	5196	44087	-197	40532
 G_MoveActors	5196	44087	-197	40532
 G_MoveActors	5196	44087	-197	40532
 G_MoveActors	5196	44087	-237	40435
 G_MoveActors	5380	43991	-237	40435
 G_MoveActors	5380	43991	-237	40435
 G_MoveActors	5380	43991	-237	40435
 G_MoveActors	5380	43991	-277	40338
 G_MoveActors	5587	43973	-277	40338
 G_MoveActors	5587	43973	-277	40338
 G_MoveActors	5587	43973	-277	40338
 G_MoveActors	5587	43973	-277	40234
 G_MoveActors	5785	44035	-277	40234
 G_MoveActors	5785	44035	-277	40234
 G_MoveActors	5785	44035	-277	40234
 G_MoveActors	5785	44035	-277	40130
 G_MoveActors	5983	44097	-277	40130
 G_MoveActors	5983	44097	-277	40130
 G_MoveActors	5983	44097	-277	40130
 G_MoveActors	5983	44097	-277	40026
 G_MoveActors	5983	44097	-277	40026
 G_MoveActors	6181	44159	-277	40026
 G_MoveActors	6181	44159	-277	40026
 G_MoveActors	6181	44159	-316	39929
 G_MoveActors	6181	44159	-316	39929
It seems there is a potential bug in F1C100S, which seems like we found before (LDRH instruction in odd address). I cannot make sure whether we can find root cause or not but it is very interesting for this issue. Here is the current finding for reference.
#39 Re: 司徒开源 » 研究FC3000掌機的開源可行性 » 2022-10-03 08:15:21
#40 Re: 司徒开源 » 研究FC3000掌機的開源可行性 » 2022-10-02 12:55:59
#41 Re: 司徒开源 » 研究FC3000掌機的開源可行性 » 2022-10-01 22:56:25
@neotendo
User need to resize the first partition in order to put all of needed files. For battery issue, we needs to take a look at GMenu2X to see what kind of value read from kernel driver. For eduke32, it seems this issue is related to chip issue rather than performance issue because the enemy's position is wrong when render sprite. Since eduke32's source code is very complicated, I think it is not easy to find root cause out in a short time. For RetroArch, it is worthy to run RetroArch on miyoo handheld even if the performance is not good. We need focus on software optimization rather than high performance chip, which this is what we need eventually. Also, we need to thanks all of contributors for open source ported on miyoo handheld.
#42 Re: 司徒开源 » 研究FC3000掌機的開源可行性 » 2022-09-30 22:31:49
#43 Re: 司徒开源 » 研究FC3000掌機的開源可行性 » 2022-09-30 21:16:18
Support dual boot function on FC3000 handheld
U-Boot source: https://github.com/steward-fu/bootloader/commit/e02c2adfa3eacbe93338df28d7b93c3bbb5f93d9
By default, it boots into Linux OS.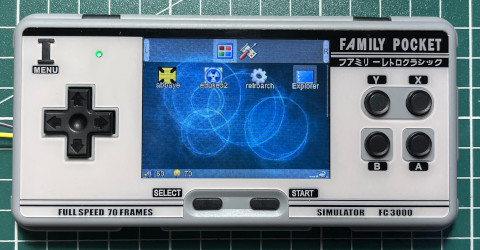
If press SELECT button and then power on, it boots into stock system.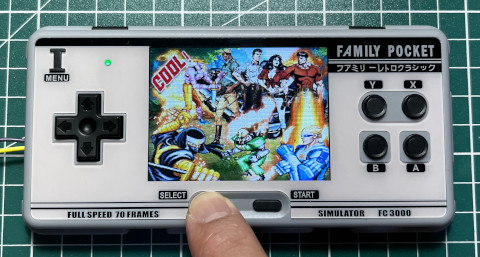
![]()
![]() I miss dingux system on Dingoo A320.
I miss dingux system on Dingoo A320.
#44 Re: 司徒开源 » 研究FC3000掌機的開源可行性 » 2022-09-30 20:52:40
#45 Re: 司徒开源 » 研究FC3000掌機的開源可行性 » 2022-09-30 18:42:05
@neotendo @Apaczer
Wow ! It is official support ~ Thanks for this information !
stable: https://buildbot.libretro.com/stable/1.10.3/dingux/miyoo-arm32/
nightly: https://buildbot.libretro.com/nightly/dingux/miyoo-arm32/
Run RetroArch on FC3000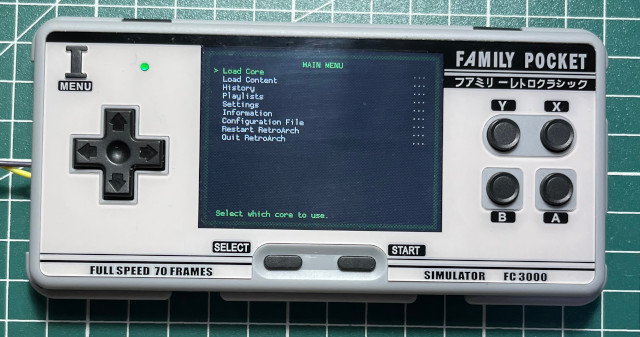
#46 Re: 司徒开源 » 研究FC3000掌機的開源可行性 » 2022-09-30 11:49:16
#47 Re: 司徒开源 » 研究FC3000掌機的開源可行性 » 2022-09-29 21:32:20
@neotendo
For eduke32 problem, it seems related to performance issue because we use same binary ELF. If possible, you can do hardware modding and then overclock CPU speed upto 900MHz to check whether it can fix or not. If it is related to display driver, it should be flicking rather than disappearing. So, I guess this issue is related to performance.
#48 Re: 司徒开源 » 研究FC3000掌機的開源可行性 » 2022-09-29 10:28:58
QEMU for FC3000 handheld
I spent some time on porting QEMU for FC3000 handheld. It is very useful for software development on QEMU environment because you can debug your application more easily. It is just a software level compatible, not hardware level, for example: you cannot access F1C100s registers in your application. This port is based on QEMU versatilepb (ARM926EJS) CPU and run FC3000's rootfs. So, you can test your app on this environment and then put it into your FC3000 after pass testing on QEMU environment.
Kernel Source: https://github.com/steward-fu/kernel/tree/f1c100s_fc3000_linux-4.14.0_qemu
Prebuilt QEMU: https://github.com/steward-fu/fc3000/releases/download/v1.0/fc3000-qemu_20220929.7z
QEMU for FC3000 handheld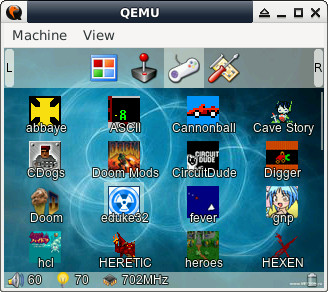
You can type command via your terminal.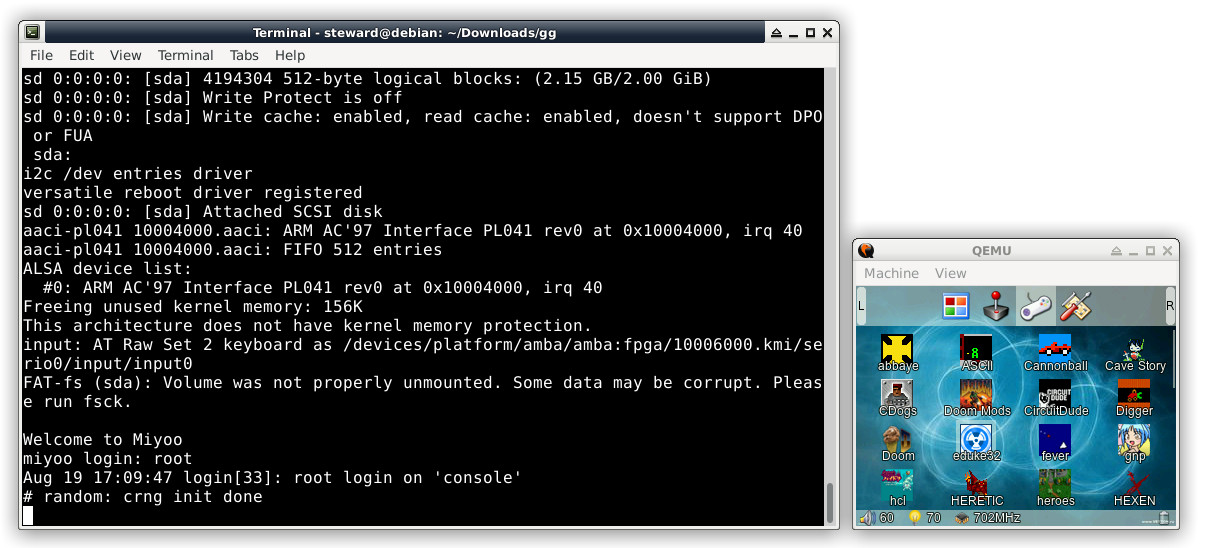
If you want to debug your app, add "sleep" in "/etc/main" and then repack rootfs.img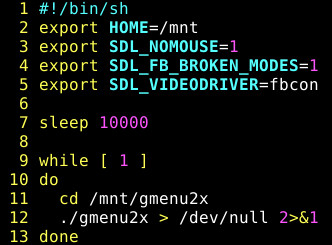
Remember to export SDL variables and then run gdb (I have put into rootfs.img already)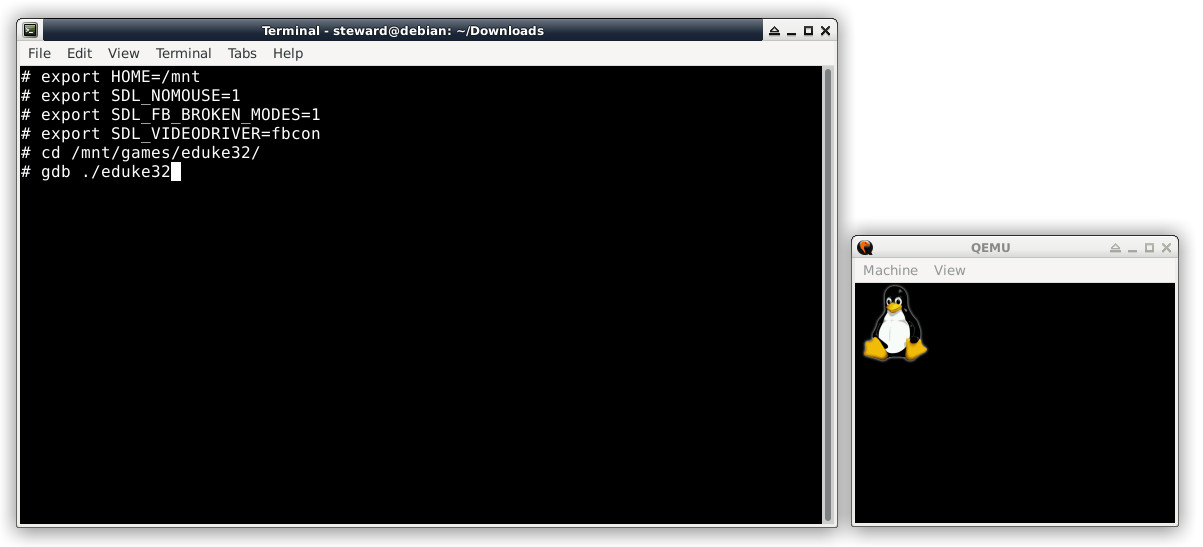
You can also put source code into sd.img for debugging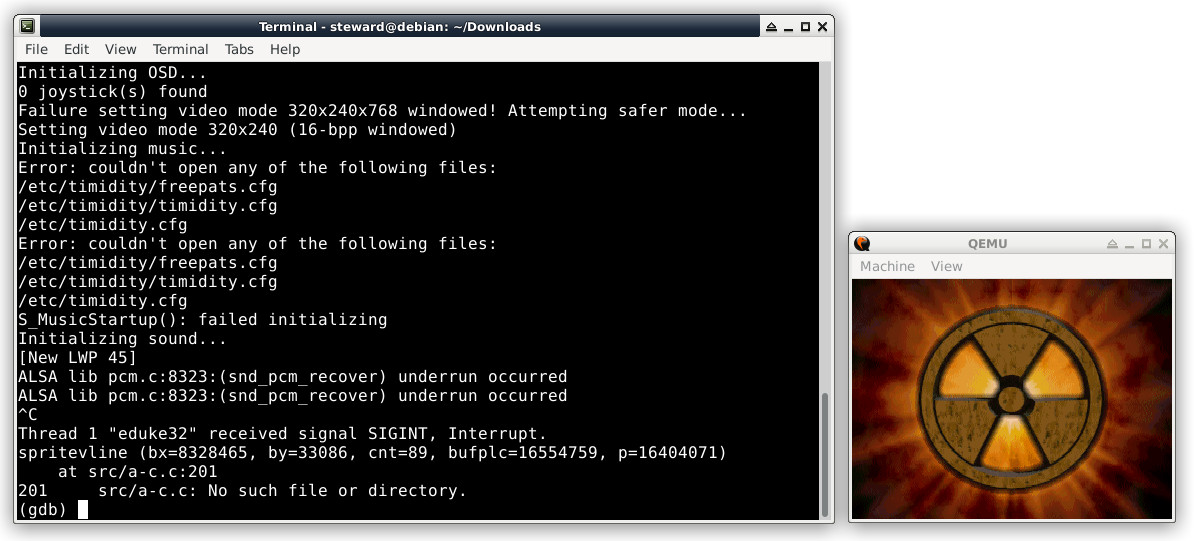
How to run QEMU for FC3000 handheld
$ cd
$ wget https://github.com/steward-fu/fc3000/releases/download/v1.0/fc3000-qemu_20220929.7z
$ 7za x fc3000-qemu_20220929.7z
$ ./run.sh
How to extract rootfs.img
$ zcat rootfs.img | cpio -idvmHow to repack rootfs.img
$ sudo find . | sudo cpio -o -H newc | gzip -9 > ../rootfs.img#49 Re: 司徒开源 » 研究FC3000掌機的開源可行性 » 2022-09-28 23:08:33
#50 Re: 司徒开源 » 研究FC3000掌機的開源可行性 » 2022-09-28 21:31:30
#51 Re: 司徒开源 » 研究FC3000掌機的開源可行性 » 2022-09-28 12:12:31
#52 Re: 司徒开源 » 研究FC3000掌機的開源可行性 » 2022-09-27 09:25:58
@Apaczer
Thanks for your information. It seems your repo has fixed CPU overclock issue (or 0x80000000) already. After tested, it cannot work properly. It hangs after using different CPU clock (not 702MHz). You can test with different CPU clock value for this issue. Here is the reference for you: https://whycan.com/t_6647.html#p66051
#53 Re: 司徒开源 » 研究FC3000掌機的開源可行性 » 2022-09-26 19:20:19
Fix battery issue: https://github.com/steward-fu/kernel/commit/3dc11057d85302f41b8b23627fb247dadd7e4520
But I don't know how to calibrate it so far.
#54 Re: 司徒开源 » 研究FC3000掌機的開源可行性 » 2022-09-26 07:21:27
@neotendo
Yes, I would like to see X Window running on FC3000. This is why I bought new FC3000 again. Accroding to the terminal log (it is most same as eduke32.log), I cannot find useful information. Maybe, I am not familiar with this game.
EDuke32 2.0.0devel 20100727
Using /mnt/games/eduke32/ for game data
Using /mnt/.eduke32/ for game data
Initializing SDL system interface (compiled against SDL version 1.2.15, found version 1.2.15)
Using "fbcon" video driver
No fullscreen modes available!
Searching for game data...
Using 'duke3d.grp' as main game data file.
Compiling: GAME.CON (151133 bytes)
Including: DEFS.CON (35992 bytes)
Including: USER.CON (45449 bytes)
GAME.CON: In state `blimphitstate':
GAME.CON:476: warning: expected action, found define.
GAME.CON: In actor `ORGANTIC':
GAME.CON:3969: warning: found `else' with no `if'.
GAME.CON: In state `pigshootenemystate':
GAME.CON:5892: warning: found `else' with no `if'.
Found 3 warning(s), 0 error(s).
Resizing code buffer to 16189*4 bytes
Script compiled in 948ms, 16181*4b, version 1.4+
1917/11264 labels, 321/2048 variables
125 quotes, 207 actors
Initialized 24.0M cache
RTS file DUKE.RTS was not found
Initializing OSD...
0 joystick(s) found
Setting video mode 1024x768 (16-bpp windowed)
Unable to set video mode!
Failure setting video mode 1024x768x8 windowed! Attempting safer mode...
Setting video mode 1024x768 (16-bpp windowed)
Unable to set video mode!
Failure setting video mode 1024x768x8 windowed! Attempting safer mode...
Setting video mode 800x600 (16-bpp windowed)
Unable to set video mode!
Failure setting video mode 800x600x8 windowed! Attempting safer mode...
Setting video mode 640x480 (16-bpp windowed)
Unable to set video mode!
Failure setting video mode 640x480x8 windowed! Attempting safer mode...
Setting video mode 320x240 (16-bpp windowed)
Initializing music...
Error: couldn't open any of the following files:
/etc/timidity/freepats.cfg
/etc/timidity/timidity.cfg
/etc/timidity.cfg
Error: couldn't open any of the following files:
/etc/timidity/freepats.cfg
/etc/timidity/timidity.cfg
/etc/timidity.cfg
S_MusicStartup(): failed initializing
Initializing sound...
ALSA lib pcm.c:8323:(snd_pcm_recover) underrun occurred
ALSA lib pcm.c:8323:(snd_pcm_recover) underrun occurred
ALSA lib pcm.c:8323:(snd_pcm_recover) underrun occurred
ALSA lib pcm.c:8323:(snd_pcm_recover) underrun occurred
ALSA lib pcm.c:8323:(snd_pcm_recover) underrun occurred
ALSA lib pcm.c:8323:(snd_pcm_recover) underrun occurred
ALSA lib pcm.c:8323:(snd_pcm_recover) underrun occurred
ALSA lib pcm.c:8323:(snd_pcm_recover) underrun occurred
ALSA lib pcm.c:8323:(snd_pcm_recover) underrun occurred
It is recommended to do CPU overclock for this issue. In general, "underrun occurred" means the running speed is very slow (CPU is very busy) so that sound buffer cannot be handled properly. To do overclock can fix this issue.
#55 Re: 司徒开源 » 研究FC3000掌機的開源可行性 » 2022-09-25 23:40:57
#56 Re: 司徒开源 » 研究FC3000掌機的開源可行性 » 2022-09-25 23:23:00
It is very weird !!!
source/jmact/animlib.c
147 static void decodeframe(uint8_t * srcP, uint8_t * dstP)
...
172         count = B_LITTLE16(*((uint16_t *)((srcP += sizeof(int16_t)) - sizeof(int16_t))));
...
It can be formatted as the following code
count = B_LITTLE16(*(uint16_t *)srcP);
srcP += sizeof(int16_t);
It is just to get the content of memory at srcP and then put into count variable.
From GDB
count = B_LITTLE16(*((uint16_t *)((srcP += sizeof(int16_t)) - sizeof(int16_t))));

(gdb) p/x count
$2 = 0x9d80

(gdb) x/16x srcP-4
0xb4dc9b81:     0x8000  0xd99d  0x0000  0x2605  0x2d80  0x00c1  0x2605  0x2826
0xb4dc9b91:     0x280b  0x0600  0x0b0b  0x0b16  0x1a16  0x1a0b  0x0b1a  0x0b1a
srcP = 0xb4dc9b83
In general, it should be *(uint_16_t*)srcP = 0xd99d
But what we got is *(uint_16_t*)srcP = 0x9d80
GDB with instruction level
(gdb) stepi
   0x001e1f08 <+304>:   sub     r3, r3, #2
=> 0x001e1f0c <+308>:   ldrh    r3, [r3]
   0x001e1f10 <+312>:   str     r3, [r11, #-8]
   0x001e1f14 <+316>:   ldr     r3, [r11, #-8]

(gdb) info r
r3             0xb4dc9b83       3034356611

(gdb) stepi
   0x001e1f08 <+304>:   sub     r3, r3, #2
   0x001e1f0c <+308>:   ldrh    r3, [r3]
=> 0x001e1f10 <+312>:   str     r3, [r11, #-8]
   0x001e1f14 <+316>:   ldr     r3, [r11, #-8]

(gdb) info r
r3             0x9d80   40320
I'm getting crazy...
So, this is a workaround to fix this shit issue
172         //count = B_LITTLE16(*((uint16_t *)((srcP += sizeof(int16_t)) - sizeof(int16_t))));
173         count = B_LITTLE16(srcP[0] + (((uint16_t)srcP[1]) << 8));
174         srcP += sizeof(int16_t);
And now, animation works !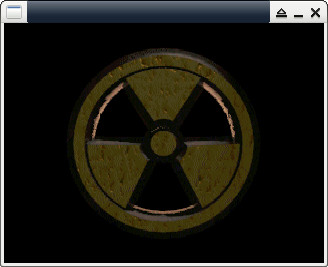
eduke32_fix.zip
Now, it is time to check MIDI issue...
#57 Re: 司徒开源 » 研究FC3000掌機的開源可行性 » 2022-09-25 14:23:55
@Apaczer
[Q1] Could you advice us how to debug apps on this platform without UART ?
[A1] No, you need to debug your app via UART because you need type command from UART.
[Q2] Do you have QEMU setup for ARM926EJ-S with "gdb" program as a help ? I see you are pasting images from sort of windowed mode and though you might be using those.
[A2] I wrote render tool to show image that obtained from /dev/fb0 node.
render tool: https://github.com/steward-fu/bootloader/blob/f1c100s_fc3000_uboot-2018.01/tools/show_320x240
How to use:
On FC3000:
# cat /dev/fb0 > xxx.rawOn PC:
$ show_320x240 xxx.raw[Q3] I've tried to run my port with "gdb" through terminal app on Miyoo, but it didn't display anything.
[A3] You may need to redirect terminal output to framebuffer driver. So, you need enable "Framebuffer Console output" to show gdb result on your LCD panel. For more convenient way to debug your app without UART, you can try to port gdb client app on FC3000. Google is your friend !
@neotendo
[Q1] do you have an FC3000 emulator ?
[A1] No.
[Q2] why does the duke nukem screenshots have a window ?
[A2] Refer to reply above.
[Q3] had to change command binman to binman.py in Makefile (make gives error 'binman.py not found'), and change #!/bin/sh to #!/bin/bash in make_suniv.sh(maybe only on my system cause i use a linux subsystem on windows).
[A3] Fixed, thanks for reporting issue.
[Q4] fc3000_ips1 - do not ask me why, but i had to change the lcd color order from BGR to RGB (the last 0x36 command in lcd init, change data 0x09 to 0x08), uboot bootlogo was kind of inverted colors.
[A4] Did you mean tft v1 ? As the following lines shown, they need to be changed as 0x08 ?
U-Boot: https://github.com/steward-fu/bootloader/blob/f1c100s_fc3000_uboot-2018.01/drivers/video/fc3000_tft1.c#L205
Kernel: https://github.com/steward-fu/kernel/blob/f1c100s_fc3000_linux-4.14.0/drivers/video/fbdev/sunivfb.c#L1070
[Q5] i narrowed down eduke32 segmentation fault at animation playing to the decodeframe procedure in animlib.c, bypassing this function allows eduke32 to start and plays the animation sound without animation of course.
[A5] Thanks for your inforamtion. I will check it.
[Q6] do not know if it happens a second time, but when i do 'make clean' in new uboot folder, i can not compile it again. mkimage not found.
[A6] Fixed, thanks for reporting issue.
I think the sound issue is still in there even if update timidity.cfg and instruments because it seems SOUND option is disabled.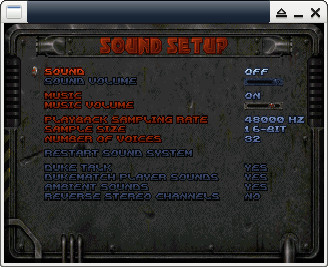
#58 Re: 司徒开源 » 研究FC3000掌機的開源可行性 » 2022-09-24 22:37:36
@neotendo
For sound issue as the following logs, it isn't the key point caused eduke32 crash.
Initializing music...
Error: couldn't open any of the following files:
/etc/timidity/freepats.cfg
/etc/timidity/timidity.cfg
/etc/timidity.cfg
Although no any timidity.cfg found, it still works as well. Updating rootfs is an idea for this problem as you did. For more easy way to fix this warning, you can specify the timidity.cfg path as the following (in source/sdlmusic.c)
221 static char *s[] = { "/mnt/games/eduke32/timidity.cfg", "/etc/timidity.cfg", "/etc/timidity/timidity.cfg", "/etc/timidity/freepats.cfg" };The main problem is at renderframe()
Thread 1 "eduke32" received signal SIGSEGV, Segmentation fault.
0xb6e25e68 in memset () from /lib//libc.so.0
(gdb) bt
#0  0xb6e25e68 in memset () from /lib//libc.so.0
#1  0x001e1e68 in decodeframe (
    srcP=0xb4df2bc6 "((\v\v\026!\342Ƴ\001\263\263\263\001\263\001\361\241_,,\017`\032\032!\026(",
    dstP=0x1d229bb <error: Cannot access memory at address 0x1d229bb>)
    at source/jmact/animlib.c:180
#2  0x001e212c in renderframe (framenumber=0, pagepointer=0xb4df0b78)
    at source/jmact/animlib.c:239
#3  0x001e2198 in drawframe (framenumber=0) at source/jmact/animlib.c:253
#4  0x001e2a98 in ANIM_DrawFrame (framenumber=1) at source/jmact/animlib.c:330
#5  0x000cf2d0 in G_PlayAnim (fn=0x26a658 "logo.anm", t=5 '\005')
    at source/anim.c:261
#6  0x0006bccc in G_DisplayLogo () at source/game.c:8668
#7  0x0007055c in app_main (argc=1, argv=0xbeedbdf4) at source/game.c:9960
#8  0x00250f20 in main (argc=1, argv=0xbeedbdf4) at src/sdlayer.c:208
I need to trace it deeply to see whether resolution is the problem
And it seems the sound driver has problem when loading MIDI sound format
Initializing sound...
ALSA lib pcm.c:8323:(snd_pcm_recover) underrun occurred
I also need to take a look at this problem
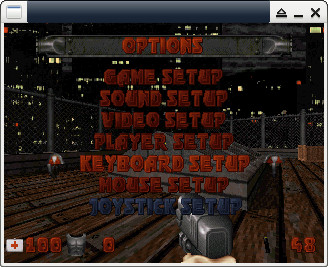
By the way, for the first time to run eduke32, you need to configure keyboard options as the following steps to make sure you can control it well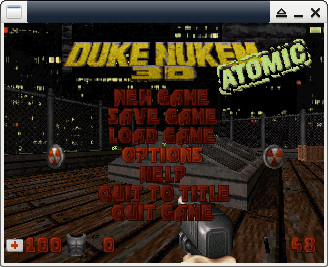
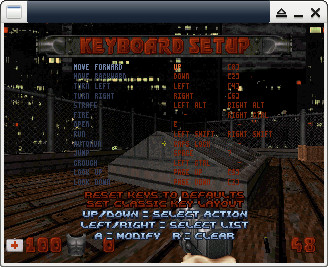
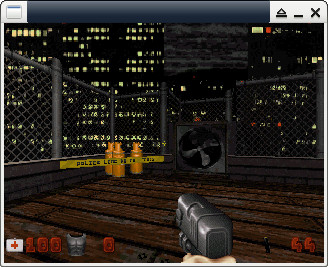
#59 Re: 司徒开源 » 研究FC3000掌機的開源可行性 » 2022-09-24 18:30:24
@neotendo
Thanks for your sharing and contributions. we appreciate your help very much !
I have created 2 repos to host uboot and kernel source:
U-Boot: https://github.com/steward-fu/bootloader/tree/f1c100s_fc3000_uboot-2018.01
Kernel: https://github.com/steward-fu/kernel/tree/f1c100s_fc3000_linux-4.14.0
In U-Boot, you can use menuconfig to change your LCD panel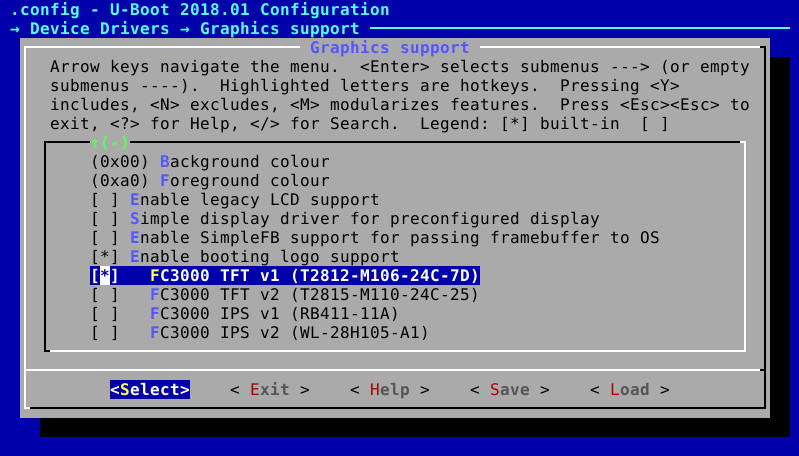
And run.sh has been renamed as tools/make_suniv.sh. For more detailed steps about how to build or flash into MicroSD, you can refer to the README page.
Here is the booting logo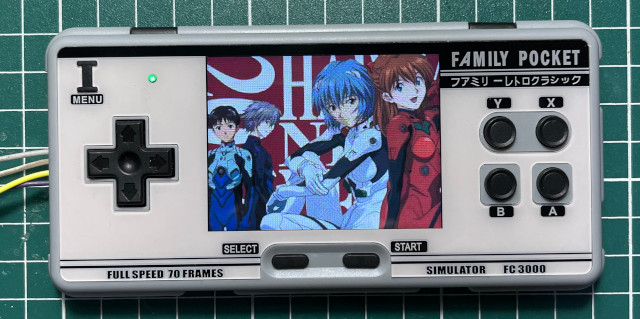
And here is the kernel logo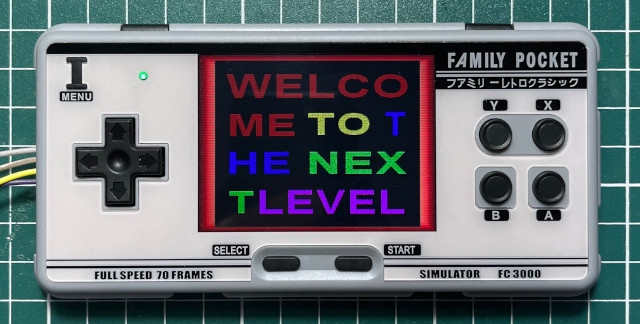
As I remembered, you have asked something about the following desktop GUI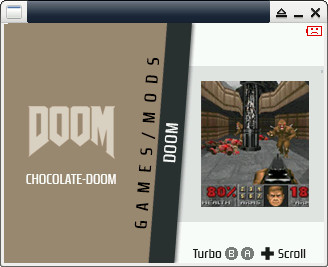
How to change it as the following desktop GUI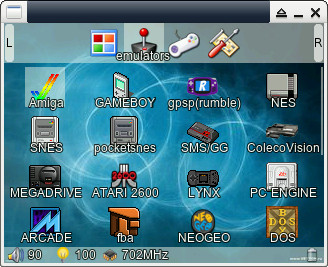
The answer is from theme setting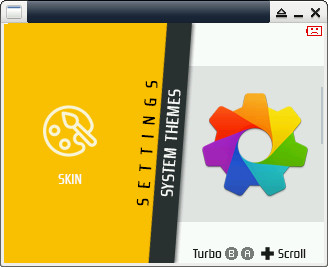
For classical GMenu2X, you can change it to Default. But it may use Default setting if unexpected rebooting.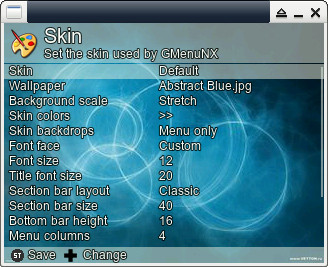
And I think it is time to check eduke32 issues, ![]()
![]()
#60 Re: 司徒开源 » 研究FC3000掌機的開源可行性 » 2022-09-22 20:31:03
@neotendo
Yes, it is running Linux OS with booting logo on my new FC3000 handheld now. I am creating 2 repos for bootloader and kernel source code. After complete, I will share it to you. For eduke32, as Apaczer mentioned, it is base on MIDI music format but it has some limitations on current rootfs because no any timidity configuration in system. Besides, eduke32 has another memory segmentation issue that happens on drawing animation. I think I will take a look at eduke32 soon.
Here are the ideas, maybe, we can use:
1. use WAV to replace MIDI
2. port SDL2 for eduke32
@卡卡cyj
你可以試試 lzgame02 提供的燒錄檔案~
@Apaczer @lzgame02
感謝分享~
#61 Re: 司徒开源 » 研究FC3000掌機的開源可行性 » 2022-09-16 10:11:11
#62 Re: 司徒开源 » 研究FC3000掌機的開源可行性 » 2022-09-14 19:10:36
@neotendo
Thanks for your contributions.
I think it is time to host 2 repositories for the kernel and uboot source code even though I don't like to maintain all of them.
[Q1] i am right that the logo is schown when the kernel is loaded? is there a way to show the logo when uboot starts?
You can add the initial code (include GPIO reinitialization) at sunxi_lcdc_panel_enable() in uboot/drivers/video/sunxi/sunxi_display.c file.
This is the simplest way you can use.
#63 Re: 司徒开源 » 研究FC3000掌機的開源可行性 » 2022-09-13 19:04:59
@neotendo
Q1: i saw in your kernel source code you already patched in the ips init code, do you have the old tft init code still
(your lcd init code in sunivfb.c matches the kernel_fc3000_ips.patch)?
A1: It is for TFT LCD panel, not for IPS panel.
Patch file for IPS panel: https://github.com/steward-fu/fc3000/releases/download/source/kernel_fc3000ips.7z
You are welcome ![]()
Please zip kernel and uboot folders and then provide to me.
It is nice to see boot logo shown on FC3000 handheld.
Thanks for your efforts.
#64 Re: 司徒开源 » 研究FC3000掌機的開源可行性 » 2022-09-13 14:06:20
#65 Re: 司徒开源 » 研究FC3000掌機的開源可行性 » 2022-09-12 18:54:58
#66 Re: 司徒开源 » 研究FC3000掌機的開源可行性 » 2022-09-10 20:36:22
#67 Re: 司徒开源 » 研究FC3000掌機的開源可行性 » 2022-09-10 20:35:09
#68 Re: 司徒开源 » 研究FC3000掌機的開源可行性 » 2022-09-09 22:52:54
@neotendo
#69 Re: 司徒开源 » 研究FC3000掌機的開源可行性 » 2022-09-09 21:45:28
#70 Re: 司徒开源 » 研究FC3000掌機的開源可行性 » 2022-09-09 19:20:40
@neotendo
Yes, in order to prevent flicking, which some LCD panels show white color when RESET is active, it is turned off in uboot and framebuffer initialization stages. So, you also need to set backlight level in device tree:
kernel/arch/arm/boot/dts/fc3000.dts
27 default-brightness-level = <0>;#71 Re: 司徒开源 » 研究FC3000掌機的開源可行性 » 2022-09-09 13:34:49
@neotendo
There is another way to show boot logo.
Just uncomment "memcpy" line and then provide "hex_splash" data.
Here is the example to demonstrate how to convert png/jpg into pixel array (hex_splash):
https://github.com/steward-fu/q8/releases/download/v1.1/png2hex.c
How to use:
$ gcc png2hex.c -o test -I/usr/include/SDL -lSDL -lSDL_image
$ ./test xxx.jpg > hex_splash.h#72 Re: 司徒开源 » 研究FC3000掌機的開源可行性 » 2022-09-08 18:05:05
@neotendo
In framebuffer driver, I switched display layer from layer-0 to layer-1 as the following image shown: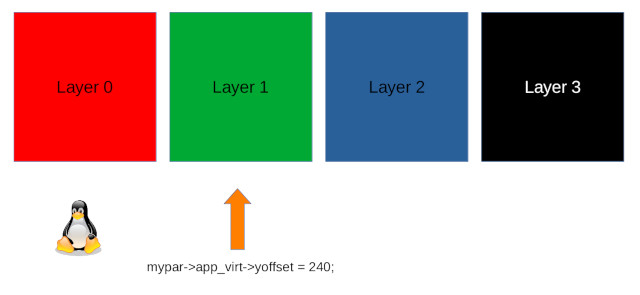
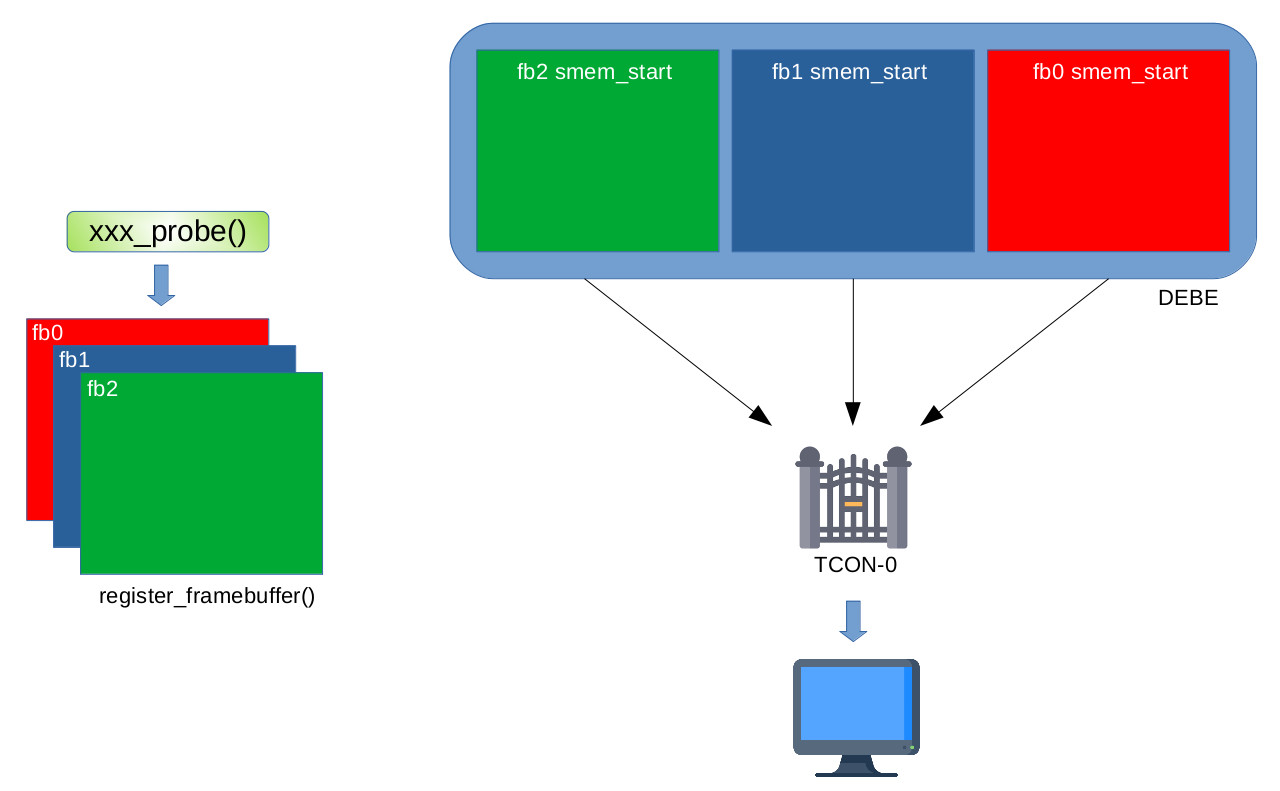
Linux logo is always displayed on layer-0 when framebuffer driver is probed.
If you would like to show starting logo on LCD panel, here are the places you need to modify:
drivers/video/fbdev/sunivfb.c
954   mypar->app_virt->yoffset = 0;

1172   fb_prepare_logo(info, 0);
1173   fb_show_logo(info, 0);
P.S. You also need to turn Linux Logo on in kernel menu configuration.
#73 Re: 司徒开源 » 研究FC3000掌機的開源可行性 » 2022-09-08 13:36:40
run X11 ? it sounds very interesting !
Here is another project that use MT7688 processor: https://whycan.com/t_8714.html
I would like to run X11 (Debian OS) on that device.
So, it is worthy to study how to run X11 on framebuffer driver.
But in order to run X11, some kernel configurations need to be turned on, ex: network.
I think I can buy FC3000 IPS handheld again and try X11 on it. ![]()
![]()
@neotendo
I am curious about what kind of game/application needs X11 ? or why did you want X11 runs on FC3000 ?
#74 Re: 司徒开源 » 研究FC3000掌機的開源可行性 » 2022-09-08 13:26:42
#75 Re: 司徒开源 » 研究FC3000掌機的開源可行性 » 2022-09-08 07:29:07
@Aksenenkoav1990
Basically, you can build uboot and kernel from scratch.
These logos have been removed from source code.
Source: https://github.com/steward-fu/fc3000
#76 Re: 司徒开源 » 研究FC3000掌機的開源可行性 » 2022-09-06 19:44:59
#77 Re: 司徒开源 » 研究FC3000掌機的開源可行性 » 2022-09-06 17:47:52
#78 Re: 司徒开源 » 研究Game Gear Micro掌機的開源可行性 » 2022-09-06 15:23:47
#79 Re: 司徒开源 » 研究FC3000掌機的開源可行性 » 2022-09-06 15:12:55
#80 Re: 司徒开源 » 研究馬沙機的開源可行性 » 2022-09-03 20:40:18
#81 Re: 司徒开源 » 研究FC3000掌機的開源可行性 » 2022-09-03 20:30:12
#82 Re: 司徒开源 » 研究FC3000掌機的開源可行性 » 2022-09-03 12:13:27
@neotendo
Yes, you can.
Make sure the dumped file is different with original one.
Even though you can dump from SPI flash successfully, but I cannot make sure it can be restored back to normal always, therefore, it is recommended not to touch any data saved in SPI flash for safety reason.
If your friend can port Linux OS on FC3000 IPS v2 and then share with us, we are really appreciate all of efforts.
#83 Re: 司徒开源 » 研究馬沙機的開源可行性 » 2022-09-03 10:44:57
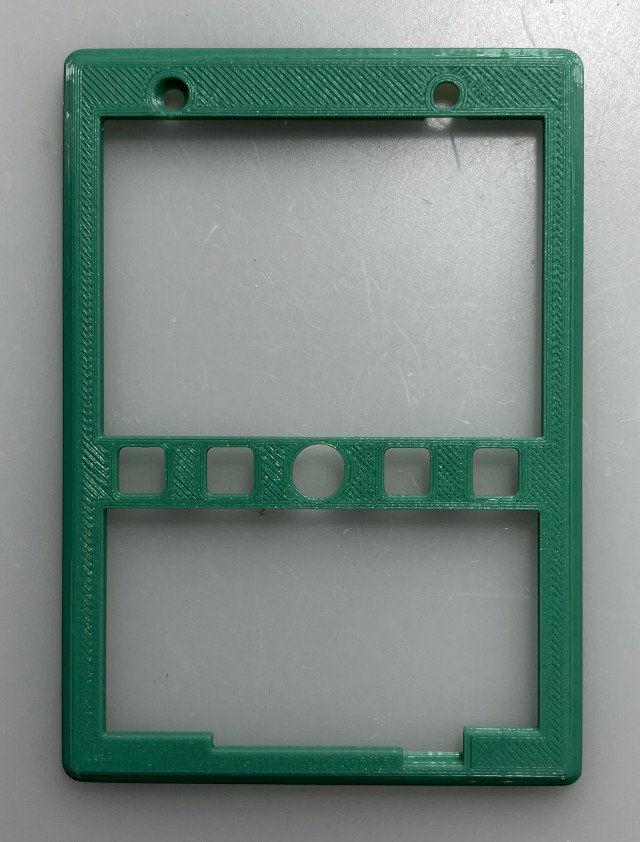
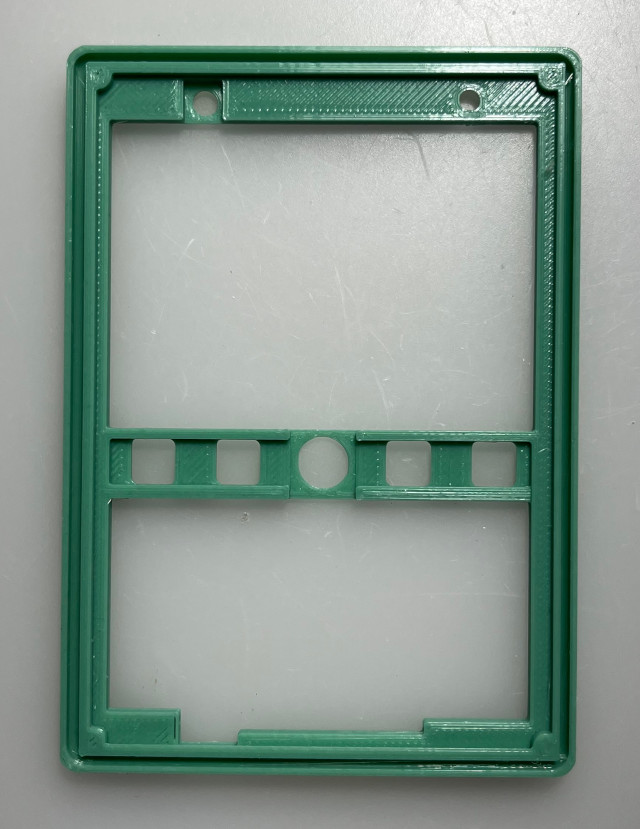
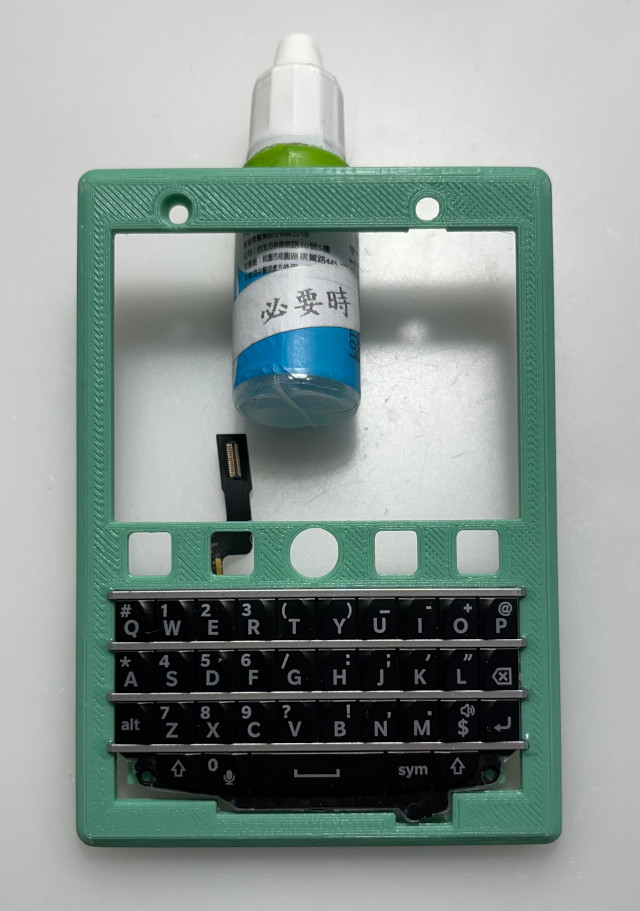
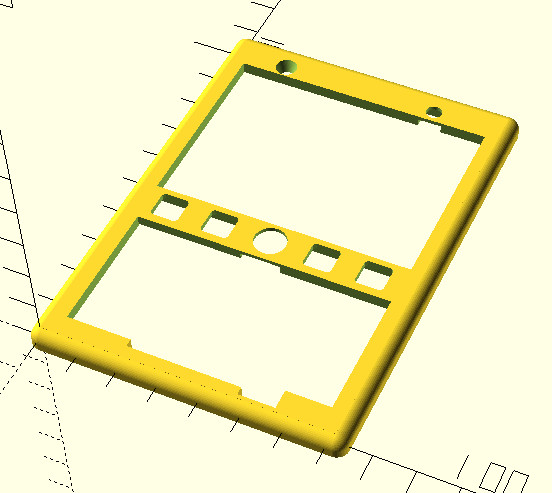
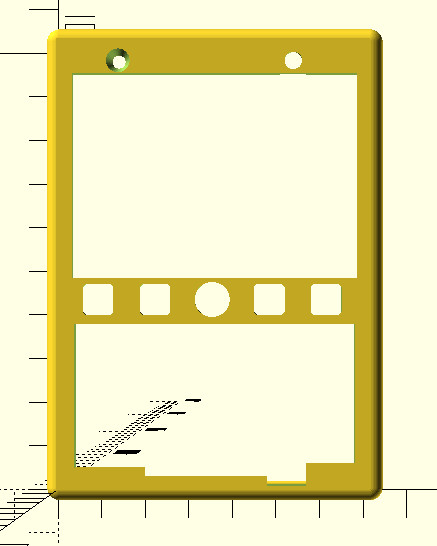
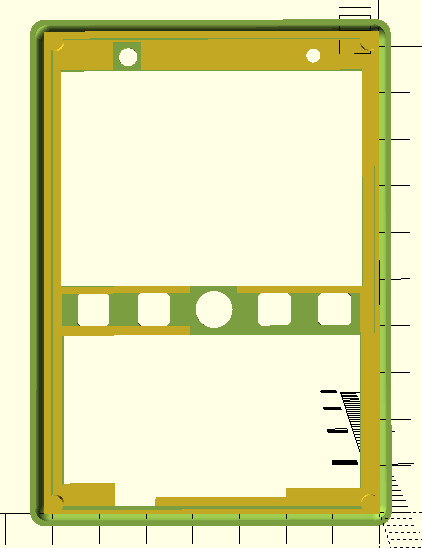
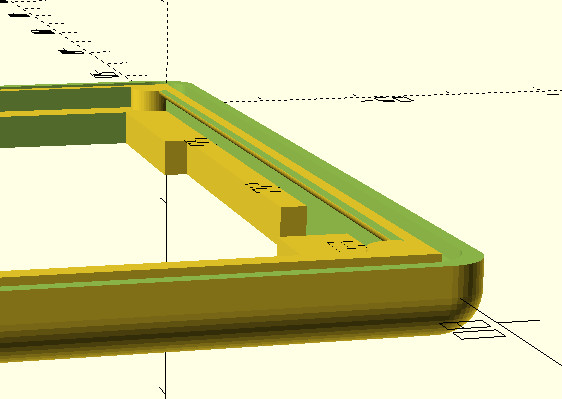
由於,下巴不夠美觀,司徒決定進行修補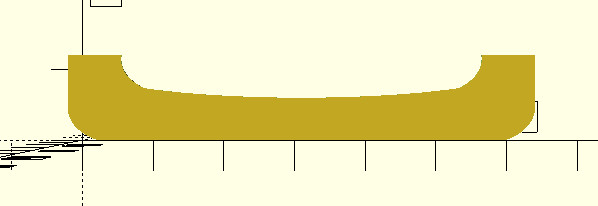
module q10_front(){
	difference(){
		union(){
			difference(){
				cube([62, 12, 0.5]);
				translate([31, 11, 0]){
					resize([65, 10]){
						cylinder(3, 1, 1);
					}
				}
			}
			translate([-2, 0, 0]){
				cube([7.5, 12, 0.5]);
			}
			translate([56.5, 0, 0]){
				cube([7.5, 12, 0.5]);
			}

			translate([47, 7, 0]){
				difference(){
					cube([10, 5, 0.5]);
					translate([2, 4.5, 0]){
						resize([15, 10]){
							cylinder(1, 1, 1);
						}
					}
				}
			}

			translate([5, 7, 0]){
				difference(){
					cube([10, 5, 0.5]);
					translate([8, 4.5, 0]){
						resize([15, 10]){
							cylinder(1, 1, 1);
						}
					}
				}
			}
		}

		translate([5.5, 4.5, 0]){
			difference(){
				translate([-7.5, -4.5, 0]){
					cube([10, 4, 1]);
				}
				resize([15, 10]){
					cylinder(5, 1, 1);
				}
			}
		}

		translate([56.5, 4.5, 0]){
			difference(){
				translate([-2, -4.5, 0]){
					cube([9.5, 4, 1]);
				}
				resize([15, 10]){
					cylinder(5, 1, 1);
				}
			}
		}
	}
}
列印完成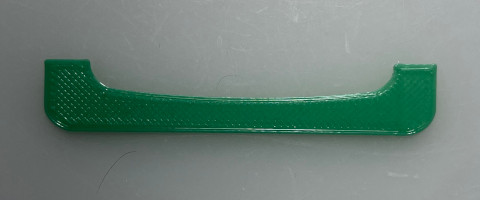
果然顏值高一點點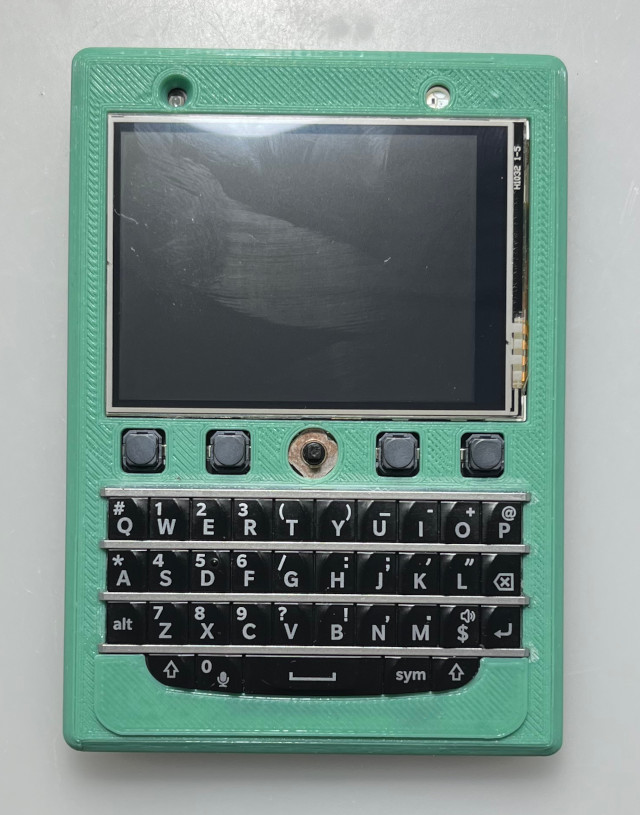
#84 Re: 司徒开源 » 研究馬沙機的開源可行性 » 2022-09-03 10:29:13
#85 Re: 司徒开源 » 研究馬沙機的開源可行性 » 2022-09-03 08:26:39
#86 Re: 司徒开源 » 研究馬沙機的開源可行性 » 2022-09-02 20:14:15
#87 Re: 司徒开源 » 研究FC3000掌機的開源可行性 » 2022-09-02 16:03:42
#88 Re: 司徒开源 » 研究FC3000掌機的開源可行性 » 2022-09-02 14:42:53
#89 Re: 司徒开源 » 研究馬沙機的開源可行性 » 2022-09-02 13:08:06
#90 Re: 司徒开源 » 研究FC3000掌機的開源可行性 » 2022-09-01 19:36:41
#91 Re: 司徒开源 » 研究FC3000掌機的開源可行性 » 2022-09-01 19:36:06
#92 Re: 司徒开源 » 研究馬沙機的開源可行性 » 2022-09-01 13:28:04
#93 Re: 司徒开源 » 研究FC3000掌機的開源可行性 » 2022-08-31 20:00:53
#94 Re: 司徒开源 » 研究FC3000掌機的開源可行性 » 2022-08-31 16:56:24
#95 Re: 司徒开源 » 研究馬沙機的開源可行性 » 2022-08-31 09:28:29
鍵盤是這台機器的靈魂元件,司徒對於打字手感特別在意,因此,看了下Q10鍵盤背面,發現凹凸不平,大約有0.1cm的落差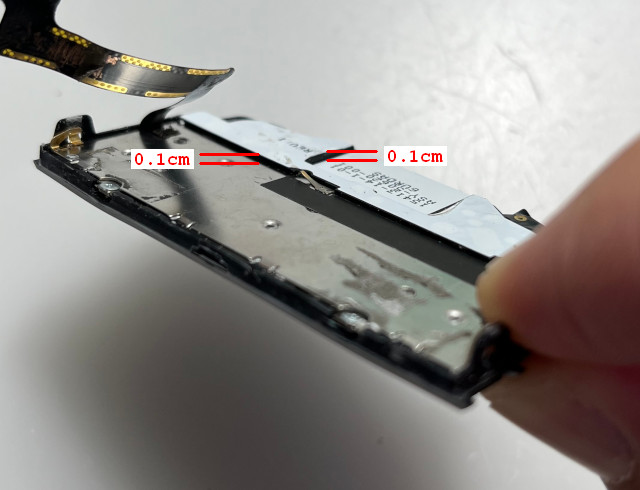
這個落差如下圖: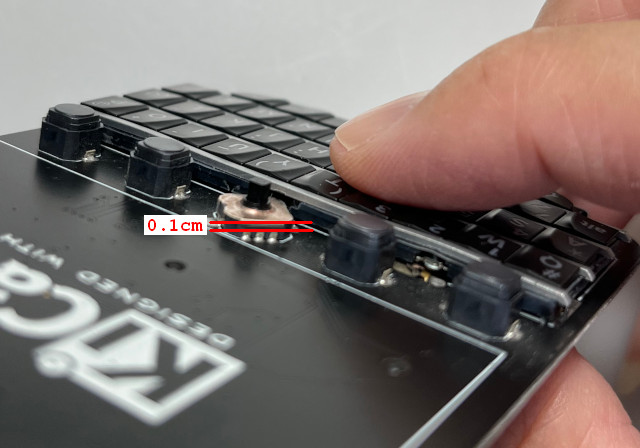
按下時,鍵盤往下凹,嚴重影響手感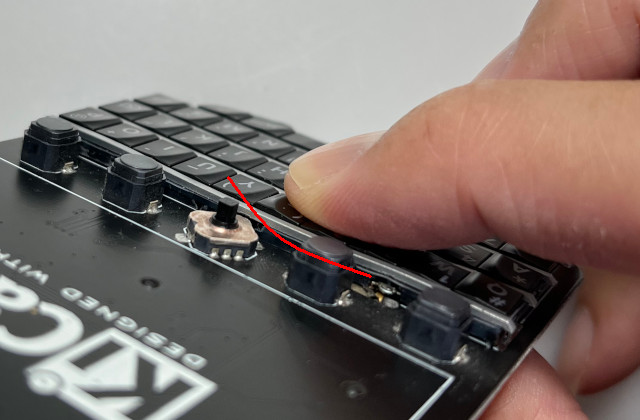
司徒開始修補這個漏洞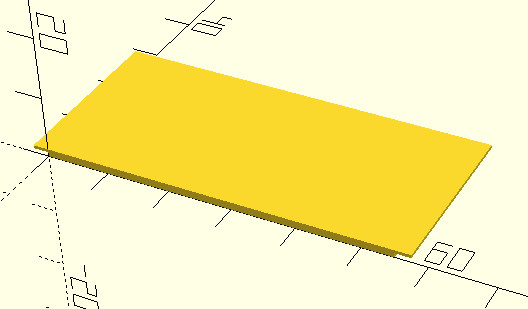
module q10_back(){
	cube([55, 15, 0.7]);
	translate([(55 / 2) - 5, 22, 0]){
		cube([10, 5, 0.7]);
	}
	translate([-2.5, 0, 0.7]){
		cube([60, 28, 0.5]);
	}
}
凸起的部份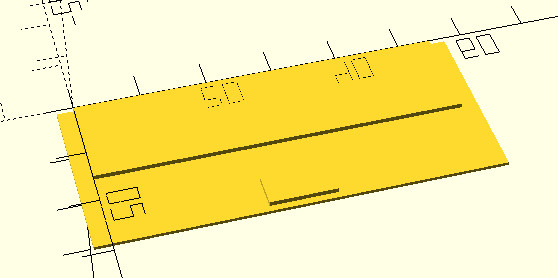
司徒使用堪用的3D印表機打印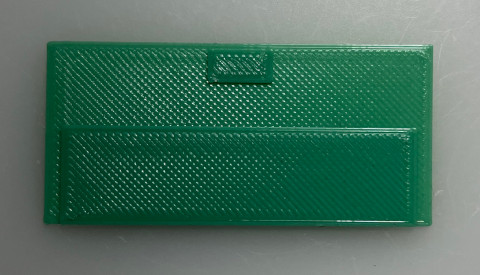
粗糙且漂亮的紋理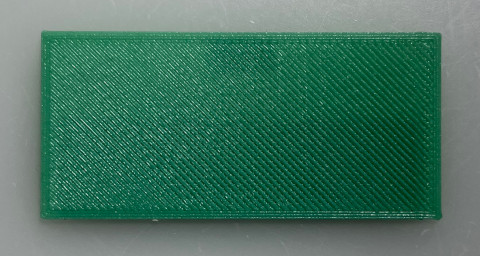
三秒膠上陣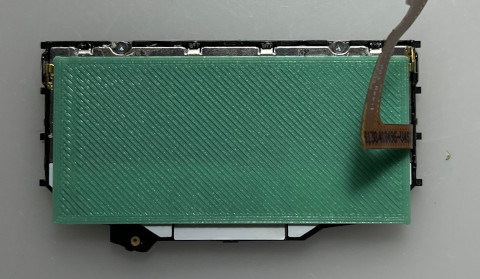
相當平整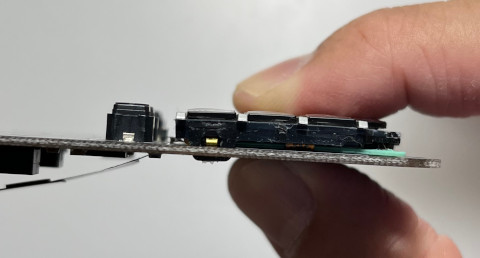
#96 Re: 司徒开源 » 研究馬沙機的開源可行性 » 2022-08-31 09:24:24
#97 Re: 司徒开源 » 研究FC3000掌機的開源可行性 » 2022-08-31 08:59:41
@neotendo
[Q1] sound is working with unmodded connection.
Do you mean the noise issue is fixed without any hardware modding ?
[Q2] Can you tell me how to dump only the needed data like your linux images (~2GB)?
Here are the steps to create 2GB image and then you can flash what you want into this 2GB image file
$ sudo dd if=/dev/zero of=test.img bs=1M count=2024
	2024+0 records in
	2024+0 records out
	2122317824 bytes (2.1 GB, 2.0 GiB) copied, 1.83519 s, 1.2 GB/s

$ sudo fdisk test.img
	Command (m for help): n
	Partition type
	   p   primary (0 primary, 0 extended, 4 free)
	   e   extended (container for logical partitions)
	Select (default p): p
	Partition number (1-4, default 1):
	First sector (2048-4145151, default 2048): 16384
	Last sector, +/-sectors or +/-size{K,M,G,T,P} (16384-4145151, default 4145151):

	Created a new partition 1 of type 'Linux' and of size 2 GiB.

	Command (m for help): p
	Disk test.img: 2 GiB, 2122317824 bytes, 4145152 sectors
	Units: sectors of 1 * 512 = 512 bytes
	Sector size (logical/physical): 512 bytes / 512 bytes
	I/O size (minimum/optimal): 512 bytes / 512 bytes
	Disklabel type: dos
	Disk identifier: 0x0eb9d800

	Device     Boot Start     End Sectors Size Id Type
	test.img1       16384 4145151 4128768   2G 83 Linux

	Command (m for help): w
	The partition table has been altered.
	Syncing disks.

$ sudo losetup -f test.img
$ sudo kpartx -a -v test.img
	add map loop0p1 (254:0): 0 4128768 linear 7:0 16384

$ sudo mkfs.vfat -F32 /dev/mapper/loop0p1
	mkfs.fat 4.1 (2017-01-24)

$ sudo fatlabel /dev/mapper/loop0p1 FC3000

$ sudo kpartx -d -v /dev/loop0
	del devmap : loop0p1

$ sudo losetup -d /dev/loop0
#98 Re: 司徒开源 » 研究FC3000掌機的開源可行性 » 2022-08-30 22:18:31
@neotendo
[Q1] can you tell me how i can add a new variant?
In kernel folder, run the following command and then you will know how to do next
$ grep suniv_variant . -r[Q2] do you have the tool or can you maybe ask the user for his tool please (User: aoa)?
I don't have any tool to decrypt ".wst" file.
I have asked "aoa" for further information on dingoonity forum.
[Q3] rootfs is too small and does not boot
Make sure SDL v1.2 library is included and then edit "/etc/inittab" and "/etc/main" files.
#99 司徒开源 » 研究馬沙機的開源可行性 » 2022-08-30 22:03:52
- 司徒
- 回复: 16
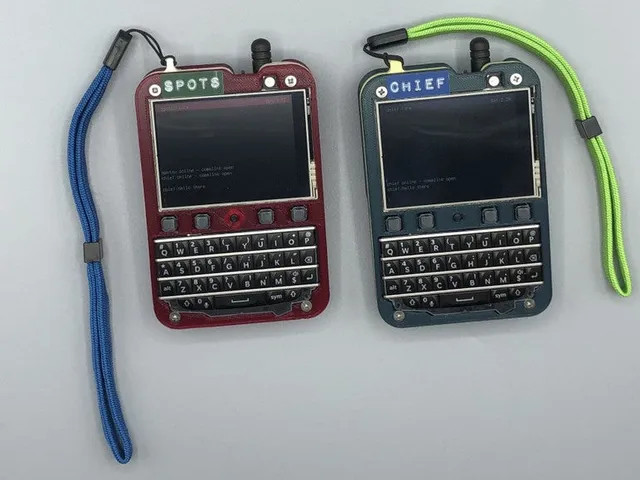
什麼!司徒你又開了一個新帖~不是要研究草食系統嗎?難道,草食系統已經進入生命結束前必須完成的作品之中嗎?這...不好說~因為那些還沒有製作完成的東西,其實都是屬於元宇宙 (Metaverse) 的概念,元宇宙是一個美好的虛擬世界,大家應該好好沈浸在那樣的世界,你說是不是呢?
為何叫馬沙機呢?因為司徒想做一台碼農專用的上網機器,因此,縮寫就使用碼上機這幾個字眼,不過這幾個字不夠漂亮,司徒改取同音字馬殺雞,但是,為了能夠更優雅的使用文字描述這台機器,最後取名叫:馬沙機,是不是很棒的名字呢!
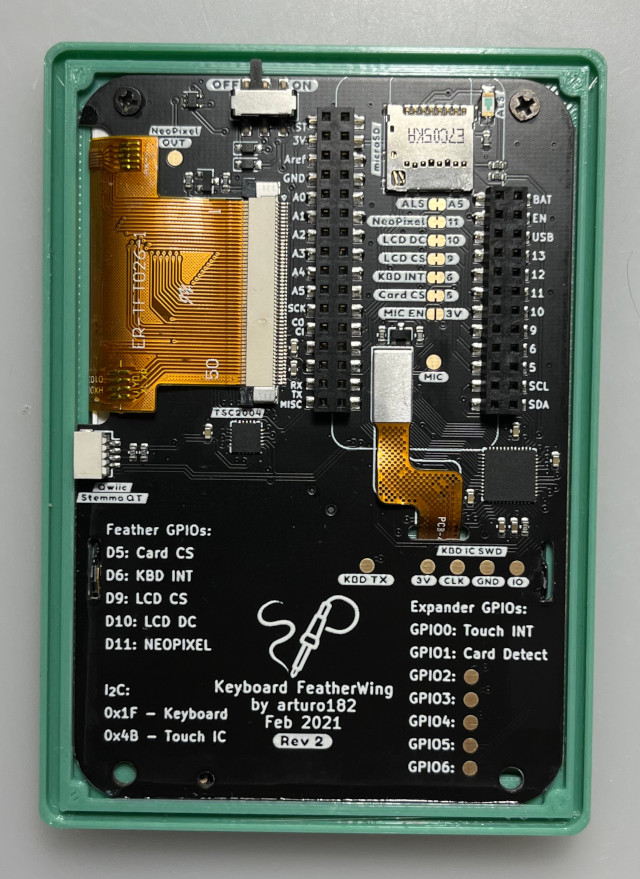
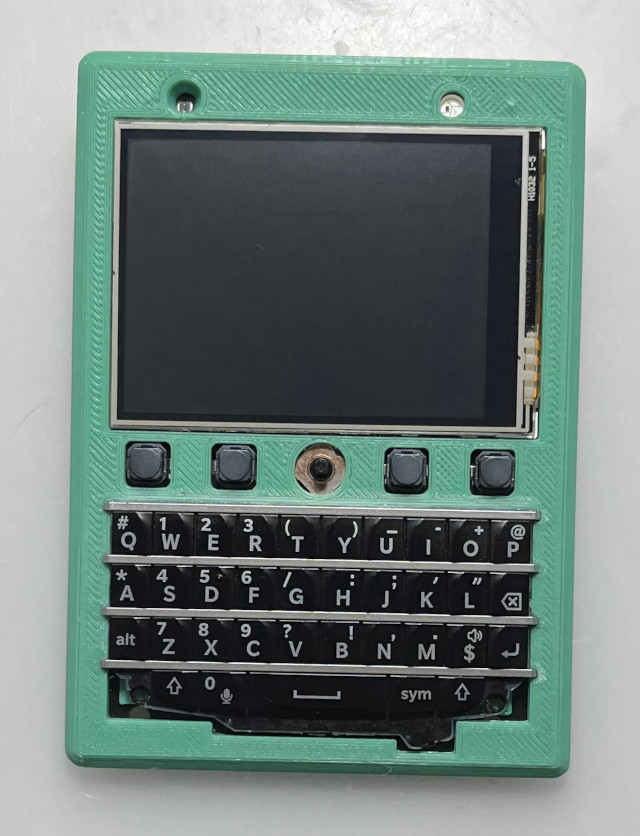
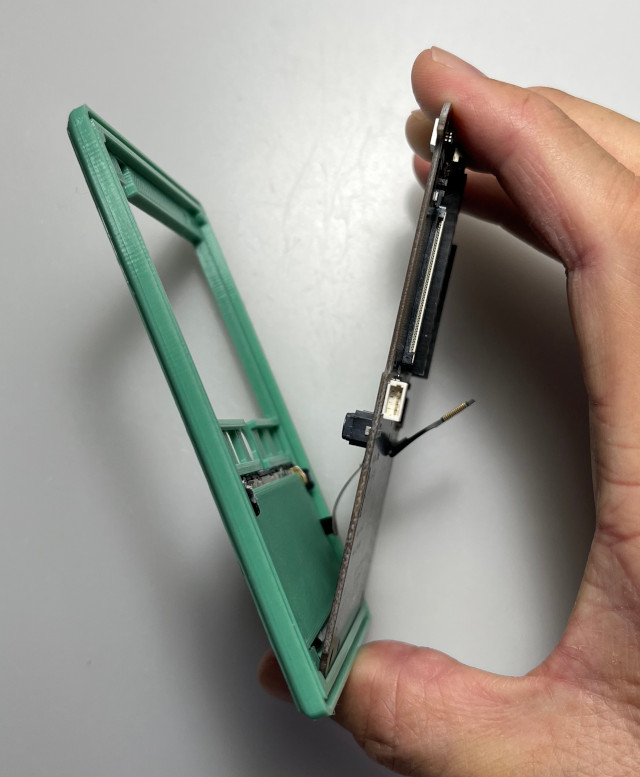
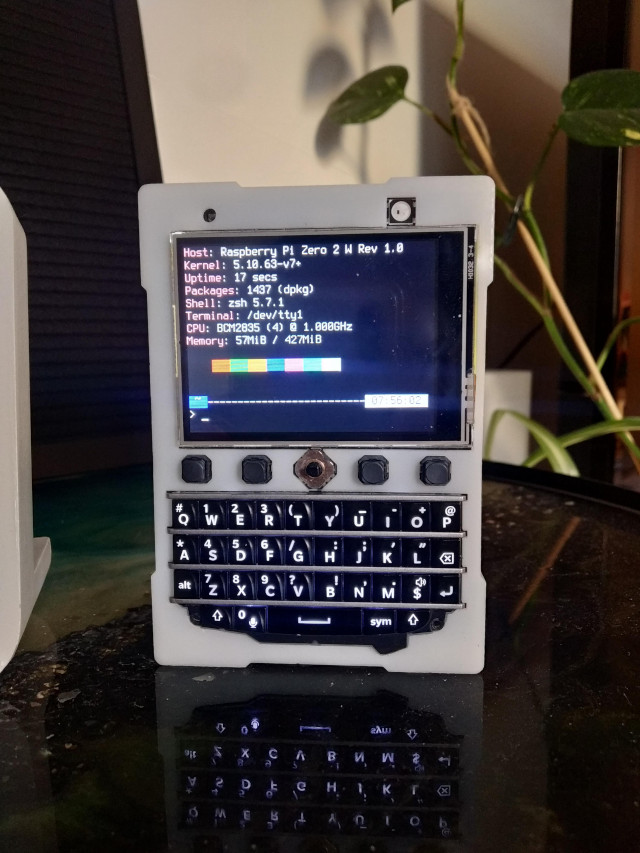
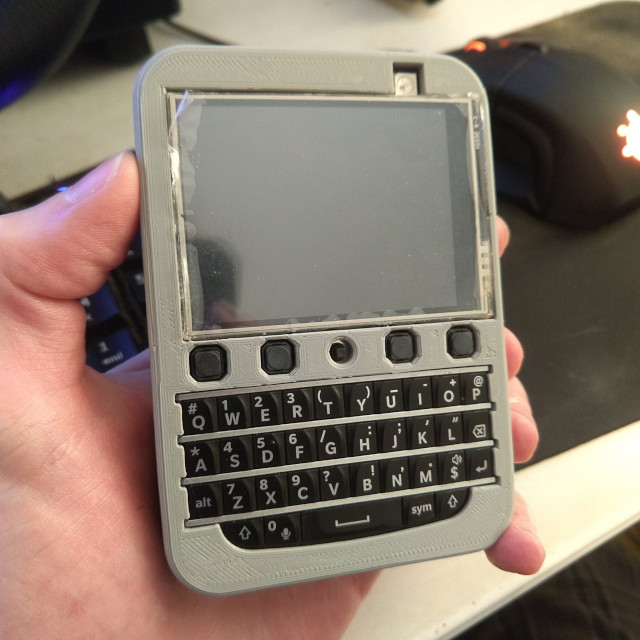
那這台機器的主要目的是什麼呢?其實就是司徒無聊時,可以拿來寫寫程式碼,雖然有點唬爛的感覺,不過只能暫時相信,所以這台機器就是為了這個簡單的目的而誕生,那這台機器要跑什麼系統呢?司徒設定這台機器可以跑 Debian 系統,如果有 GUI 圖形桌面則更好,沒有的話,至少可以跑 Console 介面,由於是跑 Debian 系統,那當然需要具備上網更新的功能,因此,這台機器也要具備網路連線的功能,司徒大約擬定簡要規格後,就開始找尋手邊可以使用的元件,這才發現,原來 Keyboard FeatherWing 已經放在冰箱好些日子,FeatherWing 長成如下樣子: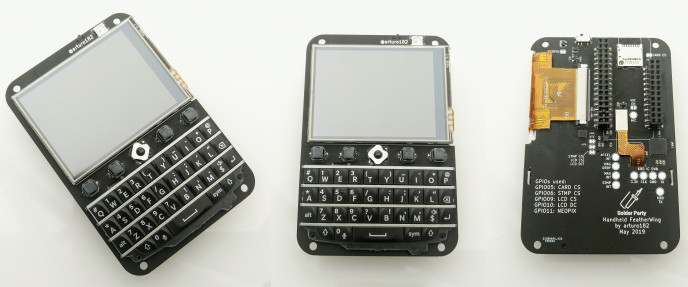
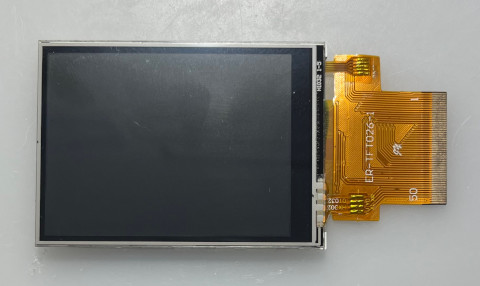
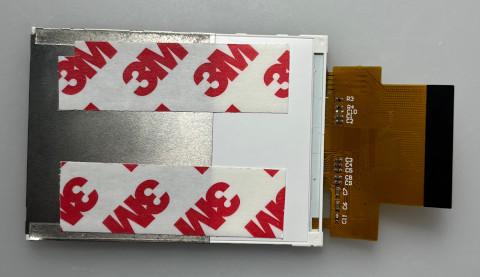
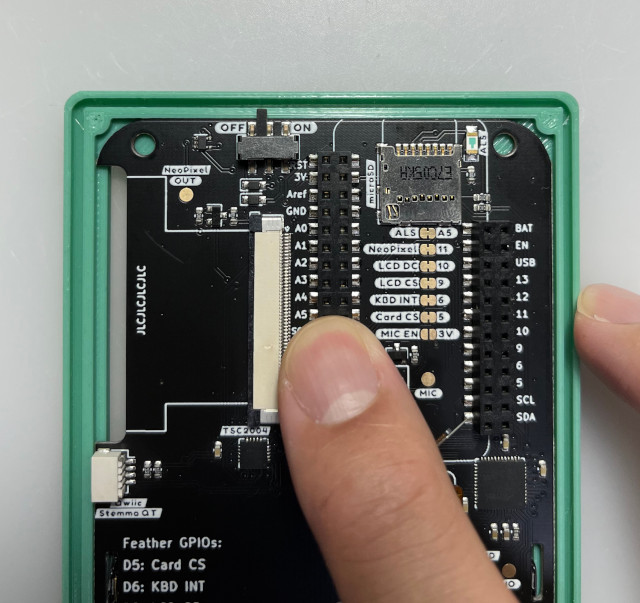
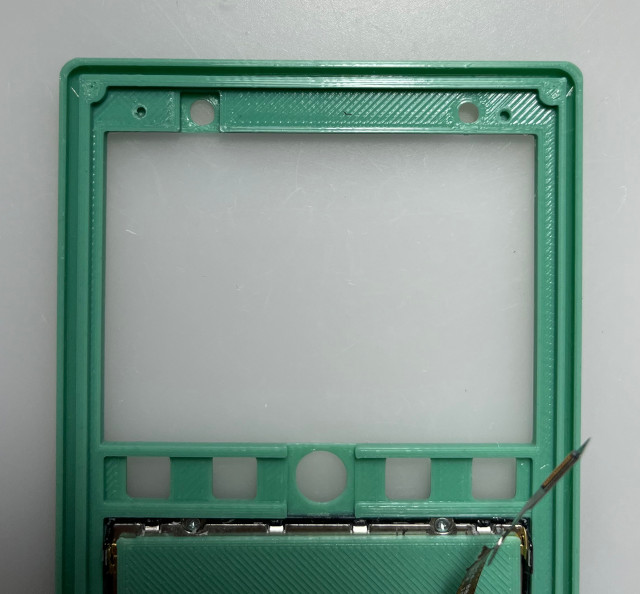
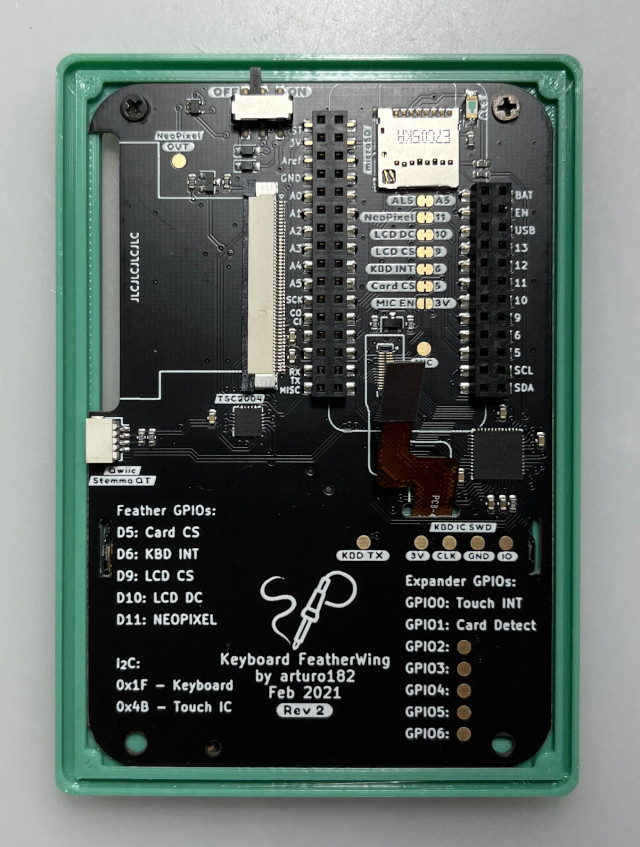
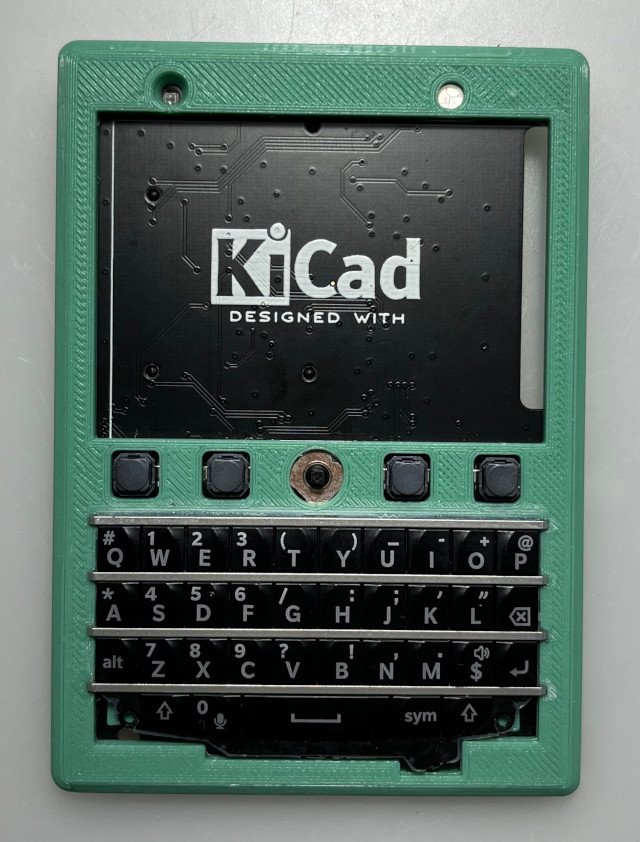
主要元件就是:2.6吋SPI屏、Q10鍵盤、PCB板子
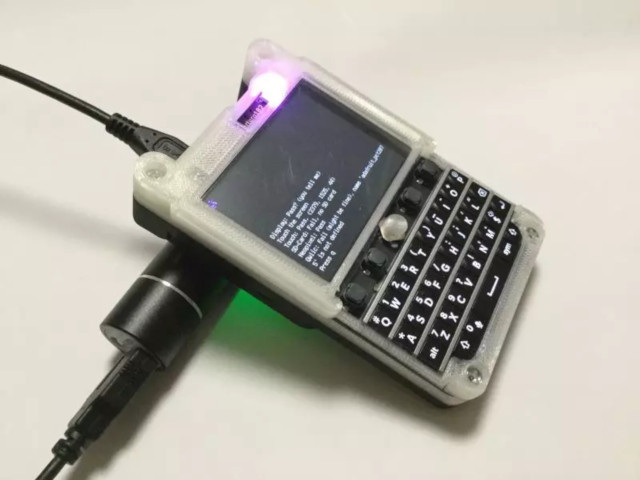
司徒當初購買時,還有額外添購 RP2040 專用的轉板,如下圖片: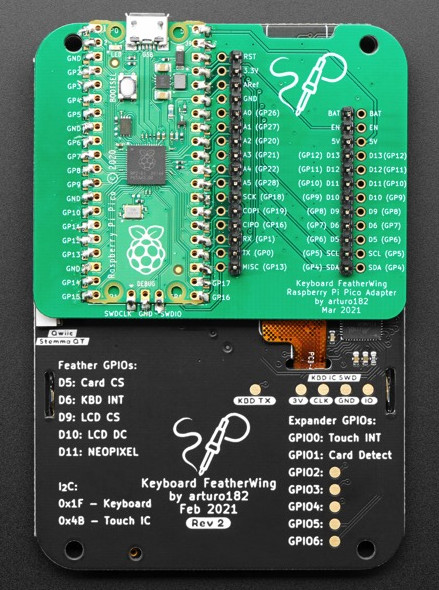
不過,司徒目前不打算使用 RP2040,於是,再度翻找冰箱,尋找可用的元件,這才發現,原來還有更古老的 MT7688 元件可以使用,那就是 HLK-RM08S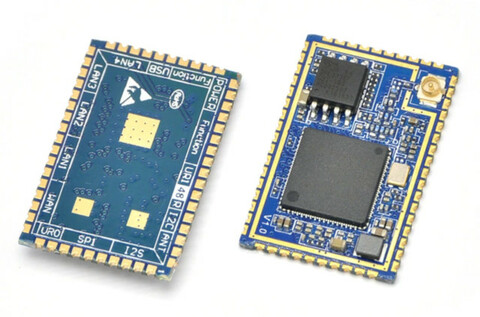
不過,司徒購買的是 RAM 8MB、Flash 4MB,以這樣的規格來看,司徒也不確定能不能跑 Debian GUI 圖形桌面,只能試試看才知道~
全部零件就是這些,可能有人好奇,為何有小紅點呢?這是因為5路方向鍵必須使用這顆小紅點,才能達到完美操控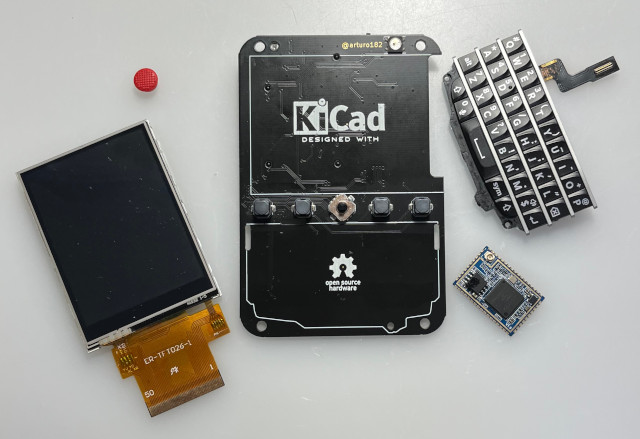
背面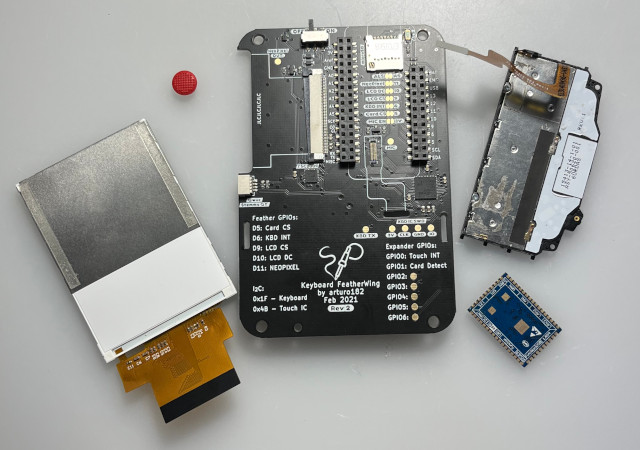
此帖目標如下:
1. 跑 Debian 系統 (基本要求是 Console Terminal)
2. 可以連上網路更新 Package
3. 可以編譯並且執行 Hello, world! 程式
P.S. 達標後,此貼就會結帖
雖然司徒可用的時間相當有限,不過,司徒還是喜歡搞一些比較有趣的東西,因此,基於行動緩慢的理由,此帖預計更新週期為一年,當然,邪惡的鍵盤俠可能想說,司徒一定是跑去搞小三才變得沒有時間,這...,不瞞各位,司徒確實在搞小三,小犬目前國小三年級,司徒花費比較多時間在小犬身上,因此,就讓此貼慢慢更新吧~哈~
#100 Re: 司徒开源 » 研究FC3000掌機的開源可行性 » 2022-08-30 19:31:17
By the way, here is the way (black box testing) to find L1 and R1 in kernel level.
(it assumes that they are not physically connected with A and B buttons):
1. List out all of unused GPIO, ex: PAx, PBx, PCx and so on.
2. Change framebuffer as console mode that log can be printed on LCD.
3. Try each unused GPIO and configure it as output (only 1 ouput for every round).
4. Press L1 and R1 and check the result on LCD.
But I am wrong because L1=A and R1=B, ha ha
#101 Re: 司徒开源 » 研究FC3000掌機的開源可行性 » 2022-08-30 19:12:04
@neotendo
[Q1] TV-OUT
It is not implemented yet and no any plan for this feature.
[Q2] Since my I button connects to PA3 i think this pin is not in input mode!?
PA3 was mapped as Y button.
[Q3] when reading ((32 *4) + 6) system does not boot when Green LED is on via DAC.C
PE6 was used as PWM output for LCD backlight.
[Q4] the coil noise is gone when setting backlight to 100%
Yes, sound signal is effected by PWM.
Ref:
https://whycan.com/t_6647.html#p78183
https://whycan.com/t_6647.html#p76849
[Q5] I got all buttons working, only need to cut traces from L1,R1 and connect it to free io pins on mcu if possible.
Goooood !
[Q6] i guess the encryption/decryption chip is only for the roms when inserting the "cartridge".
We only focusd on Linux OS so far.
If you have any update information, it is welcome to share with us.
I think you have already completed all of tasks for Linux OS on your FC3000.
It is excellent task done by yourself.
If it is possible, please help share the image file that can be flashed into MicroSD to someone who needs it.
Thanks ![]()
#102 Re: 司徒开源 » 研究FC3000掌機的開源可行性 » 2022-08-29 20:50:50
@neotendo
Good spot !
I need to check whether we are on the same page or not.
Is our goal to find out why L/R and A/B use the same pins ?
If yes, please provide PCB front view image without LCD panel.
(you have already provided PCB back view in previous testing)
I would like to check something on this PCB.
In such scenario, black box testing is more powerful than white box testing.
I have an idea for this issue based on kernel level testing.
I will explain to you later.
#103 Re: 司徒开源 » 研究FC3000掌機的開源可行性 » 2022-08-29 19:18:33
#104 Re: 司徒开源 » 研究FC3000掌機的開源可行性 » 2022-08-29 13:03:23
@neotendo
It seems (A / L1, B / R1) share the same I/O pins in your FC3000.
In our FC3000, the designing is almost same as yours but different buttons mapping.
The following schematic I depicted shows the buttons share same I/O pins in our FC3000: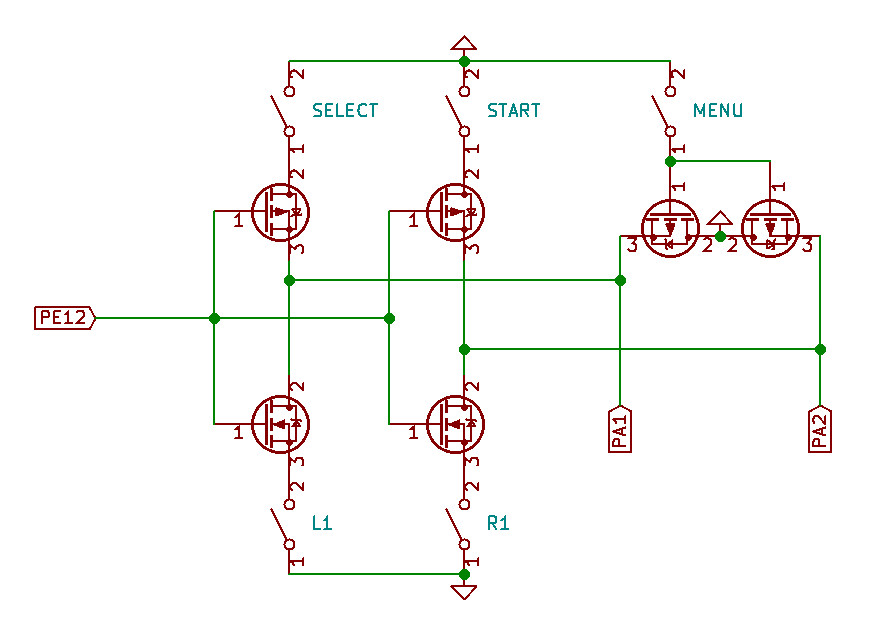
And functionality is shown in the following image: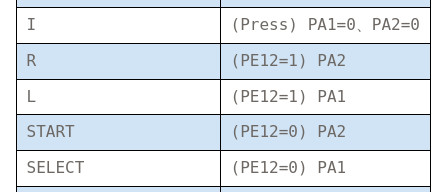
Here is the code shows how to check MENU button:
290       l = gpio_get_value(I_L1);
291       r = gpio_get_value(I_R1);
292       if((l == 0) && (r == 0)){
293         val|= R_MENU;
294       }
Check PE12 firstly to see whether it connects to NMOS or PMOS elments or not.
#105 Re: 司徒开源 » 研究FC3000掌機的開源可行性 » 2022-08-28 20:30:14
#106 Re: 司徒开源 » 研究FC3000掌機的開源可行性 » 2022-08-28 08:53:22
@neotendo
[Q1] GUI issue
I have no idea too.
[Q2] Sound issue
It is PA2 (TPY1) as the following image shown: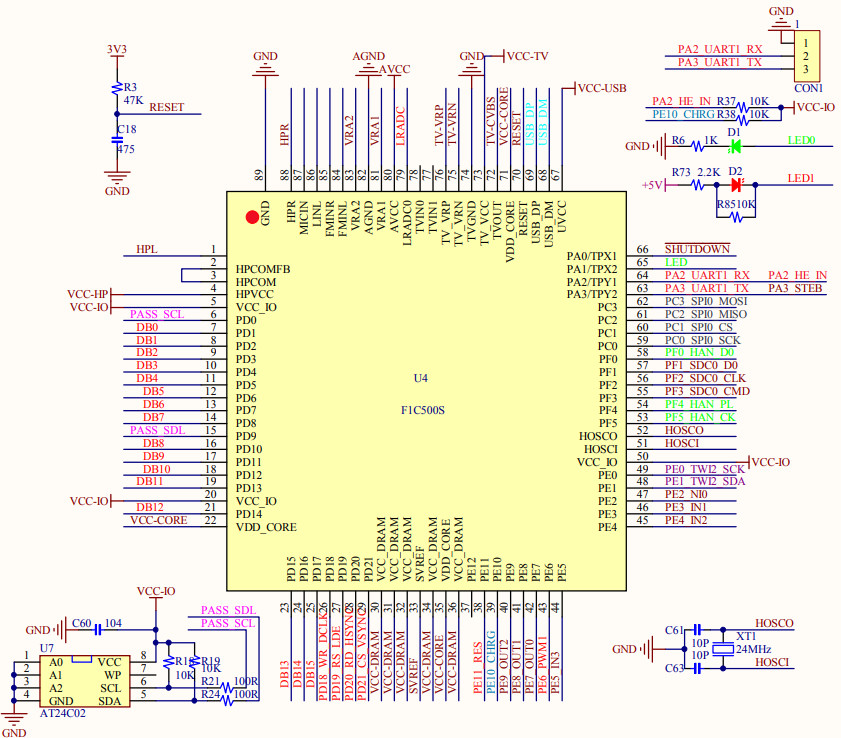
We need configure PA2 as OUTPUT so that it can be controlled as HIGH and the bits for PA2 are bit8 ~ bit10:
Source code: kernel/sound/soc/suniv/dac.c
suniv_variant = 1: PocketGo
suniv_variant = 2: TRIMUI
suniv_variant = 3: FC3000
Change L144 as the following one:
129 static void suniv_gpio_init(void)
130 {
131   uint32_t ret;
132
133   if(suniv_variant == 0){
134     ret = readl(iomm.gpio + PA_CFG0);
135 #if POCKETGO_USE_EARPHONE
136     ret&= 0xfffff0f0;
137 #else
138     ret&= 0xfffffff0;
139 #endif
140     ret|= 0x00000001;
141     writel(ret, iomm.gpio + PA_CFG0);
142     suniv_setbits(iomm.gpio + PA_DATA, (1 << 0));
143   }
144   else if((suniv_variant == 1) || (suniv_variant == 2)){
145     ret = readl(iomm.gpio + PA_CFG0);
146     ret&= 0xffffff0f;
147     ret|= 0x00000010;
148     writel(ret, iomm.gpio + PA_CFG0);
149     suniv_setbits(iomm.gpio + PA_DATA, (1 << 1));
150   }
151 }#107 Re: 司徒开源 » 研究FC3000掌機的開源可行性 » 2022-08-27 20:32:37
@neotendo
GUI is very complicated than you think and there are many variants based on classical GMenu2X GUI.
And there are many configurations you need to know how to configure for your need (google is your friend).
It is a long story in open source handheld.
If you are interested about this, I can explain for you later.
In current stage, it will be good if all of drivers are ready.
#108 Re: 司徒开源 » 研究FC3000掌機的開源可行性 » 2022-08-27 12:48:27
@neotendo
What is filebrowser menu ?
Do you mean the ROMS list menu you can select the rom to be loaded in PICRODRIVE emulator ?
If yes, you need to press A button and then it shows ROMS lists for you.
Before this, you need make sure all of buttons can work properly.
I mean your input driver can work properly.
#109 Re: 司徒开源 » 研究FC3000掌機的開源可行性 » 2022-08-26 22:23:04
@neotendo
[Q1] Sound
Source code: kernel/sound/soc/suniv/dac.c
In our FC3000, sound signal is connected to LM4890 amplifier IC directly and the SHUTDOWN pin is connected to 3.3V, which is always in unmute state.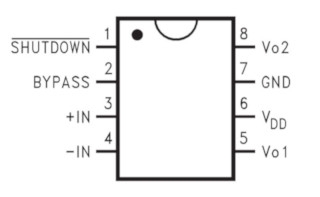
So, you need to check whether the hardware is same as ours or not.
If not, it may be controlled by mute/unmute pin.
Check your sound hardware first and then we can make decision for next step.
LM4890 location in our FC3000: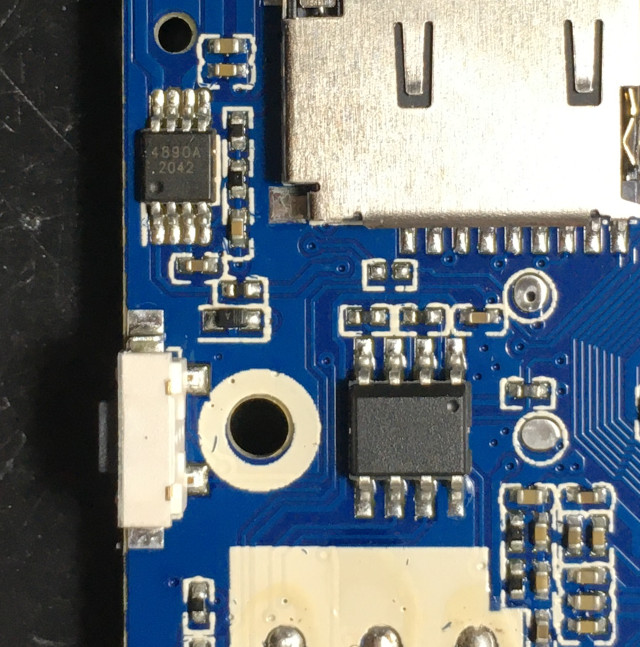
[Q2] Buttons
Source code: kernel/drivers/input/keyboard/suniv-keypad.c
Find all of GPIO pins and then I will teach you how to modify in kernel source code.
All of GPIO pins in our FC3000: https://steward-fu.github.io/website/handheld/fc3000/pin.htm
[Q3] how i can enter the gmenu2x app?
Please post the content of "/etc/main" file.
[Q4] fc3000 does not boot with my rootfs
If you need more detailed information about why your rootfs cannot be launched properly, you need solder UART to see detailed logs.
UART pin: https://steward-fu.github.io/website/handheld/fc3000/uart.htm
#110 Re: 司徒开源 » 研究FC3000掌機的開源可行性 » 2022-08-26 10:30:03
@neotendo
Congratulations !
I am very happy to see Linux OS runs on your FC3000 ~
[Q1] sound not working
In general, there is an enable pin in amplifier IC to mute or unmute sound.
You can use multimeter to see where this pin connects to.
[Q2] most buttons not working
You can use multimeter to find all of them out.
Then you need update changes into kernel/drivers/input/keyboard/suniv-keypad.c file.
[Q3] green power led not working
As I known, the LED isn't controlled by F1C100S.
It is just a power indicator.
[Q4] is it possible to inject the new lcd code into an stock v1 or v2 rom?
Yes, it is possible but you need reverse and analyze stock firmware in assembly to see how to do inject.
If you can do this, we appreciate your efforts.
[Q5] colors wrong
You can change the settings (swap r-g-b) in LCD panel or framebuffer driver.
#111 Re: 司徒开源 » 研究FC3000掌機的開源可行性 » 2022-08-25 21:03:07
@neotendo
T2812-M106-24C-7D_HX8347.zip
sunivfb.c: replaced initial code as hx8347 (based on your previous file) for fc3000
sunivfb_hx8347.patch: patch file for hx8347
For your requirement, just update sunivfb.c file and then rebuild kernel and uboot.
I think it is time to run Linux OS on your FC3000.
Ref: https://github.com/steward-fu/fc3000
#112 Re: 司徒开源 » 研究FC3000掌機的開源可行性 » 2022-08-25 17:42:10
#113 Re: 司徒开源 » 研究FC3000掌機的開源可行性 » 2022-08-25 16:06:44
#114 Re: 司徒开源 » 研究FC3000掌機的開源可行性 » 2022-08-25 10:58:06
@neotendo
Here is the another idea for testing as the following image: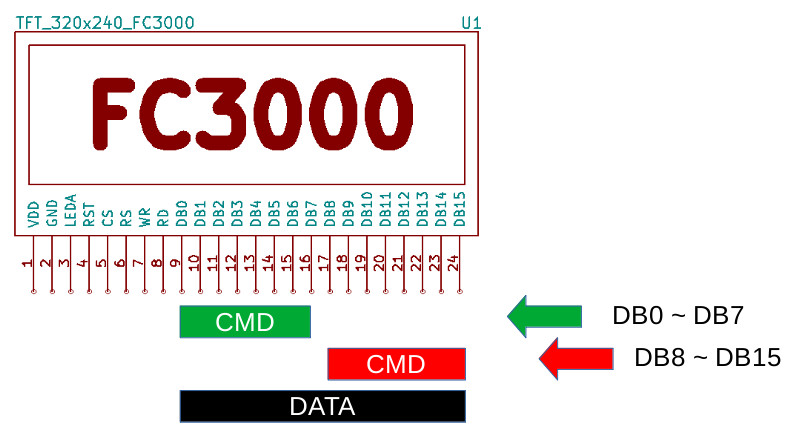
For i80 interface, there are 2 methods used to send command, which are DB0~DB7 and DB8~DB15 respectively.
In our previous testing, we focused on DB0~DB7 bus for command.
It is time to test another testing to see whether it works or not.
Here is the download link for testing (swap R-B and send command via DB8~DB15):
https://github.com/steward-fu/fc3000/releases/download/v1.0/lcd_panel_identify_swap-2_img.zip
SHA1
2ed14db691ad2add6257ef450cc003819e0708ad  test_1.img
f119dcd0328bf34114f969234477624252e8e30b  test_2.img
c8a20326a5896045f73e124d96d68ec0b4d534db  test_3.img
27d85a6b8f2408fc507e8e2a37cab78b0d4401c1  test_4.img
8f586266ad2b3b19b18bf9bbf738495884537f9f  test_5.img
01753ae90098cec8992732107fb3ef0f50c30063  test_6.img
88bf176e7bafc24e5f857d581a7982c5e7f9535a test_7.img#115 Re: 司徒开源 » 研究FC3000掌機的開源可行性 » 2022-08-24 23:55:27
@neotendo
Here is the testing file (swap R-B and then reverse DB0-DB15):
https://github.com/steward-fu/fc3000/releases/download/v1.0/lcd_panel_identify_swap-1_img.zip
SHA1
3a1e957291d36ff5302f30dcb54dcb54aec79063  test_1.img
6b4ffd2e876c1fae617482ed52147b46e537c884  test_2.img
b1ad9914b93e1262820c028e631dc315f10caf06  test_3.img
83749d860e9642d5b3b8f3c6082d3b501d95b111  test_4.img
d744e25906877e2c30da15694e2ca24d3a52e53f  test_5.img
459bf12908d91cc3ebe22338cccbbbc20eda9d0b  test_6.img
1ff27922d41d53c479bef6d6f220d868f36ed6b0 test_7.img#116 Re: 司徒开源 » 研究FC3000掌機的開源可行性 » 2022-08-24 20:51:56
#117 Re: 司徒开源 » 研究FC3000掌機的開源可行性 » 2022-08-24 20:45:15
@neotendo
I guess it should miss write command (0x2c), which is used to tell MCU we can start to write data into memory.
So, the screen you posted is like the following one: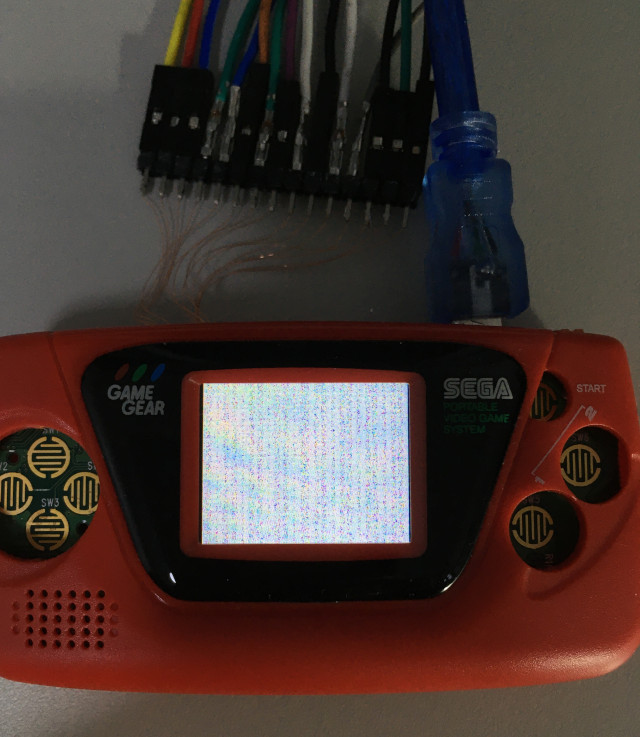
Here is the modified test_6 for your testing (append 0x2c at the end of code):
test_6.img.zip
SHA1:
b530ea20039c5ed7dd695f3ee9bd2228275a4fca test_6.img#118 Re: 司徒开源 » 研究FC3000掌機的開源可行性 » 2022-08-24 19:07:56
@neotendo
[Q1] if R and B are swapped, shouldn't it just be wrong colors?
[A1]
For i80 interface, there is a MCU embedded in LCD panel, which is in charge of rendering color on LCD.
Before MCU gets started, we need to initialize this MCU firstly, ex: voltage, gamma, frame rate and so on.
So, this is why we need initial code to initialize LCD panel.
If the bus of R and B are swapped, the MCU cannot be initialized properly due to invalid initial sequence.
It means MCU cannot work properly, just like "snow" screen as your testing.
I have to think what of testing we can use.
If you have any suggestion or idea, it is very welcome.
#119 Re: 司徒开源 » 研究FC3000掌機的開源可行性 » 2022-08-24 17:06:58
@neotendo
Here is testing file (test_1.img ~ test_8.img):
https://github.com/steward-fu/fc3000/releases/download/v1.0/lcd_panel_identify_swap_img.zip
SHA1
f18644f790e4b2ccd6cc55ce161b8661e369ed42  test_1.img
f51dc6390855e26676f9f0564cc9b8f6b7ffa57e  test_2.img
65c541eb2e3aa9807cacf99dd6b0a7a3f56ea531  test_3.img
7df42ceb8cfec7b421980b7544a8481ed83d8b9a  test_4.img
93ffd00c223166149afa91c835e90be12a5ab3b4  test_5.img
6f3e295018b2aa3a363ca169510327e294c17afa  test_6.img
59df3d8467e044ee725a200522ff52ec1c59e466  test_7.img
c4dddb1afb0cfe5ffd7450e84c524a10caa3062b test_8.img#120 Re: 司徒开源 » 研究FC3000掌機的開源可行性 » 2022-08-24 13:31:07
@neotendo
[Q1] why do you think it's not hx8347?
[A1] In my experiences, ST-xxxx, GC-xxxx, ILI-xxxx series are more commonly used in inexpensive handheld.
Thanks for your information.
If I understood correctly, it seems the bus of R and B are swapped from F1C100S side as the following image I depicted:
Here is link for all of the LCD pinouts (TFT FC3000):
https://steward-fu.github.io/website/handheld/fc3000/lcd_init.htm
It is worthy to try this idea on your FC3000.
I will prepare testing images for your FC3000 later on.
Please wait for update.
#121 Re: 司徒开源 » 研究FC3000掌機的開源可行性 » 2022-08-24 10:57:26
#122 Re: 司徒开源 » 研究FC3000掌機的開源可行性 » 2022-08-23 20:52:15
@neotendo
[Q1] Had already tried to compile that yesterday, but I had errors in the gdb compilation.
[A1] Please post error logs if need help.
[Q2] fc3000 starts with a white screen now. is that right?
[A2] Yes, it means your FC3000 is bootig from MicroSD.
[Q3] i do not hear any sound when booting linux
[A3] Basically, it is a noise when turn on speaker.
According to the image you posted, it seems your FC3000 is more older than ours.
I guess some of LCD pinouts may be different with our FC3000.
Except for pinout changed, I am afraid that the LCD panel on your FC3000 is not HX8347.
So, it is not easy for us to port Linux OS into your FC3000 beacuse of many unknown information.
But we can try our best to see whether it is possible or not.
I spent some time to collect initial code from google for your FC3000 as possible.
Here are the lists I would like to test on your FC3000:
1. https://os.mbed.com/users/Suky/code/LCDTFT//file/1085b6177f6e/LCDTFT.cpp
2. https://searchcode.com/codesearch/view/46088261/
3. https://steward-fu.github.io/website/handheld/q8/asm_lcd_gpio.htm
4. https://whycan.com/t_6647.html#p64598
5. https://whycan.com/t_6647.html#p64694
6. https://www.microchip.com/forums/m624935.aspx
7. https://github.com/CariadDisplayLibrary/HX8347D/blob/master/src/HX8347D.cpp
All of them are compiled and packed as flash image files.
So, you just need flash them into your MicroSD and then test it on your FC3000.
Source code: https://github.com/steward-fu/fc3000/releases/download/source/lcd_panel_identify_src.zip
Flash image: https://github.com/steward-fu/fc3000/releases/download/v1.0/lcd_panel_identify_img.zip
SHA1
beb68550727732fe80b8f5083463df0e5f2996d8  test_1.img
3d4d309a1111e6cc813de2dfba485a7888ad67eb  test_2.img
57de59c85e1cca75983c1a1dc5283444137b4e76  test_3.img
dbef7df5b042f95398c8e7ff3d7188ec7a57a47c  test_4.img
47fa196756b54ee022ae305a81fe7dc200ccb727  test_5.img
e9efbfd13c8c508e7a392ce20bbb7e1dc79f1e2b  test_6.img
f7a49d1ea656d7df7800b4bec202d4e60a98fab8  test_7.img
How to test (test_1.img ~ test_7.img):
Step 1: flash test_x.img into MicroSD as the following command
$ sudo dd if=test_x.img of=/dev/sdX bs=1MStep 2: put MicroSD into FC3000 and then power on
Step 3: if the initial code is correct, your FC3000 should look like this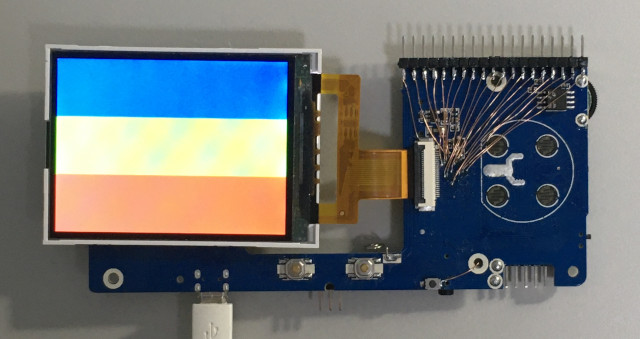
#123 Re: 司徒开源 » 研究FC3000掌機的開源可行性 » 2022-08-23 13:38:34
#124 Re: 司徒开源 » 研究FC3000掌機的開源可行性 » 2022-08-23 12:25:43
#125 Re: 司徒开源 » 研究FC3000掌機的開源可行性 » 2022-08-22 21:35:53
@neotendo
[Q1] Thank you very much, maybe i can find someone with the same model, a dump tool would be handy.
[A1]
Here is the dump tool you can use to dump firmware from another FC3000:
https://github.com/steward-fu/fc3000/releases/download/v1.0/ips_fc3000_dump_0627_1.img.7z
Step 1: extract ips_fc3000_dump_0627_1.img.7z
Step 2: flash image into MicroSD as the following command
$ sudo dd if=ips_fc3000_dump_0627_1.img of=/dev/sdX bs=1MStep 3: put this MicroSD into another FC3000 and then power on
Step 4: wait for 10 minutes and then power off
Step 5: provide v1rom.img back to me and I will create restore tool for you
[Q2] i would be very grateful if you would help me there at least to have linux on it
[A2]
It is easy for you to port Linux OS into your FC3000 if leverage existing source code.
So, here is what you need: https://github.com/steward-fu/fc3000
Preparation
Step 1: make sure your development environment is ready
Step 2: download https://github.com/steward-fu/fc3000/releases/download/v1.0/fc3000_ips_od_jutleys_no_roms.img.7z
Step 3: extract fc3000_ips_od_jutleys_no_roms.img.7z and then flash into MicroSD
Step 4: build kernel source code (kernel.tar.gz) without any problem
Step 5: build uboot source code (uboot.tar.gz) without any problem
Step 6: put MicroSD into your FC3000 and then power on
Step 7: when boot into Linux OS, you can hear a beep sound from speaker
Step 8: make sure all of steps as described above are ready and then you can go to next step
Porting LCD driver for Linux OS
Step 1: update initial code for HX8347 panel, kernel source code: kernel/drivers/video/fbdev/sunivfb.c
593 static void fc3000_lcd_init(void)Since we guess the LCD panel is HX8347, so, we need try example code to see whether it works or not.
Here is the example code we can use: https://os.mbed.com/users/Suky/code/LCDTFT//file/1085b6177f6e/LCDTFT.cpp
If it does not work, you need google it and then try different example code.
Such method we use is more like black box testing.
Step 2: build modified kernel source
Step 3: build uboot source code (in this step, kernel and uboot images will be updated into MicroSD)
Step 4: put MicroSD into your FC3000 and then power on
Step 5: if the LCD is still blank, go back to Step 1
Here are the steps I wrote for your referece to port Linux OS into your FC3000.
I cannot make sure whether it is clear or not.
If not, it is welcome to post your question.
#126 Re: 司徒开源 » 研究Game Gear Micro掌機的開源可行性 » 2022-08-21 18:03:30
#127 Re: 司徒开源 » 研究Game Gear Micro掌機的開源可行性 » 2022-08-21 14:36:38
此貼最後更新通知~
阿彌陀佛~善哉~善哉~貧僧隨風而來~隨風而去~法號~夢遺,夢遺大濕最近潛入深山修行,有天在夢中驚見 Game Gear Micro 駕鶴歸西,亡魂訴說其被司徒折騰的慘不忍睹,接近五馬分屍狀態,嚇醒夢遺大師,於是連夜奔赴尋找司徒,這才發現,原來司徒都在鬼混,好在最終司徒答應做最後更新,夢遺大濕這才放下心中大石~
前言
司徒幫 Miyoo Mini(SSD202) 上了一顆虛擬 GPU(Google SwiftShader),用來跑 PPSSPP 模擬器,原本打算再次移植給 F1C200S 使用,讓它跑 OpenGL ES 2.0 程式,可惜司徒錯估 SwiftShader 需要至少 ARMv7 才可以支援,於是司徒再度修改項目,將原本 app_e (OpenGL ES) 改成跑 GB 模擬器,而 app_a (Arduboy 模擬器) 改成跑 GBC 模擬器,這樣此貼剛好就可以做結貼的動作,真是一石二鳥之計~
關於聲音控制方式
司徒最後再度挖掘,才發現 GGM 音量轉輪是接到 PA0,透過 TouchPanel 方式輸入,利用其電壓做音量控制,修改後的 Kernel 位於:https://github.com/steward-fu/ggm/releases/download/src/kernel_20220821.tar.gz,目前已經可以控制音量大小~
app_e (GB 模擬器)
源代碼:https://github.com/steward-fu/ggm/releases/download/src/gambatte_20220821.tar.gz
編譯後:https://github.com/steward-fu/ggm/releases/download/v1.0/app_e_20220821.tar.gz
玩家只要將編譯後的檔案解壓縮到 app_e 資料夾就可以,接著執行如下程式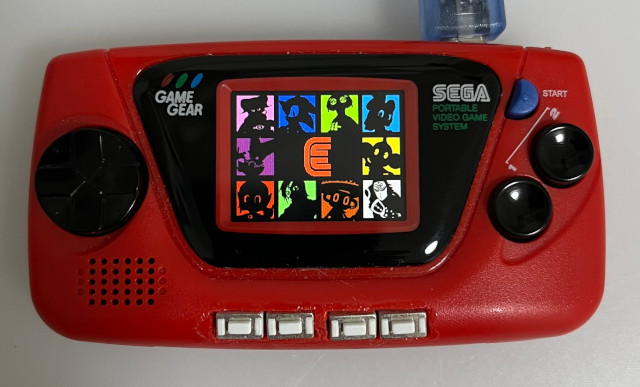
司徒將 GBA 的選單拿來重複使用,因此,字型大小算是相當剛好 (遊戲請放在 roms/gb 資料夾)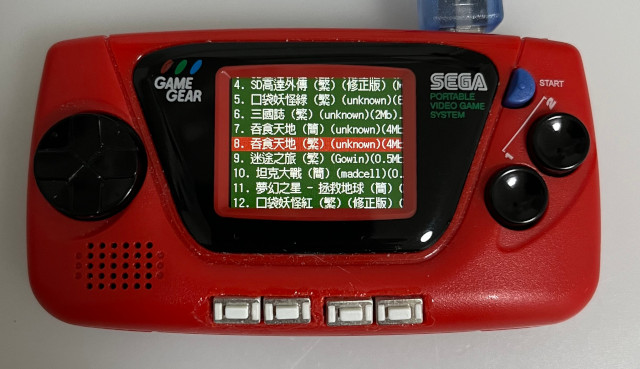
司徒保留 GB 的 BIOS 開機畫面,每次看到這個畫面總是相當懷念~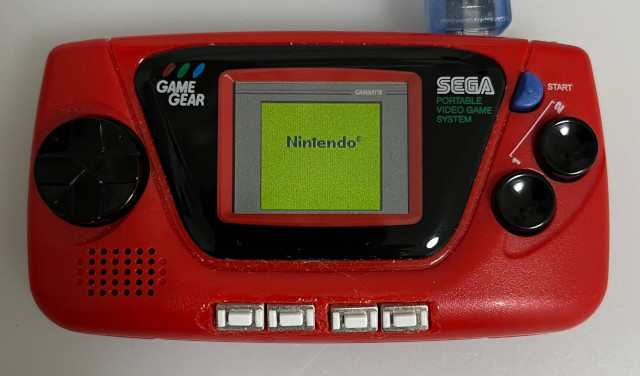
司徒打包了很多調色盤以供使用,因此,有相當多調色盤可以好好試試~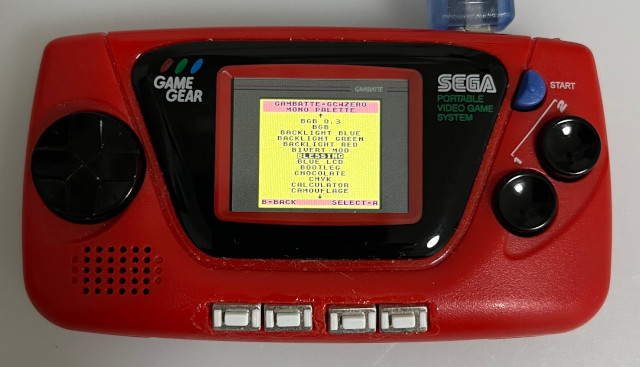
別有一番風味~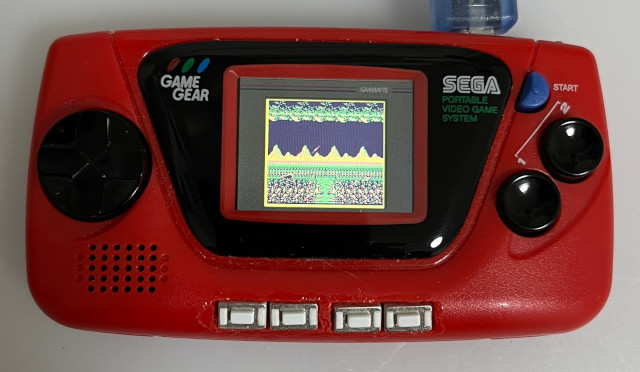
app_a (GBC 模擬器)
源代碼:https://github.com/steward-fu/ggm/releases/download/src/gambatte_20220821.tar.gz
編譯後:https://github.com/steward-fu/ggm/releases/download/v1.0/app_a_20220821.tar.gz
玩家只要將編譯後的檔案解壓縮到 app_a 資料夾就可以,接著執行如下程式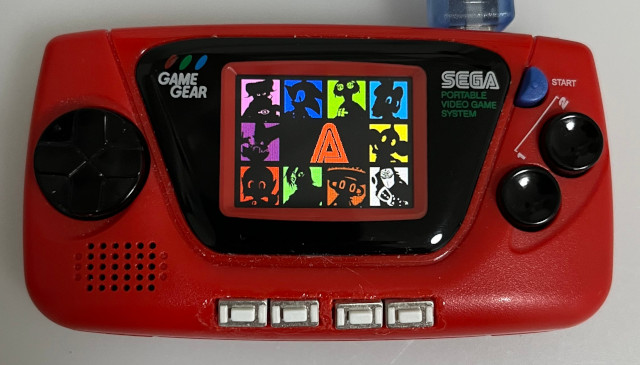
字型大小算是相當剛好 (遊戲請放在 roms/gbc 資料夾)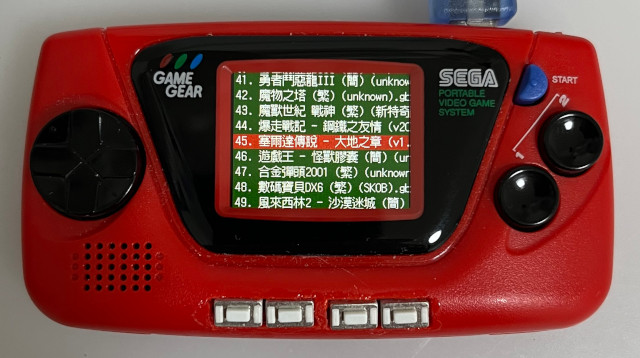
保留 GBC 的 BIOS 開機畫面,是不是相當懷念~哈~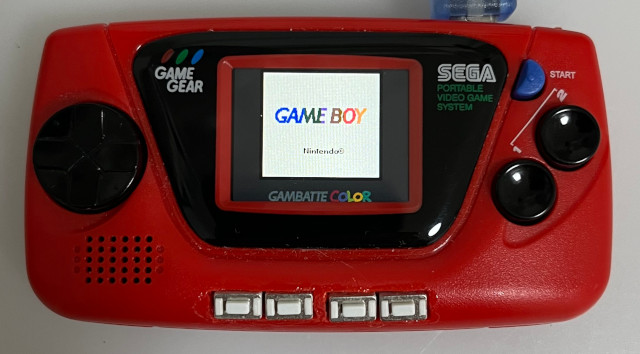
如果玩家有注意到,司徒將 GB 的外框往上移動,GBC 則是往下移動,這樣看起來是不是更有感覺呢~哈~
菜單都是使用藍色按鍵做設定~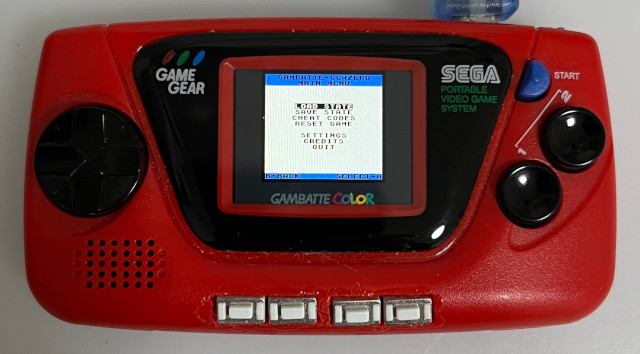
基於開源精神,司徒將所有源代碼放在GitHub(https://github.com/steward-fu/ggm),如果有興趣搗鼓的玩家,歡迎繼續把玩,而基於開源精神,司徒也希望大家可以將修改後的源代碼再次公開,有助於開源的發展,最後,司徒相當感謝大家對於此貼的厚愛,司徒在此至上謝意,此貼將不在更新技術部份,而對於問題仍會持續回覆,感謝~
#128 Re: 司徒开源 » 研究FC3000掌機的開源可行性 » 2022-08-20 12:40:03
@neotendo
Q1: does anybody have the stock rom from the v1 old version ?
A1: As I known, we don't have such backup rom for you to restore your device back to normal. If you can find someone has the model as yours, I can provide dump progam to you and then you can try to dump it. I think this is what we can help on.
Q2: can anyone point me in a direction to port the linux to this device ?
A2: Sure, we can. But before porting Linux into your device, you need known which LCD model is used in your device.
So, what is your next step ?
#129 Re: 全志 SOC » V3S zero 5.2y的内核 Kernel panic - not syncing: Attempted to kill init! » 2022-08-13 14:43:38
出錯點位於 free_netdev(0xc061c26c), 從 stack 看到的觸發源頭是 driver_probe_device(0xc0484f90), 加上如下 logs:
[    0.849756] libphy: stmmac: probed
[    0.853875] dwmac-sun8i 1c30000.ethernet: Cannot get mdio-mux node
源頭應該是 https://github.com/torvalds/linux/blob/master/drivers/net/ethernet/stmicro/stmmac/dwmac-sun8i.c#L763, 代表你的 device tree 對於 mdio-mux 的描述有問題, 導致 network probe 中途就做 free 的動作, 如果要可以順利進入系統, 可以先把 kernel 的這個網路驅動移掉, 這樣應該就可以開機進入系統, 不過這個問題應該是 network remove 時, 沒有做好錯誤檢查的問題~
#130 Re: 全志 SOC » 荔枝派Zero V3s开发板驱动 ili9341 摆拍 » 2022-08-12 10:46:34
@tevada2010 @nicholas3388
要使用 framebuffer console, 兩個部分需要:
1. UBoot 傳遞 console=tty0 訊息 (或者 kernel hardcode 這個訊息)
2. Kernel 必須開啟支援 Device Drivers > Graphics support > Console display driver support > Framebuffer Console Support
Ref: https://steward-fu.github.io/website/mcu/nuc972/framebuffer_console.htm
#131 Re: 司徒开源 » 研究Game Gear Micro掌機的開源可行性 » 2022-08-07 10:20:25
#132 Re: 司徒开源 » 研究FC3000掌機的開源可行性 » 2022-08-07 10:13:34
#133 Re: 司徒开源 » 研究FC3000掌機的開源可行性 » 2022-07-09 20:09:11
#134 Re: 司徒开源 » 研究FC3000掌機的開源可行性 » 2022-07-06 23:20:34
#135 Re: 司徒开源 » 研究FC3000掌機的開源可行性 » 2022-07-05 22:46:21
你修改下如下源代碼, 讓LCD IRQ也可以掃屏試試~
drivers/video/fbdev/sunivfb.c
 370 static irqreturn_t lcdc_irq_handler(int irq, void *arg)
 371 {
 372   //if((suniv_variant == 1) || (suniv_variant == 2)){
 373     flip_lcd(arg);
 374   //}
 375   suniv_clrbits(iomm.lcdc + TCON_INT_REG0, (1 << 15));
 376   return IRQ_HANDLED;
377 }#136 Re: 司徒开源 » 研究FC3000掌機的開源可行性 » 2022-07-05 20:40:33
#137 Re: 司徒开源 » 研究FC3000掌機的開源可行性 » 2022-07-04 20:29:17
#138 Re: 全志 SOC » 只有一个TCON控制器,但是我想要两个frambuffer?? » 2022-07-04 20:20:25
#139 Re: 司徒开源 » 研究FC3000掌機的開源可行性 » 2022-07-02 19:42:39
#140 Re: 司徒开源 » 研究Game Gear Micro掌機的開源可行性 » 2022-07-02 10:53:51
你的聲音 freq 有點問題, 預設應該是 44K~48KHz, 所以建議直接使用 gdb debug 看問題
修改 Makefile, 把 -s 修改成 -ggdb
LIBS += -ldl -lpthread -lz -lgcov -lasound -Wl,--as-needed -Wl,--gc-sections -flto -ggdb -lpng讓 gpsp 帶有 debug symbol (not stripped)
$ file gpsp
gpsp: ELF 32-bit LSB executable, ARM, EABI5 version 1 (SYSV), dynamically linked, interpreter /lib/ld-uClibc.so.0, with debug_info, not stripped
用 gdb 跑 gpsp, 你應該就可以馬上看到問題
# gdb --args ./gpsp xxx.gba#141 Re: 司徒开源 » 研究Game Gear Micro掌機的開源可行性 » 2022-06-30 18:01:26
#142 Re: 司徒开源 » 研究Game Gear Micro掌機的開源可行性 » 2022-06-30 11:39:40
Miyoo 的 SDL-1.2 源代碼是使用官方的, 沒有做任何修改, Miyoo 是從顯示驅動(fbcon)和聲音驅動(alsa)做修改, 符合 SDL-1.2 的基本需求, 所以可以直接使用官方預設的源代碼, 至於, v3s 是否可以使用 ?這要看驅動程式端的製作才可以知道, 我把 SDL-1.2 和 SDL-2.0 對於顯示和聲音驅動程式的要求貼在下方, 你可以看一下, 看看是否你的 v3s 驅動程式有支援~
SDL 對於顯示驅動的需求:
SDL 對於聲音驅動的需求:
如果你的 v3s 驅動程式不符合 SDL 的基本需求, 那也可對 SDL 源代碼動刀, 就像 PSP 或者 PSVita 那樣, 不過, 那個就是另一個話題了~
#143 Re: 司徒开源 » 研究Game Gear Micro掌機的開源可行性 » 2022-06-30 08:25:43
@hsinyuwang
gpsp 源代碼:https://github.com/steward-fu/miyoo/releases/download/v1.2/gpsp.7z
這個 gpsp 源代碼是當初移植給 Miyoo 使用的, 你可以從這份代碼做修改~
一般移植模擬器, 思路大致上如下步驟(不包含驅動程式部份):
1. 確定可以編譯 (交叉編譯器)
2. 確定可以顯示 (SDL)
3. 調整顯示比例
4. 調整按鍵輸入
1. 確定可以編譯 (交叉編譯器)
gpsp 源代碼解壓縮後, 可以看到 bittboy 資料夾, 複製一份成 v3s, 修改 Makefile, 3 個部份需要修改:
(1). CC 指向你的交叉編譯器
CC = arm-linux-gcc(2). 告知 SDL.h 的位置, 一般使用 sdl-config 取得
CFLAGS += `/opt/miyoo/arm-miyoo-linux-uclibcgnueabi/sysroot/usr/bin/sdl-config --cflags`當然也可以使用固定路徑, 如下:
CFLAGS += -I/opt/miyoo/arm-miyoo-linux-uclibcgnueabi/sysroot/usr/include/SDL(3). 告知 SDL 元件庫, 一般使用 sdl-config 取得
LIBS += `/opt/miyoo/arm-miyoo-linux-uclibcgnueabi/sysroot/usr/bin/sdl-config --libs`當然也可以使用固定名稱, 如下:
LIBS += -lSDL(4). 拿到機器上跑, 確定不會有crash問題
2. 確定可以顯示 (SDL)
(1). SDL_Init() 初始化顯示驅動, 一般需要判斷回傳值是否初始化成功, 因為有時候, 顯示驅動不支援,
(2). 設定顯示解析度 SDL_SetVideoMode(), 由於這些模擬器幾乎都是從早期 320x240 顯示開始製作,
所以預設是跑 320x240, 假如你的顯示驅動只有支援 640x480, 你可以把 video_scale 設定成 2
void init_video()
{
  SDL_Init(SDL_INIT_VIDEO | SDL_INIT_JOYSTICK | SDL_INIT_NOPARACHUTE);
  rl_screen = SDL_SetVideoMode(320 * video_scale, 240 * video_scale, 16, SDL_HWSURFACE);
  screen = SDL_CreateRGBSurface(SDL_SWSURFACE, 240 * video_scale, 160 * video_scale, 16, 0, 0, 0, 0);
  SDL_ShowCursor(0);
}
(3). 拿到機器上跑, 確定可以顯示東西
3. 調整顯示比例
(1). flip_screen() 用來顯示模擬器的畫面, 由於經過太多人修改, 很多重複變數使用的問題, 不過這裡是你做顯示的動作, 畫面比例調整可以在這裡實做
void flip_screen()
{
...
        switch(video_scale)
        {
            case 2:
                integer_scale_horizontal(2);
            break;
            case 3:
                integer_scale_horizontal(3);
            break;
            default:
            case 4:
                integer_scale_horizontal(4);
            break;
        }

        for(y = 159, y2 = (160 * video_scale) - 1; y >= 0; y--)
        {
            for(i = 0; i < video_scale; i++)
            {
                memcpy(screen_ptr + (y2 * pitch),
                screen_ptr + (y * pitch), 480 * video_scale);
                y2--;
            }
        }
...
}
(2). 拿到機器上跑, 確定顯示正確
4. 調整按鍵輸入
(1). 你需要先知道 Input 驅動程式對應的按鍵值, 接著設定按鍵
#if defined(PC_BUILD)

u32 key_map(SDLKey key_sym)
{
  switch(key_sym)
  {
    case SDLK_LSHIFT:
    case SDLK_BACKSPACE:
      return BUTTON_R;

    case SDLK_SPACE:
    case SDLK_TAB:
      return BUTTON_L;

    case SDLK_DOWN:
      return BUTTON_DOWN;

    case SDLK_UP:
      return BUTTON_UP;

    case SDLK_LEFT:
      return BUTTON_LEFT;

    case SDLK_RIGHT:
      return BUTTON_RIGHT;

    case SDLK_RETURN:
      return BUTTON_START;

    case SDLK_ESCAPE:
      return BUTTON_SELECT;

    case SDLK_LCTRL:
      return BUTTON_B;

    case SDLK_LALT:
      return BUTTON_A;

    default:
      return BUTTON_NONE;
  }
}
#endif
(2). 拿到機器上跑, 確定按鍵正確
#144 Re: 司徒开源 » 研究Game Gear Micro掌機的開源可行性 » 2022-06-28 18:30:40
#145 Re: 司徒开源 » 研究FC3000掌機的開源可行性 » 2022-06-28 18:06:33
#146 Re: 司徒开源 » 研究FC3000掌機的開源可行性 » 2022-06-25 20:12:24
@txusevas
Thank you for providing stock rom dumped from WL-28H105-A1 panel.
Restore back to stock rom for FC3000 with WL-28H105-A1 panel: https://github.com/steward-fu/fc3000/releases/download/v1.0/WL-28H105-A1_restore.img
Steps:
1. clone WL-28H105-A1_restore.img into microsd
2. insert MicroSD into your FC3000
3. power on (blank screen)
4. it starts to write stock rom from microsd automatically (take about 10 mins)
5. when screen backlight starts to blink (on ~ off ~ on ~ off...)
6. remove microsd and then reboot your IPS FC3000
#147 Re: 全志 SOC » 有谁知道f1c100s MMC频率如何修改吗 » 2022-06-21 08:40:38
MMC 速度是依據插入的卡別做判斷, 所以不是寫死在DTS裡面, 如果不是特殊應用, Kernel已經做最好速度處理, 以下資訊提供參考:
=> mmc_set_clock() in drivers/mmc/core/core.c
=> mmc_set_ios() in drivers/mmc/host/sunxi-mmc.c
=> sunxi_mmc_set_ios()
=> sunxi_mmc_clk_set_rate()
=> sunxi_mmc_clk_set_rate()
=> clk_round_rate()
如果需要查看MMC設定流程, 善用printk()列印就可以知道~
#148 Re: 司徒开源 » 研究Game Gear Micro掌機的開源可行性 » 2022-06-18 21:36:18
@huanxing
好的, 沒問題~
GitHub資源:https://github.com/steward-fu/ggm/releases
GGM燒錄檔案:https://github.com/steward-fu/ggm/releases/download/v1.0/ggm_linux_sd_20220618.img.7z
目前司徒已經完成Game Gear Micro掌機的第一版Linux系統,雖然改機難度有點偏高,不過,司徒還是相當推薦喜歡改機的愛好者可以動手試試,那種樂趣只有自己體驗過才懂得,而基於開源精神,司徒目前已經把所有源代碼發布在GitHub,分享給有興趣研究的開源愛好者,雖然開源並沒有強制的法律約束力,不過,司徒還是建議大家可以多多分享修改後的源代碼,這種東西或許就是我們可以傳承給下一代的好東西!司徒接著說明刷機過程和源代碼修改的部份,如果對於源代碼沒興趣的玩家,只要看前半部份的說明就可以。
刷機步驟:
1. 下載ggm_linux_sd_20220618.img.7z
2. 解壓縮ggm_linux_sd_20220618.img.7z
3. 將ggm_linux_sd_20220618.img刷到MicroSD
4. 插入MicroSD後,開機就可以看到如下畫面:
按鍵1:官方系統(NAND Flash)
按鍵2:Linux系統(MicroSD)
按下按鍵1就會進入官方系統(NAND Flash)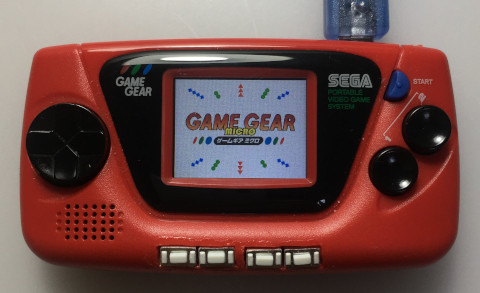
按下按鍵2就會進入Linux系統(MicroSD)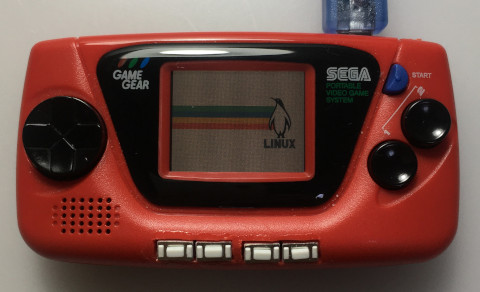

為了致敬SEGA,司徒將桌面拆成四個字母使用:




S:設定(Setting)
進入S後,有兩個設定可以使用,分別是亮度調整以及超頻,使用十字按鍵操作,按下藍色START按鍵會返回桌面
E:實驗(Experiment)
目前尚未完成,這部份之後會用來跑虛擬GPU實驗項目,目前司徒先放閃屏測試程式,按下藍色START按鍵會返回桌面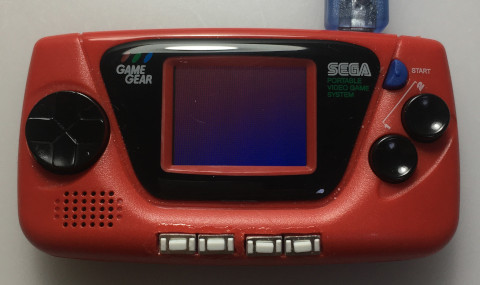

G:GBA模擬器(GBA Emulator)
司徒使用gpsp模擬器進行修改,為了配合GGM的屏幕特性,司徒修改很多東西,而進入GBA模擬器後,如果沒有遊戲檔案(/roms/gba/),則提示如下畫面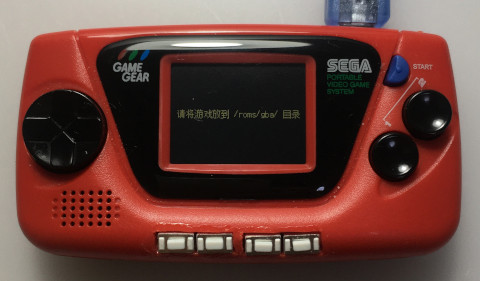
司徒重新改寫了載入遊戲選單,支援中文顯示,字型大小做了適當調整,每次啟動該選單時,會自動停在上次載入遊戲的位置,選單效能也進行優化,不會因為大量遊戲而造成卡頓(如PSP上面那樣),支援LR快速選單跳躍功能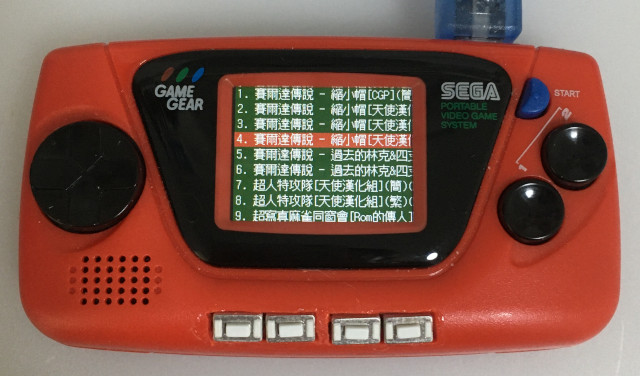
GGM的屏幕顯示區域是240x195,但是,GBA解析度是240x160,因此,多餘的35像素部份,司徒使用GAME BOY ADVANCE字眼顯示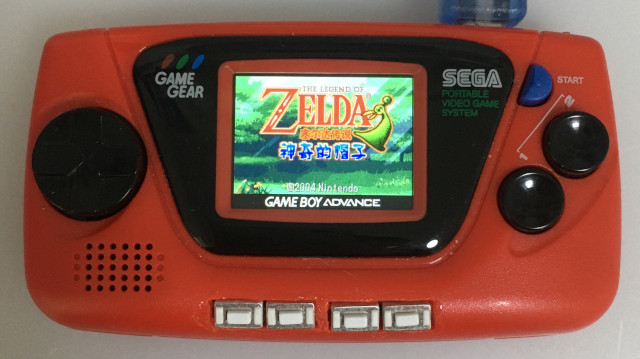
按下藍色START按鍵進入選單(按鍵1退出菜單),司徒也對菜單進行大改寫,只保留司徒覺得想要的部份
司徒也花了相當大量的時間在改善閃屏問題,司徒覺得目前狀態算是相當不錯,畫面顯示也相當柔順,如果玩家還是不滿意,建議超頻使用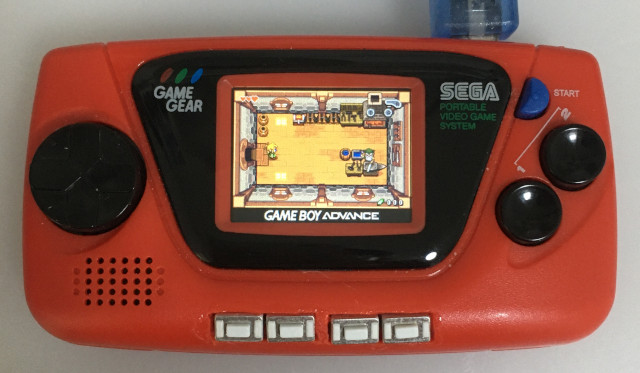
A:Arduboy模擬器(Arduboy Emulator)
目前尚未完成,目前司徒先放聲音以及按鍵測試,按下藍色START按鍵會返回桌面

源代碼修改說明:
UBOOT修改部份如下
在reset時,就先跳轉到boot_menu,為何要在reset一開始就先跳轉呢?因為這是唯一一個可以轉從SPI啟動的時機
    .globl  reset
    .globl  save_boot_params_ret
    .type   save_boot_params_ret,%function

reset:
    bl boot_menu

    /* Allow the board to save important registers */
    b   save_boot_params
boot_menu一開始就會判斷是否從RAM執行(UBOOT Relocate後),如果是,代表UBOOT正在啟動Linux Kernel
boot_menu:
    push {lr}
    tst pc, #0x80000000
    bne boot_linux
如果不是正在啟動Linux Kernel,則顯示開機選單,圖片位於MicroSD 2MB偏移位置
    bl ccu_module_init
    bl dram_module_init
    bl sd_module_init

    ldr r0, =IMG_BASE / 512
    ldr r1, =0x80000000
    ldr r2, =(2 * 1024 * 1024) / 512
    bl load_image
    bl lcd_init

    ldr r4, =PIO_BASE + PE
0:
    ldr r0, [r4, #PIO_DATA]
    tst r0, #(1 << 9)
    beq boot_stock
    tst r0, #(1 << 10)
    beq boot_linux
    b 0b
如果是需要從SPI啟動,則直接呼叫BROM的SPI啟動位址,反之則直接返回原本UBOOT,繼續啟動Linux Kernel的步驟
boot_stock:
    bl lcd_off
    ldr pc, =0xffff4110

boot_linux:
    pop {pc}
GBA模擬器修改部份,菜單源代碼替換成gui4ggm.c,原本舊的gui.c保留不動,SDL部份都改成Double Buffer
rl_screen = SDL_SetVideoMode(240, 240, 16, SDL_SWSURFACE | SDL_DOUBLEBUF);
screen = SDL_CreateRGBSurface(SDL_SWSURFACE, 240 * video_scale, 240 * video_scale, 16, 0, 0, 0, 0);
像素搬移的部份
int x=0, y=0;
uint32_t *s = (uint32_t*)screen->pixels + (30 * 120);
uint32_t *d = (uint32_t*)rl_screen->pixels + (30 * 120);
for(y=0; y<195; y++){
    for(x=0; x<120; x++){
        *d++ = *s++;
    }
}
VSYNC改使用IOCTL方式(司徒已經實作在Framebuffer顯示驅動中)
//delay_us((u64)virtual_frame_count * 50000 / 3 - new_ticks + 2);
if(fbdev > 0){
    int zero=0;
    ioctl(fbdev, FBIO_WAITFORVSYNC, &zero);
}
編譯步驟:
Miyoo編譯開發工具
$ cd
$ wget https://github.com/steward-fu/miyoo/releases/download/v1.0/toolchain.7z
$ 7za x toolchain.7z
$ sudo mv miyoo /opt/
$ export PATH=$PATH:/opt/miyoo/bin
編譯Kernel
$ cd
$ wget https://github.com/steward-fu/ggm/releases/download/src/kernel_20220618.tar.gz
$ tar xvf kernel_20220618.tar.gz
$ cd kernel
$ ./run.sh ggm
編譯UBOOT
$ cd
$ wget https://github.com/steward-fu/ggm/releases/download/src/uboot.tar.gz
$ tar xvf uboot.tar.gz
$ cd uboot
$ ./run.sh /dev/sdX ggm
編譯GBA模擬器
$ cd
$ wget https://github.com/steward-fu/ggm/releases/download/src/gpsp_20220618.tar.gz
$ tar xvf gpsp_20220618.tar.gz
$ cd gpsp/ggm
$ make -j
MicroSD佈局如下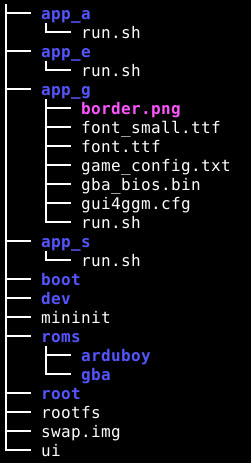
ui:主界面顯示App
app_s:設定App(run.sh)
app_e:實驗App(run.sh)
app_g:GBA模擬器(run.sh)
app_a:Arduboy模擬器(run.sh)
rootfs:系統
mininit:由Kernel呼叫用來掛載rootfs(squashfs系統)
swap.img:虛擬內存(128MB)
音量控制是司徒失算的部份,一般音量轉盤都是直接控制大小聲音,但是GGM掌機並不是這樣設計,所以目前無法控制音量,另一部份則是電池顯示,不完美的部份就留給想要折騰的玩家,司徒接下來會把剩餘的虛擬GPU以及Arduboy模擬器完成
#149 Re: 司徒开源 » 研究FC3000掌機的開源可行性 » 2022-06-18 21:15:19
#150 Re: 司徒开源 » 研究Game Gear Micro掌機的開源可行性 » 2022-06-17 14:08:13
#151 Re: 司徒开源 » 研究Game Gear Micro掌機的開源可行性 » 2022-06-13 10:25:48
#152 Re: 司徒开源 » 研究FC3000掌機的開源可行性 » 2022-06-13 10:21:36
#153 Re: 司徒开源 » 研究Game Gear Micro掌機的開源可行性 » 2022-06-10 13:54:11
仔細觀察那個企鵝的畫面, 不知道大家有無發現,那個畫面有一半是亂掉的, 司徒心想~這應該就是乱马1/2的問題~
為了解乱马1/2的問題, 我調整了下屏的參數, 你測試下如下檔案:
https://github.com/steward-fu/ggm/releases/download/v1.0/ggm_btn_test_20220610.img.7z
#154 Re: 司徒开源 » 研究Game Gear Micro掌機的開源可行性 » 2022-06-09 17:12:56
@huanxing
驚!竟然真的有人改機~我來想想如何搞壞你的機器~
將這個檔案燒錄到MicroSD
https://github.com/steward-fu/ggm/releases/download/v1.0/ggm_lcd_test_20220609.img
看看開機後是不是這個畫面
兩個方向定位問題:
1. 硬件:如果畫面一樣有問題,那應該是焊接短路問題
2. 軟件:如果畫面正常,那是屏的參數有差異
#155 Re: 全志 SOC » lcd如何与tty1相对应? » 2022-06-09 11:40:16
1. Framebuffer 驅動可以將 Console 輸出導到顯示, 但是, 你必須先開啟 Framebuffer Console 的支援才可以
2. Kernel 參數:console=tty1 console=ttyS0,11520, 代表將 Kernel 輸出訊息輸出到虛擬 Console (tty1) 和 UART (ttyS0)
Framebuffer 驅動在啟動時, 就會去綁定 console (有興趣可以去看 do_take_over_console() 流程), 因此, 當你從 Kernel 參數描述 console=tty1 時, 意思代表輸出的訊息會由 Framebuffer 顯示, 當然, tty1 是虛擬 Console, 你可以只寫:console=tty 就可以~
Linux Kernel 底下有一個 Documentation 資料夾, 相關問題裡面幾乎都會描述, 你可以先看一下, 我幫你抓了三個高度的相關文件給你參考:
https://www.kernel.org/doc/html/latest/fb/fbcon.html
https://www.kernel.org/doc/html/latest/driver-api/console.html
https://tldp.org/HOWTO/Remote-Serial-Console-HOWTO/configure-kernel.html
#156 Re: 司徒开源 » 研究Game Gear Micro掌機的開源可行性 » 2022-06-06 21:05:31
#157 Re: 司徒开源 » 研究Game Gear Micro掌機的開源可行性 » 2022-06-05 13:01:24
#158 Re: 司徒开源 » 研究Game Gear Micro掌機的開源可行性 » 2022-06-05 09:27:22
#159 Re: 司徒开源 » 研究FC3000掌機的開源可行性 » 2022-06-04 11:52:42
#160 Re: 司徒开源 » 研究Game Gear Micro掌機的開源可行性 » 2022-06-04 09:52:04
@huanxing
感謝支持~
司徒發覺有必要先把FrameBuffer的東西紀錄下來,當作以後的參考資料,因為GGM的屏是一個很奇耙的設計,解析度是240x240,但是,顯示區域則是240x195,為此,司徒在FrameBuffer驅動做了一些處理,從下圖司徒畫的圖可以看到,F1C100S的TCON0是以240x240做更新處理,DEBE則使用4個Layers做處理,解析度都是240x240,資料輸出給屏的機制是使用TE中斷腳位觸發,因此,保證從F1C100S給的資料不會有Buffer覆蓋問題(閃屏),但是,最後回報給User Application則是240x195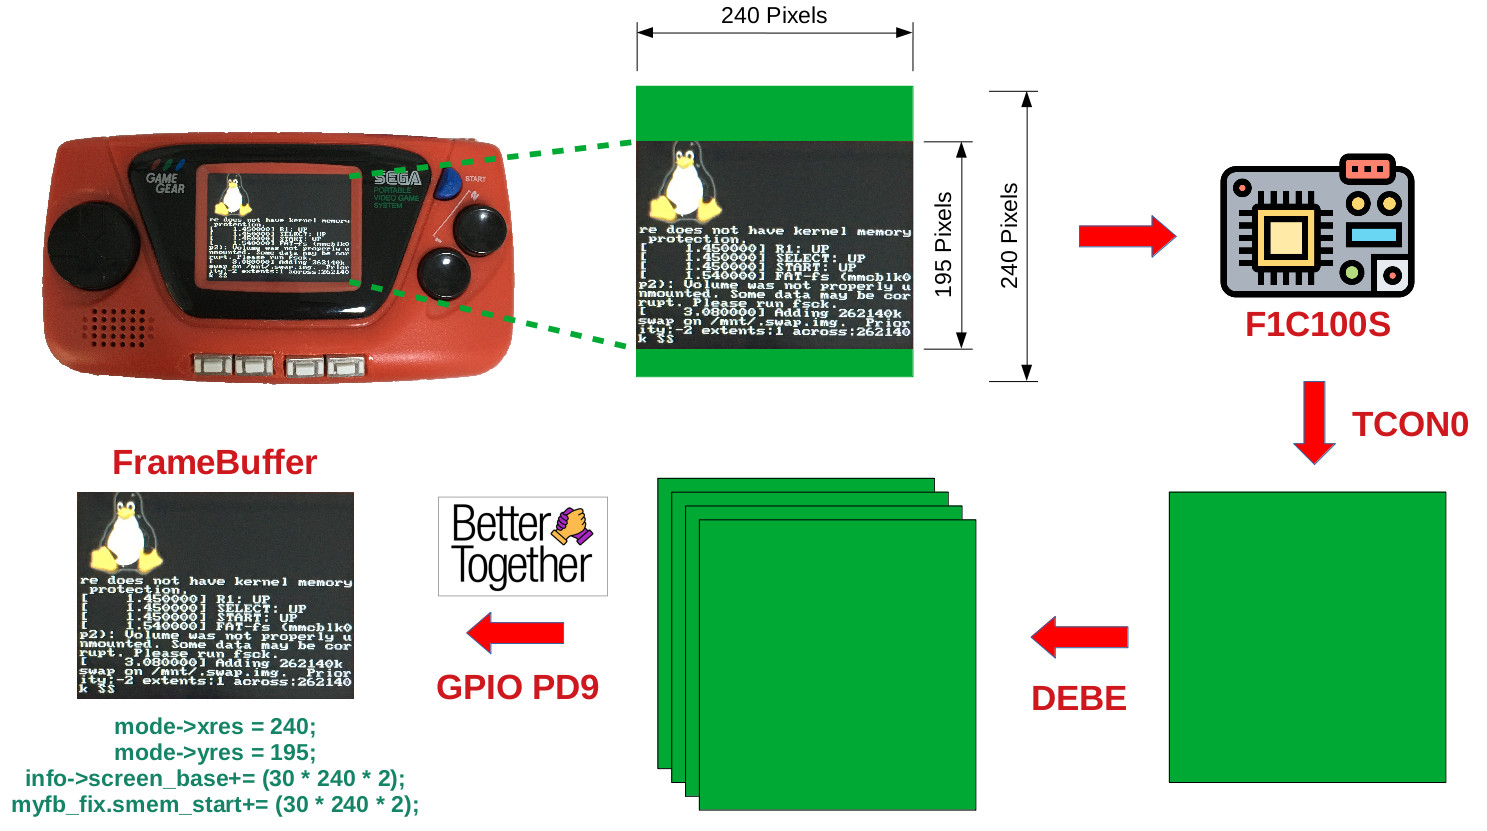
為何是以240x195回報給User Application呢?因為,有效顯示區域只有240x195,為了不讓User Application花費多餘力氣處理偏移問題,這也是為何Linux Logo可以正確顯示在GGM屏幕顯示區域的原因,因此,SDL程式可以直接使用240x195製作
#include <stdio.h>
#include <stdlib.h>
#include <SDL.h>

int main(int argc, char** argv)
{
  SDL_Rect rt={0};
  SDL_Surface* screen;

  SDL_Init(SDL_INIT_VIDEO);
  screen = SDL_SetVideoMode(240, 195, 16, SDL_SWSURFACE);

  SDL_FillRect(screen, &screen->clip_rect, SDL_MapRGB(screen->format, 0xff, 0x00, 0x00));

  rt.x = 50;
  rt.y = 50;
  rt.w = 30;
  rt.h = 30;
  SDL_FillRect(screen, &rt, SDL_MapRGB(screen->format, 0x00, 0xff, 0x00));

  rt.x = 100;
  rt.y = 100;
  rt.w = 50;
  rt.h = 80;
  SDL_FillRect(screen, &rt, SDL_MapRGB(screen->format, 0x00, 0x00, 0xff));

  SDL_Flip(screen);
  SDL_Delay(3000);
  SDL_Quit();
  return 0;
}
編譯好的程式還需要設定如下3個環境變數:
# export SDL_NOMOUSE=1
# export SDL_FB_BROKEN_MODES=1
# export SDL_VIDEODRIVER=fbcon
SDL_NOMOUSE:不需要檢查滑鼠
SDL_FB_BROKEN_MODES:將240x195解析度加入預設清單
SDL_VIDEODRIVER:顯示驅動使用FrameBuffer
完成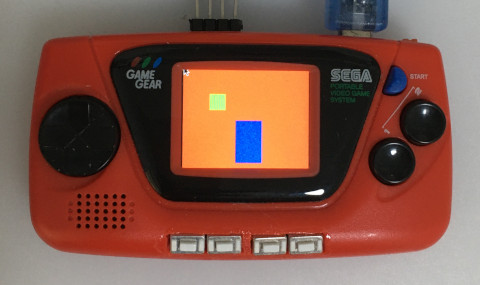
P.S. 對於需要Double Buffer或者Quadruple Buffer則需要自己做Map
#161 Re: 司徒开源 » 研究Game Gear Micro掌機的開源可行性 » 2022-06-03 10:03:23
@xiaoyu356
其實我算錯了,我今年才剛滿18歲~
今天是一年一度的端午佳節,司徒在此祝福大家端午佳節愉快~
司徒潛入深山修行許久,昨天才剛剛出關,回家路上遇到一位老人,老人看著司徒三秒後,繼續玩著他的GGM掌機,司徒這時才恍然大悟,原來還有一個東西尚未完成,於是,司徒使出出奶的力氣,挖糞圖牆,終於,看到一道成功的曙光~
GGM BTN:https://github.com/steward-fu/ggm/releases/download/v1.0/ggm_btn_test_20220603.img.7z
這個項目目前已經接近完成的狀態,司徒先放出按鍵測試燒錄鏡像,供有興趣改機研究的朋友使用,刷入後,開機就可以看到小企鵝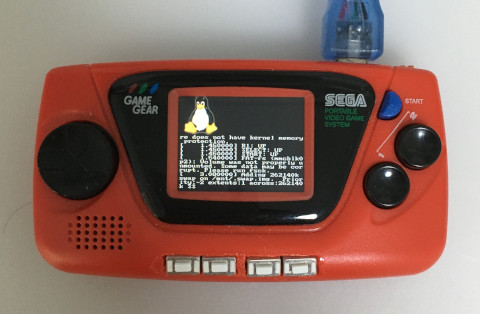
按鍵測試會顯示在屏幕上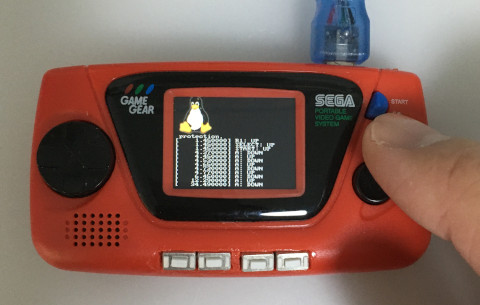
#162 Re: 全志 SOC » 请教,交叉编译出错,找不到ld-linux-armhf.so.3。 » 2022-06-02 11:43:33
#164 Re: 全志 SOC » 请教,交叉编译出错,找不到ld-linux-armhf.so.3。 » 2022-06-01 16:35:04
#165 Re: 全志 SOC » 请教,交叉编译出错,找不到ld-linux-armhf.so.3。 » 2022-06-01 13:58:38
#167 Re: 全志 SOC » 请教,交叉编译出错,找不到ld-linux-armhf.so.3。 » 2022-06-01 11:25:43
#169 Re: 全志 SOC » 请教,交叉编译出错,找不到ld-linux-armhf.so.3。 » 2022-06-01 10:29:23
#170 Re: 司徒开源 » 研究FC3000掌機的開源可行性 » 2022-05-30 10:25:15
@lzgame02
小強~好久不見了~IDA Pro比適合用於靜態分析,OllyDbg比較適合用於Windows PE檔案做動態分析,兩個都是很經典好用,如果可以不要逆向,那是最好,因為太花時間了,對於時間上來說,不見得划算,當然,不得已,那只能逆向了~
@tiopex
Welcome~
I am happy you can find the solution in this website.
The latest revised kernel source has been uploaded by geekchun today.
You can download and test it to see whether it has more better than previous one or not.
Backup source code has been put on: https://github.com/steward-fu/q8/releases/download/v1.1/lcd_q8_tf28qs006a.7z
@geekchun
相當感謝你的幫助,也感謝你開源出來讓大家使用,感謝~
#171 Re: 司徒开源 » 研究FC3000掌機的開源可行性 » 2022-05-29 14:11:00
#172 Re: 司徒开源 » 研究FC3000掌機的開源可行性 » 2022-05-29 11:53:59
The LCD model is same as https://whycan.com/t_6647_2.html#p65793
#173 Re: 司徒开源 » 研究FC3000掌機的開源可行性 » 2022-05-29 11:41:17
@tiopex
May I know LCD works or not on your Q8 handheld after uses the image file provided by geekchun ?
If not work, according to the image you provided, I guess the model should be GC9306 or ST7789.
In your GitHub repo, the initialization code of ST7789 was located in panel_init() in r61520fb.c file.
You can try it firstly.
#174 Re: 司徒开源 » 研究FC3000掌機的開源可行性 » 2022-05-28 23:29:37
#175 Re: 司徒开源 » 研究FC3000掌機的開源可行性 » 2022-05-22 21:31:43
#176 Re: 司徒开源 » 研究FC3000掌機的開源可行性 » 2022-05-19 07:20:41
#177 Re: 司徒开源 » 研究FC3000掌機的開源可行性 » 2022-05-16 12:53:00
#178 Re: 司徒开源 » 研究FC3000掌機的開源可行性 » 2022-05-13 15:47:21
#179 Re: 司徒开源 » 研究FC3000掌機的開源可行性 » 2022-05-13 12:24:00
#180 Re: 司徒开源 » 研究FC3000掌機的開源可行性 » 2022-05-12 22:48:17
@kendling
相當感謝你的實驗,我原本的用意只是想把你機器搞壞,然後,你就自我放棄,想不到你是殺不死的蟑螂,感動上天,馬祖託夢叫司徒需要關心一下~
接著司徒開始嘗試解決噪音問題,首先,標注相關線路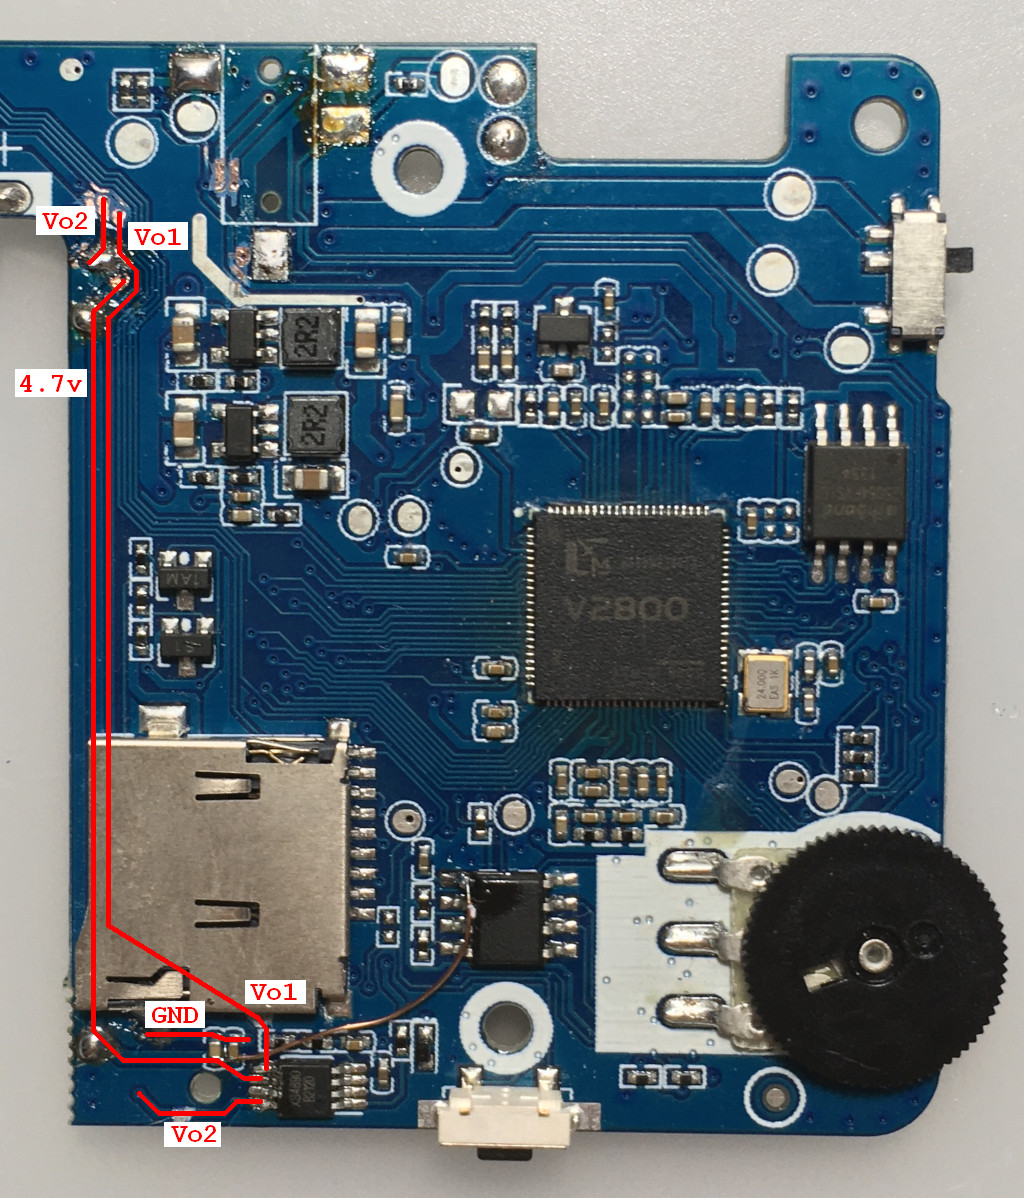
背面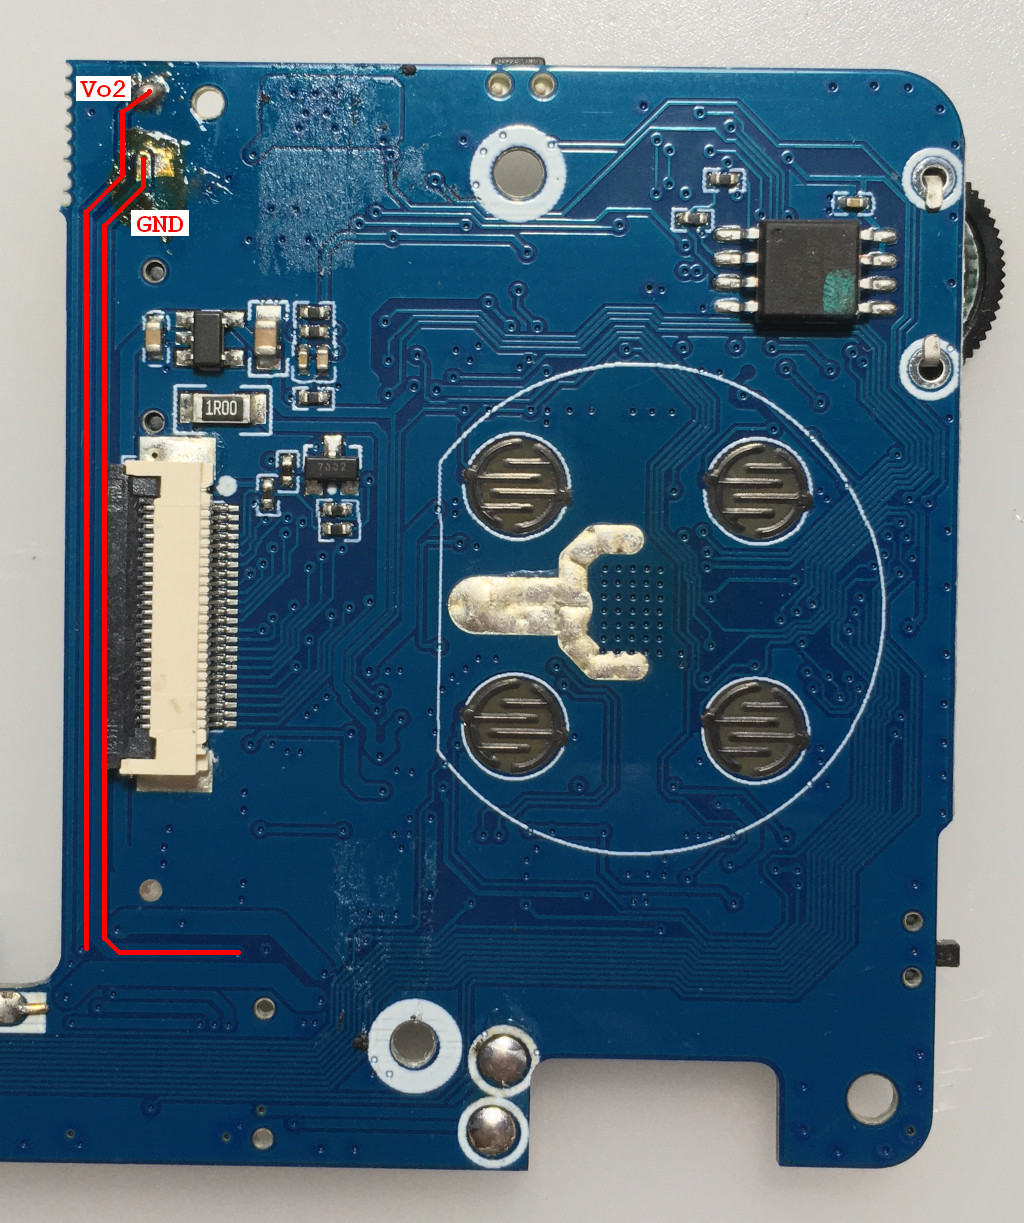
1:Vo2割斷,下半部份接地
2:Vo1割斷,下半部份接地
3:Vo2、Vo1、GND接在一起
4:4.7v割斷
5:4.7v下半部份接地
6:4.7v下半部份接地
7:GND接MicroSD的GND(這個可以省略)
8:Vo1割斷
9:Vo2割斷
LM4890第5腳接喇叭
LM4890第6腳連接到加密IC第一腳位3.3V
LM4890第8腳接喇叭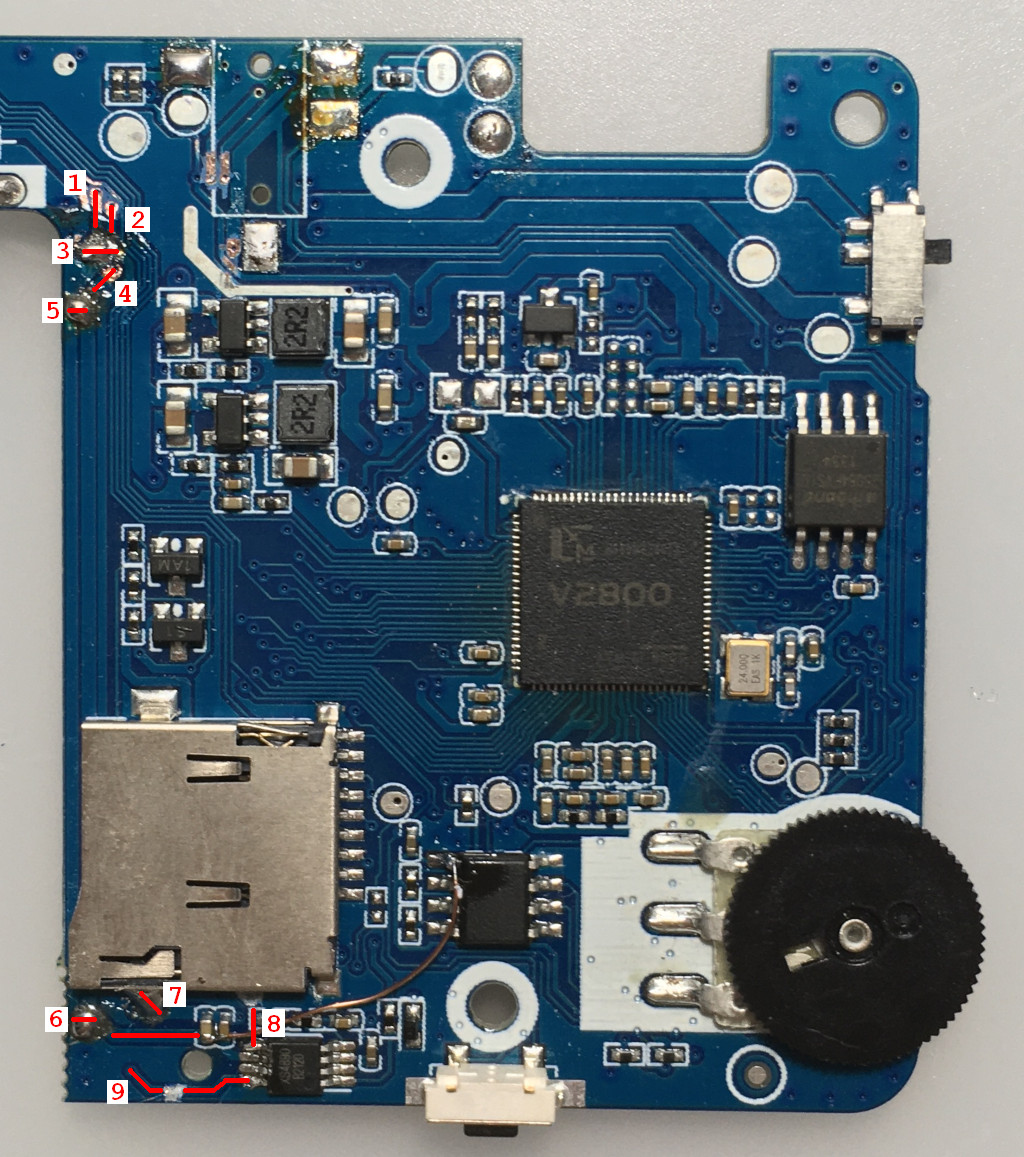
Vo2下半部份接地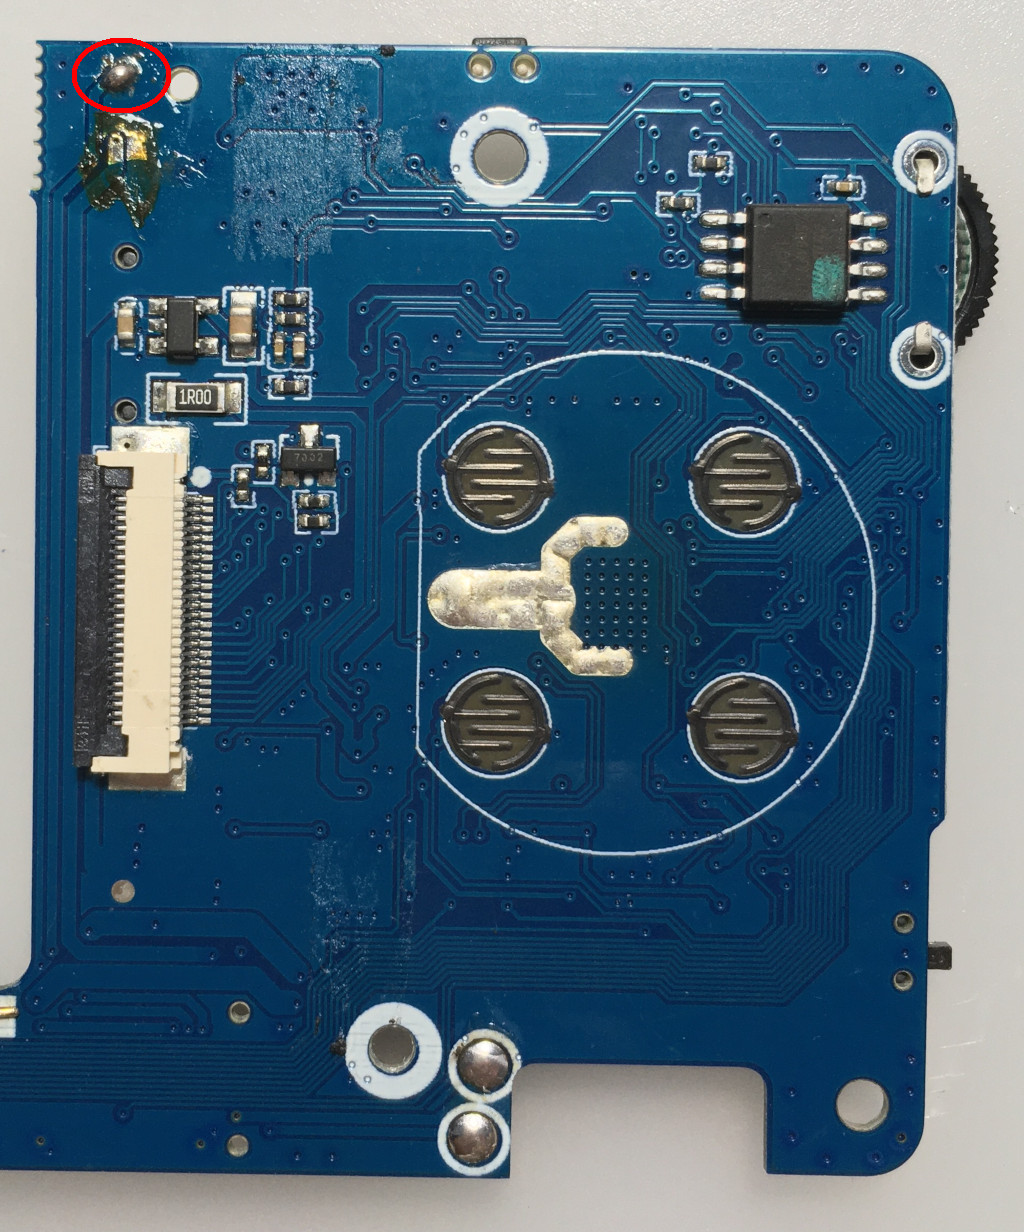
連接示波器量測訊號(需要掛上喇叭負載)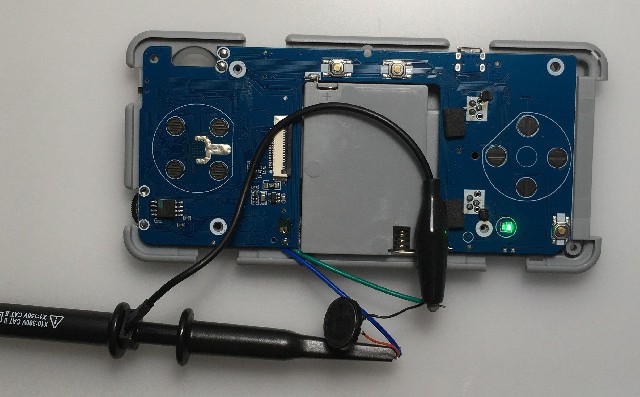
官方系統開機後,量測的喇叭訊號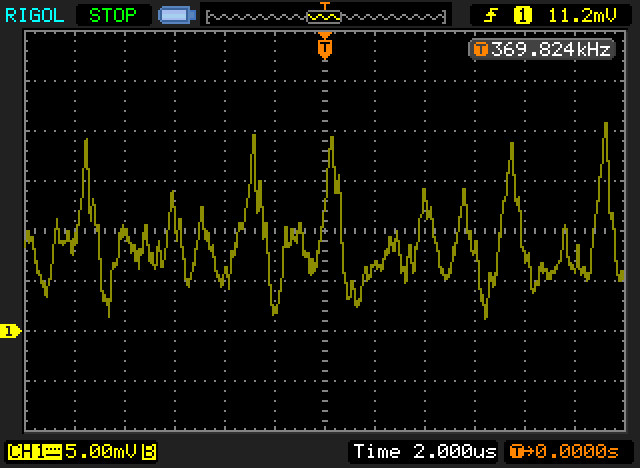
OD系統開機後,量測的喇叭訊號(4.7v割斷,但是沒有接地)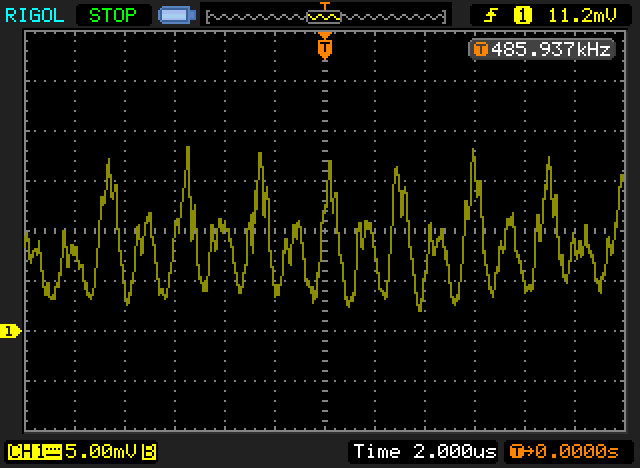
OD系統開機後,量測的喇叭訊號(4.7v割斷,餘線部份接地)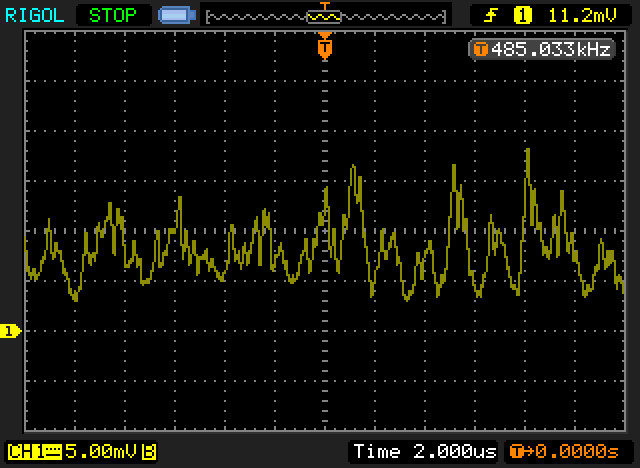
從量測到的訊號,可以發現4.7v那根線是一個關鍵性的影響,因為有一個很穩定影響波形,這個波形應該就是LCD背光震盪電路,因此,玩家也可以先從4.7v割斷開始改造,目前司徒測試改造後的電流聲音,已經跟原廠系統幾乎一樣
#181 Re: 司徒开源 » 研究FC3000掌機的開源可行性 » 2022-05-03 13:17:29
@kendling
感謝你的測試,PCB部分是從功放IC連接到耳機孔,所以耳機孔那端也要斷開,因為餘線還是靠在LCD背光旁邊,會從餘線導回耳機孔,耳機孔是連接到F1C100S的LR音頻腳位~
@k3355792
你這個屏的腳位不對,你可以看下這個原理圖:
https://github.com/steward-fu/pocketgo/releases/download/v1.0/schematic.pdf
#182 Re: 司徒开源 » 研究Game Gear Micro掌機的開源可行性 » 2022-05-03 13:11:42
#183 Re: 司徒开源 » 研究FC3000掌機的開源可行性 » 2022-04-22 20:30:25
#184 Re: 司徒开源 » 研究Game Gear Micro掌機的開源可行性 » 2022-04-21 21:13:37
#185 Re: 司徒开源 » 研究FC3000掌機的開源可行性 » 2022-04-21 21:12:13
#186 Re: 司徒开源 » 研究FC3000掌機的開源可行性 » 2022-04-19 12:40:16
#187 Re: 司徒开源 » 研究FC3000掌機的開源可行性 » 2022-04-18 13:04:02
#188 Re: 司徒开源 » 研究FC3000掌機的開源可行性 » 2022-04-14 13:14:13
#189 Re: 司徒开源 » 研究FC3000掌機的開源可行性 » 2022-04-13 20:09:33
#190 Re: 司徒开源 » 研究FC3000掌機的開源可行性 » 2022-04-13 13:16:30
#191 Re: 司徒开源 » 研究FC3000掌機的開源可行性 » 2022-04-11 18:18:38
#192 Re: 司徒开源 » 研究FC3000掌機的開源可行性 » 2022-04-11 13:04:38
#193 Re: 司徒开源 » 研究FC3000掌機的開源可行性 » 2022-04-10 16:48:50
@fullniz
喇叭應該是找個形狀類似的就可以,小横米的喇叭规格不知道~
@kendling
我新買的FC3000 IPS屏(韌體是V2版本)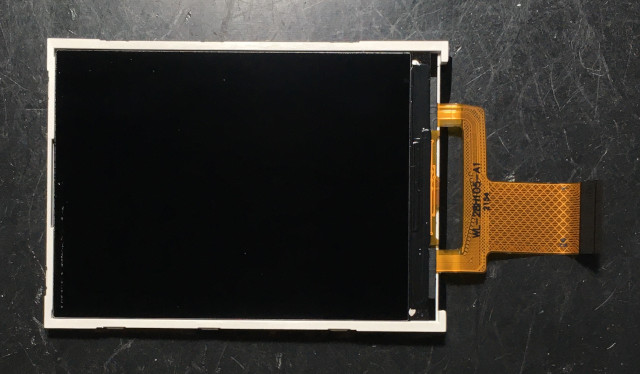
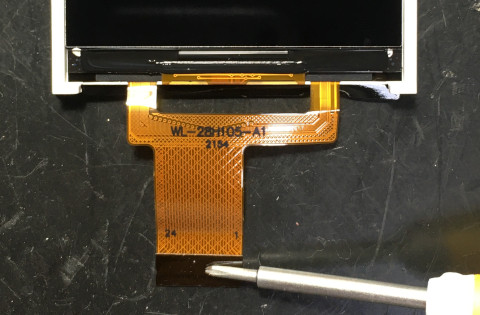
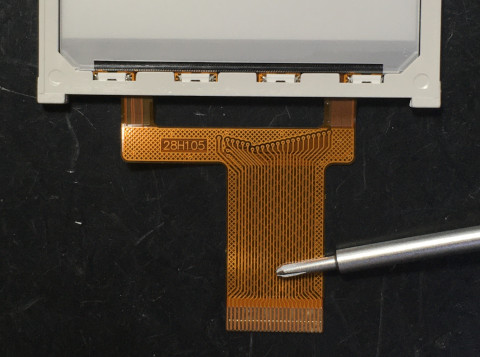
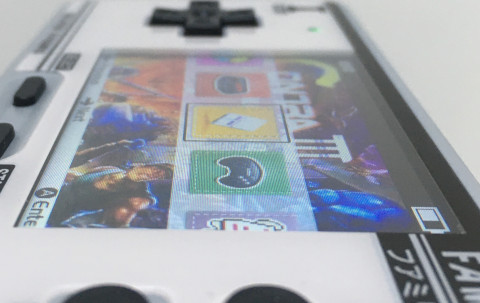
嘗試解析電流聲問題
依據網友測試,發現電流聲音跟LCD背光設定有關係,只要將LCD背光亮度調到100%,就不會有電流聲音,於是,司徒看一下PCB線路,發現聲音輸出是走在LCD背光電路旁邊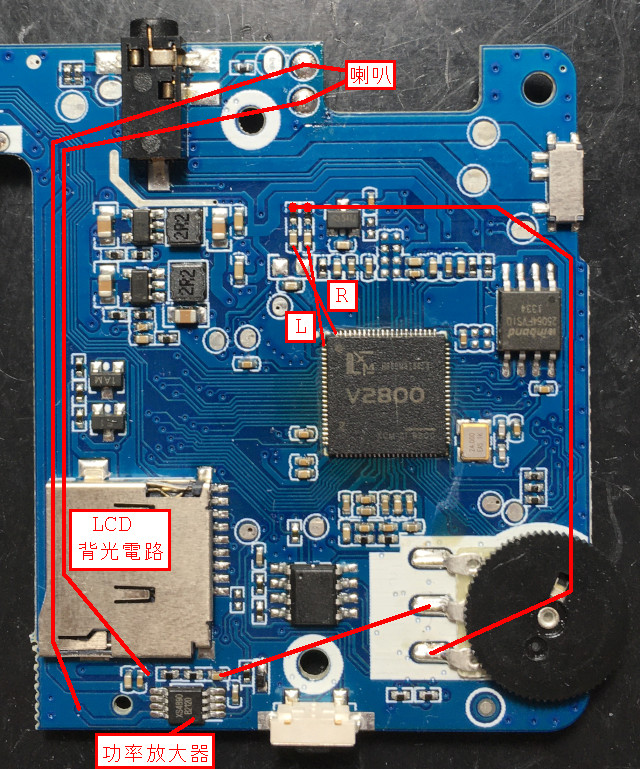
LCD背光使用PWM方式控制,亮度在100%時,輸出固定維持在高電位狀態,因此,不會有干擾的狀況發生,這也是為何原廠系統是固定在此亮度的原因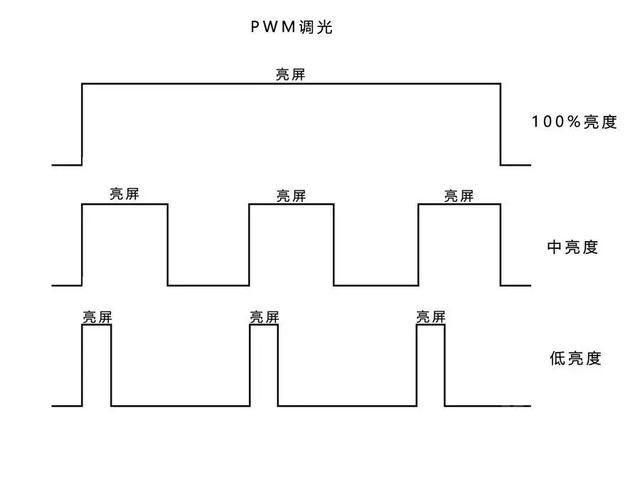
XS4890(LM4890)腳位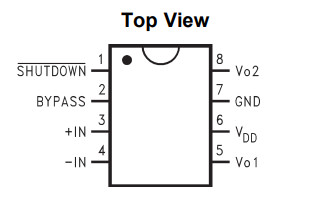
司徒看了一下PCB,發現FC3000使用的電路如下: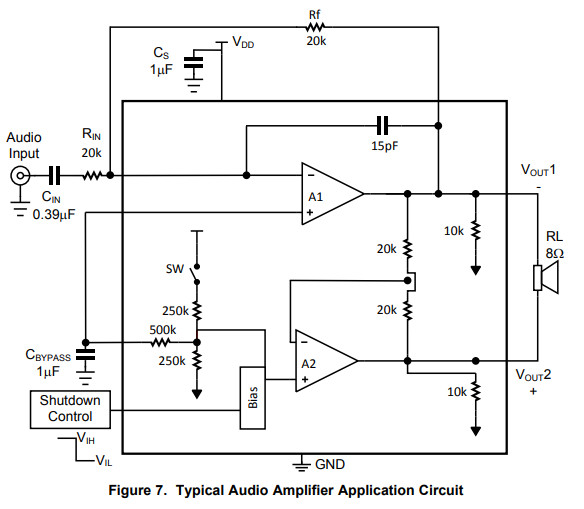
雖然目前看來,應該是輸出遭到EM干擾所造成的問題,不過,如果是輸入源遭到干擾,可以考慮改造成差分放大電路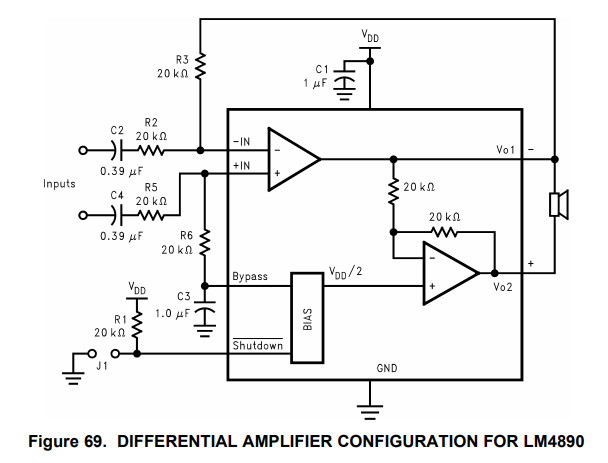
解法,大約有幾個思路:
軟體思考:
1. 可以依據LCD背光的頻率,疊加對應的波形,類似主動式噪音消除法,可以在聲音驅動實作
硬體思考:
1. 將啦叭輸出線路切斷(PCB),使用外圍有接地包覆的線材取代
2. 使用鐵片包覆LCD背光電路並且將鐵片接地
3. 將喇叭移到下方
#194 Re: 全志 SOC » 开源一个关于f1c200s开发板的miyoo扩展板 » 2022-04-07 13:56:57
#195 Re: 全志 SOC » 开源一个关于f1c200s开发板的miyoo扩展板 » 2022-04-07 13:55:48
關於顏色部分,如果要從驅動修改,可以考慮改如下位置
$ vim drivers/video/fbdev/sunivfb.c

 735   writel((5 << 8), iomm.debe + DEBE_LAY0_ATT_CTRL_REG1);
 736   writel((5 << 8), iomm.debe + DEBE_LAY1_ATT_CTRL_REG1);
 737   writel((5 << 8), iomm.debe + DEBE_LAY2_ATT_CTRL_REG1);
 738   writel((5 << 8), iomm.debe + DEBE_LAY3_ATT_CTRL_REG1);
顏色格式如下
#196 Re: 全志 SOC » 开源一个关于f1c200s开发板的miyoo扩展板 » 2022-04-07 13:48:39
#197 Re: 司徒开源 » 研究FC3000掌機的開源可行性 » 2022-04-07 13:19:18
#198 Re: 司徒开源 » 研究FC3000掌機的開源可行性 » 2022-04-07 08:11:03
#199 Re: 司徒开源 » 研究FC3000掌機的開源可行性 » 2022-04-04 11:48:41
#200 Re: 司徒开源 » 研究FC3000掌機的開源可行性 » 2022-04-03 23:54:50
太原小智科技有限责任公司 - 东莞哇酷科技有限公司联合开发
