#1 Re: 司徒开源 » 研究FC3000掌機的開源可行性 » 2023-07-11 21:19:57
8 個月沒來了~竟然還有後續留言, 感謝各位的支持, 如果還想跟司徒繼續惡搞掌機, 可以關注 Gaviar Handheld (小志掌機)
https://bbs.aw-ol.com/topic/3650/gaviar-handheld-%E5%B0%8F%E5%BF%97%E6%8E%8C%E6%A9%9F
感謝~
#2 Re: 司徒开源 » 开源精神值得敬佩,但是你司徒公开po 解FC3000的加密芯片就是可耻,做技术要有底线 » 2022-10-29 21:06:09
這是司徒在挖坑網最後留下的紀錄~
相當感謝暈哥以及支持司徒的所有朋友, 司徒在此跟大家說聲感謝 !
從RetroGame、Miyoo、FC3000一路走來, 得罪相當多的方案商,
我都只想讓掌機可以跑上更多的遊戲或者模擬器, 從來就沒有想要斷人財路的想法,
如果因此得罪, 在此說聲抱歉!
司徒相當感謝周哥、怀旧堂兩位恩人, 成功把司徒從國內圈子送走, 司徒之後不再碰觸任何寨機 !
馬沙機將會在司徒的網站繼續完善, 如果有興趣, 歡迎關注!
日後, 對於有興趣的掌機, 司徒將轉往discord參與討論, 司徒心想那或許是一個比較適合的地方~
感謝大家的支持~
@mstempin
Thanks for supporting me. I think we don't need waste time to discuss this topic further. As I known, FunKey S is preparing the next generation handheld. I would like to see more detailed information about this handheld. Do you have any discord channel for this handheld. If yes, please send invitation to my email (steward.fu@gmail.com). Thanks ~
#3 Re: 司徒开源 » 研究馬沙機的開源可行性 » 2022-10-25 14:31:18
#5 Re: 司徒开源 » 研究FC3000掌機的開源可行性 » 2022-10-25 14:26:53
#6 Re: 司徒开源 » 研究Game Gear Micro掌機的開源可行性 » 2022-10-24 08:31:14
#7 Re: 司徒开源 » 研究FC3000掌機的開源可行性 » 2022-10-22 00:11:13
由於FC3000的MicroSD控制方式是使用SPI介面,因此,缺少幾根JTAG腳位,不然就可以很方便的透過JTAG除錯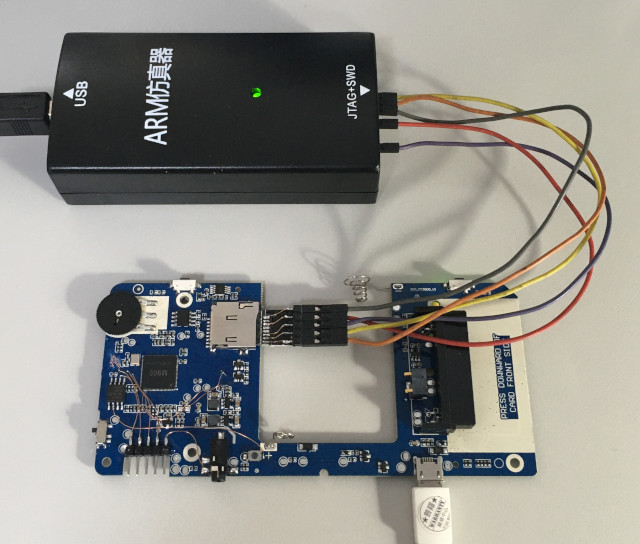
司徒在之前的測試當中,有把對應的JTAG腳位找出來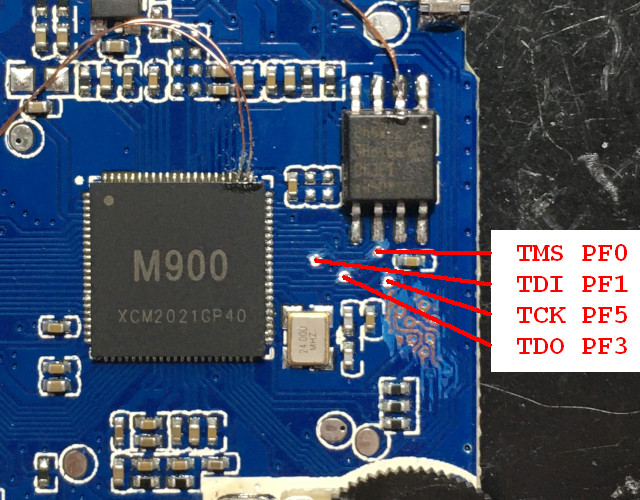
拉出一個專屬的JTAG排針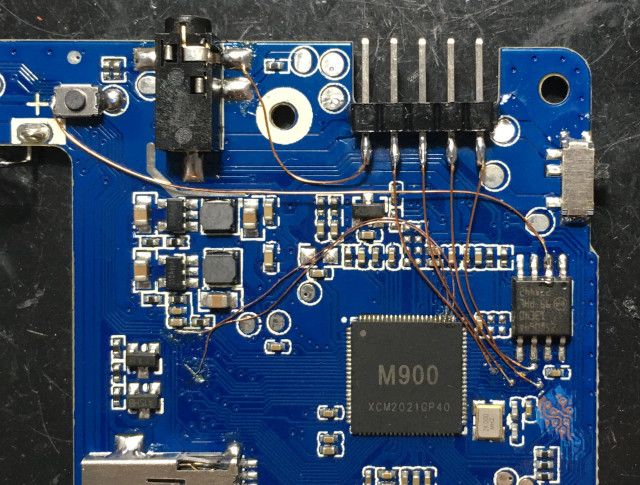
可惜,這樣的方式相當容易跑飛
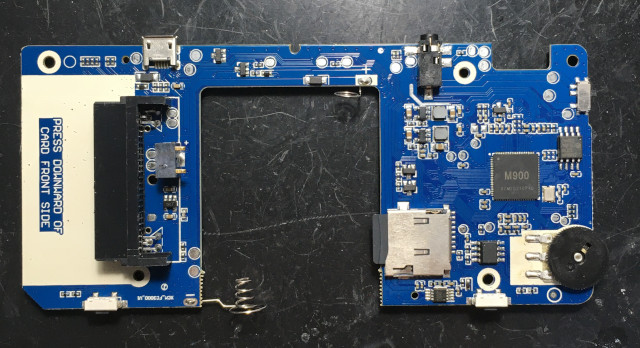
司徒這次並沒有打算在FC3000上面做除錯的動作,而是想找一個完美軀體做借屍還魂測試,因此,首要任務就是需要把加密IC的腳位找出來,加密IC位置如下: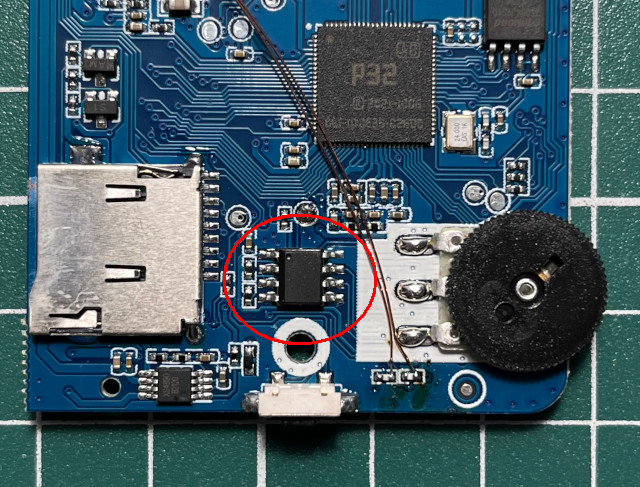
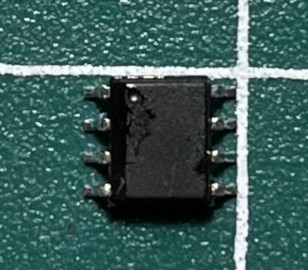
解焊後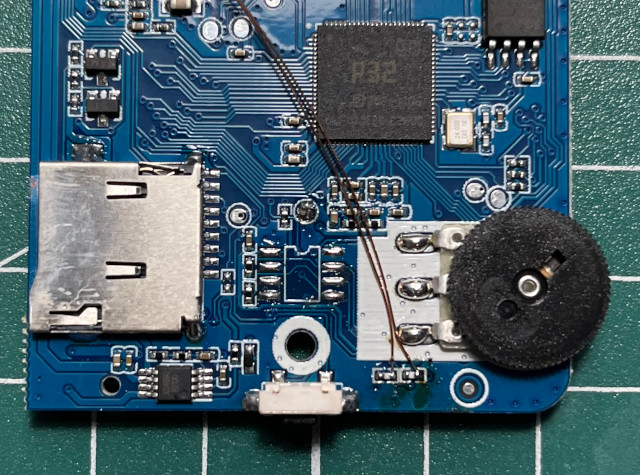
查了一下電路,腳位如下: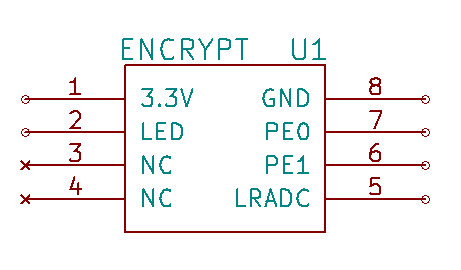
可以看出,現今加密IC競爭激烈,連電池電量指示都需要包進去,真是一個相當辛苦的行業~
為了尋找完美的軀體,司徒再度來到芒果三兄弟的家裡,芒果三兄弟在上次超頻事件中,損失慘重,目前只剩下芒果大哥一人,大哥似乎知道司徒來訪的目的,輕聲細語跟司徒說:不要超頻,其餘都可以~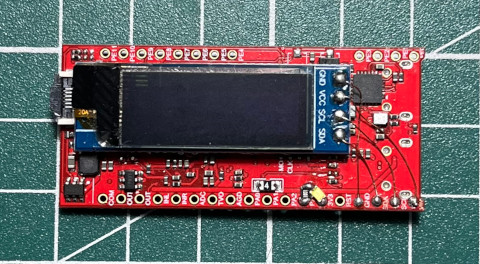
首先拆掉NAND Flash,換成FC3000的W25Q64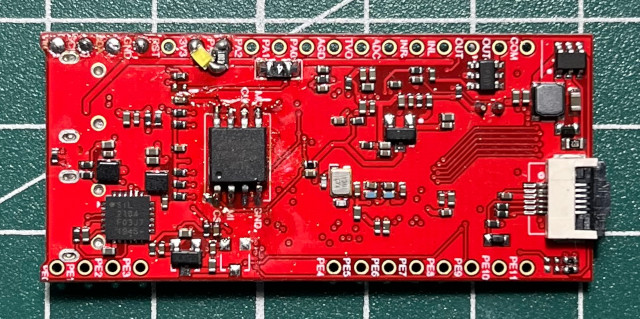
接著接上加密IC、喇叭、按鍵(PE2, 按鍵RIGHT),透過按鍵跟喇叭的測試,可以知道目前是否正常啟動官方系統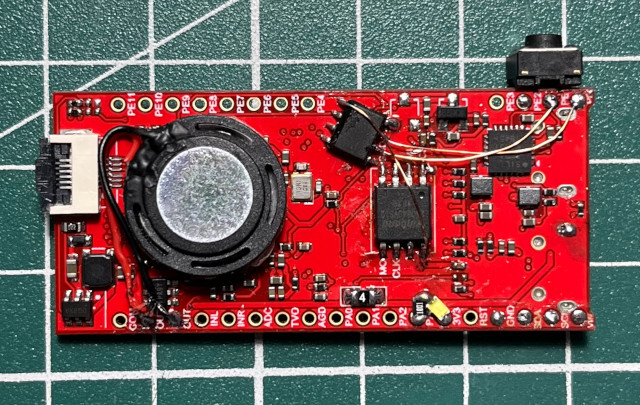
MicroSD就可以接上JTAG進行除錯
#8 Re: 司徒开源 » 研究FC3000掌機的開源可行性 » 2022-10-20 22:09:48
司徒收到許多網友的來信,信中主要的問題,幾乎都是想要在舊版機器(8個模擬器)刷入新版的系統(10個模擬器),因此,發生許多變磚的情況,雖然事後幾乎都有補救回來,不過,這也讓司徒更加好奇並且想要一探官方系統的奧秘,雖然逆向破解需要花費很多時間跟精力,而且失敗機率很高,司徒也不確定是否可以勝任,因此,司徒訂了兩個逆向目標:
1. 找出LCD初始化的地方
2. 繞過加密IC,不需要加密IC也可以進入官方系統
司徒給自己的時間是三個月,三個月後,如果還是無法破解,則以失敗收場,當然,這應該是司徒幫FC3000進行的最後一個實驗項目了,司徒還是希望可以漂亮收場,這樣就可以讓新系統可以刷入舊版的機器!
司徒使用黑箱測試手法測試,發現加密IC有三個使用時機點,分別是:
1. 開機時檢查,如果沒有加密IC,則無限迴圈
2. 進入模擬器時檢查,如果沒有加密IC,則無限迴圈
3. 退出模擬器時檢查,如果沒有加密IC,則等待到加密IC出現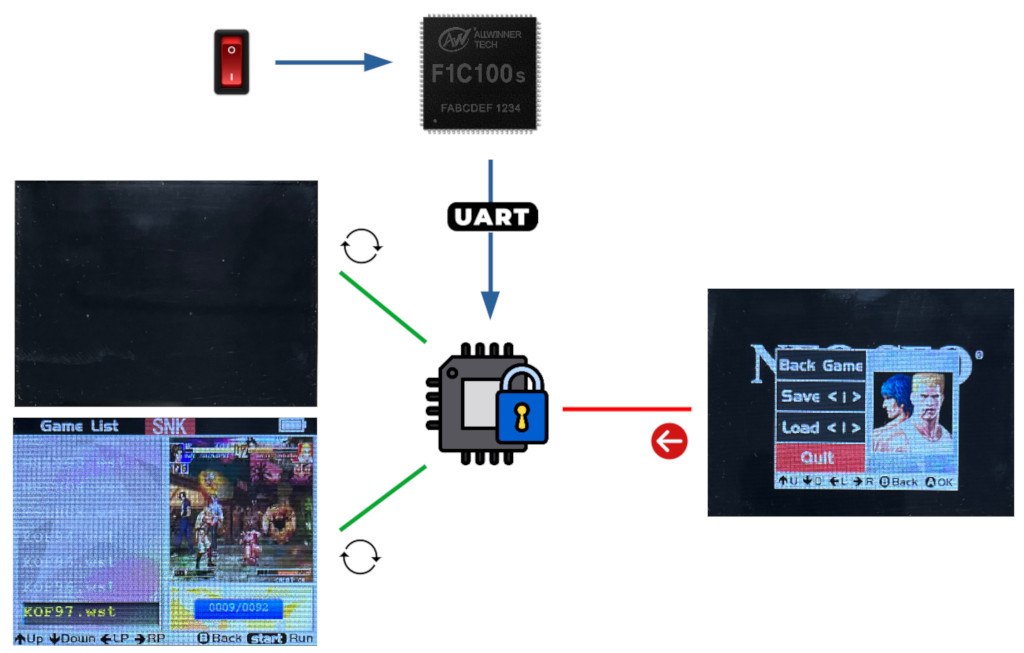
司徒使用黑箱測試後,發現最舊的TFT v1系統和最新的IPS v2系統都是使用同一種加密IC,因此,合理猜測全部的FC3000都是使用同一套加密算法,廠家真是相當貼心~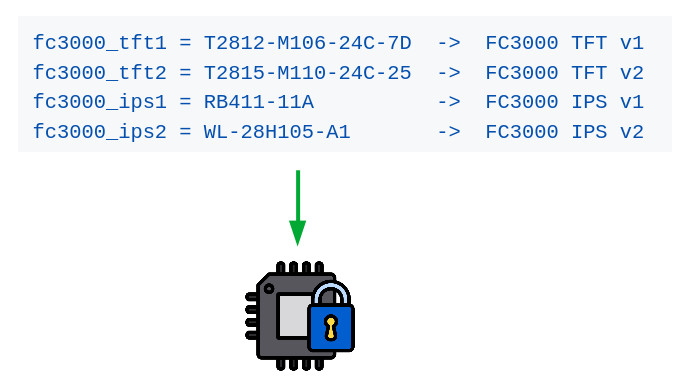
#9 Re: 司徒开源 » 研究Game Gear Micro掌機的開源可行性 » 2022-10-20 07:27:59
@hsinyuwang
不好意思, 之前的訊息沒有看到, 我一起回覆~
key_map的部份, 位於conf.c
 69 #if defined(GP2X) || defined(WIZ)
 70 static char * default_p1control = "UP=J0B0,DOWN=J0B4,LEFT=J0B2,RIGHT=J0B6,A=J0B14,B=J0B13,C=J0B12,D=J0B15,COIN=J0B9,START=J0B8,HOTKEY1=J0B10,HOTKEY2=J0B11";
 71 static char * default_p2control = "";
 72 #elif defined(PANDORA)
 73 static char * default_p1control = "A=K281,B=K279,C=K278,D=K280,START=K308,COIN=K306,UP=K273,DOWN=K274,LEFT=K276,RIGHT=K275,MENU=K32";
 74 static char * default_p2control = "";
 75 #elif defined (DINGUX)
 76 static char * default_p1control = "A=K308,B=K306,C=K304,D=K32,START=K13,COIN=K9,UP=K273,DOWN=K274,LEFT=K276,RIGHT=K275,MENU=K113";
 77 static char * default_p2control = "";
 78 #elif defined (WII)
 79 static char *default_p1control = "A=J0B9,B=J0B10,C=J0B11,D=J0B12,START=J0B18,COIN=J0B17,UPDOWN=J0A1,LEFTRIGHT=J0A0,JOY=J0H0";
 80 static char *default_p2control = "....";
 81 #else
 82 //static char * default_p1control = "A=K119,B=K120,C=K113,D=K115,START=K38,COIN=K34,UP=K273,DOWN=K274,LEFT=K276,RIGHT=K275,MENU=K27";
 83 static char * default_p1control = "A=K306,B=K308,C=K32,D=K304,START=K13,COIN=K27,UP=K273,DOWN=K274,LEFT=K276,RIGHT=K275,MENU=K305";
 84 static char * default_p2control = "";
 85 #endif
P.S. 如果你不知道你的按鍵對應的數值, 你可以在收到SDL_PollEvent()後, 把數值列印出來
關於GL問題, 你可以從config.h直接關閉
 47 /* Define to 1 if you have the <GL/gl.h> header file. */
48 #define HAVE_GL_GL_H 1#10 Re: 司徒开源 » 研究FC3000掌機的開源可行性 » 2022-10-18 22:05:38
#11 Re: 司徒开源 » 研究FC3000掌機的開源可行性 » 2022-10-18 12:58:04
@neotendo
Recently, I got the dumpped firmware from Kike for FC3000 TFT v1 handheld. His FC3000 is bricked due to flashing wrong firmware. Fortunately, he has another FC3000 that is the same spec as the bricked FC3000. According to the information I got from Kike, his FC3000 should be the same as yours. Here is the way how to restore your FC3000, you can try it:
Step 1: download https://github.com/steward-fu/fc3000/releases/download/v1.0/T2812-M106-24C-7D_restore.img
Step 2: flash T2812-M106-24C-7D_restore.img into new MicroSD
Step 3: insert MicroSD into the bricked FC3000 and then power on (white screen or black screen)
Step 4: wait for 10 mins and then power off FC3000
Step 5: remove MicroSD and then power on FC3000
Thanks Kike's help to dump the firmware to us ~
#12 Re: 司徒开源 » 研究FC3000掌機的開源可行性 » 2022-10-17 16:10:54
#13 Re: 司徒开源 » 研究FC3000掌機的開源可行性 » 2022-10-16 14:35:14
#14 Re: 司徒开源 » 研究FC3000掌機的開源可行性 » 2022-10-14 20:40:01
Here is the invitation link for FC3000 handheld: https://discord.gg/cqpK2XjXfv
#15 Re: 司徒开源 » 研究FC3000掌機的開源可行性 » 2022-10-14 19:42:10
Discord for FC3000 handheld: https://discord.com/channels/529983248114122762/1030443921601462272
If you have any question or problem, you can post on whycan forum or go to discord.
如果有問題要討論, 可以貼在此帖或者去Discord討論~
#16 Re: 司徒开源 » 研究FC3000掌機的開源可行性 » 2022-10-14 14:37:48
#17 Re: 司徒开源 » 研究FC3000掌機的開源可行性 » 2022-10-14 14:35:17
#18 Re: 司徒开源 » 研究FC3000掌機的開源可行性 » 2022-10-14 08:48:10
#19 Re: 司徒开源 » 研究FC3000掌機的開源可行性 » 2022-10-14 08:47:01
#20 Re: 司徒开源 » 研究FC3000掌機的開源可行性 » 2022-10-14 08:43:46
Tool for keypad testing
Source code: https://github.com/steward-fu/goodies
Run on PC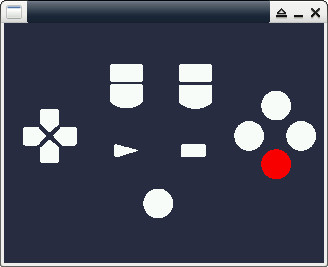
Run on FC3000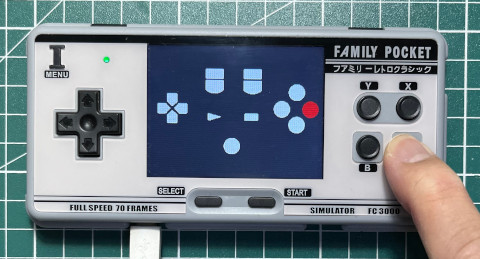
prebuilt binary: keytest_20221014.zip
#21 Re: 司徒开源 » 研究FC3000掌機的開源可行性 » 2022-10-13 15:58:50
#22 Re: 司徒开源 » 研究FC3000掌機的開源可行性 » 2022-10-13 07:17:20
@neotendo
Yes, this tool is only for dumping stock rom.
Here is the dump tool you can use to dump firmware from another FC3000:
https://github.com/steward-fu/fc3000/releases/download/v1.0/ips_fc3000_dump_0627_1.img.7z
Step 1: extract ips_fc3000_dump_0627_1.img.7z
Step 2: flash image into MicroSD as the following command
$ sudo dd if=ips_fc3000_dump_0627_1.img of=/dev/sdX bs=1MStep 3: put this MicroSD into another FC3000 and then power on
Step 4: wait for 10 minutes and then power off
Step 5: provide v1rom.img back to me and I will create restore tool for you
#23 Re: 司徒开源 » 研究FC3000掌機的開源可行性 » 2022-10-12 09:22:01
#24 Re: 司徒开源 » 研究FC3000掌機的開源可行性 » 2022-10-11 15:21:07
#25 Re: 司徒开源 » 研究FC3000掌機的開源可行性 » 2022-10-11 10:26:32
@neotendo
Thanks for your efftors and welcome all of friends from the 4PDA.RU forum ![]()
Here is the new commit for testing
https://github.com/steward-fu/bootloader/commit/4a4a286c35db6e1ab2dba0a791912dd100f74c3d
The provided image works on my FC3000, thanks neotendo

#26 Re: 司徒开源 » 研究FC3000掌機的開源可行性 » 2022-10-09 21:50:26
#27 Re: 司徒开源 » 研究FC3000掌機的開源可行性 » 2022-10-09 12:45:48
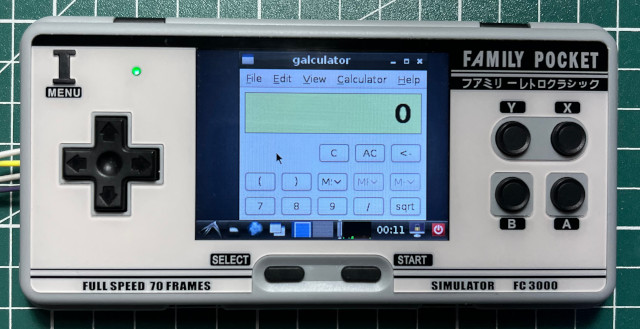
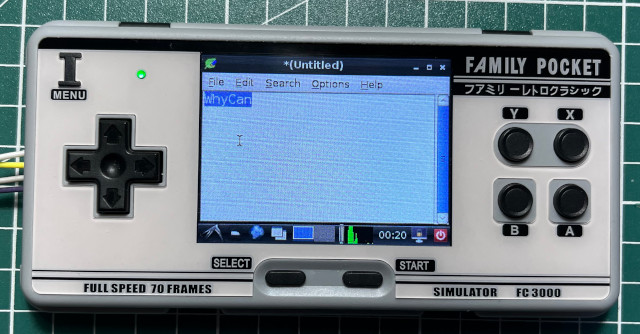
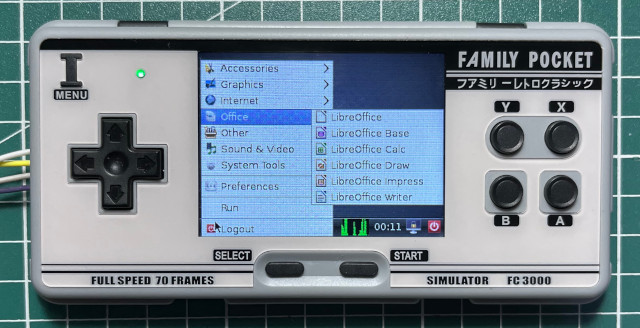
Debian 7 (Wheezy) on FC3000 Handheld
司徒最後決定使用 Debian 7 (Wheezy),因為跑在 F1C100S ARM9 CPU:486MHz, RAM:32MB, SWAP:512MB 下,速度算是可以接受,當然,如果更換成 F1C200S(RAM 64MB) 會更好,CPU超頻後,整體運作速度應該也會更順暢,司徒把製作步驟寫下來,如果玩家想更換成 Debian 10 (Buster) 系統就可以自己更換,當然,可以在 FC3000 掌機上編譯、執行程式,是司徒重新購買 FC3000 的主要目標,很高興這個目標可以達成,因此,在此分享成果給大家~
Kernel: https://github.com/steward-fu/kernel/tree/f1c100s_fc3000_linux-4.14.0_debian
Bootloader: https://github.com/steward-fu/bootloader/tree/f1c100s_fc3000_uboot-2018.01
製作好的燒錄檔案(root:root, user:user): https://github.com/steward-fu/fc3000/releases/download/v1.0/fc3000_ips2_debian7.img.7z
製作Debian系統:
$ cd
$ sudo apt-get install binfmt-support qemu qemu-user-static debootstrap
$ sudo debootstrap --arch armel --foreign wheezy wheezy http://archive.debian.org/debian/
$ sudo chroot wheezy /debootstrap/debootstrap --second-stage

$ sudo mount -o bind /dev wheezy/dev
$ sudo mount -o bind /sys wheezy/sys
$ sudo mount -o bind /proc wheezy/proc

$ sudo chroot wheezy
# passwd
# adduser user
# nano /etc/apt/sources.list
    deb http://deb.debian.org/debian buster main contrib non-free
    deb http://deb.debian.org/debian buster-updates main contrib non-free
    deb http://deb.debian.org/debian buster-backports main contrib non-free
    deb http://deb.debian.org/debian-debug/ buster-debug main contrib non-free

# apt-get update
# apt-get install lxde obconf openbox lxdm lxde-common xbindkeys xdotool -y
# nano home/user/.xbindkeysrc
    "xdotool mousemove_relative 10 0"
        Right
    "xdotool mousemove_relative -- -10 0"
        Left
    "xdotool mousemove_relative 0 -10"
        Up
    "xdotool mousemove_relative 0 10"
        Down

    "xdotool click 1"
        m:0x0 + c:65

    "xdotool click 3"
        m:0x1 + c:50

# nano /etc/lightdm/lightdm.conf
    autologin-user=user

# nano /etc/inittab
    1:2345:respawn:/sbin/getty -L ttyS0 115200 vt100

# nano /etc/rc.local
    /usr/bin/xbindkeys -f /home/user/.xbindkeysrc

# nano /etc/fstab
    /swap.img none  swap  sw  0  0

# dd if=/dev/swap.img of=/swap.img bs=1M count=512
# mkswap /swap.img
# exit

$ sudo umount wheezy/dev
$ sudo umount wheezy/sys
$ sudo umount wheezy/proc
編譯Kernel
$ cd
$ wget https://github.com/steward-fu/miyoo/releases/download/v1.0/toolchain.7z
$ 7za x toolchain.7z
$ sudo mv miyoo /opt

$ git clone https://github.com/steward-fu/kernel
$ cd kernel
$ git checkout f1c100s_fc3000_linux-4.14.0_debian
$ ARCH=arm make suniv-debian_defconfig
$ ./tools/make_suniv.sh fc3000_ips2
準備一張MicroSD並分割成如下: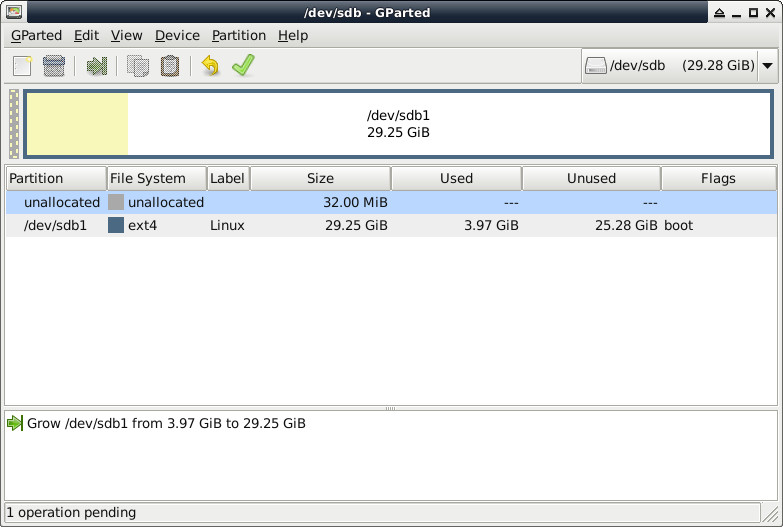
編譯Bootloader並且燒錄到MicroSD
$ cd
$ git clone https://github.com/steward-fu/bootloader
$ cd bootloader
$ git checkout f1c100s_fc3000_uboot-2018.01
$ ARCH=arm make suniv_defconfig
$ ./tools/make_suniv.sh /dev/sdX fc3000
P.S. 如果不想手動自己安裝,可以使用司徒打包好的燒錄檔案(fc3000_ips2_debian7.img.7z, root:root, user:user)
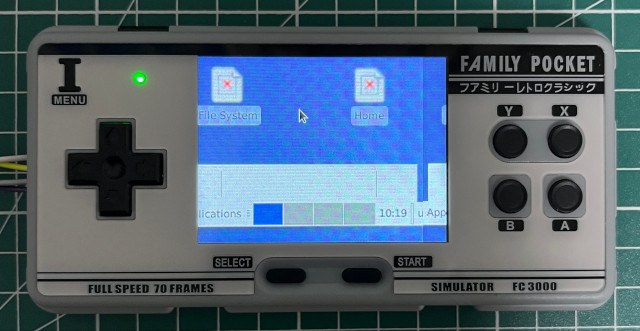
系統穩定時間大約需要三分鐘(F1C100S CPU:486MHz, RAM:32MB, SWAP:512MB)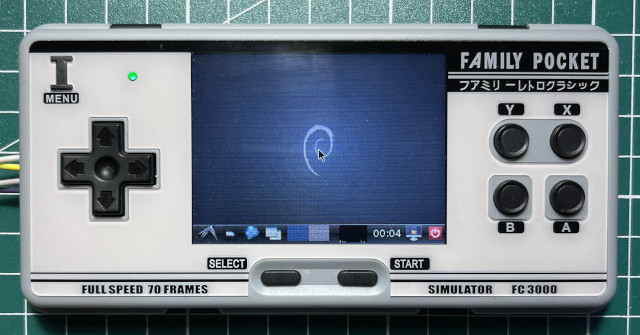
記得連接FC3000 UART,這樣就可以有Terminal操作的功能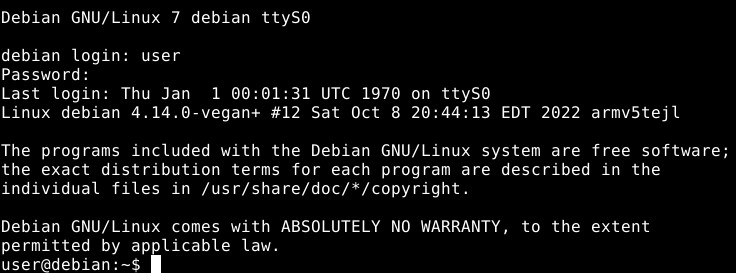
按鍵映射(滑鼠左、右鍵需要長按大約3秒再放開)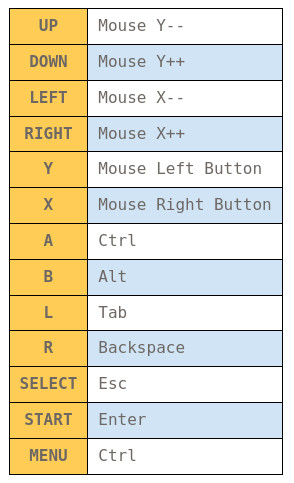
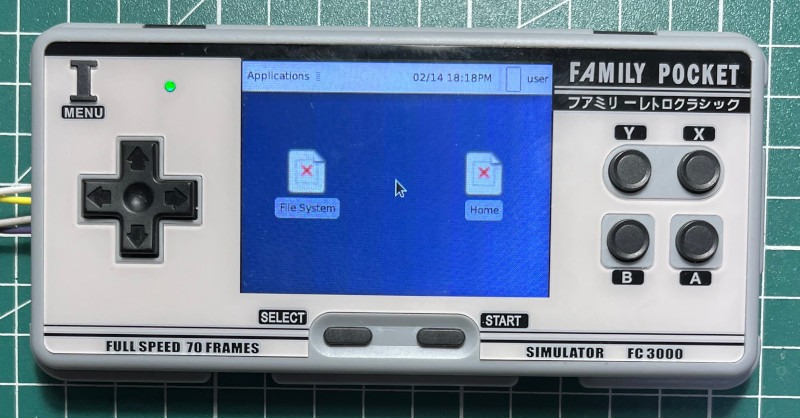
司徒打包的燒錄檔案有包含許多編譯器套件,這樣就可以直接在FC3000上面做開發的工作,首先,試試Hello, world!
$ cd
$ gcc hello.c -o hello
$ ./hello
    hello, world!
接著試試SDL 1.2(sdl.c)
#include <stdio.h>
#include <stdlib.h>
#include <SDL.h>

int main(int argc, char** argv)
{
    SDL_Rect rt={0};
    SDL_Surface* screen;

    SDL_Init(SDL_INIT_VIDEO);
    screen = SDL_SetVideoMode(150, 150, 16, SDL_HWSURFACE);

    SDL_FillRect(screen, &screen->clip_rect, SDL_MapRGB(screen->format, 0xff, 0x00, 0x00));

    rt.x = 0;
    rt.y = 0;
    rt.w = 30;
    rt.h = 30;
    SDL_FillRect(screen, &rt, SDL_MapRGB(screen->format, 0x00, 0xff, 0x00));

    rt.x = 50;
    rt.y = 50;
    rt.w = 30;
    rt.h = 40;
    SDL_FillRect(screen, &rt, SDL_MapRGB(screen->format, 0x00, 0x00, 0xff));

    SDL_Flip(screen);
    SDL_Delay(3000);
    SDL_Quit();
    return 0;
}
編譯SDL 1.2並且執行
$ export DISPLAY=:0
$ gcc sdl.c -o sdl -lSDL -I/usr/include/SDL
$ ./sdl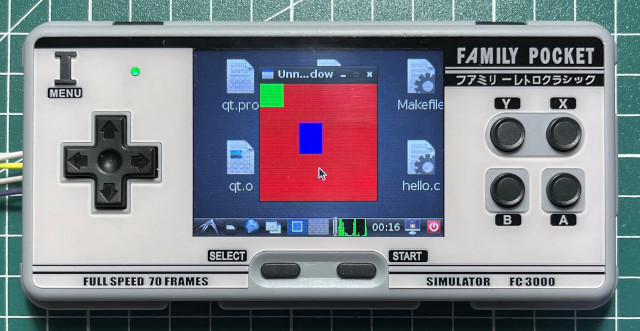
接著試試GTK(gtk.c)
#include <gtk/gtk.h>

int main(int argc, char** argv)
{
    GtkWidget *win;
    GtkWidget *label;

    gtk_init(&argc, &argv);
    win = gtk_window_new(GTK_WINDOW_TOPLEVEL);

    label = gtk_label_new("Hello, world!");
    gtk_container_add(GTK_CONTAINER(win), label);

    gtk_widget_show_all(win);
    g_signal_connect(win, "destroy", G_CALLBACK(gtk_main_quit), NULL);
    gtk_main();
    return 0;
}
編譯GTK並且執行
$ export DISPLAY=:0
$ gcc -o gtk gtk.c `pkg-config --libs --cflags gtk+-2.0`
$ ./gtk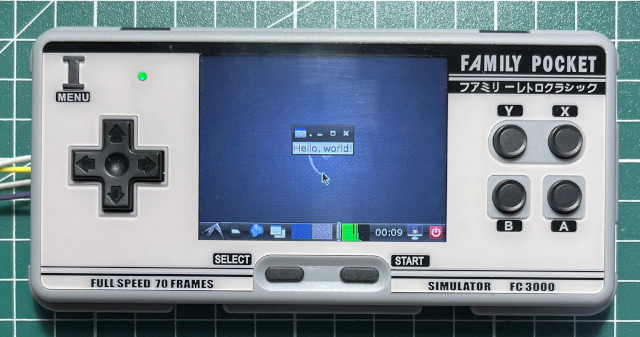
接著試試QT(qt.cpp)
#include <QApplication>
#include <QWidget>
#include <QLabel>

int main(int argc, char** argv)
{
    QApplication app(argc, argv);
    QWidget *win;
    QLabel *label;

    win = new QWidget;
    label = new QLabel("Hello, world!", win);
    win->show();
    return app.exec();
}
qt.pro
TARGET = qt
SOURCES = qt.cpp
編譯QT並且執行
$ export DISPLAY=:0
$ qmake
$ make
$ ./qt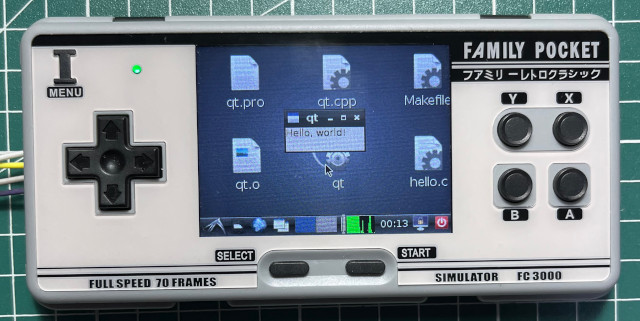
#28 Re: 司徒开源 » 研究FC3000掌機的開源可行性 » 2022-10-09 00:06:42
#29 Re: 司徒开源 » 研究FC3000掌機的開源可行性 » 2022-10-08 22:48:06
#30 Re: 司徒开源 » 研究FC3000掌機的開源可行性 » 2022-10-08 19:24:17
#31 Re: 司徒开源 » 研究FC3000掌機的開源可行性 » 2022-10-07 21:00:43
@zjzixuan
你需要先知道屏的參數規格,接著才知道如何做下一步,屏的驅動在這邊:https://github.com/steward-fu/kernel/blob/f1c100s_fc3000_linux-4.14.0/drivers/video/fbdev/sunivfb.c
#32 Re: 司徒开源 » 研究FC3000掌機的開源可行性 » 2022-10-07 08:20:50
@neotendo
Thanks for your testing. It is different with other FC3000
660     // FC3000 V1 TFT (Old Version)
661     //
662     else if(suniv_variant == 3) {
663         I_UP    = ((32 * 5) + 0);
664         I_DOWN  = ((32 * 5) + 5);
665         I_LEFT  = ((32 * 5) + 4);
666         I_RIGHT = ((32 * 4) + 2);
667         //(32*4) 0,1,(2=RIGHT),(3=SELECT),(4=START),(5=A),(7=B),(8=Y),(9=X),(6=hangboot)
668         //(32*0) 1,2 = Shutdown menu!?, (3=MENU)
669         I_START = ((32 * 4) + 4);
670         I_SELECT = ((32 * 4) + 3);
TFT 1 => SELECT button, PE3
Others => SELECT button, (PE12=0) PA1
Here is the commit: https://github.com/steward-fu/bootloader/commit/123766b9e1b6639cfd9fe0fff16ae0a21d0172f6
#33 Re: 司徒开源 » 研究FC3000掌機的開源可行性 » 2022-10-07 08:17:07
@neotendo
Since the post message MUST be reviewed by administrator before display on this forum, so, some messages were overlooked and disorder. ![]() For SaveGame/LoadGame, I will check these issues later. For your solutions (remount, one partition, dirty bit), I think it is okay except dirty bit because we don't need check it. To check dirty bit causes long time waiting for boot. Even if dirty bit turns on, it is not easy to recovery because MicroSD is not a safe storage device. I mean it is hard to recovery back if data is corrupted. For one partiton, in some bootloaders that don't fully implement FAT32 file system, it only reads the first 32 files from FAT32 Table. So, copy order is very important. This is why I prefer 2 partitons in MicroSD. It is just for compatible problem. For RW, in general, we put important system files in first partition and mount as read only in order to prevent data from damaging because MicroSD is not safy storage device. For X11, the progress is 0% so far.
For SaveGame/LoadGame, I will check these issues later. For your solutions (remount, one partition, dirty bit), I think it is okay except dirty bit because we don't need check it. To check dirty bit causes long time waiting for boot. Even if dirty bit turns on, it is not easy to recovery because MicroSD is not a safe storage device. I mean it is hard to recovery back if data is corrupted. For one partiton, in some bootloaders that don't fully implement FAT32 file system, it only reads the first 32 files from FAT32 Table. So, copy order is very important. This is why I prefer 2 partitons in MicroSD. It is just for compatible problem. For RW, in general, we put important system files in first partition and mount as read only in order to prevent data from damaging because MicroSD is not safy storage device. For X11, the progress is 0% so far. ![]() For TVout, I have no idea but there are some related settings in U-Boot source code. Maybe, it is a good reference for you.
For TVout, I have no idea but there are some related settings in U-Boot source code. Maybe, it is a good reference for you.
#34 Re: 司徒开源 » 研究FC3000掌機的開源可行性 » 2022-10-06 19:11:29
@neotendo
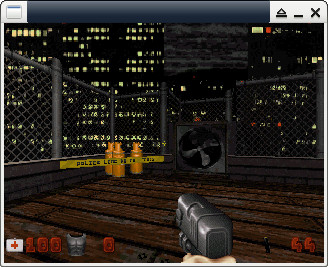
Yes, user prefer flashing image over unzipping these files. I will not create any tool for this purpose because it is a little more complex and depends on many binary files we need upload upto another repo. So far, it seems eduke32 is running pretty well on FC3000 after build with new source code. I think it is time to study something I am interested on. If you have any question and would like to discuss with us, it is very welome. And thanks for your contributions on FC3000 ! ![]()
#35 Re: 司徒开源 » 研究FC3000掌機的開源可行性 » 2022-10-06 10:48:22
@ZOMBIE
感謝分享~
@neotendo
Yes, I repacked the files you provided as fc3000_ips2_dualboot.img.7z, which also include stock games.
fc3000_ips2_dualboot.img.7z: https://drive.google.com/file/d/1O_4df4wM6qx2zPaP7eXzVJiqDsXbPa9T/view?usp=sharing
May I know where I can download the source code of eduke32_20131102-4128 ? By the way, after tried the eduke32.7z you provided on FC3000, it seems all of issues got fixed except for SaveGame and LoadGame ?
#36 Re: 司徒开源 » 研究FC3000掌機的開源可行性 » 2022-10-04 22:04:51
@neotendo
Thanks for your efforts to share this image to us !
Here are the backtrace logs
// #define ZOFFSET (1 << 8)
// vm.g_sp->z = actor[vm.g_i].floorz - ZOFFSET;  <= at source/gameexec.c:1160
(gdb) p vm.g_i
$13 = 448

(gdb) p vm.g_sp->z
$2 = -8448

(gdb) p actor[vm.g_i].floorz
$3 = -469696513

(gdb) n
1162    in source/gameexec.c

(gdb) p vm.g_sp->z
$4 = -469696769

#0  VM_Execute (once=0) at source/gameexec.c:1160
#0  VM_Execute (once=0) at source/gameexec.c:1402
#0  VM_Execute (once=0) at source/gameexec.c:1402
#0  VM_Execute (once=0) at source/gameexec.c:695
#0  A_Execute (iActor=448, iPlayer=0, lDist=12586) at source/gameexec.c:4930
#0  G_MoveActors () at source/actors.c:4774

(gdb) p sprite[448]
$1 = {x = 384, y = 44608, z = -8448, cstat = 257, picnum = 1680,
  shade = 4 '\004', pal = 22 '\026', clipdist = 80 'P', filler = 0 '\000',
  xrepeat = 40 '(', yrepeat = 40 '(', xoffset = 0 '\000', yoffset = 0 '\000',
  sectnum = 258, statnum = 1, ang = 1920, owner = 448, xvel = 0, yvel = 0,
  zvel = 0, lotag = 0, hitag = 0, extra = 30}

#0  G_MoveActors () at source/actors.c:3415     <= trace from here (i == 448)
#0  G_MoveWorld () at source/actors.c:7901
#0  G_DoMoveThings () at source/game.c:10447
#0  G_MoveLoop () at source/game.c:10312
#0  app_main (argc=1, argv=0x7fffffffe128) at source/game.c:10229
#0  main (argc=1, argv=0x7fffffffe128) at src/sdlayer.c:235
I don't know when the variable "actor[vm.g_i].floorz" is set as 0xe400ffff (-469696513). So, after subtract, the value of Z position becomes as invalid (-469696769). As you mentioned before, besides Z, XY are also affected. This issue doesn't happen on QEMU and x64 PC environments but on FC3000 handheld. Interesting ![]()
![]()
Here is the table for reference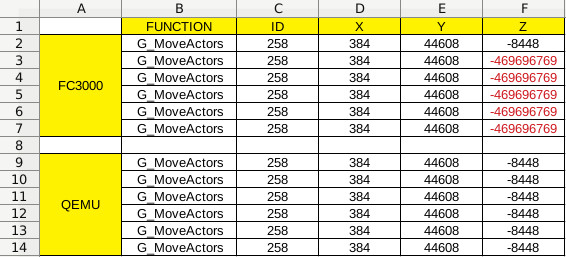
According to the testing, Z position is affected firstly and then X postion.
#37 Re: 司徒开源 » 研究FC3000掌機的開源可行性 » 2022-10-04 10:32:18
#38 Re: 司徒开源 » 研究FC3000掌機的開源可行性 » 2022-10-03 21:18:42
When the monster is walking towards the player, the value of X position should be in order of increasing.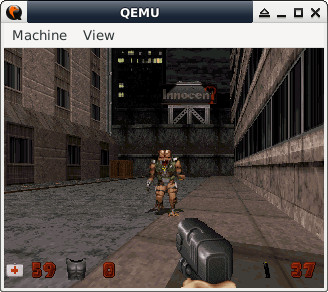
XYZ mapping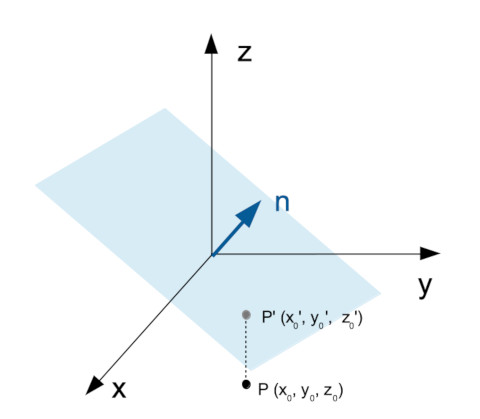
According to the raw data got from QEMU and FC3000, the results show that it is correct in QEMU environment but incorrect in FC3000.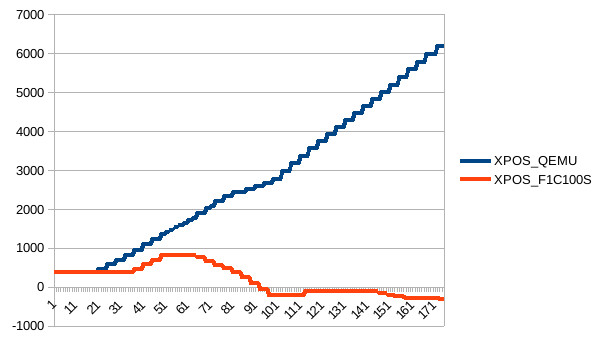
Raw Data
 FUNCTION	X_QEMU	Y_QEMU	X_F1	Y_F1
 G_MoveActors	384	44608	384	44608
 G_MoveActors	384	44608	384	44608
 G_MoveActors	384	44608	384	44608
 G_MoveActors	384	44608	384	44608
 G_MoveActors	384	44608	384	44608
 G_MoveActors	384	44608	384	44608
 G_MoveActors	384	44608	384	44608
 G_MoveActors	384	44608	384	44608
 G_MoveActors	384	44608	384	44608
 G_MoveActors	384	44608	384	44608
 G_MoveActors	384	44608	384	44608
 G_MoveActors	384	44608	384	44608
 G_MoveActors	384	44608	384	44608
 G_MoveActors	384	44608	384	44608
 G_MoveActors	384	44608	384	44608
 G_MoveActors	384	44608	384	44608
 G_MoveActors	384	44608	384	44608
 G_MoveActors	384	44608	384	44608
 G_MoveActors	384	44608	384	44608
 G_MoveActors	384	44608	384	44608
 G_MoveActors	462	44584	384	44608
 G_MoveActors	462	44584	384	44608
 G_MoveActors	462	44584	384	44608
 G_MoveActors	462	44584	384	44608
 G_MoveActors	574	44549	384	44608
 G_MoveActors	574	44549	384	44608
 G_MoveActors	574	44549	384	44608
 G_MoveActors	574	44549	384	44608
 G_MoveActors	698	44511	384	44608
 G_MoveActors	698	44511	384	44608
 G_MoveActors	698	44511	384	44608
 G_MoveActors	698	44511	384	44608
 G_MoveActors	828	44471	384	44608
 G_MoveActors	828	44471	384	44608
 G_MoveActors	828	44471	384	44608
 G_MoveActors	828	44471	384	44608
 G_MoveActors	958	44432	462	44584
 G_MoveActors	958	44432	462	44584
 G_MoveActors	958	44432	462	44584
 G_MoveActors	958	44432	462	44584
 G_MoveActors	1088	44393	574	44549
 G_MoveActors	1088	44393	574	44549
 G_MoveActors	1088	44393	574	44549
 G_MoveActors	1088	44393	574	44549
 G_MoveActors	1218	44354	698	44511
 G_MoveActors	1218	44354	698	44511
 G_MoveActors	1218	44354	698	44511
 G_MoveActors	1218	44354	698	44511
 G_MoveActors	1353	44368	828	44471
 G_MoveActors	1353	44368	828	44471
 G_MoveActors	1412	44400	828	44471
 G_MoveActors	1412	44400	828	44471
 G_MoveActors	1471	44432	826	44335
 G_MoveActors	1471	44432	826	44335
 G_MoveActors	1530	44464	826	44335
 G_MoveActors	1530	44464	826	44335
 G_MoveActors	1589	44496	824	44199
 G_MoveActors	1589	44496	824	44199
 G_MoveActors	1648	44528	824	44199
 G_MoveActors	1648	44528	824	44199
 G_MoveActors	1707	44560	822	44063
 G_MoveActors	1707	44560	822	44063
 G_MoveActors	1766	44592	822	44063
 G_MoveActors	1766	44592	822	44063
 G_MoveActors	1885	44657	768	43938
 G_MoveActors	1885	44657	768	43938
 G_MoveActors	1885	44657	768	43938
 G_MoveActors	1885	44657	768	43938
 G_MoveActors	2012	44610	670	43843
 G_MoveActors	2012	44610	670	43843
 G_MoveActors	2075	44586	670	43843
 G_MoveActors	2075	44586	670	43843
 G_MoveActors	2202	44539	572	43748
 G_MoveActors	2202	44539	572	43748
 G_MoveActors	2202	44539	572	43748
 G_MoveActors	2202	44539	572	43748
 G_MoveActors	2329	44492	474	43653
 G_MoveActors	2329	44492	474	43653
 G_MoveActors	2329	44492	474	43653
 G_MoveActors	2329	44492	474	43653
 G_MoveActors	2429	44400	376	43558
 G_MoveActors	2429	44400	376	43558
 G_MoveActors	2429	44400	376	43558
 G_MoveActors	2429	44400	376	43558
 G_MoveActors	2429	44400	245	43430
 G_MoveActors	2429	44400	245	43430
 G_MoveActors	2506	44235	245	43430
 G_MoveActors	2506	44235	245	43430
 G_MoveActors	2506	44235	101	43290
 G_MoveActors	2506	44235	101	43290
 G_MoveActors	2590	44053	101	43290
 G_MoveActors	2590	44053	101	43290
 G_MoveActors	2590	44053	-48	43144
 G_MoveActors	2590	44053	-48	43144
 G_MoveActors	2678	43864	-48	43144
 G_MoveActors	2678	43864	-48	43144
 G_MoveActors	2678	43864	-197	42998
 G_MoveActors	2678	43864	-197	42998
 G_MoveActors	2766	43675	-197	42998
 G_MoveActors	2766	43675	-197	42998
 G_MoveActors	2766	43675	-197	42790
 G_MoveActors	2766	43675	-197	42790
 G_MoveActors	2967	43622	-197	42790
 G_MoveActors	2967	43622	-197	42790
 G_MoveActors	2967	43622	-197	42582
 G_MoveActors	2967	43622	-197	42582
 G_MoveActors	3168	43569	-197	42582
 G_MoveActors	3168	43569	-197	42582
 G_MoveActors	3168	43569	-197	42374
 G_MoveActors	3168	43569	-197	42374
 G_MoveActors	3369	43516	-197	42374
 G_MoveActors	3369	43516	-197	42374
 G_MoveActors	3369	43516	-117	42182
 G_MoveActors	3369	43516	-117	42182
 G_MoveActors	3575	43544	-117	42182
 G_MoveActors	3575	43544	-117	42182
 G_MoveActors	3575	43544	-117	41974
 G_MoveActors	3575	43544	-117	41974
 G_MoveActors	3754	43649	-117	41974
 G_MoveActors	3754	43649	-117	41974
 G_MoveActors	3754	43649	-117	41766
 G_MoveActors	3754	43649	-117	41766
 G_MoveActors	3933	43754	-117	41766
 G_MoveActors	3933	43754	-117	41766
 G_MoveActors	3933	43754	-117	41558
 G_MoveActors	3933	43754	-117	41558
 G_MoveActors	4112	43859	-117	41558
 G_MoveActors	4112	43859	-117	41558
 G_MoveActors	4112	43859	-117	41350
 G_MoveActors	4112	43859	-117	41350
 G_MoveActors	4291	43964	-117	41350
 G_MoveActors	4291	43964	-117	41350
 G_MoveActors	4291	43964	-117	41142
 G_MoveActors	4291	43964	-117	41142
 G_MoveActors	4470	44069	-117	41142
 G_MoveActors	4470	44069	-117	41142
 G_MoveActors	4470	44069	-117	40934
 G_MoveActors	4470	44069	-117	40934
 G_MoveActors	4649	44174	-117	40934
 G_MoveActors	4649	44174	-117	40934
 G_MoveActors	4649	44174	-117	40726
 G_MoveActors	4649	44174	-117	40726
 G_MoveActors	4828	44279	-117	40726
 G_MoveActors	4828	44279	-117	40726
 G_MoveActors	4828	44279	-117	40726
 G_MoveActors	4828	44279	-157	40629
 G_MoveActors	5012	44183	-157	40629
 G_MoveActors	5012	44183	-157	40629
 G_MoveActors	5012	44183	-157	40629
 G_MoveActors	5012	44183	-197	40532
 G_MoveActors	5196	44087	-197	40532
 G_MoveActors	5196	44087	-197	40532
 G_MoveActors	5196	44087	-197	40532
 G_MoveActors	5196	44087	-237	40435
 G_MoveActors	5380	43991	-237	40435
 G_MoveActors	5380	43991	-237	40435
 G_MoveActors	5380	43991	-237	40435
 G_MoveActors	5380	43991	-277	40338
 G_MoveActors	5587	43973	-277	40338
 G_MoveActors	5587	43973	-277	40338
 G_MoveActors	5587	43973	-277	40338
 G_MoveActors	5587	43973	-277	40234
 G_MoveActors	5785	44035	-277	40234
 G_MoveActors	5785	44035	-277	40234
 G_MoveActors	5785	44035	-277	40234
 G_MoveActors	5785	44035	-277	40130
 G_MoveActors	5983	44097	-277	40130
 G_MoveActors	5983	44097	-277	40130
 G_MoveActors	5983	44097	-277	40130
 G_MoveActors	5983	44097	-277	40026
 G_MoveActors	5983	44097	-277	40026
 G_MoveActors	6181	44159	-277	40026
 G_MoveActors	6181	44159	-277	40026
 G_MoveActors	6181	44159	-316	39929
 G_MoveActors	6181	44159	-316	39929
It seems there is a potential bug in F1C100S, which seems like we found before (LDRH instruction in odd address). I cannot make sure whether we can find root cause or not but it is very interesting for this issue. Here is the current finding for reference.
#39 Re: 司徒开源 » 研究FC3000掌機的開源可行性 » 2022-10-03 08:15:21
#40 Re: 司徒开源 » 研究FC3000掌機的開源可行性 » 2022-10-02 12:55:59
#41 Re: 司徒开源 » 研究FC3000掌機的開源可行性 » 2022-10-01 22:56:25
@neotendo
User need to resize the first partition in order to put all of needed files. For battery issue, we needs to take a look at GMenu2X to see what kind of value read from kernel driver. For eduke32, it seems this issue is related to chip issue rather than performance issue because the enemy's position is wrong when render sprite. Since eduke32's source code is very complicated, I think it is not easy to find root cause out in a short time. For RetroArch, it is worthy to run RetroArch on miyoo handheld even if the performance is not good. We need focus on software optimization rather than high performance chip, which this is what we need eventually. Also, we need to thanks all of contributors for open source ported on miyoo handheld.
#42 Re: 司徒开源 » 研究FC3000掌機的開源可行性 » 2022-09-30 22:31:49
#43 Re: 司徒开源 » 研究FC3000掌機的開源可行性 » 2022-09-30 21:16:18
Support dual boot function on FC3000 handheld
U-Boot source: https://github.com/steward-fu/bootloader/commit/e02c2adfa3eacbe93338df28d7b93c3bbb5f93d9
By default, it boots into Linux OS.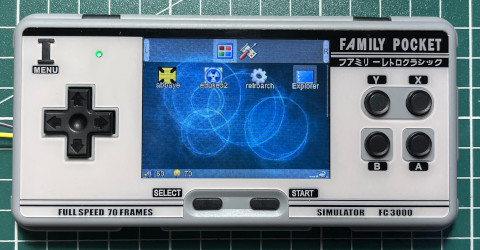
If press SELECT button and then power on, it boots into stock system.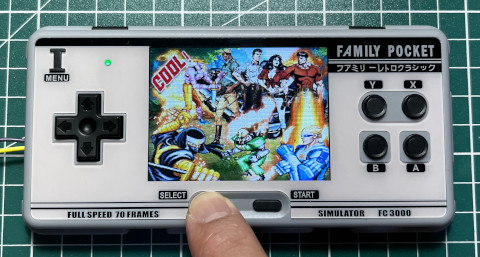
![]()
![]() I miss dingux system on Dingoo A320.
I miss dingux system on Dingoo A320.
#44 Re: 司徒开源 » 研究FC3000掌機的開源可行性 » 2022-09-30 20:52:40
#45 Re: 司徒开源 » 研究FC3000掌機的開源可行性 » 2022-09-30 18:42:05
@neotendo @Apaczer
Wow ! It is official support ~ Thanks for this information !
stable: https://buildbot.libretro.com/stable/1.10.3/dingux/miyoo-arm32/
nightly: https://buildbot.libretro.com/nightly/dingux/miyoo-arm32/
Run RetroArch on FC3000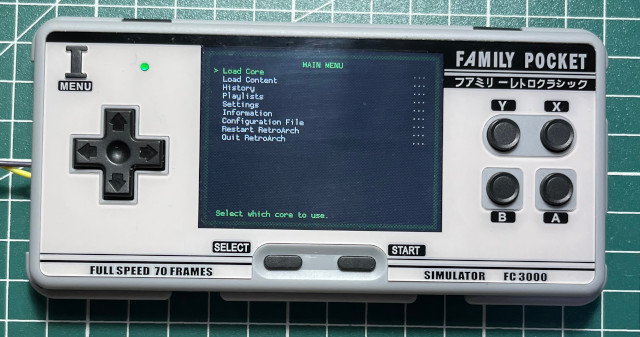
#46 Re: 司徒开源 » 研究FC3000掌機的開源可行性 » 2022-09-30 11:49:16
#47 Re: 司徒开源 » 研究FC3000掌機的開源可行性 » 2022-09-29 21:32:20
@neotendo
For eduke32 problem, it seems related to performance issue because we use same binary ELF. If possible, you can do hardware modding and then overclock CPU speed upto 900MHz to check whether it can fix or not. If it is related to display driver, it should be flicking rather than disappearing. So, I guess this issue is related to performance.
#48 Re: 司徒开源 » 研究FC3000掌機的開源可行性 » 2022-09-29 10:28:58
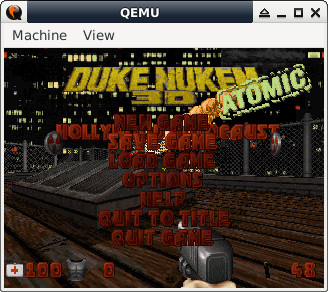
QEMU for FC3000 handheld
I spent some time on porting QEMU for FC3000 handheld. It is very useful for software development on QEMU environment because you can debug your application more easily. It is just a software level compatible, not hardware level, for example: you cannot access F1C100s registers in your application. This port is based on QEMU versatilepb (ARM926EJS) CPU and run FC3000's rootfs. So, you can test your app on this environment and then put it into your FC3000 after pass testing on QEMU environment.
Kernel Source: https://github.com/steward-fu/kernel/tree/f1c100s_fc3000_linux-4.14.0_qemu
Prebuilt QEMU: https://github.com/steward-fu/fc3000/releases/download/v1.0/fc3000-qemu_20220929.7z
QEMU for FC3000 handheld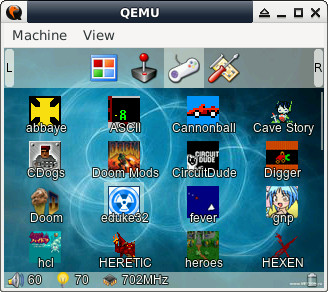
You can type command via your terminal.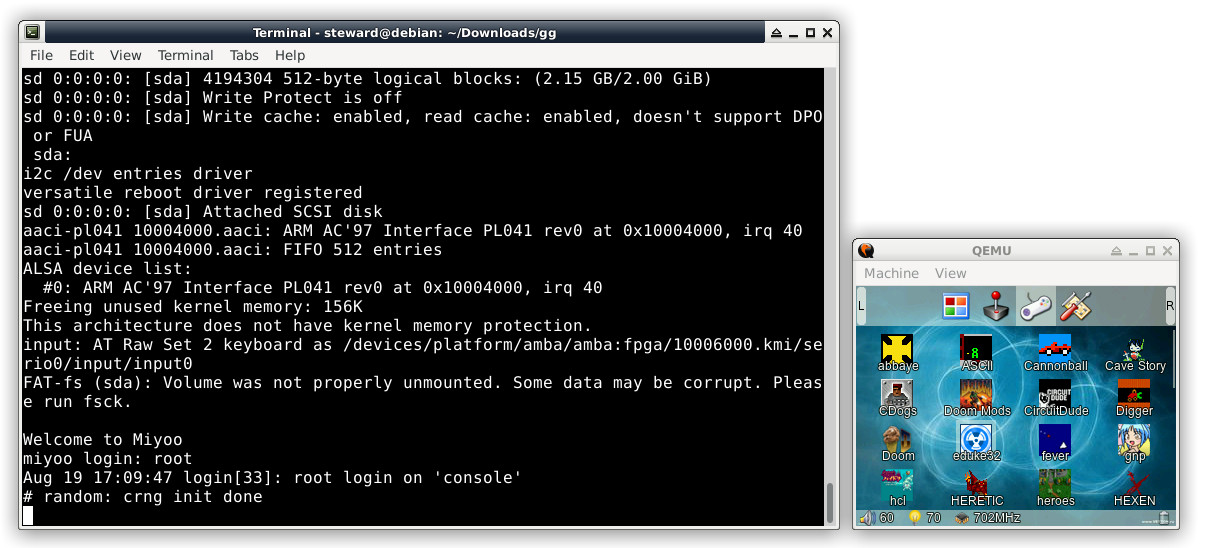
If you want to debug your app, add "sleep" in "/etc/main" and then repack rootfs.img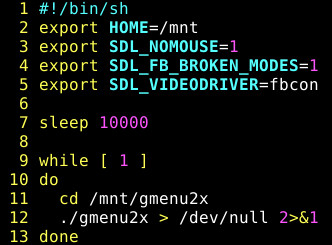
Remember to export SDL variables and then run gdb (I have put into rootfs.img already)
You can also put source code into sd.img for debugging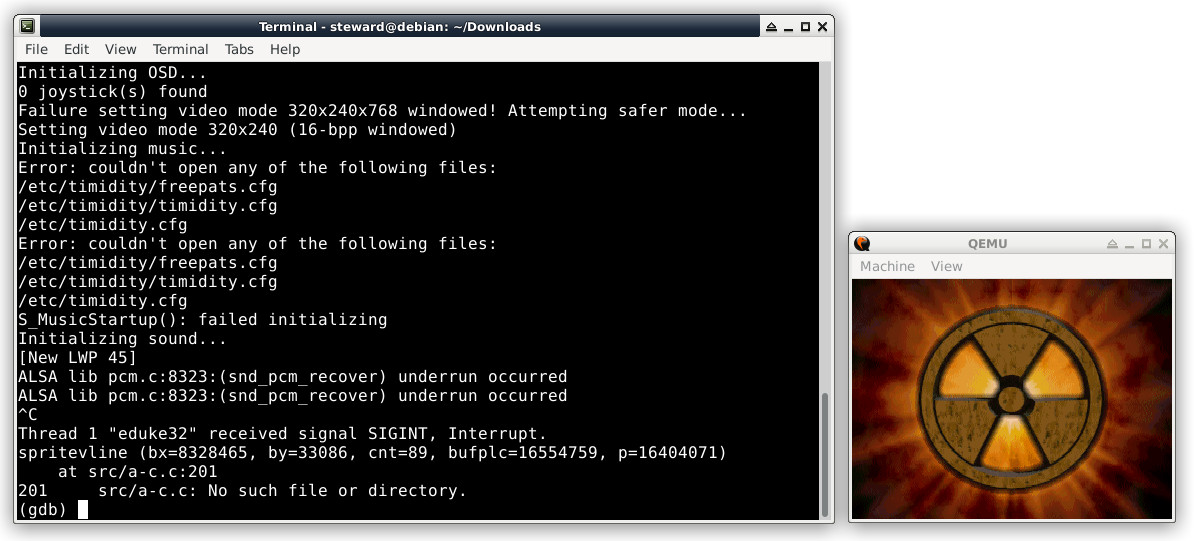
How to run QEMU for FC3000 handheld
$ cd
$ wget https://github.com/steward-fu/fc3000/releases/download/v1.0/fc3000-qemu_20220929.7z
$ 7za x fc3000-qemu_20220929.7z
$ ./run.sh
How to extract rootfs.img
$ zcat rootfs.img | cpio -idvmHow to repack rootfs.img
$ sudo find . | sudo cpio -o -H newc | gzip -9 > ../rootfs.img#49 Re: 司徒开源 » 研究FC3000掌機的開源可行性 » 2022-09-28 23:08:33
#50 Re: 司徒开源 » 研究FC3000掌機的開源可行性 » 2022-09-28 21:31:30
#51 Re: 司徒开源 » 研究FC3000掌機的開源可行性 » 2022-09-28 12:12:31
#52 Re: 司徒开源 » 研究FC3000掌機的開源可行性 » 2022-09-27 09:25:58
@Apaczer
Thanks for your information. It seems your repo has fixed CPU overclock issue (or 0x80000000) already. After tested, it cannot work properly. It hangs after using different CPU clock (not 702MHz). You can test with different CPU clock value for this issue. Here is the reference for you: https://whycan.com/t_6647.html#p66051
#53 Re: 司徒开源 » 研究FC3000掌機的開源可行性 » 2022-09-26 19:20:19
Fix battery issue: https://github.com/steward-fu/kernel/commit/3dc11057d85302f41b8b23627fb247dadd7e4520
But I don't know how to calibrate it so far.
#54 Re: 司徒开源 » 研究FC3000掌機的開源可行性 » 2022-09-26 07:21:27
@neotendo
Yes, I would like to see X Window running on FC3000. This is why I bought new FC3000 again. Accroding to the terminal log (it is most same as eduke32.log), I cannot find useful information. Maybe, I am not familiar with this game.
EDuke32 2.0.0devel 20100727
Using /mnt/games/eduke32/ for game data
Using /mnt/.eduke32/ for game data
Initializing SDL system interface (compiled against SDL version 1.2.15, found version 1.2.15)
Using "fbcon" video driver
No fullscreen modes available!
Searching for game data...
Using 'duke3d.grp' as main game data file.
Compiling: GAME.CON (151133 bytes)
Including: DEFS.CON (35992 bytes)
Including: USER.CON (45449 bytes)
GAME.CON: In state `blimphitstate':
GAME.CON:476: warning: expected action, found define.
GAME.CON: In actor `ORGANTIC':
GAME.CON:3969: warning: found `else' with no `if'.
GAME.CON: In state `pigshootenemystate':
GAME.CON:5892: warning: found `else' with no `if'.
Found 3 warning(s), 0 error(s).
Resizing code buffer to 16189*4 bytes
Script compiled in 948ms, 16181*4b, version 1.4+
1917/11264 labels, 321/2048 variables
125 quotes, 207 actors
Initialized 24.0M cache
RTS file DUKE.RTS was not found
Initializing OSD...
0 joystick(s) found
Setting video mode 1024x768 (16-bpp windowed)
Unable to set video mode!
Failure setting video mode 1024x768x8 windowed! Attempting safer mode...
Setting video mode 1024x768 (16-bpp windowed)
Unable to set video mode!
Failure setting video mode 1024x768x8 windowed! Attempting safer mode...
Setting video mode 800x600 (16-bpp windowed)
Unable to set video mode!
Failure setting video mode 800x600x8 windowed! Attempting safer mode...
Setting video mode 640x480 (16-bpp windowed)
Unable to set video mode!
Failure setting video mode 640x480x8 windowed! Attempting safer mode...
Setting video mode 320x240 (16-bpp windowed)
Initializing music...
Error: couldn't open any of the following files:
/etc/timidity/freepats.cfg
/etc/timidity/timidity.cfg
/etc/timidity.cfg
Error: couldn't open any of the following files:
/etc/timidity/freepats.cfg
/etc/timidity/timidity.cfg
/etc/timidity.cfg
S_MusicStartup(): failed initializing
Initializing sound...
ALSA lib pcm.c:8323:(snd_pcm_recover) underrun occurred
ALSA lib pcm.c:8323:(snd_pcm_recover) underrun occurred
ALSA lib pcm.c:8323:(snd_pcm_recover) underrun occurred
ALSA lib pcm.c:8323:(snd_pcm_recover) underrun occurred
ALSA lib pcm.c:8323:(snd_pcm_recover) underrun occurred
ALSA lib pcm.c:8323:(snd_pcm_recover) underrun occurred
ALSA lib pcm.c:8323:(snd_pcm_recover) underrun occurred
ALSA lib pcm.c:8323:(snd_pcm_recover) underrun occurred
ALSA lib pcm.c:8323:(snd_pcm_recover) underrun occurred
It is recommended to do CPU overclock for this issue. In general, "underrun occurred" means the running speed is very slow (CPU is very busy) so that sound buffer cannot be handled properly. To do overclock can fix this issue.
#55 Re: 司徒开源 » 研究FC3000掌機的開源可行性 » 2022-09-25 23:40:57
#56 Re: 司徒开源 » 研究FC3000掌機的開源可行性 » 2022-09-25 23:23:00
It is very weird !!!
source/jmact/animlib.c
147 static void decodeframe(uint8_t * srcP, uint8_t * dstP)
...
172         count = B_LITTLE16(*((uint16_t *)((srcP += sizeof(int16_t)) - sizeof(int16_t))));
...
It can be formatted as the following code
count = B_LITTLE16(*(uint16_t *)srcP);
srcP += sizeof(int16_t);
It is just to get the content of memory at srcP and then put into count variable.
From GDB
count = B_LITTLE16(*((uint16_t *)((srcP += sizeof(int16_t)) - sizeof(int16_t))));

(gdb) p/x count
$2 = 0x9d80

(gdb) x/16x srcP-4
0xb4dc9b81:     0x8000  0xd99d  0x0000  0x2605  0x2d80  0x00c1  0x2605  0x2826
0xb4dc9b91:     0x280b  0x0600  0x0b0b  0x0b16  0x1a16  0x1a0b  0x0b1a  0x0b1a
srcP = 0xb4dc9b83
In general, it should be *(uint_16_t*)srcP = 0xd99d
But what we got is *(uint_16_t*)srcP = 0x9d80
GDB with instruction level
(gdb) stepi
   0x001e1f08 <+304>:   sub     r3, r3, #2
=> 0x001e1f0c <+308>:   ldrh    r3, [r3]
   0x001e1f10 <+312>:   str     r3, [r11, #-8]
   0x001e1f14 <+316>:   ldr     r3, [r11, #-8]

(gdb) info r
r3             0xb4dc9b83       3034356611

(gdb) stepi
   0x001e1f08 <+304>:   sub     r3, r3, #2
   0x001e1f0c <+308>:   ldrh    r3, [r3]
=> 0x001e1f10 <+312>:   str     r3, [r11, #-8]
   0x001e1f14 <+316>:   ldr     r3, [r11, #-8]

(gdb) info r
r3             0x9d80   40320
I'm getting crazy...
So, this is a workaround to fix this shit issue
172         //count = B_LITTLE16(*((uint16_t *)((srcP += sizeof(int16_t)) - sizeof(int16_t))));
173         count = B_LITTLE16(srcP[0] + (((uint16_t)srcP[1]) << 8));
174         srcP += sizeof(int16_t);
And now, animation works !
eduke32_fix.zip
Now, it is time to check MIDI issue...
#57 Re: 司徒开源 » 研究FC3000掌機的開源可行性 » 2022-09-25 14:23:55
@Apaczer
[Q1] Could you advice us how to debug apps on this platform without UART ?
[A1] No, you need to debug your app via UART because you need type command from UART.
[Q2] Do you have QEMU setup for ARM926EJ-S with "gdb" program as a help ? I see you are pasting images from sort of windowed mode and though you might be using those.
[A2] I wrote render tool to show image that obtained from /dev/fb0 node.
render tool: https://github.com/steward-fu/bootloader/blob/f1c100s_fc3000_uboot-2018.01/tools/show_320x240
How to use:
On FC3000:
# cat /dev/fb0 > xxx.rawOn PC:
$ show_320x240 xxx.raw[Q3] I've tried to run my port with "gdb" through terminal app on Miyoo, but it didn't display anything.
[A3] You may need to redirect terminal output to framebuffer driver. So, you need enable "Framebuffer Console output" to show gdb result on your LCD panel. For more convenient way to debug your app without UART, you can try to port gdb client app on FC3000. Google is your friend !
@neotendo
[Q1] do you have an FC3000 emulator ?
[A1] No.
[Q2] why does the duke nukem screenshots have a window ?
[A2] Refer to reply above.
[Q3] had to change command binman to binman.py in Makefile (make gives error 'binman.py not found'), and change #!/bin/sh to #!/bin/bash in make_suniv.sh(maybe only on my system cause i use a linux subsystem on windows).
[A3] Fixed, thanks for reporting issue.
[Q4] fc3000_ips1 - do not ask me why, but i had to change the lcd color order from BGR to RGB (the last 0x36 command in lcd init, change data 0x09 to 0x08), uboot bootlogo was kind of inverted colors.
[A4] Did you mean tft v1 ? As the following lines shown, they need to be changed as 0x08 ?
U-Boot: https://github.com/steward-fu/bootloader/blob/f1c100s_fc3000_uboot-2018.01/drivers/video/fc3000_tft1.c#L205
Kernel: https://github.com/steward-fu/kernel/blob/f1c100s_fc3000_linux-4.14.0/drivers/video/fbdev/sunivfb.c#L1070
[Q5] i narrowed down eduke32 segmentation fault at animation playing to the decodeframe procedure in animlib.c, bypassing this function allows eduke32 to start and plays the animation sound without animation of course.
[A5] Thanks for your inforamtion. I will check it.
[Q6] do not know if it happens a second time, but when i do 'make clean' in new uboot folder, i can not compile it again. mkimage not found.
[A6] Fixed, thanks for reporting issue.
I think the sound issue is still in there even if update timidity.cfg and instruments because it seems SOUND option is disabled.
#58 Re: 司徒开源 » 研究FC3000掌機的開源可行性 » 2022-09-24 22:37:36
@neotendo
For sound issue as the following logs, it isn't the key point caused eduke32 crash.
Initializing music...
Error: couldn't open any of the following files:
/etc/timidity/freepats.cfg
/etc/timidity/timidity.cfg
/etc/timidity.cfg
Although no any timidity.cfg found, it still works as well. Updating rootfs is an idea for this problem as you did. For more easy way to fix this warning, you can specify the timidity.cfg path as the following (in source/sdlmusic.c)
221 static char *s[] = { "/mnt/games/eduke32/timidity.cfg", "/etc/timidity.cfg", "/etc/timidity/timidity.cfg", "/etc/timidity/freepats.cfg" };The main problem is at renderframe()
Thread 1 "eduke32" received signal SIGSEGV, Segmentation fault.
0xb6e25e68 in memset () from /lib//libc.so.0
(gdb) bt
#0  0xb6e25e68 in memset () from /lib//libc.so.0
#1  0x001e1e68 in decodeframe (
    srcP=0xb4df2bc6 "((\v\v\026!\342Ƴ\001\263\263\263\001\263\001\361\241_,,\017`\032\032!\026(",
    dstP=0x1d229bb <error: Cannot access memory at address 0x1d229bb>)
    at source/jmact/animlib.c:180
#2  0x001e212c in renderframe (framenumber=0, pagepointer=0xb4df0b78)
    at source/jmact/animlib.c:239
#3  0x001e2198 in drawframe (framenumber=0) at source/jmact/animlib.c:253
#4  0x001e2a98 in ANIM_DrawFrame (framenumber=1) at source/jmact/animlib.c:330
#5  0x000cf2d0 in G_PlayAnim (fn=0x26a658 "logo.anm", t=5 '\005')
    at source/anim.c:261
#6  0x0006bccc in G_DisplayLogo () at source/game.c:8668
#7  0x0007055c in app_main (argc=1, argv=0xbeedbdf4) at source/game.c:9960
#8  0x00250f20 in main (argc=1, argv=0xbeedbdf4) at src/sdlayer.c:208
I need to trace it deeply to see whether resolution is the problem
And it seems the sound driver has problem when loading MIDI sound format
Initializing sound...
ALSA lib pcm.c:8323:(snd_pcm_recover) underrun occurred
I also need to take a look at this problem
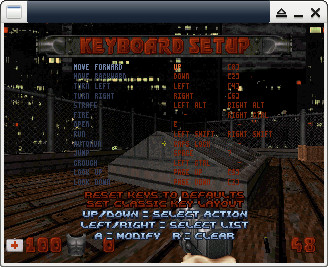
By the way, for the first time to run eduke32, you need to configure keyboard options as the following steps to make sure you can control it well

#59 Re: 司徒开源 » 研究FC3000掌機的開源可行性 » 2022-09-24 18:30:24
@neotendo
Thanks for your sharing and contributions. we appreciate your help very much !
I have created 2 repos to host uboot and kernel source:
U-Boot: https://github.com/steward-fu/bootloader/tree/f1c100s_fc3000_uboot-2018.01
Kernel: https://github.com/steward-fu/kernel/tree/f1c100s_fc3000_linux-4.14.0
In U-Boot, you can use menuconfig to change your LCD panel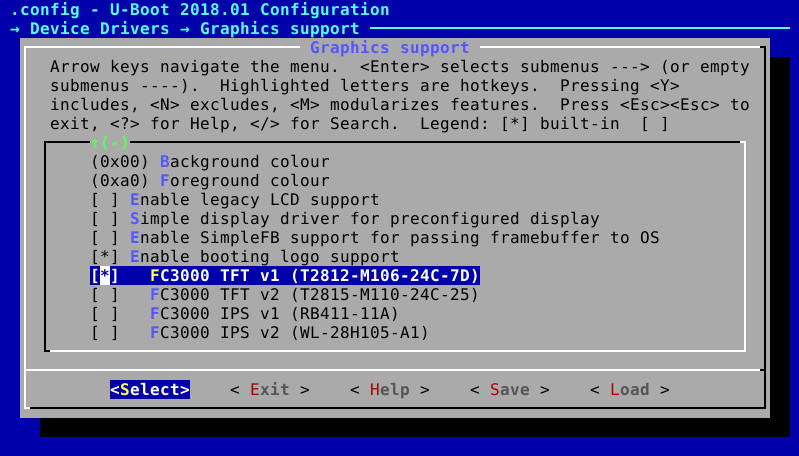
And run.sh has been renamed as tools/make_suniv.sh. For more detailed steps about how to build or flash into MicroSD, you can refer to the README page.
Here is the booting logo
And here is the kernel logo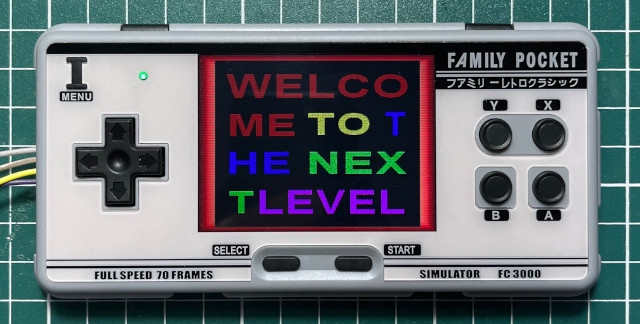
As I remembered, you have asked something about the following desktop GUI
How to change it as the following desktop GUI
The answer is from theme setting
For classical GMenu2X, you can change it to Default. But it may use Default setting if unexpected rebooting.
And I think it is time to check eduke32 issues, ![]()
![]()
#60 Re: 司徒开源 » 研究FC3000掌機的開源可行性 » 2022-09-22 20:31:03
@neotendo
Yes, it is running Linux OS with booting logo on my new FC3000 handheld now. I am creating 2 repos for bootloader and kernel source code. After complete, I will share it to you. For eduke32, as Apaczer mentioned, it is base on MIDI music format but it has some limitations on current rootfs because no any timidity configuration in system. Besides, eduke32 has another memory segmentation issue that happens on drawing animation. I think I will take a look at eduke32 soon.
Here are the ideas, maybe, we can use:
1. use WAV to replace MIDI
2. port SDL2 for eduke32
@卡卡cyj
你可以試試 lzgame02 提供的燒錄檔案~
@Apaczer @lzgame02
感謝分享~
#61 Re: 司徒开源 » 研究FC3000掌機的開源可行性 » 2022-09-16 10:11:11
#62 Re: 司徒开源 » 研究FC3000掌機的開源可行性 » 2022-09-14 19:10:36
@neotendo
Thanks for your contributions.
I think it is time to host 2 repositories for the kernel and uboot source code even though I don't like to maintain all of them.
[Q1] i am right that the logo is schown when the kernel is loaded? is there a way to show the logo when uboot starts?
You can add the initial code (include GPIO reinitialization) at sunxi_lcdc_panel_enable() in uboot/drivers/video/sunxi/sunxi_display.c file.
This is the simplest way you can use.
#63 Re: 司徒开源 » 研究FC3000掌機的開源可行性 » 2022-09-13 19:04:59
@neotendo
Q1: i saw in your kernel source code you already patched in the ips init code, do you have the old tft init code still
(your lcd init code in sunivfb.c matches the kernel_fc3000_ips.patch)?
A1: It is for TFT LCD panel, not for IPS panel.
Patch file for IPS panel: https://github.com/steward-fu/fc3000/releases/download/source/kernel_fc3000ips.7z
You are welcome ![]()
Please zip kernel and uboot folders and then provide to me.
It is nice to see boot logo shown on FC3000 handheld.
Thanks for your efforts.
#64 Re: 司徒开源 » 研究FC3000掌機的開源可行性 » 2022-09-13 14:06:20
#65 Re: 司徒开源 » 研究FC3000掌機的開源可行性 » 2022-09-12 18:54:58
#66 Re: 司徒开源 » 研究FC3000掌機的開源可行性 » 2022-09-10 20:36:22

#67 Re: 司徒开源 » 研究FC3000掌機的開源可行性 » 2022-09-10 20:35:09
#68 Re: 司徒开源 » 研究FC3000掌機的開源可行性 » 2022-09-09 22:52:54
@neotendo
#69 Re: 司徒开源 » 研究FC3000掌機的開源可行性 » 2022-09-09 21:45:28
#70 Re: 司徒开源 » 研究FC3000掌機的開源可行性 » 2022-09-09 19:20:40
@neotendo
Yes, in order to prevent flicking, which some LCD panels show white color when RESET is active, it is turned off in uboot and framebuffer initialization stages. So, you also need to set backlight level in device tree:
kernel/arch/arm/boot/dts/fc3000.dts
27 default-brightness-level = <0>;#71 Re: 司徒开源 » 研究FC3000掌機的開源可行性 » 2022-09-09 13:34:49
@neotendo
There is another way to show boot logo.
Just uncomment "memcpy" line and then provide "hex_splash" data.
Here is the example to demonstrate how to convert png/jpg into pixel array (hex_splash):
https://github.com/steward-fu/q8/releases/download/v1.1/png2hex.c
How to use:
$ gcc png2hex.c -o test -I/usr/include/SDL -lSDL -lSDL_image
$ ./test xxx.jpg > hex_splash.h#72 Re: 司徒开源 » 研究FC3000掌機的開源可行性 » 2022-09-08 18:05:05
@neotendo
In framebuffer driver, I switched display layer from layer-0 to layer-1 as the following image shown: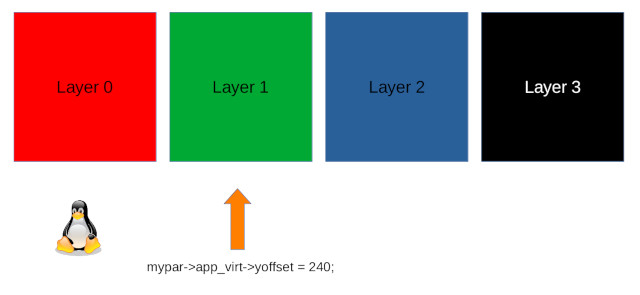
Linux logo is always displayed on layer-0 when framebuffer driver is probed.
If you would like to show starting logo on LCD panel, here are the places you need to modify:
drivers/video/fbdev/sunivfb.c
954   mypar->app_virt->yoffset = 0;

1172   fb_prepare_logo(info, 0);
1173   fb_show_logo(info, 0);
P.S. You also need to turn Linux Logo on in kernel menu configuration.
#73 Re: 司徒开源 » 研究FC3000掌機的開源可行性 » 2022-09-08 13:36:40
run X11 ? it sounds very interesting !
Here is another project that use MT7688 processor: https://whycan.com/t_8714.html
I would like to run X11 (Debian OS) on that device.
So, it is worthy to study how to run X11 on framebuffer driver.
But in order to run X11, some kernel configurations need to be turned on, ex: network.
I think I can buy FC3000 IPS handheld again and try X11 on it. ![]()
![]()
@neotendo
I am curious about what kind of game/application needs X11 ? or why did you want X11 runs on FC3000 ?
#74 Re: 司徒开源 » 研究FC3000掌機的開源可行性 » 2022-09-08 13:26:42

#75 Re: 司徒开源 » 研究FC3000掌機的開源可行性 » 2022-09-08 07:29:07
@Aksenenkoav1990
Basically, you can build uboot and kernel from scratch.
These logos have been removed from source code.
Source: https://github.com/steward-fu/fc3000
#76 Re: 司徒开源 » 研究FC3000掌機的開源可行性 » 2022-09-06 19:44:59
#77 Re: 司徒开源 » 研究FC3000掌機的開源可行性 » 2022-09-06 17:47:52
#78 Re: 司徒开源 » 研究Game Gear Micro掌機的開源可行性 » 2022-09-06 15:23:47
#79 Re: 司徒开源 » 研究FC3000掌機的開源可行性 » 2022-09-06 15:12:55
#80 Re: 司徒开源 » 研究馬沙機的開源可行性 » 2022-09-03 20:40:18

#81 Re: 司徒开源 » 研究FC3000掌機的開源可行性 » 2022-09-03 20:30:12
#82 Re: 司徒开源 » 研究FC3000掌機的開源可行性 » 2022-09-03 12:13:27
@neotendo
Yes, you can.
Make sure the dumped file is different with original one.
Even though you can dump from SPI flash successfully, but I cannot make sure it can be restored back to normal always, therefore, it is recommended not to touch any data saved in SPI flash for safety reason.
If your friend can port Linux OS on FC3000 IPS v2 and then share with us, we are really appreciate all of efforts.
#83 Re: 司徒开源 » 研究馬沙機的開源可行性 » 2022-09-03 10:44:57
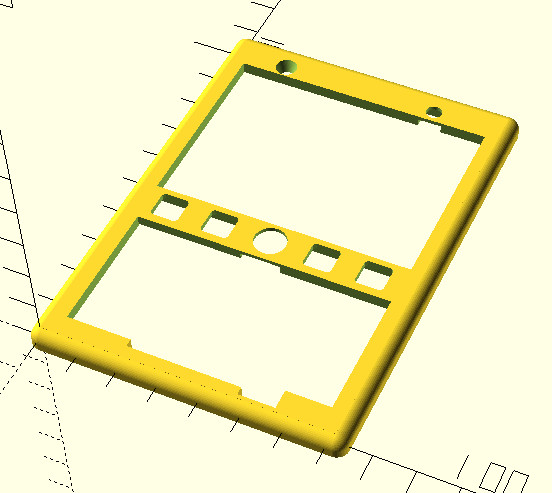
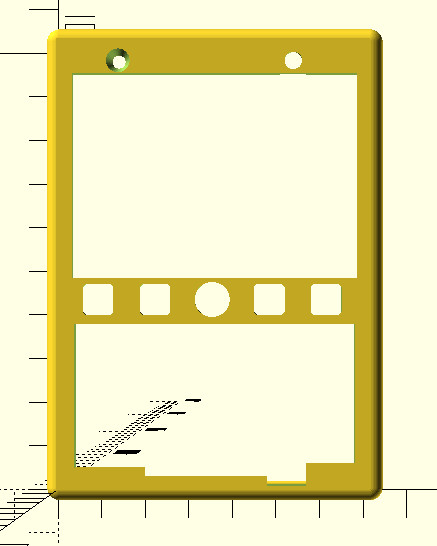
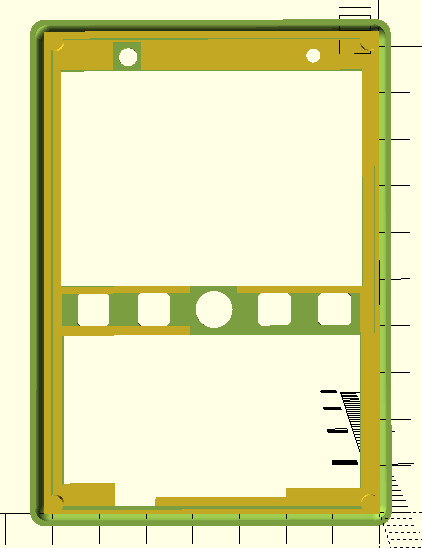
由於,下巴不夠美觀,司徒決定進行修補
module q10_front(){
	difference(){
		union(){
			difference(){
				cube([62, 12, 0.5]);
				translate([31, 11, 0]){
					resize([65, 10]){
						cylinder(3, 1, 1);
					}
				}
			}
			translate([-2, 0, 0]){
				cube([7.5, 12, 0.5]);
			}
			translate([56.5, 0, 0]){
				cube([7.5, 12, 0.5]);
			}

			translate([47, 7, 0]){
				difference(){
					cube([10, 5, 0.5]);
					translate([2, 4.5, 0]){
						resize([15, 10]){
							cylinder(1, 1, 1);
						}
					}
				}
			}

			translate([5, 7, 0]){
				difference(){
					cube([10, 5, 0.5]);
					translate([8, 4.5, 0]){
						resize([15, 10]){
							cylinder(1, 1, 1);
						}
					}
				}
			}
		}

		translate([5.5, 4.5, 0]){
			difference(){
				translate([-7.5, -4.5, 0]){
					cube([10, 4, 1]);
				}
				resize([15, 10]){
					cylinder(5, 1, 1);
				}
			}
		}

		translate([56.5, 4.5, 0]){
			difference(){
				translate([-2, -4.5, 0]){
					cube([9.5, 4, 1]);
				}
				resize([15, 10]){
					cylinder(5, 1, 1);
				}
			}
		}
	}
}
列印完成
果然顏值高一點點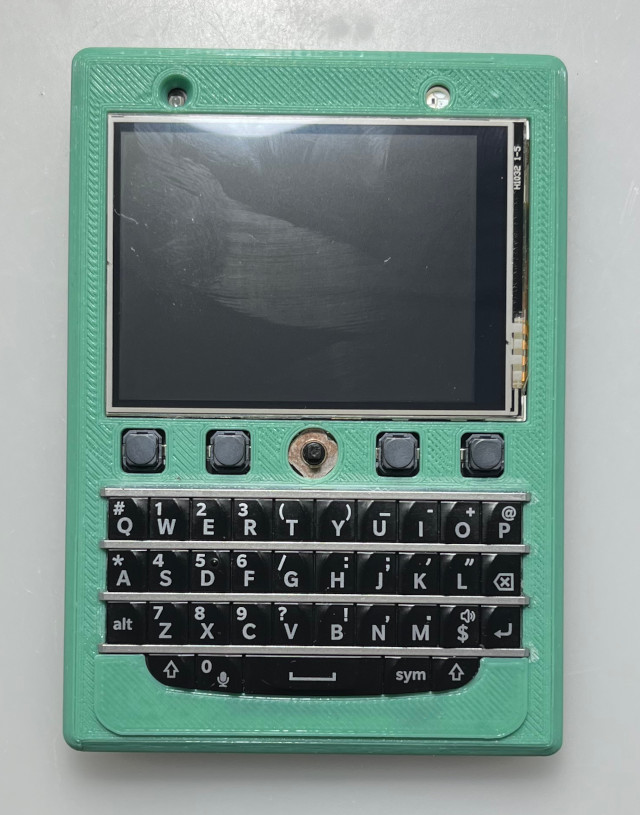
#84 Re: 司徒开源 » 研究馬沙機的開源可行性 » 2022-09-03 10:29:13

#85 Re: 司徒开源 » 研究馬沙機的開源可行性 » 2022-09-03 08:26:39


#86 Re: 司徒开源 » 研究馬沙機的開源可行性 » 2022-09-02 20:14:15
#87 Re: 司徒开源 » 研究FC3000掌機的開源可行性 » 2022-09-02 16:03:42
#88 Re: 司徒开源 » 研究FC3000掌機的開源可行性 » 2022-09-02 14:42:53
#89 Re: 司徒开源 » 研究馬沙機的開源可行性 » 2022-09-02 13:08:06
#90 Re: 司徒开源 » 研究FC3000掌機的開源可行性 » 2022-09-01 19:36:41
#91 Re: 司徒开源 » 研究FC3000掌機的開源可行性 » 2022-09-01 19:36:06
#92 Re: 司徒开源 » 研究馬沙機的開源可行性 » 2022-09-01 13:28:04
#93 Re: 司徒开源 » 研究FC3000掌機的開源可行性 » 2022-08-31 20:00:53
#94 Re: 司徒开源 » 研究FC3000掌機的開源可行性 » 2022-08-31 16:56:24
#95 Re: 司徒开源 » 研究馬沙機的開源可行性 » 2022-08-31 09:28:29
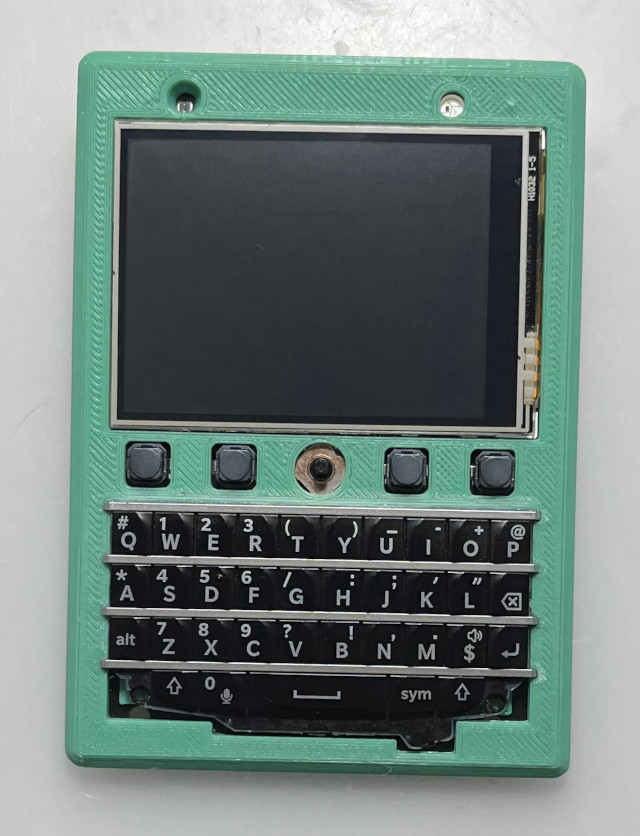
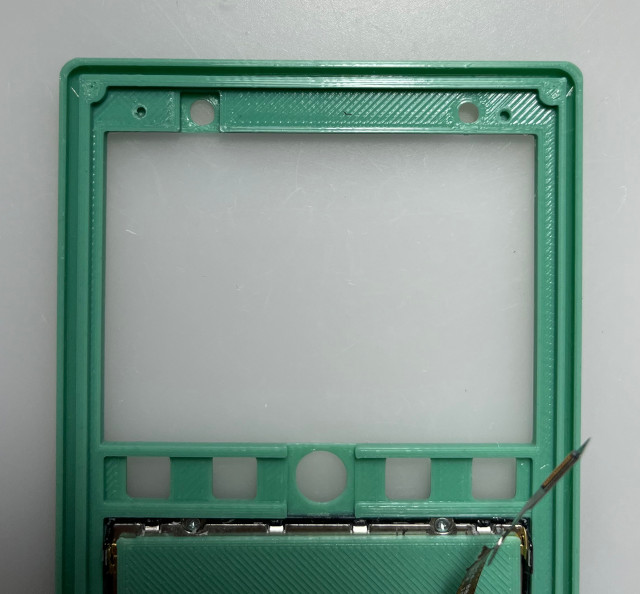
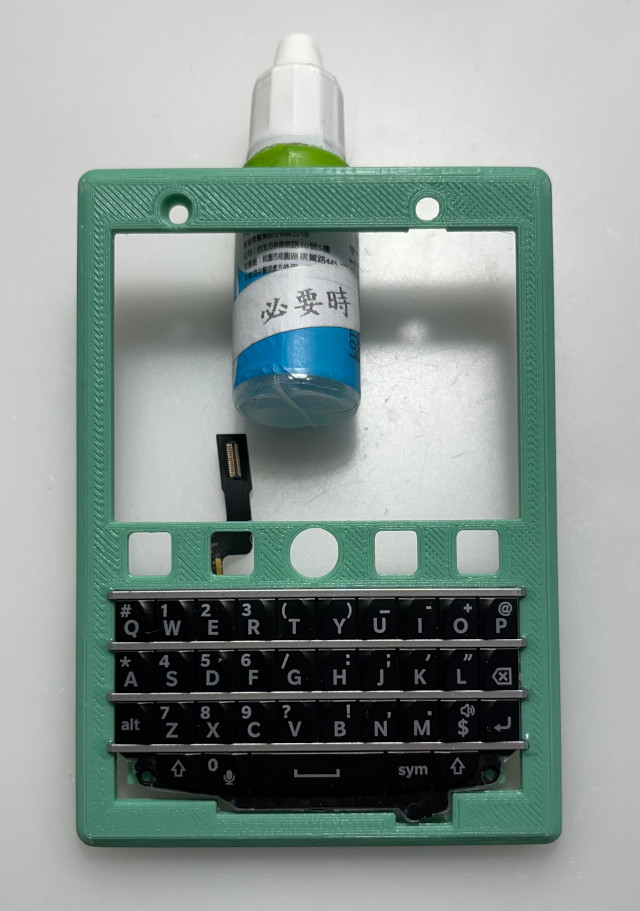
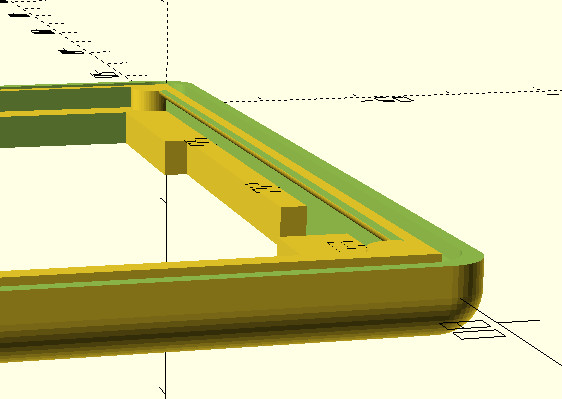
鍵盤是這台機器的靈魂元件,司徒對於打字手感特別在意,因此,看了下Q10鍵盤背面,發現凹凸不平,大約有0.1cm的落差
這個落差如下圖: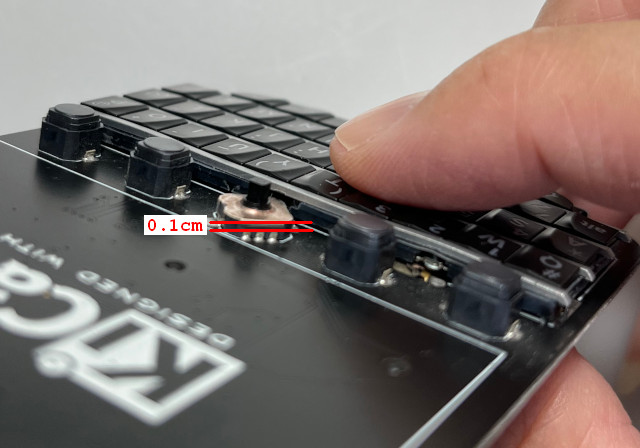
按下時,鍵盤往下凹,嚴重影響手感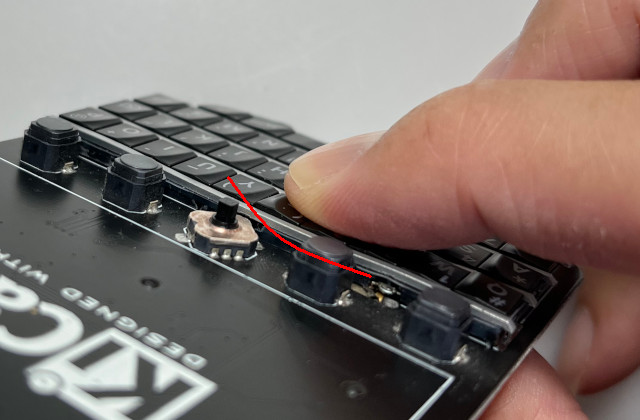
司徒開始修補這個漏洞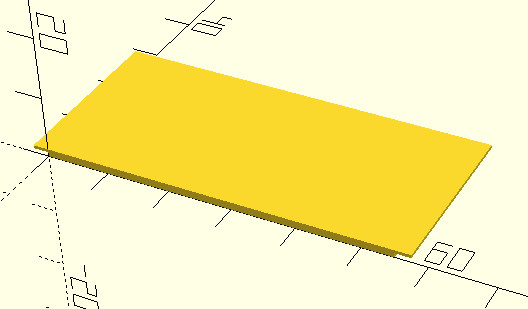
module q10_back(){
cube([55, 15, 0.7]);
translate([(55 / 2) - 5, 22, 0]){
cube([10, 5, 0.7]);
}
translate([-2.5, 0, 0.7]){
cube([60, 28, 0.5]);
}
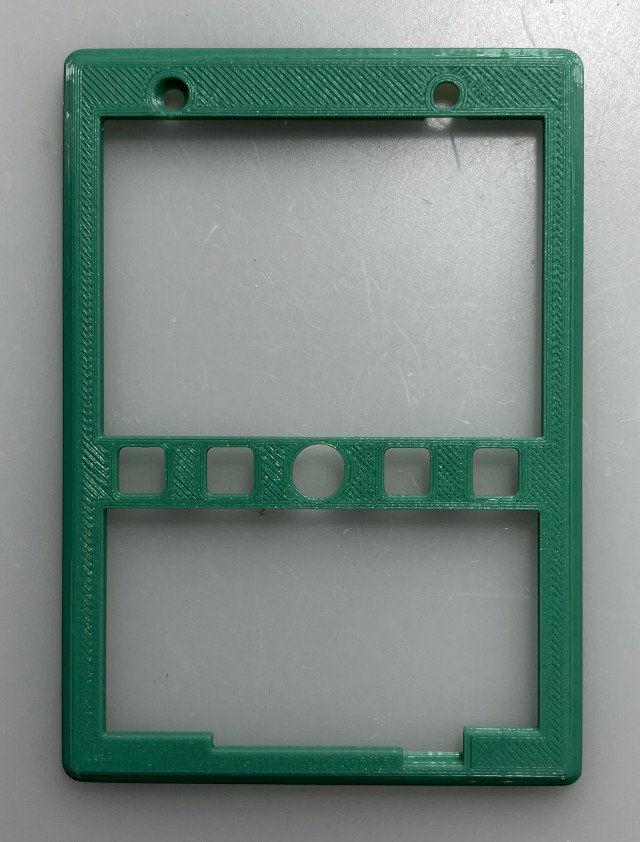
}凸起的部份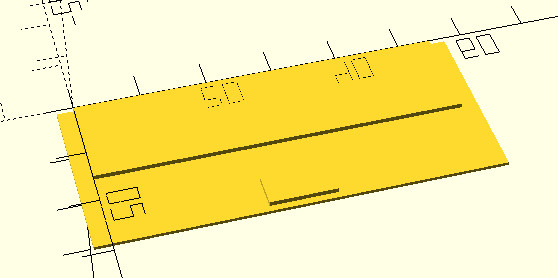
司徒使用堪用的3D印表機打印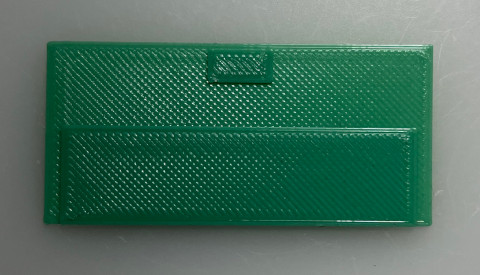
粗糙且漂亮的紋理
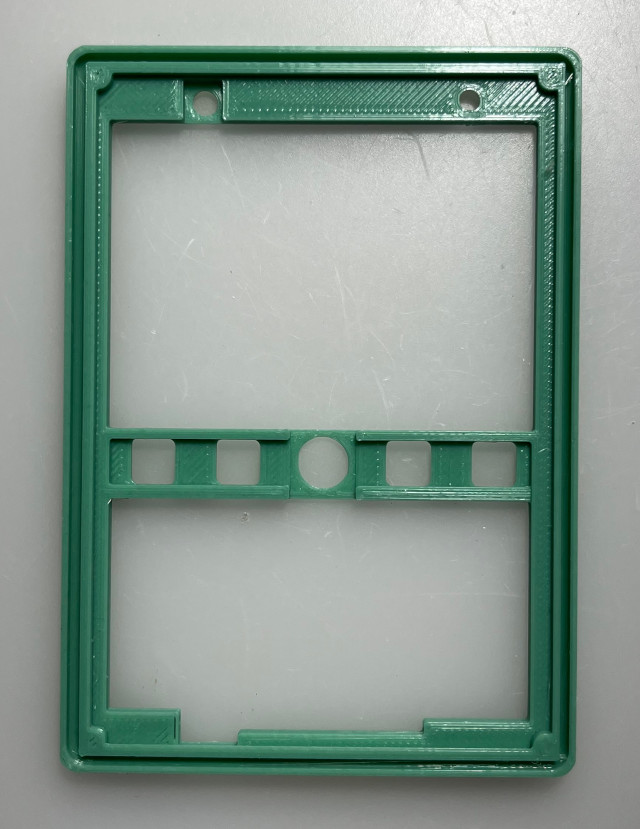
三秒膠上陣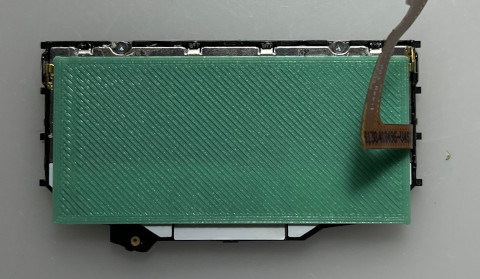
相當平整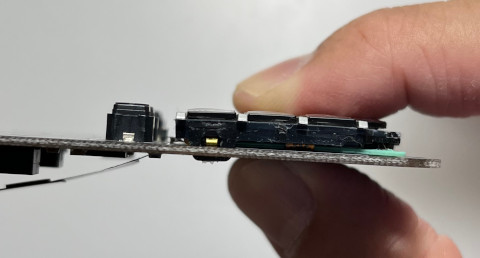
#96 Re: 司徒开源 » 研究馬沙機的開源可行性 » 2022-08-31 09:24:24
#97 Re: 司徒开源 » 研究FC3000掌機的開源可行性 » 2022-08-31 08:59:41
@neotendo
[Q1] sound is working with unmodded connection.
Do you mean the noise issue is fixed without any hardware modding ?
[Q2] Can you tell me how to dump only the needed data like your linux images (~2GB)?
Here are the steps to create 2GB image and then you can flash what you want into this 2GB image file
$ sudo dd if=/dev/zero of=test.img bs=1M count=2024
	2024+0 records in
	2024+0 records out
	2122317824 bytes (2.1 GB, 2.0 GiB) copied, 1.83519 s, 1.2 GB/s

$ sudo fdisk test.img
	Command (m for help): n
	Partition type
	   p   primary (0 primary, 0 extended, 4 free)
	   e   extended (container for logical partitions)
	Select (default p): p
	Partition number (1-4, default 1):
	First sector (2048-4145151, default 2048): 16384
	Last sector, +/-sectors or +/-size{K,M,G,T,P} (16384-4145151, default 4145151):

	Created a new partition 1 of type 'Linux' and of size 2 GiB.

	Command (m for help): p
	Disk test.img: 2 GiB, 2122317824 bytes, 4145152 sectors
	Units: sectors of 1 * 512 = 512 bytes
	Sector size (logical/physical): 512 bytes / 512 bytes
	I/O size (minimum/optimal): 512 bytes / 512 bytes
	Disklabel type: dos
	Disk identifier: 0x0eb9d800

	Device     Boot Start     End Sectors Size Id Type
	test.img1       16384 4145151 4128768   2G 83 Linux

	Command (m for help): w
	The partition table has been altered.
	Syncing disks.

$ sudo losetup -f test.img
$ sudo kpartx -a -v test.img
	add map loop0p1 (254:0): 0 4128768 linear 7:0 16384

$ sudo mkfs.vfat -F32 /dev/mapper/loop0p1
	mkfs.fat 4.1 (2017-01-24)

$ sudo fatlabel /dev/mapper/loop0p1 FC3000

$ sudo kpartx -d -v /dev/loop0
	del devmap : loop0p1

$ sudo losetup -d /dev/loop0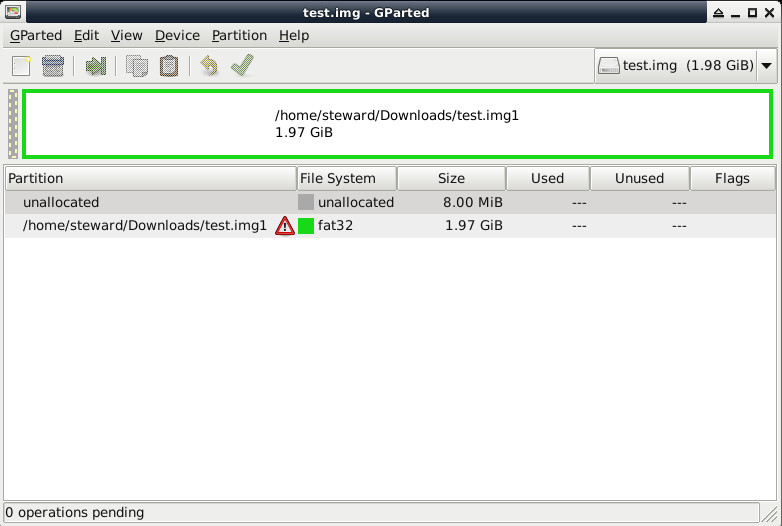
#98 Re: 司徒开源 » 研究FC3000掌機的開源可行性 » 2022-08-30 22:18:31
@neotendo
[Q1] can you tell me how i can add a new variant?
In kernel folder, run the following command and then you will know how to do next
$ grep suniv_variant . -r[Q2] do you have the tool or can you maybe ask the user for his tool please (User: aoa)?
I don't have any tool to decrypt ".wst" file.
I have asked "aoa" for further information on dingoonity forum.
[Q3] rootfs is too small and does not boot
Make sure SDL v1.2 library is included and then edit "/etc/inittab" and "/etc/main" files.
#99 司徒开源 » 研究馬沙機的開源可行性 » 2022-08-30 22:03:52
- 司徒
- 回复: 16
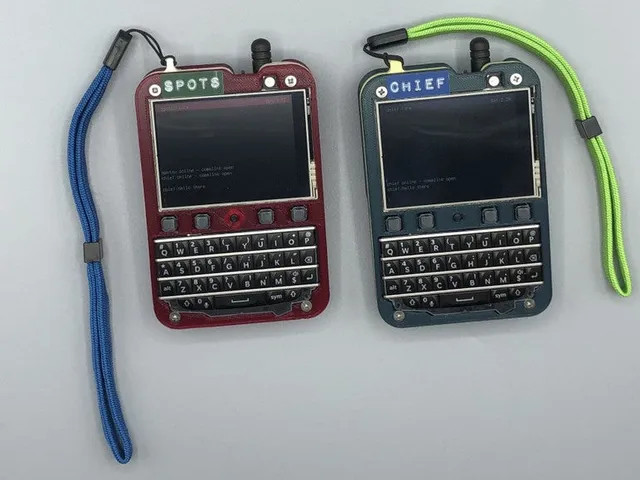
什麼!司徒你又開了一個新帖~不是要研究草食系統嗎?難道,草食系統已經進入生命結束前必須完成的作品之中嗎?這...不好說~因為那些還沒有製作完成的東西,其實都是屬於元宇宙 (Metaverse) 的概念,元宇宙是一個美好的虛擬世界,大家應該好好沈浸在那樣的世界,你說是不是呢?
為何叫馬沙機呢?因為司徒想做一台碼農專用的上網機器,因此,縮寫就使用碼上機這幾個字眼,不過這幾個字不夠漂亮,司徒改取同音字馬殺雞,但是,為了能夠更優雅的使用文字描述這台機器,最後取名叫:馬沙機,是不是很棒的名字呢!
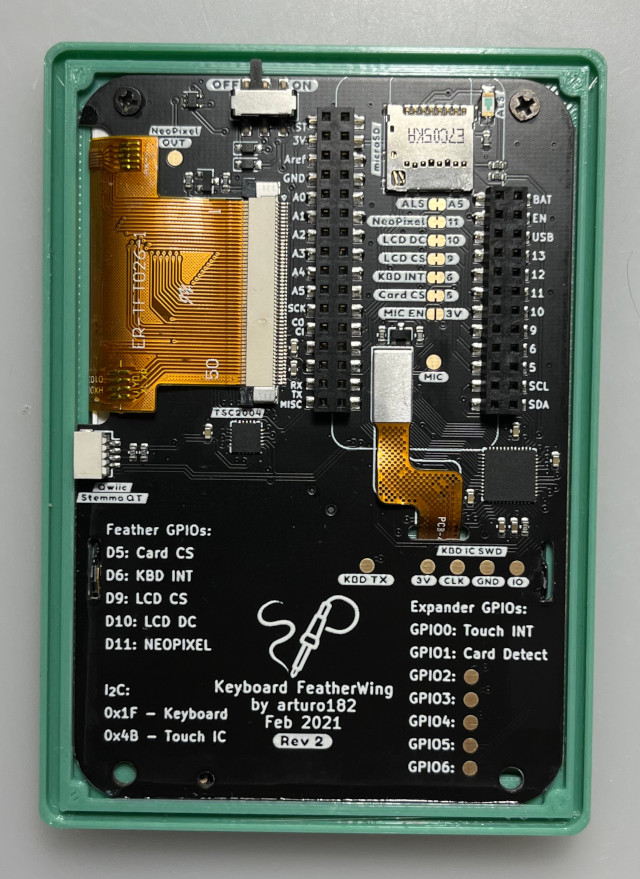
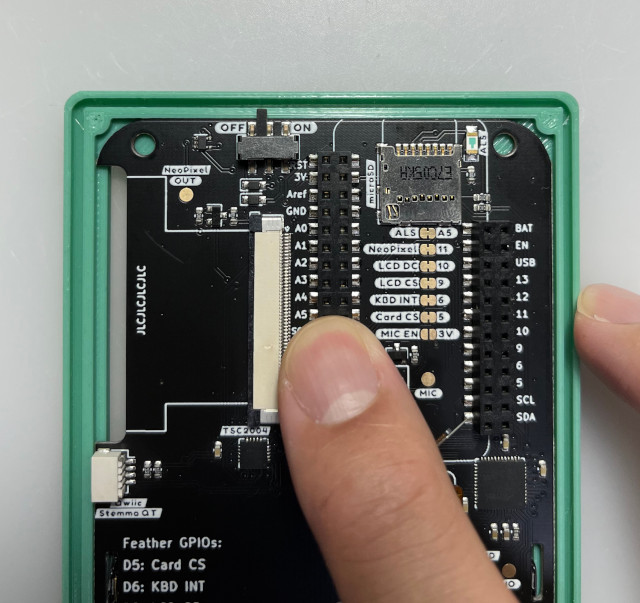
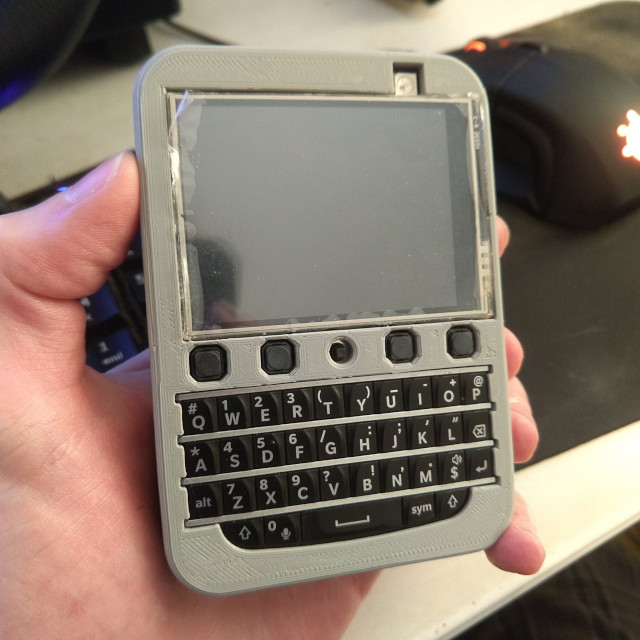
那這台機器的主要目的是什麼呢?其實就是司徒無聊時,可以拿來寫寫程式碼,雖然有點唬爛的感覺,不過只能暫時相信,所以這台機器就是為了這個簡單的目的而誕生,那這台機器要跑什麼系統呢?司徒設定這台機器可以跑 Debian 系統,如果有 GUI 圖形桌面則更好,沒有的話,至少可以跑 Console 介面,由於是跑 Debian 系統,那當然需要具備上網更新的功能,因此,這台機器也要具備網路連線的功能,司徒大約擬定簡要規格後,就開始找尋手邊可以使用的元件,這才發現,原來 Keyboard FeatherWing 已經放在冰箱好些日子,FeatherWing 長成如下樣子: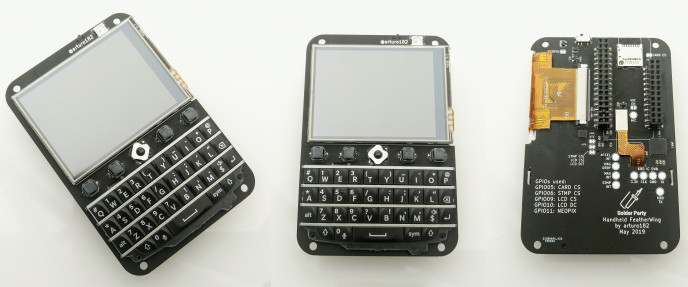
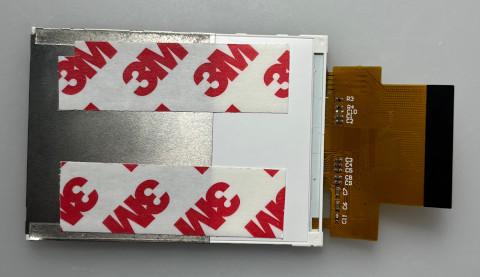
主要元件就是:2.6吋SPI屏、Q10鍵盤、PCB板子
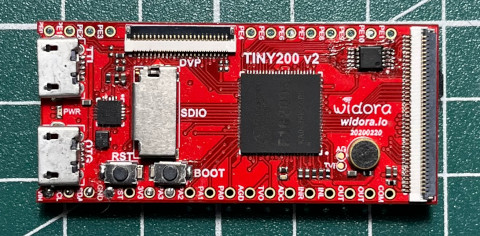
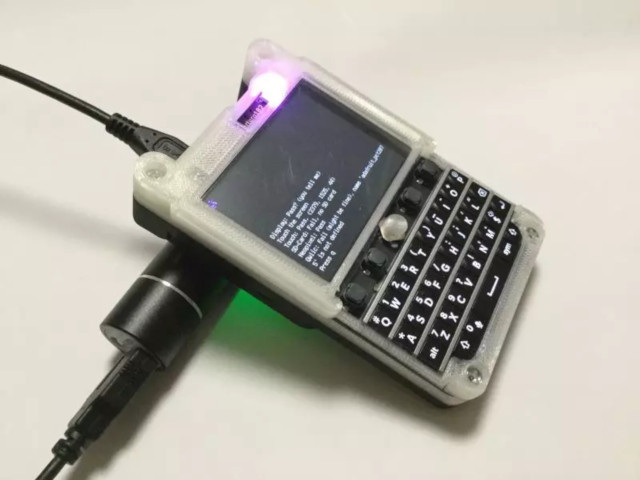
司徒當初購買時,還有額外添購 RP2040 專用的轉板,如下圖片:
不過,司徒目前不打算使用 RP2040,於是,再度翻找冰箱,尋找可用的元件,這才發現,原來還有更古老的 MT7688 元件可以使用,那就是 HLK-RM08S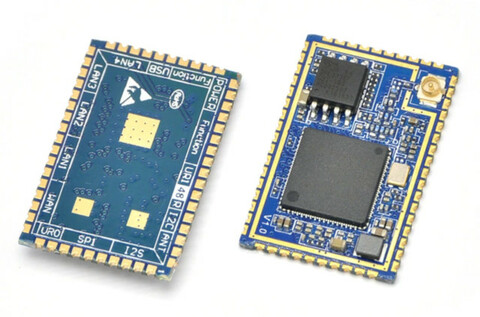
不過,司徒購買的是 RAM 8MB、Flash 4MB,以這樣的規格來看,司徒也不確定能不能跑 Debian GUI 圖形桌面,只能試試看才知道~
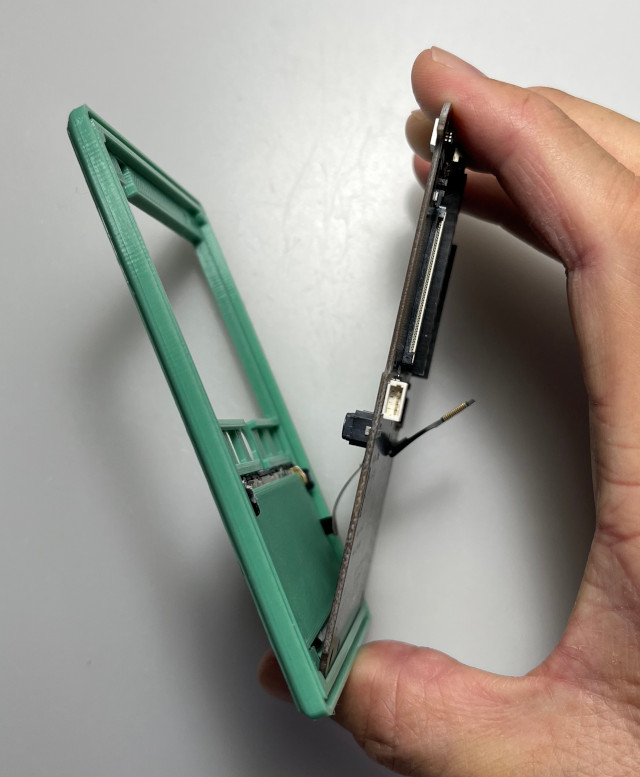
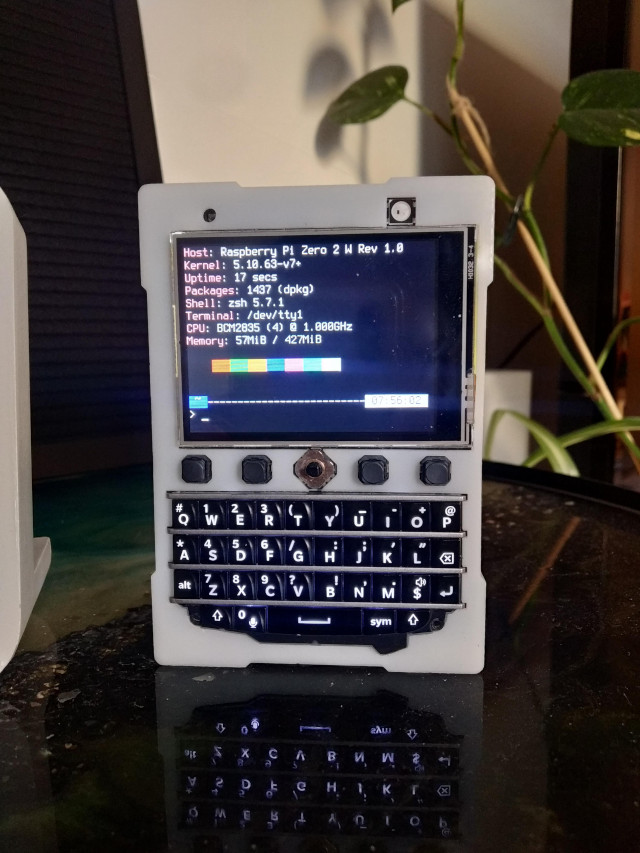
全部零件就是這些,可能有人好奇,為何有小紅點呢?這是因為5路方向鍵必須使用這顆小紅點,才能達到完美操控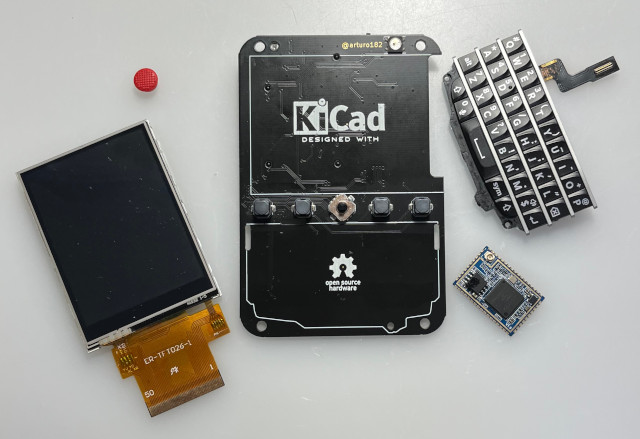
背面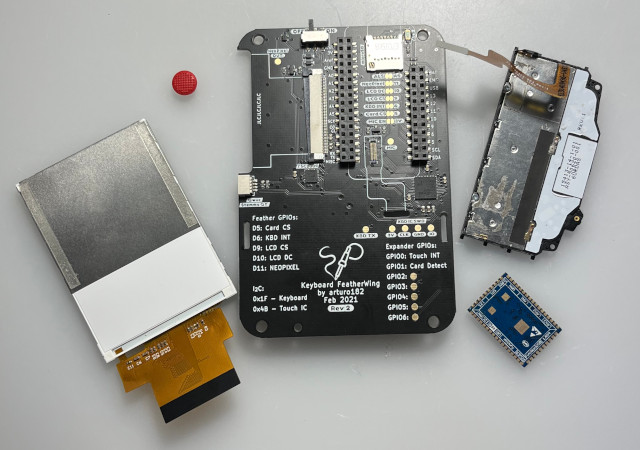
此帖目標如下:
1. 跑 Debian 系統 (基本要求是 Console Terminal)
2. 可以連上網路更新 Package
3. 可以編譯並且執行 Hello, world! 程式
P.S. 達標後,此貼就會結帖
雖然司徒可用的時間相當有限,不過,司徒還是喜歡搞一些比較有趣的東西,因此,基於行動緩慢的理由,此帖預計更新週期為一年,當然,邪惡的鍵盤俠可能想說,司徒一定是跑去搞小三才變得沒有時間,這...,不瞞各位,司徒確實在搞小三,小犬目前國小三年級,司徒花費比較多時間在小犬身上,因此,就讓此貼慢慢更新吧~哈~
#100 Re: 司徒开源 » 研究FC3000掌機的開源可行性 » 2022-08-30 19:31:17
By the way, here is the way (black box testing) to find L1 and R1 in kernel level.
(it assumes that they are not physically connected with A and B buttons):
1. List out all of unused GPIO, ex: PAx, PBx, PCx and so on.
2. Change framebuffer as console mode that log can be printed on LCD.
3. Try each unused GPIO and configure it as output (only 1 ouput for every round).
4. Press L1 and R1 and check the result on LCD.
But I am wrong because L1=A and R1=B, ha ha
#101 Re: 司徒开源 » 研究FC3000掌機的開源可行性 » 2022-08-30 19:12:04
@neotendo
[Q1] TV-OUT
It is not implemented yet and no any plan for this feature.
[Q2] Since my I button connects to PA3 i think this pin is not in input mode!?
PA3 was mapped as Y button.
[Q3] when reading ((32 *4) + 6) system does not boot when Green LED is on via DAC.C
PE6 was used as PWM output for LCD backlight.
[Q4] the coil noise is gone when setting backlight to 100%
Yes, sound signal is effected by PWM.
Ref:
https://whycan.com/t_6647.html#p78183
https://whycan.com/t_6647.html#p76849
[Q5] I got all buttons working, only need to cut traces from L1,R1 and connect it to free io pins on mcu if possible.
Goooood !
[Q6] i guess the encryption/decryption chip is only for the roms when inserting the "cartridge".
We only focusd on Linux OS so far.
If you have any update information, it is welcome to share with us.
I think you have already completed all of tasks for Linux OS on your FC3000.
It is excellent task done by yourself.
If it is possible, please help share the image file that can be flashed into MicroSD to someone who needs it.
Thanks ![]()
#102 Re: 司徒开源 » 研究FC3000掌機的開源可行性 » 2022-08-29 20:50:50
@neotendo
Good spot !
I need to check whether we are on the same page or not.
Is our goal to find out why L/R and A/B use the same pins ?
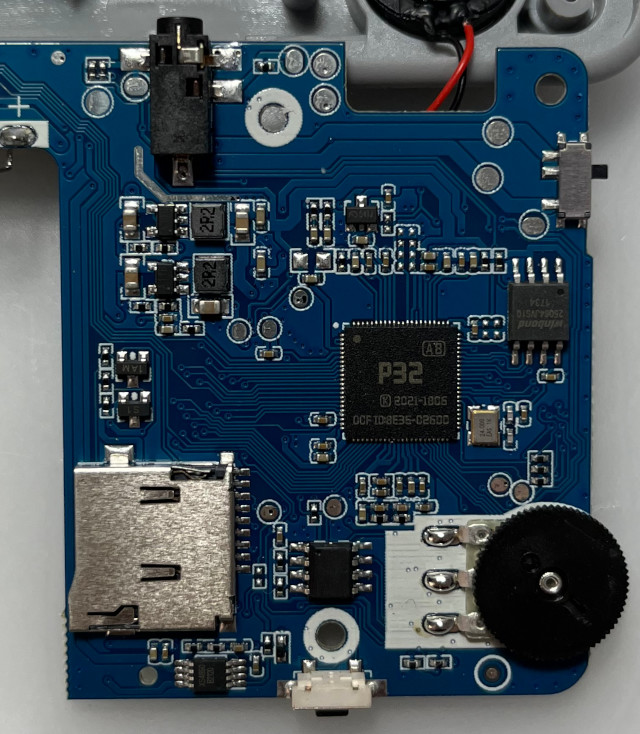
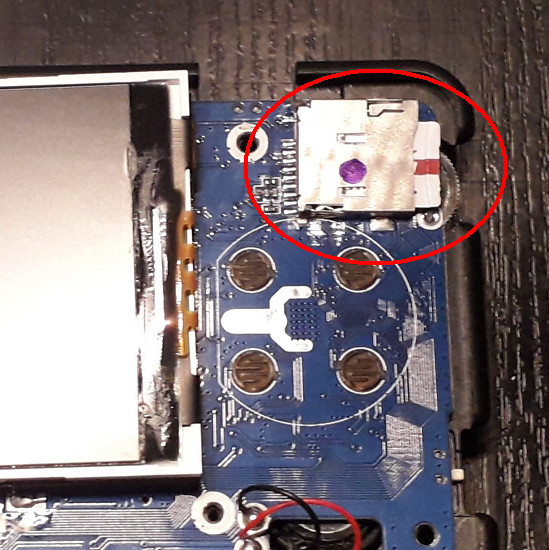
If yes, please provide PCB front view image without LCD panel.
(you have already provided PCB back view in previous testing)
I would like to check something on this PCB.
In such scenario, black box testing is more powerful than white box testing.
I have an idea for this issue based on kernel level testing.
I will explain to you later.
#103 Re: 司徒开源 » 研究FC3000掌機的開源可行性 » 2022-08-29 19:18:33
#104 Re: 司徒开源 » 研究FC3000掌機的開源可行性 » 2022-08-29 13:03:23
@neotendo
It seems (A / L1, B / R1) share the same I/O pins in your FC3000.
In our FC3000, the designing is almost same as yours but different buttons mapping.
The following schematic I depicted shows the buttons share same I/O pins in our FC3000: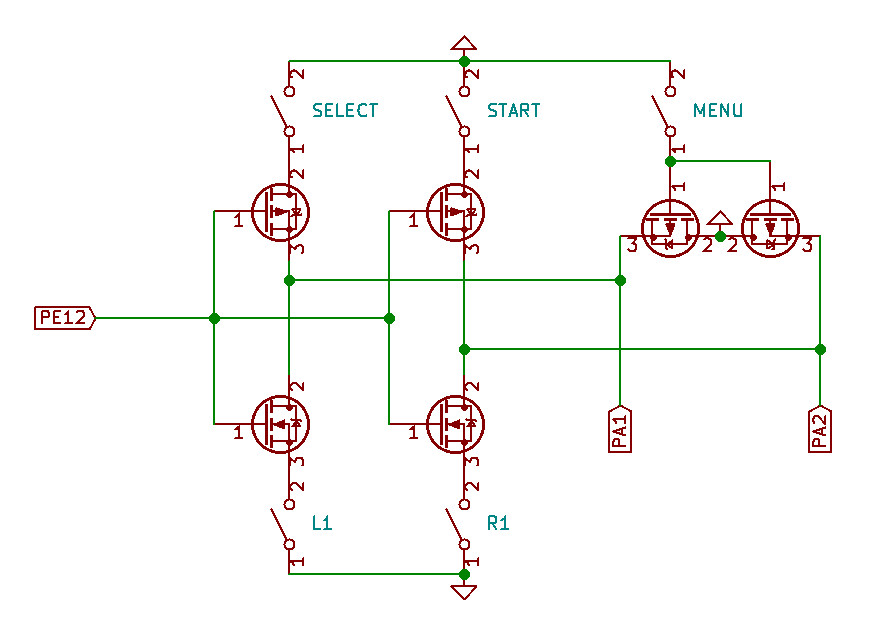
And functionality is shown in the following image:
Here is the code shows how to check MENU button:
290       l = gpio_get_value(I_L1);
291       r = gpio_get_value(I_R1);
292       if((l == 0) && (r == 0)){
293         val|= R_MENU;
294       }
Check PE12 firstly to see whether it connects to NMOS or PMOS elments or not.
#105 Re: 司徒开源 » 研究FC3000掌機的開源可行性 » 2022-08-28 20:30:14
#106 Re: 司徒开源 » 研究FC3000掌機的開源可行性 » 2022-08-28 08:53:22
@neotendo
[Q1] GUI issue
I have no idea too.
[Q2] Sound issue
It is PA2 (TPY1) as the following image shown: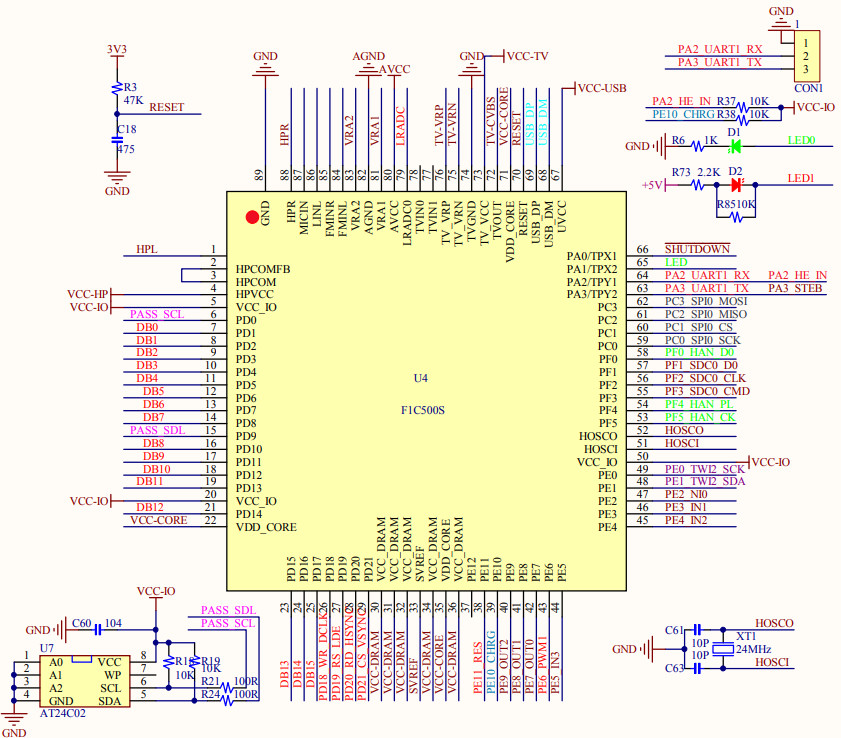
We need configure PA2 as OUTPUT so that it can be controlled as HIGH and the bits for PA2 are bit8 ~ bit10:
Source code: kernel/sound/soc/suniv/dac.c
suniv_variant = 1: PocketGo
suniv_variant = 2: TRIMUI
suniv_variant = 3: FC3000
Change L144 as the following one:
129 static void suniv_gpio_init(void)
130 {
131   uint32_t ret;
132
133   if(suniv_variant == 0){
134     ret = readl(iomm.gpio + PA_CFG0);
135 #if POCKETGO_USE_EARPHONE
136     ret&= 0xfffff0f0;
137 #else
138     ret&= 0xfffffff0;
139 #endif
140     ret|= 0x00000001;
141     writel(ret, iomm.gpio + PA_CFG0);
142     suniv_setbits(iomm.gpio + PA_DATA, (1 << 0));
143   }
144   else if((suniv_variant == 1) || (suniv_variant == 2)){
145     ret = readl(iomm.gpio + PA_CFG0);
146     ret&= 0xffffff0f;
147     ret|= 0x00000010;
148     writel(ret, iomm.gpio + PA_CFG0);
149     suniv_setbits(iomm.gpio + PA_DATA, (1 << 1));
150   }
151 }#107 Re: 司徒开源 » 研究FC3000掌機的開源可行性 » 2022-08-27 20:32:37
@neotendo
GUI is very complicated than you think and there are many variants based on classical GMenu2X GUI.
And there are many configurations you need to know how to configure for your need (google is your friend).
It is a long story in open source handheld.
If you are interested about this, I can explain for you later.
In current stage, it will be good if all of drivers are ready.
#108 Re: 司徒开源 » 研究FC3000掌機的開源可行性 » 2022-08-27 12:48:27
@neotendo
What is filebrowser menu ?
Do you mean the ROMS list menu you can select the rom to be loaded in PICRODRIVE emulator ?
If yes, you need to press A button and then it shows ROMS lists for you.
Before this, you need make sure all of buttons can work properly.
I mean your input driver can work properly.
#109 Re: 司徒开源 » 研究FC3000掌機的開源可行性 » 2022-08-26 22:23:04
@neotendo
[Q1] Sound
Source code: kernel/sound/soc/suniv/dac.c
In our FC3000, sound signal is connected to LM4890 amplifier IC directly and the SHUTDOWN pin is connected to 3.3V, which is always in unmute state.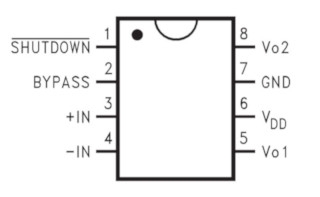
So, you need to check whether the hardware is same as ours or not.
If not, it may be controlled by mute/unmute pin.
Check your sound hardware first and then we can make decision for next step.
LM4890 location in our FC3000: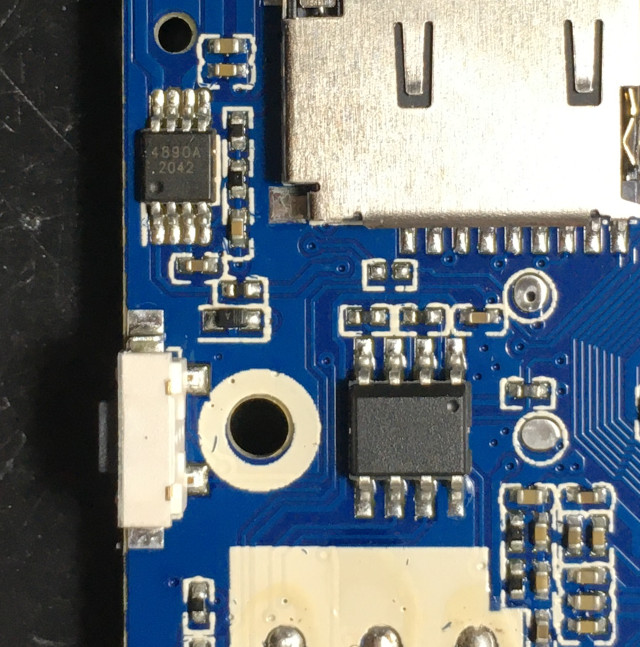
[Q2] Buttons
Source code: kernel/drivers/input/keyboard/suniv-keypad.c
Find all of GPIO pins and then I will teach you how to modify in kernel source code.
All of GPIO pins in our FC3000: https://steward-fu.github.io/website/handheld/fc3000/pin.htm
[Q3] how i can enter the gmenu2x app?
Please post the content of "/etc/main" file.
[Q4] fc3000 does not boot with my rootfs
If you need more detailed information about why your rootfs cannot be launched properly, you need solder UART to see detailed logs.
UART pin: https://steward-fu.github.io/website/handheld/fc3000/uart.htm
#110 Re: 司徒开源 » 研究FC3000掌機的開源可行性 » 2022-08-26 10:30:03
@neotendo
Congratulations !
I am very happy to see Linux OS runs on your FC3000 ~
[Q1] sound not working
In general, there is an enable pin in amplifier IC to mute or unmute sound.
You can use multimeter to see where this pin connects to.
[Q2] most buttons not working
You can use multimeter to find all of them out.
Then you need update changes into kernel/drivers/input/keyboard/suniv-keypad.c file.
[Q3] green power led not working
As I known, the LED isn't controlled by F1C100S.
It is just a power indicator.
[Q4] is it possible to inject the new lcd code into an stock v1 or v2 rom?
Yes, it is possible but you need reverse and analyze stock firmware in assembly to see how to do inject.
If you can do this, we appreciate your efforts.
[Q5] colors wrong
You can change the settings (swap r-g-b) in LCD panel or framebuffer driver.
#111 Re: 司徒开源 » 研究FC3000掌機的開源可行性 » 2022-08-25 21:03:07
@neotendo
T2812-M106-24C-7D_HX8347.zip
sunivfb.c: replaced initial code as hx8347 (based on your previous file) for fc3000
sunivfb_hx8347.patch: patch file for hx8347
For your requirement, just update sunivfb.c file and then rebuild kernel and uboot.
I think it is time to run Linux OS on your FC3000.
Ref: https://github.com/steward-fu/fc3000
#112 Re: 司徒开源 » 研究FC3000掌機的開源可行性 » 2022-08-25 17:42:10
#113 Re: 司徒开源 » 研究FC3000掌機的開源可行性 » 2022-08-25 16:06:44
#114 Re: 司徒开源 » 研究FC3000掌機的開源可行性 » 2022-08-25 10:58:06
@neotendo
Here is the another idea for testing as the following image: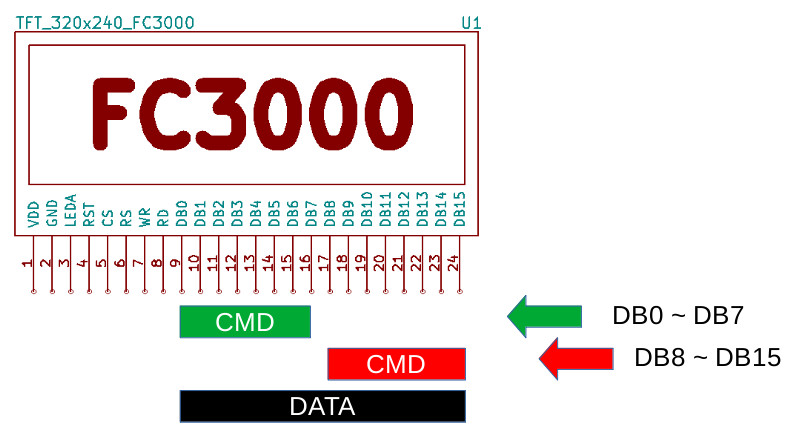
For i80 interface, there are 2 methods used to send command, which are DB0~DB7 and DB8~DB15 respectively.
In our previous testing, we focused on DB0~DB7 bus for command.
It is time to test another testing to see whether it works or not.
Here is the download link for testing (swap R-B and send command via DB8~DB15):
https://github.com/steward-fu/fc3000/releases/download/v1.0/lcd_panel_identify_swap-2_img.zip
SHA1
2ed14db691ad2add6257ef450cc003819e0708ad  test_1.img
f119dcd0328bf34114f969234477624252e8e30b  test_2.img
c8a20326a5896045f73e124d96d68ec0b4d534db  test_3.img
27d85a6b8f2408fc507e8e2a37cab78b0d4401c1  test_4.img
8f586266ad2b3b19b18bf9bbf738495884537f9f  test_5.img
01753ae90098cec8992732107fb3ef0f50c30063  test_6.img
88bf176e7bafc24e5f857d581a7982c5e7f9535a test_7.img#115 Re: 司徒开源 » 研究FC3000掌機的開源可行性 » 2022-08-24 23:55:27
@neotendo
Here is the testing file (swap R-B and then reverse DB0-DB15):
https://github.com/steward-fu/fc3000/releases/download/v1.0/lcd_panel_identify_swap-1_img.zip
SHA1
3a1e957291d36ff5302f30dcb54dcb54aec79063  test_1.img
6b4ffd2e876c1fae617482ed52147b46e537c884  test_2.img
b1ad9914b93e1262820c028e631dc315f10caf06  test_3.img
83749d860e9642d5b3b8f3c6082d3b501d95b111  test_4.img
d744e25906877e2c30da15694e2ca24d3a52e53f  test_5.img
459bf12908d91cc3ebe22338cccbbbc20eda9d0b  test_6.img
1ff27922d41d53c479bef6d6f220d868f36ed6b0 test_7.img#116 Re: 司徒开源 » 研究FC3000掌機的開源可行性 » 2022-08-24 20:51:56
#117 Re: 司徒开源 » 研究FC3000掌機的開源可行性 » 2022-08-24 20:45:15
@neotendo
I guess it should miss write command (0x2c), which is used to tell MCU we can start to write data into memory.
So, the screen you posted is like the following one: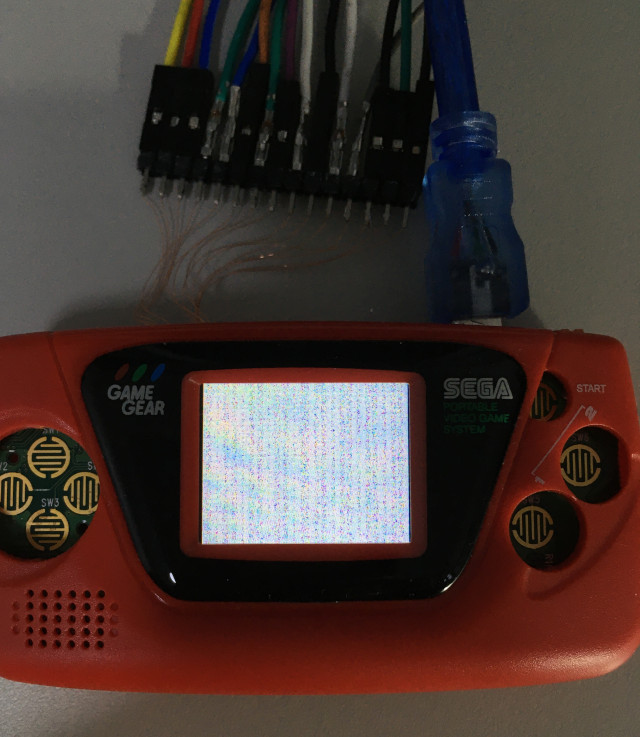
Here is the modified test_6 for your testing (append 0x2c at the end of code):
test_6.img.zip
SHA1:
b530ea20039c5ed7dd695f3ee9bd2228275a4fca test_6.img#118 Re: 司徒开源 » 研究FC3000掌機的開源可行性 » 2022-08-24 19:07:56
@neotendo
[Q1] if R and B are swapped, shouldn't it just be wrong colors?
[A1]
For i80 interface, there is a MCU embedded in LCD panel, which is in charge of rendering color on LCD.
Before MCU gets started, we need to initialize this MCU firstly, ex: voltage, gamma, frame rate and so on.
So, this is why we need initial code to initialize LCD panel.
If the bus of R and B are swapped, the MCU cannot be initialized properly due to invalid initial sequence.
It means MCU cannot work properly, just like "snow" screen as your testing.
I have to think what of testing we can use.
If you have any suggestion or idea, it is very welcome.
#119 Re: 司徒开源 » 研究FC3000掌機的開源可行性 » 2022-08-24 17:06:58
@neotendo
Here is testing file (test_1.img ~ test_8.img):
https://github.com/steward-fu/fc3000/releases/download/v1.0/lcd_panel_identify_swap_img.zip
SHA1
f18644f790e4b2ccd6cc55ce161b8661e369ed42  test_1.img
f51dc6390855e26676f9f0564cc9b8f6b7ffa57e  test_2.img
65c541eb2e3aa9807cacf99dd6b0a7a3f56ea531  test_3.img
7df42ceb8cfec7b421980b7544a8481ed83d8b9a  test_4.img
93ffd00c223166149afa91c835e90be12a5ab3b4  test_5.img
6f3e295018b2aa3a363ca169510327e294c17afa  test_6.img
59df3d8467e044ee725a200522ff52ec1c59e466  test_7.img
c4dddb1afb0cfe5ffd7450e84c524a10caa3062b test_8.img#120 Re: 司徒开源 » 研究FC3000掌機的開源可行性 » 2022-08-24 13:31:07
@neotendo
[Q1] why do you think it's not hx8347?
[A1] In my experiences, ST-xxxx, GC-xxxx, ILI-xxxx series are more commonly used in inexpensive handheld.
Thanks for your information.
If I understood correctly, it seems the bus of R and B are swapped from F1C100S side as the following image I depicted:
Here is link for all of the LCD pinouts (TFT FC3000):
https://steward-fu.github.io/website/handheld/fc3000/lcd_init.htm
It is worthy to try this idea on your FC3000.
I will prepare testing images for your FC3000 later on.
Please wait for update.
#121 Re: 司徒开源 » 研究FC3000掌機的開源可行性 » 2022-08-24 10:57:26
#122 Re: 司徒开源 » 研究FC3000掌機的開源可行性 » 2022-08-23 20:52:15
@neotendo
[Q1] Had already tried to compile that yesterday, but I had errors in the gdb compilation.
[A1] Please post error logs if need help.
[Q2] fc3000 starts with a white screen now. is that right?
[A2] Yes, it means your FC3000 is bootig from MicroSD.
[Q3] i do not hear any sound when booting linux
[A3] Basically, it is a noise when turn on speaker.
According to the image you posted, it seems your FC3000 is more older than ours.
I guess some of LCD pinouts may be different with our FC3000.
Except for pinout changed, I am afraid that the LCD panel on your FC3000 is not HX8347.
So, it is not easy for us to port Linux OS into your FC3000 beacuse of many unknown information.
But we can try our best to see whether it is possible or not.
I spent some time to collect initial code from google for your FC3000 as possible.
Here are the lists I would like to test on your FC3000:
1. https://os.mbed.com/users/Suky/code/LCDTFT//file/1085b6177f6e/LCDTFT.cpp
2. https://searchcode.com/codesearch/view/46088261/
3. https://steward-fu.github.io/website/handheld/q8/asm_lcd_gpio.htm
4. https://whycan.com/t_6647.html#p64598
5. https://whycan.com/t_6647.html#p64694
6. https://www.microchip.com/forums/m624935.aspx
7. https://github.com/CariadDisplayLibrary/HX8347D/blob/master/src/HX8347D.cpp
All of them are compiled and packed as flash image files.
So, you just need flash them into your MicroSD and then test it on your FC3000.
Source code: https://github.com/steward-fu/fc3000/releases/download/source/lcd_panel_identify_src.zip
Flash image: https://github.com/steward-fu/fc3000/releases/download/v1.0/lcd_panel_identify_img.zip
SHA1
beb68550727732fe80b8f5083463df0e5f2996d8  test_1.img
3d4d309a1111e6cc813de2dfba485a7888ad67eb  test_2.img
57de59c85e1cca75983c1a1dc5283444137b4e76  test_3.img
dbef7df5b042f95398c8e7ff3d7188ec7a57a47c  test_4.img
47fa196756b54ee022ae305a81fe7dc200ccb727  test_5.img
e9efbfd13c8c508e7a392ce20bbb7e1dc79f1e2b  test_6.img
f7a49d1ea656d7df7800b4bec202d4e60a98fab8  test_7.img
How to test (test_1.img ~ test_7.img):
Step 1: flash test_x.img into MicroSD as the following command
$ sudo dd if=test_x.img of=/dev/sdX bs=1MStep 2: put MicroSD into FC3000 and then power on
Step 3: if the initial code is correct, your FC3000 should look like this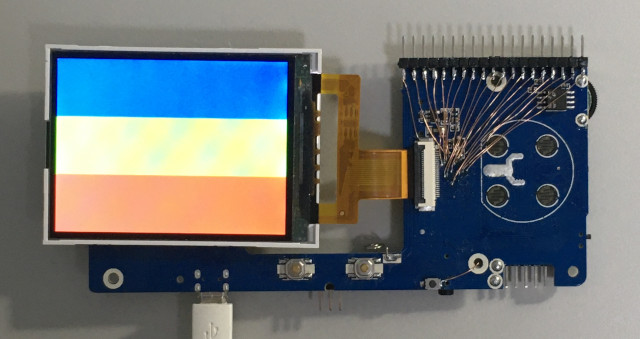
#123 Re: 司徒开源 » 研究FC3000掌機的開源可行性 » 2022-08-23 13:38:34
#124 Re: 司徒开源 » 研究FC3000掌機的開源可行性 » 2022-08-23 12:25:43
#125 Re: 司徒开源 » 研究FC3000掌機的開源可行性 » 2022-08-22 21:35:53
@neotendo
[Q1] Thank you very much, maybe i can find someone with the same model, a dump tool would be handy.
[A1]
Here is the dump tool you can use to dump firmware from another FC3000:
https://github.com/steward-fu/fc3000/releases/download/v1.0/ips_fc3000_dump_0627_1.img.7z
Step 1: extract ips_fc3000_dump_0627_1.img.7z
Step 2: flash image into MicroSD as the following command
$ sudo dd if=ips_fc3000_dump_0627_1.img of=/dev/sdX bs=1MStep 3: put this MicroSD into another FC3000 and then power on
Step 4: wait for 10 minutes and then power off
Step 5: provide v1rom.img back to me and I will create restore tool for you
[Q2] i would be very grateful if you would help me there at least to have linux on it
[A2]
It is easy for you to port Linux OS into your FC3000 if leverage existing source code.
So, here is what you need: https://github.com/steward-fu/fc3000
Preparation
Step 1: make sure your development environment is ready
Step 2: download https://github.com/steward-fu/fc3000/releases/download/v1.0/fc3000_ips_od_jutleys_no_roms.img.7z
Step 3: extract fc3000_ips_od_jutleys_no_roms.img.7z and then flash into MicroSD
Step 4: build kernel source code (kernel.tar.gz) without any problem
Step 5: build uboot source code (uboot.tar.gz) without any problem
Step 6: put MicroSD into your FC3000 and then power on
Step 7: when boot into Linux OS, you can hear a beep sound from speaker
Step 8: make sure all of steps as described above are ready and then you can go to next step
Porting LCD driver for Linux OS
Step 1: update initial code for HX8347 panel, kernel source code: kernel/drivers/video/fbdev/sunivfb.c
593 static void fc3000_lcd_init(void)Since we guess the LCD panel is HX8347, so, we need try example code to see whether it works or not.
Here is the example code we can use: https://os.mbed.com/users/Suky/code/LCDTFT//file/1085b6177f6e/LCDTFT.cpp
If it does not work, you need google it and then try different example code.
Such method we use is more like black box testing.
Step 2: build modified kernel source
Step 3: build uboot source code (in this step, kernel and uboot images will be updated into MicroSD)
Step 4: put MicroSD into your FC3000 and then power on
Step 5: if the LCD is still blank, go back to Step 1
Here are the steps I wrote for your referece to port Linux OS into your FC3000.
I cannot make sure whether it is clear or not.
If not, it is welcome to post your question.
#126 Re: 司徒开源 » 研究Game Gear Micro掌機的開源可行性 » 2022-08-21 18:03:30
#127 Re: 司徒开源 » 研究Game Gear Micro掌機的開源可行性 » 2022-08-21 14:36:38
此貼最後更新通知~
阿彌陀佛~善哉~善哉~貧僧隨風而來~隨風而去~法號~夢遺,夢遺大濕最近潛入深山修行,有天在夢中驚見 Game Gear Micro 駕鶴歸西,亡魂訴說其被司徒折騰的慘不忍睹,接近五馬分屍狀態,嚇醒夢遺大師,於是連夜奔赴尋找司徒,這才發現,原來司徒都在鬼混,好在最終司徒答應做最後更新,夢遺大濕這才放下心中大石~
前言
司徒幫 Miyoo Mini(SSD202) 上了一顆虛擬 GPU(Google SwiftShader),用來跑 PPSSPP 模擬器,原本打算再次移植給 F1C200S 使用,讓它跑 OpenGL ES 2.0 程式,可惜司徒錯估 SwiftShader 需要至少 ARMv7 才可以支援,於是司徒再度修改項目,將原本 app_e (OpenGL ES) 改成跑 GB 模擬器,而 app_a (Arduboy 模擬器) 改成跑 GBC 模擬器,這樣此貼剛好就可以做結貼的動作,真是一石二鳥之計~
關於聲音控制方式
司徒最後再度挖掘,才發現 GGM 音量轉輪是接到 PA0,透過 TouchPanel 方式輸入,利用其電壓做音量控制,修改後的 Kernel 位於:https://github.com/steward-fu/ggm/releases/download/src/kernel_20220821.tar.gz,目前已經可以控制音量大小~
app_e (GB 模擬器)
源代碼:https://github.com/steward-fu/ggm/releases/download/src/gambatte_20220821.tar.gz
編譯後:https://github.com/steward-fu/ggm/releases/download/v1.0/app_e_20220821.tar.gz
玩家只要將編譯後的檔案解壓縮到 app_e 資料夾就可以,接著執行如下程式
司徒將 GBA 的選單拿來重複使用,因此,字型大小算是相當剛好 (遊戲請放在 roms/gb 資料夾)
司徒保留 GB 的 BIOS 開機畫面,每次看到這個畫面總是相當懷念~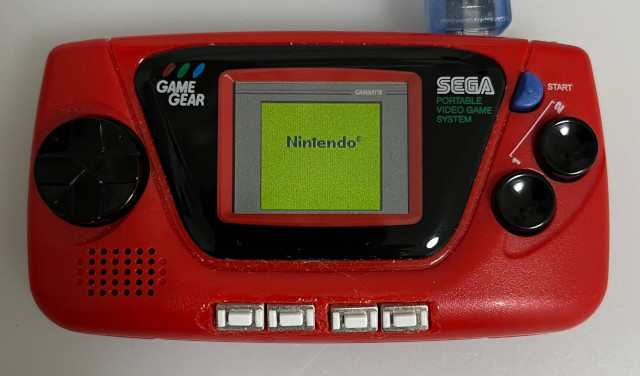
司徒打包了很多調色盤以供使用,因此,有相當多調色盤可以好好試試~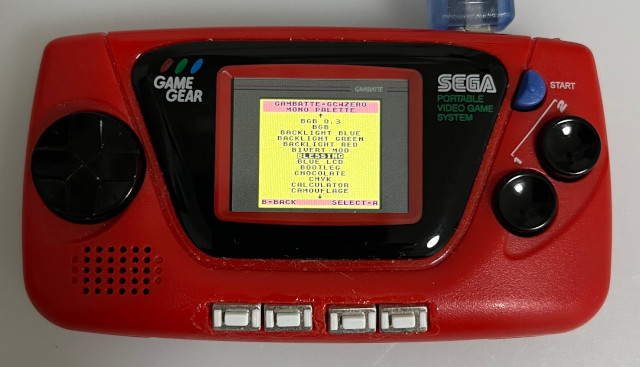
別有一番風味~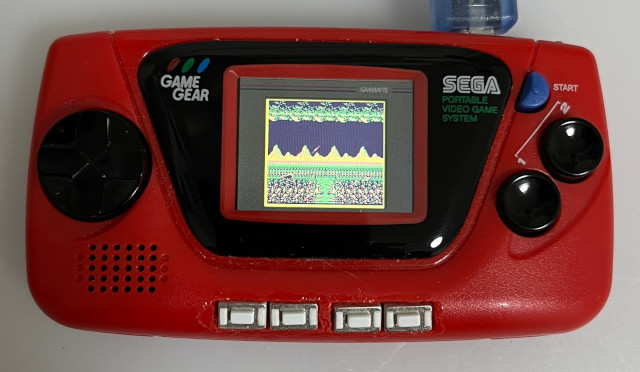
app_a (GBC 模擬器)
源代碼:https://github.com/steward-fu/ggm/releases/download/src/gambatte_20220821.tar.gz
編譯後:https://github.com/steward-fu/ggm/releases/download/v1.0/app_a_20220821.tar.gz
玩家只要將編譯後的檔案解壓縮到 app_a 資料夾就可以,接著執行如下程式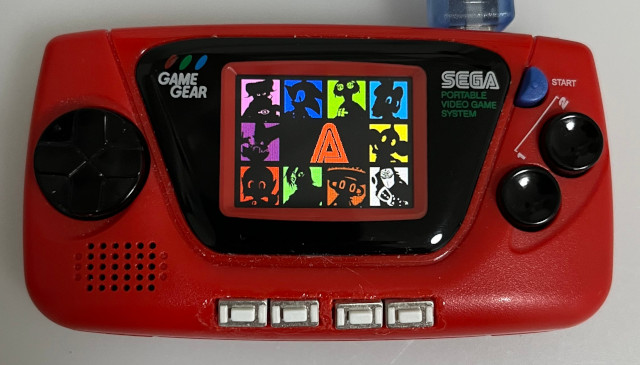
字型大小算是相當剛好 (遊戲請放在 roms/gbc 資料夾)
保留 GBC 的 BIOS 開機畫面,是不是相當懷念~哈~
如果玩家有注意到,司徒將 GB 的外框往上移動,GBC 則是往下移動,這樣看起來是不是更有感覺呢~哈~
菜單都是使用藍色按鍵做設定~
基於開源精神,司徒將所有源代碼放在GitHub(https://github.com/steward-fu/ggm),如果有興趣搗鼓的玩家,歡迎繼續把玩,而基於開源精神,司徒也希望大家可以將修改後的源代碼再次公開,有助於開源的發展,最後,司徒相當感謝大家對於此貼的厚愛,司徒在此至上謝意,此貼將不在更新技術部份,而對於問題仍會持續回覆,感謝~
#128 Re: 司徒开源 » 研究FC3000掌機的開源可行性 » 2022-08-20 12:40:03
@neotendo
Q1: does anybody have the stock rom from the v1 old version ?
A1: As I known, we don't have such backup rom for you to restore your device back to normal. If you can find someone has the model as yours, I can provide dump progam to you and then you can try to dump it. I think this is what we can help on.
Q2: can anyone point me in a direction to port the linux to this device ?
A2: Sure, we can. But before porting Linux into your device, you need known which LCD model is used in your device.
So, what is your next step ?
#129 Re: 全志 SOC » V3S zero 5.2y的内核 Kernel panic - not syncing: Attempted to kill init! » 2022-08-13 14:43:38
出錯點位於 free_netdev(0xc061c26c), 從 stack 看到的觸發源頭是 driver_probe_device(0xc0484f90), 加上如下 logs:
[    0.849756] libphy: stmmac: probed
[    0.853875] dwmac-sun8i 1c30000.ethernet: Cannot get mdio-mux node
源頭應該是 https://github.com/torvalds/linux/blob/master/drivers/net/ethernet/stmicro/stmmac/dwmac-sun8i.c#L763, 代表你的 device tree 對於 mdio-mux 的描述有問題, 導致 network probe 中途就做 free 的動作, 如果要可以順利進入系統, 可以先把 kernel 的這個網路驅動移掉, 這樣應該就可以開機進入系統, 不過這個問題應該是 network remove 時, 沒有做好錯誤檢查的問題~
#130 Re: 全志 SOC » 荔枝派Zero V3s开发板驱动 ili9341 摆拍 » 2022-08-12 10:46:34
@tevada2010 @nicholas3388
要使用 framebuffer console, 兩個部分需要:
1. UBoot 傳遞 console=tty0 訊息 (或者 kernel hardcode 這個訊息)
2. Kernel 必須開啟支援 Device Drivers > Graphics support > Console display driver support > Framebuffer Console Support
Ref: https://steward-fu.github.io/website/mcu/nuc972/framebuffer_console.htm
#131 Re: 司徒开源 » 研究Game Gear Micro掌機的開源可行性 » 2022-08-07 10:20:25
#132 Re: 司徒开源 » 研究FC3000掌機的開源可行性 » 2022-08-07 10:13:34
#133 Re: 司徒开源 » 研究FC3000掌機的開源可行性 » 2022-07-09 20:09:11
#134 Re: 司徒开源 » 研究FC3000掌機的開源可行性 » 2022-07-06 23:20:34
#135 Re: 司徒开源 » 研究FC3000掌機的開源可行性 » 2022-07-05 22:46:21
你修改下如下源代碼, 讓LCD IRQ也可以掃屏試試~
drivers/video/fbdev/sunivfb.c
 370 static irqreturn_t lcdc_irq_handler(int irq, void *arg)
 371 {
 372   //if((suniv_variant == 1) || (suniv_variant == 2)){
 373     flip_lcd(arg);
 374   //}
 375   suniv_clrbits(iomm.lcdc + TCON_INT_REG0, (1 << 15));
 376   return IRQ_HANDLED;
377 }#136 Re: 司徒开源 » 研究FC3000掌機的開源可行性 » 2022-07-05 20:40:33
#137 Re: 司徒开源 » 研究FC3000掌機的開源可行性 » 2022-07-04 20:29:17
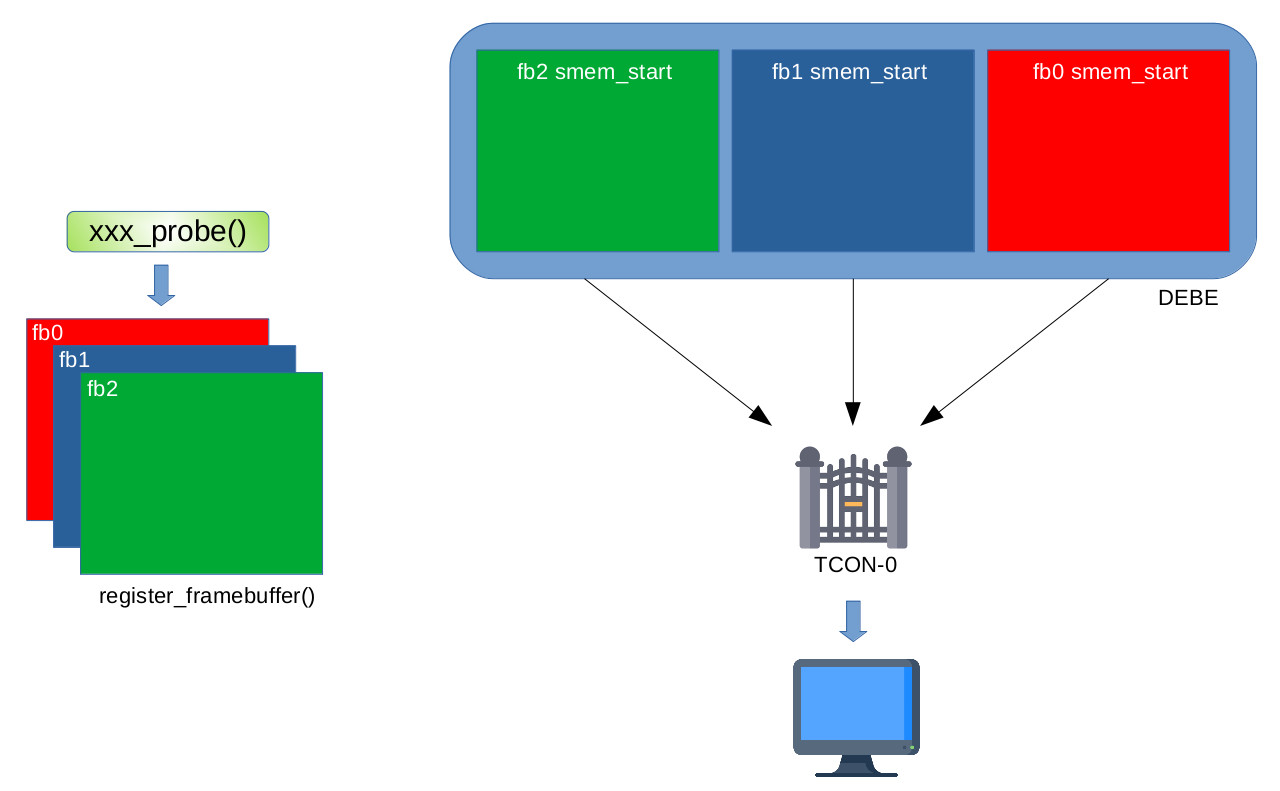
#138 Re: 全志 SOC » 只有一个TCON控制器,但是我想要两个frambuffer?? » 2022-07-04 20:20:25
#139 Re: 司徒开源 » 研究FC3000掌機的開源可行性 » 2022-07-02 19:42:39
#140 Re: 司徒开源 » 研究Game Gear Micro掌機的開源可行性 » 2022-07-02 10:53:51
你的聲音 freq 有點問題, 預設應該是 44K~48KHz, 所以建議直接使用 gdb debug 看問題
修改 Makefile, 把 -s 修改成 -ggdb
LIBS += -ldl -lpthread -lz -lgcov -lasound -Wl,--as-needed -Wl,--gc-sections -flto -ggdb -lpng讓 gpsp 帶有 debug symbol (not stripped)
$ file gpsp
gpsp: ELF 32-bit LSB executable, ARM, EABI5 version 1 (SYSV), dynamically linked, interpreter /lib/ld-uClibc.so.0, with debug_info, not stripped
用 gdb 跑 gpsp, 你應該就可以馬上看到問題
# gdb --args ./gpsp xxx.gba#141 Re: 司徒开源 » 研究Game Gear Micro掌機的開源可行性 » 2022-06-30 18:01:26
#142 Re: 司徒开源 » 研究Game Gear Micro掌機的開源可行性 » 2022-06-30 11:39:40
Miyoo 的 SDL-1.2 源代碼是使用官方的, 沒有做任何修改, Miyoo 是從顯示驅動(fbcon)和聲音驅動(alsa)做修改, 符合 SDL-1.2 的基本需求, 所以可以直接使用官方預設的源代碼, 至於, v3s 是否可以使用 ?這要看驅動程式端的製作才可以知道, 我把 SDL-1.2 和 SDL-2.0 對於顯示和聲音驅動程式的要求貼在下方, 你可以看一下, 看看是否你的 v3s 驅動程式有支援~
SDL 對於顯示驅動的需求: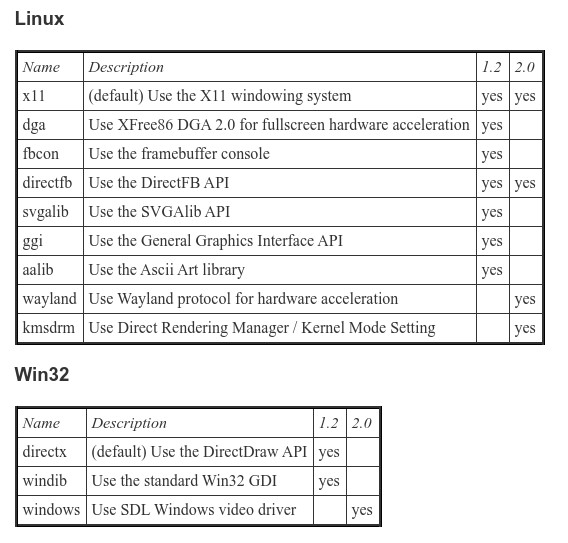
SDL 對於聲音驅動的需求: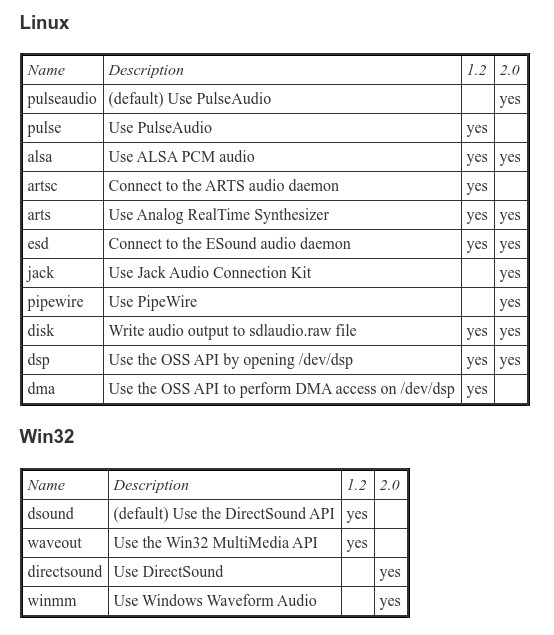
如果你的 v3s 驅動程式不符合 SDL 的基本需求, 那也可對 SDL 源代碼動刀, 就像 PSP 或者 PSVita 那樣, 不過, 那個就是另一個話題了~
#143 Re: 司徒开源 » 研究Game Gear Micro掌機的開源可行性 » 2022-06-30 08:25:43
@hsinyuwang
gpsp 源代碼:https://github.com/steward-fu/miyoo/releases/download/v1.2/gpsp.7z
這個 gpsp 源代碼是當初移植給 Miyoo 使用的, 你可以從這份代碼做修改~
一般移植模擬器, 思路大致上如下步驟(不包含驅動程式部份):
1. 確定可以編譯 (交叉編譯器)
2. 確定可以顯示 (SDL)
3. 調整顯示比例
4. 調整按鍵輸入
1. 確定可以編譯 (交叉編譯器)
gpsp 源代碼解壓縮後, 可以看到 bittboy 資料夾, 複製一份成 v3s, 修改 Makefile, 3 個部份需要修改:
(1). CC 指向你的交叉編譯器
CC = arm-linux-gcc(2). 告知 SDL.h 的位置, 一般使用 sdl-config 取得
CFLAGS += `/opt/miyoo/arm-miyoo-linux-uclibcgnueabi/sysroot/usr/bin/sdl-config --cflags`當然也可以使用固定路徑, 如下:
CFLAGS += -I/opt/miyoo/arm-miyoo-linux-uclibcgnueabi/sysroot/usr/include/SDL(3). 告知 SDL 元件庫, 一般使用 sdl-config 取得
LIBS += `/opt/miyoo/arm-miyoo-linux-uclibcgnueabi/sysroot/usr/bin/sdl-config --libs`當然也可以使用固定名稱, 如下:
LIBS += -lSDL(4). 拿到機器上跑, 確定不會有crash問題
2. 確定可以顯示 (SDL)
(1). SDL_Init() 初始化顯示驅動, 一般需要判斷回傳值是否初始化成功, 因為有時候, 顯示驅動不支援,
(2). 設定顯示解析度 SDL_SetVideoMode(), 由於這些模擬器幾乎都是從早期 320x240 顯示開始製作,
所以預設是跑 320x240, 假如你的顯示驅動只有支援 640x480, 你可以把 video_scale 設定成 2
void init_video()
{
  SDL_Init(SDL_INIT_VIDEO | SDL_INIT_JOYSTICK | SDL_INIT_NOPARACHUTE);
  rl_screen = SDL_SetVideoMode(320 * video_scale, 240 * video_scale, 16, SDL_HWSURFACE);
  screen = SDL_CreateRGBSurface(SDL_SWSURFACE, 240 * video_scale, 160 * video_scale, 16, 0, 0, 0, 0);
  SDL_ShowCursor(0);
}
(3). 拿到機器上跑, 確定可以顯示東西
3. 調整顯示比例
(1). flip_screen() 用來顯示模擬器的畫面, 由於經過太多人修改, 很多重複變數使用的問題, 不過這裡是你做顯示的動作, 畫面比例調整可以在這裡實做
void flip_screen()
{
...
        switch(video_scale)
        {
            case 2:
                integer_scale_horizontal(2);
            break;
            case 3:
                integer_scale_horizontal(3);
            break;
            default:
            case 4:
                integer_scale_horizontal(4);
            break;
        }

        for(y = 159, y2 = (160 * video_scale) - 1; y >= 0; y--)
        {
            for(i = 0; i < video_scale; i++)
            {
                memcpy(screen_ptr + (y2 * pitch),
                screen_ptr + (y * pitch), 480 * video_scale);
                y2--;
            }
        }
...
}
(2). 拿到機器上跑, 確定顯示正確
4. 調整按鍵輸入
(1). 你需要先知道 Input 驅動程式對應的按鍵值, 接著設定按鍵
#if defined(PC_BUILD)

u32 key_map(SDLKey key_sym)
{
  switch(key_sym)
  {
    case SDLK_LSHIFT:
    case SDLK_BACKSPACE:
      return BUTTON_R;

    case SDLK_SPACE:
    case SDLK_TAB:
      return BUTTON_L;

    case SDLK_DOWN:
      return BUTTON_DOWN;

    case SDLK_UP:
      return BUTTON_UP;

    case SDLK_LEFT:
      return BUTTON_LEFT;

    case SDLK_RIGHT:
      return BUTTON_RIGHT;

    case SDLK_RETURN:
      return BUTTON_START;

    case SDLK_ESCAPE:
      return BUTTON_SELECT;

    case SDLK_LCTRL:
      return BUTTON_B;

    case SDLK_LALT:
      return BUTTON_A;

    default:
      return BUTTON_NONE;
  }
}
#endif
(2). 拿到機器上跑, 確定按鍵正確
#144 Re: 司徒开源 » 研究Game Gear Micro掌機的開源可行性 » 2022-06-28 18:30:40
#145 Re: 司徒开源 » 研究FC3000掌機的開源可行性 » 2022-06-28 18:06:33
#146 Re: 司徒开源 » 研究FC3000掌機的開源可行性 » 2022-06-25 20:12:24
@txusevas
Thank you for providing stock rom dumped from WL-28H105-A1 panel.
Restore back to stock rom for FC3000 with WL-28H105-A1 panel: https://github.com/steward-fu/fc3000/releases/download/v1.0/WL-28H105-A1_restore.img
Steps:
1. clone WL-28H105-A1_restore.img into microsd
2. insert MicroSD into your FC3000
3. power on (blank screen)
4. it starts to write stock rom from microsd automatically (take about 10 mins)
5. when screen backlight starts to blink (on ~ off ~ on ~ off...)
6. remove microsd and then reboot your IPS FC3000
#147 Re: 全志 SOC » 有谁知道f1c100s MMC频率如何修改吗 » 2022-06-21 08:40:38
MMC 速度是依據插入的卡別做判斷, 所以不是寫死在DTS裡面, 如果不是特殊應用, Kernel已經做最好速度處理, 以下資訊提供參考:
=> mmc_set_clock() in drivers/mmc/core/core.c
=> mmc_set_ios() in drivers/mmc/host/sunxi-mmc.c
=> sunxi_mmc_set_ios()
=> sunxi_mmc_clk_set_rate()
=> sunxi_mmc_clk_set_rate()
=> clk_round_rate()
如果需要查看MMC設定流程, 善用printk()列印就可以知道~
#148 Re: 司徒开源 » 研究Game Gear Micro掌機的開源可行性 » 2022-06-18 21:36:18
@huanxing
好的, 沒問題~
GitHub資源:https://github.com/steward-fu/ggm/releases
GGM燒錄檔案:https://github.com/steward-fu/ggm/releases/download/v1.0/ggm_linux_sd_20220618.img.7z
目前司徒已經完成Game Gear Micro掌機的第一版Linux系統,雖然改機難度有點偏高,不過,司徒還是相當推薦喜歡改機的愛好者可以動手試試,那種樂趣只有自己體驗過才懂得,而基於開源精神,司徒目前已經把所有源代碼發布在GitHub,分享給有興趣研究的開源愛好者,雖然開源並沒有強制的法律約束力,不過,司徒還是建議大家可以多多分享修改後的源代碼,這種東西或許就是我們可以傳承給下一代的好東西!司徒接著說明刷機過程和源代碼修改的部份,如果對於源代碼沒興趣的玩家,只要看前半部份的說明就可以。
刷機步驟:
1. 下載ggm_linux_sd_20220618.img.7z
2. 解壓縮ggm_linux_sd_20220618.img.7z
3. 將ggm_linux_sd_20220618.img刷到MicroSD
4. 插入MicroSD後,開機就可以看到如下畫面:
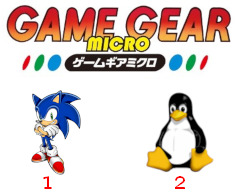
按鍵1:官方系統(NAND Flash)
按鍵2:Linux系統(MicroSD)
按下按鍵1就會進入官方系統(NAND Flash)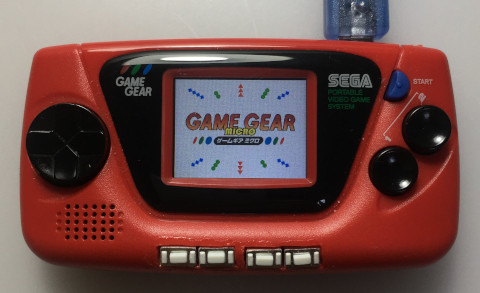
按下按鍵2就會進入Linux系統(MicroSD)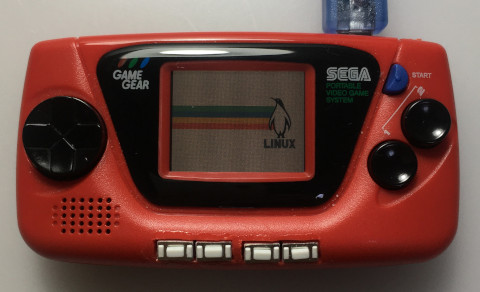

為了致敬SEGA,司徒將桌面拆成四個字母使用:

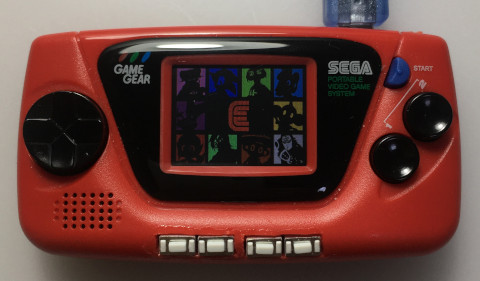

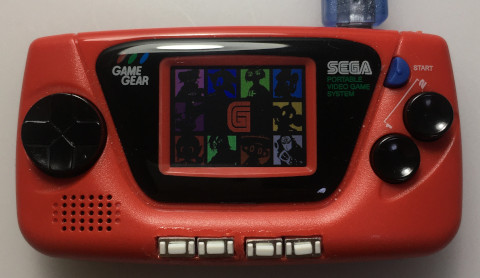


S:設定(Setting)
進入S後,有兩個設定可以使用,分別是亮度調整以及超頻,使用十字按鍵操作,按下藍色START按鍵會返回桌面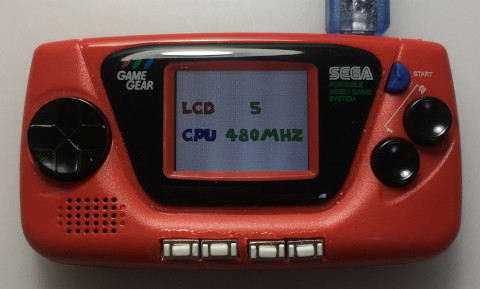
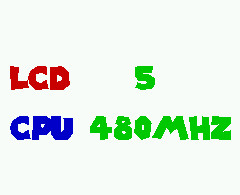
E:實驗(Experiment)
目前尚未完成,這部份之後會用來跑虛擬GPU實驗項目,目前司徒先放閃屏測試程式,按下藍色START按鍵會返回桌面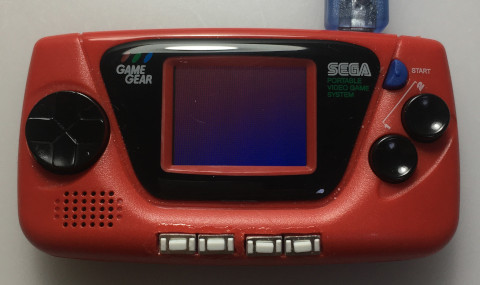

G:GBA模擬器(GBA Emulator)
司徒使用gpsp模擬器進行修改,為了配合GGM的屏幕特性,司徒修改很多東西,而進入GBA模擬器後,如果沒有遊戲檔案(/roms/gba/),則提示如下畫面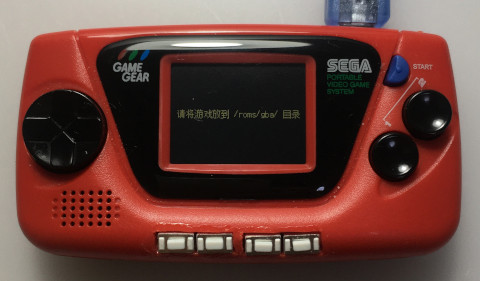

司徒重新改寫了載入遊戲選單,支援中文顯示,字型大小做了適當調整,每次啟動該選單時,會自動停在上次載入遊戲的位置,選單效能也進行優化,不會因為大量遊戲而造成卡頓(如PSP上面那樣),支援LR快速選單跳躍功能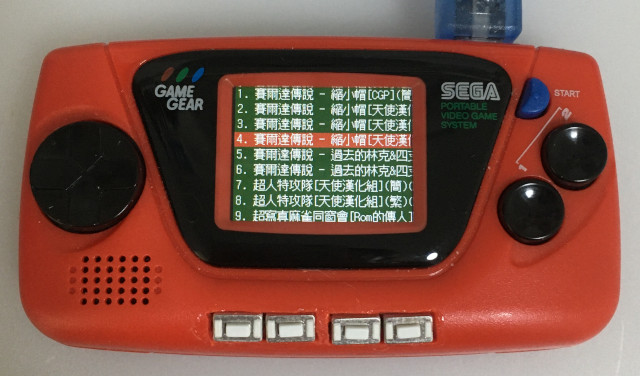
GGM的屏幕顯示區域是240x195,但是,GBA解析度是240x160,因此,多餘的35像素部份,司徒使用GAME BOY ADVANCE字眼顯示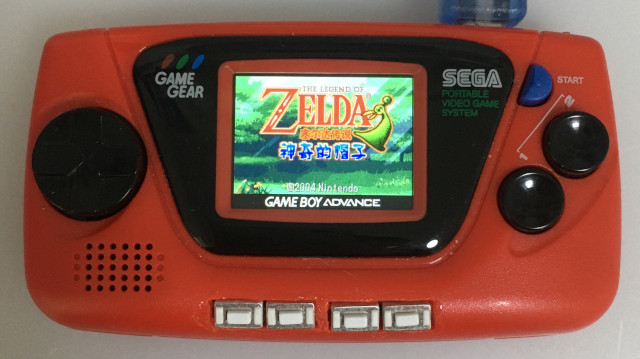
按下藍色START按鍵進入選單(按鍵1退出菜單),司徒也對菜單進行大改寫,只保留司徒覺得想要的部份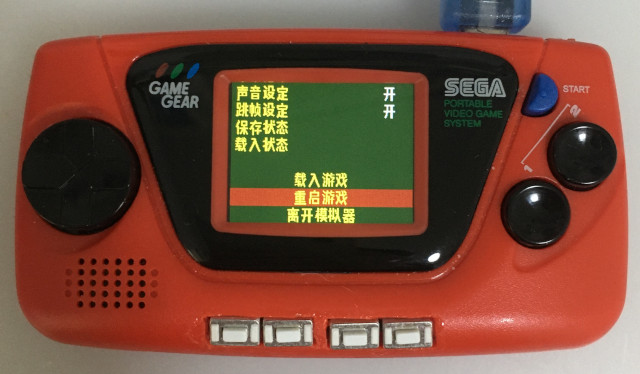
司徒也花了相當大量的時間在改善閃屏問題,司徒覺得目前狀態算是相當不錯,畫面顯示也相當柔順,如果玩家還是不滿意,建議超頻使用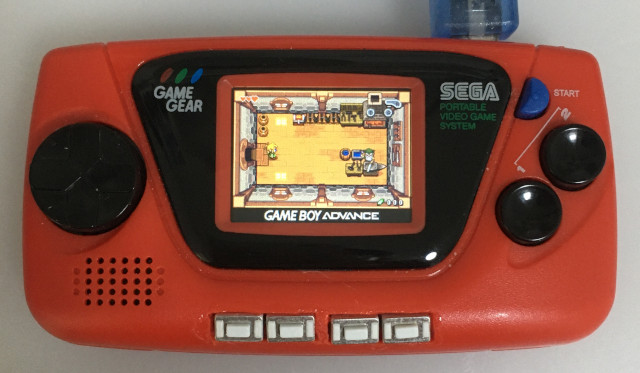
A:Arduboy模擬器(Arduboy Emulator)
目前尚未完成,目前司徒先放聲音以及按鍵測試,按下藍色START按鍵會返回桌面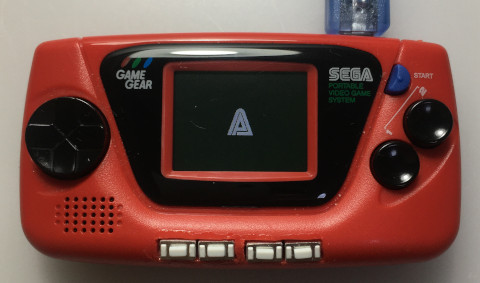

源代碼修改說明:
UBOOT修改部份如下
在reset時,就先跳轉到boot_menu,為何要在reset一開始就先跳轉呢?因為這是唯一一個可以轉從SPI啟動的時機
    .globl  reset
    .globl  save_boot_params_ret
    .type   save_boot_params_ret,%function

reset:
    bl boot_menu

    /* Allow the board to save important registers */
    b   save_boot_params
boot_menu一開始就會判斷是否從RAM執行(UBOOT Relocate後),如果是,代表UBOOT正在啟動Linux Kernel
boot_menu:
    push {lr}
    tst pc, #0x80000000
    bne boot_linux
如果不是正在啟動Linux Kernel,則顯示開機選單,圖片位於MicroSD 2MB偏移位置
    bl ccu_module_init
    bl dram_module_init
    bl sd_module_init

    ldr r0, =IMG_BASE / 512
    ldr r1, =0x80000000
    ldr r2, =(2 * 1024 * 1024) / 512
    bl load_image
    bl lcd_init

    ldr r4, =PIO_BASE + PE
0:
    ldr r0, [r4, #PIO_DATA]
    tst r0, #(1 << 9)
    beq boot_stock
    tst r0, #(1 << 10)
    beq boot_linux
    b 0b
如果是需要從SPI啟動,則直接呼叫BROM的SPI啟動位址,反之則直接返回原本UBOOT,繼續啟動Linux Kernel的步驟
boot_stock:
    bl lcd_off
    ldr pc, =0xffff4110

boot_linux:
    pop {pc}
GBA模擬器修改部份,菜單源代碼替換成gui4ggm.c,原本舊的gui.c保留不動,SDL部份都改成Double Buffer
rl_screen = SDL_SetVideoMode(240, 240, 16, SDL_SWSURFACE | SDL_DOUBLEBUF);
screen = SDL_CreateRGBSurface(SDL_SWSURFACE, 240 * video_scale, 240 * video_scale, 16, 0, 0, 0, 0);
像素搬移的部份
int x=0, y=0;
uint32_t *s = (uint32_t*)screen->pixels + (30 * 120);
uint32_t *d = (uint32_t*)rl_screen->pixels + (30 * 120);
for(y=0; y<195; y++){
    for(x=0; x<120; x++){
        *d++ = *s++;
    }
}
VSYNC改使用IOCTL方式(司徒已經實作在Framebuffer顯示驅動中)
//delay_us((u64)virtual_frame_count * 50000 / 3 - new_ticks + 2);
if(fbdev > 0){
    int zero=0;
    ioctl(fbdev, FBIO_WAITFORVSYNC, &zero);
}
編譯步驟:
Miyoo編譯開發工具
$ cd
$ wget https://github.com/steward-fu/miyoo/releases/download/v1.0/toolchain.7z
$ 7za x toolchain.7z
$ sudo mv miyoo /opt/
$ export PATH=$PATH:/opt/miyoo/bin
編譯Kernel
$ cd
$ wget https://github.com/steward-fu/ggm/releases/download/src/kernel_20220618.tar.gz
$ tar xvf kernel_20220618.tar.gz
$ cd kernel
$ ./run.sh ggm
編譯UBOOT
$ cd
$ wget https://github.com/steward-fu/ggm/releases/download/src/uboot.tar.gz
$ tar xvf uboot.tar.gz
$ cd uboot
$ ./run.sh /dev/sdX ggm
編譯GBA模擬器
$ cd
$ wget https://github.com/steward-fu/ggm/releases/download/src/gpsp_20220618.tar.gz
$ tar xvf gpsp_20220618.tar.gz
$ cd gpsp/ggm
$ make -j
MicroSD佈局如下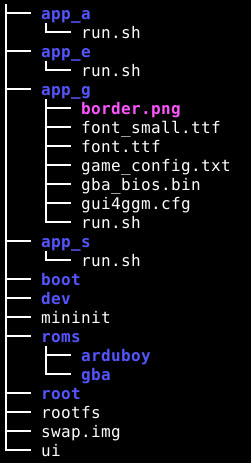
ui:主界面顯示App
app_s:設定App(run.sh)
app_e:實驗App(run.sh)
app_g:GBA模擬器(run.sh)
app_a:Arduboy模擬器(run.sh)
rootfs:系統
mininit:由Kernel呼叫用來掛載rootfs(squashfs系統)
swap.img:虛擬內存(128MB)
音量控制是司徒失算的部份,一般音量轉盤都是直接控制大小聲音,但是GGM掌機並不是這樣設計,所以目前無法控制音量,另一部份則是電池顯示,不完美的部份就留給想要折騰的玩家,司徒接下來會把剩餘的虛擬GPU以及Arduboy模擬器完成
#149 Re: 司徒开源 » 研究FC3000掌機的開源可行性 » 2022-06-18 21:15:19
#150 Re: 司徒开源 » 研究Game Gear Micro掌機的開源可行性 » 2022-06-17 14:08:13
#151 Re: 司徒开源 » 研究Game Gear Micro掌機的開源可行性 » 2022-06-13 10:25:48
#152 Re: 司徒开源 » 研究FC3000掌機的開源可行性 » 2022-06-13 10:21:36
#153 Re: 司徒开源 » 研究Game Gear Micro掌機的開源可行性 » 2022-06-10 13:54:11
仔細觀察那個企鵝的畫面, 不知道大家有無發現,那個畫面有一半是亂掉的, 司徒心想~這應該就是乱马1/2的問題~
為了解乱马1/2的問題, 我調整了下屏的參數, 你測試下如下檔案:
https://github.com/steward-fu/ggm/releases/download/v1.0/ggm_btn_test_20220610.img.7z
#154 Re: 司徒开源 » 研究Game Gear Micro掌機的開源可行性 » 2022-06-09 17:12:56
@huanxing
驚!竟然真的有人改機~我來想想如何搞壞你的機器~
將這個檔案燒錄到MicroSD
https://github.com/steward-fu/ggm/releases/download/v1.0/ggm_lcd_test_20220609.img
看看開機後是不是這個畫面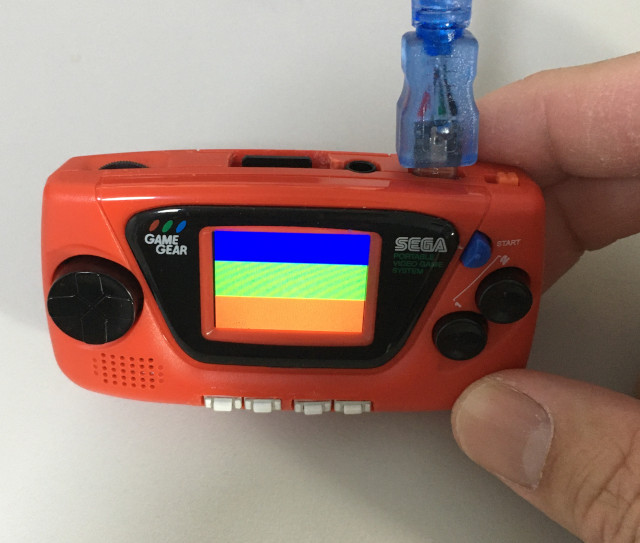
兩個方向定位問題:
1. 硬件:如果畫面一樣有問題,那應該是焊接短路問題
2. 軟件:如果畫面正常,那是屏的參數有差異
#155 Re: 全志 SOC » lcd如何与tty1相对应? » 2022-06-09 11:40:16
1. Framebuffer 驅動可以將 Console 輸出導到顯示, 但是, 你必須先開啟 Framebuffer Console 的支援才可以
2. Kernel 參數:console=tty1 console=ttyS0,11520, 代表將 Kernel 輸出訊息輸出到虛擬 Console (tty1) 和 UART (ttyS0)
Framebuffer 驅動在啟動時, 就會去綁定 console (有興趣可以去看 do_take_over_console() 流程), 因此, 當你從 Kernel 參數描述 console=tty1 時, 意思代表輸出的訊息會由 Framebuffer 顯示, 當然, tty1 是虛擬 Console, 你可以只寫:console=tty 就可以~
Linux Kernel 底下有一個 Documentation 資料夾, 相關問題裡面幾乎都會描述, 你可以先看一下, 我幫你抓了三個高度的相關文件給你參考:
https://www.kernel.org/doc/html/latest/fb/fbcon.html
https://www.kernel.org/doc/html/latest/driver-api/console.html
https://tldp.org/HOWTO/Remote-Serial-Console-HOWTO/configure-kernel.html
#156 Re: 司徒开源 » 研究Game Gear Micro掌機的開源可行性 » 2022-06-06 21:05:31
#157 Re: 司徒开源 » 研究Game Gear Micro掌機的開源可行性 » 2022-06-05 13:01:24
#158 Re: 司徒开源 » 研究Game Gear Micro掌機的開源可行性 » 2022-06-05 09:27:22
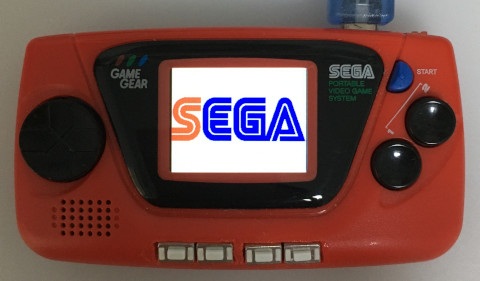
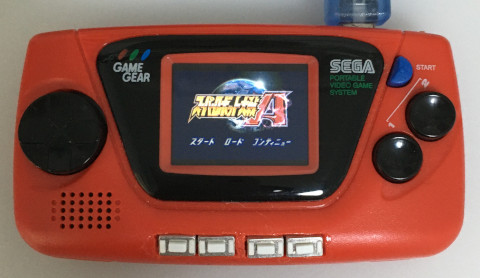
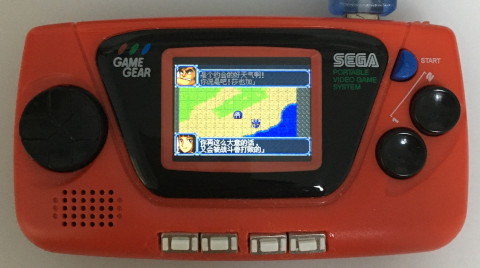
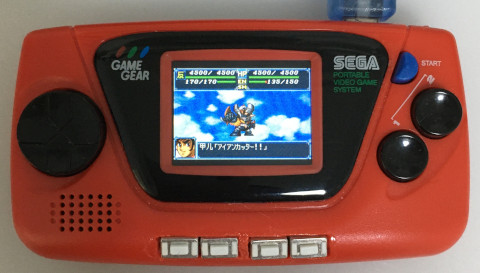
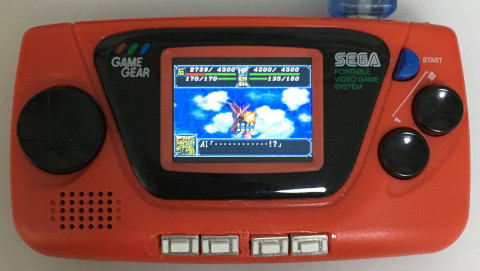
#159 Re: 司徒开源 » 研究FC3000掌機的開源可行性 » 2022-06-04 11:52:42
#160 Re: 司徒开源 » 研究Game Gear Micro掌機的開源可行性 » 2022-06-04 09:52:04
@huanxing
感謝支持~
司徒發覺有必要先把FrameBuffer的東西紀錄下來,當作以後的參考資料,因為GGM的屏是一個很奇耙的設計,解析度是240x240,但是,顯示區域則是240x195,為此,司徒在FrameBuffer驅動做了一些處理,從下圖司徒畫的圖可以看到,F1C100S的TCON0是以240x240做更新處理,DEBE則使用4個Layers做處理,解析度都是240x240,資料輸出給屏的機制是使用TE中斷腳位觸發,因此,保證從F1C100S給的資料不會有Buffer覆蓋問題(閃屏),但是,最後回報給User Application則是240x195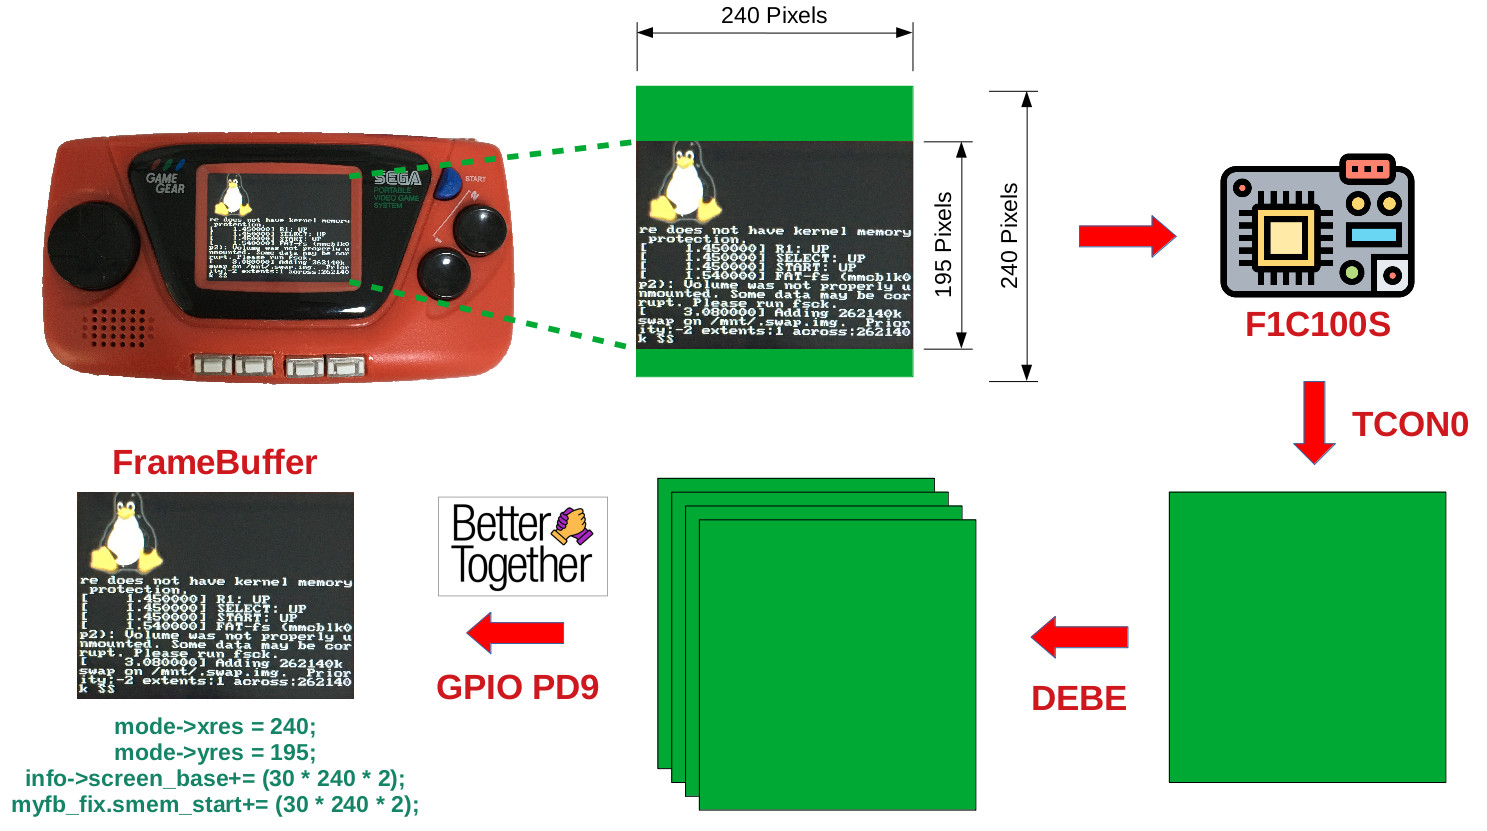
為何是以240x195回報給User Application呢?因為,有效顯示區域只有240x195,為了不讓User Application花費多餘力氣處理偏移問題,這也是為何Linux Logo可以正確顯示在GGM屏幕顯示區域的原因,因此,SDL程式可以直接使用240x195製作
#include <stdio.h>
#include <stdlib.h>
#include <SDL.h>

int main(int argc, char** argv)
{
  SDL_Rect rt={0};
  SDL_Surface* screen;

  SDL_Init(SDL_INIT_VIDEO);
  screen = SDL_SetVideoMode(240, 195, 16, SDL_SWSURFACE);

  SDL_FillRect(screen, &screen->clip_rect, SDL_MapRGB(screen->format, 0xff, 0x00, 0x00));

  rt.x = 50;
  rt.y = 50;
  rt.w = 30;
  rt.h = 30;
  SDL_FillRect(screen, &rt, SDL_MapRGB(screen->format, 0x00, 0xff, 0x00));

  rt.x = 100;
  rt.y = 100;
  rt.w = 50;
  rt.h = 80;
  SDL_FillRect(screen, &rt, SDL_MapRGB(screen->format, 0x00, 0x00, 0xff));

  SDL_Flip(screen);
  SDL_Delay(3000);
  SDL_Quit();
  return 0;
}
編譯好的程式還需要設定如下3個環境變數:
# export SDL_NOMOUSE=1
# export SDL_FB_BROKEN_MODES=1
# export SDL_VIDEODRIVER=fbcon
SDL_NOMOUSE:不需要檢查滑鼠
SDL_FB_BROKEN_MODES:將240x195解析度加入預設清單
SDL_VIDEODRIVER:顯示驅動使用FrameBuffer
完成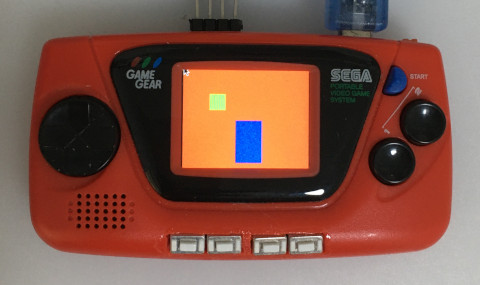
P.S. 對於需要Double Buffer或者Quadruple Buffer則需要自己做Map
#161 Re: 司徒开源 » 研究Game Gear Micro掌機的開源可行性 » 2022-06-03 10:03:23
@xiaoyu356
其實我算錯了,我今年才剛滿18歲~
今天是一年一度的端午佳節,司徒在此祝福大家端午佳節愉快~
司徒潛入深山修行許久,昨天才剛剛出關,回家路上遇到一位老人,老人看著司徒三秒後,繼續玩著他的GGM掌機,司徒這時才恍然大悟,原來還有一個東西尚未完成,於是,司徒使出出奶的力氣,挖糞圖牆,終於,看到一道成功的曙光~
GGM BTN:https://github.com/steward-fu/ggm/releases/download/v1.0/ggm_btn_test_20220603.img.7z
這個項目目前已經接近完成的狀態,司徒先放出按鍵測試燒錄鏡像,供有興趣改機研究的朋友使用,刷入後,開機就可以看到小企鵝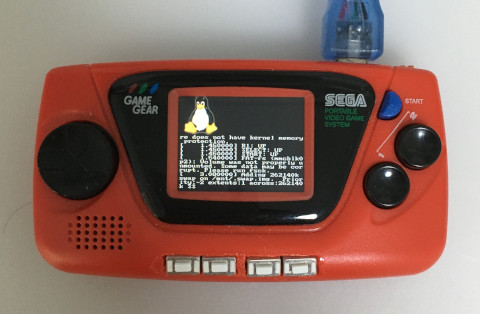
按鍵測試會顯示在屏幕上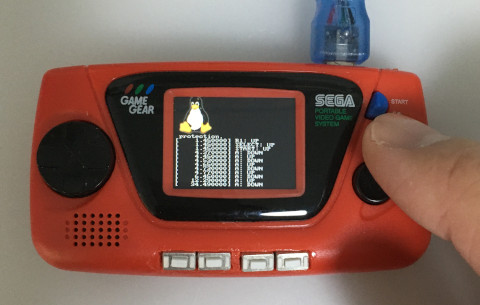
#162 Re: 全志 SOC » 请教,交叉编译出错,找不到ld-linux-armhf.so.3。 » 2022-06-02 11:43:33
#164 Re: 全志 SOC » 请教,交叉编译出错,找不到ld-linux-armhf.so.3。 » 2022-06-01 16:35:04
#165 Re: 全志 SOC » 请教,交叉编译出错,找不到ld-linux-armhf.so.3。 » 2022-06-01 13:58:38
#167 Re: 全志 SOC » 请教,交叉编译出错,找不到ld-linux-armhf.so.3。 » 2022-06-01 11:25:43
#169 Re: 全志 SOC » 请教,交叉编译出错,找不到ld-linux-armhf.so.3。 » 2022-06-01 10:29:23
#170 Re: 司徒开源 » 研究FC3000掌機的開源可行性 » 2022-05-30 10:25:15
@lzgame02
小強~好久不見了~IDA Pro比適合用於靜態分析,OllyDbg比較適合用於Windows PE檔案做動態分析,兩個都是很經典好用,如果可以不要逆向,那是最好,因為太花時間了,對於時間上來說,不見得划算,當然,不得已,那只能逆向了~
@tiopex
Welcome~
I am happy you can find the solution in this website.
The latest revised kernel source has been uploaded by geekchun today.
You can download and test it to see whether it has more better than previous one or not.
Backup source code has been put on: https://github.com/steward-fu/q8/releases/download/v1.1/lcd_q8_tf28qs006a.7z
@geekchun
相當感謝你的幫助,也感謝你開源出來讓大家使用,感謝~
#171 Re: 司徒开源 » 研究FC3000掌機的開源可行性 » 2022-05-29 14:11:00
#172 Re: 司徒开源 » 研究FC3000掌機的開源可行性 » 2022-05-29 11:53:59
The LCD model is same as https://whycan.com/t_6647_2.html#p65793
#173 Re: 司徒开源 » 研究FC3000掌機的開源可行性 » 2022-05-29 11:41:17
@tiopex
May I know LCD works or not on your Q8 handheld after uses the image file provided by geekchun ?
If not work, according to the image you provided, I guess the model should be GC9306 or ST7789.
In your GitHub repo, the initialization code of ST7789 was located in panel_init() in r61520fb.c file.
You can try it firstly.
#174 Re: 司徒开源 » 研究FC3000掌機的開源可行性 » 2022-05-28 23:29:37

#175 Re: 司徒开源 » 研究FC3000掌機的開源可行性 » 2022-05-22 21:31:43
#176 Re: 司徒开源 » 研究FC3000掌機的開源可行性 » 2022-05-19 07:20:41
#177 Re: 司徒开源 » 研究FC3000掌機的開源可行性 » 2022-05-16 12:53:00
#178 Re: 司徒开源 » 研究FC3000掌機的開源可行性 » 2022-05-13 15:47:21
#179 Re: 司徒开源 » 研究FC3000掌機的開源可行性 » 2022-05-13 12:24:00
#180 Re: 司徒开源 » 研究FC3000掌機的開源可行性 » 2022-05-12 22:48:17
@kendling
相當感謝你的實驗,我原本的用意只是想把你機器搞壞,然後,你就自我放棄,想不到你是殺不死的蟑螂,感動上天,馬祖託夢叫司徒需要關心一下~
接著司徒開始嘗試解決噪音問題,首先,標注相關線路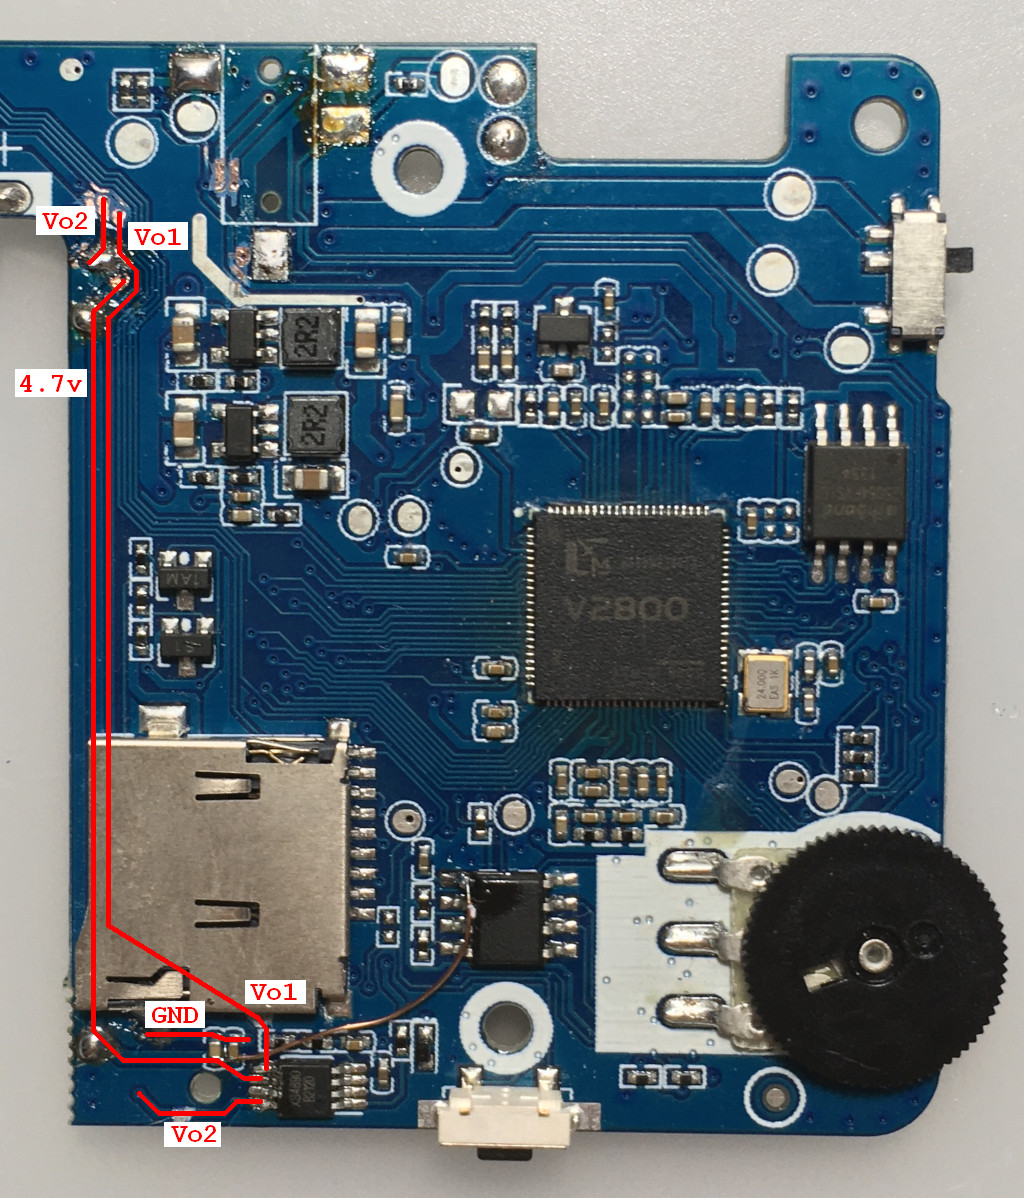
背面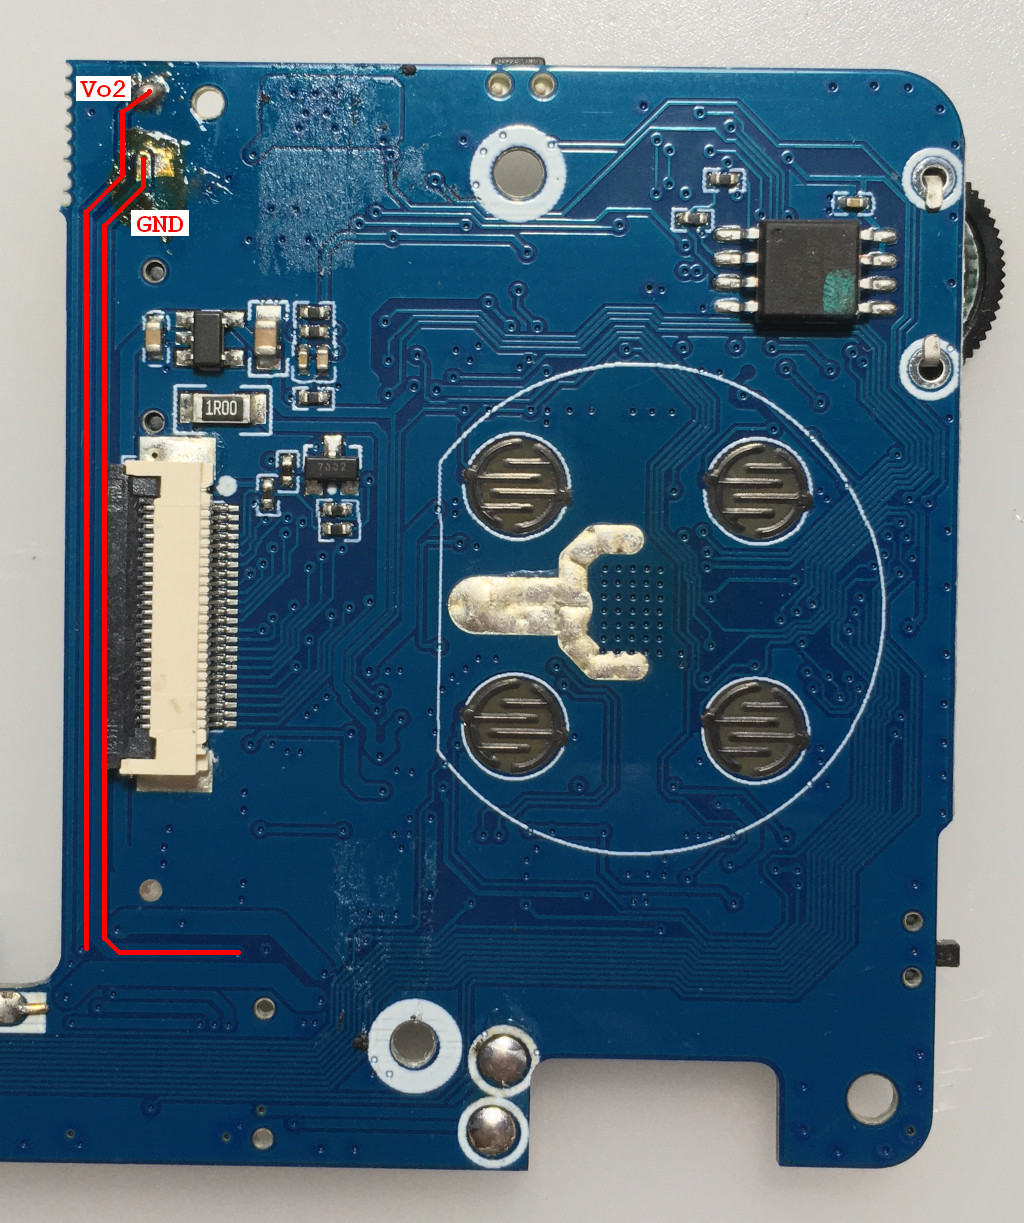
1:Vo2割斷,下半部份接地
2:Vo1割斷,下半部份接地
3:Vo2、Vo1、GND接在一起
4:4.7v割斷
5:4.7v下半部份接地
6:4.7v下半部份接地
7:GND接MicroSD的GND(這個可以省略)
8:Vo1割斷
9:Vo2割斷
LM4890第5腳接喇叭
LM4890第6腳連接到加密IC第一腳位3.3V
LM4890第8腳接喇叭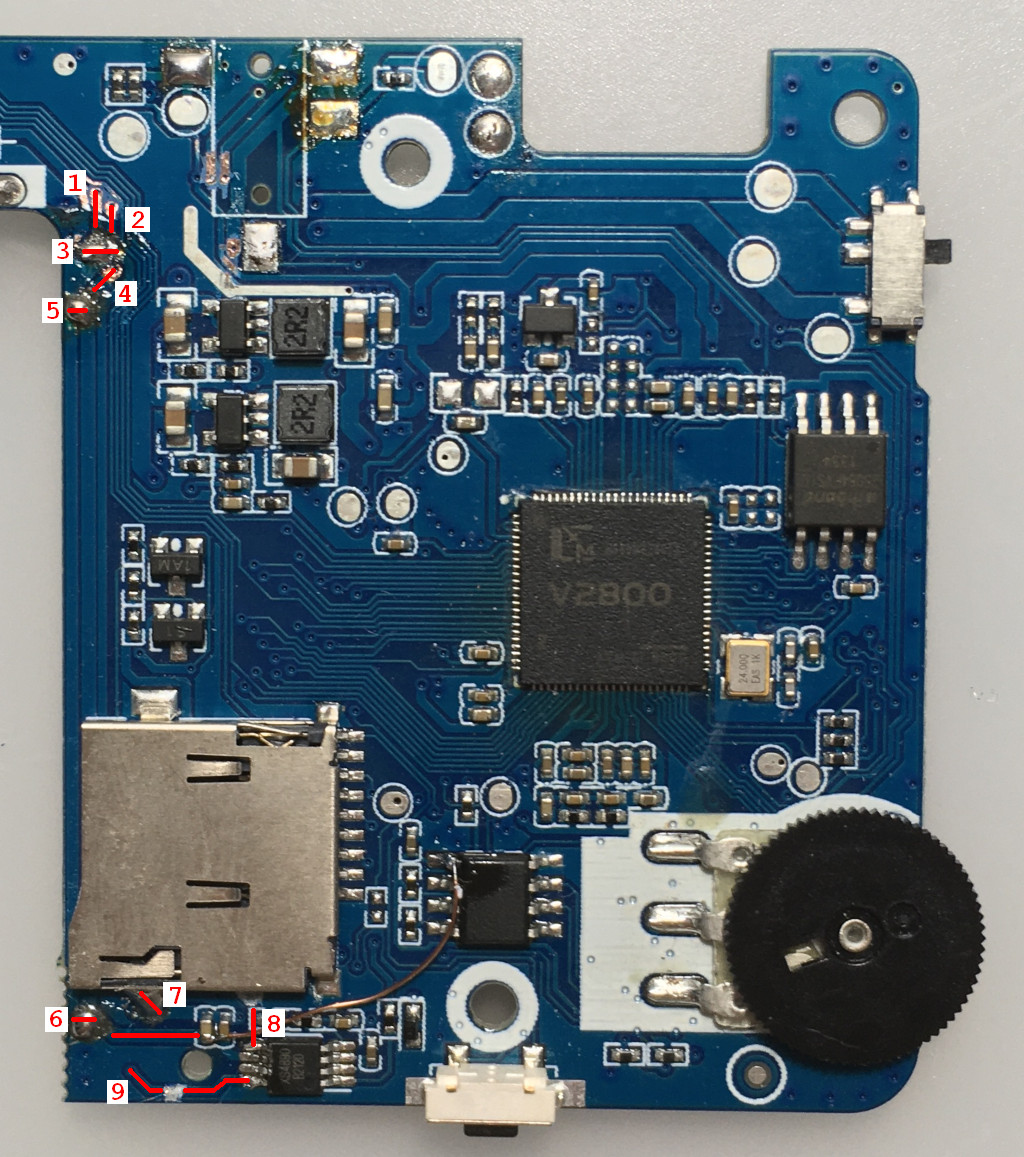
Vo2下半部份接地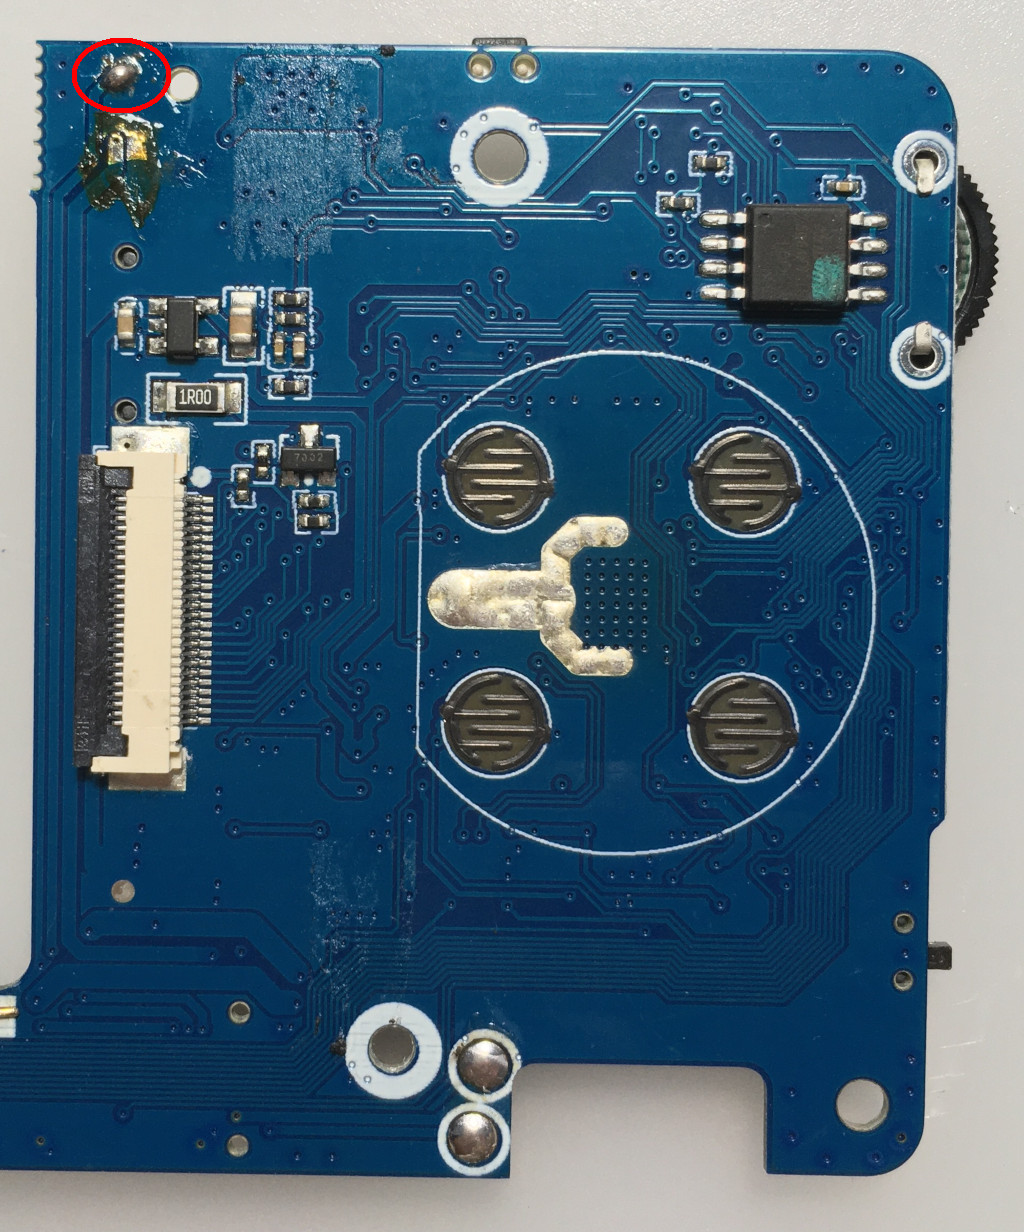
連接示波器量測訊號(需要掛上喇叭負載)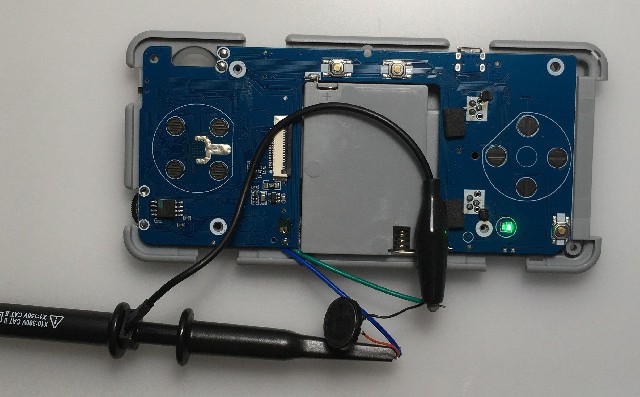
官方系統開機後,量測的喇叭訊號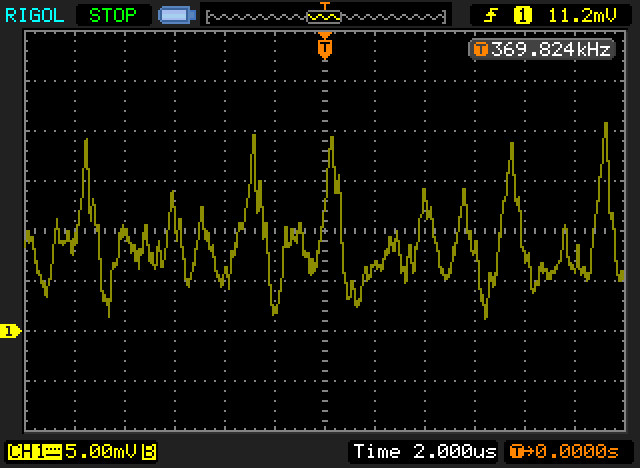
OD系統開機後,量測的喇叭訊號(4.7v割斷,但是沒有接地)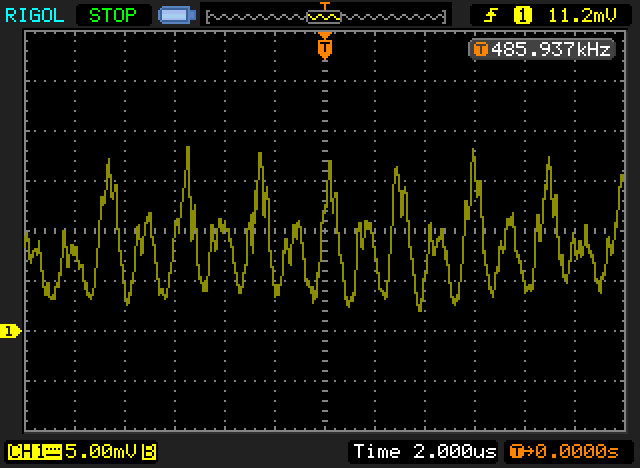
OD系統開機後,量測的喇叭訊號(4.7v割斷,餘線部份接地)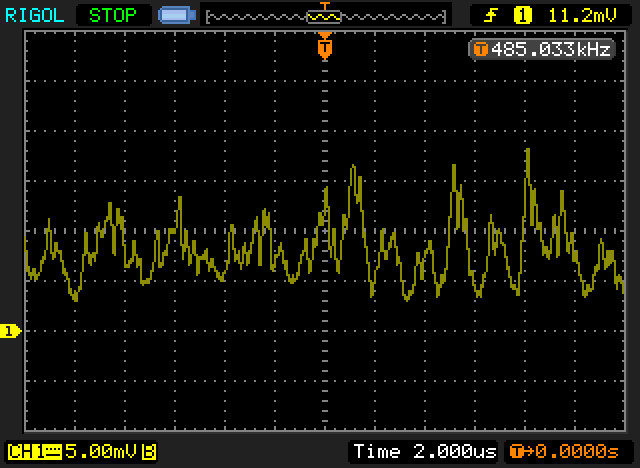
從量測到的訊號,可以發現4.7v那根線是一個關鍵性的影響,因為有一個很穩定影響波形,這個波形應該就是LCD背光震盪電路,因此,玩家也可以先從4.7v割斷開始改造,目前司徒測試改造後的電流聲音,已經跟原廠系統幾乎一樣
#181 Re: 司徒开源 » 研究FC3000掌機的開源可行性 » 2022-05-03 13:17:29
@kendling
感謝你的測試,PCB部分是從功放IC連接到耳機孔,所以耳機孔那端也要斷開,因為餘線還是靠在LCD背光旁邊,會從餘線導回耳機孔,耳機孔是連接到F1C100S的LR音頻腳位~
@k3355792
你這個屏的腳位不對,你可以看下這個原理圖:
https://github.com/steward-fu/pocketgo/releases/download/v1.0/schematic.pdf
#182 Re: 司徒开源 » 研究Game Gear Micro掌機的開源可行性 » 2022-05-03 13:11:42
#183 Re: 司徒开源 » 研究FC3000掌機的開源可行性 » 2022-04-22 20:30:25
#184 Re: 司徒开源 » 研究Game Gear Micro掌機的開源可行性 » 2022-04-21 21:13:37
#185 Re: 司徒开源 » 研究FC3000掌機的開源可行性 » 2022-04-21 21:12:13
#186 Re: 司徒开源 » 研究FC3000掌機的開源可行性 » 2022-04-19 12:40:16
#187 Re: 司徒开源 » 研究FC3000掌機的開源可行性 » 2022-04-18 13:04:02
#188 Re: 司徒开源 » 研究FC3000掌機的開源可行性 » 2022-04-14 13:14:13
#189 Re: 司徒开源 » 研究FC3000掌機的開源可行性 » 2022-04-13 20:09:33
#190 Re: 司徒开源 » 研究FC3000掌機的開源可行性 » 2022-04-13 13:16:30
#191 Re: 司徒开源 » 研究FC3000掌機的開源可行性 » 2022-04-11 18:18:38
#192 Re: 司徒开源 » 研究FC3000掌機的開源可行性 » 2022-04-11 13:04:38
#193 Re: 司徒开源 » 研究FC3000掌機的開源可行性 » 2022-04-10 16:48:50
@fullniz
喇叭應該是找個形狀類似的就可以,小横米的喇叭规格不知道~
@kendling
我新買的FC3000 IPS屏(韌體是V2版本)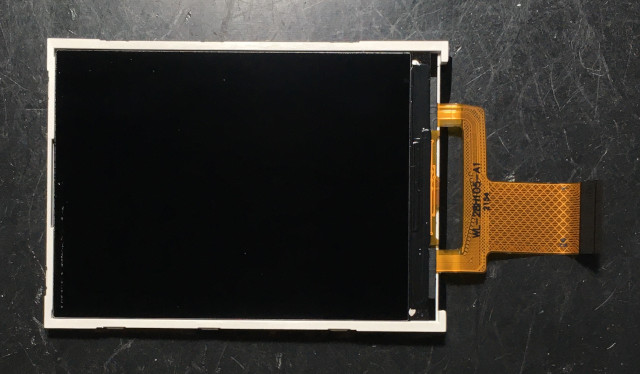
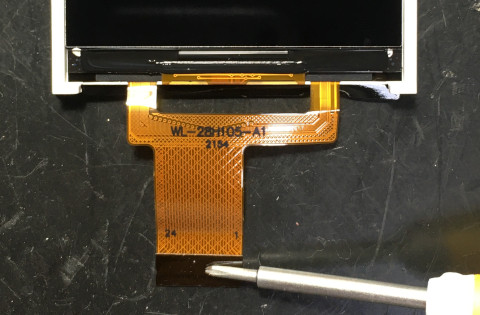
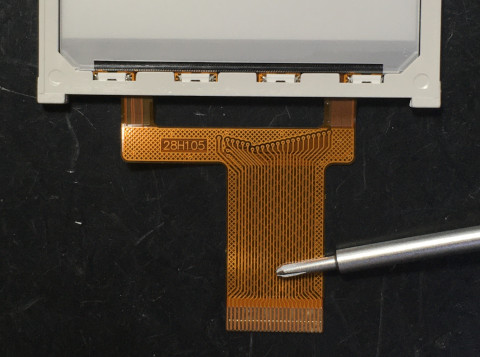
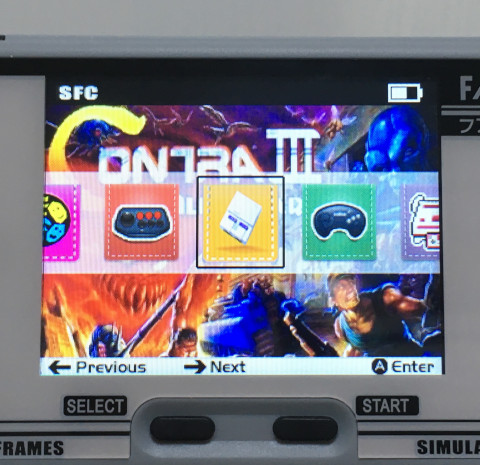
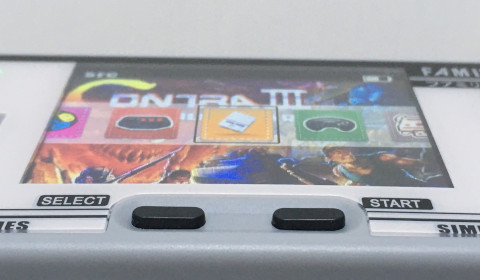
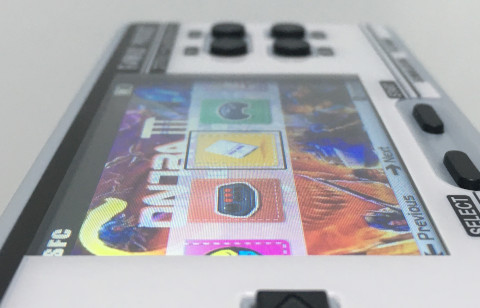
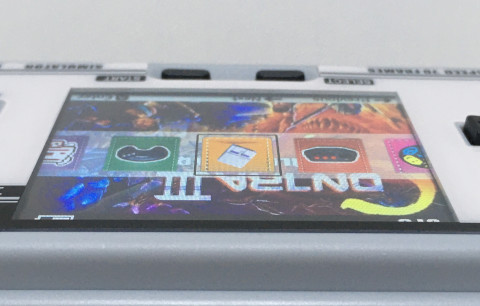
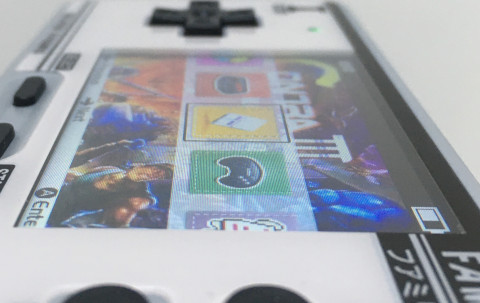
嘗試解析電流聲問題
依據網友測試,發現電流聲音跟LCD背光設定有關係,只要將LCD背光亮度調到100%,就不會有電流聲音,於是,司徒看一下PCB線路,發現聲音輸出是走在LCD背光電路旁邊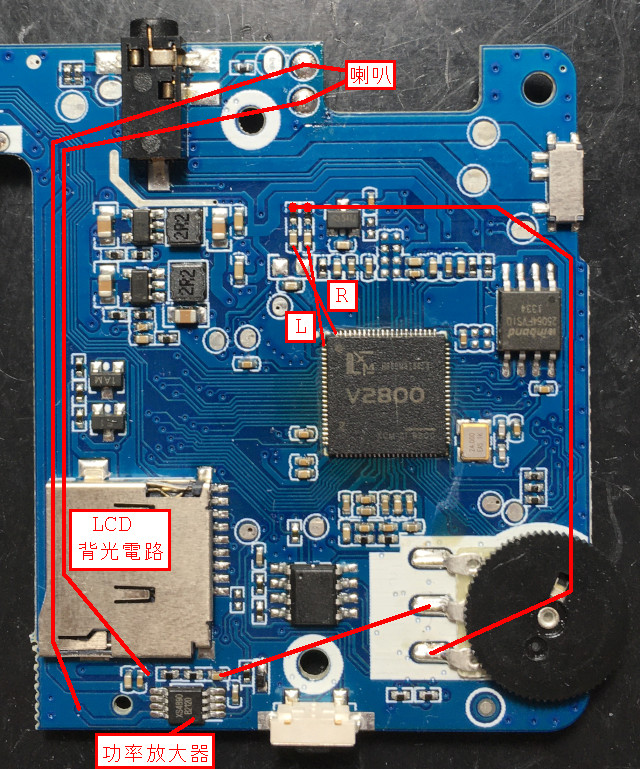
LCD背光使用PWM方式控制,亮度在100%時,輸出固定維持在高電位狀態,因此,不會有干擾的狀況發生,這也是為何原廠系統是固定在此亮度的原因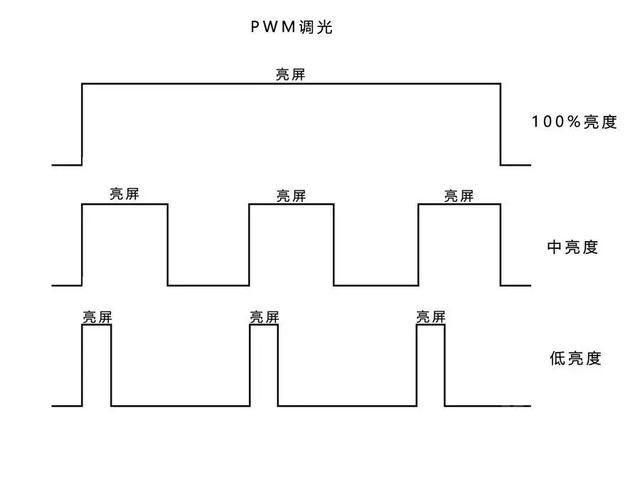
XS4890(LM4890)腳位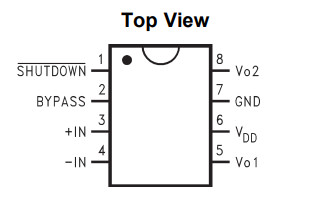
司徒看了一下PCB,發現FC3000使用的電路如下: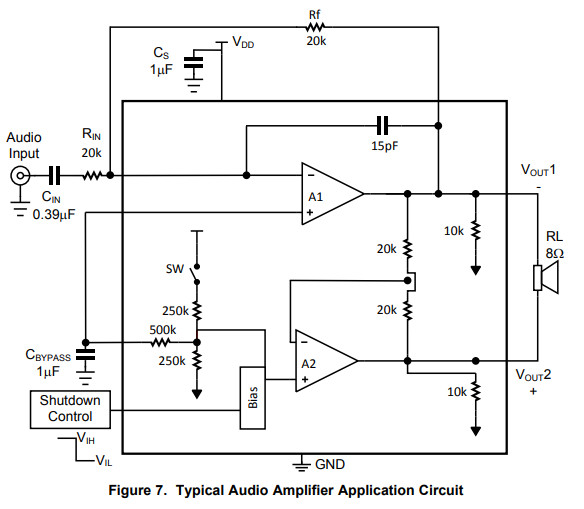
雖然目前看來,應該是輸出遭到EM干擾所造成的問題,不過,如果是輸入源遭到干擾,可以考慮改造成差分放大電路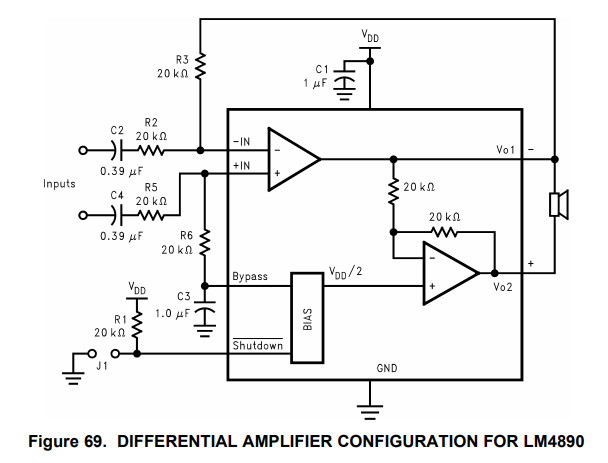
解法,大約有幾個思路:
軟體思考:
1. 可以依據LCD背光的頻率,疊加對應的波形,類似主動式噪音消除法,可以在聲音驅動實作
硬體思考:
1. 將啦叭輸出線路切斷(PCB),使用外圍有接地包覆的線材取代
2. 使用鐵片包覆LCD背光電路並且將鐵片接地
3. 將喇叭移到下方
#194 Re: 全志 SOC » 开源一个关于f1c200s开发板的miyoo扩展板 » 2022-04-07 13:56:57
#195 Re: 全志 SOC » 开源一个关于f1c200s开发板的miyoo扩展板 » 2022-04-07 13:55:48
關於顏色部分,如果要從驅動修改,可以考慮改如下位置
$ vim drivers/video/fbdev/sunivfb.c

 735   writel((5 << 8), iomm.debe + DEBE_LAY0_ATT_CTRL_REG1);
 736   writel((5 << 8), iomm.debe + DEBE_LAY1_ATT_CTRL_REG1);
 737   writel((5 << 8), iomm.debe + DEBE_LAY2_ATT_CTRL_REG1);
 738   writel((5 << 8), iomm.debe + DEBE_LAY3_ATT_CTRL_REG1);
顏色格式如下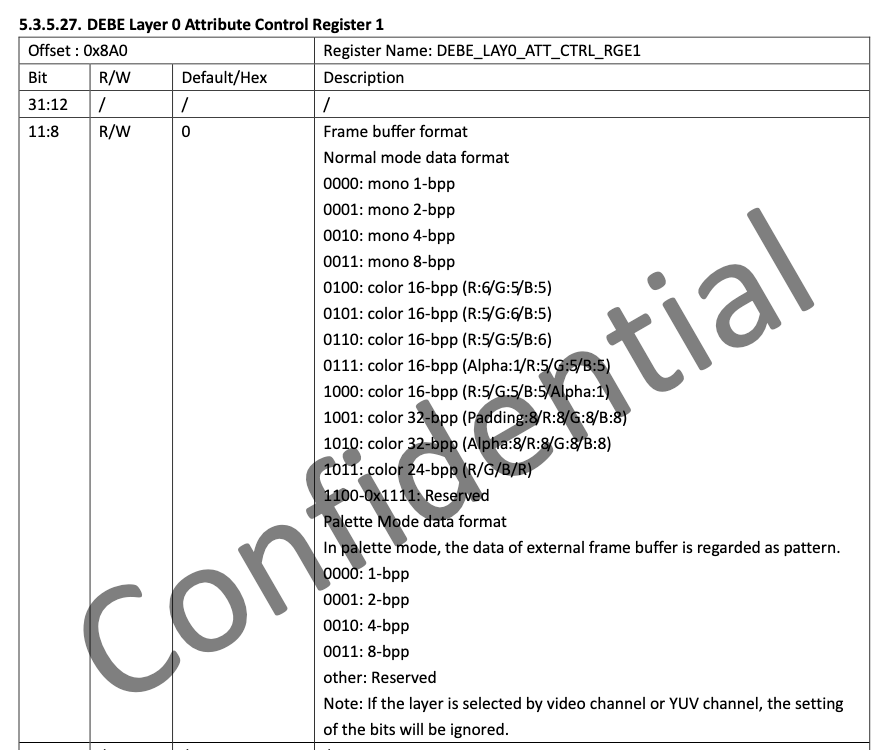
#196 Re: 全志 SOC » 开源一个关于f1c200s开发板的miyoo扩展板 » 2022-04-07 13:48:39
#197 Re: 司徒开源 » 研究FC3000掌機的開源可行性 » 2022-04-07 13:19:18
#198 Re: 司徒开源 » 研究FC3000掌機的開源可行性 » 2022-04-07 08:11:03
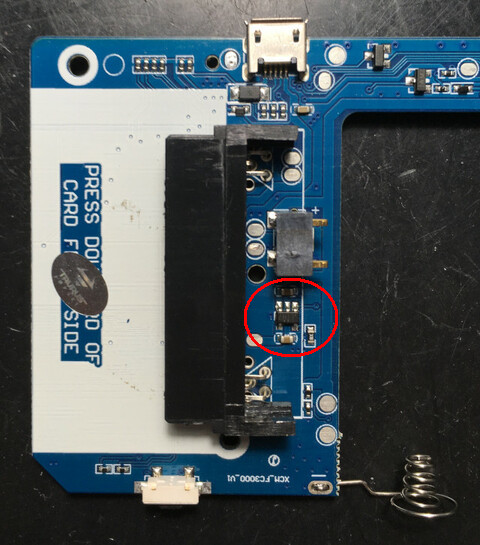
#199 Re: 司徒开源 » 研究FC3000掌機的開源可行性 » 2022-04-04 11:48:41
#200 Re: 司徒开源 » 研究FC3000掌機的開源可行性 » 2022-04-03 23:54:50
#201 Re: 司徒开源 » 研究FC3000掌機的開源可行性 » 2022-04-01 12:52:26
#202 Re: 司徒开源 » 研究FC3000掌機的開源可行性 » 2022-03-31 17:04:59
#203 Re: 司徒开源 » 研究FC3000掌機的開源可行性 » 2022-03-31 13:34:24
#204 Re: 司徒开源 » 研究FC3000掌機的開源可行性 » 2022-03-30 20:25:02
#205 Re: 司徒开源 » 研究FC3000掌機的開源可行性 » 2022-03-30 07:17:56
#206 Re: 司徒开源 » 研究Game Gear Micro掌機的開源可行性 » 2022-03-26 11:46:21
#207 Re: 司徒开源 » 研究Game Gear Micro掌機的開源可行性 » 2022-03-24 10:29:55
#208 Re: 司徒开源 » 研究FC3000掌機的開源可行性 » 2022-03-23 15:14:23
#209 Re: 司徒开源 » 研究FC3000掌機的開源可行性 » 2022-03-23 07:13:09
#210 Re: 司徒开源 » 研究Game Gear Micro掌機的開源可行性 » 2022-03-22 13:01:13
#211 Re: 司徒开源 » 研究FC3000掌機的開源可行性 » 2022-03-21 19:16:26
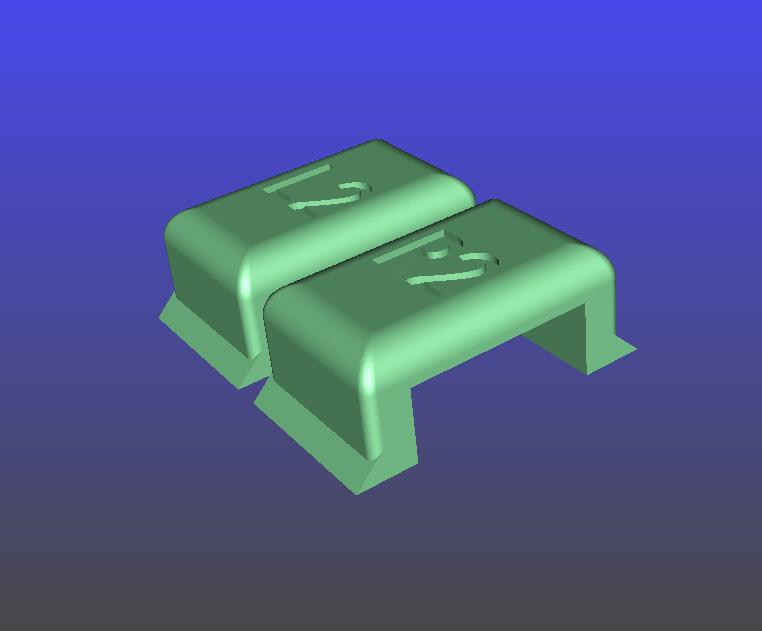
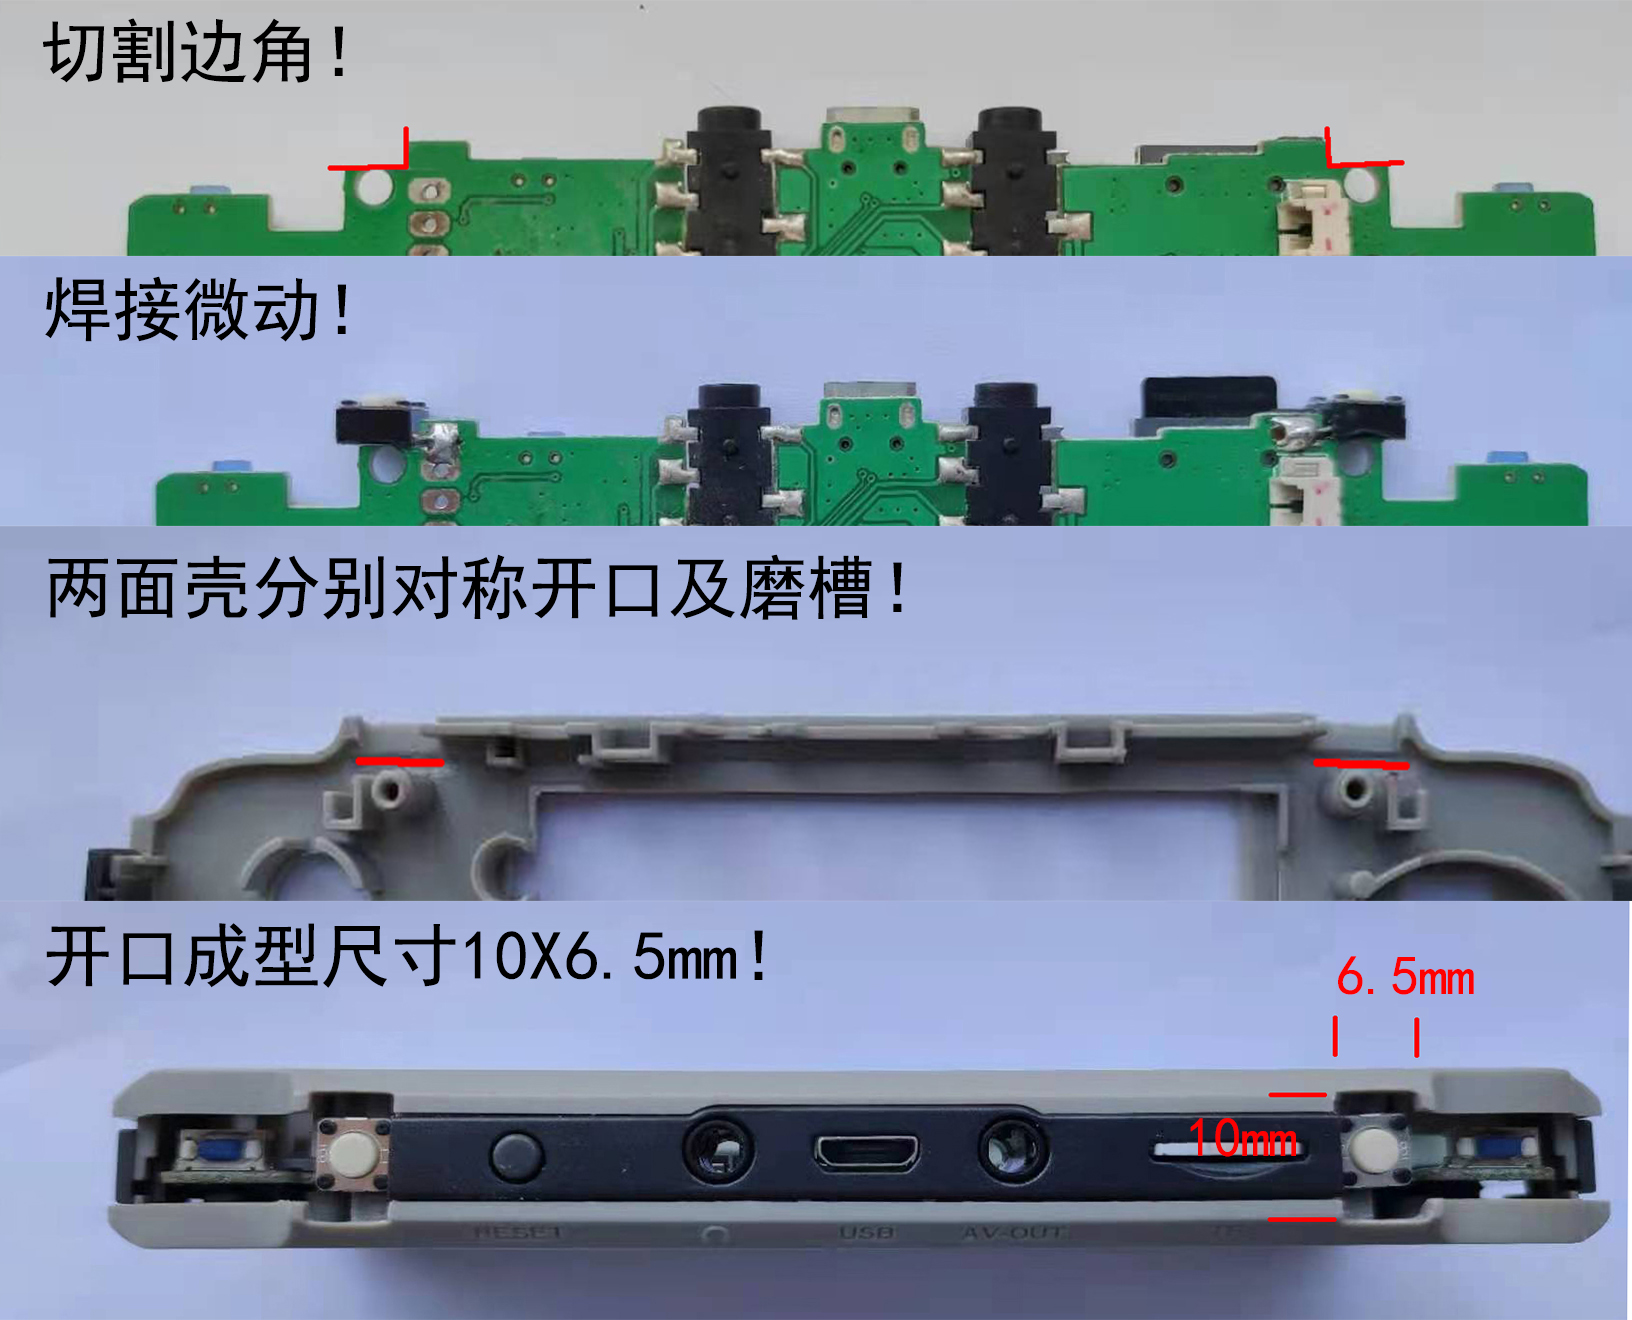
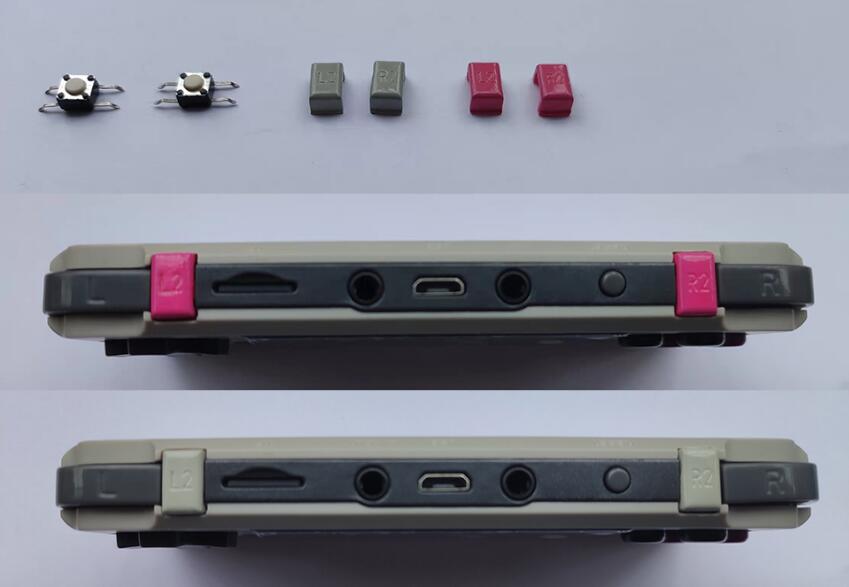
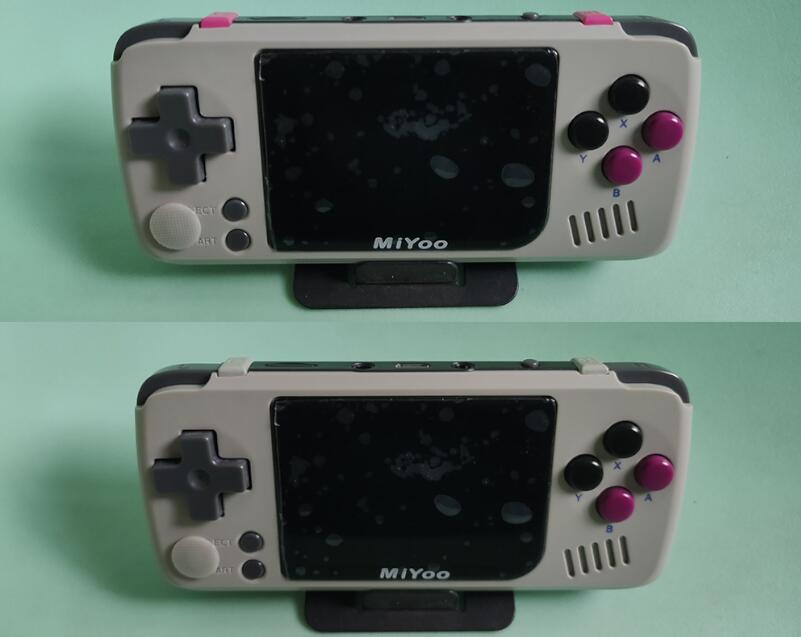
#212 Re: 司徒开源 » 研究Game Gear Micro掌機的開源可行性 » 2022-03-21 19:08:44
#213 Re: 司徒开源 » 研究FC3000掌機的開源可行性 » 2022-03-17 12:55:19
#214 Re: 司徒开源 » 研究FC3000掌機的開源可行性 » 2022-03-17 09:05:16
#215 Re: 司徒开源 » 研究Game Gear Micro掌機的開源可行性 » 2022-03-16 08:42:08
量測後的對應腳位
Game Gear Micro | F1C200S
----------------+--------
UP              | PE5
DOWN            | PE7
LEFT            | PE6
RIGHT           | PE8
START(BLUE)     | PE11
1               | PE9
2               | PE10
L1(MOD)         | PE2
R1(MOD)         | PD13
SELECT(MOD)     | PE3
START(MOD)      | PD14
LCD RST         | PD0
LCD DB0         | PD1
LCD DB1         | PD2
LCD DB2         | PD3
LCD DB3         | PD4
LCD DB4         | PD5
LCD DB5         | PD6
LCD DB6         | PD7
LCD DB7         | PD8
LCD TE          | PD9
LCD BL          | PE12
FLASH MOSI      | PC3
FLASH MISO      | PC2
FLASH CS        | PC1
FLASH SCK | PC0#216 Re: 司徒开源 » 研究FC3000掌機的開源可行性 » 2022-03-16 07:08:12
#217 Re: 司徒开源 » 研究Game Gear Micro掌機的開源可行性 » 2022-03-15 20:59:55
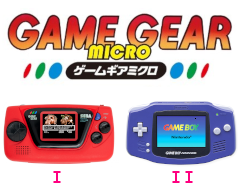
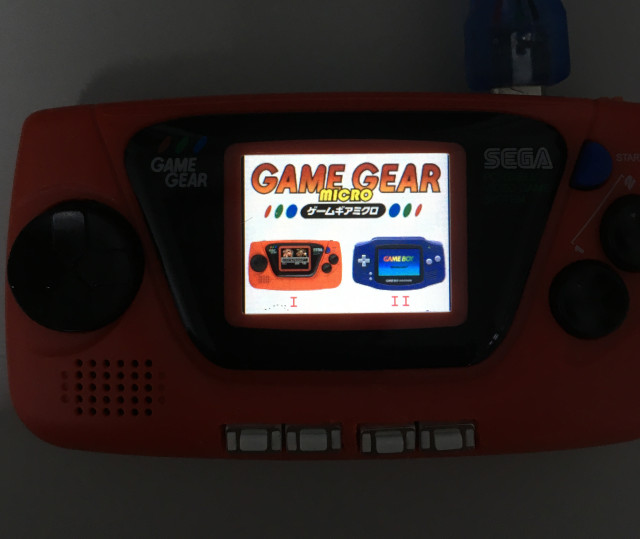
#218 Re: 司徒开源 » 研究FC3000掌機的開源可行性 » 2022-03-15 19:31:19
#219 Re: 司徒开源 » 研究FC3000掌機的開源可行性 » 2022-03-15 17:56:04
#220 Re: 司徒开源 » 研究FC3000掌機的開源可行性 » 2022-03-15 09:19:27
預設rootfs不包含GMenu2X,我都是使用miyoo的rootfs配置檔案,你可以參可:https://github.com/steward-fu/miyoo
#221 Re: 司徒开源 » 研究FC3000掌機的開源可行性 » 2022-03-15 07:13:05
#222 Re: 司徒开源 » 研究Game Gear Micro掌機的開源可行性 » 2022-03-14 20:59:56
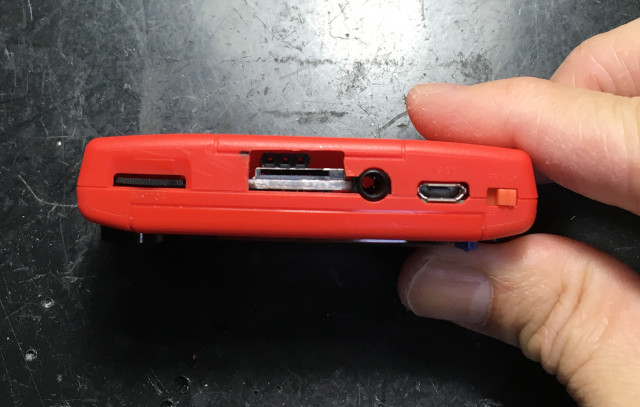
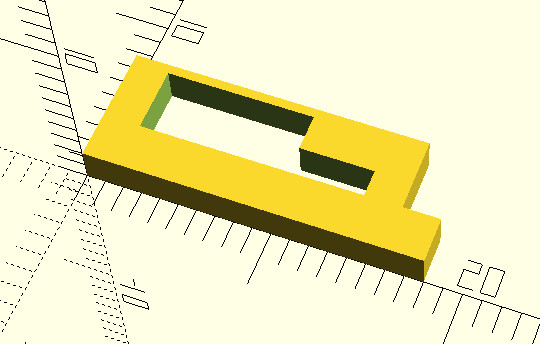
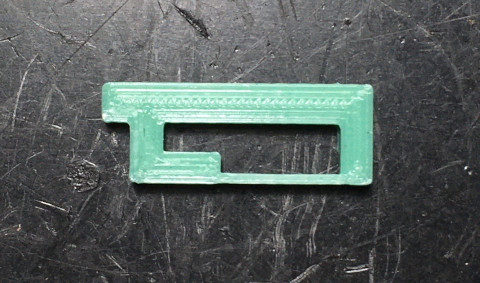
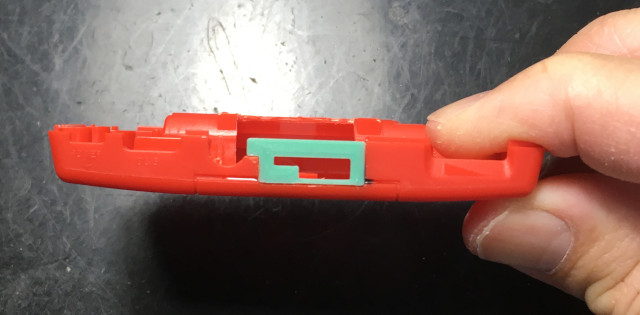
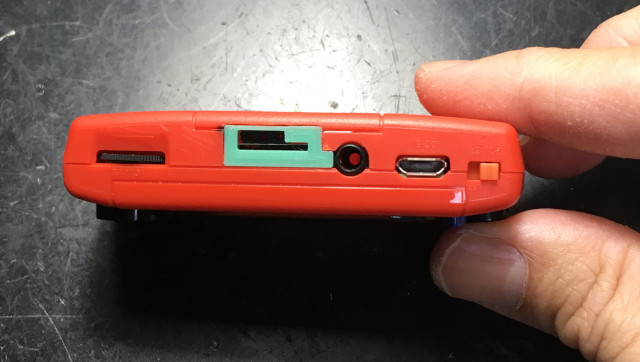
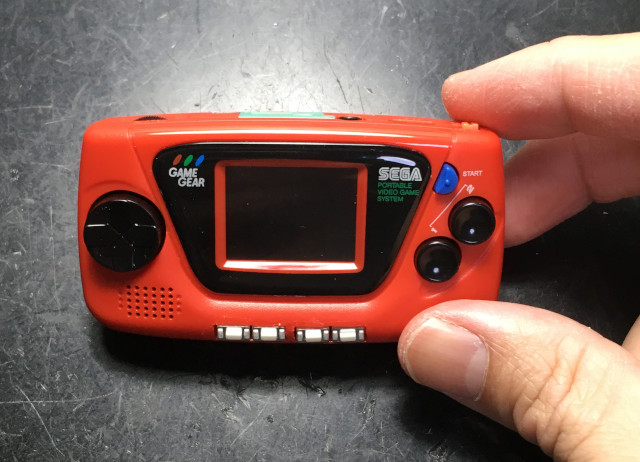
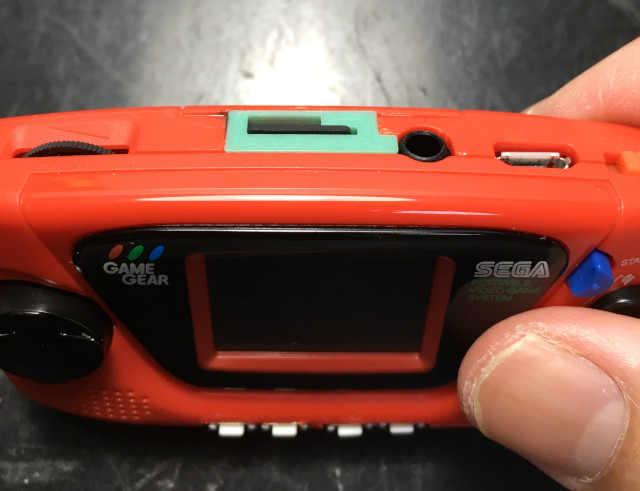
#223 Re: 司徒开源 » 研究FC3000掌機的開源可行性 » 2022-03-14 16:39:42
#224 Re: 司徒开源 » 研究Game Gear Micro掌機的開源可行性 » 2022-03-14 16:35:23
雖然"怀旧堂"企圖想把改造難度,從中上拉到下下等級,不過,司徒今天剛好打完疫苗,請假在家休息,想測試下,手是否會有抖動的問題,因此,司徒還是按照原本計畫進行改機~
由於目標是跑GBA模擬器,因此,至少還需要4個按鍵,司徒把PD13、PD14拿出來當作按鍵使用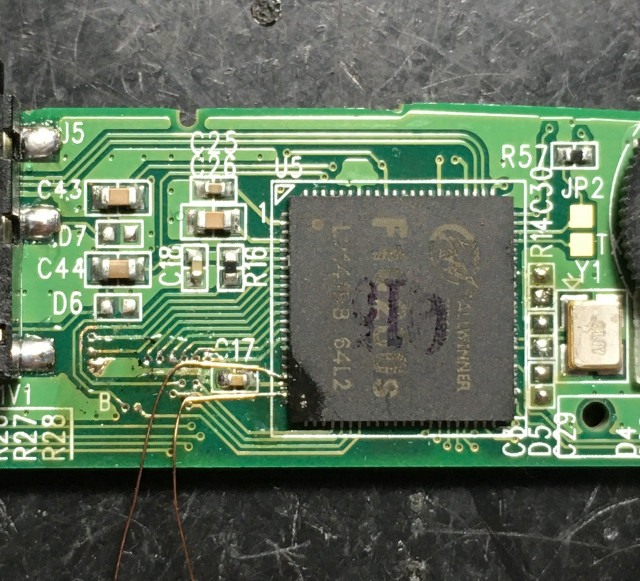
膠帶固定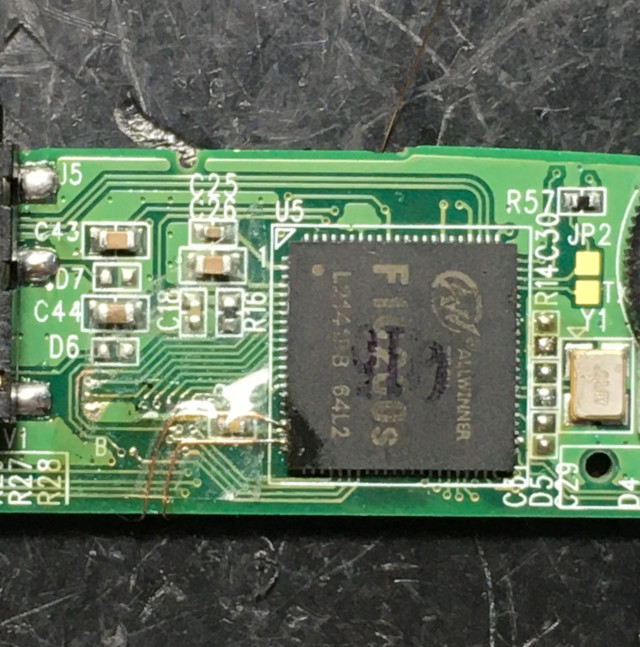
接著安裝MicroSD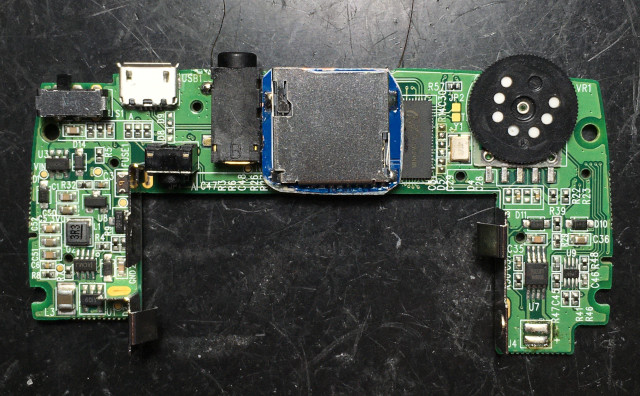
MicroSD腳位對應圖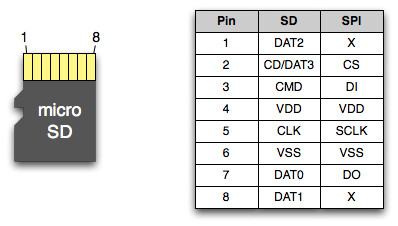
MicroSD使用4bits模式,PE2、PE3也拉出來當做按鍵使用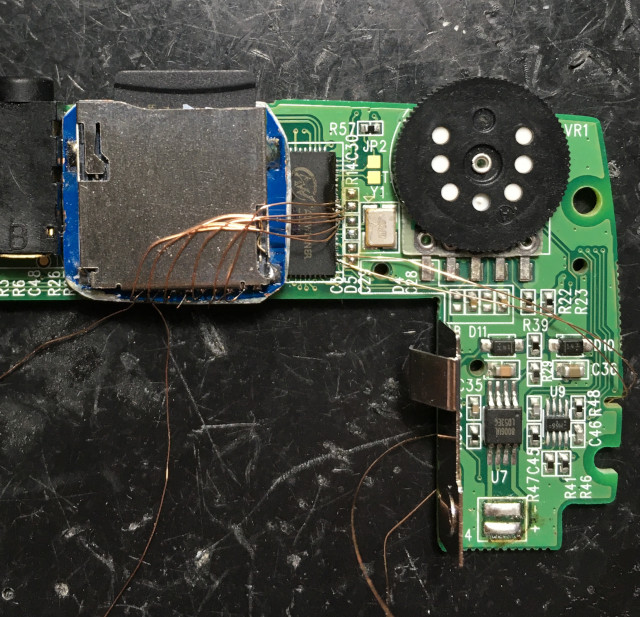
總共跳了10根線
MicroSD VDD、GND接到Flash IC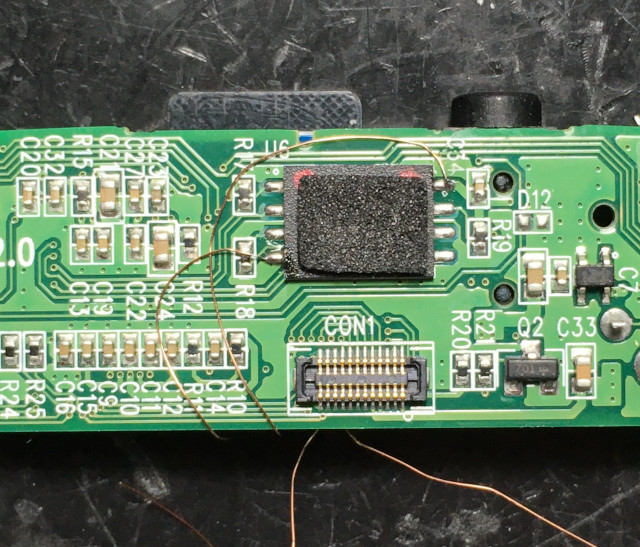
四顆按鍵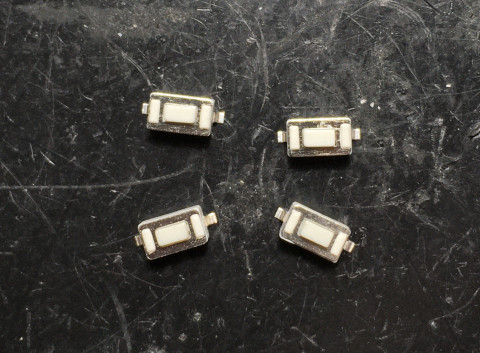
固定FPC,避免損壞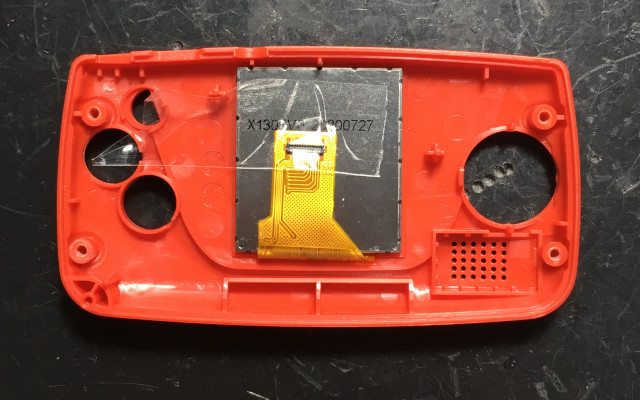
肉雞定位完成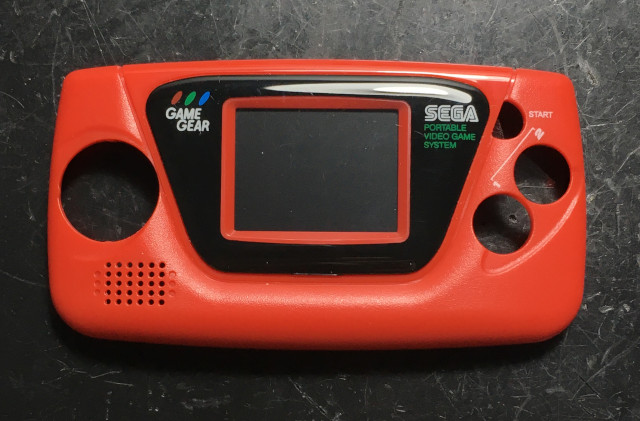
預計擺放位置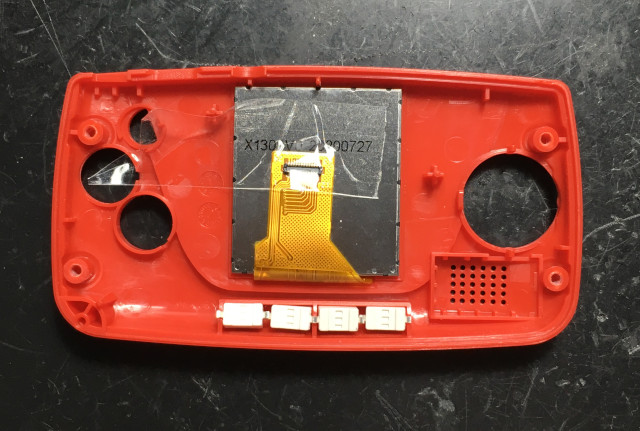
完成開鑿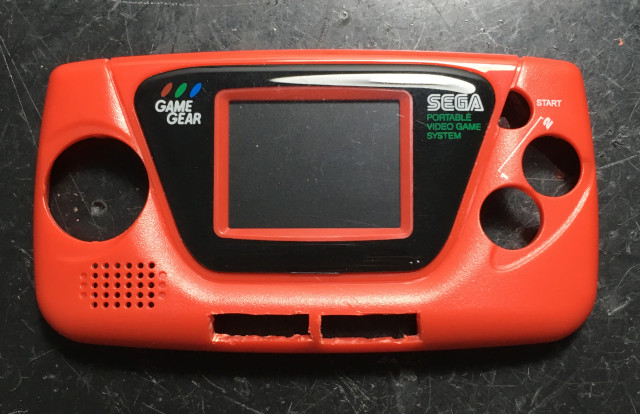
固定按鍵
背面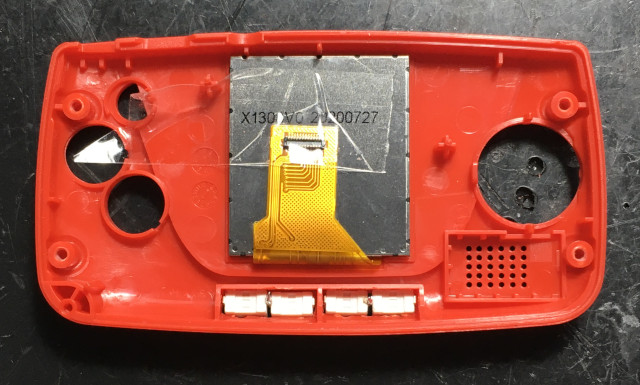
開始整線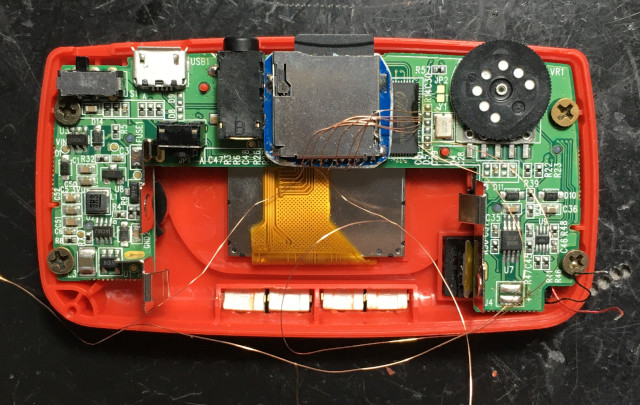
整線完成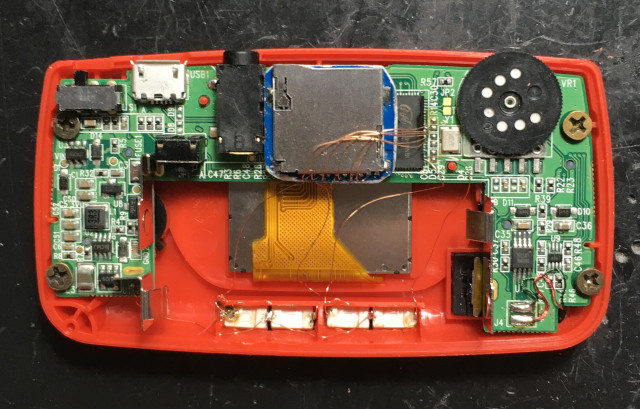
由於MicroSD位置太下方,背蓋需要動刀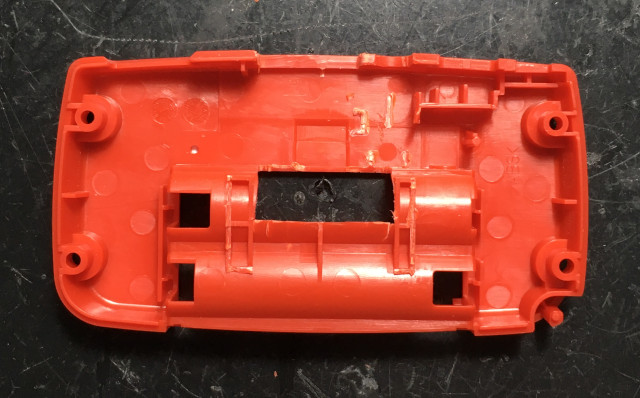
上邊缺口部份,之後有時間可以使用3D列印機補齊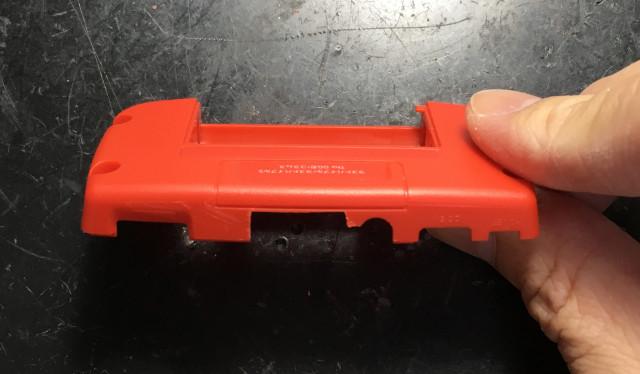
UART擺放在MicroSD上方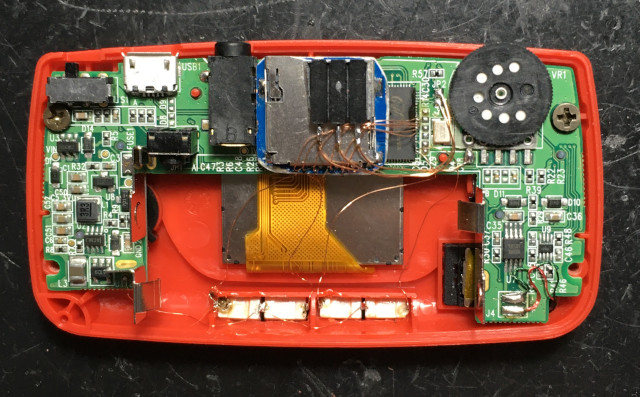
整體評分還算可以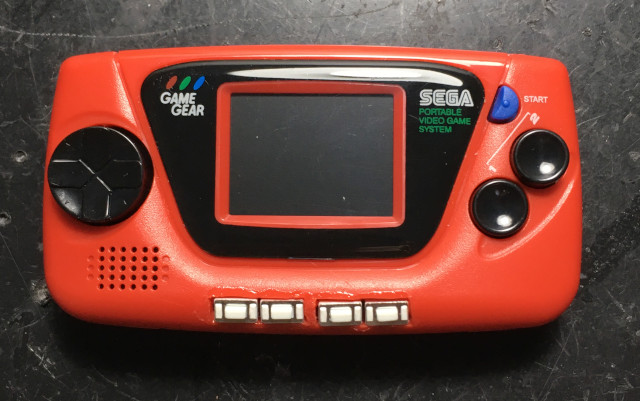
上方醜了點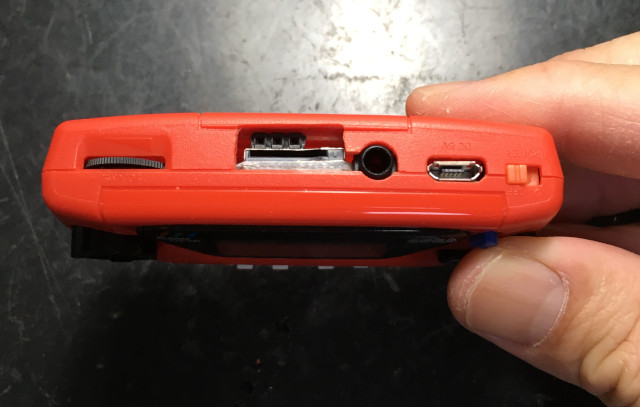
可以從MicroSD開機,終於,完美的開發機誕生~
可能有人會好奇,司徒的焊接工具是不是很高級,可以飛出那麼細的線,其實,司徒使用很便宜的焊槍,而且也用了快五年~
銲錫的部份,使用比較好一點點的日本制銲錫~
#225 Re: 司徒开源 » 研究Game Gear Micro掌機的開源可行性 » 2022-03-14 11:15:51
#226 Re: 司徒开源 » 研究FC3000掌機的開源可行性 » 2022-03-14 10:02:11
A1: 第三腳位是LEDA,一般是接到PWM IC,所以你可以從PWM EN腳位查出是哪根F1C100S腳位
A2: 第四腳位是RST,一般是直接連接到F1C100S,FC3000則是透過MOSFET連接,你可以從MOSFET查到F1C100S腳位
A3: 電池電量需要看App是讀取那個位置,目前應該是不一樣的位置,GMenuNX可以改
A4: ABXY按鍵如果要更換,你可以修改驅動程式
A5: 选择系统的界面,這部份代碼沒有保留,因為後來轉到草食系統,不過,你只要在UBoot裡面添加按鍵判斷就可以
A6: games遊戲問題,你可能需要查下,這部份,從目前訊息,看不出哪裡有問題
A7: 中文亂碼,替換字型就可以,GMenu2X支援中文顯示
#227 Re: 司徒开源 » 研究Game Gear Micro掌機的開源可行性 » 2022-03-14 09:54:27
#228 Re: 司徒开源 » 研究Game Gear Micro掌機的開源可行性 » 2022-03-14 07:25:50
根據此GitHub:https://github.com/ethanpierce/gamegearmicrohack
此人似乎早知道這個屏是ST7789,而經由分析結果,屏也確實是ST7789~
#229 Re: 司徒开源 » 研究FC3000掌機的開源可行性 » 2022-03-14 07:16:05
#230 Re: 司徒开源 » 研究FC3000掌機的開源可行性 » 2022-03-13 22:35:58
@jck0430
目前源代碼已經釋出,如果你無法自己修改,很抱歉~你只能等草食系統再回報問題了~
@kendling
你解析出來的資料跟我解析出來的不一樣,但是,就我感覺,都不像是屏的初始化資料~我的方法如下:
原始檔案大小
-rw-r--r-- 1 steward steward 800000048 Mar 12 22:57 new1.csv
-rw-r--r-- 1 steward steward 800000048 Mar 12 23:11 new2.csv
-rw-r--r-- 1 steward steward 800000048 Mar 12 23:13 new3.csv
slim.py (合併重複資料)
#!/usr/bin/python
import os
import sys

if len(sys.argv) != 2:
  print 'slim.py xxx.csv'
  sys.exit()

f = open(sys.argv[1])
c = f.readlines()
f.close()

pre = ''
for x in c:
  l = x.replace('\r', '').replace('\n', '')
  if pre != l:
    pre = l
    print l
合併後大小
-rw-r--r-- 1 steward steward 162121808 Mar 13 09:16 s1.csv
-rw-r--r-- 1 steward steward 153456496 Mar 13 09:17 s2.csv
-rw-r--r-- 1 steward steward 139407888 Mar 13 09:18 s3.csv
run.py (位元重組)
#!/usr/bin/python
import os
import sys

f = open('s1.csv')
c1 = f.readlines()
f.close()

f = open('s2.csv')
c2 = f.readlines()
f.close()

f = open('s3.csv')
c3 = f.readlines()
f.close()
cc = len(c3)

for x in range(cc):
  l1 = c1[x].replace('\r', '').replace('\n', '').split(',')
  l2 = c1[x].replace('\r', '').replace('\n', '').split(',')
  l3 = c1[x].replace('\r', '').replace('\n', '').split(',')
  l1.reverse()
  l2.reverse()
  l3.reverse()
  if l1[0] == 'logic':
    continue

  if (l1[5] != l2[5]) or (l2[5] != l3[5]) or (l3[5] != l1[5]):
    print 'error'
    sys.exit()

  wr = l1[0]
  rs = l1[1]
  t3 = ''.join('{:x}'.format(int(v)) for v in l3[2:8])
  t2 = ''.join('{:x}'.format(int(v)) for v in l2[3:8])
  t1 = ''.join('{:x}'.format(int(v)) for v in l1[3:8])
  t = t3 + t2 + t1
  v = '0x%04x' % int(t, 2)
  if wr == '0':
    if rs == '0':
      print 'CMD:{}'.format(v)
    else:
      print 'DAT:{}'.format(v)

  if 0:
    print l3
    print l2
    print l1
    print t
    print v
    print ''
最後取得的屏初始化資料
CMD:0x0000
CMD:0x0421
CMD:0x0c63
CMD:0x1ce7
CMD:0x3def
CMD:0x7fff
CMD:0xffff
DAT:0x0000
CMD:0x0000
DAT:0x0000
CMD:0x0000
DAT:0x0000
CMD:0x0000
DAT:0x0000
CMD:0x0000
DAT:0x8842
CMD:0x0000
DAT:0x0000
CMD:0x0000
DAT:0x0000
CMD:0x0000
DAT:0x0000
CMD:0x0000
DAT:0x0000
CMD:0x0000
DAT:0x0000
CMD:0x0000
DAT:0x0000
CMD:0x0000
DAT:0x8000
CMD:0x0000
DAT:0x0000
CMD:0x0000
DAT:0x0000
CMD:0x0000
DAT:0x0000
CMD:0x0000
DAT:0x0000
CMD:0x0000
DAT:0x0000
CMD:0x0000
DAT:0x8000
CMD:0x0000
DAT:0x8000
CMD:0x0000
DAT:0x8000
CMD:0x0000
DAT:0x0842
CMD:0x8000
DAT:0x0000
CMD:0x8000
DAT:0x0000
CMD:0x8000
DAT:0x0000
CMD:0x8000
DAT:0x8000
CMD:0x8000
DAT:0x0000
CMD:0x8000
DAT:0x0000
CMD:0x8000
DAT:0x0000
CMD:0x8000
DAT:0x0000
CMD:0x8000
DAT:0x0000
CMD:0x8000
DAT:0x0000
CMD:0x8000
DAT:0x0000
CMD:0x8000
DAT:0x0c63
CMD:0x8000
DAT:0x0000
CMD:0x8000
DAT:0x8000
DAT:0x0000
CMD:0x8000
DAT:0x0000
CMD:0x8000
DAT:0x0000
CMD:0x8000
DAT:0x0000
CMD:0x8000
DAT:0x0000
CMD:0x8000
DAT:0x0000
CMD:0x0000
DAT:0x0000
CMD:0x0000
DAT:0x8000
CMD:0x0000
DAT:0x0000
CMD:0x0000
DAT:0x8000
CMD:0x8000
DAT:0x1084
CMD:0x8000
DAT:0x0000
CMD:0x8000
DAT:0x0000
CMD:0x0000
DAT:0x0000
CMD:0x0000
DAT:0x0000
CMD:0x0000
DAT:0x0000
CMD:0x0000
DAT:0x0000
CMD:0x0000
DAT:0x0000
CMD:0x0000
DAT:0x0000
CMD:0x0000
DAT:0x0000
CMD:0x0000
DAT:0x0000
CMD:0x0000
DAT:0x0000
CMD:0x0000
DAT:0x0000
CMD:0x0000
DAT:0x0000
CMD:0x0000
DAT:0x0000
CMD:0x0000
DAT:0x8000
CMD:0x0000
DAT:0x8000
CMD:0x0000
DAT:0x8000
CMD:0x0000
DAT:0x8000
CMD:0x0000
DAT:0x0000
CMD:0x0000
DAT:0x0000
DAT:0x8000
CMD:0x8000
CMD:0x0000
DAT:0x0000
CMD:0x0000
DAT:0x8000
CMD:0x8000
DAT:0x8000
CMD:0x8000
DAT:0x0000
CMD:0x8000
雖然感覺都怪怪的,不過,我還是把它做成燒錄檔案給你測試,你依序燒錄到MicroSD並且插入到你的FC3000開機看看,如果有顯示RGB顏色,那代表可以動作~
20220313_0.img
20220313_1.img
#231 Re: 司徒开源 » 研究FC3000掌機的開源可行性 » 2022-03-13 20:36:59
#232 Re: 司徒开源 » 研究Game Gear Micro掌機的開源可行性 » 2022-03-13 20:08:59
司徒想了想,發現有一個位置可以用來擺放MicroSD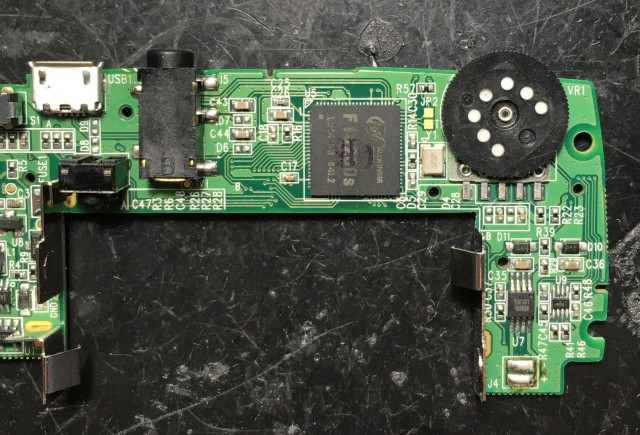
F1C200S左邊是屏的走線,右邊則是用來跳線連接MicroSD,這改機難度屬於中上...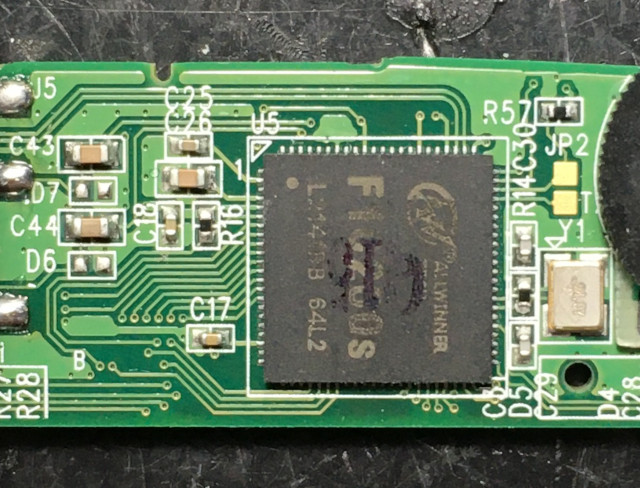
為了方便跳線,司徒先將10uPF、1M電阻拆掉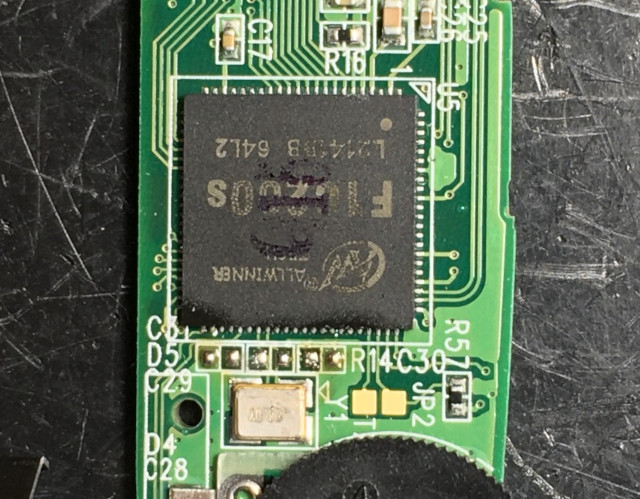
原本想直接使用MicroSD元件,但是,發現接觸的排針會脫落,需要固定,因此,司徒找來一個肉雞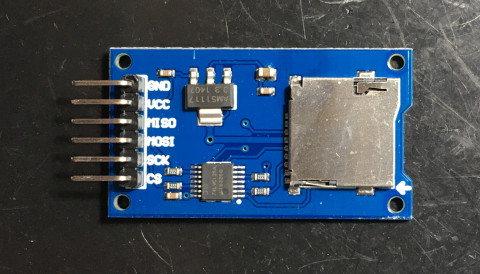
電宰後...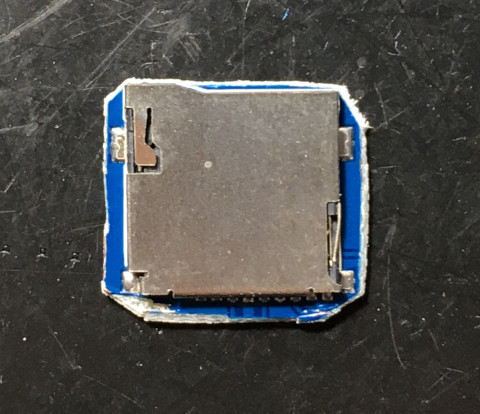
相當完美的位置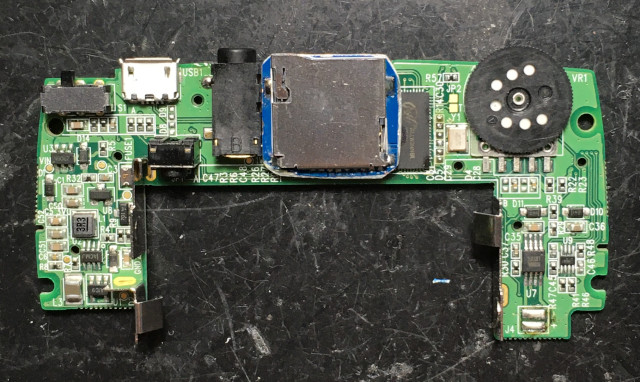
但是,下方是屏的走線,假如先改造MicroSD,這屏的問題可能就很難解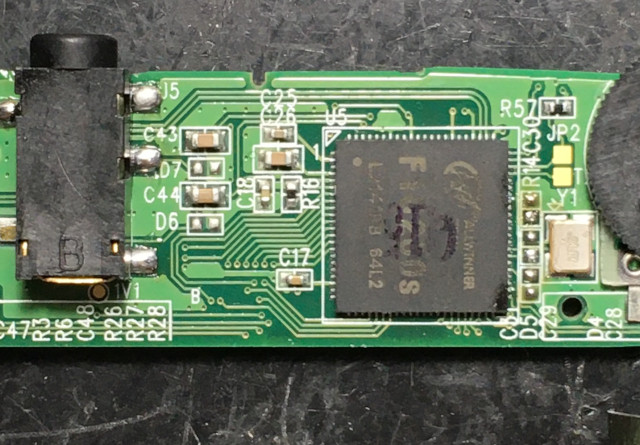
因此,司徒打算先把屏的初始化代碼找出來,於是開始刮線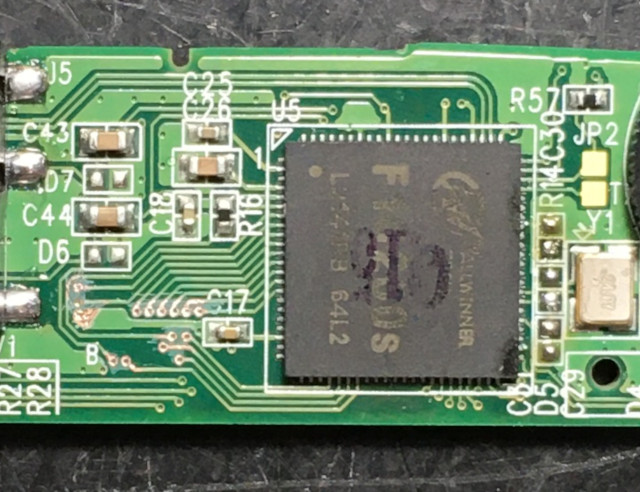
腳位圖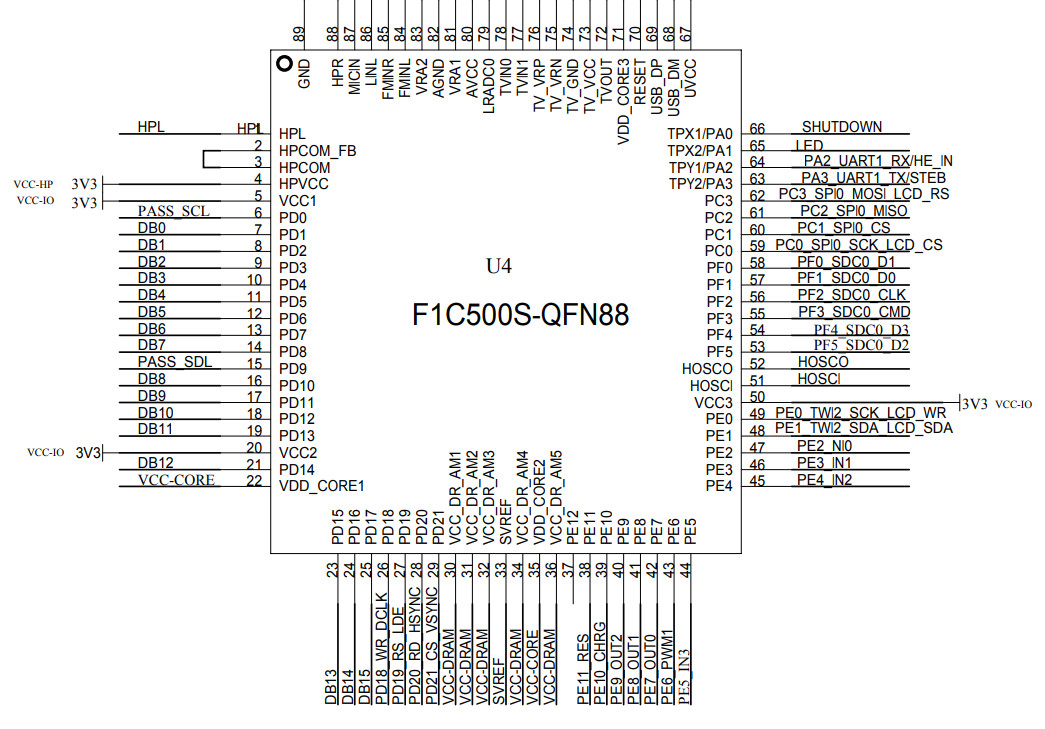
標示位置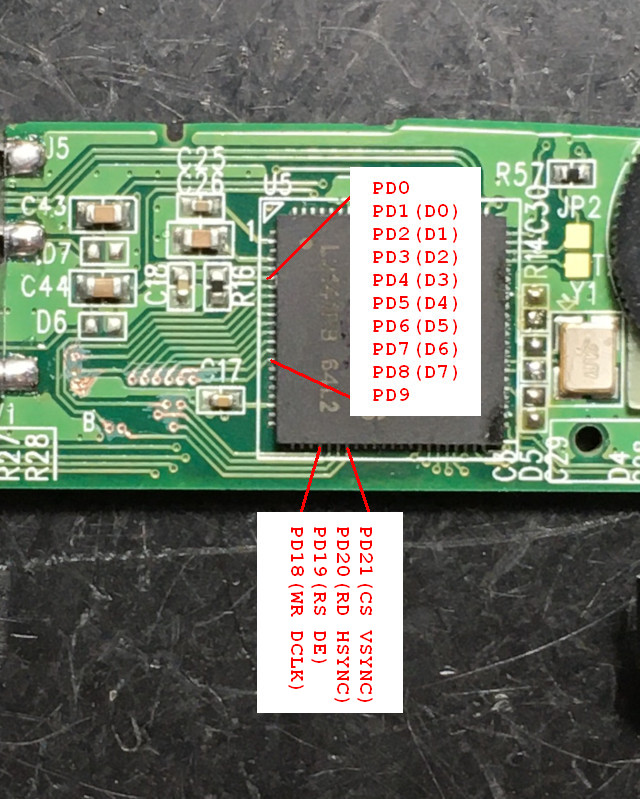
跳線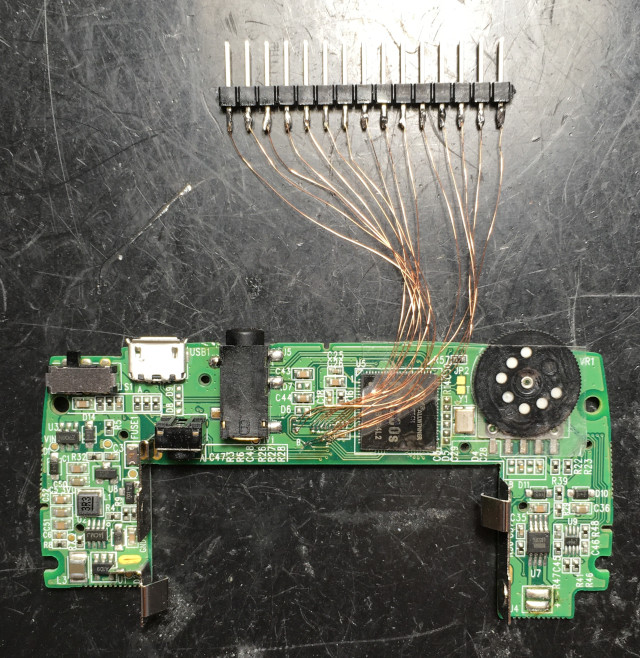
屏的走線真的蠻細的,需要一點苦工,司徒一想到後面的MicroSD跳線,有種想哭的感覺...
寨機邏輯分析儀上場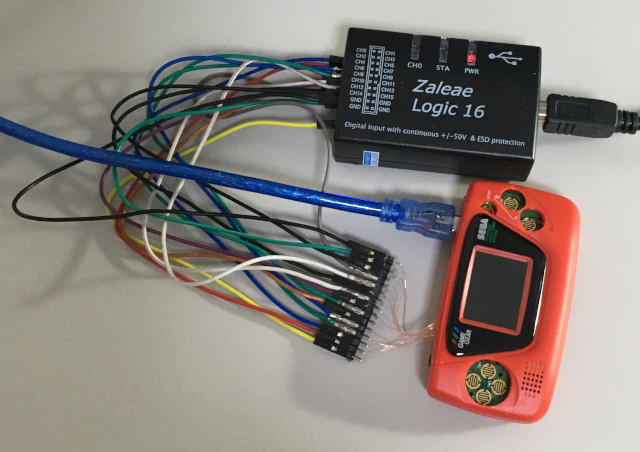
由上而下分別是:CS、RD、RS、WR、PD0、DB0~DB7、PD8,從這個圖,得到四個資訊:
1. 屏的驅動方式是MCU方式(i80)
2. 屏有TE腳位(Screen Tearing)
3. PD0是TE腳位
4. PD8是RESET腳位
TE腳位剛好是60Hz,代表這個屏的顯示可以達60FPS,相當不錯的屏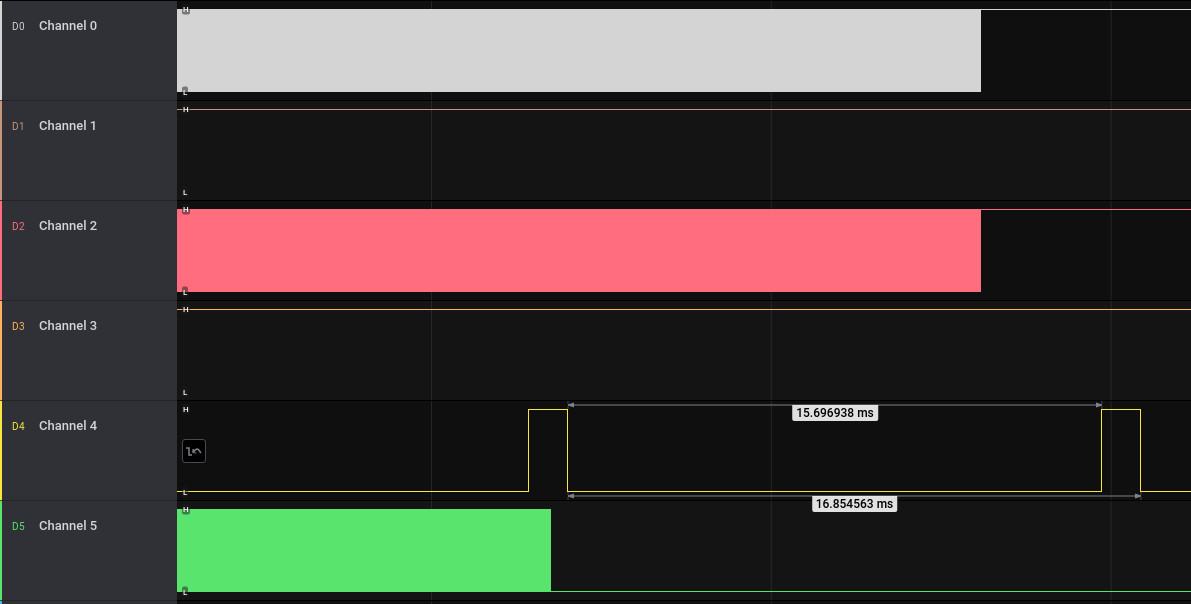
邏輯分析儀取得的資料
0.000000000,1,1,1,0,0,0,0,0,0,0,0,1
0.000002600,1,1,1,0,0,0,0,0,0,0,0,0
0.000003200,1,1,1,0,0,0,0,0,0,0,0,1
0.110548360,1,1,1,0,0,0,0,0,0,0,0,0
0.220564240,1,1,1,0,0,0,0,0,0,0,0,1
0.230566400,1,1,1,0,0,0,0,0,0,0,0,0
0.240566320,1,1,1,0,0,0,0,0,0,0,0,1
0.340535600,0,0,1,0,0,0,1,0,0,0,1,1
0.340535640,0,0,0,0,0,0,1,0,0,0,1,1
0.340535680,0,0,1,0,0,0,1,0,0,0,1,1
0.340535720,1,1,1,0,0,0,0,0,0,0,0,1
0.460496120,0,0,0,0,0,1,1,0,1,1,0,1
0.460496200,1,1,1,0,0,0,0,0,0,0,0,1
0.460598320,0,1,0,0,0,0,0,1,1,0,0,1
0.460598400,1,1,1,0,0,0,0,0,0,0,0,1
0.460699800,0,0,1,0,0,0,0,1,0,0,0,1
0.460699840,0,0,0,0,0,1,1,1,1,0,0,1
0.460699880,0,0,1,0,0,1,1,1,1,0,0,1
0.460699920,1,1,1,0,0,0,0,0,0,0,0,1
0.460801720,0,1,1,0,0,0,0,0,0,1,1,1
0.460801760,0,1,0,0,0,0,0,0,0,1,1,1
0.460801800,0,1,1,0,0,0,0,0,0,1,1,1
0.460801840,1,1,1,0,0,0,0,0,0,0,0,1
0.460902760,0,0,0,0,0,1,1,0,0,1,0,1
0.460902840,1,1,1,0,0,0,0,0,0,0,0,1
0.461004640,0,0,1,0,0,1,1,0,0,1,1,1
0.461004680,0,0,0,0,0,1,1,0,0,1,1,1
0.461004720,0,0,1,0,0,1,1,0,0,1,1,1
0.461004760,1,1,1,0,0,0,0,0,0,0,0,1
0.461105680,0,1,1,0,0,0,0,0,0,0,0,1
0.461105720,0,1,0,0,0,0,0,0,0,0,0,1
0.461105760,1,1,1,0,0,0,0,0,0,0,0,1
0.461206600,0,0,1,1,0,1,1,0,1,0,0,1
0.461206640,0,0,0,1,0,1,1,0,1,0,0,1
0.461206680,0,0,1,1,0,1,1,0,1,0,0,1
0.461206720,1,1,1,0,0,0,0,0,0,0,0,1
0.461308600,0,1,1,0,0,0,0,1,0,1,0,1
0.461308640,0,1,0,0,0,0,0,1,0,1,0,1
0.461308680,0,1,1,0,0,0,0,1,0,1,0,1
0.461308720,1,1,1,0,0,0,0,0,0,0,0,1
0.461409520,0,1,1,0,0,0,0,0,0,0,0,1
0.461409560,0,1,0,0,0,0,0,1,0,1,0,1
0.461409600,0,1,1,0,0,0,0,1,0,1,0,1
0.461409640,1,1,1,0,0,0,0,0,0,0,0,1
0.461510560,0,1,1,0,0,0,0,0,0,0,0,1
0.461510600,0,1,0,0,0,0,0,0,0,0,0,1
0.461510640,0,1,1,0,0,0,0,0,0,0,0,1
0.461510680,1,1,1,0,0,0,0,0,0,0,0,1
0.461612480,0,1,0,0,0,1,1,0,1,0,1,1
0.461612560,1,1,1,0,0,0,0,0,0,0,0,1
0.461713480,0,1,1,0,0,1,0,0,1,0,1,1
0.461713520,0,1,0,0,0,1,1,0,1,0,1,1
0.461713560,0,1,1,0,0,1,1,0,1,0,1,1
0.461713600,1,1,1,0,0,0,0,0,0,0,0,1
0.461815400,0,0,1,1,0,1,1,0,1,1,1,1
0.461815440,0,0,0,1,0,1,1,0,1,1,1,1
0.461815480,1,1,1,1,0,1,0,0,0,0,0,1
0.461815520,1,1,1,0,0,0,0,0,0,0,0,1
0.461916440,0,1,0,0,0,0,0,0,1,0,0,1
0.461916520,1,1,1,0,0,0,0,0,0,0,0,1
0.462017360,0,0,1,1,0,1,1,1,1,0,1,1
0.462017400,0,0,0,1,0,1,1,1,1,0,1,1
0.462017440,1,1,1,0,0,0,0,0,0,0,0,1
0.462119360,0,1,1,0,0,1,1,0,0,0,0,1
0.462119400,0,1,0,0,0,1,1,0,0,0,0,1
0.462119440,1,1,1,0,0,1,0,0,0,0,0,1
0.462119480,1,1,1,0,0,0,0,0,0,0,0,1
0.462220280,0,0,1,1,1,0,0,0,0,0,0,1
0.462220320,0,0,0,1,1,0,0,0,0,0,0,1
0.462220360,0,0,1,1,1,0,0,0,0,0,0,1
0.462220400,1,1,1,0,0,0,0,0,0,0,0,1
0.462321200,0,1,1,0,0,1,0,1,0,1,0,1
0.462321240,0,1,0,0,0,1,0,1,0,1,0,1
0.462321280,0,1,1,0,0,1,0,1,0,1,0,1
0.462321320,1,1,1,0,0,0,0,0,0,0,0,1
0.462422240,0,0,1,1,1,0,0,0,1,0,0,1
0.462422280,0,0,0,1,1,0,0,0,1,0,0,1
0.462422320,1,1,1,1,1,0,0,0,1,0,0,1
0.462422360,1,1,1,0,0,0,0,0,0,0,0,1
0.462523160,0,1,1,0,0,0,0,0,0,0,1,1
0.462523200,0,1,0,0,0,0,0,0,0,0,1,1
0.462523240,0,1,1,0,0,0,0,0,0,0,1,1
0.462523280,1,1,1,0,0,0,0,0,0,0,0,1
0.462624200,0,0,1,1,1,0,0,0,1,0,1,1
0.462624240,0,0,0,1,1,0,0,0,1,0,1,1
0.462624280,1,1,1,0,0,0,0,0,0,0,0,1
0.462725120,0,1,1,0,0,0,1,0,1,1,1,1
0.462725160,0,1,0,0,0,0,1,0,1,1,1,1
0.462725200,0,1,1,0,0,0,1,0,1,1,1,1
0.462725240,1,1,1,0,0,0,0,0,0,0,0,1
0.462826040,0,0,1,1,1,0,0,0,0,1,0,1
0.462826080,0,0,0,1,1,0,0,0,0,1,0,1
0.462826120,0,0,1,1,1,0,0,0,0,1,0,1
0.462826160,1,1,1,0,0,0,0,0,0,0,0,1
0.462927960,0,1,1,0,0,1,0,0,0,0,0,1
0.462928000,0,1,0,0,0,1,0,0,0,0,0,1
0.462928040,1,1,1,0,0,0,0,0,0,0,0,1
0.463029000,0,0,0,1,1,0,0,0,1,1,0,1
0.463029080,1,1,1,0,0,0,0,0,0,0,0,1
0.463130000,0,1,1,0,0,0,0,1,1,1,1,1
0.463130040,0,1,0,0,0,0,0,1,1,1,1,1
0.463130080,0,1,1,0,0,0,0,1,1,1,1,1
0.463130120,1,1,1,0,0,0,0,0,0,0,0,1
0.463231920,0,0,1,1,1,0,1,0,0,0,0,1
0.463231960,0,0,0,1,1,0,1,0,0,0,0,1
0.463232000,1,1,1,0,0,0,0,0,0,0,0,1
0.463332960,0,1,0,1,0,1,0,0,0,1,0,1
0.463333000,0,1,1,1,0,1,0,0,0,1,0,1
0.463333040,1,1,1,0,0,0,0,0,0,0,0,1
0.463434840,0,1,1,1,0,1,0,0,0,0,1,1
0.463434880,0,1,0,1,0,1,0,0,0,0,1,1
0.463434920,0,1,1,1,0,1,0,0,0,0,1,1
0.463434960,1,1,1,0,0,0,0,0,0,0,0,1
0.463535760,0,0,1,1,1,0,1,0,1,1,0,1
0.463535800,0,0,0,1,1,0,1,0,1,1,0,1
0.463535840,0,0,1,1,1,0,1,0,1,1,0,1
0.463535880,1,1,1,0,0,0,0,0,0,0,0,1
0.463636800,0,1,1,1,0,1,0,0,0,0,1,1
0.463636840,0,1,0,1,0,1,0,0,0,0,1,1
0.463636880,1,1,1,0,0,1,0,0,0,0,0,1
0.463636920,1,1,1,0,0,0,0,0,0,0,0,1
0.463738720,0,0,0,1,1,1,0,0,0,0,0,1
0.463738800,1,1,1,0,0,0,0,0,0,0,0,1
0.463839720,0,1,1,1,1,0,1,0,0,0,0,1
0.463839760,0,1,0,1,1,0,1,0,0,0,0,1
0.463839800,0,1,1,1,1,0,1,0,0,0,0,1
0.463839840,1,1,1,0,0,0,0,0,0,0,0,1
0.463940760,0,1,1,0,0,0,0,0,0,1,0,1
0.463940800,0,1,0,0,0,0,0,0,0,1,0,1
0.463940840,1,1,1,0,0,0,0,0,0,0,0,1
0.464042680,0,1,0,0,0,0,0,1,0,1,0,1
0.464042720,0,1,1,0,0,0,0,1,0,1,0,1
0.464042760,1,1,1,0,0,0,0,0,0,0,0,1
0.464143680,0,1,1,0,0,0,1,0,0,0,1,1
0.464143720,0,1,0,0,0,0,1,0,0,0,1,1
0.464143760,0,1,1,0,0,0,1,0,0,0,1,1
0.464143800,1,1,1,0,0,0,0,0,0,0,0,1
0.464245600,0,1,1,0,0,0,1,0,1,0,1,1
0.464245640,0,1,0,0,0,0,1,0,1,0,1,1
0.464245680,1,1,1,0,0,0,0,0,0,0,0,1
0.464346520,0,1,1,0,0,1,0,1,0,1,0,1
0.464346560,0,1,0,0,0,1,0,1,0,1,0,1
0.464346600,1,1,1,0,0,1,0,0,0,0,0,1
0.464346640,1,1,1,0,0,0,0,0,0,0,0,1
0.464447560,0,1,0,0,0,1,1,1,1,0,1,1
0.464447640,1,1,1,0,0,0,0,0,0,0,0,1
0.464549440,0,1,1,0,1,0,1,0,0,1,1,1
0.464549480,0,1,0,0,1,0,1,0,0,1,1,1
0.464549520,0,1,1,0,1,0,1,0,0,1,1,1
0.464549560,1,1,1,0,0,0,0,0,0,0,0,1
0.464650480,0,1,1,0,1,0,0,0,0,1,0,1
0.464650520,0,1,0,0,1,0,0,0,0,1,0,1
0.464650560,1,1,1,0,0,0,0,0,0,0,0,1
0.464751400,0,1,1,0,0,0,1,0,1,1,0,1
0.464751440,0,1,0,0,0,0,1,0,1,1,0,1
0.464751480,0,1,1,0,0,0,1,0,1,1,0,1
0.464751520,1,1,1,0,0,0,0,0,0,0,0,1
0.464852320,0,1,1,0,0,0,0,1,0,1,1,1
0.464852360,0,1,0,0,0,0,0,1,0,1,1,1
0.464852400,0,1,1,0,0,0,0,1,0,1,1,1
0.464852440,1,1,1,0,0,0,0,0,0,0,0,1
0.464953360,0,1,1,0,0,0,0,1,1,0,1,1
0.464953400,0,1,0,0,0,0,0,1,1,0,1,1
0.464953440,1,1,1,0,0,0,0,1,1,0,0,1
0.464953480,1,1,1,0,0,0,0,0,0,0,0,1
0.465054280,0,1,1,0,0,0,1,1,1,1,1,1
0.465054320,0,1,0,0,0,0,1,1,1,1,1,1
0.465054360,0,1,1,0,0,0,1,1,1,1,1,1
0.465054400,1,1,1,0,0,0,0,0,0,0,0,1
0.465155200,0,1,1,0,0,1,0,0,0,0,1,1
0.465155240,0,1,0,0,0,1,0,0,1,0,1,1
0.465155280,0,1,1,0,0,1,0,0,1,0,1,1
0.465155320,1,1,1,0,0,0,0,0,0,0,0,1
0.465256240,0,0,1,1,1,1,0,0,0,0,1,1
0.465256280,0,0,0,1,1,1,0,0,0,0,1,1
0.465256320,0,0,1,1,1,1,0,0,0,0,1,1
0.465256360,1,1,1,0,0,0,0,0,0,0,0,1
0.465358160,0,1,0,1,1,0,1,0,0,0,0,1
0.465358240,1,1,1,0,0,0,0,0,0,0,0,1
0.465459160,0,1,1,0,0,0,0,0,0,1,0,1
0.465459200,0,1,0,0,0,0,0,0,0,1,0,1
0.465459240,0,1,1,0,0,0,0,0,0,1,0,1
0.465459280,1,1,1,0,0,0,0,0,0,0,0,1
0.465560120,0,1,0,0,0,0,0,1,1,0,1,1
0.465560200,1,1,1,0,0,0,0,0,0,0,0,1
0.465662120,0,1,0,0,0,0,1,0,0,0,0,1
0.465662200,1,1,1,0,0,0,0,0,0,0,0,1
0.465763040,0,1,1,0,0,0,1,0,1,0,1,1
0.465763080,0,1,0,0,0,0,1,0,1,0,1,1
0.465763120,1,1,1,0,0,0,0,0,0,0,0,1
0.465865040,0,1,1,0,0,1,0,1,0,1,0,1
0.465865080,0,1,0,0,0,1,0,1,0,1,0,1
0.465865120,1,1,1,0,0,0,0,0,0,0,0,1
0.465965960,0,1,1,0,0,1,1,1,1,0,0,1
0.465966000,0,1,0,0,0,1,1,1,1,0,0,1
0.465966040,0,1,1,0,0,1,1,1,1,0,0,1
0.465966080,1,1,1,0,0,0,0,0,0,0,0,1
0.466067000,0,1,1,0,1,0,0,0,0,1,0,1
0.466067040,0,1,0,0,1,0,0,0,0,1,0,1
0.466067080,1,1,1,0,0,0,0,0,0,0,0,1
0.466168880,0,1,1,0,1,0,1,0,0,0,1,1
0.466168920,0,1,0,0,1,0,1,0,0,0,1,1
0.466168960,0,1,1,0,1,0,1,0,0,0,1,1
0.466169000,1,1,1,0,0,0,0,0,0,0,0,1
0.466269920,0,1,1,0,0,1,0,0,1,1,0,1
0.466269960,0,1,0,0,0,1,0,0,1,1,0,1
0.466270000,1,1,1,0,0,1,0,0,1,0,0,1
0.466270040,1,1,1,0,0,0,0,0,0,0,0,1
0.466370840,0,1,1,0,0,0,1,1,1,1,1,1
0.466370880,0,1,0,0,0,0,1,1,1,1,1,1
0.466370920,0,1,1,0,0,0,1,1,1,1,1,1
0.466370960,1,1,1,0,0,0,0,0,0,0,0,1
0.466472840,0,1,1,0,0,0,1,1,1,1,1,1
0.466472880,0,1,0,0,0,0,1,1,1,1,1,1
0.466472920,0,1,1,0,0,0,1,1,1,1,1,1
0.466472960,1,1,1,0,0,0,0,0,0,0,0,1
0.466573800,0,1,0,0,0,1,0,0,0,0,0,1
0.466573840,0,1,1,0,0,1,0,0,0,0,0,1
0.466573880,1,1,1,0,0,0,0,0,0,0,0,1
0.466675800,0,1,0,0,0,1,0,0,1,0,1,1
0.466675880,1,1,1,0,0,0,0,0,0,0,0,1
0.466776720,0,0,1,0,0,1,0,0,0,0,1,1
0.466776760,0,0,0,0,0,1,0,0,0,0,1,1
0.466776800,1,1,1,0,0,0,0,0,0,0,0,1
0.466877720,0,0,1,0,0,1,0,1,0,0,0,1
0.466877760,0,0,0,0,0,1,0,1,1,0,0,1
0.466877800,0,0,1,0,0,1,0,1,1,0,0,1
0.466877840,1,1,1,0,0,0,0,0,0,0,0,1
0.466979640,0,1,1,0,0,0,0,0,0,0,0,1
0.466979680,0,1,0,0,0,0,0,0,0,0,0,1
0.466979720,0,1,1,0,0,0,0,0,0,0,0,1
0.466979760,1,1,1,0,0,0,0,0,0,0,0,1
0.467080560,0,1,1,0,0,0,0,0,0,0,0,1
0.467080600,0,1,0,0,0,0,0,0,0,0,0,1
0.467080640,0,1,1,0,0,0,0,0,0,0,0,1
0.467080680,1,1,1,0,0,0,0,0,0,0,0,1
0.467181600,0,1,1,0,0,0,0,0,0,0,0,1
0.467181640,0,1,0,0,0,0,0,0,0,0,0,1
0.467181680,1,1,1,0,0,0,0,0,0,0,0,1
0.467283520,0,1,0,1,1,1,0,1,1,1,1,1
0.467283560,0,1,1,1,1,1,0,1,1,1,1,1
0.467283600,1,1,1,0,0,0,0,0,0,0,0,1
0.467384520,0,0,1,0,0,1,0,1,1,0,1,1
0.467384560,0,0,0,0,0,1,0,1,1,0,1,1
0.467384600,0,0,1,0,0,1,0,1,1,0,1,1
0.467384640,1,1,1,0,0,0,0,0,0,0,0,1
0.467486440,0,1,1,0,0,0,0,0,0,0,0,1
0.467486480,0,1,0,0,0,0,0,0,0,0,0,1
0.467486520,1,1,1,0,0,0,0,0,0,0,0,1
0.467587440,0,1,1,0,0,0,0,0,0,0,0,1
0.467587480,0,1,0,0,0,0,0,0,0,0,0,1
0.467587520,0,1,1,0,0,0,0,0,0,0,0,1
0.467587560,1,1,1,0,0,0,0,0,0,0,0,1
0.467688480,0,1,1,0,0,0,0,0,0,0,0,1
0.467688520,0,1,0,0,0,0,0,0,0,0,0,1
0.467688560,0,1,1,0,0,0,0,0,0,0,0,1
0.467688600,1,1,1,0,0,0,0,0,0,0,0,1
0.467790400,0,1,0,1,1,1,0,1,1,1,1,1
0.467790480,1,1,1,0,0,0,0,0,0,0,0,1
0.467891400,0,0,1,0,0,0,0,0,0,0,0,1
0.467891440,0,0,0,0,0,0,0,0,0,0,0,1
0.467891480,0,0,1,0,0,0,0,0,0,0,0,1
0.467891520,1,1,1,0,0,0,0,0,0,0,0,1
0.467992360,0,0,0,0,0,1,0,1,0,0,1,1
0.467992440,1,1,1,0,0,0,0,0,0,0,0,1
0.587952560,0,0,0,0,0,1,0,1,0,1,0,1
0.587952640,1,1,1,0,0,0,0,0,0,0,0,1
0.588053280,0,0,1,0,0,1,0,1,0,1,0,1
0.588053320,0,0,0,0,0,1,0,1,0,1,0,1
0.588053360,1,1,1,0,0,1,0,0,0,0,0,1
司徒寫了一隻Python用來解資料
#!/usr/bin/python
import os
import sys

f = open('digital.csv')
c = f.readlines()
f.close()

for x in c:
  l = x.replace('\r', '').replace('\n', '').split(',')
  t0 = l[0]
  cs = l[1]
  rs = l[2]
  wr = l[3]
  db = '0x%02x' % int(''.join('{:x}'.format(int(v)) for v in l[4:12]), 2)
  rst = l[12]

  if cs == '0' and wr == '0':
    if rs == '0':
      print 'CMD:{}'.format(db)
    else:
      print 'DAT:{}'.format(db)
解譯後的屏初始化資料
CMD:0x11
CMD:0x36
DAT:0x0c
CMD:0x3c
DAT:0x03
CMD:0x32
CMD:0x33
DAT:0x00
CMD:0xb4
DAT:0x0a
DAT:0x0a
DAT:0x00
DAT:0x35
DAT:0x35
CMD:0xb7
DAT:0x04
CMD:0xbd
DAT:0x30
CMD:0xc0
DAT:0x2a
CMD:0xc4
DAT:0x01
CMD:0xc5
DAT:0x17
CMD:0xc2
DAT:0x20
CMD:0xc6
DAT:0x0f
CMD:0xd0
DAT:0xa2
DAT:0xa1
CMD:0xd6
DAT:0xa1
CMD:0xe0
DAT:0xd0
DAT:0x02
DAT:0x0a
DAT:0x11
DAT:0x15
DAT:0x2a
DAT:0x3d
DAT:0x53
DAT:0x42
DAT:0x16
DAT:0x0b
DAT:0x0d
DAT:0x1f
DAT:0x25
CMD:0xe1
DAT:0xd0
DAT:0x02
DAT:0x0d
DAT:0x10
DAT:0x15
DAT:0x2a
DAT:0x3c
DAT:0x42
DAT:0x51
DAT:0x26
DAT:0x1f
DAT:0x1f
DAT:0x20
DAT:0x25
CMD:0x21
CMD:0x2c
DAT:0x00
DAT:0x00
DAT:0x00
DAT:0xef
CMD:0x2d
DAT:0x00
DAT:0x00
DAT:0x00
DAT:0xef
CMD:0x00
CMD:0x29
CMD:0x2a
CMD:0x2a
main.s
  .global _start

  .equiv PIO_BASE,  0x01c20800
  .equiv PA,        (0x24 * 0)
  .equiv PB,        (0x24 * 1)
  .equiv PC,        (0x24 * 2)
  .equiv PD,        (0x24 * 3)
  .equiv PE,        (0x24 * 4)
  .equiv PIO_CFG0,  0x00
  .equiv PIO_CFG1,  0x04
  .equiv PIO_CFG2,  0x08
  .equiv PIO_DATA,  0x10

  .equiv LCD_CS,    (1 << 21)
  .equiv LCD_RD,    (1 << 20)
  .equiv LCD_RS,    (1 << 19)
  .equiv LCD_WR,    (1 << 18)
  .equiv LCD_RST,   (1 << 0)

  .arm
  .text
_start:
  .long 0xea000016
  .byte 'e', 'G', 'O', 'N', '.', 'B', 'T', '0'
  .long 0, __spl_size
  .byte 'S', 'P', 'L', 2
  .long 0, 0
  .long 0, 0, 0, 0, 0, 0, 0, 0
  .long 0, 0, 0, 0, 0, 0, 0, 0

_vector:
  b reset
  b .
  b .
  b .
  b .
  b .
  b .
  b .

reset:
  ldr r4, =PIO_BASE + PD
  ldr r1, =0x11111111
  str r1, [r4, #PIO_CFG0]
  str r1, [r4, #PIO_CFG1]
  str r1, [r4, #PIO_CFG2]

  ldr r4, =PIO_BASE + PE
  ldr r1, =0x11111111
  str r1, [r4, #PIO_CFG0]
  str r1, [r4, #PIO_CFG1]
  str r1, [r4, #PIO_CFG2]

  ldr r4, =PIO_BASE + PD
  ldr r1, =0xffffffff
  str r1, [r4, #PIO_DATA]

  ldr r4, =PIO_BASE + PE
  ldr r1, =0xffffffff
  str r1, [r4, #PIO_DATA]

  bl lcd_rst

  ldr r0, =0x11
  bl lcd_cmd
  ldr r0, =0x36
  bl lcd_cmd
  ldr r1, =0x0c
  bl lcd_dat
  ldr r0, =0x3c
  bl lcd_cmd
  ldr r1, =0x03
  bl lcd_dat
  ldr r0, =0x32
  bl lcd_cmd
  ldr r0, =0x33
  bl lcd_cmd
  ldr r1, =0x00
  bl lcd_dat
  ldr r0, =0xb4
  bl lcd_cmd
  ldr r1, =0x0a
  bl lcd_dat
  ldr r1, =0x0a
  bl lcd_dat
  ldr r1, =0x00
  bl lcd_dat
  ldr r1, =0x35
  bl lcd_dat
  ldr r1, =0x35
  bl lcd_dat
  ldr r0, =0xb7
  bl lcd_cmd
  ldr r1, =0x04
  bl lcd_dat
  ldr r0, =0xbd
  bl lcd_cmd
  ldr r1, =0x30
  bl lcd_dat
  ldr r0, =0xc0
  bl lcd_cmd
  ldr r1, =0x2a
  bl lcd_dat
  ldr r0, =0xc4
  bl lcd_cmd
  ldr r1, =0x01
  bl lcd_dat
  ldr r0, =0xc5
  bl lcd_cmd
  ldr r1, =0x17
  bl lcd_dat
  ldr r0, =0xc2
  bl lcd_cmd
  ldr r1, =0x20
  bl lcd_dat
  ldr r0, =0xc6
  bl lcd_cmd
  ldr r1, =0x0f
  bl lcd_dat
  ldr r0, =0xd0
  bl lcd_cmd
  ldr r1, =0xa2
  bl lcd_dat
  ldr r1, =0xa1
  bl lcd_dat
  ldr r0, =0xd6
  bl lcd_cmd
  ldr r1, =0xa1
  bl lcd_dat
  ldr r0, =0xe0
  bl lcd_cmd
  ldr r1, =0xd0
  bl lcd_dat
  ldr r1, =0x02
  bl lcd_dat
  ldr r1, =0x0a
  bl lcd_dat
  ldr r1, =0x11
  bl lcd_dat
  ldr r1, =0x15
  bl lcd_dat
  ldr r1, =0x2a
  bl lcd_dat
  ldr r1, =0x3d
  bl lcd_dat
  ldr r1, =0x53
  bl lcd_dat
  ldr r1, =0x42
  bl lcd_dat
  ldr r1, =0x16
  bl lcd_dat
  ldr r1, =0x0b
  bl lcd_dat
  ldr r1, =0x0d
  bl lcd_dat
  ldr r1, =0x1f
  bl lcd_dat
  ldr r1, =0x25
  bl lcd_dat
  ldr r0, =0xe1
  bl lcd_cmd
  ldr r1, =0xd0
  bl lcd_dat
  ldr r1, =0x02
  bl lcd_dat
  ldr r1, =0x0d
  bl lcd_dat
  ldr r1, =0x10
  bl lcd_dat
  ldr r1, =0x15
  bl lcd_dat
  ldr r1, =0x2a
  bl lcd_dat
  ldr r1, =0x3c
  bl lcd_dat
  ldr r1, =0x42
  bl lcd_dat
  ldr r1, =0x51
  bl lcd_dat
  ldr r1, =0x26
  bl lcd_dat
  ldr r1, =0x1f
  bl lcd_dat
  ldr r1, =0x1f
  bl lcd_dat
  ldr r1, =0x20
  bl lcd_dat
  ldr r1, =0x25
  bl lcd_dat
  ldr r0, =0x21
  bl lcd_cmd
  ldr r0, =0x2c
  bl lcd_cmd
  ldr r1, =0x00
  bl lcd_dat
  ldr r1, =0x00
  bl lcd_dat
  ldr r1, =0x00
  bl lcd_dat
  ldr r1, =0xef
  bl lcd_dat
  ldr r0, =0x2d
  bl lcd_cmd
  ldr r1, =0x00
  bl lcd_dat
  ldr r1, =0x00
  bl lcd_dat
  ldr r1, =0x00
  bl lcd_dat
  ldr r1, =0xef
  bl lcd_dat
  ldr r0, =0x00
  bl lcd_cmd
  ldr r0, =0x29
  bl lcd_cmd
  ldr r0, =0x2a
  bl lcd_cmd
  ldr r0, =0x2a
  bl lcd_cmd

  ldr r4, =240*180
  ldr r5, =0xffff
0:
  lsr r0, r5, #8
  bl lcd_dat
  mov r0, r5
  bl lcd_dat
  subs r4, #1
  bne 0b

loop:
  b loop

delay:
  push {lr}
0:
  subs r0, #1
  bne 0b
  pop {pc}

lcd_rst:
  push {r4, r5, lr}
  ldr r4, =PIO_BASE + PD
  ldr r5, =0xffffffff

  bic r5, #LCD_RST
  str r5, [r4, #PIO_DATA]
  ldr r0, =10000
  bl delay

  orr r5, #LCD_RST
  str r5, [r4, #PIO_DATA]
  ldr r0, =10000
  bl delay
  pop {r4, r5, pc}

lcd_wr:
  push {r4, r5, lr}
  ldr r4, =PIO_BASE + PD

  and r0, #0xff
  lsl r0, #1
  mov r5, r0
  orr r5, r1
  orr r5, #LCD_RST
  orr r5, #LCD_RD
  str r5, [r4, #PIO_DATA]

  orr r5, #LCD_WR
  str r5, [r4, #PIO_DATA]
  pop {r4, r5, pc}

lcd_dat:
  push {lr}
  mov r1, #LCD_RS
  bl lcd_wr
  pop {pc}

lcd_cmd:
  push {lr}
  mov r1, #0
  bl lcd_wr
  pop {pc}
  .end
main.ld
OUTPUT_FORMAT("elf32-littlearm", "elf32-bigarm", "elf32-littlearm")
OUTPUT_ARCH(arm)
ENTRY(_start)

MEMORY {
  ram : ORIGIN = 0x00000000, LENGTH = 32M
}

SECTIONS {
  .text :
  {
    PROVIDE(__spl_start = .);
    *(.text*)
    PROVIDE(__spl_end = .);
    *(.init.text)
    *(.exit.text)
    *(.glue*)
    *(.note.gnu.build-id)
  } > ram
  PROVIDE(__spl_size = __spl_end - __spl_start);

  .rodata ALIGN(8) :
  {
    PROVIDE(__rodata_start = .);
    *(SORT_BY_ALIGNMENT(SORT_BY_NAME(.rodata*)))
    PROVIDE(__rodata_end = .);
  } > ram

  .data ALIGN(8) :
  {
    PROVIDE(__data_start = .);
    *(.data*)
    . = ALIGN(8);
      PROVIDE(__data_end = .);
    PROVIDE(__image_end = .);
  } > ram

  .bss ALIGN(8) (NOLOAD) :
  {
    PROVIDE(__bss_start = .);
    *(.bss*)
    *(.sbss*)
    *(COMMON)
    . = ALIGN(8);
    PROVIDE(__bss_end = .);
  } > ram

  .stab 0 : { *(.stab) }
  .stabstr 0 : { *(.stabstr) }
  .stab.excl 0 : { *(.stab.excl) }
  .stab.exclstr 0 : { *(.stab.exclstr) }
  .stab.index 0 : { *(.stab.index) }
  .stab.indexstr 0 : { *(.stab.indexstr) }
  .comment 0 : { *(.comment) }
  .debug_abbrev 0 : { *(.debug_abbrev) }
  .debug_info 0 : { *(.debug_info) }
  .debug_line 0 : { *(.debug_line) }
  .debug_pubnames 0 : { *(.debug_pubnames) }
  .debug_aranges 0 : { *(.debug_aranges) }
}
Makefile
all:
  arm-none-eabi-as -mcpu=arm9 -o main.o main.s
  arm-none-eabi-ld -T main.ld -o main.elf main.o
  arm-none-eabi-objcopy -O binary main.elf main.bin
  gcc mksunxi.c -o mksunxi
  ./mksunxi main.bin

ram:
  sunxi-fel -p write 0 main.bin && sunxi-fel exec 0

clean:
  rm -rf main.bin main.o main.elf
進入下載模式
編譯下載
$ make
  arm-none-eabi-as -mcpu=arm9 -o main.o main.s
  arm-none-eabi-ld -T main.ld -o main.elf main.o
  arm-none-eabi-objcopy -O binary main.elf main.bin
  gcc mksunxi.c -o mksunxi
  ./mksunxi main.bin
  The bootloader head has been fixed, spl size is 1024 bytes.

$ make ram
  sunxi-fel -p write 0 main.bin && sunxi-fel exec 0
  100% [================================================]     1 kB,  167.0 kB/s
這...,讓司徒又陷入難點,應該是要顯示全白才對,從這個畫面顯示結果,代表屏初始化有問題,經過幾番查找,司徒發現一般屏的最後一道命令應該是0x2C,而且設定位址的命令一般是0x2A、0x2B,因此,比對了一下,司徒應該是記錯DB1和DB2的位置,導致解析錯誤
修正DB1和DB2
#!/usr/bin/python
import os
import sys

f = open('digital.csv')
c = f.readlines()
f.close()

for x in c:
  l = x.replace('\r', '').replace('\n', '').split(',')
  t0 = l[0]
  cs = l[1]
  rs = l[2]
  wr = l[3]
  t = l[9]
  l[9] = l[10]
  l[10] = t
  db = '0x%02x' % int(''.join('{:x}'.format(int(v)) for v in l[4:12]), 2)
  rst = l[12]

  if cs == '0' and wr == '0':
    if rs == '0':
      print 'CMD:{}'.format(db)
    else:
      print 'DAT:{}'.format(db)
最後一道命令是0x2C了~
CMD:0x11
CMD:0x36
DAT:0x0a
CMD:0x3a
DAT:0x05
CMD:0x34
CMD:0x35
DAT:0x00
CMD:0xb2
DAT:0x0c
DAT:0x0c
DAT:0x00
DAT:0x33
DAT:0x33
CMD:0xb7
DAT:0x02
CMD:0xbb
DAT:0x30
CMD:0xc0
DAT:0x2c
CMD:0xc2
DAT:0x01
CMD:0xc3
DAT:0x17
CMD:0xc4
DAT:0x20
CMD:0xc6
DAT:0x0f
CMD:0xd0
DAT:0xa4
DAT:0xa1
CMD:0xd6
DAT:0xa1
CMD:0xe0
DAT:0xd0
DAT:0x04
DAT:0x0c
DAT:0x11
DAT:0x13
DAT:0x2c
DAT:0x3b
DAT:0x55
DAT:0x44
DAT:0x16
DAT:0x0d
DAT:0x0b
DAT:0x1f
DAT:0x23
CMD:0xe1
DAT:0xd0
DAT:0x04
DAT:0x0b
DAT:0x10
DAT:0x13
DAT:0x2c
DAT:0x3a
DAT:0x44
DAT:0x51
DAT:0x26
DAT:0x1f
DAT:0x1f
DAT:0x20
DAT:0x23
CMD:0x21
CMD:0x2a
DAT:0x00
DAT:0x00
DAT:0x00
DAT:0xef
CMD:0x2b
DAT:0x00
DAT:0x00
DAT:0x00
DAT:0xef
CMD:0x00
CMD:0x29
CMD:0x2c
CMD:0x2c
main.s
  .global _start

  .equiv PIO_BASE,  0x01c20800
  .equiv PA,        (0x24 * 0)
  .equiv PB,        (0x24 * 1)
  .equiv PC,        (0x24 * 2)
  .equiv PD,        (0x24 * 3)
  .equiv PE,        (0x24 * 4)
  .equiv PIO_CFG0,  0x00
  .equiv PIO_CFG1,  0x04
  .equiv PIO_CFG2,  0x08
  .equiv PIO_DATA,  0x10

  .equiv LCD_CS,    (1 << 21)
  .equiv LCD_RD,    (1 << 20)
  .equiv LCD_RS,    (1 << 19)
  .equiv LCD_WR,    (1 << 18)
  .equiv LCD_RST,   (1 << 0)

  .arm
  .text
_start:
  .long 0xea000016
  .byte 'e', 'G', 'O', 'N', '.', 'B', 'T', '0'
  .long 0, __spl_size
  .byte 'S', 'P', 'L', 2
  .long 0, 0
  .long 0, 0, 0, 0, 0, 0, 0, 0
  .long 0, 0, 0, 0, 0, 0, 0, 0

_vector:
  b reset
  b .
  b .
  b .
  b .
  b .
  b .
  b .

reset:
  ldr r4, =PIO_BASE + PD
  ldr r1, =0x11111111
  str r1, [r4, #PIO_CFG0]
  str r1, [r4, #PIO_CFG1]
  str r1, [r4, #PIO_CFG2]

  ldr r4, =PIO_BASE + PE
  ldr r1, =0x11111111
  str r1, [r4, #PIO_CFG0]
  str r1, [r4, #PIO_CFG1]
  str r1, [r4, #PIO_CFG2]

  ldr r4, =PIO_BASE + PD
  ldr r1, =0xffffffff
  str r1, [r4, #PIO_DATA]

  ldr r4, =PIO_BASE + PE
  ldr r1, =0xffffffff
  str r1, [r4, #PIO_DATA]

  bl lcd_rst

  ldr r0, =0x11
  bl lcd_cmd
  ldr r0, =0x36
  bl lcd_cmd
  ldr r0, =0x0a
  bl lcd_dat
  ldr r0, =0x3a
  bl lcd_cmd
  ldr r0, =0x05
  bl lcd_dat
  ldr r0, =0x34
  bl lcd_cmd
  ldr r0, =0x35
  bl lcd_cmd
  ldr r0, =0x00
  bl lcd_dat
  ldr r0, =0xb2
  bl lcd_cmd
  ldr r0, =0x0c
  bl lcd_dat
  ldr r0, =0x0c
  bl lcd_dat
  ldr r0, =0x00
  bl lcd_dat
  ldr r0, =0x33
  bl lcd_dat
  ldr r0, =0x33
  bl lcd_dat
  ldr r0, =0xb7
  bl lcd_cmd
  ldr r0, =0x02
  bl lcd_dat
  ldr r0, =0xbb
  bl lcd_cmd
  ldr r0, =0x30
  bl lcd_dat
  ldr r0, =0xc0
  bl lcd_cmd
  ldr r0, =0x2c
  bl lcd_dat
  ldr r0, =0xc2
  bl lcd_cmd
  ldr r0, =0x01
  bl lcd_dat
  ldr r0, =0xc3
  bl lcd_cmd
  ldr r0, =0x17
  bl lcd_dat
  ldr r0, =0xc4
  bl lcd_cmd
  ldr r0, =0x20
  bl lcd_dat
  ldr r0, =0xc6
  bl lcd_cmd
  ldr r0, =0x0f
  bl lcd_dat
  ldr r0, =0xd0
  bl lcd_cmd
  ldr r0, =0xa4
  bl lcd_dat
  ldr r0, =0xa1
  bl lcd_dat
  ldr r0, =0xd6
  bl lcd_cmd
  ldr r0, =0xa1
  bl lcd_dat
  ldr r0, =0xe0
  bl lcd_cmd
  ldr r0, =0xd0
  bl lcd_dat
  ldr r0, =0x04
  bl lcd_dat
  ldr r0, =0x0c
  bl lcd_dat
  ldr r0, =0x11
  bl lcd_dat
  ldr r0, =0x13
  bl lcd_dat
  ldr r0, =0x2c
  bl lcd_dat
  ldr r0, =0x3b
  bl lcd_dat
  ldr r0, =0x55
  bl lcd_dat
  ldr r0, =0x44
  bl lcd_dat
  ldr r0, =0x16
  bl lcd_dat
  ldr r0, =0x0d
  bl lcd_dat
  ldr r0, =0x0b
  bl lcd_dat
  ldr r0, =0x1f
  bl lcd_dat
  ldr r0, =0x23
  bl lcd_dat
  ldr r0, =0xe1
  bl lcd_cmd
  ldr r0, =0xd0
  bl lcd_dat
  ldr r0, =0x04
  bl lcd_dat
  ldr r0, =0x0b
  bl lcd_dat
  ldr r0, =0x10
  bl lcd_dat
  ldr r0, =0x13
  bl lcd_dat
  ldr r0, =0x2c
  bl lcd_dat
  ldr r0, =0x3a
  bl lcd_dat
  ldr r0, =0x44
  bl lcd_dat
  ldr r0, =0x51
  bl lcd_dat
  ldr r0, =0x26
  bl lcd_dat
  ldr r0, =0x1f
  bl lcd_dat
  ldr r0, =0x1f
  bl lcd_dat
  ldr r0, =0x20
  bl lcd_dat
  ldr r0, =0x23
  bl lcd_dat
  ldr r0, =0x21
  bl lcd_cmd
  ldr r0, =0x2a
  bl lcd_cmd
  ldr r0, =0x00
  bl lcd_dat
  ldr r0, =0x00
  bl lcd_dat
  ldr r0, =0x00
  bl lcd_dat
  ldr r0, =0xef
  bl lcd_dat
  ldr r0, =0x2b
  bl lcd_cmd
  ldr r0, =0x00
  bl lcd_dat
  ldr r0, =0x00
  bl lcd_dat
  ldr r0, =0x00
  bl lcd_dat
  ldr r0, =0xef
  bl lcd_dat
  ldr r0, =0x00
  bl lcd_cmd
  ldr r0, =0x29
  bl lcd_cmd
  ldr r0, =0x2c
  bl lcd_cmd
  ldr r0, =0x2c
  bl lcd_cmd

  ldr r4, =240*180
  ldr r5, =0xffff
0:
  lsr r0, r5, #8
  bl lcd_dat
  mov r0, r5
  bl lcd_dat
  subs r4, #1
  bne 0b

loop:
  b loop

delay:
  push {lr}
0:
  subs r0, #1
  bne 0b
  pop {pc}

lcd_rst:
  push {r4, r5, lr}
  ldr r4, =PIO_BASE + PD
  ldr r5, =0xffffffff

  bic r5, #LCD_RST
  str r5, [r4, #PIO_DATA]
  ldr r0, =10000
  bl delay

  orr r5, #LCD_RST
  str r5, [r4, #PIO_DATA]
  ldr r0, =10000
  bl delay
  pop {r4, r5, pc}

lcd_wr:
  push {r4, r5, lr}
  ldr r4, =PIO_BASE + PD

  and r0, #0xff
  lsl r0, #1
  mov r5, r0
  orr r5, r1
  orr r5, #LCD_RST
  orr r5, #LCD_RD
  str r5, [r4, #PIO_DATA]

  orr r5, #LCD_WR
  str r5, [r4, #PIO_DATA]
  pop {r4, r5, pc}

lcd_dat:
  push {lr}
  mov r1, #LCD_RS
  bl lcd_wr
  pop {pc}

lcd_cmd:
  push {lr}
  mov r1, #0
  bl lcd_wr
  pop {pc}
  .end
終於顯示白屏了~但是,怎麼沒有全屏?司徒往回找了一下,發現這個屏的初始化命令(解析度)竟然是使用240x240...
司徒開始探測問題,發現屏的上方有一塊區域被隱蔽(前30行)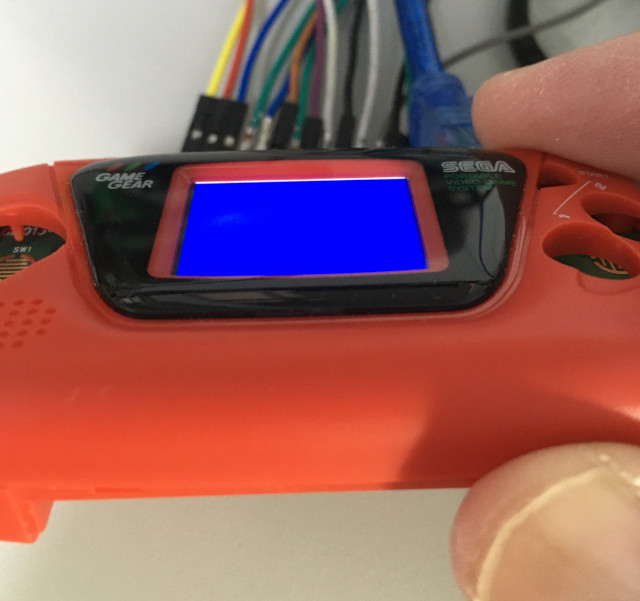
下方也有一塊區域被隱蔽(後15行)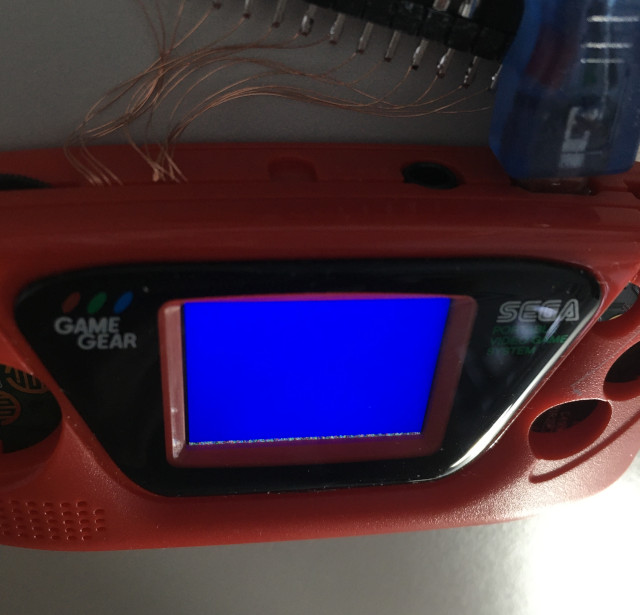
經過一番測試後,結論是:屏的原生解析度是240x240,不過,可視區域只有240x195,最後,屏終於可以正常控制了~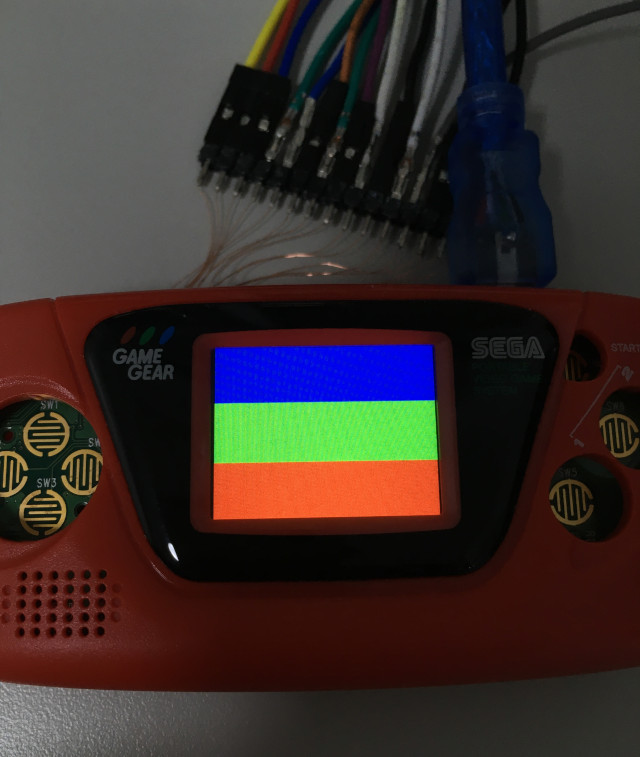
main.s
  .global _start

  .equiv PIO_BASE,  0x01c20800
  .equiv PA,        (0x24 * 0)
  .equiv PB,        (0x24 * 1)
  .equiv PC,        (0x24 * 2)
  .equiv PD,        (0x24 * 3)
  .equiv PE,        (0x24 * 4)
  .equiv PIO_CFG0,  0x00
  .equiv PIO_CFG1,  0x04
  .equiv PIO_CFG2,  0x08
  .equiv PIO_DATA,  0x10

  .equiv LCD_CS,    (1 << 21)
  .equiv LCD_RD,    (1 << 20)
  .equiv LCD_RS,    (1 << 19)
  .equiv LCD_WR,    (1 << 18)
  .equiv LCD_RST,   (1 << 0)

  .arm
  .text
_start:
  .long 0xea000016
  .byte 'e', 'G', 'O', 'N', '.', 'B', 'T', '0'
  .long 0, __spl_size
  .byte 'S', 'P', 'L', 2
  .long 0, 0
  .long 0, 0, 0, 0, 0, 0, 0, 0
  .long 0, 0, 0, 0, 0, 0, 0, 0

_vector:
  b reset
  b .
  b .
  b .
  b .
  b .
  b .
  b .

reset:
  ldr r4, =PIO_BASE + PD
  ldr r1, =0x11111111
  str r1, [r4, #PIO_CFG0]
  str r1, [r4, #PIO_CFG1]
  str r1, [r4, #PIO_CFG2]

  ldr r4, =PIO_BASE + PE
  ldr r1, =0x11111111
  str r1, [r4, #PIO_CFG0]
  str r1, [r4, #PIO_CFG1]
  str r1, [r4, #PIO_CFG2]

  ldr r4, =PIO_BASE + PD
  ldr r1, =0xffffffff
  str r1, [r4, #PIO_DATA]

  ldr r4, =PIO_BASE + PE
  ldr r1, =0xffffffff
  str r1, [r4, #PIO_DATA]

  bl lcd_rst

  ldr r0, =0x11
  bl lcd_cmd
  ldr r0, =0x36
  bl lcd_cmd
  ldr r0, =0x0a
  bl lcd_dat
  ldr r0, =0x3a
  bl lcd_cmd
  ldr r0, =0x05
  bl lcd_dat
  ldr r0, =0x34
  bl lcd_cmd
  ldr r0, =0x35
  bl lcd_cmd
  ldr r0, =0x00
  bl lcd_dat
  ldr r0, =0xb2
  bl lcd_cmd
  ldr r0, =0x0c
  bl lcd_dat
  ldr r0, =0x0c
  bl lcd_dat
  ldr r0, =0x00
  bl lcd_dat
  ldr r0, =0x33
  bl lcd_dat
  ldr r0, =0x33
  bl lcd_dat
  ldr r0, =0xb7
  bl lcd_cmd
  ldr r0, =0x02
  bl lcd_dat
  ldr r0, =0xbb
  bl lcd_cmd
  ldr r0, =0x30
  bl lcd_dat
  ldr r0, =0xc0
  bl lcd_cmd
  ldr r0, =0x2c
  bl lcd_dat
  ldr r0, =0xc2
  bl lcd_cmd
  ldr r0, =0x01
  bl lcd_dat
  ldr r0, =0xc3
  bl lcd_cmd
  ldr r0, =0x17
  bl lcd_dat
  ldr r0, =0xc4
  bl lcd_cmd
  ldr r0, =0x20
  bl lcd_dat
  ldr r0, =0xc6
  bl lcd_cmd
  ldr r0, =0x0f
  bl lcd_dat
  ldr r0, =0xd0
  bl lcd_cmd
  ldr r0, =0xa4
  bl lcd_dat
  ldr r0, =0xa1
  bl lcd_dat
  ldr r0, =0xd6
  bl lcd_cmd
  ldr r0, =0xa1
  bl lcd_dat
  ldr r0, =0xe0
  bl lcd_cmd
  ldr r0, =0xd0
  bl lcd_dat
  ldr r0, =0x04
  bl lcd_dat
  ldr r0, =0x0c
  bl lcd_dat
  ldr r0, =0x11
  bl lcd_dat
  ldr r0, =0x13
  bl lcd_dat
  ldr r0, =0x2c
  bl lcd_dat
  ldr r0, =0x3b
  bl lcd_dat
  ldr r0, =0x55
  bl lcd_dat
  ldr r0, =0x44
  bl lcd_dat
  ldr r0, =0x16
  bl lcd_dat
  ldr r0, =0x0d
  bl lcd_dat
  ldr r0, =0x0b
  bl lcd_dat
  ldr r0, =0x1f
  bl lcd_dat
  ldr r0, =0x23
  bl lcd_dat
  ldr r0, =0xe1
  bl lcd_cmd
  ldr r0, =0xd0
  bl lcd_dat
  ldr r0, =0x04
  bl lcd_dat
  ldr r0, =0x0b
  bl lcd_dat
  ldr r0, =0x10
  bl lcd_dat
  ldr r0, =0x13
  bl lcd_dat
  ldr r0, =0x2c
  bl lcd_dat
  ldr r0, =0x3a
  bl lcd_dat
  ldr r0, =0x44
  bl lcd_dat
  ldr r0, =0x51
  bl lcd_dat
  ldr r0, =0x26
  bl lcd_dat
  ldr r0, =0x1f
  bl lcd_dat
  ldr r0, =0x1f
  bl lcd_dat
  ldr r0, =0x20
  bl lcd_dat
  ldr r0, =0x23
  bl lcd_dat
  ldr r0, =0x21
  bl lcd_cmd
  ldr r0, =0x2a
  bl lcd_cmd
  ldr r0, =0x00
  bl lcd_dat
  ldr r0, =0x00
  bl lcd_dat
  ldr r0, =0x00
  bl lcd_dat
  ldr r0, =0xef
  bl lcd_dat
  ldr r0, =0x2b
  bl lcd_cmd
  ldr r0, =0x00
  bl lcd_dat
  ldr r0, =0x00
  bl lcd_dat
  ldr r0, =0x00
  bl lcd_dat
  ldr r0, =0xef
  bl lcd_dat
  ldr r0, =0x00
  bl lcd_cmd
  ldr r0, =0x29
  bl lcd_cmd
  ldr r0, =0x2c
  bl lcd_cmd
  ldr r0, =0x2c
  bl lcd_cmd

  ldr r4, =240*30
  ldr r5, =0xffff
0:
  lsr r0, r5, #8
  bl lcd_dat
  mov r0, r5
  bl lcd_dat
  subs r4, #1
  bne 0b

  ldr r4, =240*65
  ldr r5, =0xf800
0:
  lsr r0, r5, #8
  bl lcd_dat
  mov r0, r5
  bl lcd_dat
  subs r4, #1
  bne 0b

  ldr r4, =240*65
  ldr r5, =0x7e0
0:
  lsr r0, r5, #8
  bl lcd_dat
  mov r0, r5
  bl lcd_dat
  subs r4, #1
  bne 0b

  ldr r4, =240*65
  ldr r5, =0x1f
0:
  lsr r0, r5, #8
  bl lcd_dat
  mov r0, r5
  bl lcd_dat
  subs r4, #1
  bne 0b

loop:
  b loop

delay:
  push {lr}
0:
  subs r0, #1
  bne 0b
  pop {pc}

lcd_rst:
  push {r4, r5, lr}
  ldr r4, =PIO_BASE + PD
  ldr r5, =0xffffffff

  bic r5, #LCD_RST
  str r5, [r4, #PIO_DATA]
  ldr r0, =10000
  bl delay

  orr r5, #LCD_RST
  str r5, [r4, #PIO_DATA]
  ldr r0, =10000
  bl delay
  pop {r4, r5, pc}

lcd_wr:
  push {r4, r5, lr}
  ldr r4, =PIO_BASE + PD

  and r0, #0xff
  lsl r0, #1
  mov r5, r0
  orr r5, r1
  orr r5, #LCD_RST
  orr r5, #LCD_RD
  str r5, [r4, #PIO_DATA]

  orr r5, #LCD_WR
  str r5, [r4, #PIO_DATA]
  pop {r4, r5, pc}

lcd_dat:
  push {lr}
  mov r1, #LCD_RS
  bl lcd_wr
  pop {pc}

lcd_cmd:
  push {lr}
  mov r1, #0
  bl lcd_wr
  pop {pc}
.end#233 Re: 司徒开源 » 研究FC3000掌機的開源可行性 » 2022-03-13 11:11:26
#234 Re: 司徒开源 » 研究FC3000掌機的開源可行性 » 2022-03-13 08:01:18
#235 Re: 司徒开源 » 研究FC3000掌機的開源可行性 » 2022-03-12 21:48:39
@kendling
這裡是當初如何找出FC3000屏的過程,你可參考:https://steward-fu.github.io/website/handheld/fc3000/lcd_init.htm
P.S. 當沒有任何CMD送出時,就是初始化結束的訊息~
#236 Re: 司徒开源 » 研究FC3000掌機的開源可行性 » 2022-03-09 07:38:29
#237 Re: 司徒开源 » 研究Game Gear Micro掌機的開源可行性 » 2022-03-09 07:24:43
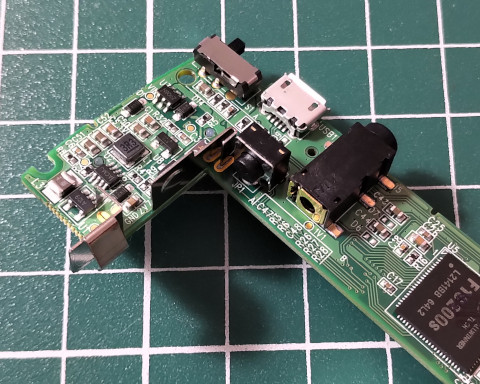
#238 Re: 司徒开源 » 研究Game Gear Micro掌機的開源可行性 » 2022-03-08 21:22:50
@tigger
老骨头總是有相同的默契~哈~
UART位置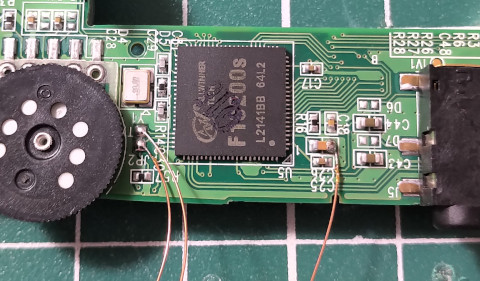
跳線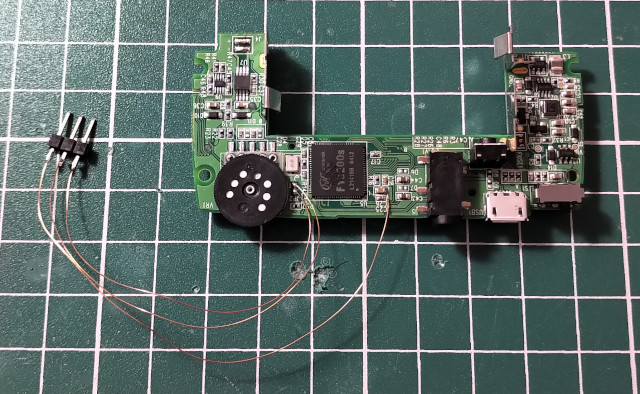
連接UART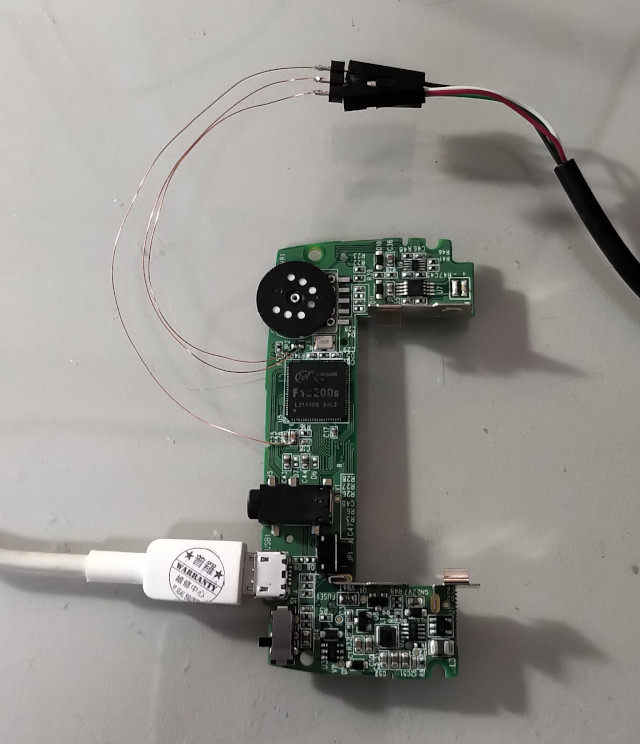
Baudrate 115200bps
[0]HELLO! BOOT0 is starting!
[2]boot0 commit : e9d7c88390ded1551ff4a4bcfef31cbc9cf717cb

[0]HELLO! BOOT0 is starting!
[2]boot0 commit : e9d7c88390ded1551ff4a4bcfef31cbc9cf717cb

[0]HELLO! BOOT0 is starting!
[2]boot0 commit : e9d7c88390ded1551ff4a4bcfef31cbc9cf717cb

[    0.000000] Booting Linux on physical CPU 0x0
[    0.000000] Initializing cgroup subsys cpuset
[    0.000000] Initializing cgroup subsys cpuacct
[    0.000000] Linux version 3.10.65 (oe-user@oe-host) (gcc version 8.3.0 (GCC) ) #1 Tue Jul 21 03:52:29 UTC 2020
[    0.000000] CPU: ARM926EJ-S [41069265] revision 5 (ARMv5TEJ), cr=00053177
[    0.000000] CPU: VIVT data cache, VIVT instruction cache
[    0.000000] Machine: Allwinner A1X (Device Tree), model: sun3iw1p1
[    0.000000] bootconsole [earlycon0] enabled
INIT: version 2.88 booting
/dev/nandh: LABEL="UDISK" UUID="2b800baa-27fe-453f-a194-cee18ef6824a" TYPE="ext4"
/dev/nandh already format by ext4
/dev/nande: LABEL="rootfs_data" UUID="3e6930be-09d1-481c-b098-4e68743a36f6" TYPE="ext4"
/dev/nande already format by ext4
Starting udev
hwclock: can't open '/dev/misc/rtc': No such file or directory
Tue Jul 21 04:02:17 UTC 2020
hwclock: can't open '/dev/misc/rtc': No such file or directory
rm: can't remove '/tmp': Read-only file system
rm: can't remove '/etc/resolv.conf': Read-only file system
ln: /etc/resolv.conf: File exists
INIT: Entering runlevel: 5
Configuring network interfaces... ip: SIOCGIFFLAGS: No such device
hwclock: can't open '/dev/misc/rtc': No such file or directory
Starting syslogd/klogd: done

Vivid-Yocto-Distro V0.1 c200s-gamegearmicro /dev/ttyS0

c200s-gamegearmicro login:#239 Re: 司徒开源 » 研究FC3000掌機的開源可行性 » 2022-03-08 21:18:58
#240 Re: 司徒开源 » 研究Game Gear Micro掌機的開源可行性 » 2022-03-08 15:35:22
#241 司徒开源 » 研究Game Gear Micro掌機的開源可行性 » 2022-03-08 08:08:44
- 司徒
- 回复: 85
什麼!司徒你又開了一個新帖~不是要研究草食系統嗎?難道,草食系統已經進入生命結束前必須完成的作品之中嗎?這...不好說~司徒把這個帖子看待成番外篇,番外的特性就是盡量不要引起外人注意就草草結束~此時,邪惡的鍵盤俠可能要說:司徒的話如果可以信,狗屎都可以吃了,坦白說,司徒的話確實可以信的,狗屎也確實是可以吃的~
番外篇的目標如下:
1. 可以從MicroSD進入Linux系統
2. 可以支援雙系統
3. 可以控制屏幕顯示
4. 可以玩GBA模擬器
P.S. 達標後,此貼就會結帖
簡要規格
CPU          Allwinner F1C200S ARM9 408MHz
RAM          32MB
Flash        128MB
Screen       1.15" 240x180
Gamepad      DPad, 2 Buttons, Start
Port         MicroUSB
Battery      AAAx2
Dimension    80mm x 40mm x 20mm
Weight       60g
正面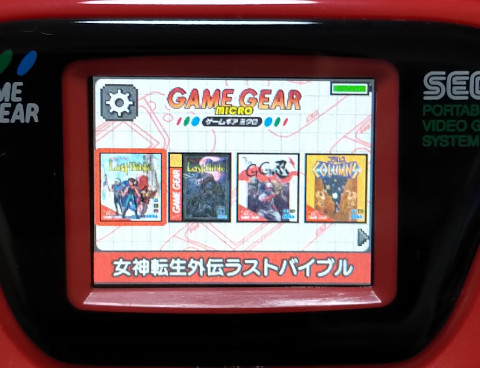
下邊
側邊
上邊
側邊
精美的包裝盒,真像以前購買GB卡帶的感覺...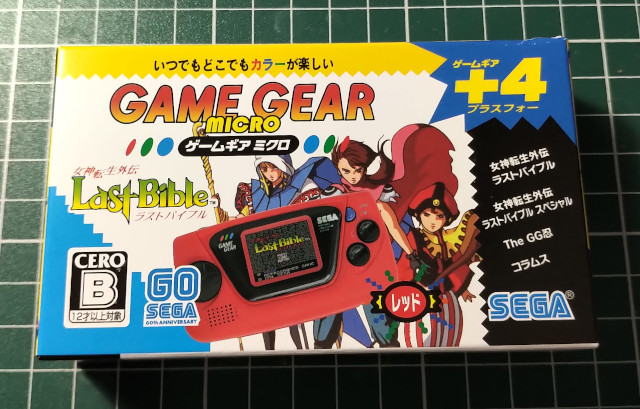
背面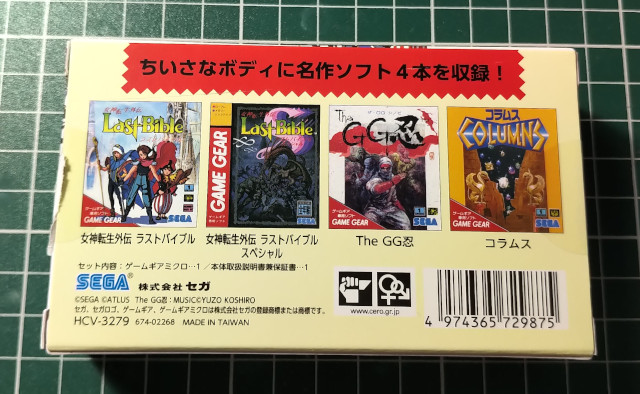
主機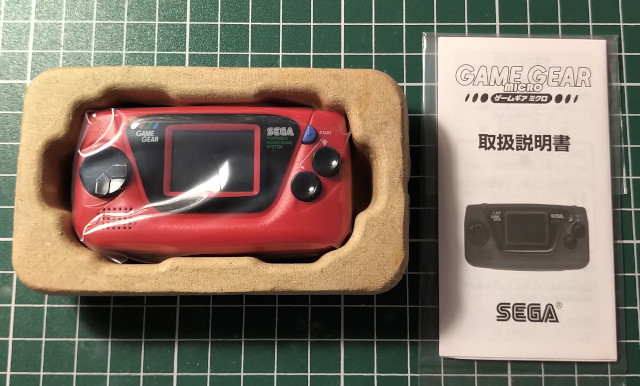
相較於PocketGo的大小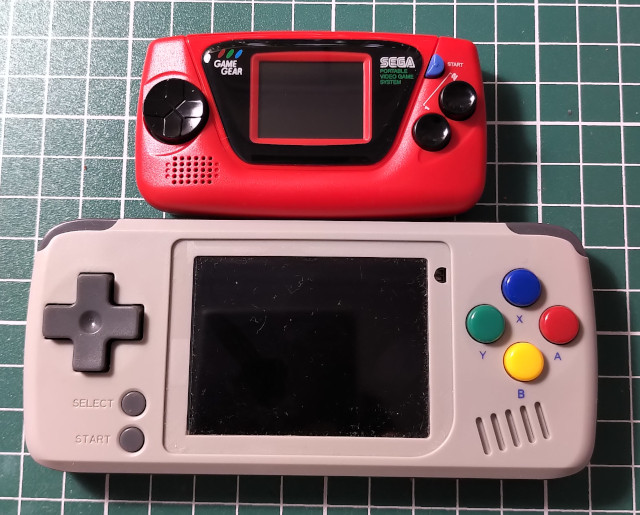
正面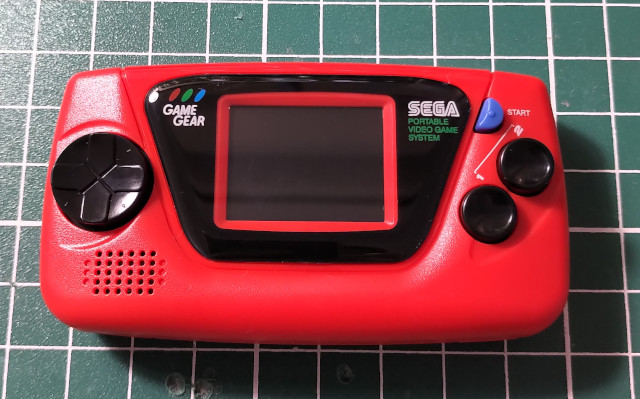
背面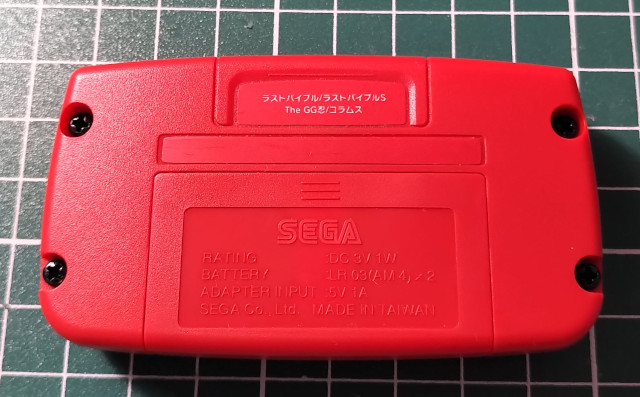
PCB主板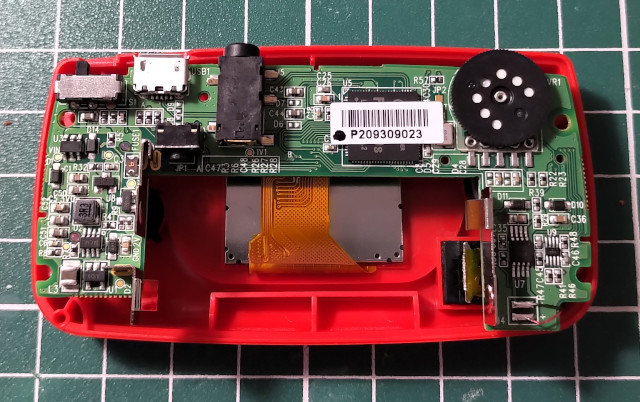
Allwinner F1C200S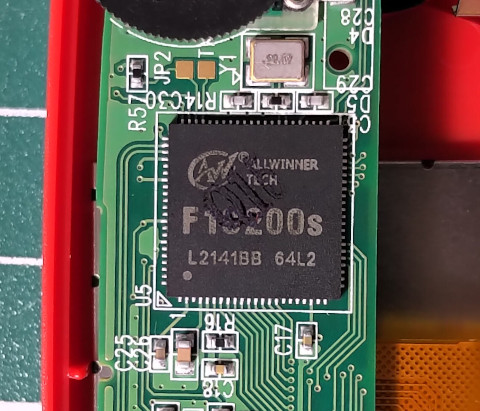
8006UL LD53EG(聲音放大)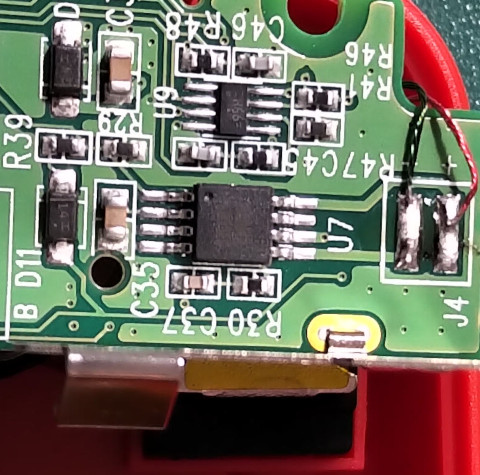
PCB正面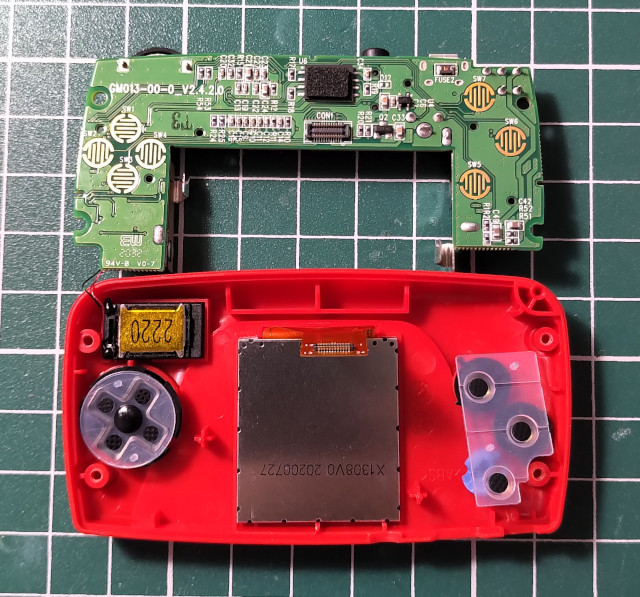
XT26G01AWSEGA
X1308V0 20200727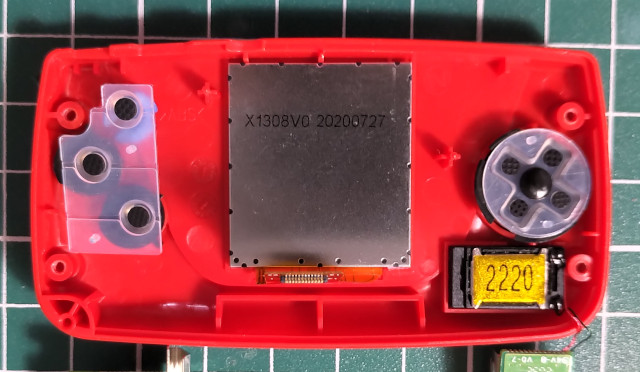
屏24Pin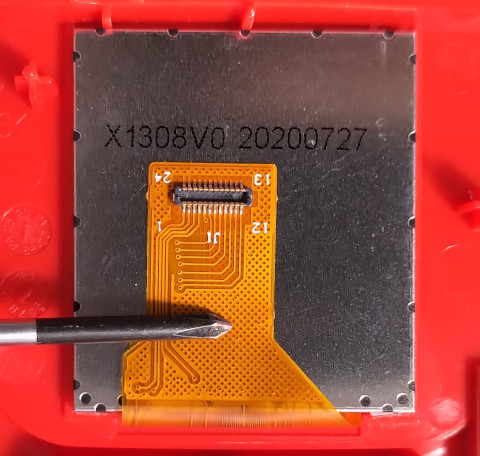
ALT-013BSLN-J2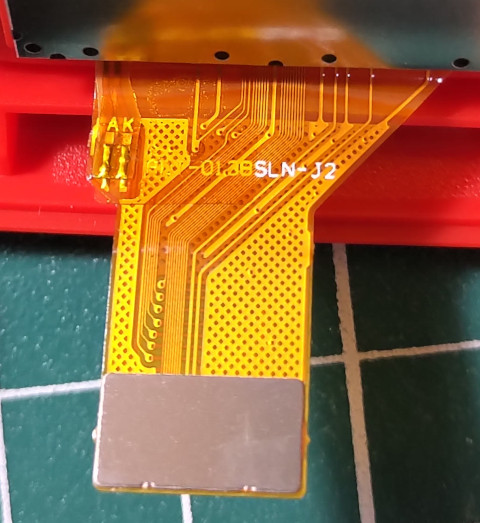
喇叭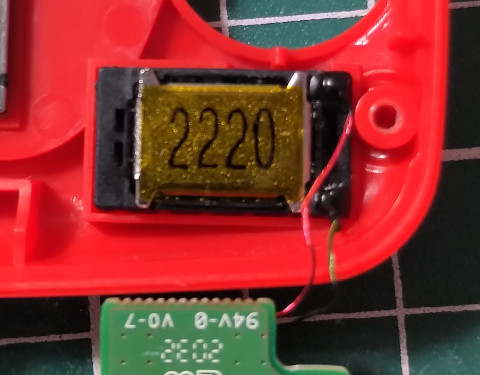
有落塵可能
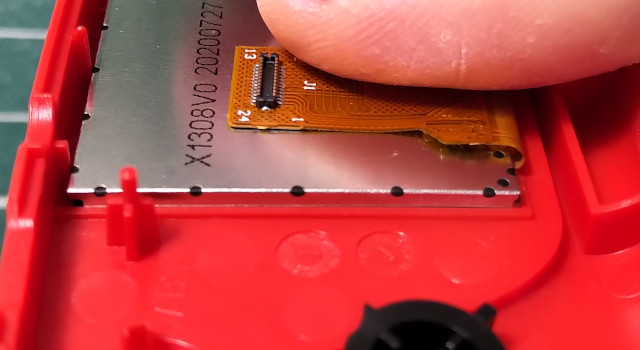
B面
AAAx2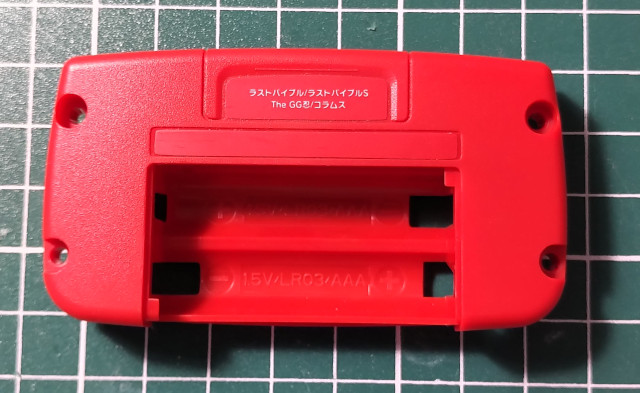
軟膠墊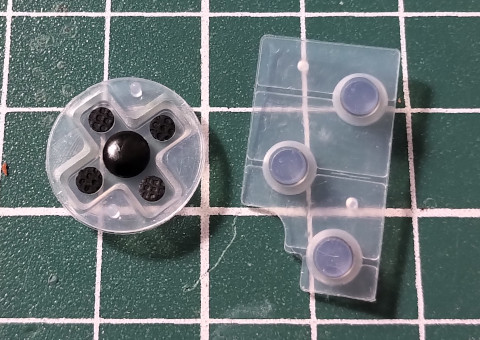
DPad中心支撐在軟膠墊上
#242 Re: 司徒开源 » 研究FC3000掌機的開源可行性 » 2022-03-08 07:17:38
@mrnull
RetroFW是基於GMenuNX(GMenu2X的延伸)作為桌面管理,所以你可以基於你的Buildroot去編譯GMenuNX:
GMenuNX https://github.com/pingflood/gmenunx
RetroFW當初是給JZ4760(MIPS CPU)整合的一套系統,所以RetroFW裡面的那些模擬器,如:ReGBA,你無法搬到你的系統上,你可以找gpSP或者mGBA使用,然後把模擬器或者遊戲一個一個移植到你的系統上就可以~
RetroFW https://github.com/retrofw/retrofw.github.io
#244 Re: 司徒开源 » 研究FC3000掌機的開源可行性 » 2022-03-07 21:45:19
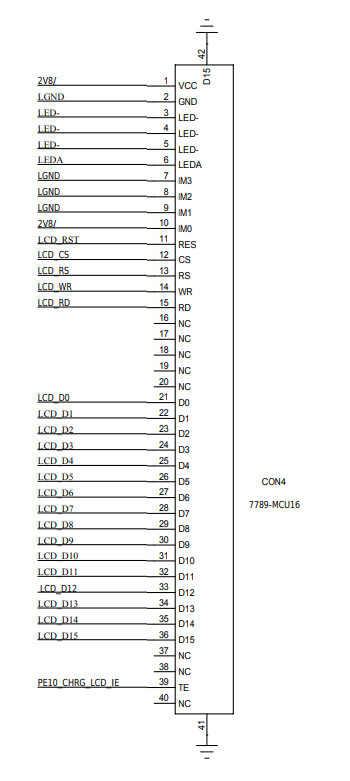
#245 Re: 司徒开源 » 研究FC3000掌機的開源可行性 » 2022-03-07 20:16:17
#246 Re: 司徒开源 » 研究FC3000掌機的開源可行性 » 2022-03-07 16:52:25
#247 Re: 司徒开源 » 研究FC3000掌機的開源可行性 » 2022-03-07 14:30:12
#248 Re: 司徒开源 » 研究FC3000掌機的開源可行性 » 2022-03-07 13:00:04
#249 Re: 司徒开源 » 研究FC3000掌機的開源可行性 » 2022-03-07 07:16:37
@fullniz
buildroot編譯步驟可以參考:https://steward-fu.github.io/website/handheld/miyoo/build_buildroot.htm
如果你是使用外部toolchain,要記得選擇glibc作為相容(除非是musl),還需要知道你toolchain對應的kernel header版本,可以參考這篇:https://whycan.com/t_3177.html
$ cd
$ wget https://github.com/steward-fu/miyoo/releases/download/v1.0/devel.zip
$ unzip devel.zip -d devel
$ wget https://buildroot.org/downloads/buildroot-2018.02.9.tar.gz
$ tar xvf buildroot-2018.02.9.tar.gz
$ cp devel/config_buildroot-2018.02.9 buildroot-2018.02.9/.config
$ cd buildroot-2018.02.9
$ make -j
P.S. make menuconfig => 把filesystem改成squashfs
@kendling
目前我的編譯環境都是基於Debian 9和Debian 10,Debian 11換成了GCC 10.x,看來有很多相容問題,建議使用Debian 10作為編譯環境,可以省去一些問題,也感謝提供make -j資訊~
#250 Re: 司徒开源 » 研究FC3000掌機的開源可行性 » 2022-03-06 16:23:09
司徒竟然忘記說明超頻的部份...
DRAM超頻是在UBoot設定,CPU超頻則可以在User Application設定(如:GMenu2X),如下說明:
UBoot (DRAM)
arch/arm/mach-sunxi/dram_suniv.c
 56 // 156, 168, 192, 204, 216, 228, 240, 252
 57 struct dram_para suniv_dram_para = {
 58   .size = 32,
 59   .clk = 156,
 60   .access_mode = 1,
 61   .cs_num = 1,
 62   .ddr8_remap = 0,
 63   .sdr_ddr = DRAM_TYPE_DDR,
 64   .bwidth = 16,
 65   .col_width = 10,
 66   .row_width = 13,
 67   .bank_size = 4,
 68   .cas = 0x3,
 69 };
目前預設是跑156MHz,玩家可以加壓測試DRAM的超頻~
為了避免超頻導致UBoot無法開機,司徒有做按下按鍵即可回復到156MHz的保護,超過252MHz的判斷記得拿掉~
407 static void do_dram_init(struct dram_para * para)
408 {
409   u8 m;
410   u32 val;
411   struct sunxi_ccm_reg * const ccm = (struct sunxi_ccm_reg *)SUNXI_CCM_BASE;
412
413   val = readl(SUNXI_PIO_BASE + (4 * 0x24) + 0x00) & 0xfffff0ff;
414   writel(val, SUNXI_PIO_BASE + ((4 * 0x24) + 0x00));
415   writel(0x00000010, SUNXI_PIO_BASE + ((4 * 0x24) + 0x1c));
416   udelay(5000);
417   m = readl(SUNXI_PIO_BASE + (4 * 0x24) + 0x10) & 4;
418   if(m == 0){
419     printf("(use default 156MHz)");
420     para->clk = 156;
421   }
422
423   if((para->clk < 156) || (para->clk > 252)){
424     printf("(adjust dram clock from 0x%x to 156MHz)", para->clk);
425     para->clk = 156;
426   }
427
428   printf("%d MHz,", para->clk);
CPU
GMenu2X CPU超頻修正:https://github.com/steward-fu/trimui/releases/download/v1.2/gmenunx_fix_oc.zip
直接Map Register(0x01c20000)做設定就可以,
876 void GMenu2X::hwInit() {
 877 #if defined(TARGET_GP2X) || defined(TARGET_WIZ) || defined(TARGET_CAANOO) || defined(TARGET_RS97) || defined(TARGET_MIYOO)
 878   memdev = open("/dev/mem", O_RDWR);
 879   if (memdev < 0) WARNING("Could not open /dev/mem");
 880 #endif
 881
 882   if (memdev > 0) {

 900     memregs = (uint32_t*)mmap(0, 4096, PROT_READ | PROT_WRITE, MAP_SHARED, memdev, 0x01c20000);

 902     if (memregs == MAP_FAILED) {
 903       ERROR("Could not mmap hardware registers!");
 904       close(memdev);
 905     }
 906   }

2474     uint32_t x, v;
2475     uint32_t total=sizeof(oc_table)/sizeof(uint32_t);
2476
2477     for(x=0; x<total; x++){
2478       if((oc_table[x] >> 16) >= mhz){
2479         memregs[0] = (1 << 31) | (oc_table[x] &  0x0000ffff);
2480         break;
2481       }
2482     }
2483 INFO("Set CPU clock: %d(0x%08x)", mhz, v);#251 Re: 司徒开源 » 研究FC3000掌機的開源可行性 » 2022-03-06 10:24:30
#252 Re: 司徒开源 » 研究FC3000掌機的開源可行性 » 2022-03-05 17:27:04
@geekchun
感謝分享~
@lzgame02
Q8音量並沒有實做在Kernel, 因此, 需要User Application自己去管理音效裝置
@8000945
很抱歉我盡量不放ROM在GitHub, 因此,無法整合遊戲包, 另外, Q8我沒有在研究了, 不用寄機器給我~
@jck0430
感謝支持~
@hydize
這部份需要你自己確認下~
此帖最後更新通知
司徒最近剛從深山修行出來~意識到此帖太過複雜且很多東西都混在一起,因此,司徒決定要拆帖~把接下來的東西,拆成各自獨立的開源帖子,所以,還是會繼續搞F1C100S/F1C200S~ARM9是一個里程碑,如果可以讓它跑出極致效能,那將會是一個很棒的成果(對我個人來說),當然,這些都是偏研究樂趣為主,如果真要玩遊戲,司徒還是真心建議去玩PSP, PSV, N3DS掌機,另外,不要再說我又拿了全志好處~
由於接下來的開源帖子都是以草食系統為製作方向,屬於全新製作,因此,司徒目前已經將手上的源代碼(FC3000, 小橫米, TRIMUI)都開源出來了,有興趣研究的玩家可以從如下位置下載:
Kernel、UBoot、Mininit源代碼:https://github.com/steward-fu/fc3000/releases/tag/source
FC3000編譯步驟:https://github.com/steward-fu/fc3000
小橫米編譯步驟:https://github.com/steward-fu/pocketgo
TRIMUI編譯步驟:https://github.com/steward-fu/trimui
FC3000恐龍包:https://github.com/steward-fu/fc3000/releases/download/v1.0/fc3000_tft_od_jckl_no_roms.img.7z
FC3000老外包:https://github.com/steward-fu/fc3000/releases/download/v1.0/fc3000_tft_od_jutleys_no_roms.img.7z
小橫米恐龍包:https://github.com/steward-fu/pocketgo/releases/download/v1.0/pocketgo_od_jckl_no_roms.img.7z
小橫米老外包:https://github.com/steward-fu/pocketgo/releases/download/v1.0/pocketgo_od_jutleys_no_roms.img.7z
TRIMUI恐龍包:https://github.com/steward-fu/trimui/releases/download/v1.0/trimui_od_jckl_no_roms.img.7z
TRIMUI老外包:https://github.com/steward-fu/trimui/releases/download/v1.0/trimui_od_jutleys_no_roms.img.7z
Toolchain:https://github.com/steward-fu/miyoo/releases/download/v1.0/toolchain.7z
Buildroot Config:https://github.com/steward-fu/miyoo/releases/download/v1.0/devel.zip
作為結帖,司徒說明一下源代碼的一些移植需要注意的地方,方便有興趣的玩家可以快速入手
Kernel
1. 配置統一使用arch/arm/configs/suniv_defconfig,DeviceTree位於如下位置:
arch/arm/boot/dts/pocketgo.dts
arch/arm/boot/dts/trimui.dts
arch/arm/boot/dts/fc3000.dts
2. FC3000, 小橫米, TRIMUI共用一份Kernel, 使用變數區隔(由CMDLINE在編譯時帶入)
init/main.c
int suniv_variant=0;
// 0: 小橫米
// 1: TRIMUI
// 2: FC3000
3. 按鍵驅動位於:drivers/input/keyboard/suniv-keypad.c,如果要打印按鍵訊息,開啟如下配置
#define DEBUG_LOG 1P.S. 按鍵的處理,由suniv_variant判斷是要處理哪台機器(小橫米, TRIMUI, FC3000)
4. 屏幕背光、馬達驅動位於:drivers/pwm/pwm-suniv.c,馬達控制使用IOCTL方式控制
#define VMOTOR_ENABLE _IOWR(0x100, 0, unsigned long)
#define VMOTOR_SET    _IOWR(0x101, 0, unsigned long)
控制裝置/dev/vmotor
  alloc_chrdev_region(&major, 0, 1, "vmotor");
  myclass = class_create(THIS_MODULE, "vmotor");
  device_create(myclass, NULL, major, NULL, "vmotor");
  cdev_init(&mycdev, &myfops);
  cdev_add(&mycdev, major, 1);

  switch(suniv_variant){
  case 1:
    break;
  case 2:
    break;
  default:
    pin = (32 * 4) + 12;
    break;
  }
  do_gpio_request(pin);
5. 電池量測驅動位於:drivers/power/supply/suniv-battery.c
6. 顯示驅動位於:drivers/video/fbdev/sunivfb.c,由suniv_variant判斷是要處理哪台機器(小橫米, TRIMUI, FC3000)
小橫米、TRIMUI的顯示是60FPS,FC3000因為沒有手冊,所以速度有待調整
 759   if(suniv_variant == 0){
 760     writel((0xf << 28) | (6 << 0), iomm.lcdc + TCON_CLK_CTRL_REG);
 761   }
 762   else if(suniv_variant == 2){
 763     //writel((0xf << 28) | (63 << 0), iomm.lcdc + TCON_CLK_CTRL_REG);
 764     writel((0xf << 28) | (127 << 0), iomm.lcdc + TCON_CLK_CTRL_REG);
 765   }
目前4個Layer全用上,使用者可以直接DMA映射填充像素,速度可以大大提昇
 849   writel((uint32_t)(par->vram_phys + 320*240*2*0) << 3, iomm.debe + DEBE_LAY0_FB_ADDR_REG);
 850   writel((uint32_t)(par->vram_phys + 320*240*2*1) << 3, iomm.debe + DEBE_LAY1_FB_ADDR_REG);
 851   writel((uint32_t)(par->vram_phys + 320*240*2*2) << 3, iomm.debe + DEBE_LAY2_FB_ADDR_REG);
 852   writel((uint32_t)(par->vram_phys + 320*240*2*3) << 3, iomm.debe + DEBE_LAY3_FB_ADDR_REG);
 853
 854   writel((uint32_t)(par->vram_phys + 320*240*2*0) >> 29, iomm.debe + DEBE_LAY0_FB_HI_ADDR_REG);
 855   writel((uint32_t)(par->vram_phys + 320*240*2*1) >> 29, iomm.debe + DEBE_LAY1_FB_HI_ADDR_REG);
 856   writel((uint32_t)(par->vram_phys + 320*240*2*2) >> 29, iomm.debe + DEBE_LAY2_FB_HI_ADDR_REG);
 857   writel((uint32_t)(par->vram_phys + 320*240*2*3) >> 29, iomm.debe + DEBE_LAY3_FB_HI_ADDR_REG);
為了解決閃屏,User Application必須映射DMA,然後自己控制Layer輸出
 315 static void flip_lcd(struct myfb_par *par)
 316 {
 317 #if 0
 318   static uint32_t report=0;
 319
 320   if((report++ % 60) == 0){
 321     printk("%s, vsync\n", __func__);
 322   }
 323 #endif
 324   suniv_clrbits(iomm.lcdc + TCON_INT_REG0, (1 << 15));
 325   suniv_clrbits(iomm.lcdc + TCON_CTRL_REG, (1 << 31));
 326
 327   if(par->lcdc_ready){
 328     if(suniv_variant == 0){
 329       lcdc_wr_cmd(0x2c);
 330     }
 331
 332     if(par->app_virt->yoffset == 0){
 333       suniv_setbits(iomm.debe + DEBE_MODE_CTRL_REG, (1 << 8));
 334       suniv_clrbits(iomm.debe + DEBE_MODE_CTRL_REG, (1 << 9));
 335       suniv_clrbits(iomm.debe + DEBE_MODE_CTRL_REG, (1 << 10));
 336       suniv_clrbits(iomm.debe + DEBE_MODE_CTRL_REG, (1 << 11));
 337     }
 338     else if(par->app_virt->yoffset == 240){
 339       suniv_clrbits(iomm.debe + DEBE_MODE_CTRL_REG, (1 << 8));
 340       suniv_setbits(iomm.debe + DEBE_MODE_CTRL_REG, (1 << 9));
 341       suniv_clrbits(iomm.debe + DEBE_MODE_CTRL_REG, (1 << 10));
 342       suniv_clrbits(iomm.debe + DEBE_MODE_CTRL_REG, (1 << 11));
 343     }
 344     else if(par->app_virt->yoffset == 480){
 345       suniv_clrbits(iomm.debe + DEBE_MODE_CTRL_REG, (1 << 8));
 346       suniv_clrbits(iomm.debe + DEBE_MODE_CTRL_REG, (1 << 9));
 347       suniv_setbits(iomm.debe + DEBE_MODE_CTRL_REG, (1 << 10));
 348       suniv_clrbits(iomm.debe + DEBE_MODE_CTRL_REG, (1 << 11));
 349     }
 350     else if(par->app_virt->yoffset == 720){
 351       suniv_clrbits(iomm.debe + DEBE_MODE_CTRL_REG, (1 << 8));
 352       suniv_clrbits(iomm.debe + DEBE_MODE_CTRL_REG, (1 << 9));
 353       suniv_clrbits(iomm.debe + DEBE_MODE_CTRL_REG, (1 << 10));
 354       suniv_setbits(iomm.debe + DEBE_MODE_CTRL_REG, (1 << 11));
 355     }
 356   }
 357   suniv_setbits(iomm.debe + DEBE_REGBUFF_CTRL_REG, (1 << 0));
 358   suniv_setbits(iomm.lcdc + TCON_CTRL_REG, (1 << 31));
 359
 360   par->app_virt->vsync_count+= 1;
 361   wake_up_interruptible_all(&wait_vsync_queue);
 362 }
有實做VSYNC
 147 static int wait_for_vsync(struct myfb_par *par)
 148 {
 149   uint32_t count = par->app_virt->vsync_count;
 150   long t = wait_event_interruptible_timeout(wait_vsync_queue, count != par->app_virt->vsync_count, HZ / 10);
 151   return t > 0 ? 0 : (t < 0 ? (int)t : -ETIMEDOUT);
 152 }
支援FBIO_WAITFORVSYNC
1027 static int myfb_ioctl(struct fb_info *info, unsigned int cmd, unsigned long arg)
1028 {
1029   struct myfb_par *par = info->par;
1030
1031   switch(cmd){
1032   case FBIO_WAITFORVSYNC:
1033     wait_for_vsync(par);
1034     break;
如果玩家想修改以符合自己的FC3000屏,可以修改如下:
237 static void fc3000_gpio_init(void)

593 static void fc3000_lcd_init(void)
7. 音效驅動位於:sound/soc/suniv/dac.c,小橫米因為音效致能跟UART綁在一起,如果要開啟UART列印,可以打開
53 #define POCKETGO_USE_EARPHONE 1UBoot
1. 司徒把UBoot, boot.scr, zImage, dtb都寫到啟動磁區,避免被誤刪,位置如下:
fs/fs.c
22 #include "hex_dtb.h"
23 #include "hex_boot.h"
24 #include "hex_kernel.h"

568   len_read = sizeof(hex_boot);
569   memcpy((void*)0x80c50000, (void*)hex_boot, sizeof(hex_boot));
570   memcpy((void*)0x80c00000, (void*)hex_dtb, sizeof(hex_dtb));
571   memcpy((void*)0x80008000, (void*)hex_kernel, sizeof(hex_kernel));
2. 啟動參數位置:param.cmd
mininit
1. mininit是用來載入rootfs.squashfs,傳統方式使用Partition方式(不正常斷電容易發生卡崩)
2. 開啟Debug Log
16 #define dbg(...) LOG("<14>", __VA_ARGS__)最後,感謝大家對於此帖的熱情回復,司徒感謝大家的支持,期望開源可以發展的越來越好~
#253 Re: 司徒开源 » 研究FC3000掌機的開源可行性 » 2021-12-31 07:41:48
#254 Re: 司徒开源 » 研究FC3000掌機的開源可行性 » 2021-12-24 16:19:14
#255 Re: 司徒开源 » 研究FC3000掌機的開源可行性 » 2021-12-24 13:46:42
@lzgame02
感謝你的資訊~
牙膏狗的作品我蠻久以前就注意到,就知道的資訊來看(應該是使用F1C200S),確實很用心在做,不過,比較值得說的是他的背後那個人,此人頗有來歷~這個人就是Miyoo第一代的作者,當初我移植Linux系統上Miyoo掌機,導致此人沒有了這個項目的收入,確實讓我相當內疚,而且剛好我跟他都是被謝工迫害的兩個人,於是,我們兩個成了好朋友,我也再次跟他道歉,害他沒有收入,他人相當好,並沒有再次怪罪,後來的Miyoo閃屏問題,我也是詢問他的意見,然後再加上"MiyooCROM"這位作者的解說,最終才知道解法,所以,牙膏狗的掌機,我是不會去碰的~畢竟,移植開源系統到掌機上,可能讓方案商沒了工作~最終自己只會惹來一身腥~
#256 Re: 司徒开源 » 研究FC3000掌機的開源可行性 » 2021-12-20 10:53:55
#257 Re: 司徒开源 » 研究FC3000掌機的開源可行性 » 2021-12-12 20:11:43
#258 Re: 司徒开源 » 研究FC3000掌機的開源可行性 » 2021-12-06 11:00:25
@lzgame02
恩,有看到這個模擬器,大約看了下主要core只有一個,位於lib/arm64-v8a/libemucore.so,大小是10.2MB,其餘兩個比較特別的文件夾是(gx_dx11, gs_opengl),裡面有一些源代碼,看來應該是有一些動態編譯技術,你或許可以研究下接口,從classes.dex逆向看接口的使用方式,這樣你或許有機會可以直接使用在RK3326上面~
檔案格式(全部寫在一起,沒有其它相依元件,佛心~)
$ file lib/arm64-v8a/libemucore.so
  lib/arm64-v8a/libemucore.so: ELF 64-bit LSB shared object, ARM aarch64, version 1 (SYSV), dynamically linked, BuildID[sha1]=c0271fd2edb2c3c2452bd3ab904d04e2efbb79ae, stripped

$ aarch64-linux-gnu-readelf -d libemucore.so | grep NEED
 0x0000000000000001 (NEEDED)             Shared library: [libEGL.so]
 0x0000000000000001 (NEEDED)             Shared library: [libdl.so]
 0x0000000000000001 (NEEDED)             Shared library: [liblog.so]
 0x0000000000000001 (NEEDED)             Shared library: [libOpenSLES.so]
 0x0000000000000001 (NEEDED)             Shared library: [libandroid.so]
 0x0000000000000001 (NEEDED)             Shared library: [libm.so]
 0x0000000000000001 (NEEDED)             Shared library: [libc.so]
 0x000000006ffffffe (VERNEED)            0xfb4c
 0x000000006fffffff (VERNEEDNUM)         3
使用NDK方式,因此,可以使用C語言串接此接口
JNI_OnLoad
pthread_key_create
JNI_OnUnload
Java_xyz_aethersx2_android_NativeLibrary_getScmVersion
Java_xyz_aethersx2_android_NativeLibrary_getFullScmVersion
Java_xyz_aethersx2_android_NativeLibrary_initialize
Java_xyz_aethersx2_android_NativeLibrary_refreshGameList
Java_xyz_aethersx2_android_NativeLibrary_getGameListEntries
Java_xyz_aethersx2_android_NativeLibrary_getGameListEntry
Java_xyz_aethersx2_android_NativeLibrary_isBIOSAvailable
Java_xyz_aethersx2_android_NativeLibrary_runVMThread
Java_xyz_aethersx2_android_NativeLibrary_stopVMThreadLoop
Java_xyz_aethersx2_android_NativeLibrary_isVMPaused
Java_xyz_aethersx2_android_NativeLibrary_pauseVM
Java_xyz_aethersx2_android_NativeLibrary_resetVM
Java_xyz_aethersx2_android_NativeLibrary_applySettings
Java_xyz_aethersx2_android_NativeLibrary_reloadGameSettings
Java_xyz_aethersx2_android_NativeLibrary_changeDisc
Java_xyz_aethersx2_android_NativeLibrary_setDisplayAlignment
Java_xyz_aethersx2_android_NativeLibrary_hasValidRenderSurface
Java_xyz_aethersx2_android_NativeLibrary_changeSurface
ANativeWindow_fromSurface
Java_xyz_aethersx2_android_NativeLibrary_loadStateSlot
Java_xyz_aethersx2_android_NativeLibrary_saveStateSlot
Java_xyz_aethersx2_android_NativeLibrary_setFrameLimitEnabled
Java_xyz_aethersx2_android_NativeLibrary_toggleFrameLimit
Java_xyz_aethersx2_android_NativeLibrary_toggleSoftwareRenderer
Java_xyz_aethersx2_android_NativeLibrary_getPadButtonIndex
Java_xyz_aethersx2_android_NativeLibrary_getPadAxisIndex
Java_xyz_aethersx2_android_NativeLibrary_setPadButton
Java_xyz_aethersx2_android_NativeLibrary_setPadAxis
Java_xyz_aethersx2_android_NativeLibrary_setDefaultSettings
_ZNSt6__ndk19to_stringEj
Java_xyz_aethersx2_android_NativeLibrary_setDefaultSettingsToIni
Java_xyz_aethersx2_android_NativeLibrary_getBIOSDescription
Java_xyz_aethersx2_android_NativeLibrary_reloadPatches
Java_xyz_aethersx2_android_NativeLibrary_addOSDMessage
Java_xyz_aethersx2_android_NativeLibrary_addKeyedOSDMessage
OpenGL and Vulkan
eglInitialize
eglGetError
eglQueryString
eglGetDisplay
eglGetProcAddress
eglGetCurrentContext
eglMakeCurrent
eglDestroySurface
eglQuerySurface
eglSwapBuffers
eglSwapInterval
eglCreateWindowSurface
eglCreatePbufferSurface
eglGetConfigAttrib
eglDestroyContext
eglGetCurrentSurface
eglChooseConfig
eglBindAPI
eglCreateContext

glCreateShader
glDeleteShader
glUniform4f
glVertexAttrib4Nbv
glEndConditionalRender
glUniform4ui
glDrawElementsInstancedBaseVertex
glSamplerParameterfv
glQueryCounter
glVertexAttribP1ui
glVertexAttribP3ui
glTexCoordP4uiv
glMultiTexCoordP4uiv
glUniform2dv
glGetSubroutineUniformLocation
glUniformSubroutinesuiv
glProgramUniformMatrix3dv
glProgramUniformMatrix2x3dv
glClearBufferData
glInvalidateBufferSubData
glShaderStorageBlockBinding
glTransformFeedbackBufferBase
glMapNamedBufferRange
glNamedFramebufferTextureLayer
glClearNamedFramebufferfi
glTextureParameterfv
glCreateProgramPipelines

vkCreateDisplayModeKHR
vkCreateFence
vkGetPipelineCacheData
vkResetDescriptorPool
vkCmdCopyImageToBuffer
vkCmdFillBuffer
vkCmdResolveImage
元件
libdl.so
LIBC
libm.so
libc.so
LIBC_N
libEGL.so
liblog.so
libOpenSLES.so
libandroid.so
libemucore.so
有趣的字串(Rockchip)
DynGenFunc *_DynGen_EventTest(bool)
/home/user/p2-arm-gp/3rdparty/wxwidgets3.0/include/wx/log.h
/home/user/p2-arm-gp/3rdparty/wxwidgets3.0/src/common/hashmap.cpp
/home/user/p2-arm-gp/3rdparty/wxwidgets3.0/src/common/zipstrm.cpp
/home/user/p2-arm-gp/3rdparty/wxwidgets3.0/src/common/time.cpp
/home/user/p2-arm-gp/3rdparty/vixl/src/aarch64/macro-assembler-aarch64.cc
Android (7714059, based on r416183c1) clang version 12.0.8 (https://android.googlesource.com/toolchain/llvm-project c935d99d7cf2016289302412d708641d52d2f7ee)
Linker: LLD 12.0.8 (/buildbot/src/android/llvm-r416183/out/llvm-project/lld c935d99d7cf2016289302412d708641d52d2f7ee)
/tmp/GS_HW_dump32/
fcma
Samsung
Nvidia
Rockchip
bool VMManager::Initialize(const VMBootParameters &)
VM is shutdown
PCSX2.index.gzip.v1|
這模擬器不是憑空出世,從這些資訊來看應該是針對Android平台花了蠻長的時間製作,因此,如果是有OpenGL支援的平台,如:RK3326,應該是有很大的機會可以搬上去~
#259 Re: 司徒开源 » 研究FC3000掌機的開源可行性 » 2021-12-04 08:13:02
#260 Re: 司徒开源 » 研究FC3000掌機的開源可行性 » 2021-11-21 16:25:59
更新項目:
1. TRIMUI L2R2改造
2. TRIMUI 草食系統測試版
TRIMUI草食系統下載位置:https://github.com/steward-fu/trimui/releases/download/v1.3/veganos_trimui_20211121.img.7z
雖然司徒最近比較忙碌一點,不過,作為司徒寨機旅程的最後一站,司徒還是希望可以把這三台寨機(小橫米、TRIMUI、FC3000)作到一定的質量,因此,即使一年的開發時間到期,如果還沒有達到司徒要求,司徒還是會延續開發週期,然而~因為重新寫了很多新東西,因此,進度比較緩慢,建議可以一個月來看一下進度就可以,接著司徒說明 下TRIMUI L2、R2的改機說明~
尋得一塊風水寶地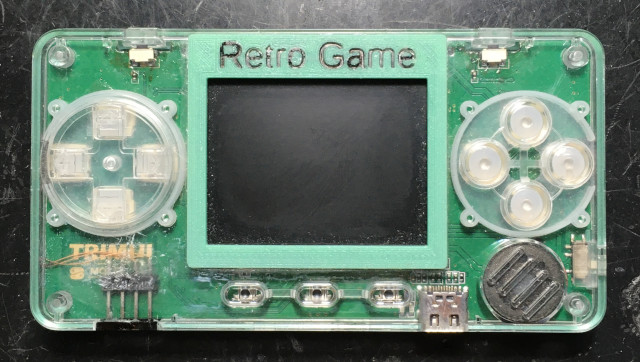
標記位置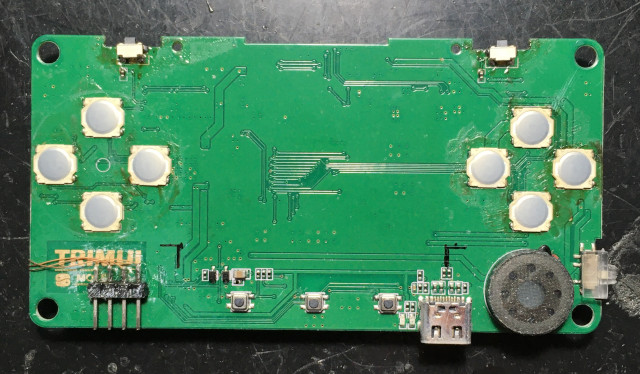
拆掉NAND FLASH
L2、R2使用的腳位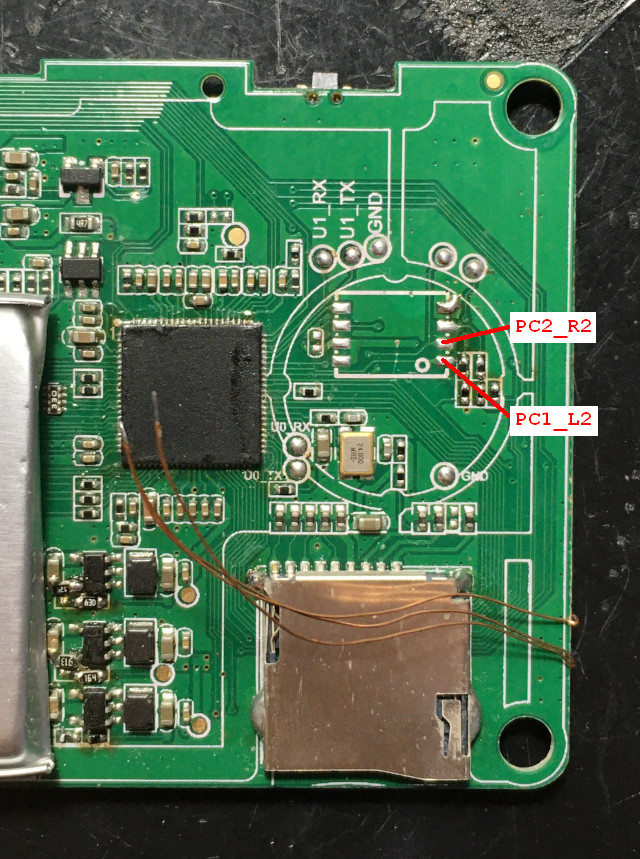
上按鍵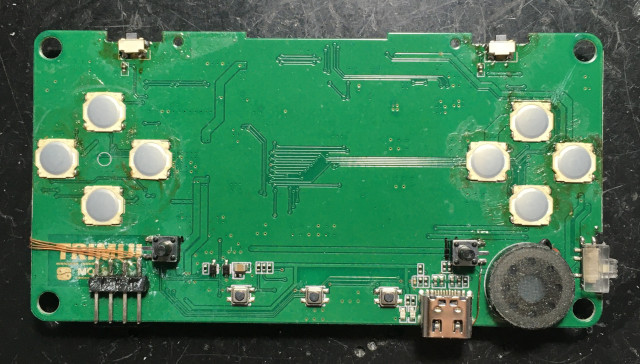
跳線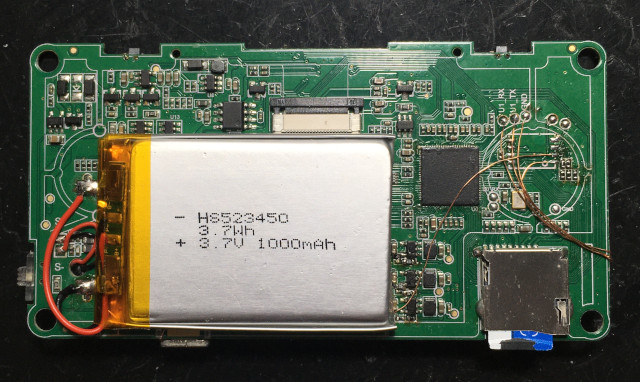
鑽孔,右邊竟然算錯位置...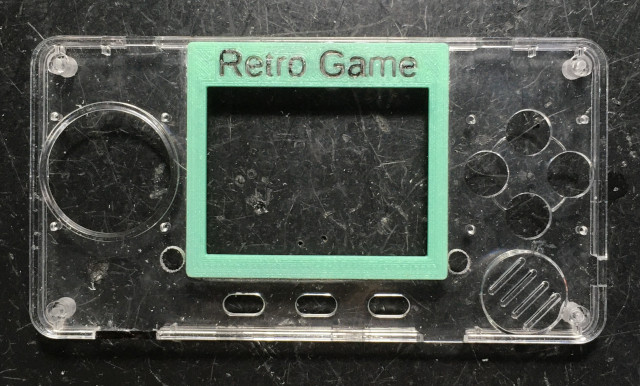
完成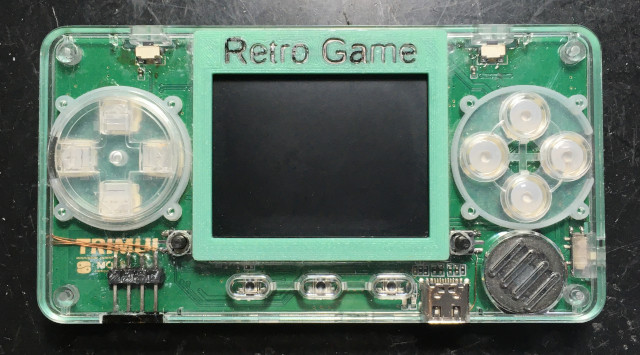
按鍵高度可以購買符合需求的高度
開啟L2R2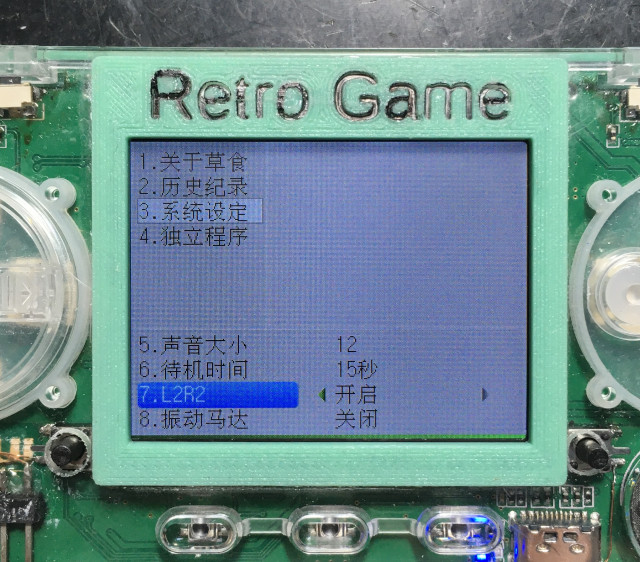
測試按鍵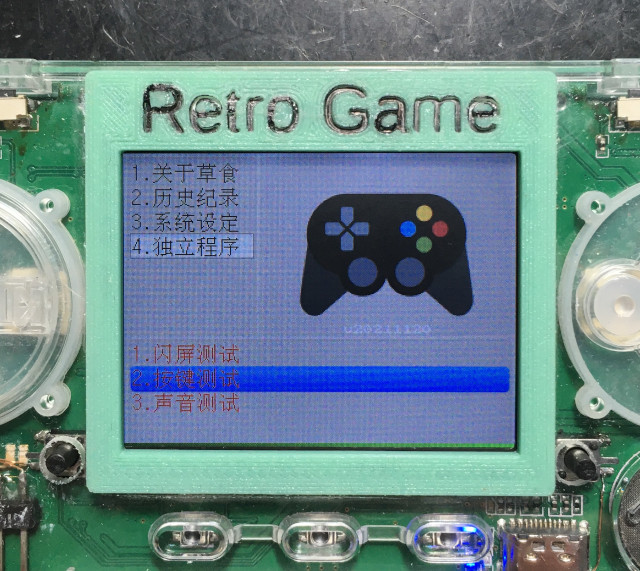
R2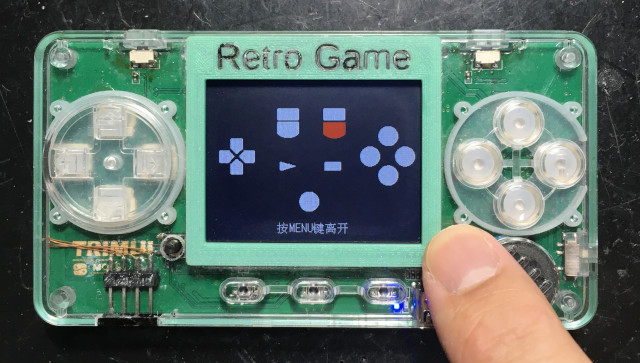
L2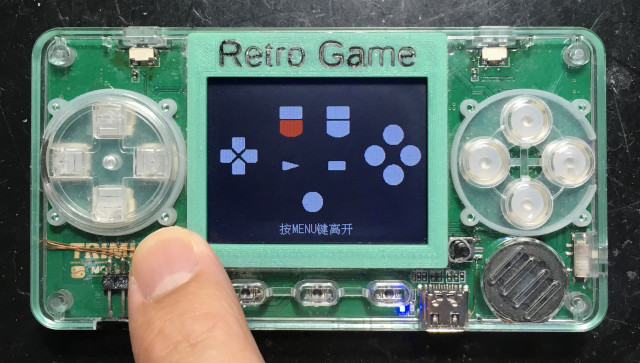
10年一見的高CP值開源掌機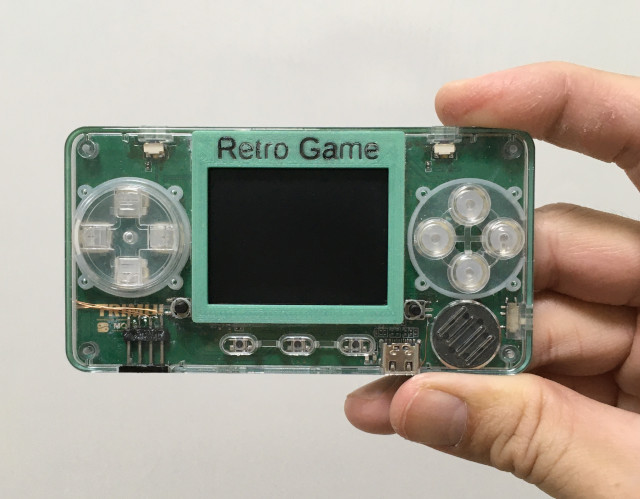
#262 Re: 全志 SOC » SDIO ESP8089开源Linux驱动现在可以直接编译通过了, 有没有朋友一起试一试 » 2021-11-16 08:59:23
@twzy
目前我這邊測試下載136MB的檔案還是可以正常,不過我測試時,ESP8089跟AP是很接近的,所以,我感覺可能是信號問題造成,你或許可以把ESP8089跟AP距離拉近測試一下,另外,你製作的這個開發板,我可以跟你購買一套嗎?這樣我們測試環境會比較一致,比較方便釐清問題,你有淘寶或閒魚店舖嗎?
測試Log
# wget ftp.gnu.org/gnu/gcc/gcc-11.2.0/gcc-11.2.0.tar.gz
Connecting to ftp.gnu.org (209.51.188.20:80)
saving to 'gcc-11.2.0.tar.gz'
gcc-11.2.0.tar.gz    100% |********************************|  136M  0:00:00 ETA
'gcc-11.2.0.tar.gz' saved

# ls -al gcc-11.2.0.tar.gz
-rwxr-xr-x 1 root root 143152863 Jan 1 01:53 gcc-11.2.0.tar.gz#264 Re: 全志 SOC » SDIO ESP8089开源Linux驱动现在可以直接编译通过了, 有没有朋友一起试一试 » 2021-11-13 22:52:27
@twzy
哈~沒辦法~真的沒有多餘時間~
司徒目前部屬Nginx後,還是無法重現斷線問題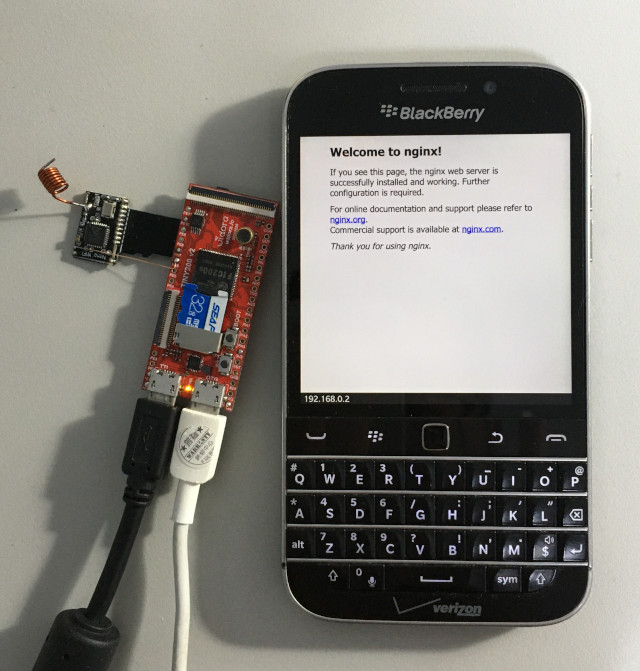
Welcome to VeganOS
vegan login: root
# cd /boot/
# insmod esp8089-spi.ko
[   13.652674] esp8089_spi: loading out-of-tree module taints kernel.
[   22.848024] random: crng init done

# ifconfig wlan0 up
# wpa_supplicant -B -i wlan0 -c /etc/wpa_supplicant.conf
Successfully initialized wpa_supplicant
rfkill: Cannot open RFKILL control device
# [   60.611010] wlan0: authenticate with a4:e4:b8:70:01:7b
[   60.616609] wlan0: send auth to a4:e4:b8:70:01:7b (try 1/3)
[   60.831775] wlan0: send auth to a4:e4:b8:70:01:7b (try 2/3)
[   60.841999] wlan0: authenticated
[   60.851734] wlan0: associate with a4:e4:b8:70:01:7b (try 1/3)
[   61.061740] wlan0: associate with a4:e4:b8:70:01:7b (try 2/3)
[   61.072413] wlan0: RX AssocResp from a4:e4:b8:70:01:7b (capab=0x431 status=0 aid=1)
[   61.080298] wlan0: AP has invalid WMM params (AIFSN=1 for ACI 2), will use 2
[   61.087501] wlan0: AP has invalid WMM params (AIFSN=1 for ACI 3), will use 2
[   61.094765] wlan0: associated

# udhcpc -i wlan0
udhcpc: started, v1.33.1
udhcpc: sending discover
udhcpc: sending select for 192.168.0.2
udhcpc: lease of 192.168.0.2 obtained, lease time 7200
deleting routers
adding dns 192.168.176.251
adding dns 192.168.176.252
adding dns 192.168.176.253
adding dns 192.168.176.254

# mkdir /tmp/logs
# /usr/nginx/sbin/nginx -c /usr/nginx/conf/nginx.conf -p /tmp
#司徒目前也沒有多餘時間可以繼續花費在這個問題上,因此,司徒將最後的Kernel和ESP8089-SPI驅動公開給大家參考~
原本Kernel: https://github.com/Lichee-Pi/linux/tree/nano-5.2-tf
原本ESP8089-SPI驅動: https://github.com/notabucketofspam/ESP8089-SPI
司徒的源代碼位置: https://github.com/steward-fu/tiny200/releases/tag/v1.0
連接腳位:
PE6: ESP8089 CHIP_EN
PE7: ESP8089 CS
PE8: ESP8089 DI
PE9: ESP8089 CLK
PE10: ESP8089 DO
PE11: ESP8089 INT
編譯Kernel
$ cd ~/Downloads
$ wget https://github.com/steward-fu/tiny200/releases/download/v1.0/kernel.tar.gz
$ tar xvf kernel.tar.gz
$ cd kernel
$ ARCH=arm CROSS_COMPILE=arm-linux- make esp8089_defconfig
$ ARCH=arm CROSS_COMPILE=arm-linux- make zImage modules dtbs -j4
編譯ESP8089-SPI
$ cd ~/Downloads
$ https://github.com/steward-fu/tiny200/releases/download/v1.0/esp8089-spi.tar.gz
$ tar xvf esp8089-spi.tar.gz
$ cd esp8089-spi
$ make#265 Re: 全志 SOC » SDIO ESP8089开源Linux驱动现在可以直接编译通过了, 有没有朋友一起试一试 » 2021-11-13 18:51:35
@twzy
請教一下你在https://www.cnblogs.com/twzy/p/15160808.html說的开发板接受数据正常,通过ssh进行访问操作都正常 ,但是只要大量发送数据,比如作为Web服务器被访问,wifi就挂了,你可以跟我說一下如何架設環境以及如何重現問題嗎?
不知為何ESP8089無法搜尋到家裡的AP,司徒陸續找個幾個裝置後,終於從倉庫找到可以連線的裝置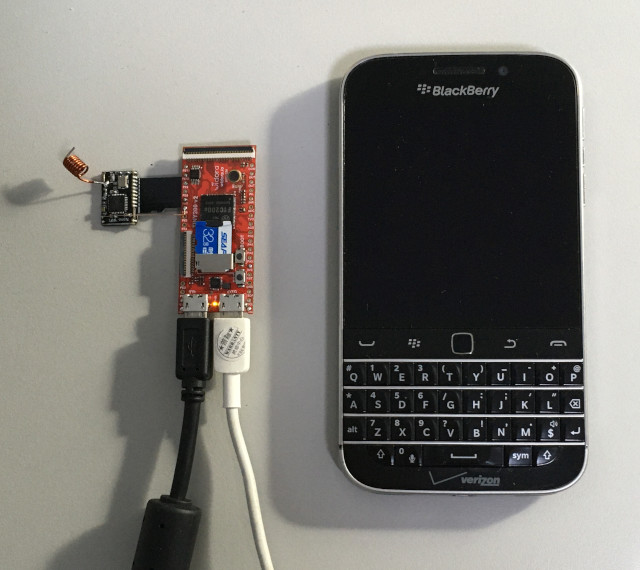
目前司徒測試了一下ping以及wget下載比較大量的檔案,沒有出線斷線問題
# wget ftp.gnu.org/gnu/gcc/gcc-3.0.3.tar.gz
Connecting to ftp.gnu.org (209.51.188.20:80)
saving to 'gcc-3.0.3.tar.gz'
gcc-3.0.3.tar.gz     100% |********************************| 17.5M  0:00:00 ETA
'gcc-3.0.3.tar.gz' saved

# wget ftp.gnu.org/gnu/gcc/gcc-3.0.4.tar.gz
Connecting to ftp.gnu.org (209.51.188.20:80)
saving to 'gcc-3.0.4.tar.gz'
gcc-3.0.4.tar.gz     100% |********************************| 17.5M  0:00:00 ETA
'gcc-3.0.4.tar.gz' saved

# ping 8.8.8.8
ping: socket: Address family not supported by protocol
PING 8.8.8.8 (8.8.8.8) 56(84) bytes of data.
64 bytes from 8.8.8.8: icmp_seq=1 ttl=115 time=1034 ms
64 bytes from 8.8.8.8: icmp_seq=2 ttl=115 time=1009 ms
64 bytes from 8.8.8.8: icmp_seq=3 ttl=115 time=1009 ms
64 bytes from 8.8.8.8: icmp_seq=4 ttl=115 time=1008 ms
64 bytes from 8.8.8.8: icmp_seq=5 ttl=115 time=1000 ms
64 bytes from 8.8.8.8: icmp_seq=6 ttl=115 time=1040 ms
64 bytes from 8.8.8.8: icmp_seq=7 ttl=115 time=1009 ms
64 bytes from 8.8.8.8: icmp_seq=8 ttl=115 time=1008 ms
64 bytes from 8.8.8.8: icmp_seq=9 ttl=115 time=1008 ms
64 bytes from 8.8.8.8: icmp_seq=10 ttl=115 time=1005 ms
^C
--- 8.8.8.8 ping statistics ---
11 packets transmitted, 10 received, 9.09091% packet loss, time 0ms
rtt min/avg/max/mdev = 1000.429/1013.056/1040.108/12.232 ms, pipe 2#266 Re: 全志 SOC » SDIO ESP8089开源Linux驱动现在可以直接编译通过了, 有没有朋友一起试一试 » 2021-11-12 21:11:34
第2次insmod失敗的原因是沒有做RESET的動作, 雖然可能可以透過命令做RESET, 不過, ESP8089的使用手冊似乎抓不到, 因此, 司徒最後飛線解決第2次insmod失敗的問題
CHIP_EN腳位如下: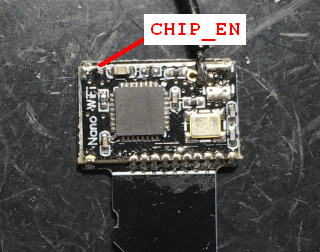
CHIP_EN連接到PE6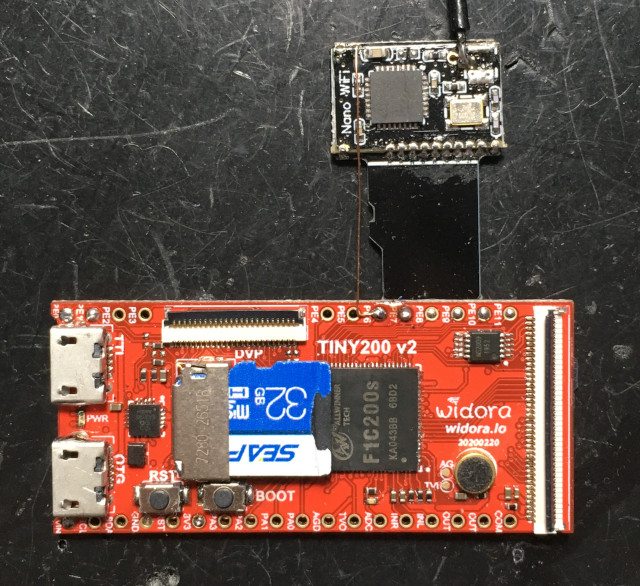
接著多次測試後, 驅動都可以正確執行, wlan0也可以正常運作
# rmmod esp8089-spi.ko
[  235.627234] (esp_spi_exit) ++
[  235.630644] (esp_spi_remove)++
[  235.635838] sip_detach, cancel rx_process_work in SIP_RUN
[  235.641465] esp_op_remove_interface enter, vif addr ac:d0:74:b8:2d:49, beacon enable 0
[  235.649660] sip_txq_process skb_len 22 pkt_len 260 blknum 1
[  235.655465] esp_op_stop
[  235.660157] sip_detach, cancel tx_work in SIP_RUN
[  235.665112] (esp_spi_remove) sip detached
[  235.669563] (esp_spi_remove) dealloc mac80211
[  235.674095] (esp_spi_remove) free dma_buffer
[  235.678420] (esp_spi_remove)--
[  235.681866] (esp_spi_exit) --

# insmod esp8089-spi.ko
[  238.117040] (esp_spi_init)++
[  238.120026] (request_init_conf) crystal_26M_en=1
[  238.120049] (request_init_conf) test_xtal=0
[  238.124831] (request_init_conf) sdio_configure=1
[  238.129059] (request_init_conf) bt_configure=0
[  238.133765] (request_init_conf) bt_protocol=0
[  238.138249] (request_init_conf) dual_ant_configure=0
[  238.142681] (request_init_conf) test_uart_configure=2
[  238.147680] (request_init_conf) share_xtal=0
[  238.152802] (request_init_conf) gpio_wake=0
[  238.157107] (request_init_conf) no_auto_sleep=0
[  238.161318] (request_init_conf) ext_rst=0
[  238.165917] (request_init_conf) wakeup_gpio=12
[  238.169962] (request_init_conf) ate_test=0
[  238.174479] (request_init_conf) speed_suspend=0
[  238.442136] (sif_platform_new_device) added spi device 0xc3228c00
[  238.671606] (esp_spi_init) power up complete
[  238.676079] (esp_spi_probe)++
[  238.679094] (esp_setup_spi)++
[  238.682200] (esp_setup_spi)--
[  238.685211] (sif_spi_protocol_init)++
[  238.688901] (sif_spi_protocol_init) failed count 0
[  238.895437] (sif_spi_protocol_init) failed count 1
[  239.101828] (sif_spi_protocol_init) failed count 2
[  239.308199] (sif_spi_protocol_init) rx: 0xff, 0xff, 0x01, 0xff, 0xff, 0xff, 0xff, 0xff, 0xff, 0xff
[  239.816383] (sif_spi_protocol_init) rx: 0xff, 0xff, 0x01, 0x10, 0xff, 0xff, 0x00, 0xff, 0xff, 0xff
[  240.324926] (sif_spi_protocol_init) rx: 0xff, 0xff, 0x00, 0x90, 0xff, 0xff, 0x00, 0xff, 0xff, 0xff
[  240.833308] (sif_spi_protocol_init) rx: 0xff, 0x00, 0x02, 0xff, 0xff, 0xff, 0xff, 0xff, 0xff, 0xff
[  241.341498] (sif_spi_protocol_init) rx: 0xff, 0x00, 0x03, 0xff, 0xff, 0xff, 0xff, 0xff, 0xff, 0xff
[  241.850059] (sif_spi_protocol_init) rx: 0xff, 0x00, 0x02, 0xff, 0xff, 0xff, 0xff, 0xff, 0xff, 0xff
[  242.358415] (sif_spi_protocol_init) rx: 0xff, 0x00, 0x03, 0xff, 0xff, 0xff, 0xff, 0xff, 0xff, 0xff
[  242.866623] (sif_spi_protocol_init) rx: 0xff, 0x00, 0x00, 0xff, 0xff, 0xff, 0xff, 0xff, 0xff, 0xff
[  243.375170] (sif_spi_protocol_init) rx: 0xff, 0x00, 0x25, 0xff, 0xff, 0xff, 0xff, 0xff, 0xff, 0xff
[  243.883519] (sif_spi_protocol_init) rx: 0xff, 0x00, 0x10, 0xff, 0xff, 0xff, 0xff, 0xff, 0xff, 0xff
[  244.391780] (sif_spi_protocol_init) rx: 0xff, 0x00, 0x12, 0xff, 0xff, 0xff, 0xff, 0xff, 0xff, 0xff
[  244.900285] (sif_spi_protocol_init) rx: 0xff, 0x00, 0x00, 0xff, 0xff, 0xff, 0xff, 0xff, 0xff, 0xff
[  245.408637] (sif_spi_protocol_init) rx: 0xff, 0x00, 0x06, 0xff, 0xff, 0xff, 0xff, 0xff, 0xff, 0xff
[  245.916879] (sif_spi_protocol_init) rx: 0xff, 0x00, 0x00, 0xff, 0xff, 0xff, 0xff, 0xff, 0xff, 0xff
[  246.425426] (sif_spi_protocol_init) rx: 0xff, 0x00, 0x00, 0xff, 0xff, 0xff, 0xff, 0xff, 0xff, 0xff
[  246.934229] (sif_spi_protocol_init) rx: 0xff, 0x00, 0x01, 0xff, 0xff, 0xff, 0xff, 0xff, 0xff, 0xff
[  247.442171] (sif_spi_protocol_init)--
[  247.448635] (check_target_id) SLC data 0x12102500, ID 0x00000600
由於esp8089-spi驅動真的太亂了, 因此, 司徒對esp8089-spi進行大量修改, 等把斷線問題解決後, 司徒會將此份驅動公開給大家使用
static int __init esp_spi_init(void)
{
  int err=0;
  int edf_ret=0;
  bool powerup=false;
  long long sem_timeout=0;

  dbg("(%s)++\n", __func__);
  edf_ret = esp_debugfs_init();
  request_init_conf();
  esp_wakelock_init();
  esp_wake_lock();

  if((err = gpio_request(ESP_RST_PIN, "esp_rst")) != 0) {
    dbg("(%s) failed to request reset gpio\n", __func__);
    return err;
  }
  gpio_direction_output(ESP_RST_PIN, 1);
  gpio_set_value(ESP_RST_PIN, 0);
  msleep(250);
  gpio_set_value(ESP_RST_PIN, 1);

  spi = sif_platform_new_device();
  powerup = true;
  if(!powerup) {
    dbg("(%s) failed to power up\n", __func__);
    err = -ENODEV;
    goto _fail;
  }

  dbg("(%s) power up complete\n", __func__);
  sif_sdio_state = ESP_SDIO_STATE_FIRST_INIT;
  sema_init(&esp_powerup_sem, 0);
  spi_register_driver(&esp_spi_driver);

  sem_timeout = down_timeout(&esp_powerup_sem, msecs_to_jiffies(ESP_WAIT_UP_TIME_MS));
  dbg("(%s) sem_timeout = %lld\n", __func__, sem_timeout);
  if(sem_timeout == 0 && sif_get_ate_config() == 0) {
    if(sif_sdio_state == ESP_SDIO_STATE_FIRST_NORMAL_EXIT) {
      spi_unregister_driver(&esp_spi_driver);
      msleep(100);
      sif_sdio_state = ESP_SDIO_STATE_SECOND_INIT;
      spi_register_driver(&esp_spi_driver);
    }
  }
  esp_register_early_suspend();
  esp_wake_unlock();
  printk("(%s)-- (errno %d)\n", __func__, err);
  return err;

_fail:
  esp_wake_unlock();
  esp_wakelock_destroy();
  printk("(%s)-- (errno %d)\n", __func__, err);
  return err;
}

static void __exit esp_spi_exit(void)
{
  dbg("(%s) ++\n", __func__);
  esp_debugfs_exit();
  esp_unregister_early_suspend();
  spi_unregister_device(spi);
  spi_unregister_driver(&esp_spi_driver);
  esp_wakelock_destroy();
  gpio_free(ESP_RST_PIN);
  dbg("(%s) --\n", __func__);
}#267 Re: 司徒开源 » 研究FC3000掌機的開源可行性 » 2021-11-08 11:25:20
#269 Re: 司徒开源 » 研究FC3000掌機的開源可行性 » 2021-11-07 22:04:47
#270 Re: 全志 SOC » SDIO ESP8089开源Linux驱动现在可以直接编译通过了, 有没有朋友一起试一试 » 2021-11-07 21:49:34
@twzy
了解,感謝~
第2次做insmod esp8089-spi.ko發生的crash如下
# insmod esp8089-spi.ko
[   79.450589] esp8089_spi: esp_spi_init
[   79.454554] esp8089_spi: EAGLE DRIVER VER bdf5087c3deb
[   79.459743] request_init_conf: attr_name[crystal_26M_en]
[   79.459762] request_init_conf: attr_name[test_xtal]
[   79.465173] request_init_conf: attr_name[sdio_configure]
[   79.470085] request_init_conf: attr_name[bt_configure]
[   79.475478] request_init_conf: attr_name[bt_protocol]
[   79.480649] request_init_conf: attr_name[dual_ant_configure]
[   79.485780] request_init_conf: attr_name[test_uart_configure]
[   79.491471] request_init_conf: attr_name[share_xtal]
[   79.497288] request_init_conf: attr_name[gpio_wake]
[   79.502327] request_init_conf: attr_name[no_auto_sleep]
[   79.507237] request_init_conf: attr_name[ext_rst]
[   79.512535] request_init_conf: attr_name[wakeup_gpio]
[   79.517277] request_init_conf: attr_name[ate_test]
[   79.522403] request_init_conf: attr_name[speed_suspend]
[   79.527399] esp8089_spi: esp_spi_dummy_probe enter
[   79.537874] sun6i-spi 1c06000.spi: chipselect 0 already in use
[   79.543869] esp8089_spi: FAILED to create slave
[   79.548475] Unable to handle kernel NULL pointer dereference at virtual address 000001a8
[   79.556682] pgd = b46ba3ec
[   79.559431] [000001a8] *pgd=832e2831, *pte=00000000, *ppte=00000000
[   79.565808] Internal error: Oops: 17 [#1] ARM
[   79.570194] Modules linked in: esp8089_spi(O+) [last unloaded: esp8089_spi]
[   79.577206] CPU: 0 PID: 102 Comm: insmod Tainted: G           O      5.2.0 #5
[   79.584353] Hardware name: Allwinner suniv Family
[   79.589102] PC is at spi_setup+0x4/0x15c
[   79.593330] LR is at sif_platform_new_device+0x38/0x88 [esp8089_spi]
[   79.599729] pc : [<c03cdbe8>]    lr : [<bf004340>]    psr: 60000013
[   79.606017] sp : c32dfe4c  ip : 00000000  fp : bf03b58c
[   79.611255] r10: bf03b574  r9 : 00000003  r8 : bf03bbf8
[   79.616497] r7 : c0a397c0  r6 : bf03b0e4  r5 : bf03b534  r4 : bf03bbf4
[   79.623035] r3 : 00000000  r2 : 00000000  r1 : 60000093  r0 : 00000000
[   79.629578] Flags: nZCv  IRQs on  FIQs on  Mode SVC_32  ISA ARM  Segment none
[   79.636730] Control: 0005317f  Table: 832d0000  DAC: 00000051
[   79.642503] Process insmod (pid: 102, stack limit = 0xf70a1f18)
[   79.648445] Stack: (0xc32dfe4c to 0xc32e0000)
[   79.652832] fe40:                            bf03bbf4 bf03b534 bf004340 bf03bbf4 00000000
[   79.661047] fe60: bf03b0e4 bf0410a8 bf03bb78 bf00e774 bf03c000 bf041000 ffffe000 00000000
[   79.669260] fe80: c0a397c0 7fffffff 00000000 00000000 00000000 c0102c24 00000000 00044920
[   79.677474] fea0: 00000000 00000000 00000000 00000000 6e72656b 00006c65 00000000 00000000
[   79.685687] fec0: 00000000 00000000 00000000 00000000 00000000 00000000 00000000 00000000
[   79.693904] fee0: 00000000 dc8cb5ab bf03b9e0 bf03b9e0 c322b200 b6fdfca0 0000017b c016f5d8
[   79.702120] ff00: 0000017b 7fffffff 00000000 00000003 b6fdfca0 c0171d6c 7fffffff 00000000
[   79.710335] ff20: 00000003 00000000 00000000 c4876000 00044920 00000000 c4883eba c48b0940
[   79.718549] ff40: c4876000 00044920 c48ba2e0 c48ba138 c48b4714 0003c000 0003dde0 000062ec
[   79.726764] ff60: 0003efeb 00000000 00000000 00000000 000062dc 00000025 00000026 0000001d
[   79.734977] ff80: 00000000 00000011 00000000 dc8cb5ab d9dcb4f6 00000001 b6fdfca0 c0101208
[   79.743193] ffa0: c32de000 c0101000 d9dcb4f6 00000001 00000003 b6fdfca0 00000000 bee6bf4d
[   79.751408] ffc0: d9dcb4f6 00000001 b6fdfca0 0000017b 000e79d0 00000000 00000000 00000000
[   79.759625] ffe0: bee6bdcc bee6bdb0 0002fa5c b6f586d8 20000010 00000003 00000000 00000000
[   79.768122] [<c03cdbe8>] (spi_setup) from [<bf03b0e4>] (esp_msg_level+0x0/0xfffd0f1c [esp8089_spi])
[   79.777241] Code: 00002af8 00002710 c07d5984 e92d4030 (e59031a8)
[   79.783497] ---[ end trace 35e8692b41672902 ]---
Segmentation fault
定位了一下問題, 是在esp_spi_exit()沒有做資源釋放的動作, 改成如下就可以解決
static void __exit esp_spi_exit(void)
{
  dbg("(%s) ++\n", __func__);
  esp_debugfs_exit();
  esp_unregister_early_suspend();
  spi_unregister_device(spi);
  spi_unregister_driver(&esp_spi_driver);
  esp_wakelock_destroy();
  dbg("(%s) --\n", __func__);
}
P. S. spi_unregister_device(spi)
不過, 司徒的esp8089是早期的版本, 沒有reset腳位, 目前也沒有特地拉出來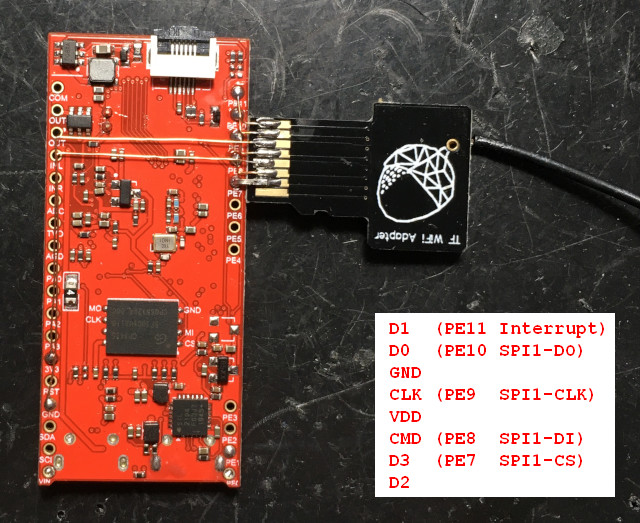
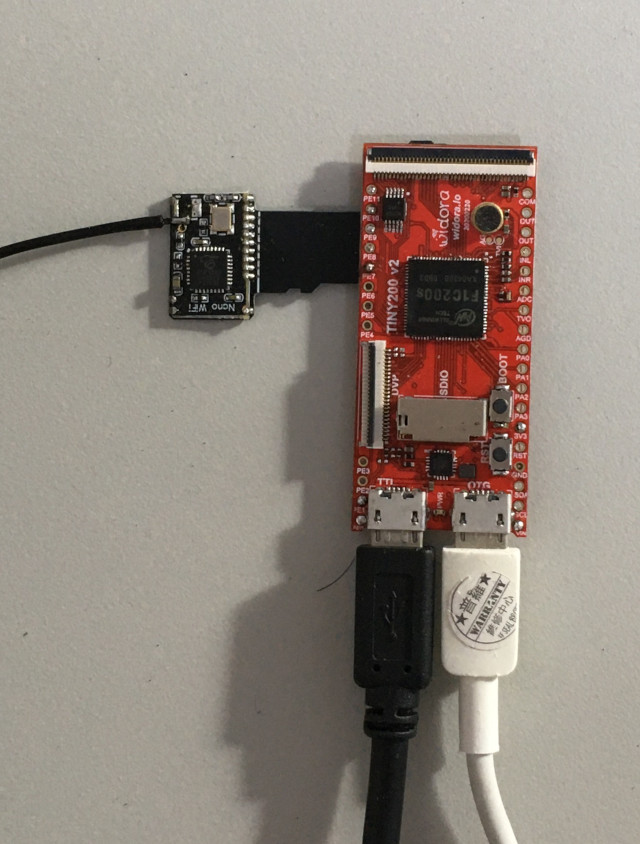
修改後, 執行第2次insmod esp8089-spi.ko已經不會crash了, 不過似乎缺少reset的動作
# insmod esp8089-spi.ko
[   56.044941] (esp_spi_init)++
[   56.047925] (request_init_conf) crystal_26M_en=1
[   56.047947] (request_init_conf) test_xtal=0
[   56.052729] (request_init_conf) sdio_configure=1
[   56.056957] (request_init_conf) bt_configure=0
[   56.061600] (request_init_conf) bt_protocol=0
[   56.066138] (request_init_conf) dual_ant_configure=0
[   56.070534] (request_init_conf) test_uart_configure=2
[   56.075581] (request_init_conf) share_xtal=0
[   56.080666] (request_init_conf) gpio_wake=0
[   56.085012] (request_init_conf) no_auto_sleep=0
[   56.089230] (request_init_conf) ext_rst=0
[   56.093831] (request_init_conf) wakeup_gpio=12
[   56.097874] (request_init_conf) ate_test=0
[   56.102388] (request_init_conf) speed_suspend=0
[   56.107036] (sif_platform_new_device) added spi device 0xc3228c00
[   56.331811] (esp_spi_init) power up complete
[   56.336285] (esp_spi_probe)++
[   56.339300] (esp_setup_spi)++
[   56.342409] (esp_setup_spi)--
[   56.345418] (sif_spi_protocol_init)++
[   56.349105] (sif_spi_protocol_init) failed count 0
[   56.555559] (sif_spi_protocol_init) failed count 1
[   56.762018] (sif_spi_protocol_init) failed count 2
[   56.968402] (sif_spi_protocol_init) failed count 3
[   57.174802] (sif_spi_protocol_init) failed count 4
[   57.381160] (sif_spi_protocol_init) failed count 5
[   57.587539] (sif_spi_protocol_init) failed count 6
[   57.794031] (sif_spi_protocol_init) failed count 7
[   58.000408] (sif_spi_protocol_init) failed count 8
[   58.206804] (sif_spi_protocol_init) failed count 9
[   58.413143] (sif_spi_protocol_init) failed count 10
[   58.619588] (esp_spi_probe) first error exit
[   58.624038] eagle: probe of spi1.0 failed with error -110
[   58.629640] (esp_spi_init) sem_timeout = 0
[   58.633867] (esp_spi_init)-- (errno 0)
修改ESP8089驅動後, 目前已經不會crash了, 所以司徒接下來會往斷線的方向查看, 希望可以找出問題根源~
#271 Re: 全志 SOC » SDIO ESP8089开源Linux驱动现在可以直接编译通过了, 有没有朋友一起试一试 » 2021-11-07 08:53:13
@拉轰的脚踏车
感謝你的資訊~
@twzy
感謝你的小白自制Linux开发板(F1C200s)整理系列,持续更新中相關教程, 我也是參考你的網站架設ESP8089驅動~
有2個問題想請教你:
Q1: 在小白自制Linux开发板 三. Linux内核与文件系统移植, 裡面用到的Kernel是官方分支, 但是, 我看ESP8089驅動的介紹, 卻是使用荔枝派官網的Kernel, 請問最後為何改成荔枝派官網的linux-nano-5.2-tf呢?
Q2: 我看你ESP8089驅動, 針對逾時(ETIMEOUT)做修正, 請問當初為何這樣修改?
關於如下的esp8089 crash問題
# rmmod esp8089-spi.ko
[   80.007618] esp8089_spi: esp_spi_exit
[   80.011553] esp8089_spi: esp_spi_remove
[   80.016011] esp8089_spi: normal byte write data no-busy wait byte 0xff no recv at the first time
[   80.027305] sip_detach, cancel rx_process_work in SIP_RUN
[   80.032885] sip_detach, cancel sendup_work in SIP_RUN
[   80.037979] ------------[ cut here ]------------
[   80.042737] WARNING: CPU: 0 PID: 101 at kernel/workqueue.c:3031 __flush_work+0x224/0x258
[   80.050866] Modules linked in: esp8089_spi(O-)
[   80.055428] CPU: 0 PID: 101 Comm: rmmod Tainted: G           O      5.2.0 #5
[   80.062544] Hardware name: Allwinner suniv Family
[   80.067360] [<c010dfa0>] (unwind_backtrace) from [<c010b210>] (show_stack+0x10/0x14)
[   80.075249] [<c010b210>] (show_stack) from [<c0116c10>] (__warn+0xc4/0xf0)
[   80.082238] [<c0116c10>] (__warn) from [<c0116c78>] (warn_slowpath_null+0x3c/0x48)
[   80.089893] [<c0116c78>] (warn_slowpath_null) from [<c012dbe0>] (__flush_work+0x224/0x258)
[   80.098295] [<c012dbe0>] (__flush_work) from [<c012dd78>] (__cancel_work_timer+0x108/0x1e4)
[   80.106941] [<c012dd78>] (__cancel_work_timer) from [<bf001d94>] (sip_detach+0x100/0x200 [esp8089_spi])
[   80.116717] [<bf001d94>] (sip_detach [esp8089_spi]) from [<bf006e0c>] (esp_spi_remove+0x5c/0x208 [esp8089_spi])
[   80.127093] [<bf006e0c>] (esp_spi_remove [esp8089_spi]) from [<c03cd7a8>] (spi_drv_remove+0x1c/0x38)
[   80.136394] [<c03cd7a8>] (spi_drv_remove) from [<c0382894>] (__device_release_driver+0x140/0x1f0)
[   80.145416] [<c0382894>] (__device_release_driver) from [<c03835a8>] (driver_detach+0xac/0xd4)
[   80.154162] [<c03835a8>] (driver_detach) from [<c0381efc>] (bus_remove_driver+0x4c/0xa0)
[   80.162537] [<c0381efc>] (bus_remove_driver) from [<bf00b2a8>] (esp_spi_exit+0x30/0xd88 [esp8089_spi])
[   80.172147] [<bf00b2a8>] (esp_spi_exit [esp8089_spi]) from [<c016f50c>] (sys_delete_module+0x170/0x1e4)
[   80.181624] [<c016f50c>] (sys_delete_module) from [<c0101000>] (ret_fast_syscall+0x0/0x50)
[   80.189995] Exception stack(0xc3241fa8 to 0xc3241ff0)
[   80.195147] 1fa0:                   0002fc38 00000000 bea1dcf4 00000880 00000000 bea1de58
[   80.203425] 1fc0: 0002fc38 00000000 00000002 00000081 000e79d0 00000000 00000000 00000000
[   80.211644] 1fe0: bea1dcdc bea1dcc0 0002fad0 b6f4e6d8
[   80.216769] ---[ end trace 2fa11815b209e97a ]---
[   80.223550] sip_detach, cancel tx_work in SIP_RUN
[   80.228354] esp8089_spi: esp_spi_remove sip detached
[   80.233839] esp8089_spi: esp_spi_remove dealloc mac80211
[   80.239305] esp8089_spi: esp_spi_remove free dma_buffer
[   80.244754] esp8089_spi: eagle spi remove complete
我定位了一下問題, 發現問題是在sendup_work並沒有初始化, 原因是在Makefile裡面定義了RX_SENDUP_SYNC, 所以解法如下
void sip_detach(struct esp_sip *sip)
{
  int po;

  if(sip == NULL) {
    return ;
  }

  sip_free_init_ctrl_buf(sip);
  if(atomic_read(&sip->state) == SIP_RUN) {
    sif_disable_target_interrupt(sip->epub);
    atomic_set(&sip->state, SIP_STOP);
    sif_disable_irq(sip->epub);

    dbg("%s, cancel rx_process_work in SIP_RUN\n", __func__);
    cancel_work_sync(&sip->rx_process_work);
    skb_queue_purge(&sip->rxq);
    mutex_destroy(&sip->rx_mtx);

#ifndef RX_SENDUP_SYNC
    dbg("%s, cancel sendup_work in SIP_RUN\n", __func__);
    cancel_work_sync(&sip->epub->sendup_work);
#endif
P. S. 通過RX_SENDUP_SYNC判斷是否需要cancel sendup_work
重新編譯後, 就可以正常rmmod esp8089-spi.ko
# rmmod esp8089-spi.ko
[   59.506484] esp8089_spi: esp_spi_exit
[   59.510416] esp8089_spi: esp_spi_remove
[   59.514883] esp8089_spi: normal byte write data no-busy wait byte 0xff no recv at the first time
[   59.526156] sip_detach, cancel rx_process_work in SIP_RUN
[   59.533771] sip_detach, cancel tx_work in SIP_RUN
[   59.538574] esp8089_spi: esp_spi_remove sip detached
[   59.544062] esp8089_spi: esp_spi_remove dealloc mac80211
[   59.549525] esp8089_spi: esp_spi_remove free dma_buffer
[   59.554975] esp8089_spi: eagle spi remove complete
但是, 重新上esp8089-spi.ko, 就會發現之前的資源並沒有被成功釋放, 相較於原本crash, 這又是另一個問題
# insmod esp8089-spi.ko
[   79.450589] esp8089_spi: esp_spi_init
[   79.454554] esp8089_spi: EAGLE DRIVER VER bdf5087c3deb
[   79.459743] request_init_conf: attr_name[crystal_26M_en]
[   79.459762] request_init_conf: attr_name[test_xtal]
[   79.465173] request_init_conf: attr_name[sdio_configure]
[   79.470085] request_init_conf: attr_name[bt_configure]
[   79.475478] request_init_conf: attr_name[bt_protocol]
[   79.480649] request_init_conf: attr_name[dual_ant_configure]
[   79.485780] request_init_conf: attr_name[test_uart_configure]
[   79.491471] request_init_conf: attr_name[share_xtal]
[   79.497288] request_init_conf: attr_name[gpio_wake]
[   79.502327] request_init_conf: attr_name[no_auto_sleep]
[   79.507237] request_init_conf: attr_name[ext_rst]
[   79.512535] request_init_conf: attr_name[wakeup_gpio]
[   79.517277] request_init_conf: attr_name[ate_test]
[   79.522403] request_init_conf: attr_name[speed_suspend]
[   79.527399] esp8089_spi: esp_spi_dummy_probe enter
[   79.537874] sun6i-spi 1c06000.spi: chipselect 0 already in use
[   79.543869] esp8089_spi: FAILED to create slave
[   79.548475] Unable to handle kernel NULL pointer dereference at virtual address 000001a8
[   79.556682] pgd = b46ba3ec
[   79.559431] [000001a8] *pgd=832e2831, *pte=00000000, *ppte=00000000
[   79.565808] Internal error: Oops: 17 [#1] ARM
[   79.570194] Modules linked in: esp8089_spi(O+) [last unloaded: esp8089_spi]
[   79.577206] CPU: 0 PID: 102 Comm: insmod Tainted: G           O      5.2.0 #5
[   79.584353] Hardware name: Allwinner suniv Family
[   79.589102] PC is at spi_setup+0x4/0x15c
[   79.593330] LR is at sif_platform_new_device+0x38/0x88 [esp8089_spi]
[   79.599729] pc : [<c03cdbe8>]    lr : [<bf004340>]    psr: 60000013
[   79.606017] sp : c32dfe4c  ip : 00000000  fp : bf03b58c
[   79.611255] r10: bf03b574  r9 : 00000003  r8 : bf03bbf8
[   79.616497] r7 : c0a397c0  r6 : bf03b0e4  r5 : bf03b534  r4 : bf03bbf4
[   79.623035] r3 : 00000000  r2 : 00000000  r1 : 60000093  r0 : 00000000
[   79.629578] Flags: nZCv  IRQs on  FIQs on  Mode SVC_32  ISA ARM  Segment none
[   79.636730] Control: 0005317f  Table: 832d0000  DAC: 00000051
[   79.642503] Process insmod (pid: 102, stack limit = 0xf70a1f18)
[   79.648445] Stack: (0xc32dfe4c to 0xc32e0000)
[   79.652832] fe40:                            bf03bbf4 bf03b534 bf004340 bf03bbf4 00000000
[   79.661047] fe60: bf03b0e4 bf0410a8 bf03bb78 bf00e774 bf03c000 bf041000 ffffe000 00000000
[   79.669260] fe80: c0a397c0 7fffffff 00000000 00000000 00000000 c0102c24 00000000 00044920
[   79.677474] fea0: 00000000 00000000 00000000 00000000 6e72656b 00006c65 00000000 00000000
[   79.685687] fec0: 00000000 00000000 00000000 00000000 00000000 00000000 00000000 00000000
[   79.693904] fee0: 00000000 dc8cb5ab bf03b9e0 bf03b9e0 c322b200 b6fdfca0 0000017b c016f5d8
[   79.702120] ff00: 0000017b 7fffffff 00000000 00000003 b6fdfca0 c0171d6c 7fffffff 00000000
[   79.710335] ff20: 00000003 00000000 00000000 c4876000 00044920 00000000 c4883eba c48b0940
[   79.718549] ff40: c4876000 00044920 c48ba2e0 c48ba138 c48b4714 0003c000 0003dde0 000062ec
[   79.726764] ff60: 0003efeb 00000000 00000000 00000000 000062dc 00000025 00000026 0000001d
[   79.734977] ff80: 00000000 00000011 00000000 dc8cb5ab d9dcb4f6 00000001 b6fdfca0 c0101208
[   79.743193] ffa0: c32de000 c0101000 d9dcb4f6 00000001 00000003 b6fdfca0 00000000 bee6bf4d
[   79.751408] ffc0: d9dcb4f6 00000001 b6fdfca0 0000017b 000e79d0 00000000 00000000 00000000
[   79.759625] ffe0: bee6bdcc bee6bdb0 0002fa5c b6f586d8 20000010 00000003 00000000 00000000
[   79.768122] [<c03cdbe8>] (spi_setup) from [<bf03b0e4>] (esp_msg_level+0x0/0xfffd0f1c [esp8089_spi])
[   79.777241] Code: 00002af8 00002710 c07d5984 e92d4030 (e59031a8)
[   79.783497] ---[ end trace 35e8692b41672902 ]---
Segmentation fault
esp8089-spi驅動經過太多人修改, 源代碼相當混亂, 所以, 可能需要花一些時間好好修改一下...
#272 Re: 全志 SOC » SDIO ESP8089开源Linux驱动现在可以直接编译通过了, 有没有朋友一起试一试 » 2021-11-06 09:08:49
@cube
了解~
@隆哥
xxx_probe()沒有被成功加載, 所以esp_spi_init()處於等待狀態, 也就是說驅動沒有加載成功, 你可以參考twzy的網站修改
https://www.cnblogs.com/twzy/p/15160808.html
#273 Re: 司徒开源 » 研究FC3000掌機的開源可行性 » 2021-11-05 07:06:04
#274 Re: 司徒开源 » 研究FC3000掌機的開源可行性 » 2021-11-04 12:15:54
#275 Re: 全志 SOC » SDIO ESP8089开源Linux驱动现在可以直接编译通过了, 有没有朋友一起试一试 » 2021-11-02 21:26:55
@twzy
假如驅動沒有crash, 你需要開啟esp_msg_level, 才會印出比較詳細的log, 不過如果你要追問題, 你應該把問題切成上、中、下三層去追, 上層從server log查看問題, 中層利用ltrace, strace查看跟驅動的交握問題, 下層埋printk log查看
@cube
源頭目前不明, 所以發生crash很合理, 你只要把esp驅動修好, 狀況就可以跟twzy一樣, 不過他是使用SPI方式~
@thank you very much!
從驅動看到的源代碼是CPU接reset控制腳位到esp
從crash log看到一個比較奇怪的問題, 那就是mmc_rescan()負責sdio卸載以及掛載的源頭, 可是這個esp sdio不是只有訊號以及reset腳位嗎?應該是沒有CD腳位, 但是, 如果是沒有CD腳位, 那mmc是如何知道sdio被拔除或者移除呢?
#276 Re: 全志 SOC » SDIO ESP8089开源Linux驱动现在可以直接编译通过了, 有没有朋友一起试一试 » 2021-11-01 12:25:22
兩點摘要:
1. 源頭問題並不清楚, 這個源頭指的是esp sdio驅動為何無故被移除
2. 這個crash是由esp8089驅動造成
問題:这个 insmod/rmmod 问题是因为 TF卡模块没有接RST 引起吗?
回答:不是, 原因解析如下
reset的動作可以區分成內部、外部兩個做說明, 從log看到"ESP8089 reset via GPIO 0"訊息, 這種現象屬於後發, 幾乎都是由驅動幹的, 流程如下:esp_sdio_exit() => sif_platform_target_poweroff() => sif_platform_reset_target()
void sif_platform_reset_target(void)
{
  printk("ESP8089 reset via GPIO %d\n", esp_reset_gpio);
  gpio_request(esp_reset_gpio,"esp_reset");
  gpio_direction_output(esp_reset_gpio,0);
  msleep(200);
  gpio_direction_input(esp_reset_gpio);
  gpio_free(esp_reset_gpio);
}
接著從Oops回推問題:esp_sdio_remove() => sip_detach() => __cancel_work_timer()
問題定位到第一個cancel_work_sync()
void sip_detach(struct esp_sip *sip)
{
#ifndef ESP_PREALLOC
        int po;
#endif
  if (sip == NULL)
    return ;

        sip_free_init_ctrl_buf(sip);

        if (atomic_read(&sip->state) == SIP_RUN) {

                sif_disable_target_interrupt(sip->epub);

                atomic_set(&sip->state, SIP_STOP);

                /* disable irq here */
                sif_disable_irq(sip->epub);
                cancel_work_sync(&sip->rx_process_work);

                skb_queue_purge(&sip->rxq);
                mutex_destroy(&sip->rx_mtx);
典型同步問題, cancel沒有同步等待完成就釋放, 該資源可能正在被使用中
接著司徒說明一下reset的問題, 試著從外部原因猜測:
Q1. reset腳位懸空沒接?
A1. 不是, 因為驅動可以控制該GPIO, 所以不會是懸空狀態
Q2. reset被突波打到?
A2: 不是, 因為你的測試屬於長時間, 如果周遭有干擾, 那時間應該是很快可以出現, 除非是半夜打大雷?
驅動的資源管理問題解決後, 應該就可以解決這個Oops問題, 不過, 這樣的系統屬於不穩定狀態, 因為根源問題沒有找出來~
#277 Re: 全志 SOC » SDIO ESP8089开源Linux驱动现在可以直接编译通过了, 有没有朋友一起试一试 » 2021-11-01 09:28:59
如果你想找出這個問題的話, 可以嘗試如下方式:
從Oops看來大約有兩個問題:
1. wlan0長時間Ping導致esp sdio重新掛載驅動(這個現象比較像是記憶體被吃光)
建議除錯手法:
a. 啟動ping程序(長時間執行)
a. 寫一個shell script的迴圈, 將剩餘的記憶體, 打印出來觀察
2. esp sdio在probe()和remove()過程中, 沒有適當管理資源
建議除錯手法:
a. 移除多餘驅動(rtc_hym8563, tsc2007), 讓除錯更單純一點
b. 寫一個shell script的迴圈做插入驅動和移除驅動的壓力測試
另外, 建議你把kallsyms也附上來, 這樣比較好對齊Oops的位置
#278 Re: 司徒开源 » 研究FC3000掌機的開源可行性 » 2021-10-30 20:55:26
更新項目:
1. FC3000 DPAD改造
2. FC3000 L2R2改造
3. FC3000 草食系統測試版
FC3000草食系統下載位置:https://github.com/steward-fu/fc3000/releases/download/v1.1/veganos_pocketgo_20211030.img.7z
草食系統不在支援雙重開機選單,也就是不在支援官方系統,取得代之,司徒把這些多餘的腳位用來改造L2R2按鍵,剛好趁這個機會,司徒也順便改造一下FC3000掌機的十字鍵,使用3D印表機打印一個墊高支撐架,讓手感更好一些,過程說明如下~
OpenSCAD程式代碼
$fn = 100;

difference(){
  union(){
    cylinder(5, 4, 2);
    translate([0, 0, 4.7]){
      sphere(2);
    }
  }
  translate([0, 0, -1.5]){
    sphere(3.5);
  }
}
預覽圖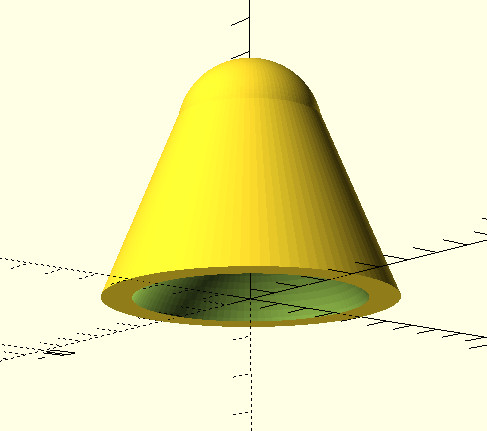
列印後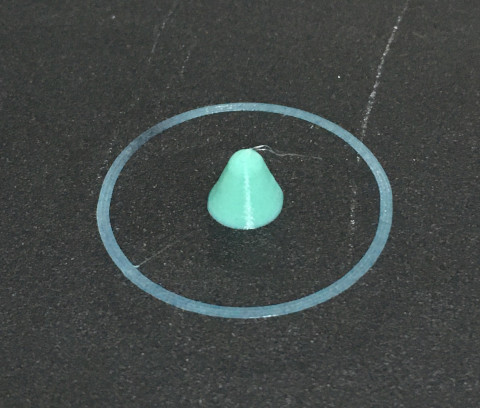
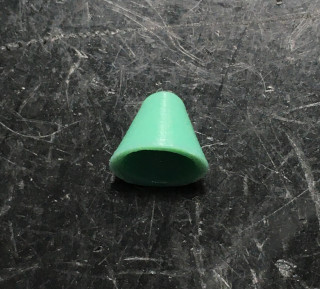
直接插入即可卡住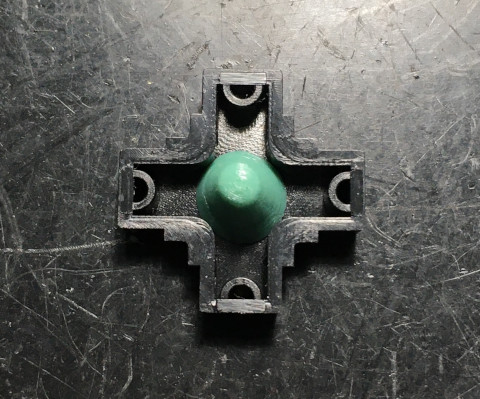
墊高部份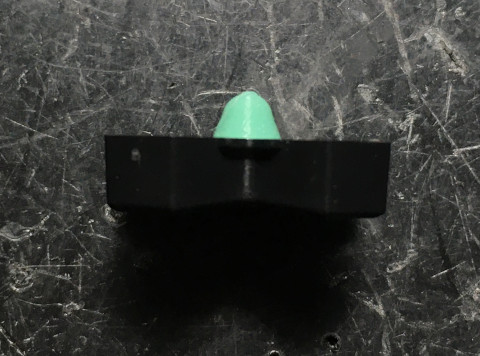
接著司徒說明一下如何改造L2R2按鍵,由於,司徒超怕落塵,因此,先拆掉擋板,這樣比較方便找尋擺放按鍵的位置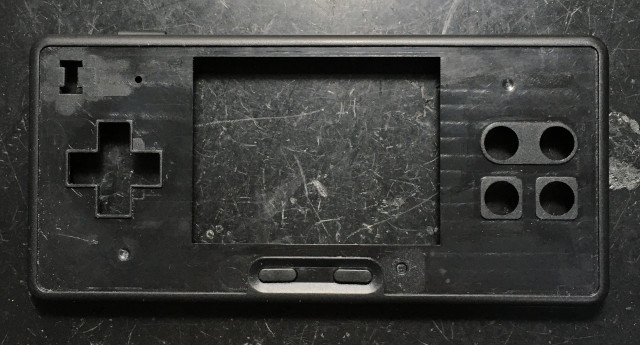
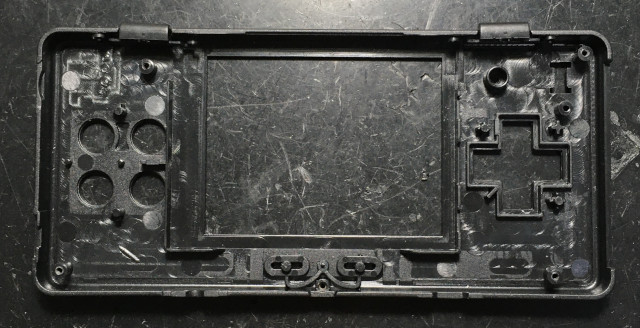
原本位置如下,缺點是跟其它按鍵太過接近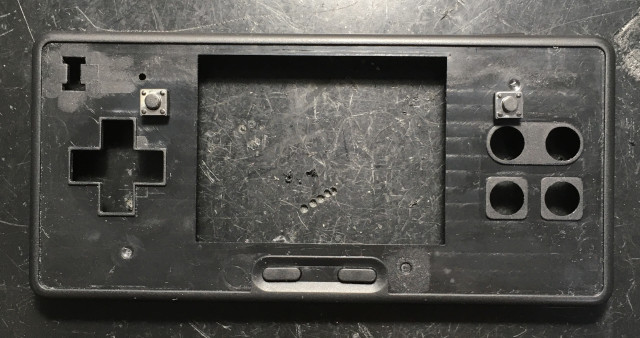
接著找尋更好的位置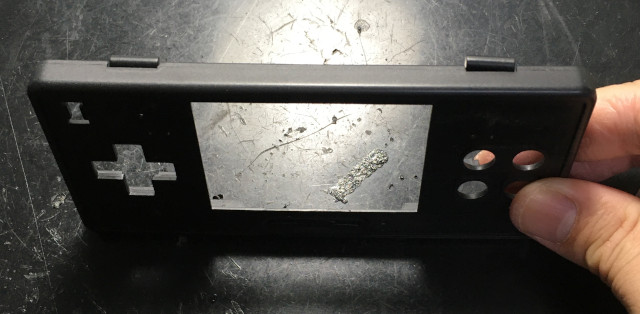
感覺不錯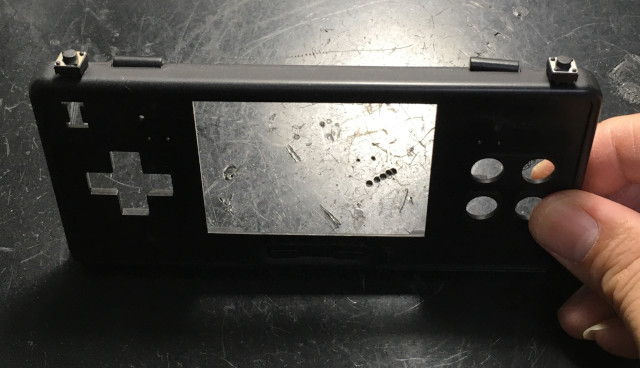
漂亮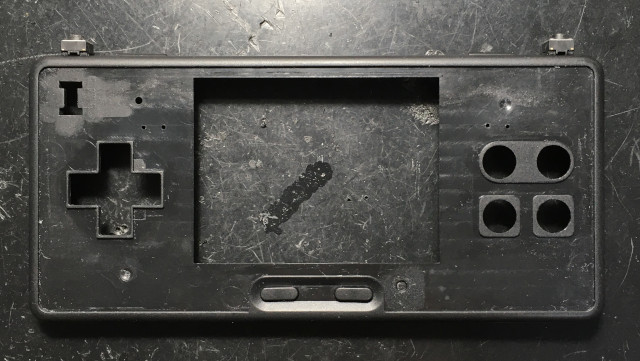
可以使用的GPIO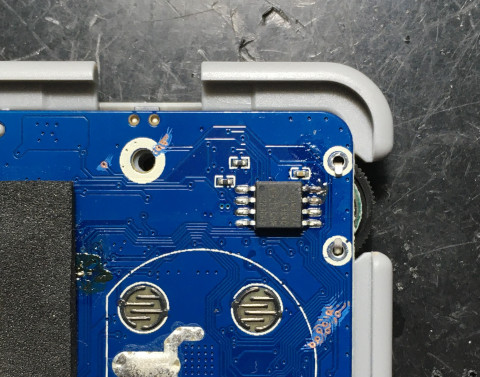
腳位
跳線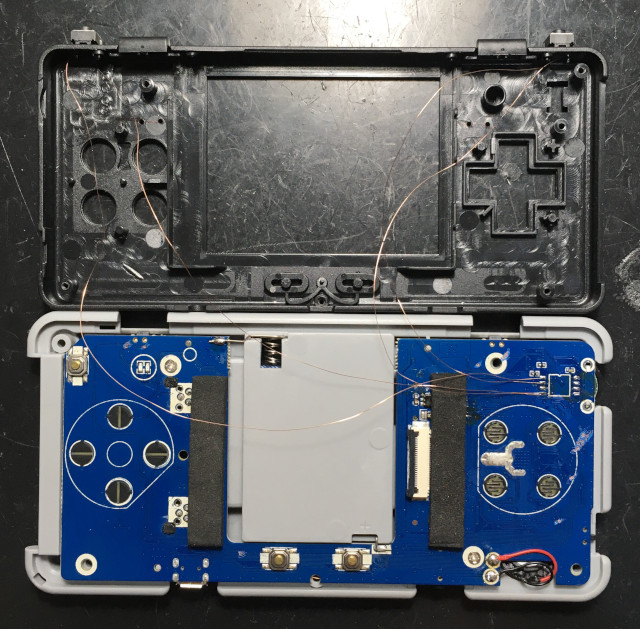
按鍵測試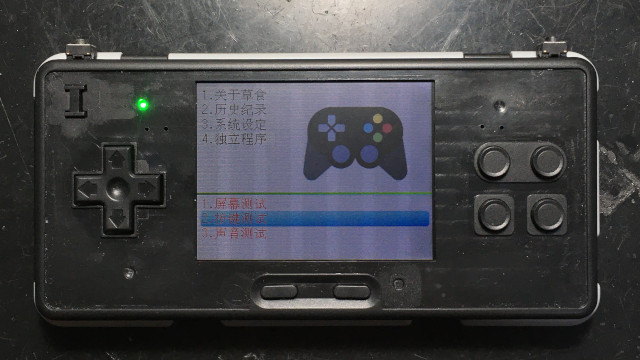
R2鍵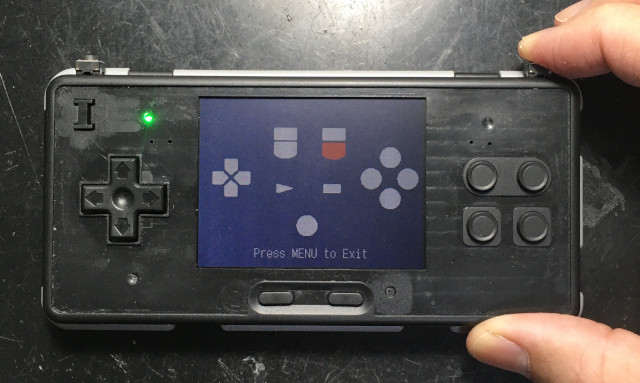
L2鍵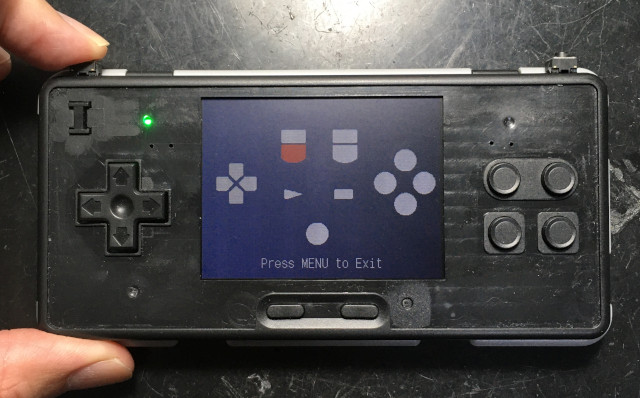
堪用的機器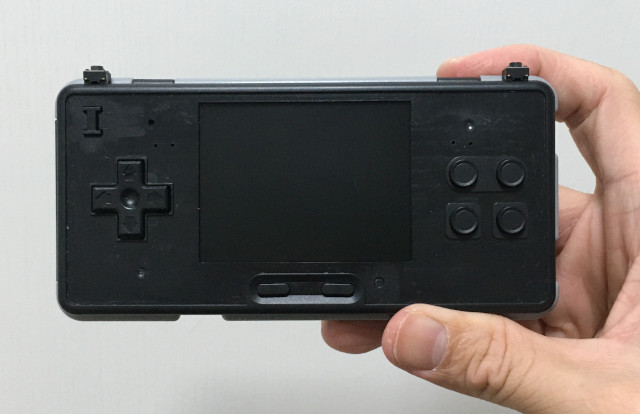
#279 Re: 司徒开源 » 研究FC3000掌機的開源可行性 » 2021-10-30 09:33:17
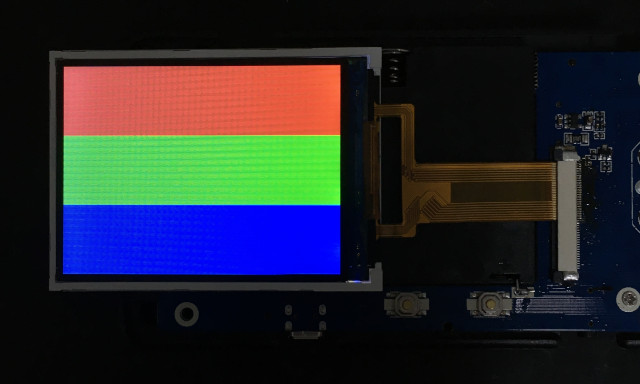
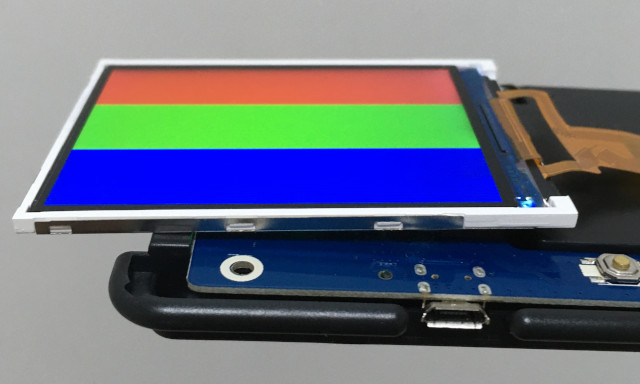

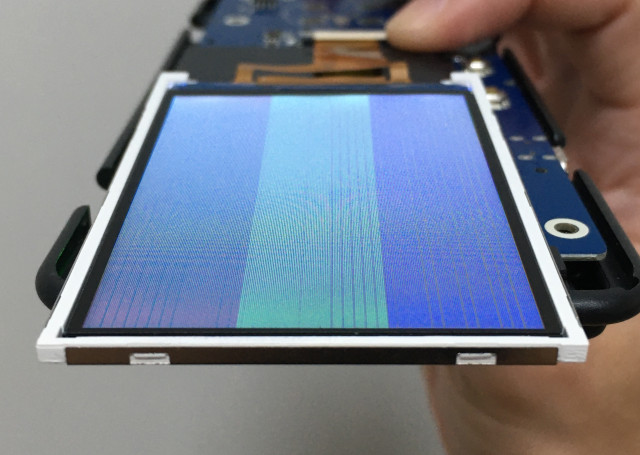
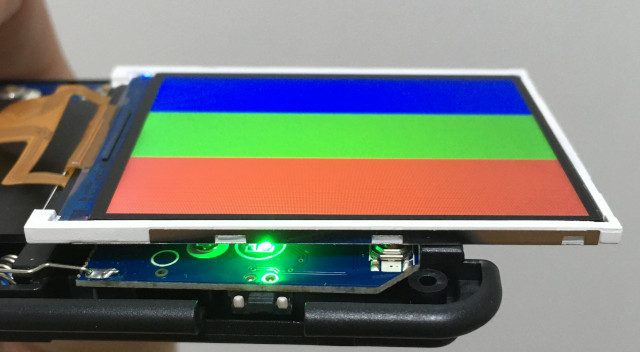
#280 Re: 司徒开源 » 研究FC3000掌機的開源可行性 » 2021-10-29 07:02:43
#281 Re: 司徒开源 » 研究FC3000掌機的開源可行性 » 2021-10-28 21:29:05

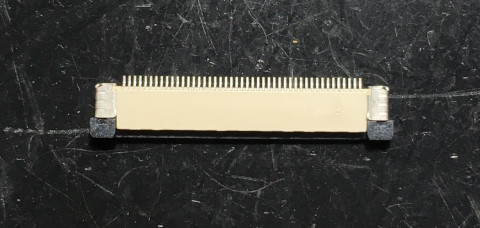
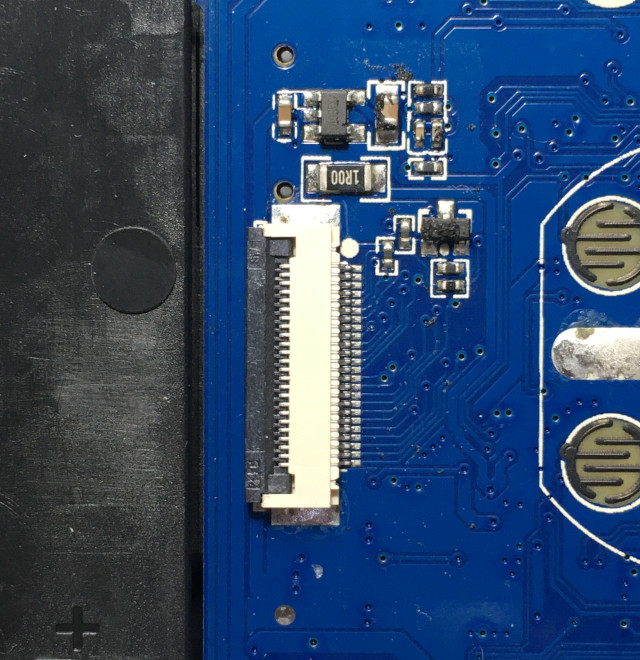
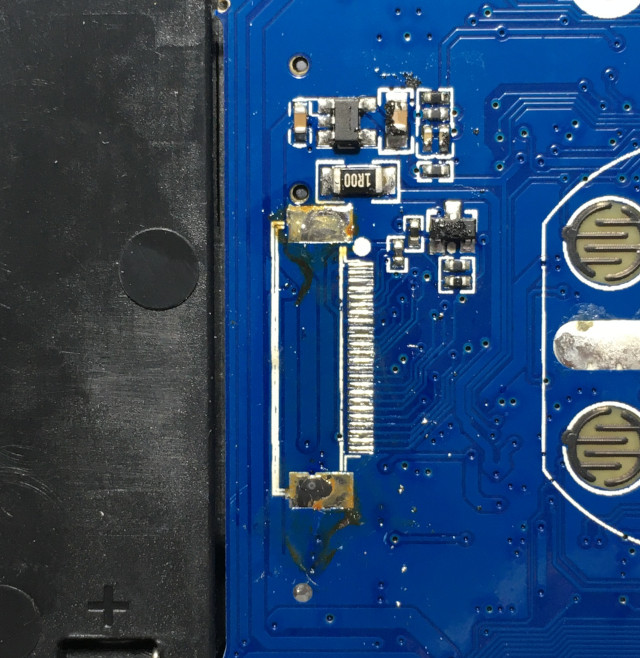
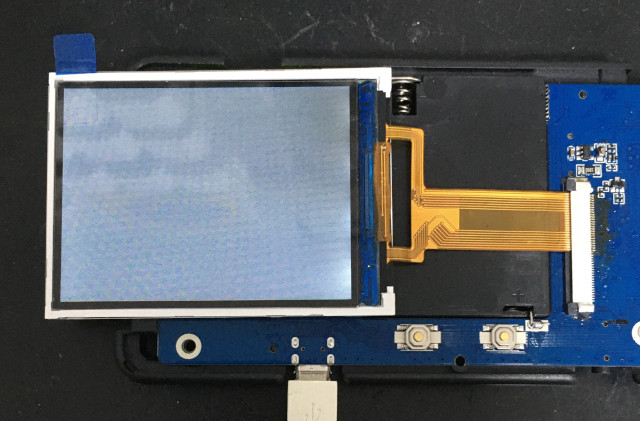
#282 Re: 司徒开源 » 研究FC3000掌機的開源可行性 » 2021-10-21 11:22:03
#283 Re: 司徒开源 » 研究FC3000掌機的開源可行性 » 2021-10-16 21:50:18
#284 Re: 司徒开源 » 研究FC3000掌機的開源可行性 » 2021-10-16 13:00:38
@IsaacJ
OK
更新事項:
1. 草食系統測試版(只提供按鍵、屏幕測試)
2. 小橫米L2R2改造
PocketGo草食系統下載位置:https://github.com/steward-fu/pocketgo/releases/download/v1.2/veganos_pocketgo_20211016.img.7z
P. S. FC3000、TRIMUI會擇期釋出測試版
目前草食系統已經完成了一半的工作量,剛好搭配L2R2按鍵測試,司徒發布一版測試版,待正式發布時,司徒會做詳細介紹,目前只做簡單描述~
草食系統 製作的原因:
1. 更簡單易用的操作環境 (小白也知道如何使用)
2. 快速進入系統 (目前4.5秒進入系統,司徒預期1秒要進入系統)
3. 避免MicroSD卡崩 (重新設計的系統架構,除了cfg、swap檔案,其餘都使用唯讀方式掛載)
4. 採用核心做動態顯示 (取消傳統ICON方式,由核心做動態加載顯示)
5. 採用快照方式做暫存 (在選單中,斷電再開機後,可以從選單回到上次玩遊戲的位置)
草食系統 借鑒的地方
1. macOS GUI (整體界面風格使用類macOS GUI製作)
2. RetroArch (運作架構使用RetroArch的主從方式並且重新設計)
3. GCW-Zero (資源封裝採用GCW-Zero使用的SquashFS壓縮方式)
4. RG351MP (字型檔案從RG351MP提取使用)
5. Blackberry Priv (電源條的想法來自Blackberry Priv的設計)
草食系統的英文名稱是取自素食字眼Vegan,因此,司徒稱它為VeganOS,所有執行程序都是以*.VPK方式呈現,VPK就是VeganOS PacKage的意思,VPK是一個很特別的串接格式,司徒在正式發布時會說明原理,GUI使用一體三面方式設計,在一個畫面上同時顯示3樣東西,如下圖: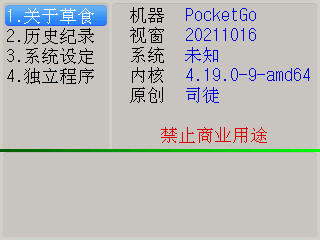
P. S. A、B按鍵用來做第一層和第二層的跳躍、返回動作,藍色字體屬於資訊類,紅色字體屬於警告類
接著司徒說明一下如何改造小橫米的L2R2按鍵~
由於PocketGo已經沒有多餘可用腳位,因此,司徒最後決定拿LCD_RD、LCD_CS作為L2、R2使用,腳位如下: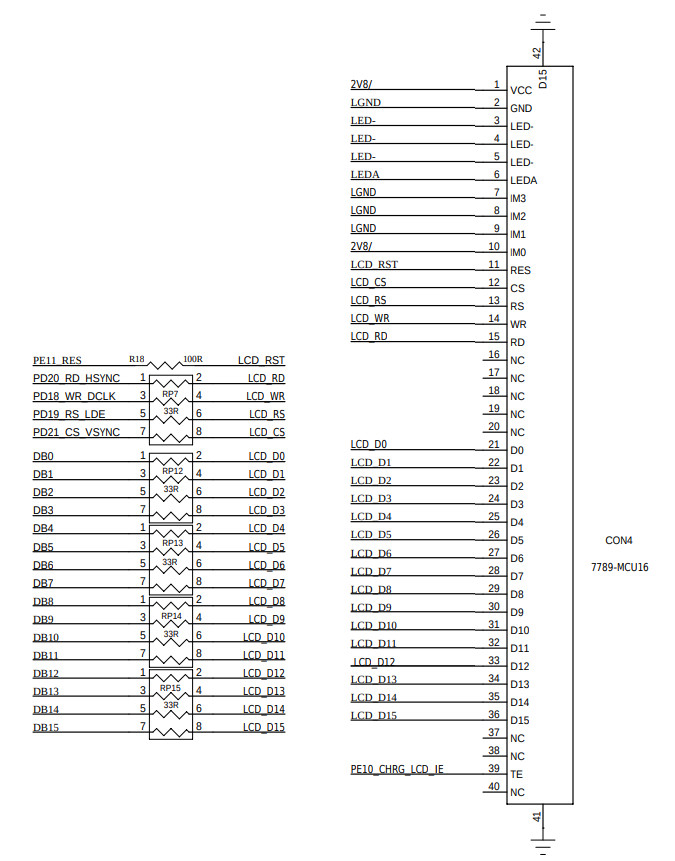
LCD_RD、LCD_CS對應到I/O腳位是PD20、PD21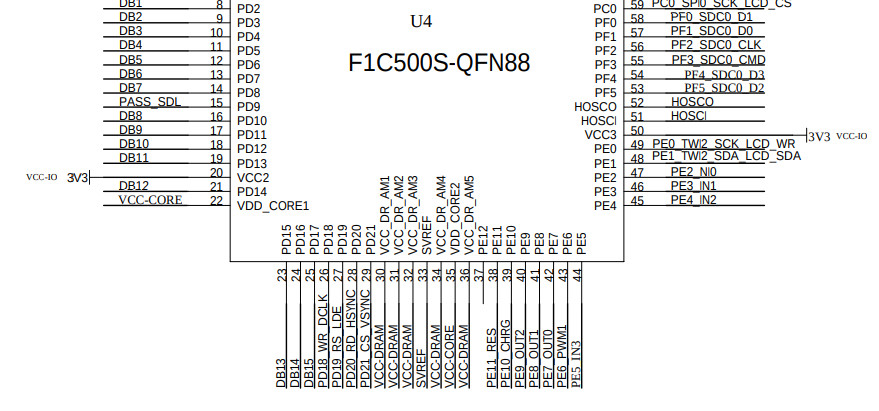
接著找尋風水寶地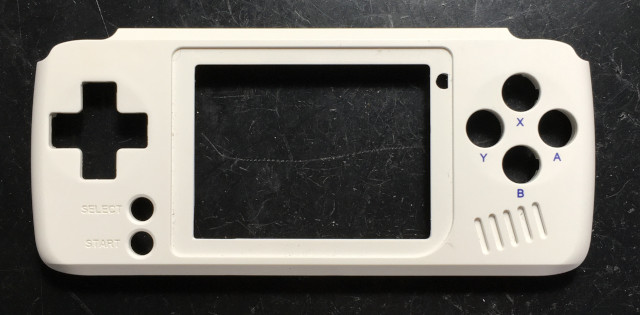
這個地理位置不錯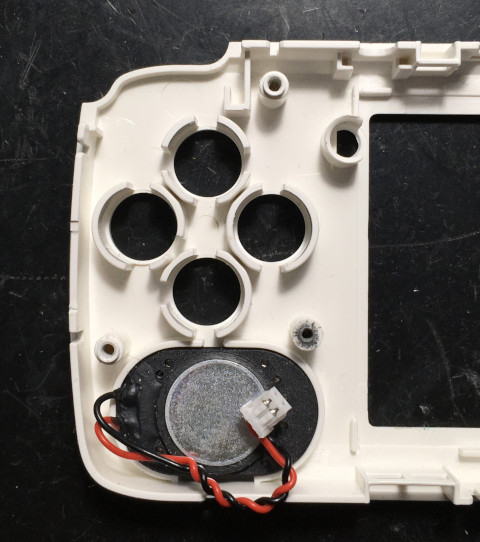
司徒使用小巧可愛的按鍵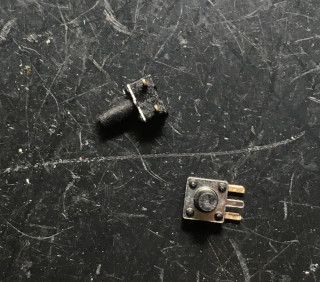
標注位置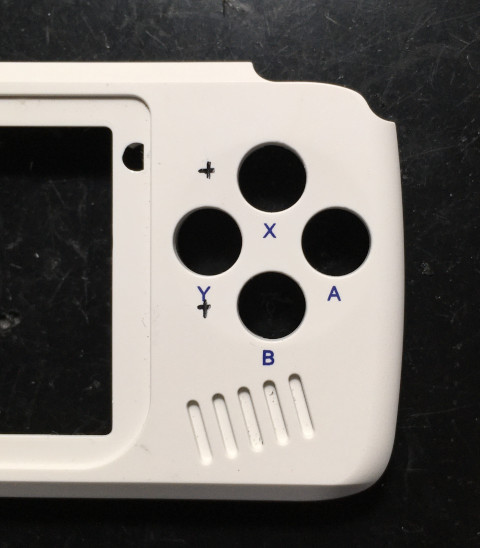
鑽孔
PCB對應位置如下:
割斷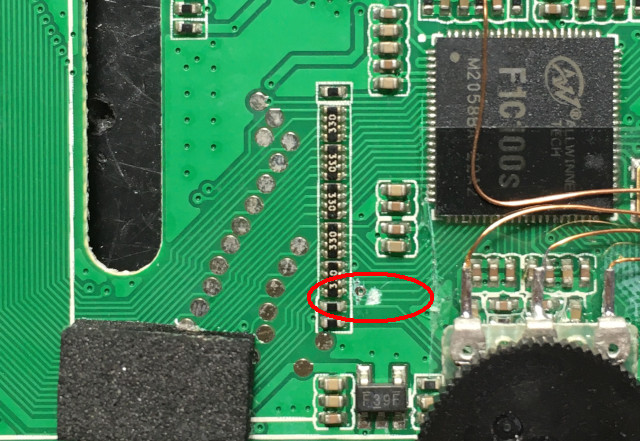
LCD_RD接到VCC,LCD_CS連接到GND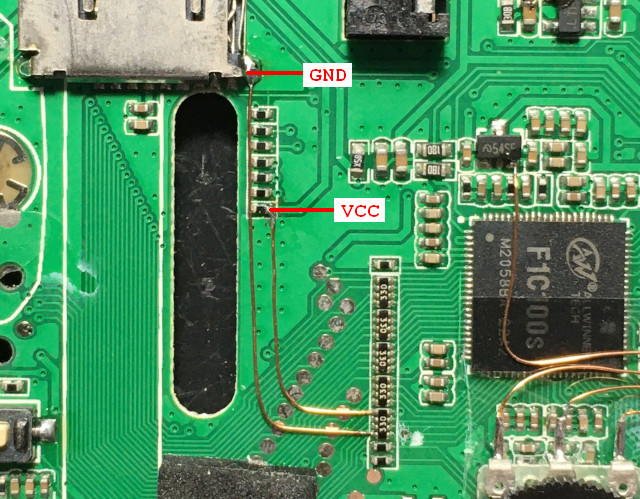
測試一下是否可以正常顯示
刮線上錫
黏上按鍵
熱溶膠盡量跟模具切齊,因為,這樣可以使用PCB壓住按鍵,避免脫膠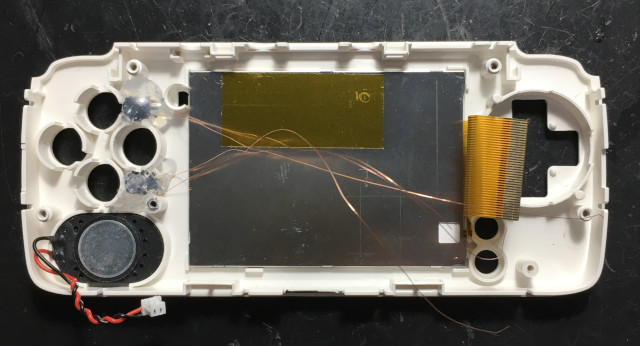
跳線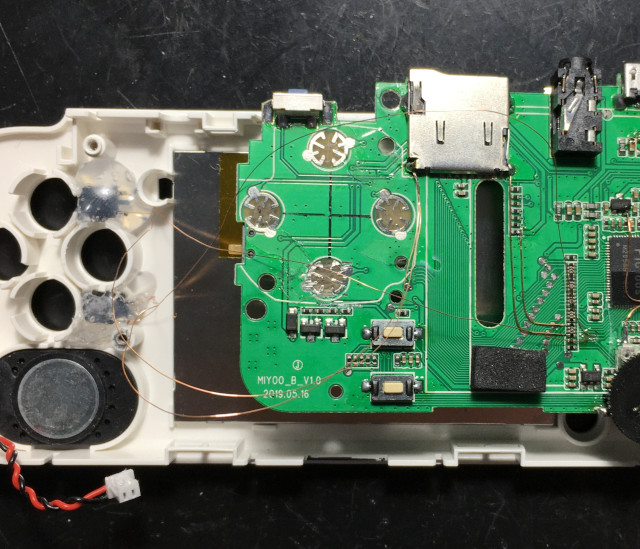
按鍵的高度可以隨個人購買不同高度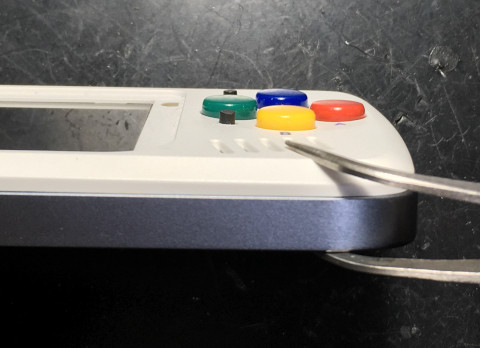
滿意滿意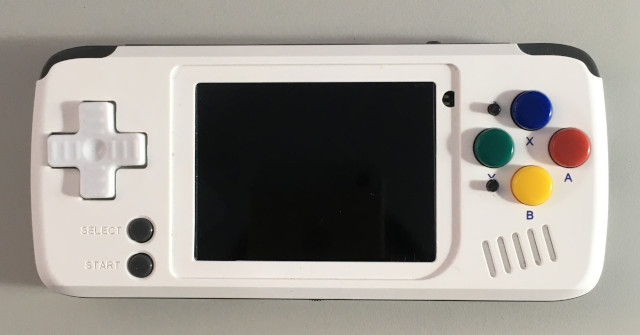
接著測試L2R2按鍵是否改造完成,首先,開啟L2R2支援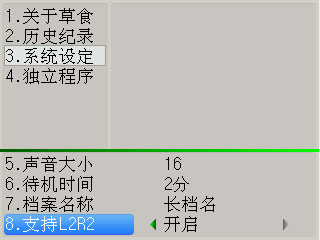
進入測試程序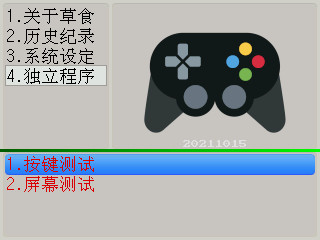
P. S. 紅字部份代表目前的程序或者模擬器是測試版本
完成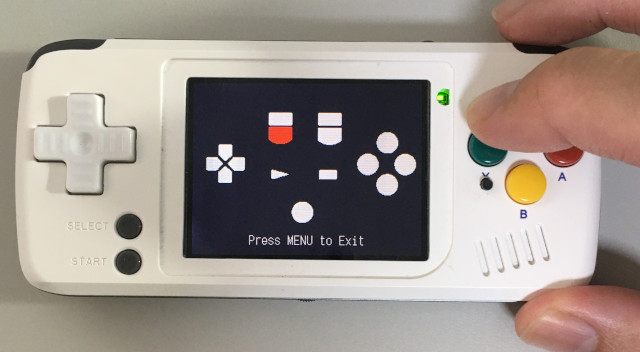
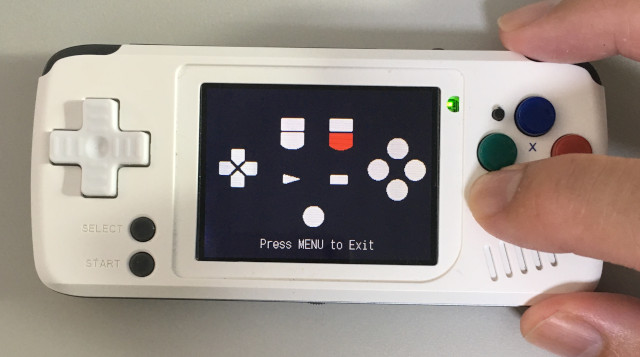
有任何建議或者問題,都相當歡迎建議給司徒,感謝~
#285 Re: 好钜润半导体(TIKY) » 好钜润3.5寸屏RGB888模式,无法点亮 » 2021-10-15 17:32:27
#286 Re: 司徒开源 » 研究FC3000掌機的開源可行性 » 2021-10-14 22:14:36
@IsaacJ
由於燒錄到MicroSD的資料包含啟動程序,因此,該卡就具備從MicroSD開機的功能,如果要刪除這個啟動程序,你必須重新切割分割表(不是格式化)~
我發現還是有蠻多玩家希望自己的IPS FC3000可以刷新系統,雖然我之前說過,多花錢在FC3000身上,會失去它廉價的優勢,不過為了可以讓更多FC3000可以擁有IPS屏,我搜尋了一下淘寶店家,發現有賣2.8吋IPS 320x240,價格是25.5RMB,腳位是24Pin且相容可用,店家說下週才有貨,所以我應該會買幾片來測試看看,如果有發現更便宜的2.8吋IPS屏320x240 24Pin,歡迎跟我說,我可以買來測試一下~
#287 Re: 好钜润半导体(TIKY) » 好钜润3.5寸屏RGB888模式,无法点亮 » 2021-10-14 18:33:08
#288 Re: 全志 SOC » 请问有没有大神搞定了f1c100s的主线kernel4.19下的声卡驱动?[13楼@wammaw1314搞定声卡驱动,欢迎测试] » 2021-10-14 10:35:55
#289 Re: 司徒开源 » 研究FC3000掌機的開源可行性 » 2021-10-11 13:43:18
#290 Re: Xilinx/Altera/FPGA/CPLD/Verilog » 安路td软件最新破解lic文件 » 2021-10-11 13:41:40
如果是使用Linux版本,我有逆向Patch掉效期問題,你可以參考如下:
https://steward-fu.github.io/website/mcu/eg4s20/patch_license.htm
#293 DIY/综合/Arduino/写字机/3D打印机/智能小车/平衡车/四轴飞行/MQTT/物联网 » 樹莓派CM4塞進GBA外殼的眾籌 » 2021-10-05 13:42:24
- 司徒
- 回复: 8
Kickstarter上面的一個眾籌,將樹莓派CM4塞進GBA外殼,雖然有點小貴,喜愛DIY掌機的玩家可以參考看看~時間只有到2021/10/15~
網址:https://www.kickstarter.com/projects/eddietay/retro-dreamer-g4a-cm4-by-my-retro-game-case/posts
影片:https://www.youtube.com/watch?v=A_ipSY58WdY&ab_channel=ETAPRIME
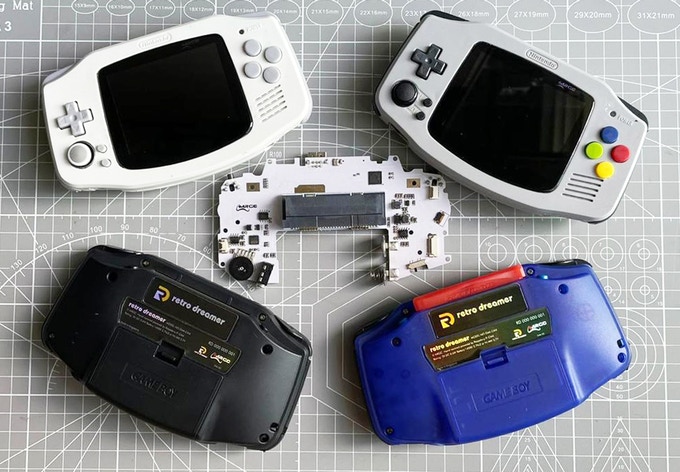
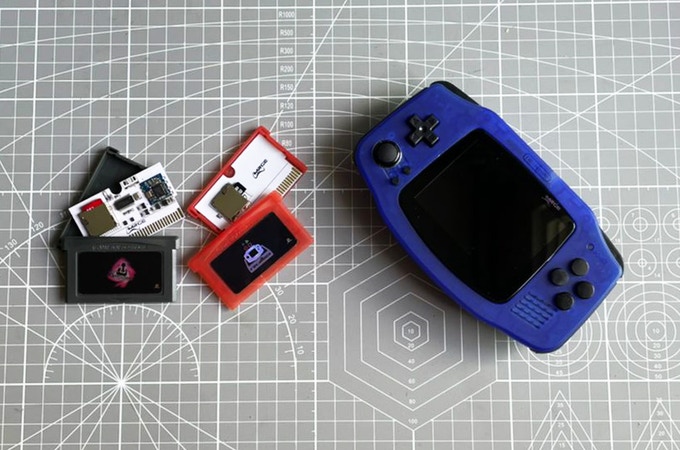
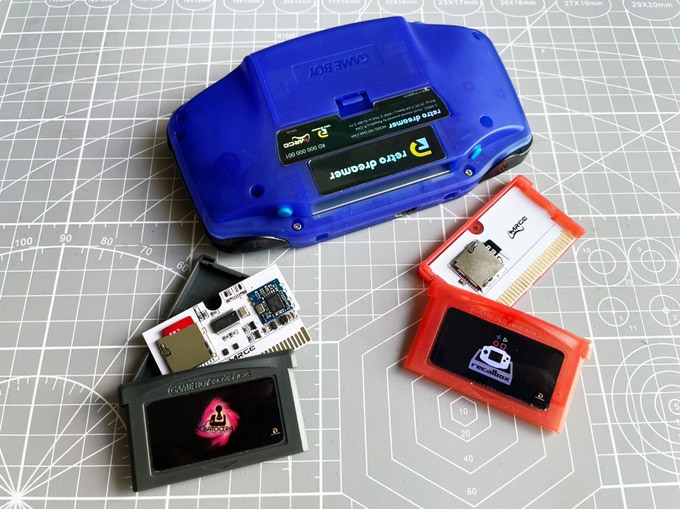

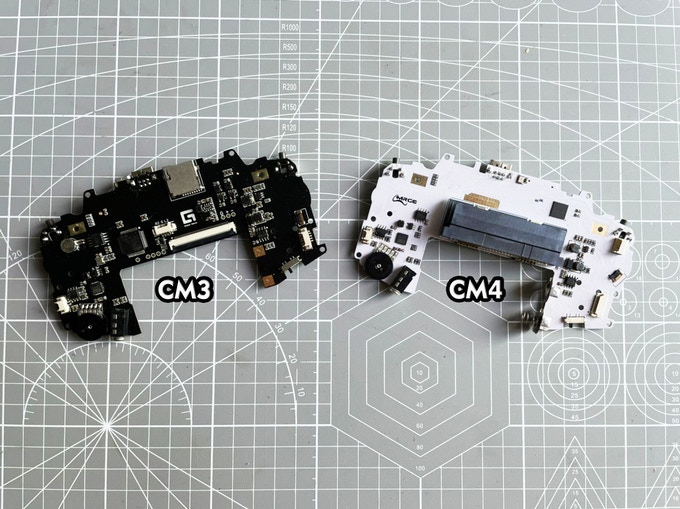
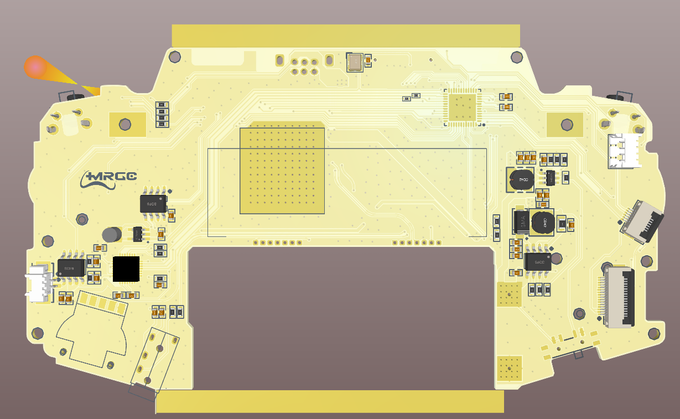
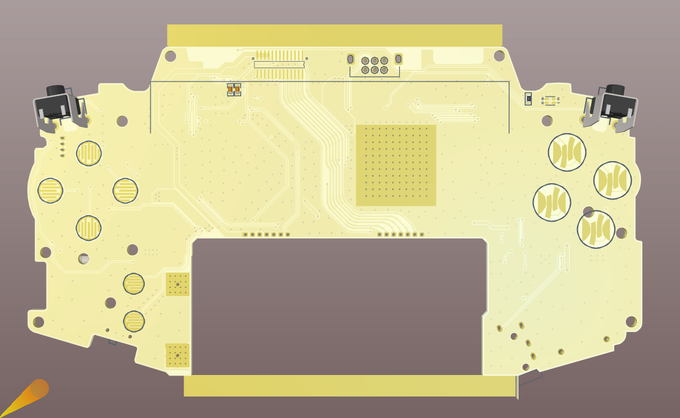

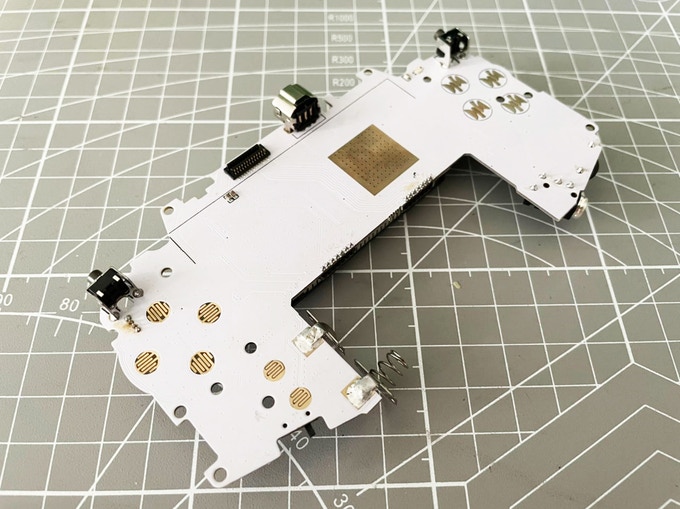
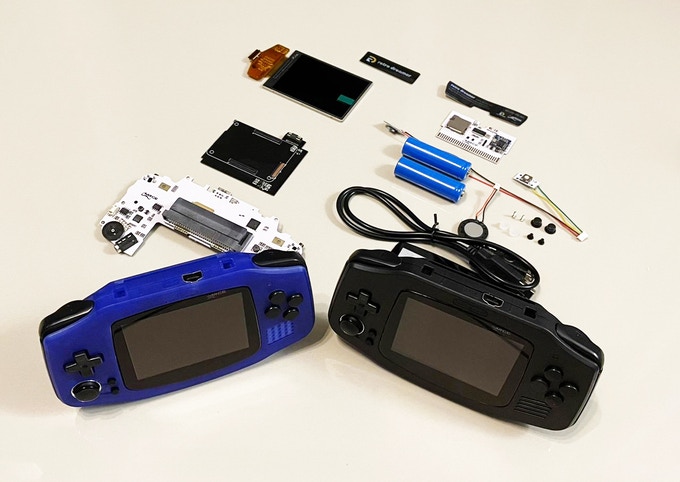

#294 Re: 司徒开源 » 研究FC3000掌機的開源可行性 » 2021-10-04 11:17:06
#295 Re: 司徒开源 » 研究FC3000掌機的開源可行性 » 2021-09-28 17:53:50
#296 Re: 司徒开源 » 研究FC3000掌機的開源可行性 » 2021-09-28 13:43:55
#297 Re: 司徒开源 » 研究FC3000掌機的開源可行性 » 2021-09-27 20:22:17
#298 Re: 司徒开源 » 研究FC3000掌機的開源可行性 » 2021-09-27 15:45:21
@maxzhou88
周哥~好久不見了~小弟在此屈膝給您老人家請安~祝周哥 福如東海,壽比南山~司徒還念念不忘你那漂亮的女兒~
時間過得真快,距離上次爭吵也已經快一年了,那時候,司徒正直更年期,火氣有點盛大,因此,對於你老人家說話有點太過份,
司徒在此跟你道歉,也希望你老人家可以原諒小弟的過錯~
距離RetroGame(RS97)掌機問世已經過了3年多,希望周哥可以繼續做一些CP值高的掌機,就如同當初RS97掌機的榮景~
高CP值的定義就是要夠便宜、質量夠好、夠好攜帶,當然不是要周哥把自己的豪宅賣掉做虧本機器給我們玩家爽~
只是希望周哥想起當初為何要作Revo K101的初心~至少以後等我老了,我還可以跟小孩說說周哥的好機器~
對了~我還欠RG280M掌機一個系統,這部份我沒有忘記,之後我會找時間補上~
敬祝 安康
司徒
#299 Re: 司徒开源 » 研究FC3000掌機的開源可行性 » 2021-09-24 10:58:09
#300 Re: 司徒开源 » 研究FC3000掌機的開源可行性 » 2021-09-17 19:44:46
請更新GNO檔案試試
GNO:https://github.com/steward-fu/neogeo/releases/tag/v1.1
使用SP-S2 BIOS測試的結果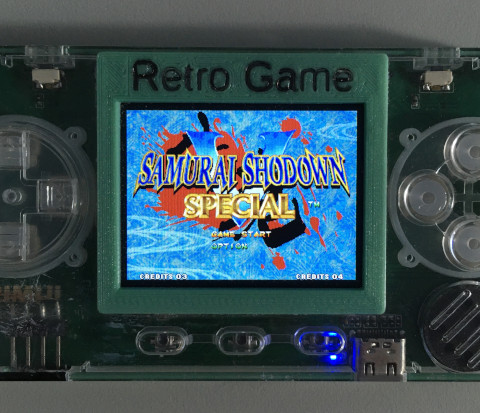
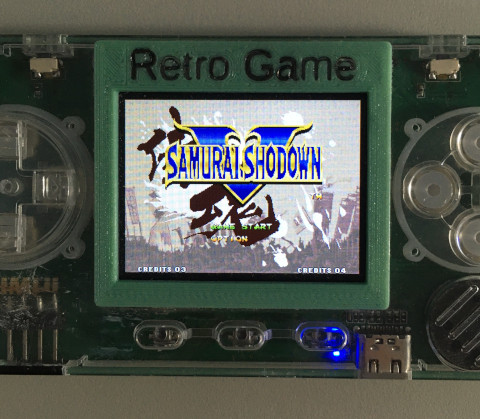
#301 Re: 司徒开源 » 研究FC3000掌機的開源可行性 » 2021-09-17 08:23:10
@fullniz
參考資料:https://gist.github.com/crabtw/3d4fee3049e342554134
後期的unibios使用bit-1當做街機投幣按鈕
--- src/event.c.orig	2016-01-01 15:55:03.995071650 +0800
+++ src/event.c	2016-01-01 15:56:36.584921148 +0800
@@ -385,6 +385,11 @@
 	if (joy_state[1][GN_START])
 		memory.intern_start &= 0xFB;

+	if (joy_state[0][GN_SELECT_COIN])
+		memory.intern_start &= 0xFD;
+	if (joy_state[1][GN_SELECT_COIN])
+		memory.intern_start &= 0xF7;
+
 	/* Update P1 */
 	memory.intern_p1 = 0xFF;
if (joy_state[0][GN_UP] && (!joy_state[0][GN_DOWN]))#302 Re: 司徒开源 » 研究FC3000掌機的開源可行性 » 2021-09-16 13:52:33
#303 Re: 司徒开源 » 研究FC3000掌機的開源可行性 » 2021-09-14 22:13:52
1. 由於VSYNC的原因,所以,原來用來偷時間的機制不見了,導致FPS下降,超頻無法改善這個問題,顯示驅動以及PS模擬器需要修改解決這個問題~
2. 如何更方便的使用組合鍵去調整背光以及音量,這個部份,感謝你的建議,讓我想一下哪種方式比較好~
3. 黑屏問題,原因找到了,GMenu2X進入待機後,背後服務程序把目前背光值寫入.backlight.conf,所以,再次按下MENU鍵時(從待機返回正常),GMenu2X卻再次讀取.backlight.conf(黑屏時為0)並且設定背光,導致系統假死狀態,其實只是沒有背光而已~
感謝你的意見,司徒把上敘問題解決後,會再出一個修正補丁,目前機器還沒打補丁的,請先不要打~
#304 Re: 司徒开源 » 研究FC3000掌機的開源可行性 » 2021-09-14 19:49:37
#305 Re: 司徒开源 » 研究FC3000掌機的開源可行性 » 2021-09-13 10:57:11
FB0不建议使用:補丁對這個沒有任何影響,因為FB0是直接操控顯示緩衝區,所以打或者不打,都是一樣有閃屏問題,打完補丁也不會有任何改善~
另外,GBA模擬器可以先使用我上次修復的那一版,那一版是使用SDL雙緩衝方式,所以不會有閃屏問題~
GBA模擬器:https://whycan.com/files/members/3145/gpsp_fix_border_tearing_bios.zip
#306 Re: 司徒开源 » 研究FC3000掌機的開源可行性 » 2021-09-12 00:04:44
作為最後一版以OpenDingux系統名目發布的更新,這篇文章有點長、更新有點複雜~
故事起因從司徒隨身攜帶TRIMUI掌機說起,外出時,司徒習慣帶上TRIMUI掌機,一有空檔,拿出來搓兩把KOF,爽度破表~缺點就是開機慢了點,但是,搓了幾次之後,司徒發現TRIMUI竟然還有閃屏問題(小橫米解決的比較乾淨),於是,司徒開始追查TRIMUI這個閃屏問題,最後發現在內核的PAN_DISPLAY()並沒有處理好,導致中斷副程式在刷屏時,模擬器有機會再次覆蓋緩衝區,導致閃屏問題,解決TRIMUI閃屏後,司徒也順便加入VSYNC同步機制(FBIO_WAITFORVSYNC),讓整個畫面顯示可以更穩定,也可以讓模擬器有一個同步機制,朝更好的方向發展~
於是,司徒心想,不如就趁這個機會,也把有閃屏問題的模擬器也一併解決,司徒的想法是修改內核、SDL元件庫來配合模擬器的閃屏問題,這是短期的最佳解決方式,如果可以順利解決閃屏問題,這些模擬器應該可以撐上一陣子,司徒只要慢慢修改RK模擬器就好~目前看來,這是一個錯誤的決定,因為司徒深入追查後,發現有些模擬器是無法解決閃屏問題的,表格整理如下: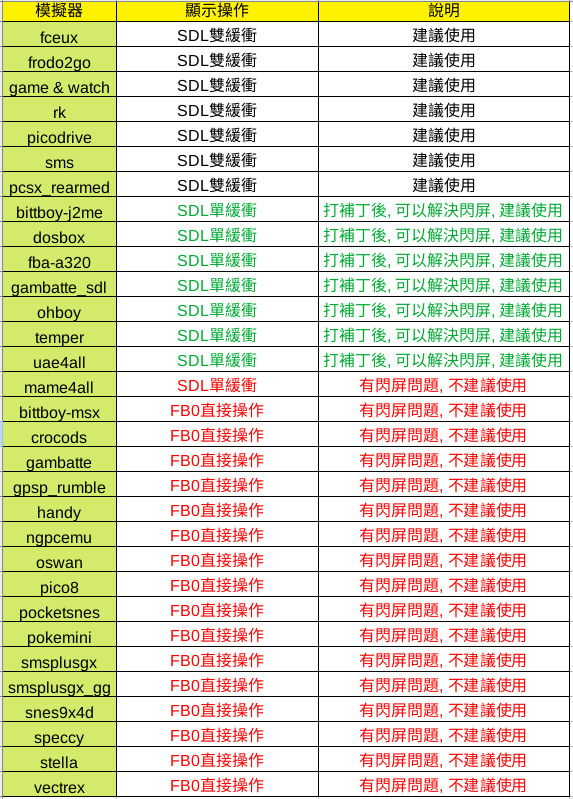
SDL雙緩衝是標準寫法,這部份的模擬器不會有閃屏問題,SDL單緩衝則會有閃屏問題,因為只有一個緩衝區做傳遞,加上SDL元件庫的SDL_Flip()不做VSYNC同步,所以模擬器在更新畫面時,內核也在更新畫面,所以一定有閃屏問題,FB0直接操作是直接映射FB0緩衝區做寫入動作,優點就是速度快(省掉SDL元件庫的複製動作),但是,這位作者缺少做VSYNC的動作,所以模擬器瘋狂刷屏時,內核也在刷屏,確定會有閃屏問題,這些FB0操作的模擬器,應該都是出自同一個人,司徒也知道是誰,不方便繼續評論~
因此,從結果來看,可以用的模擬器(不會有閃屏問題),真的沒幾個~這也是司徒決定提前汰換掉OpenDingux的原因之一~
接著,司徒便開始研究是否有機會救救SDL單緩衝的模擬器,讓這些模擬器不會有閃屏問題,幸運地,透過修改SDL元件庫,從SDL_UpdateRect()進行修改並且配合內核調用,可以順利解決閃屏問題
void SDL_UpdateRect(SDL_Surface *screen, Sint32 x, Sint32 y, Uint32 w, Uint32 h)
{
  if(need_fbflip){
    #define MYFB_FLIP _IOWR(0x100, 0, unsigned long)
    ioctl(*((int*)current_video->hidden), MYFB_FLIP, screen->pixels);
  }
  else{
    if ( screen ) {
      SDL_Rect rect;

      /* Perform some checking */
      if ( w == 0 )
        w = screen->w;
      if ( h == 0 )
        h = screen->h;
      if ( (int)(x+w) > screen->w )
        return;
      if ( (int)(y+h) > screen->h )
        return;

      /* Fill the rectangle */
      rect.x = (Sint16)x;
      rect.y = (Sint16)y;
      rect.w = (Uint16)w;
      rect.h = (Uint16)h;
      SDL_UpdateRects(screen, 1, &rect);
    }
  }
}
司徒在SDL_SetVideoMode()判斷是否為SDL_DOUBLEBUF,如果不行,則拉起一個旗標,接著,後續更新都由內核配合刷屏
司徒對顯示驅動進行修改並且開啟四倍緩衝(Quad Buffer):
SDL單緩衝:第一塊緩衝區由SDL支配使用,第二、三塊緩衝區作為刷屏使用,第四塊緩衝則作為OSD備份區域
SDL雙緩衝:第一、二塊緩衝區由SDL支配使用,第四塊緩衝則作為OSD備份區域
P.S. 所以新版顯示驅動可以支援三倍緩衝(Triple Buffer)
在這一版內核更新中,司徒加入OSD顯示支援,只要按下MENU按鍵(持續1.5秒),則會跳出OSD選單,如下:
在OSD模式下(亮度10階,音量16階),只有如下按鍵可以操作,其餘按鍵是鎖定狀態:
上鍵:亮度增加
下鍵:亮度減少
左鍵:音量減少
右鍵:音量增加
MENU鍵:離開OSD模式
P.S. OSD屬於內核級別,因此,任何時候都可以叫出OSD,包含遊戲中~
聲音驅動部份,司徒也把音量調節拉到sysfs,方便調整音量(0~35階):
/sys/devices/platform/soc/soc:codec@1c22000/volume亮度調節位置(0~10階):
/sys/devices/platform/backlight/backlight/backlight/brightness小橫米更新部份
內核部份:
1. 支援VSYNC(FBIO_WAITFORVSYNC)
2. 支援4倍緩衝區(Quad Buffer)
3. 支援OSD模式(背光、聲音調節)
系統部份:
1. SDL元件庫修改(修復SDL單緩衝閃屏問題)
小橫米更新包
ROOTFS:https://github.com/steward-fu/pocketgo/releases/download/v1.0/rootfs_20210911
內核補丁:https://github.com/steward-fu/pocketgo/releases/download/v1.0/pocketgo_patch_20210911.zip
小橫米更新步驟
1. 透過讀卡機操作,把rootfs_20210911覆蓋到第一磁區的rootfs
2. 解壓縮pocketgo_patch_20210911.zip到第二磁區,接著執行run.sh,選擇想要更新的RAM速度,更新後,重新啟動就可以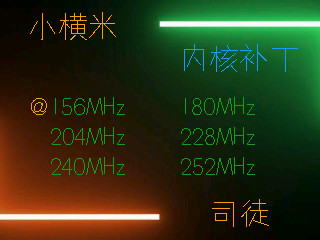

P.S. 左上角會有VSYNC圖標
TRIMUI更新部份
內核部份:
1. 解決閃屏問題
2. 支援VSYNC(FBIO_WAITFORVSYNC)
3. 支援4倍緩衝區(Quad Buffer)
4. 支援OSD模式(背光、聲音調節)
系統部份:
1. SDL元件庫修改(修復SDL單緩衝閃屏問題)
TRIMUI更新包
ROOTFS:https://github.com/steward-fu/trimui/releases/download/v1.0/rootfs_20210911
內核補丁:https://github.com/steward-fu/trimui/releases/download/v1.0/trimui_patch_20210911.zip
TRIMUI更新步驟
1. 透過讀卡機操作,把rootfs_20210911覆蓋到第一磁區的rootfs
2. 解壓縮trimui_patch_20210911.zip到第二磁區,接著執行run.sh,選擇想要更新的RAM速度,更新後,重新啟動就可以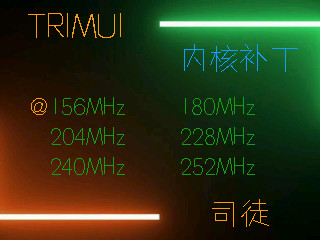

P.S. 中間會有VSYNC圖標
草食系統將在下一次發布,用來取代OpenDingux系統,草食本意為極度精簡系統,回歸最原始的初衷:好好的玩遊戲,不應該著重在主題這玩意上,司徒本身對肉食的定義就是花俏的圖標、圖片,把玩家從玩遊戲拉到玩主題的方向上,當然,人各有志,不勉強一定要玩什麼系統,司徒只是剛好想要一個適合自己的系統,順便分享給大家使用,如果合你胃口,歡迎使用,如果不合胃口,只能說聲抱歉~
由於還有很多東西還沒有做好,因此,下一次更新估計是至少一個月後了~在發布草食系統後,司徒將繼續RK模擬器原本的進度~
以上~
#307 Re: 全志 SOC » 请问有没有大神搞定了f1c100s的主线kernel4.19下的声卡驱动?[13楼@wammaw1314搞定声卡驱动,欢迎测试] » 2021-09-05 08:18:37
恭喜你把問題解決~
另外,我有兩個問題想請教你:
問題1:我從Icenowy GitHub(https://github.com/Icenowy/linux/tree/f1c100s)抓下4.15編譯,但是,我只有看到sunxi_defconfig,請問你的defconfig是哪個?因為如果要編譯出Lichee Nano DTB,需要CONFIG_MACH_SUNIV,但是sunxi_defconfig並沒開啟這個選項
問題2:我看的了一下你的Patch檔案,你的CODEC是使用.pmdown_time = 1,如果是Kernel 4.15應該是會出錯,你是改用.use_pmdown_time = 1?
#308 Re: 全志 SOC » 请问有没有大神搞定了f1c100s的主线kernel4.19下的声卡驱动?[13楼@wammaw1314搞定声卡驱动,欢迎测试] » 2021-09-04 15:01:36
#309 Re: 全志 SOC » 请问有没有大神搞定了f1c100s的主线kernel4.19下的声卡驱动?[13楼@wammaw1314搞定声卡驱动,欢迎测试] » 2021-09-04 13:56:29
#310 Re: 全志 SOC » Steward & Dr zhu V3s 掌机 » 2021-09-04 07:07:59
#311 Re: 全志 SOC » 请问有没有大神搞定了f1c100s的主线kernel4.19下的声卡驱动?[13楼@wammaw1314搞定声卡驱动,欢迎测试] » 2021-09-04 06:45:23
codec的compatible必須符合dtbs的compatible才可以被加載
sound/soc/suniv/miyoo.c
static const struct of_device_id myaudio_driver_of_match[] = {
  {
    .compatible = "allwinner,suniv-f1c500s-codec",
  },{}
};
MODULE_DEVICE_TABLE(of, myaudio_driver_of_match);
arch/arm/boot/dts/suniv.dtsi
codec: codec@1c22000 {
  compatible = "allwinner,suniv-f1c500s-codec";
  clocks = <&ccu CLK_BUS_CODEC>, <&ccu CLK_CODEC>;
  interrupts = <18>;
  status = "disabled";
};#312 Re: 司徒开源 » 研究FC3000掌機的開源可行性 » 2021-09-03 21:20:09
@lzgame02
慢走,不送了~
@M+
感謝支持
GNO檔案: https://github.com/steward-fu/neogeo/releases/tag/v1.1
RK模擬器v20210903 (小橫米、TRIMUI): https://github.com/steward-fu/trimui/releases/download/v1.0/rk_20210903.zip
RK模擬器v20210903 (RG350系列): https://github.com/steward-fu/trimui/releases/download/v1.0/jz4770_od_rk_20210903.opk
司徒目前修復許多之前無法玩的遊戲,表格整理如下: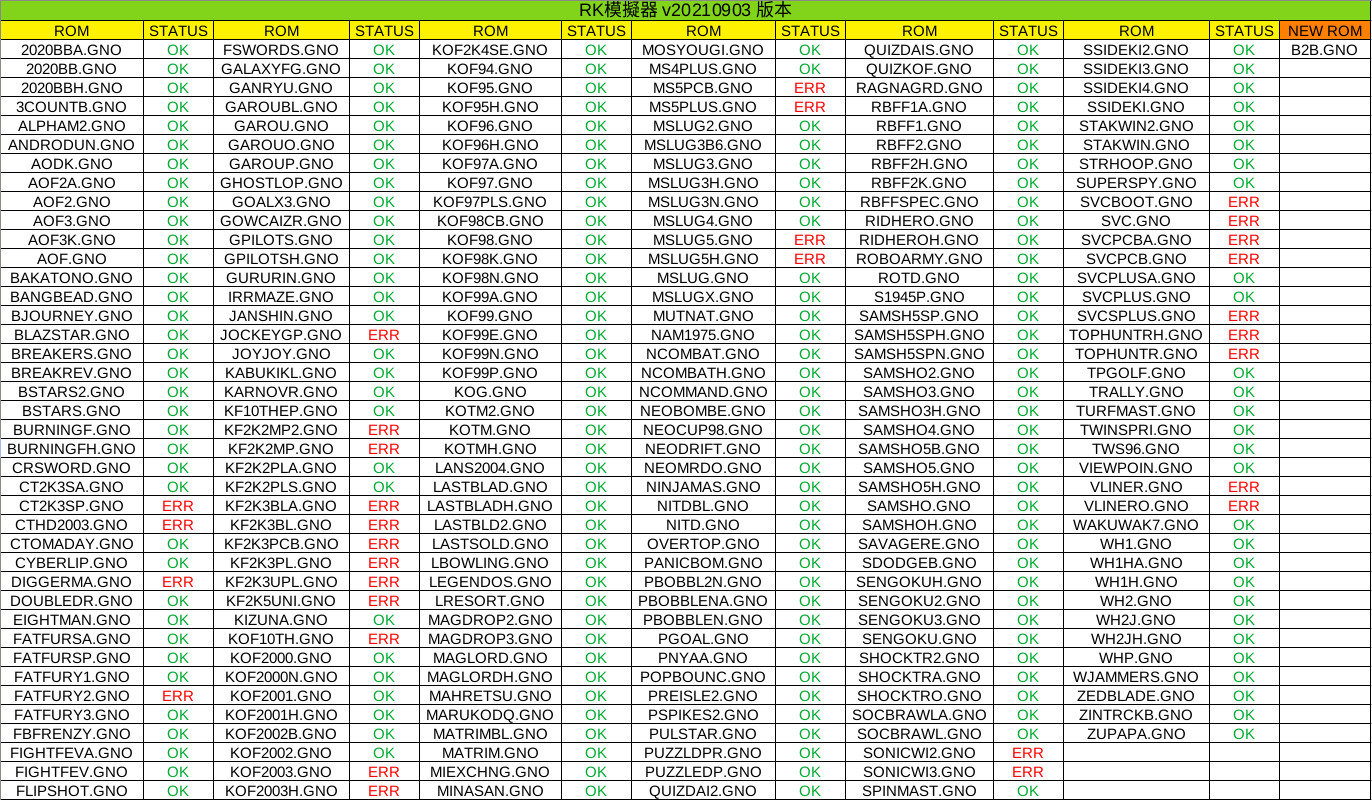
此版本加入L2、R2支援(算是幫TRIMUI鋪路)~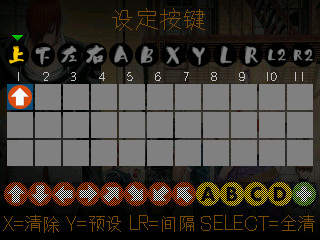
同場加映~司徒相當感謝前些日子,扬立铭贈送司徒兩台RG300X、老張贈送司徒一台鋁合金GKDMini,因此,作為報答,司徒移植RK模擬器到RG350系列掌機,司徒目前只有測試RG300X,不過,應該是可以跑在JZ4770、X1830 CPU上面,包含GCW0掌機,如果測試有問題,歡迎回報給司徒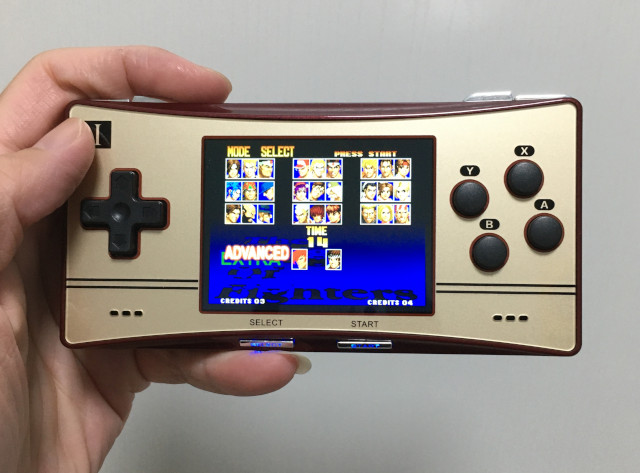
P.S. RG300X的MicroSD,建議更換高速卡,那種爛卡,真的是不建議使用~
不過,司徒最喜愛攜帶的還是TRIMUI,外出時,拿出來搓兩招,爽~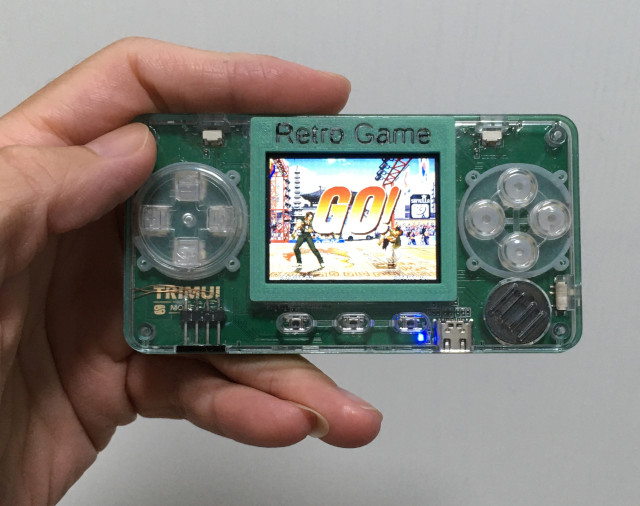
#313 Re: 司徒开源 » 研究FC3000掌機的開源可行性 » 2021-08-30 23:12:45
#314 Re: 司徒开源 » 研究FC3000掌機的開源可行性 » 2021-08-30 22:08:18
#315 Re: 司徒开源 » 研究FC3000掌機的開源可行性 » 2021-08-29 12:29:58
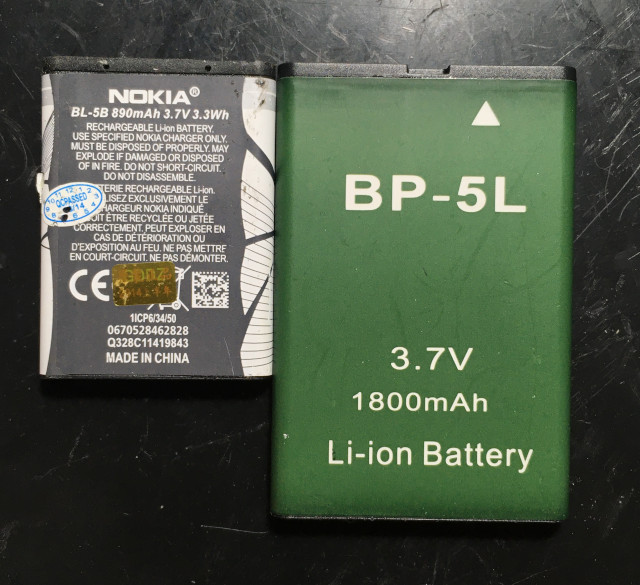
#316 Re: 司徒开源 » 研究FC3000掌機的開源可行性 » 2021-08-28 19:14:15
RK模擬器的所有配置文件位置
$(HOME)/.rk/P. S. 也就是MicroSD第二分區下的.rk資料夾
如果是儲存給全部遊戲使用,文件名稱:rk.cfg
如果是儲存給目前遊戲使用,文件名稱:xxx.cfg
P. S. 省去轉換格式,文件是二進制格式,因此,請不要編輯它,一鍵搓招並不是一個獨立的配置檔案
當初司徒在設計一鍵搓招時,有在思考是否需要儲存多組一鍵搓招的選項,但是,考慮到搓招隨著人物、版本,差異頗大,如果把設置保留下來,這樣將讓一鍵搓招失去樂趣,也讓設定更複雜,因此,司徒最終才以嚐鮮的方式呈現,當然,還是建議不要太依賴一鍵搓招,因為,司徒自己把玩後,發現太依賴一鍵搓招,反而更容易被電腦KO,哈~
#317 Re: 司徒开源 » 研究FC3000掌機的開源可行性 » 2021-08-26 13:35:49
#320 Re: 司徒开源 » 现在GP2X-F300还有研究的价值吗? » 2021-08-26 12:44:19
@fabeyond
很抱歉,現在才看到你的訊息~
其實司徒個人是很愛GP2X Wiz掌機,Wiz和F300是同一系列CPU,對於司徒來說,有其研究價值,畢竟這機器可以從533MHz超頻到800MHz,Wiz、F300的屏幕都算是不錯,國外有人研究F300,網址如下:
https://www.gp2x.dev/devboard/
由於司徒目前只專注在小橫米、TRIMUI掌機,因此,沒有時間可以研究GP2X系列的掌機~
#321 Re: 司徒开源 » 研究FC3000掌機的開源可行性 » 2021-08-26 09:28:31
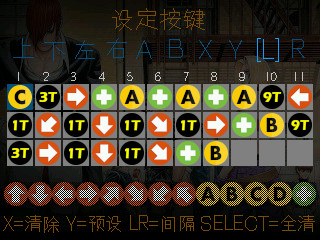

#322 Re: 司徒开源 » 研究FC3000掌機的開源可行性 » 2021-08-26 08:53:11
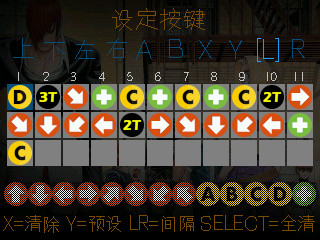

#323 Re: 司徒开源 » 研究FC3000掌機的開源可行性 » 2021-08-25 19:17:38
@老黄lh
很抱歉,目前沒有辦法~
司徒深知各位老男人已經很久沒有玩街機遊戲了~主要原因是搓招速度跟不上(手會抖)、反應太慢(一扎眼就被KO了),老男人只能回味當年自己的KOF有多強,從實踐者,退化成一個嘴砲王,因為,現今已經展現不出當年的雄風,你們的問題,司徒都知道,因為司徒也遇到一樣的問題~為此,司徒特別開發一個好玩的東西,要來孝敬各位老男人們,那就是一鍵連招,按下一個按鍵,就把複雜的大絕招搓出來~太複雜的搓招,以後就交給RK模擬器吧~讓我們這些老男人一起重回當年的雄風吧~
更新事項:
1. 修復一些之前無法玩的遊戲
2. 第一版RK模擬器v20210825發布(支援一鍵連招)
RK模擬器v20210825:https://github.com/steward-fu/trimui/releases/download/v1.0/rk_v20210825.zip
越後期的遊戲,加解密的難度,越來越高,幾乎什麼鬼東西都做加密,不過,對司徒來說,這才叫真正的樂趣~目前修復後的表格如下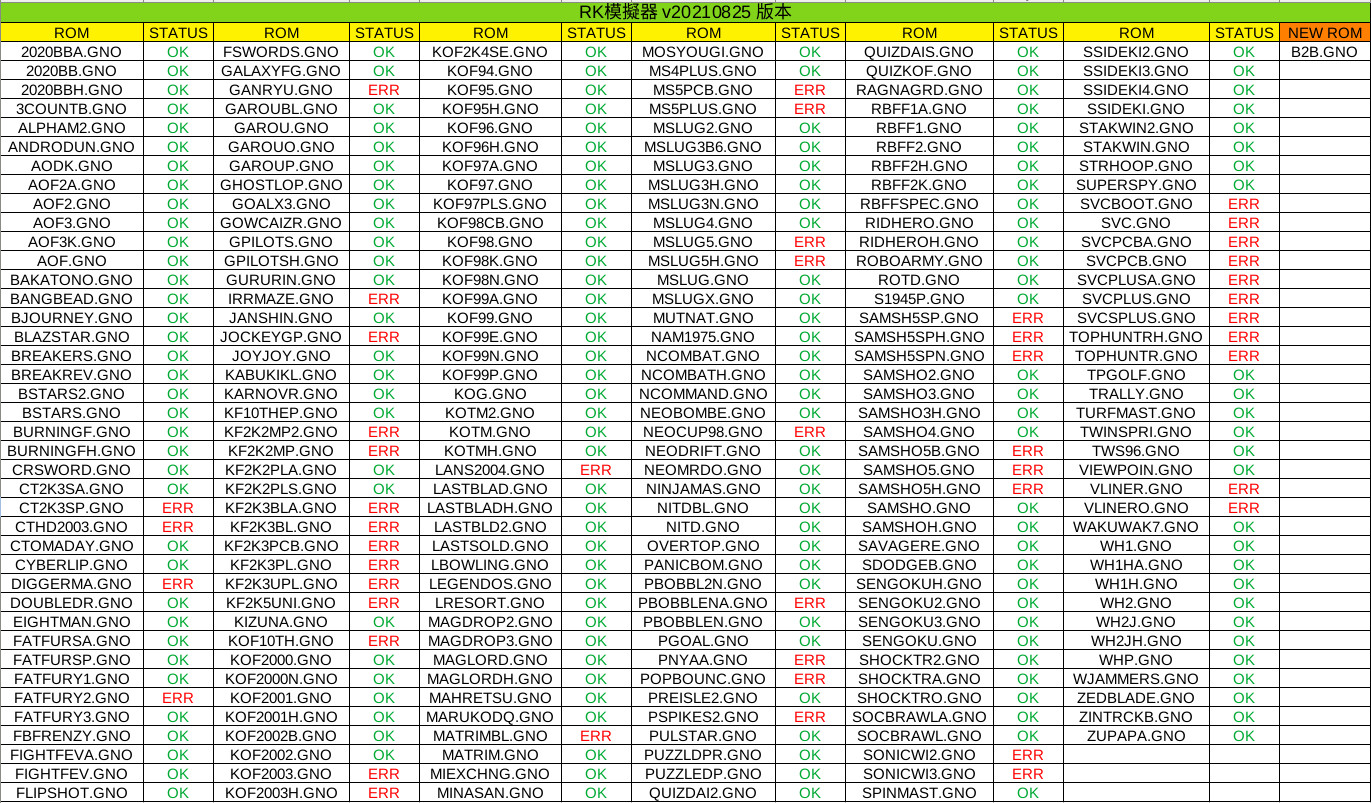
RK模擬器是基於GNGEO模擬器修改而來,主要針對小橫米、TRIMUI優化使用,重新修改操作界面,主要以中文界面、操作簡單為主,司徒將以RK模擬器為基礎,加入更多FBA、MAME的街機遊戲,期許RK模擬器可以在小橫米、TRIMUI跑順多數街機遊戲~而製作風格,司徒使用KOF97底圖、KOF98選單等效果搭配使用,畢竟司徒還是最愛KOF97、KOF98~
運行參數(載入ZIP),檔案位置可以隨意放,不需要放在固定的位置,如:/mnt/roms/NEOGEO
$ rk xxx.zip運行參數(載入GNO),檔案位置可以隨意放,不需要放在固定的位置,如:/mnt/roms/NEOGEO
$ rk xxx.gno載入遊戲的畫面如下
按下MENU按鍵可以進入設定選單,選單項目跟GNGEO差不多,司徒將在下面介紹每個項目
快速讀檔,提供9個儲存格,使用左、右按鍵選擇,按下A鍵讀取,B鍵返回
快速存檔,提供9個儲存格(支援覆蓋),使用左、右按鍵選擇,按下A鍵儲存,B鍵返回
是否顯示FPS,使用A、左、右按鍵選擇
FPS顯示在左下角位置,提供FPS和CPU資訊
是否開啟聲音,使用A、左、右按鍵選擇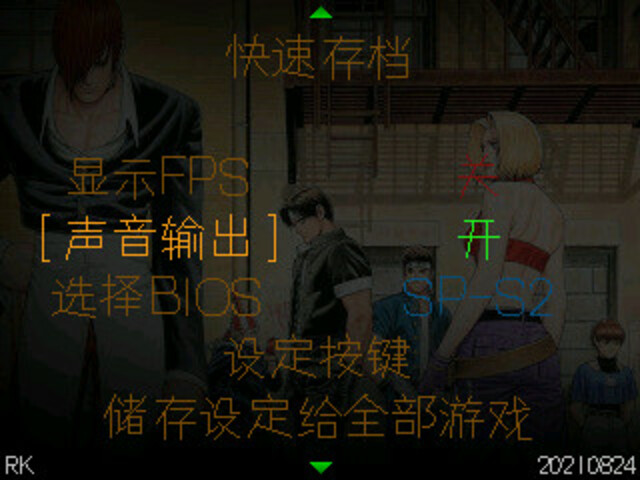
內建BIOS選擇,按A進入選單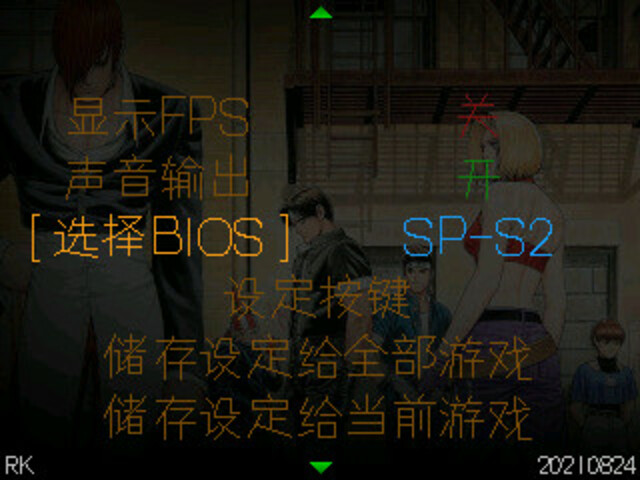
提供29種內建BIOS,參考FBA BIOS選項,按A鍵選擇,按B鍵返回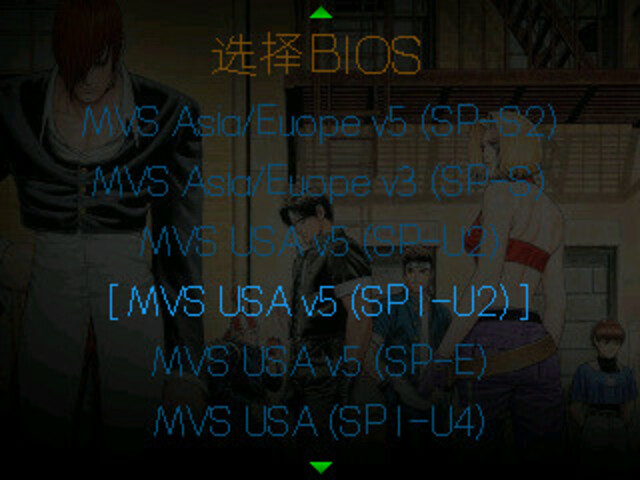
設定按鍵(支援一鍵連招),按A進入選單
設定按鍵分成三個區域,最上方藍色是小橫米、TRIMUI的按鍵,中間部份有33個格子,可以設定連招的按鍵,下方則是可以選擇的按鍵
,司徒將於後面做詳細介紹,按A鍵可以前往下一個區域,按B鍵則是返回上一個區域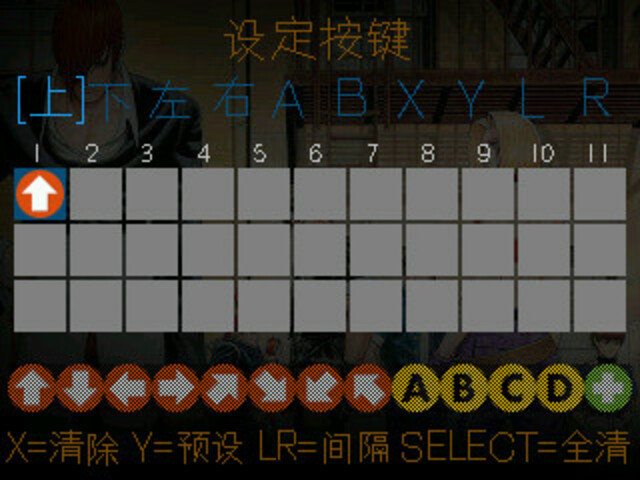
按下A鍵後,從第一個區域跑到第二個區域,使用上、下、左、右鍵選擇要設定的格子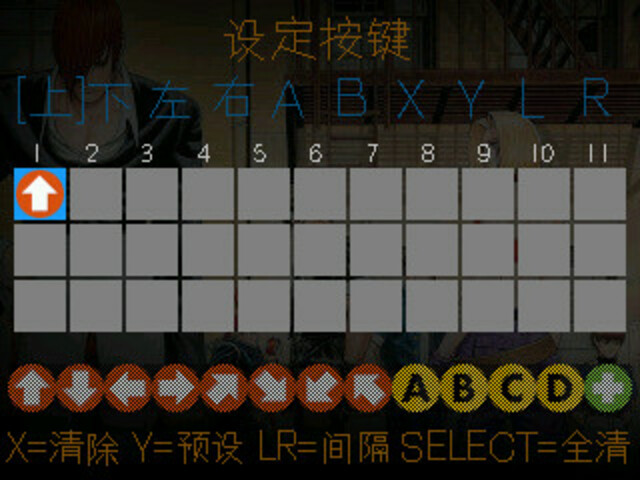
按下A鍵後,從第二個區域跑到第三個區域,使用左、右鍵選擇要設定的按鍵
L、R:插入時槽(1T~9T),也就是延時的功能,1T就是延時1次,9T就是延時9次
A:選擇設定
B:返回第二層
X:清除格子內容
Y:回復該按鍵的預設值
SELECT:清除所有格子內容
如下是KOF98 八神的3段葵花連招,使用小橫米、TRIMUI的L鍵做設定,當按下L鍵,則RK模擬器開始發招,順序如下(從左到右,從上到下依序執行):下、左下、左+C、延時1次、下、左下、左+C、延時1次、下、左下、左+C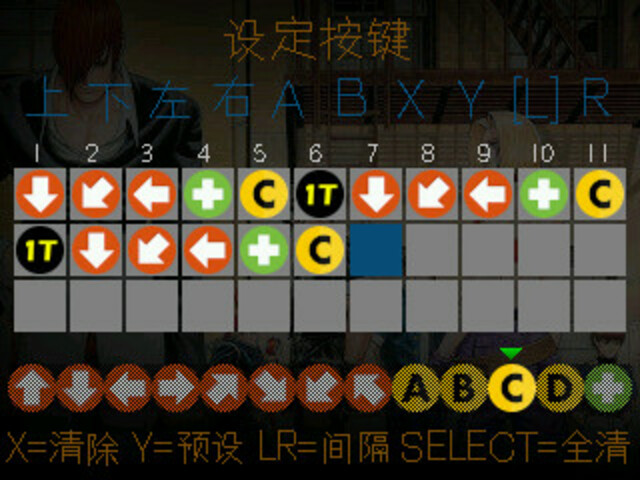
1. 每進到下一格按鍵時,將先釋放上一格的按鍵,因此,使用"+"才可以做按鍵同時按下的功能
2. 在時槽上,按L鍵可以減少時槽,如:在9T上面按L鍵,則改為8T
3. 在時槽上,按R鍵可以增加時槽,如:在1T上面按R鍵,則改為2T
4. 空白槽是結束的意思,其後的按鍵不會執行
儲存設定給全部遊戲,按A鍵儲存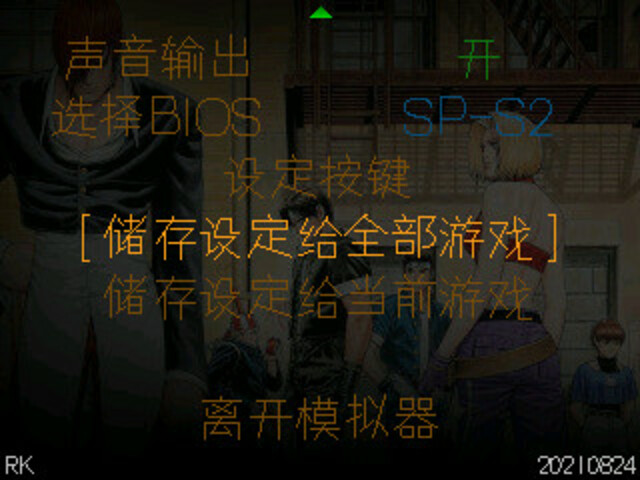
儲存完畢後,會出現提示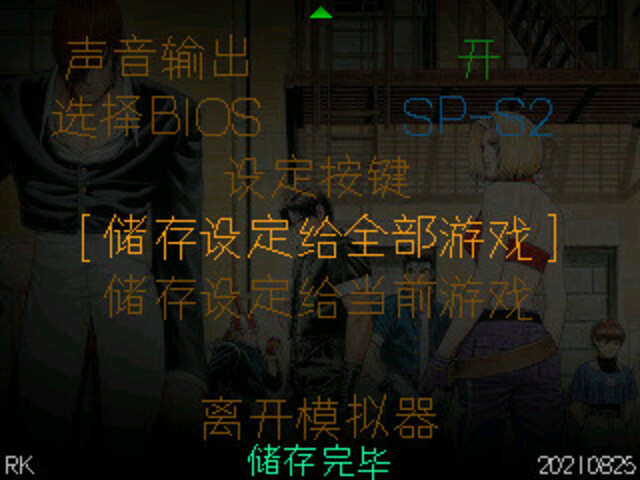
儲存設定給當前遊戲,按A鍵儲存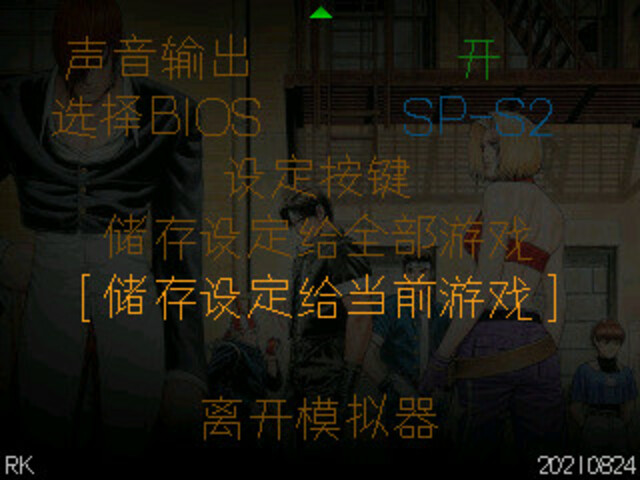
儲存完畢後,會出現提示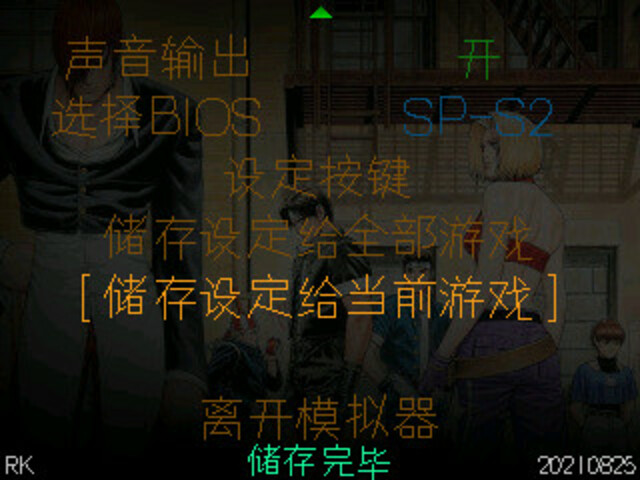
離開RK模擬器
接下來,司徒說明一下一鍵連招的設定,因為這部份可是KOF的精髓呢~也算是搞死司徒的地方,司徒原本以為很簡單,只要依序送出按鍵就可以,但是,深入研究才發現,每一個角色的搓招速度,不一定都是等速度的,尤其是多段連招時,那可真是精華,有些間隔必須要有,才可以成功連招,真它媽一度讓司徒寫代碼寫到懷疑人生~不過,這部份可以說是依照各位老男人的能力配招,或許有人可以配出很強又很簡短的招式,也算是相當有趣的部份,發揮各位老男人的長才吧~值得注意的是,一鍵連招有方向性~
司徒使用小橫米、TRIMUI的L鍵做一鍵連招設定,首先,移動左、右鍵到L鍵的位置
按下A鍵後,跑到第二個區域,可以使用上、下、左、右鍵選擇位置,RK模擬器執行的順序是從左到右,從上到下依序執行,空白槽是結束的意思,其後的按鍵不會執行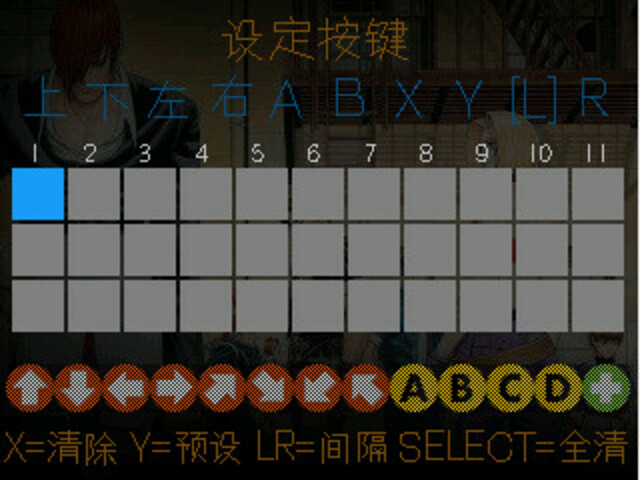
選好位置後,再按下A鍵,跑到第三個區域,選擇想要使用的按鍵,按下A鍵做設定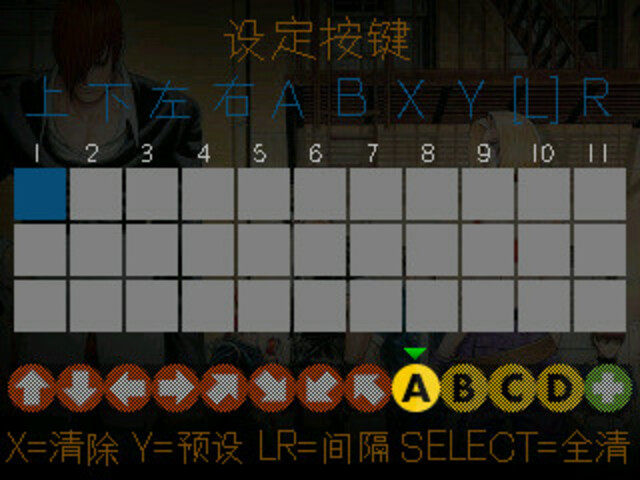
第二區域就會顯示設定的按鍵,儲存格會自動往下一格移動,方便玩家設定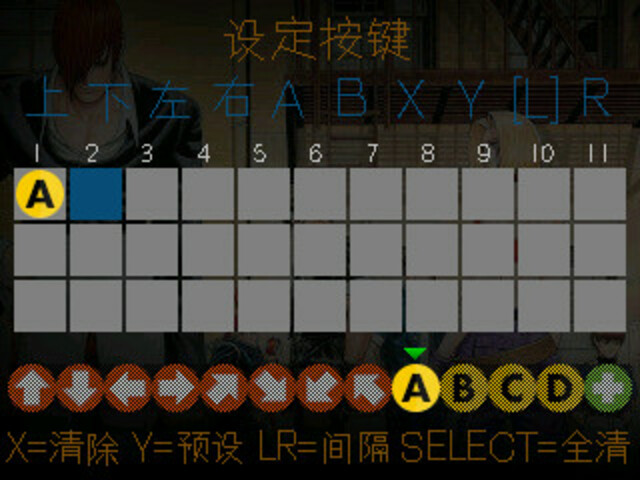
如下A+B+C,就是代表按下L鍵時,RK模擬器會自動送出A+B+C連招,如果玩家沒有使用+號,如:ABC,則RK模擬器發送順序是:按下A、釋放A 然後按下B、釋放B 然後按下C,因此,+號是連續按鍵的一個連接符號
假如玩家想要改成A+B+D,只要按下B鍵,退回到第二區域,接著移動左、右鍵到C的位置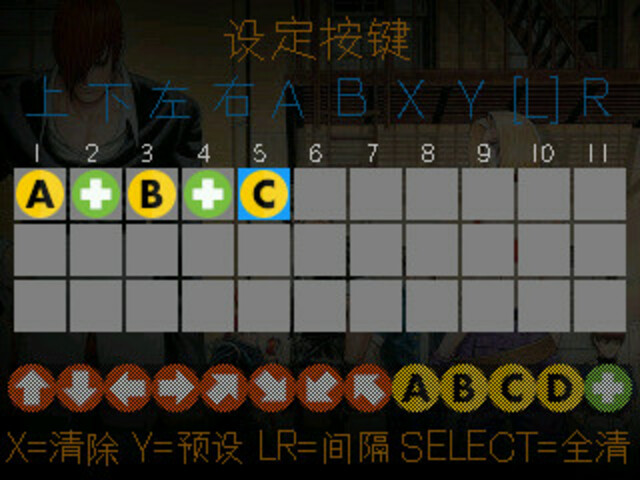
接著按下A鍵,進到第三區域,選擇D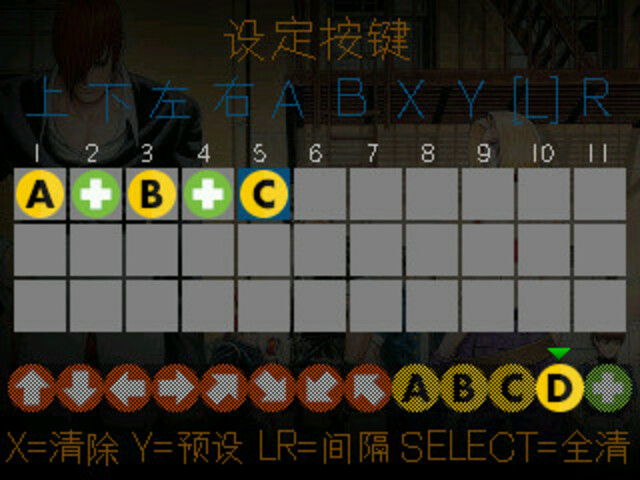
按下A鍵,就可以進行覆蓋的動作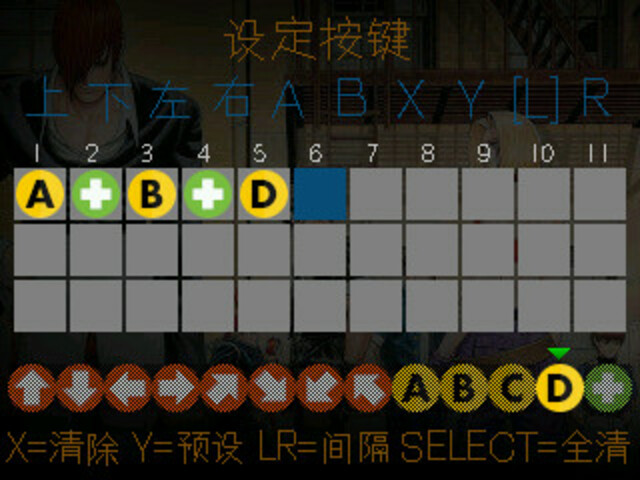
P.S. 如果要清除,可以使用SELECT鍵做全清除,或者X鍵單一槽清除,Y鍵則是回復預設值(RK模擬器的預設值)
關於時槽部份,時槽用意是延時的作用,因為某些角色的招式,不能搓招太快,因此,需要時槽的協助,司徒設定每個時槽最大值是9T,也就是單一槽最長延時9次,因為按鍵是屬於輪詢方式,因此,當設定9T,代表再接下來的9次按鍵輪詢都不會有任何動作(針對這一個按鍵,不影響其它按鍵),最小時槽則是1T,因此,當沒有設定時槽,代表按鍵連招都是順序執行(沒有延時)
設定時槽只要按下L(插入1T)、R(插入9T)鍵就可以,如下是按下R鍵,因此,插入9T
如要變更成5T,只要回到第2區域,移動到9T位置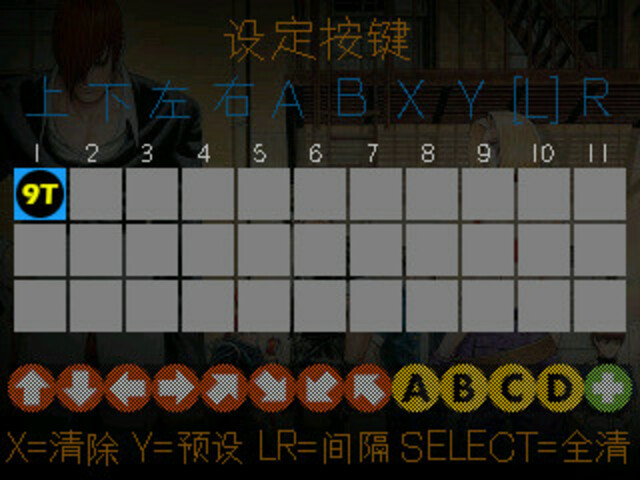
按下L鍵(減少),由於自動累加,因此,只要再按下左鍵回原本的時槽位置,然後,再度按下L鍵就可以再減1,反之,如果要增加食槽,只要按下R鍵(增加)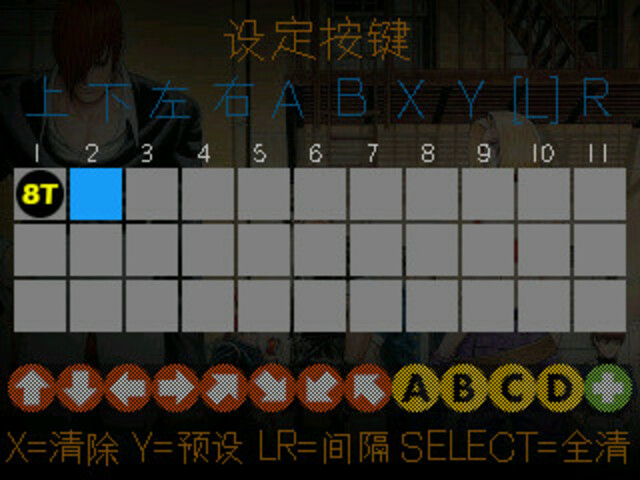
司徒嘗試過很多種設定方式,在有限的顯示區域下,這應該是最佳的呈現方式,司徒把原本3頁的設定,濃縮到一個頁面顯示,這樣才不至於感覺是很複雜的設定~而關於連招的數量,太多槽位就讓人感覺很複雜,太少槽位則是沒什麼好設定,都會失去那個味道,因此,司徒最後選擇使用33個連招槽,算是一個最佳的折衷方式~接著司徒分享一下角色的連招設定~
草薙京
招式:重拳、毒咬、罪詠、罰詠
標準:C、↓ ↘ → + C、→ ↘ ↓ ↙ ← + A、→ + A
RK招式表如下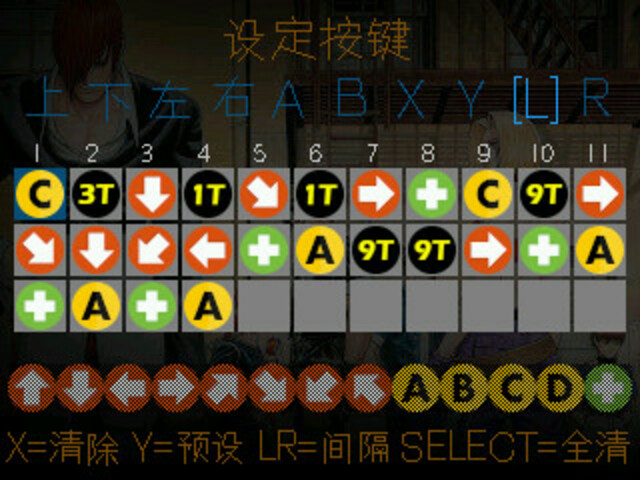
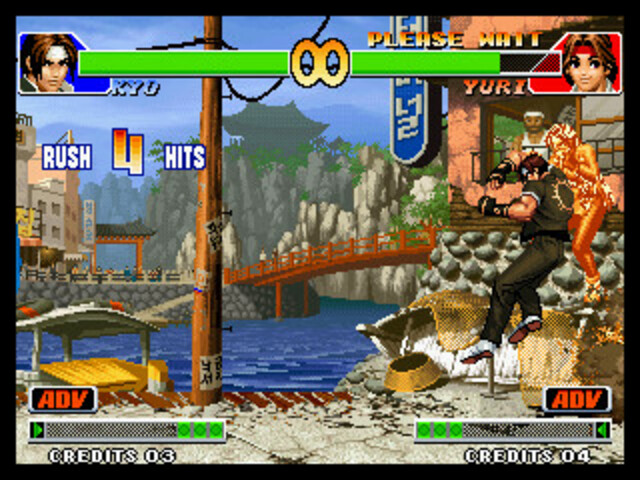
P.S. 這就是連招設定的好玩地方,某些按鍵需要延遲才可以搓出招式,正好可以發揮想像力~
大門五郎
招式:重腳、下重拳、天地返
標準:D、↘ + C、→ ↘ ↓ ↙ ← → + C
RK招式表如下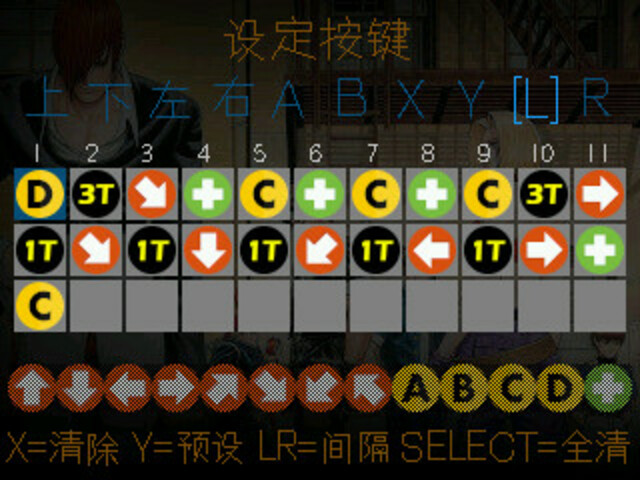
P.S. 請發揮老男人的想像力~
克拉克
招式:重拳 + 究極阿根廷閃光
標準:→ ↘ ↓ ↙ ← + C、→ ↘ ↓ ↙ ← + C
RK招式表如下
P.S. 這個很簡單吧~
金卡法
招式:重拳、特拉擊、鳳凰腳
標準:C、→ + A、↓ ↙ ← ↙ → + B
RK招式表如下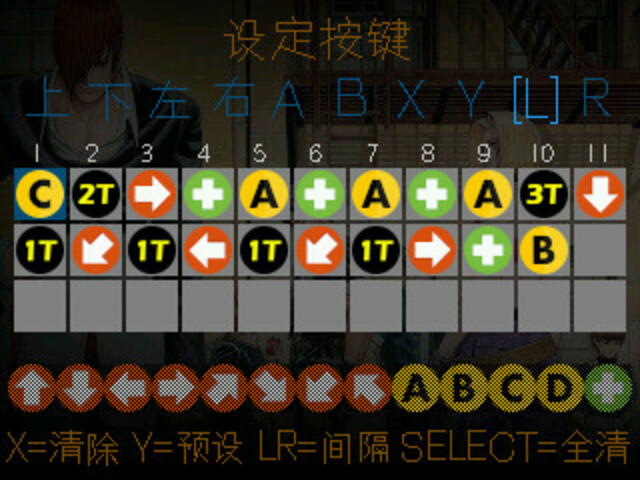
P.S. easy easy~
八神庵
招式:重拳、夢彈、葵花
標準:C、→ + A.A、↓ ↙ ← + C、↓ ↙ ← + C、↓ ↙ ← + C
RK招式表如下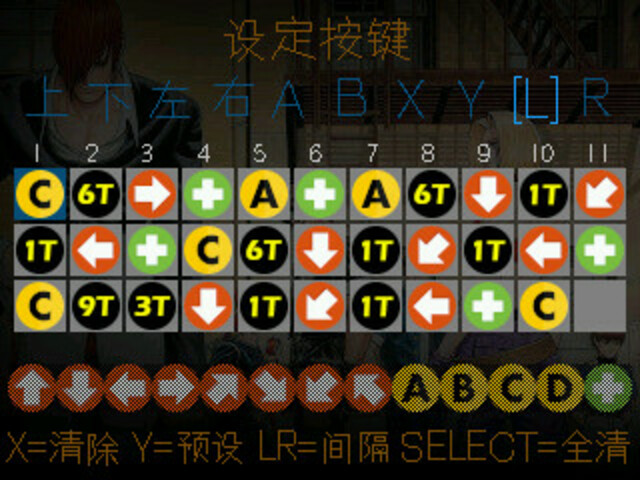

P.S. 想像力~
八神庵
招式:重拳、夢彈、八稚女
標準:C、→ + A.A、↓ ↘ → ↘ ↓ ↙ ← + C
RK招式表如下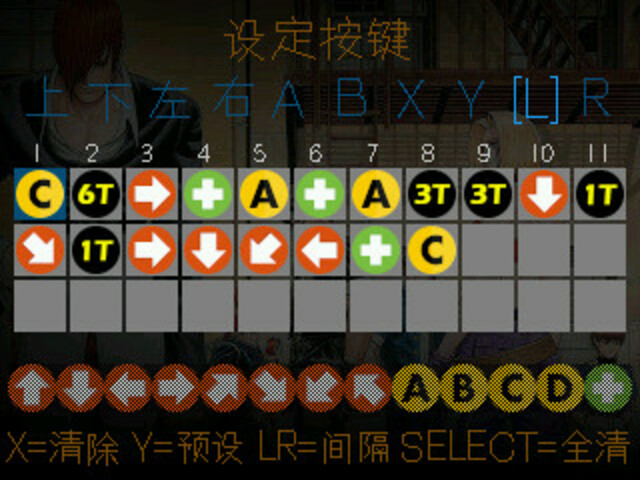
P.S. 關鍵點不知道老男人是否有看出~
可能有人會想問司徒,何時才可以開始研究第二個模擬器?回答如下:
1. 把原本GNGEO模擬器不能玩的遊戲全部解掉
2. 解決卡頓問題(至少KOF97、KOF98、KOF99不能卡)
司徒估計可能至少還需要半年的時間~
#324 Re: 司徒开源 » 研究FC3000掌機的開源可行性 » 2021-08-24 20:39:55
@gamece
了解,感謝~
@笔走天下
https://steward-fu.github.io/website/handheld/trimui/flash_phoenix.htm
#325 Re: 司徒开源 » 研究FC3000掌機的開源可行性 » 2021-08-23 15:12:21
#326 Re: 司徒开源 » 研究FC3000掌機的開源可行性 » 2021-08-23 10:22:23
@时尚电子王
目前沒有小橫米的大電池改機方案~小橫米由於按鍵和屏幕問題,司徒目前都是當作測試機器使用,很少拿來把玩,所以,小橫米動刀的機會應該是沒有了~司徒目前的改機方向主要是放在TRIMUI~
很感謝时尚电子王提供Switch Lite的導電膠更換建議,司徒買來更換後,給出的建議是:不建議更換,過程如下說明~
小橫米導電膠
背面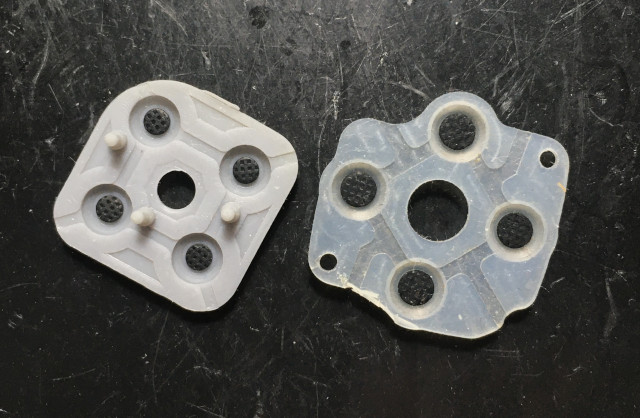
Switch Lite導電膠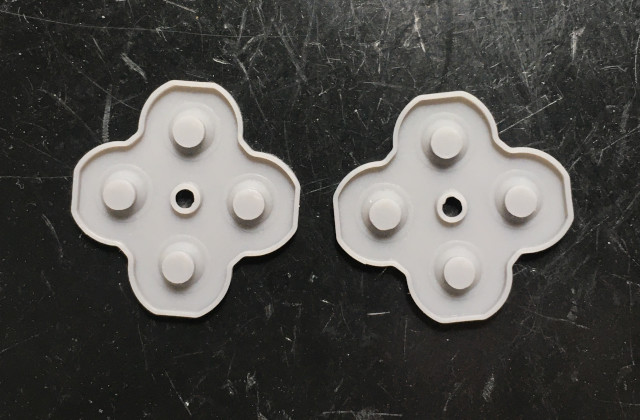
背面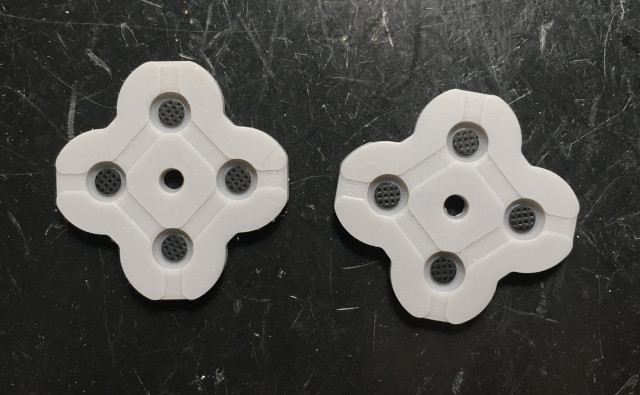
司徒使用三秒膠固定導電膠,因此,畫出十字固定點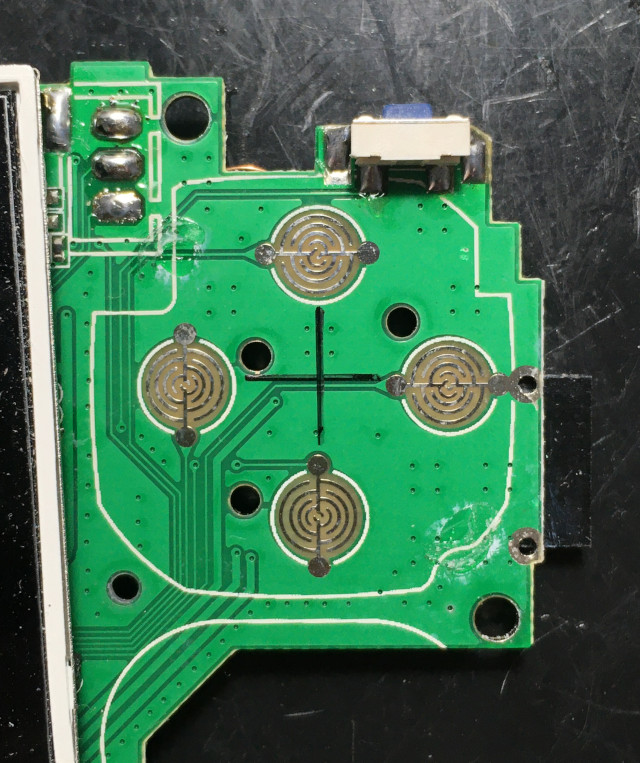
十字鍵部份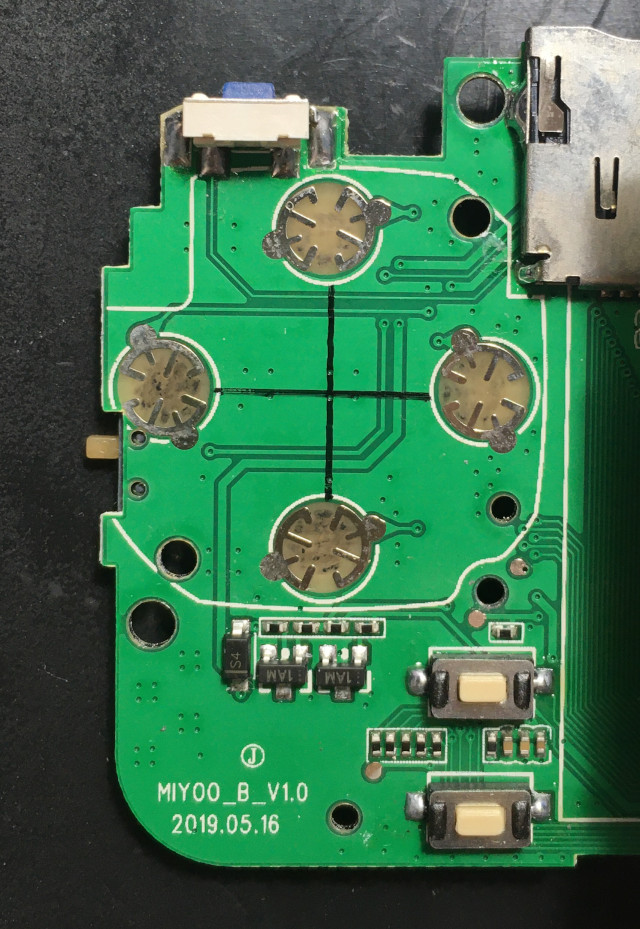
接著使用三秒膠固定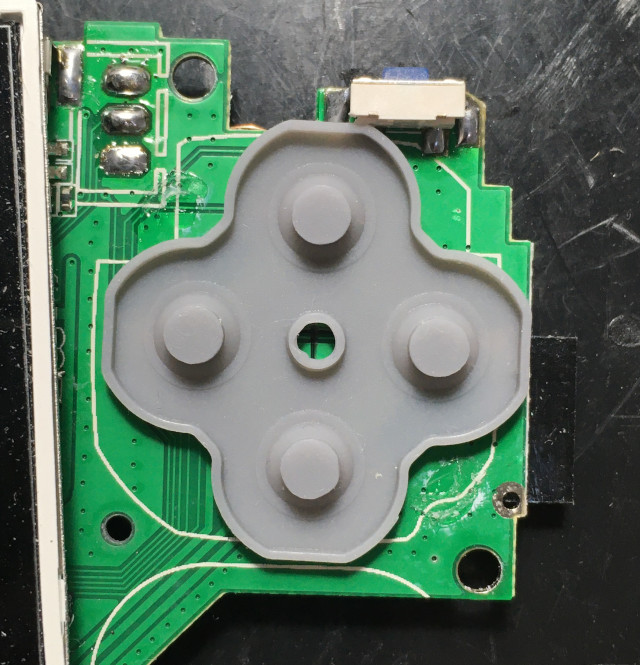
十字鍵部份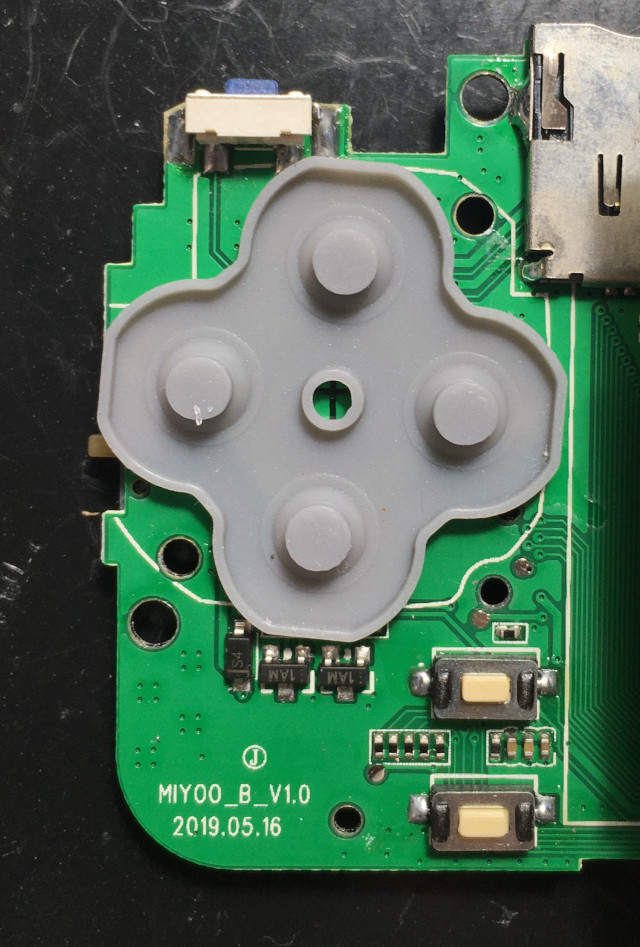
但是,安裝好後,司徒發現會撐起PCB,因此,司徒裁切導電膠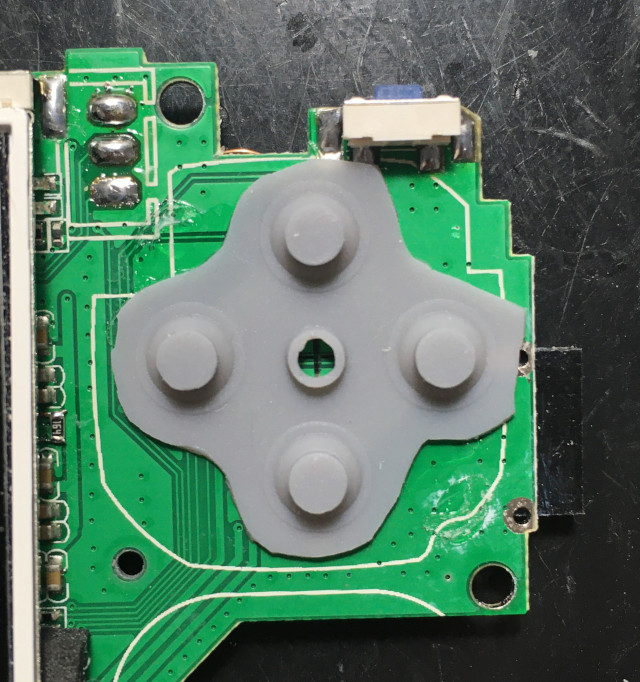
十字鍵部份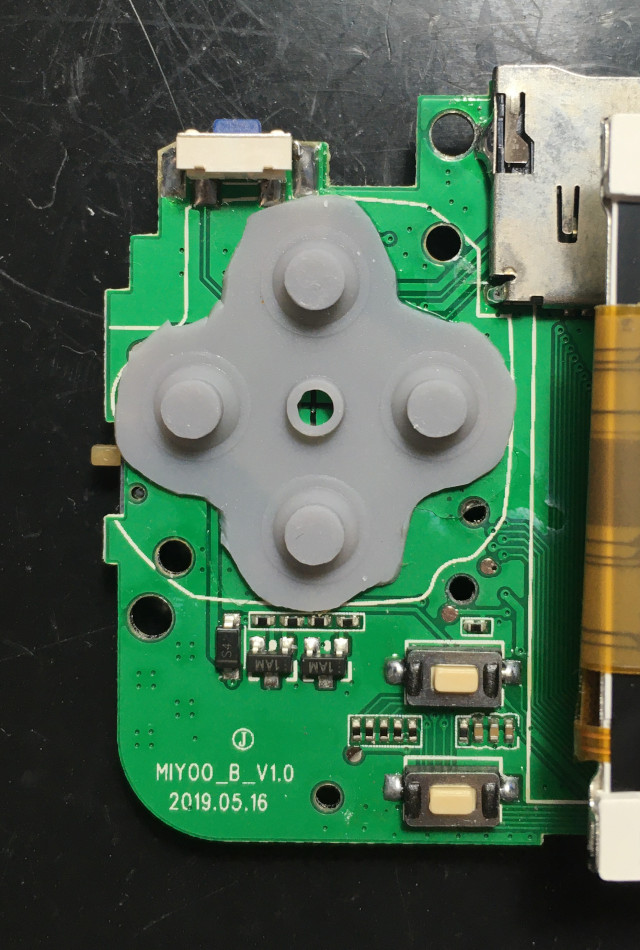
4顆功能鍵部份還算是可以接受,跟替換周哥導電膠差不多,不過,最重要的十字鍵並沒有辦法使用,因為整個頂住十字鍵,無法使用~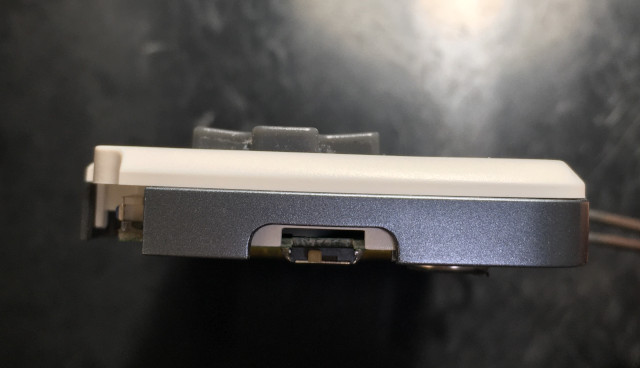
另外,關於電池部份,在不改外殼的情況下,扣除支撐點,可用的面積如下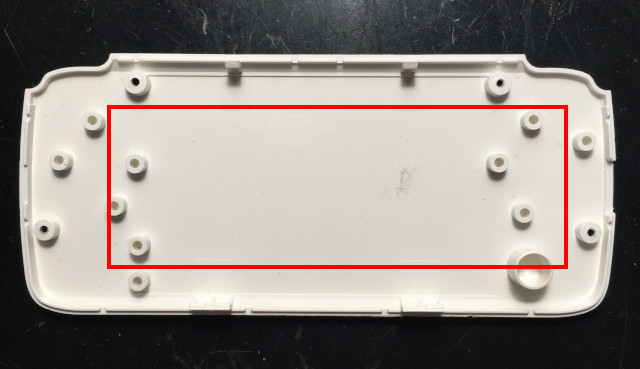
但是,考慮到PCB的元件,可以使用的區域只能縮小成如下,基本上,如果要替換大電池,外殼必須墊厚,這樣的結果就是跟Q20 Mini一樣厚~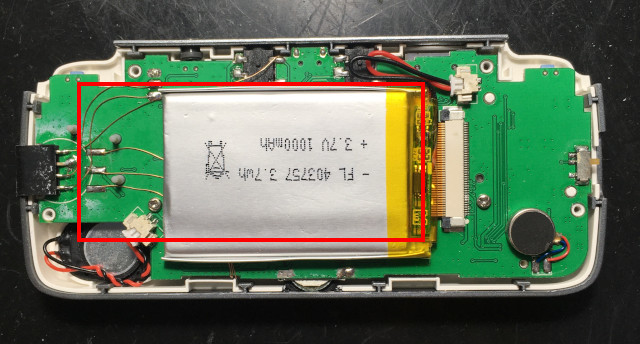
#327 Re: 司徒开源 » 研究FC3000掌機的開源可行性 » 2021-08-22 21:32:38
#328 Re: 司徒开源 » 研究FC3000掌機的開源可行性 » 2021-08-19 14:50:23
#329 Re: 司徒开源 » 研究FC3000掌機的開源可行性 » 2021-08-19 10:24:10
#330 Re: 司徒开源 » 研究FC3000掌機的開源可行性 » 2021-08-17 13:15:10
#331 Re: 司徒开源 » 研究FC3000掌機的開源可行性 » 2021-08-17 10:03:10
@huanxing
對~小橫米從第一版開始就有TE腳位(到目前為止也一樣有TE腳位),因此,確定硬件是可以解決閃屏問題~如果你更換屏幕,記得買有TE腳位的,最好是ST7789V系列驅動IC,因為解決閃屏是需要調整一些屏的參數,買一樣的驅動IC比較沒問題~
如司徒之前提過,要解決閃屏問題:硬件、驅動、模擬器都必須互相配合才可以真正解決閃屏問題
硬件:如果是CPU屏(小橫米),需要TE腳的輔助,確保寫RAM的動作不會跟驅動IC重疊,如果是RGB屏(TRIMUI),直寫RAM就可以
驅動:開啟雙緩衝,但是必須確保送給硬件的資料、從模擬器接收的資料不重疊
模擬器:開啟雙緩衝,但是必須確保送給驅動的資料、模擬器畫面刷新的資料不重疊
#332 Re: 司徒开源 » 研究FC3000掌機的開源可行性 » 2021-08-16 15:27:45
#333 Re: 司徒开源 » 研究FC3000掌機的開源可行性 » 2021-08-15 20:12:37
司徒發現自己用3D印表機打印的後蓋似乎小了一點點,導致有點變形,長時間可能會讓PCB變形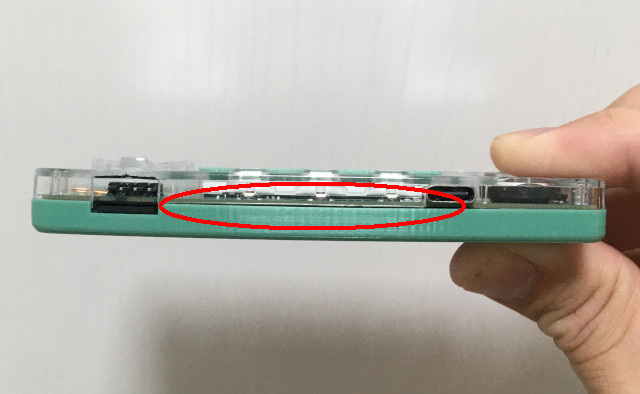
因此,司徒最後提高厚度1mm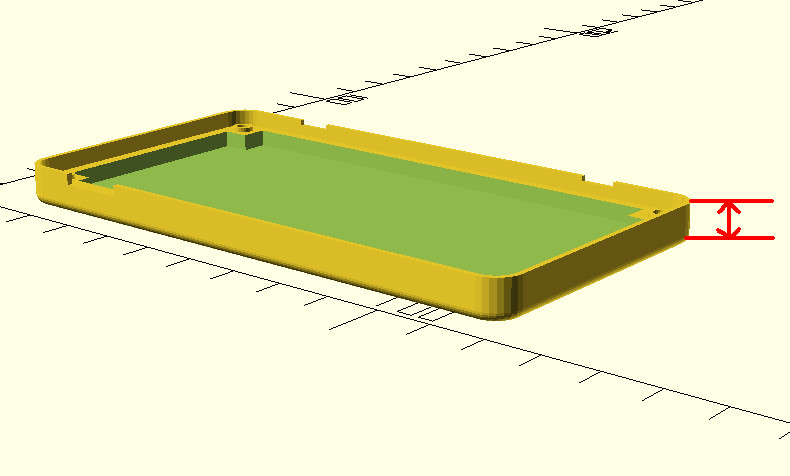
再度打印後,果然相當吻合~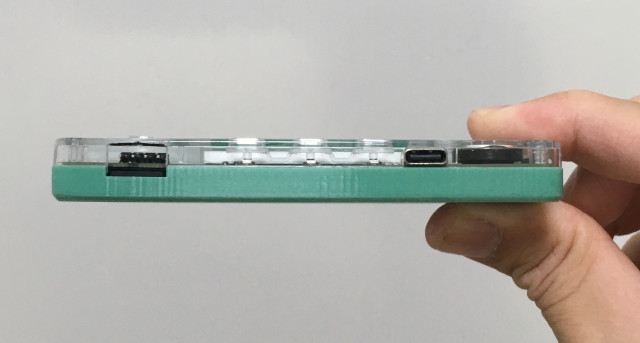
司徒也再度巡視四個邊,目前這樣相當不錯~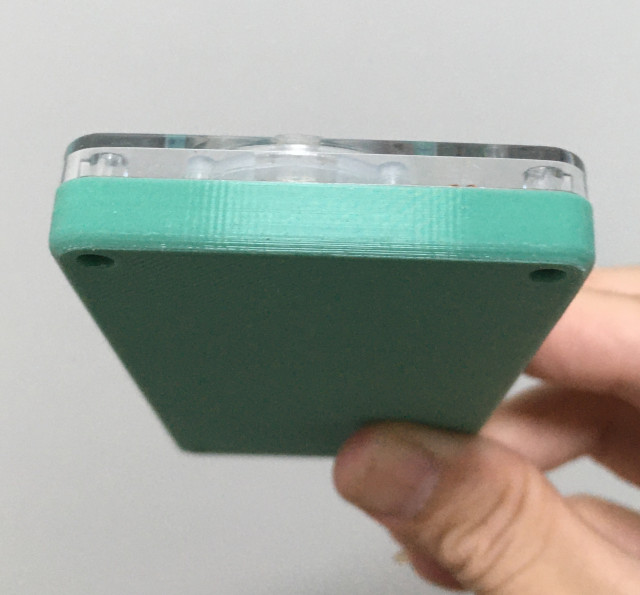
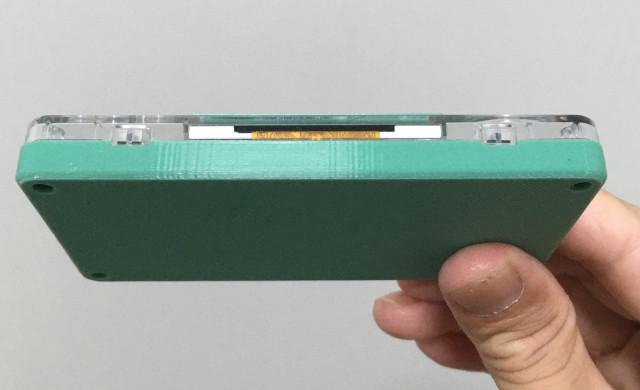
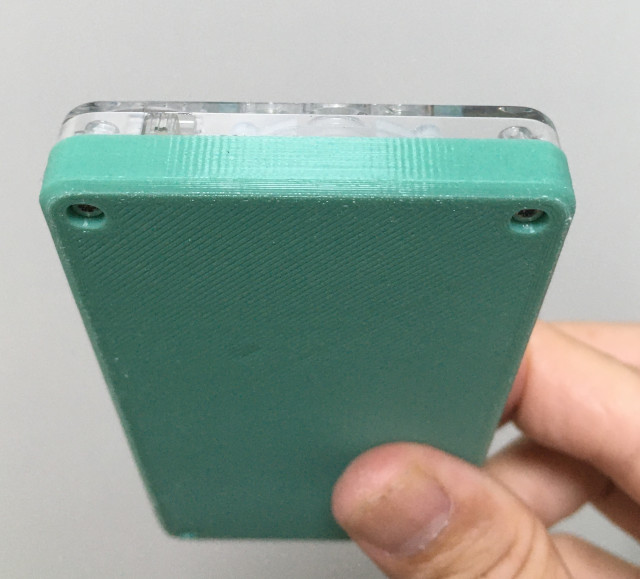
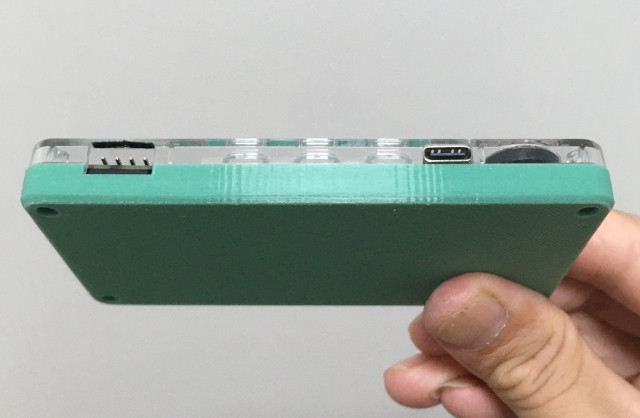
修改後的OpenSCAD源代碼
$fn = 100;

module string(str, f="Monospace", h=10, z=1) {
  linear_extrude(height=z) {
    text(str, size=h, font=f, halign="center", valign="center");
  }
}

module meniscus(h=10, r=1){
  difference(){
    translate([r/2+0.1, r/2+0.1, 0]){
      cube([r+0.2, r+0.1, h+0.2], center=true);
    }
    cylinder(h=h+0.2, r=r, center=true);
  }
}

module cube_round_corner(w=10, h=10, z=10, r=1){
  difference(){
    cube([w, h, z], center=true);
    translate([(w/2)-r, (h/2)-r]){
      rotate(0){
        meniscus(z, r);
      }
    }
    translate([(-w/2)+r, (h/2)-r]){
      rotate(90){
        meniscus(z, r);
      }
    }
    translate([(-w/2)+r, (-h/2)+r]){
      rotate(180){
        meniscus(z, r);
      }
    }
    translate([(w/2)-r, (-h/2)+r]){
      rotate(270){
        meniscus(z, r);
      }
    }
  }
}


module 3dprint_original(){
  difference(){
    union(){
      import("trimui_liartes.stl", convexity=3);
      translate([50, 7, 0]){
        cube([60, 40, 3.2]);
      }
    }
  }
}


module 3dprint_fdm_back(){
  difference(){
    translate([0, 0, 0]){
      3dprint_original();
    }
    translate([80, 0, 0]){
      cube([100, 100, 20]);
    }
    translate([0, 0, 3]){
      cube([150, 100, 20]);
    }
  }
  difference(){
    translate([0, 0, 1]){
      3dprint_original();
    }
    translate([80, 0, 0]){
      cube([100, 100, 20]);
    }
    translate([0, 0, 0]){
      cube([150, 100, 3]);
    }
  }

  difference(){
    translate([1, 0, 0]){
      3dprint_original();
    }
    translate([0, 0, 0]){
      cube([80, 100, 20]);
    }
    translate([0, 0, 3]){
      cube([150, 100, 20]);
    }
  }
  difference(){
    translate([1, 0, 1]){
      3dprint_original();
    }
    translate([0, 0, 0]){
      cube([80, 100, 20]);
    }
    translate([0, 0, 0]){
      cube([150, 100, 3]);
    }
  }
}

module 3dprint_fdm_border(){
  translate([(48-43)/2, 3, -2]){
    difference(){
      cube([43, 33, 2]);
      translate([1, 1, 0]){
        cube([41, 31, 2]);
      }
    }
  }

  difference(){
    translate([48/2, 43/2, 0]){
      cube_round_corner(48, 43, 0.5, 1);
    }
    translate([(48-41)/2, 4, -1]){
      cube([41, 31, 2]);
    }
    translate([48/2, 39, -0.3]){
      string("Retro Game", 1, 5);
    }
  }
}

difference(){
  3dprint_fdm_back();
  translate([21, 8, 1.2]){
      cube([89, 50, 5]);
    }
    translate([16, 13, 1.2]){
      cube([99, 40, 5]);
    }
}
//3dprint_fdm_border();#334 Re: 司徒开源 » 研究FC3000掌機的開源可行性 » 2021-08-15 09:41:11
#335 Re: 司徒开源 » 研究FC3000掌機的開源可行性 » 2021-08-14 20:47:38
#336 Re: 司徒开源 » 研究FC3000掌機的開源可行性 » 2021-08-14 17:31:31
對於支持司徒的朋友,司徒在此至上謝意,而無法接受司徒個人作風的朋友,只能說聲抱歉並請您安靜的離開~
司徒有兩個更新給大家:
1. GNGEO模擬器v20210814:修復一些以前無法正常玩的ROM、直接內置BIOS,可以針對每個遊戲設定不同BIOS
2. TRIMUI改機:十字鍵改造、解決落塵問題、電池1000mA改造
修復後的表格
GNGEO模擬器v20210814:https://github.com/steward-fu/trimui/releases/download/v1.0/gngeo_20210814.zip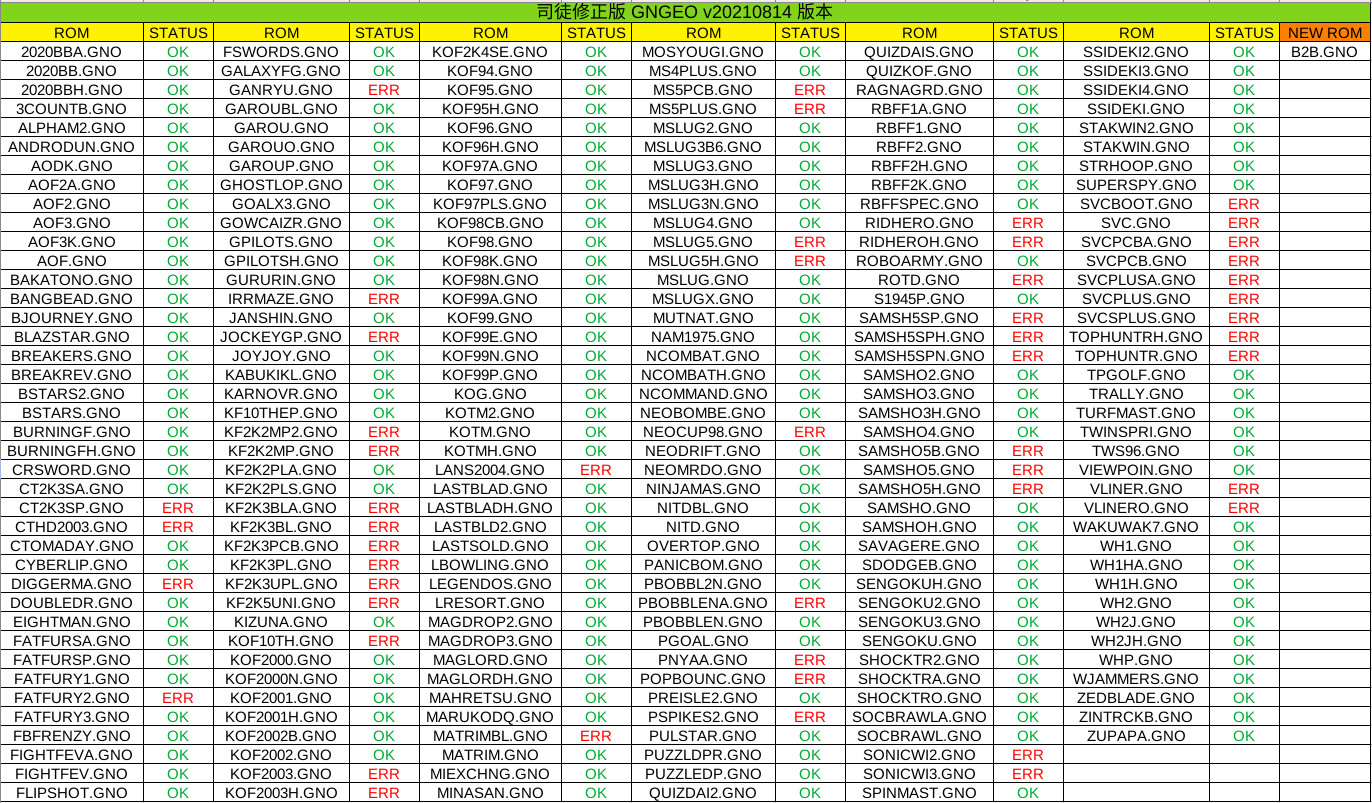
內置BIOS,BIOS直接內建在模擬器裡面,玩家不用在準備BIOS檔案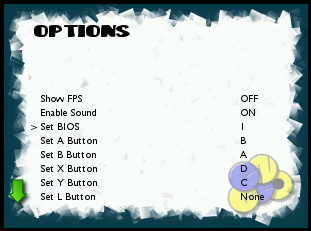
BIOS列表參考FBA模擬器,玩家可以選擇想要的BIOS,共29個BIOS,選擇後記得保存,模擬器需要重啟才可以套用新的BIOS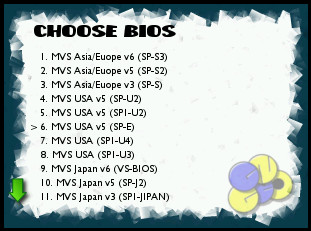
這也是最後一版使用GNGEO名字發布的模擬器,再接下來,司徒將使用RK名字取代,也就是諧音ARCADE,因為,此模擬器已經改掉很多東西,當然,司徒之後也會開始添加非NEOGEO的遊戲,因此,繼續使用GNGEO並不適合,RK模擬器將專注優化給小橫米、TRIMUI使用,期望多數街機遊戲都可以流暢運行~
接著是Maker的最愛,也就是TRIMUI機器改造的介紹
原本TRIMUI厚度是9.8mm,這個厚度相當薄,玩格鬥遊戲比較不適合,於是,司徒上Thingiverse找尋是否有相關STL素材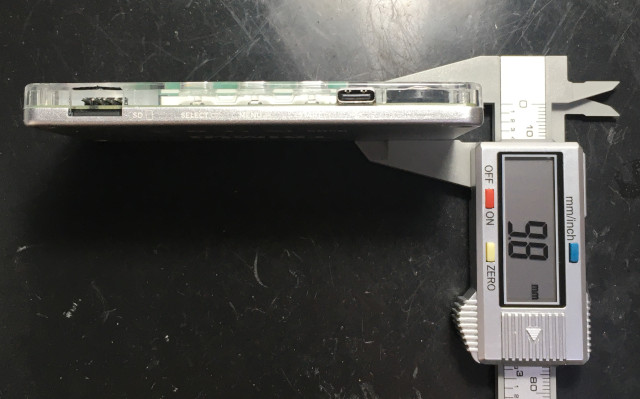
果然人間自有真情在~司徒發現Liartes製作了三個相關素材,十字鍵改造、保護殼、電池後蓋
https://www.thingiverse.com/search?q=trimui&type=things&sort=relevant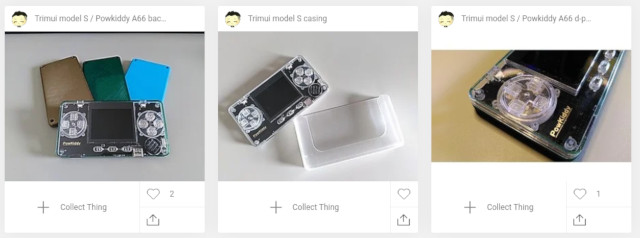
十字鍵改造就是墊高它,讓十字鍵變硬一點
https://github.com/steward-fu/trimui/releases/download/v1.0/trimui_dpad_pivot_v12.stl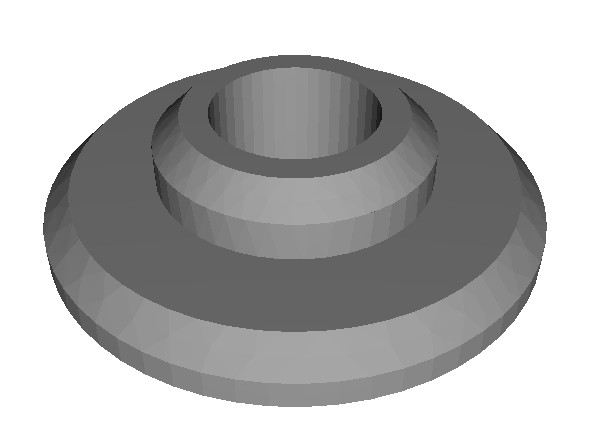
司徒使用0.12mm厚度列印,感覺還可以接受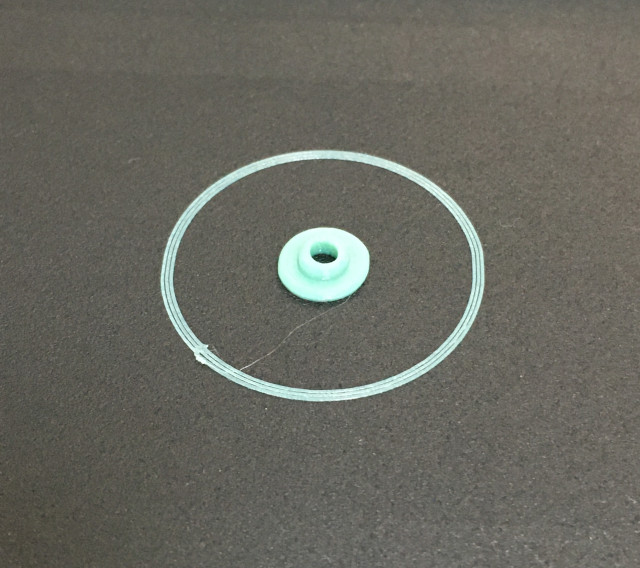
安裝上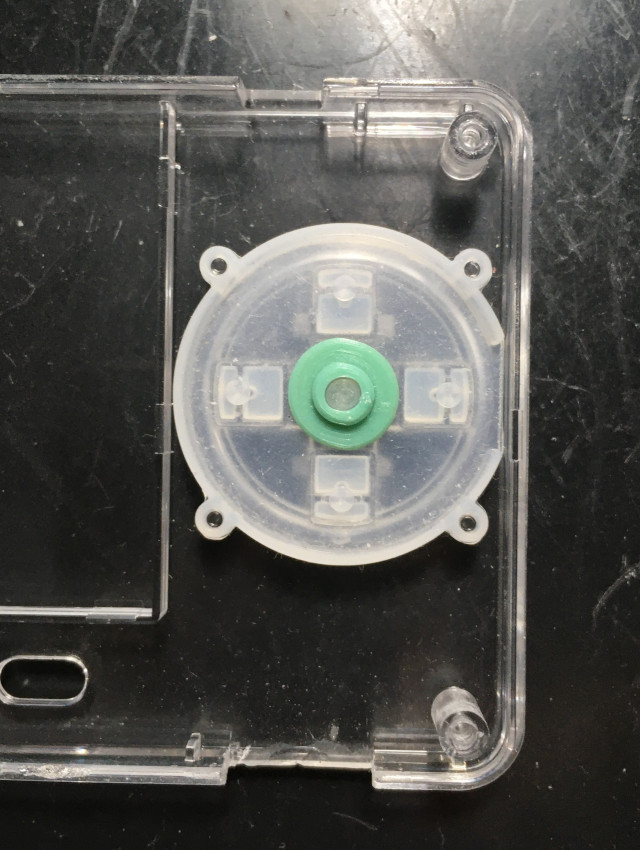 \
\
相當吻合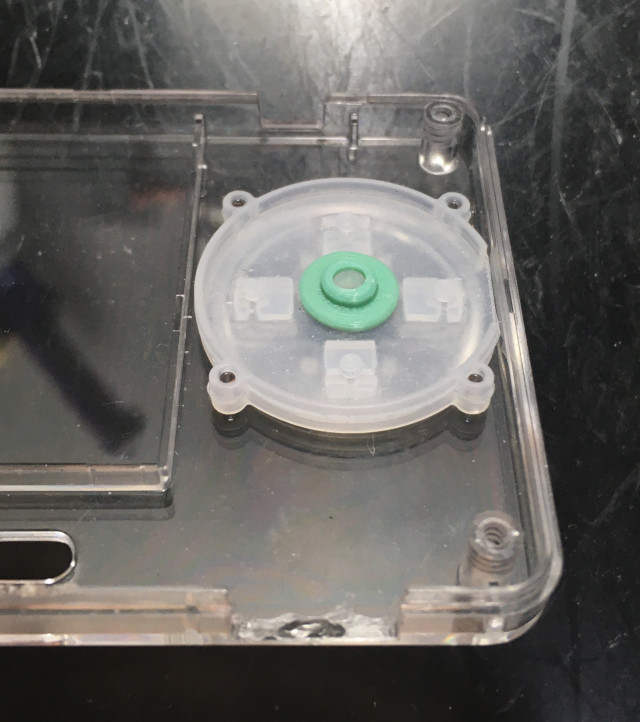
正面看的形狀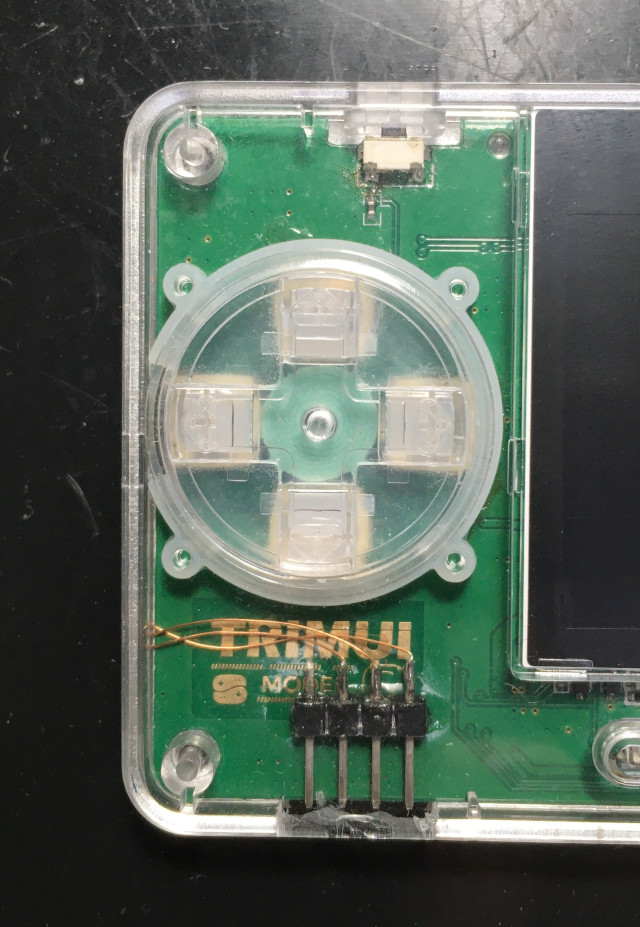
十字鍵被墊高了,不再是軟綿綿的按鍵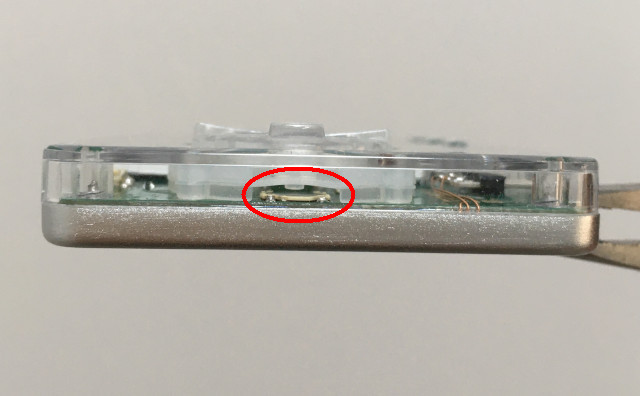
司徒是無法接受落塵的現象,因此,司徒把前蓋的屏幕部份,手動裁切掉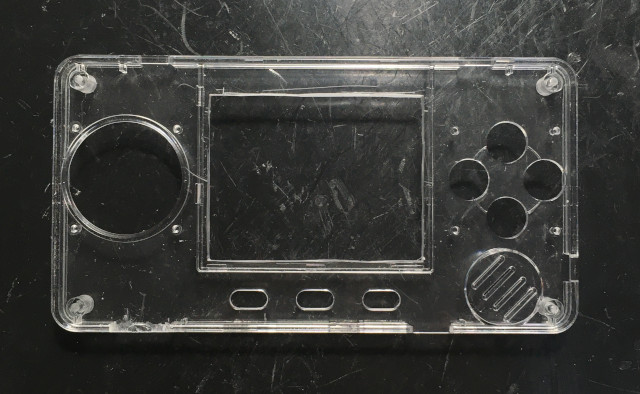
裁切後不夠美觀,於是,司徒畫了一個修飾的架子
https://github.com/steward-fu/trimui/releases/download/v1.0/trimui_fdm_border_20210814.stl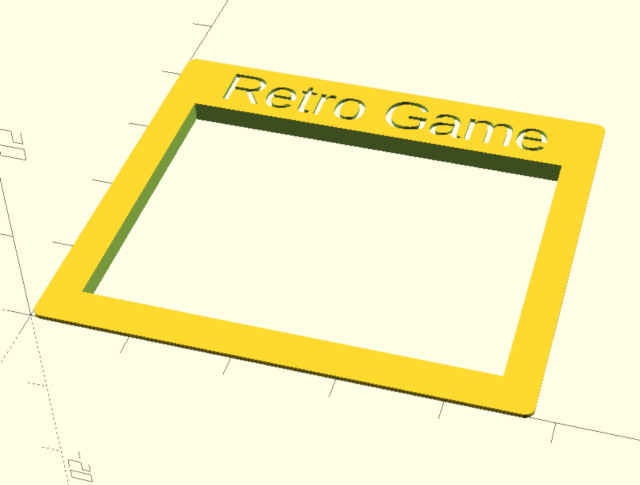
司徒畫的很薄,避免影響觸感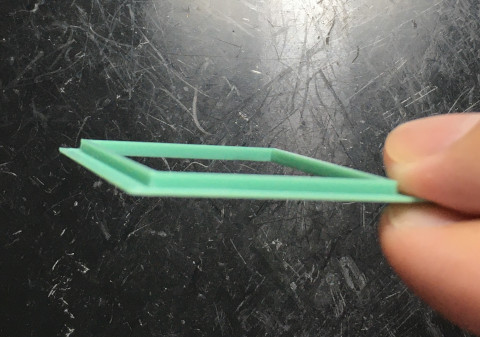
裝飾上,感覺還不錯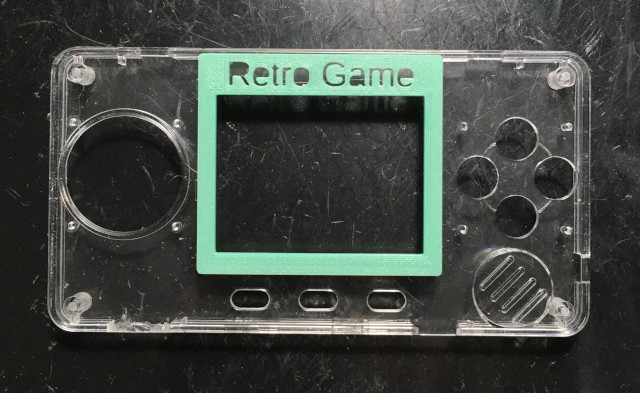
接著就是電池後蓋,這是原作者的素材,司徒找了淘寶店家使用鋁合金製作,可惜,店家說電池接觸的那個地方太薄,無法製作
https://github.com/steward-fu/trimui/releases/download/v1.0/backplate_a66_larger_battery_v11_6.2mm.stl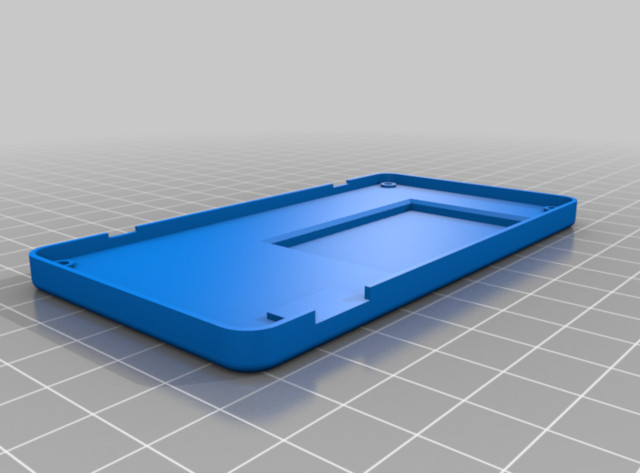
於是,司徒使用OpenSCAD改造一下,載入原本STL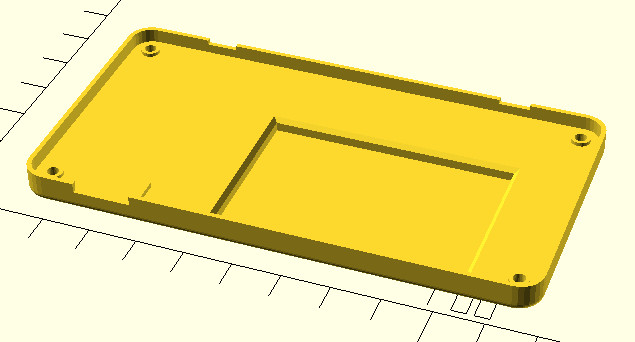
填補
司徒挖出更多空間,厚度都符合店家規定,可惜,淘寶店家最後還是無法製作...
https://github.com/steward-fu/trimui/releases/download/v1.0/trimui_aluminum_back_20210814.stl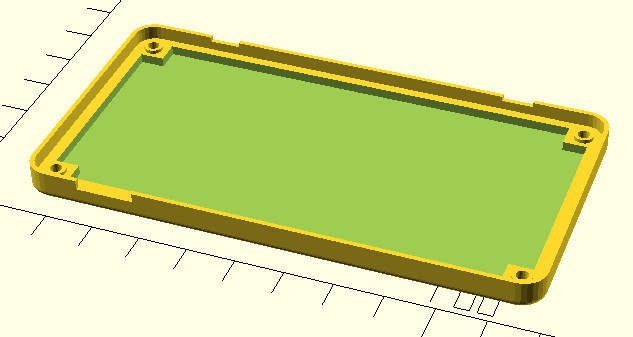
最後,司徒使用自己的3D列印機打印,厚度設定0.12mm,列印出來的質感還可以接受
https://github.com/steward-fu/trimui/releases/download/v1.0/trimui_fdm_back_20210814.stl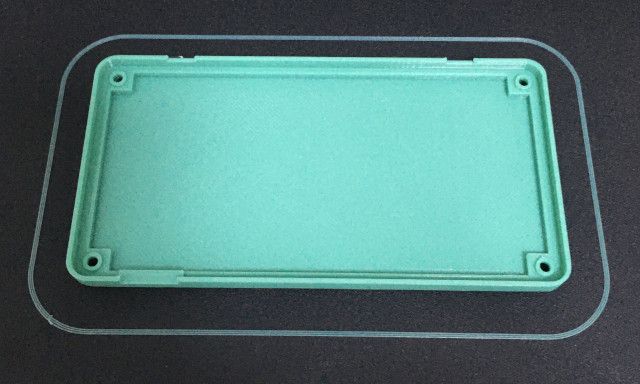
接著改造電池,這是原本司徒改的600mA電池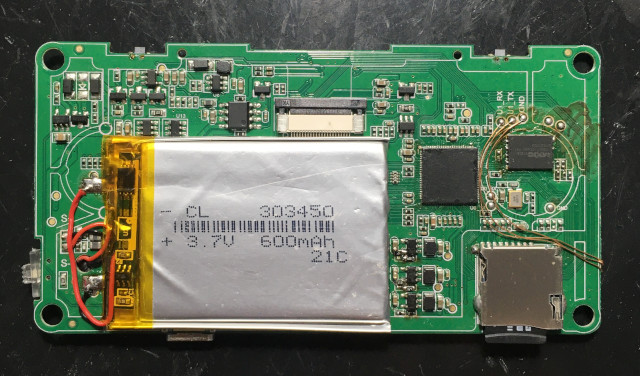
原作者推薦的1000mA電池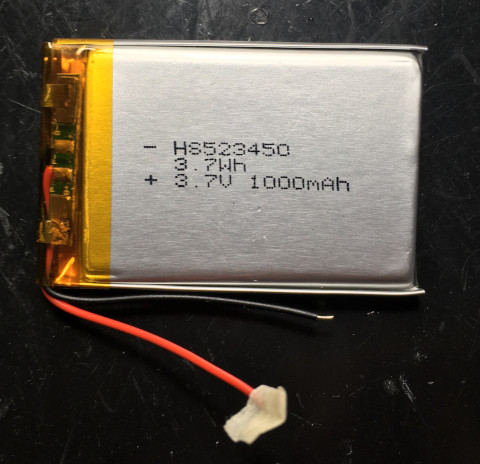
F1C200S如果有超頻的機器,請不要把電池蓋在F1C200S上面,避免爆炸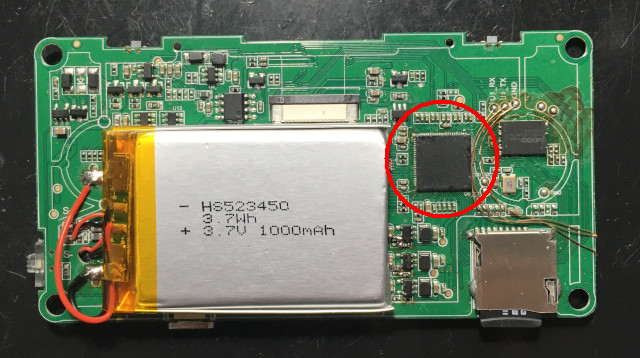
厚度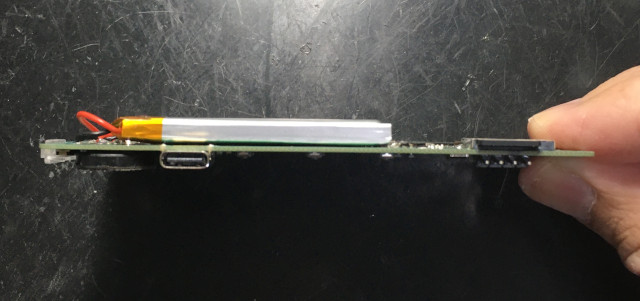
司徒覺得還不錯的列印精度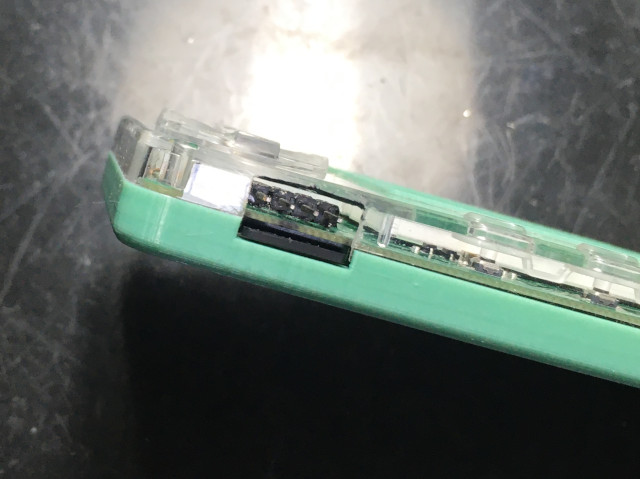
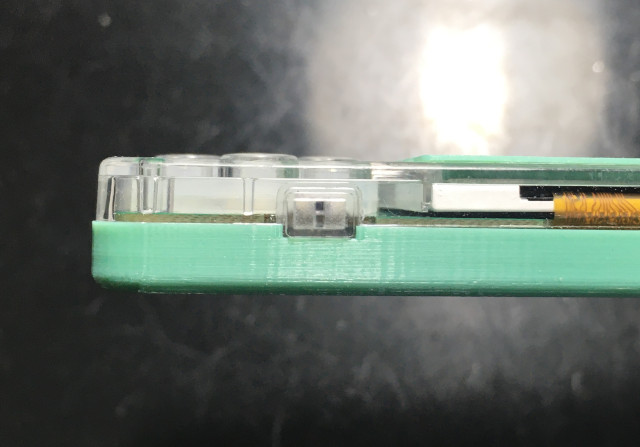
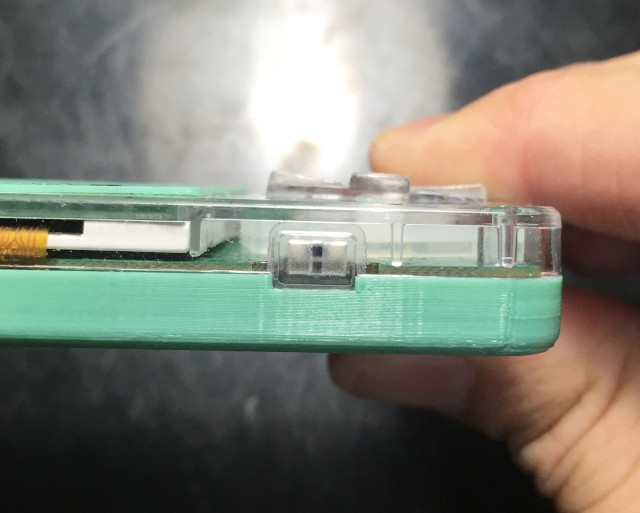
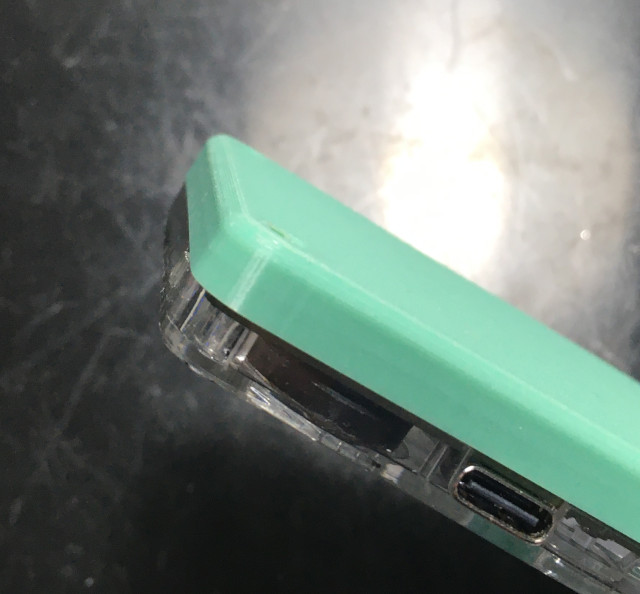
這樣的厚度最適合指腹搓招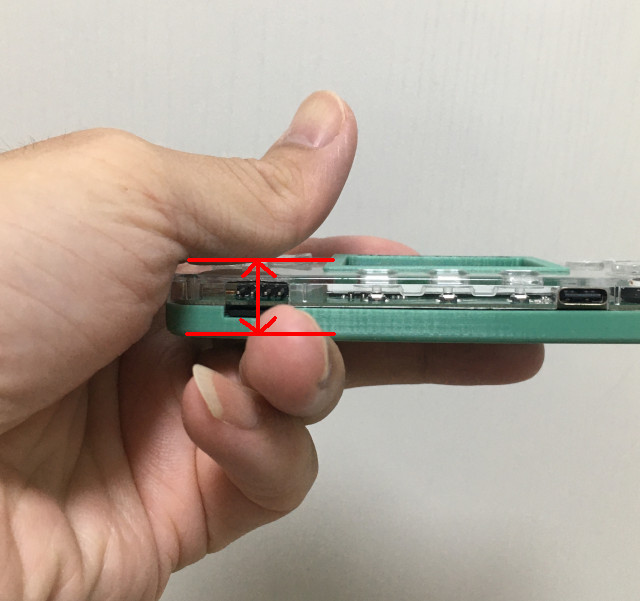
改造後的厚度是11.8mm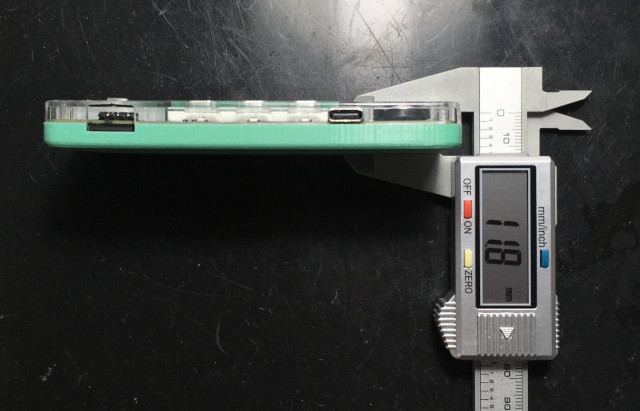
重量68g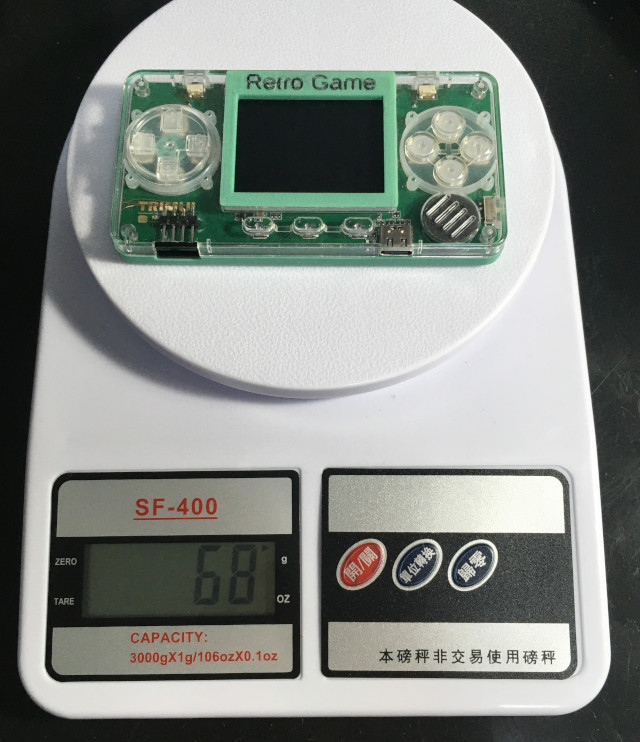
永遠的KOF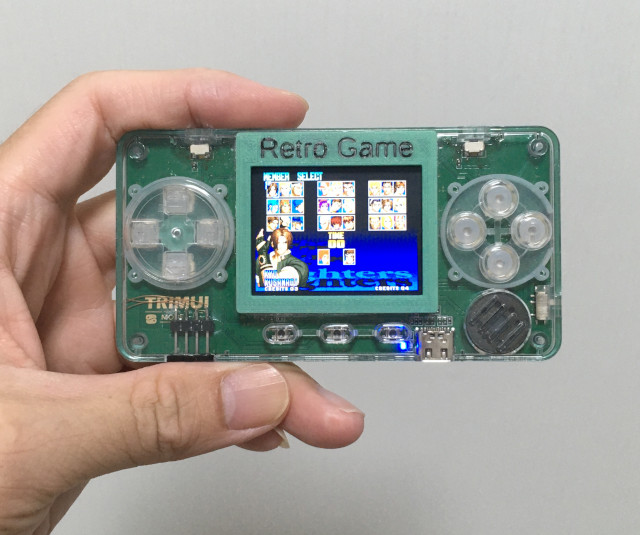
OpenSCAD源代碼
$fn = 100;

module string(str, f="Monospace", h=10, z=1) {
  linear_extrude(height=z) {
    text(str, size=h, font=f, halign="center", valign="center");
  }
}

module meniscus(h=10, r=1){
  difference(){
    translate([r/2+0.1, r/2+0.1, 0]){
      cube([r+0.2, r+0.1, h+0.2], center=true);
    }
    cylinder(h=h+0.2, r=r, center=true);
  }
}

module cube_round_corner(w=10, h=10, z=10, r=1){
  difference(){
    cube([w, h, z], center=true);
    translate([(w/2)-r, (h/2)-r]){
      rotate(0){
        meniscus(z, r);
      }
    }
    translate([(-w/2)+r, (h/2)-r]){
      rotate(90){
        meniscus(z, r);
      }
    }
    translate([(-w/2)+r, (-h/2)+r]){
      rotate(180){
        meniscus(z, r);
      }
    }
    translate([(w/2)-r, (-h/2)+r]){
      rotate(270){
        meniscus(z, r);
      }
    }
  }
}


module 3dprint_aluminum_back(){
  difference(){
    union(){
      import("trimui_liartes.stl", convexity=3);
      translate([50, 7, 0]){
        cube([60, 40, 3.2]);
      }
    }
    translate([21, 8, 1.2]){
      cube([89, 50, 5]);
    }
    translate([16, 13, 1.2]){
      cube([99, 40, 5]);
    }
  }
}


module 3dprint_fdm_back(){
  difference(){
    translate([0, 0, 0]){
      3dprint_aluminum_back();
    }
    translate([80, 0, 0]){
      cube([100, 100, 20]);
    }
  }

  difference(){
    translate([1, 0, 0]){
      3dprint_aluminum_back();
    }
    translate([0, 0, 0]){
      cube([80, 100, 20]);
    }
  }
}

module 3dprint_fdm_border(){
  translate([(48-43)/2, 3, -2]){
    difference(){
      cube([43, 33, 2]);
      translate([1, 1, 0]){
        cube([41, 31, 2]);
      }
    }
  }

  difference(){
    translate([48/2, 43/2, 0]){
      cube_round_corner(48, 43, 0.5, 1);
    }
    translate([(48-41)/2, 4, -1]){
      cube([41, 31, 2]);
    }
    translate([48/2, 39, -0.3]){
      string("Retro Game", 1, 5);
    }
  }
}

//3dprint_aluminum_back();
3dprint_fdm_back();
//3dprint_fdm_border();#337 Re: 司徒开源 » 研究FC3000掌機的開源可行性 » 2021-08-13 20:14:49
#338 Re: 司徒开源 » 研究FC3000掌機的開源可行性 » 2021-08-13 08:53:41
#339 Re: 司徒开源 » 研究FC3000掌機的開源可行性 » 2021-08-12 19:26:52
#340 Re: 司徒开源 » 研究FC3000掌機的開源可行性 » 2021-08-09 08:53:02
#341 Re: 司徒开源 » 研究FC3000掌機的開源可行性 » 2021-08-06 22:09:11
@zonbix
很抱歉我手上沒有每台IPS的ROM,因為每台IPS的原廠ROM都不一樣,所以,你的機器有可能救不回來~不過,你可以試著刷入這個IPS ROM看看,這個是西班牙老外協助DUMP出來的ROM,刷入方式一樣是燒到MicroSD,接著插入FC3000,等待5分鐘後,背光閃爍代表完成,拔除MicroSD後,重新開機~
https://github.com/steward-fu/fc3000/releases/download/v1.0/ips_fc3000_v1.img.7z
#342 Re: 司徒开源 » 研究FC3000掌機的開源可行性 » 2021-08-05 23:28:06
@波贺顺顺
最近很忙~
@hanwei
https://github.com/steward-fu/rs97/releases/download/v1.0/bin2header.7z
@fanelwin
沒有這樣的計畫~
#343 Re: 司徒开源 » 研究FC3000掌機的開源可行性 » 2021-08-03 09:16:21
#344 Re: 司徒开源 » 研究FC3000掌機的開源可行性 » 2021-08-03 08:40:25
#345 Re: 司徒开源 » 研究FC3000掌機的開源可行性 » 2021-08-02 19:00:07
#346 Re: 司徒开源 » 研究FC3000掌機的開源可行性 » 2021-08-02 16:10:19
#347 Re: 司徒开源 » 研究FC3000掌機的開源可行性 » 2021-08-02 15:30:46
@qllbee
這種小問題,你應該自我訓練會比較好,不過我看了一下,問題在dr_check_zip這裡,修正如下
ROM_DEF *dr_check_zip(const char *filename)
{
  char *z;
  ROM_DEF *drv;
  char *game = strdup(basename(filename));
  printf("check rom=%s\n", game);
  if(game == NULL) {
    return NULL;
  }
  z = strstr(game, ".zip");
  if(z == NULL) {
    free(game);
    return NULL;
  }
  z[0] = 0;
  drv = res_load_drv(game);
  free(game);
  return drv;
}
建議你拉出UART,這樣可以方便Debug,也可以用gdb debug,系統預設都有包含gdb,
GNO DUMP部份,先等我一下,我在整理一些東西,整理完後,我再給一版可以DUMP的,
不過,我看KOF96AE,跑不起來,你可以自己Debug看看,估計會花上一些時間~該是你展現熱血的時候了~
#348 Re: 司徒开源 » 研究FC3000掌機的開源可行性 » 2021-08-02 10:32:48
#349 Re: 司徒开源 » 研究FC3000掌機的開源可行性 » 2021-08-01 21:20:22
@qllbee
好,那我了解了~那個GAME_ROMS的struct你沒有仔細看,所以你才對不上,如下面的例子,9是Region 9的意思,所以那10個Size就是把每個Region個別加起來
"071.c1", 9, 0x00000000, 0x00000000, 0x200000, 0x23d84a7a,Sprite的固定存放方式是0x00000000接著0x00000001
代碼部份,司徒不會再發佈,在結束小橫米、TRIMUI維護後(預計 2022/06/01),司徒會整理釋出,你不用擔心拿不到源碼
@波贺顺顺
你打的字,我看了100次後,我依然看不懂你的意思,請問你是來自哪個星球?可否知道七龍珠悟空最近過得如何?
老外有問題,相當歡迎來此詢問,雖然英語不是司徒的母語,司徒即使語言能力不佳,司徒也會盡力幫忙~
@lzgame02
你這隻打不死的蟑螂~司徒有收到你的資訊了~你~可以安心去跟閻羅王報到了~
@kit0072
0402
@lemoine
成本會變高,改機難度也會變高~最終失去它的原本價值~所以司徒最終沒有對它動大刀~
@迪卡
司徒翻了一下A20手冊,確實有此溫度感測Register,也確實可以從F1C100S、F1C200S讀到數值,但是,這個數值不可靠,因為範圍從30~100,如果是溫度的意思,那司徒的小橫米、TRIMUI應該已經駕鶴歸西,不過,司徒也貼出代碼,供人參考
#include <stdio.h>
#include <stdint.h>
#include <stdlib.h>
#include <string.h>
#include <fcntl.h>
#include <sys/mman.h>
#include <unistd.h>
#include <time.h>

uint32_t push_it(uint32_t v)
{
  int cc=0, r=0;
  static uint32_t buf[32]={0};

  for(cc=0; cc<31; cc++){
    buf[cc] = buf[cc + 1];
  }
  buf[31] = v;

  r = 0;
  for(cc=0; cc<32; cc++){
    r+= buf[cc];
  }
  return (r >> 5);
}

int main(int argc, char* argv[])
{
  int fd=-1;
  uint8_t *mem=NULL;
  uint32_t *TP_TPR=NULL;
  uint32_t *TP_FIFOCS=NULL;
  uint32_t *TEMP_DATA=NULL;
  uint32_t *TP_CTRL_REG1=NULL;

  fd = open("/dev/mem", O_RDWR);
  mem = mmap(0, 4096, PROT_READ | PROT_WRITE, MAP_SHARED, fd, 0x1c24000);
  printf("mmap addr: %p\n", mem);

  TP_TPR = (uint32_t*)&mem[0x818];
  TP_FIFOCS = (uint32_t*)&mem[0x814];
  TEMP_DATA = (uint32_t*)&mem[0x820];
  TP_CTRL_REG1 = (uint32_t*)&mem[0x804];

  *TP_CTRL_REG1 = (1 << 5);
  *TP_TPR = (1 << 16);
  while(1){
    if(*TP_FIFOCS & (1 << 18)){
      *TP_FIFOCS = 0xffffffff;
      printf("temp: %d\n", push_it(*TEMP_DATA));
    }
    usleep(300000);
  }
  munmap(mem, 4096);
  close(fd);
  return 0;
}
@Beigo
相當感謝你的支持~
#350 Re: 司徒开源 » 研究FC3000掌機的開源可行性 » 2021-07-31 23:56:32
目前司徒又修復一些無法玩的NEOGEO ROMs,因為GNO是加解密後的檔案,因此,司徒會持續更新修復後的檔案,如果玩家無法玩,請再次下載一次
GNO檔案:https://github.com/steward-fu/neogeo/releases/tag/v1.1
GNGEO模擬器v20210801:https://github.com/steward-fu/trimui/releases/download/v1.0/gngeo_fix_roms_v20210801.zip
目前表格狀態(原圖1367x777)
#351 Re: 司徒开源 » 研究FC3000掌機的開源可行性 » 2021-07-31 21:43:58
@qllbee
我也很菜, 我也都是去琵琶行论坛找現成的東西, 照着改一些还是可以的~
在回答你的問題之前,司徒必須先說,這是一個態度問題,因為司徒已經盡量回答你的問題,但是,你的回答卻是叫司徒去找論壇,從你可以聽出左右聲道問題,接著到你懂補丁、CRC以及懂軟件,司徒並不覺得你菜,因為打完補丁,CRC一定跑掉,你如何解決?所以你一定是資深玩家~不過,算了,這個就當做是司徒回答你的最後一個問題,之後,麻煩你去琵琶行论坛詢問街機相關的問題~
Q1.
0x00000000, 0x00020000, 0x00000000, 0x00100000, 0x00000000,
0x00000000, 0x00020000, 0x00000000, 0x00080000, 0x00400000,
这10个是什么..怎么搞出来的? romsize?
A1. 這是ROM Size,你把每個Region加起來就可以
Q2.最后一行 0x00000000, 0x00000001, 0x200000, 0xce7b6248,
第三个0x200000是rom大小,第四个0xce7b6248是crc check.第一个我看貌似都是0x00000000? 第二个是什么?怎么搞出来的 不明白
A2. 第一個是來源(Source)位址,你要從BIN的哪個地方開始複製,第二個是目的(Destination)位址,你要把BIN複製到哪個地方,一般來說,大同小異,如果有特別的ROM,需要從FBAlpha去找一下複製的區間
#352 Re: 司徒开源 » 研究FC3000掌機的開源可行性 » 2021-07-31 15:55:33
#353 Re: 司徒开源 » 研究FC3000掌機的開源可行性 » 2021-07-31 14:06:05
司徒好像開始老人癡呆,按鍵ABXY搞亂了~
目前按鍵ABXY位置如下: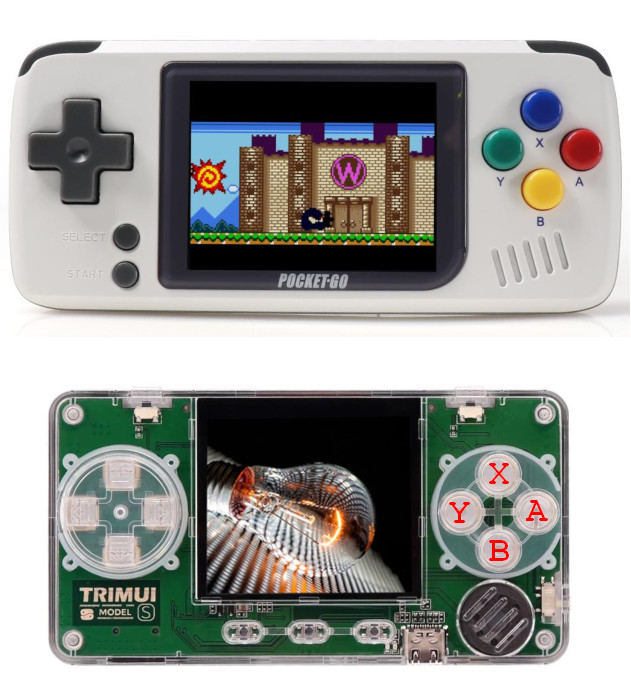
請使用如下修正ABXY位置問題的GNGEO模擬器
GNGEO模擬器 (支援b2b遊戲、按鍵設定):GNGEOhttps://github.com/steward-fu/trimui/releases/download/v1.0/gngeo_fix_abxy_v20210731.zip
#354 Re: 司徒开源 » 研究FC3000掌機的開源可行性 » 2021-07-31 13:33:21
相信大家都有看到,是怀旧堂說謝工偷工減料,不是司徒說的喔~司徒相信人性本善,不可能有人會幹這種缺德的事情,但是,怀旧堂既然都說這事了,司徒就只好去查看看,前因後果大家要搞清楚,人可是怀旧堂殺的,不是司徒~
左右聲道測試程序:speak-test.sh.zip
$ speaker-test -t wav -c 6
  Time per period = 12.163623
   0 - Front Left
   4 - Center
   1 - Front Right
   3 - Rear Right
   2 - Rear Left
5 - LFE果然跑到Fron Left時,喇吧沒有聲音輸出,而耳機是正常的
司徒對了一下電路圖,發現左右聲道是有連接的
怀旧堂說謝工偷工減料
果然是偷料,司徒標下位置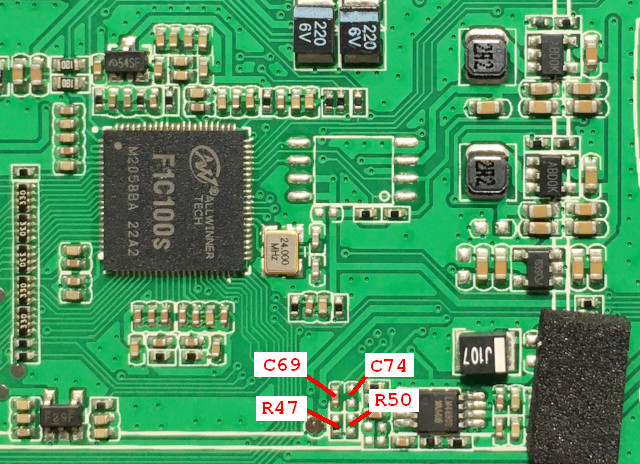
為了減少底噪,司徒把兩顆電阻都改成3K,完成後,就有左右聲道了~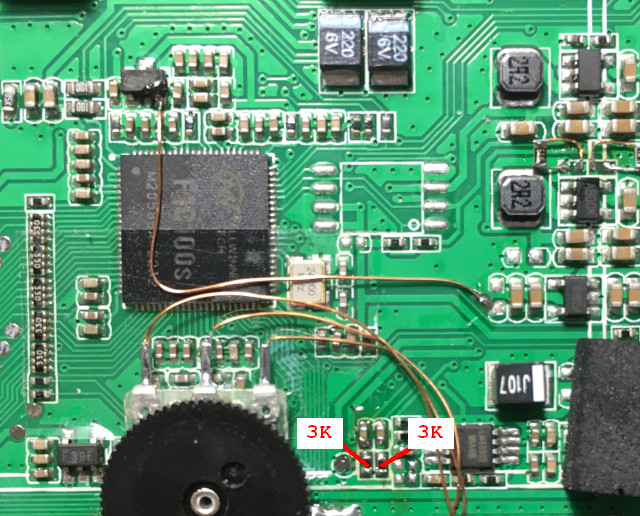
司徒也測試TRIMUI掌機,發現TRIMUI有左右聲道,沒有這個問題,TRIMUI的廠商果然比謝工可靠~而為了報答大家,司徒幫GNGEO加入人性化的按鍵設定
GNGEO v20210731源代碼:https://github.com/steward-fu/trimui/releases/download/v1.2/gngeo_v20210731.zip
GNGEO模擬器 (支援b2b遊戲、按鍵設定):https://github.com/steward-fu/trimui/releases/download/v1.0/gngeo_b2b_abxy_v20210731.zip
按鍵設定畫面,可以針對A、B、X、Y、L、R按鍵做個別設定,記得設定完成後要儲存~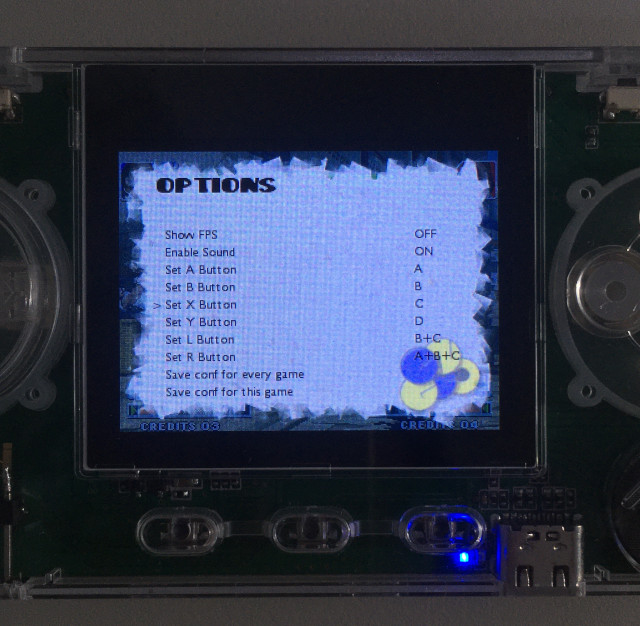
從這版開始,聲音都固定輸出44.1KHz,無法調整,不好的體驗不用保留,而Aduio Buffer Size原本只有64Bytes,有點詭異的設定,司徒也調大到2KB
#355 Re: 司徒开源 » 研究FC3000掌機的開源可行性 » 2021-07-30 18:58:41
@qllbee
A1: 聲音部份,你去看一下Miyoo那個daemon.7z,我當初做音效驅動時,留一個控制後門~當然你也可以使用傳統音效控制方式~
A2: 小橫米是雙聲道,而且據謝工說,那個喇吧也是支援雙聲道~你懷疑?難道~你不相信謝工為人?
A3: 想不到你對司徒這麼好,還要我舉一個例子給你說明,好吧~送佛送上天~移植過程如下說明~
首先找到ROM,然後,看一下他的檔案名稱
接著架設一個可以跑的專案,司徒使用RetroArch + 搭配fbalpha測試,方便Debug
https://github.com/libretro/fbalpha
在src/burn/drv/neogeo/d_neogeo.cpp可以找到相關資訊,這些資訊照抄就可以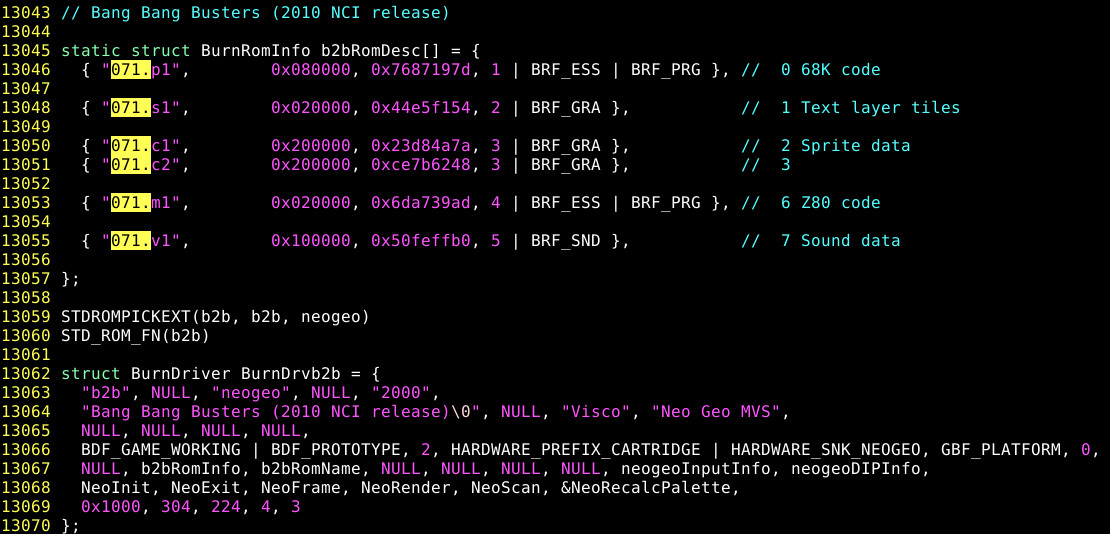
接著看一下是否有需要特別解密的東西,需要追進去fbalpha或者印log,幸好這個遊戲比較單純,想不到你對司徒真好~
幸好司徒目前已經把drv轉換成程式代碼,我就知道早晚有人要來踢館,所以,明天的洞,司徒今天已經幫你挖好了~貼上就可以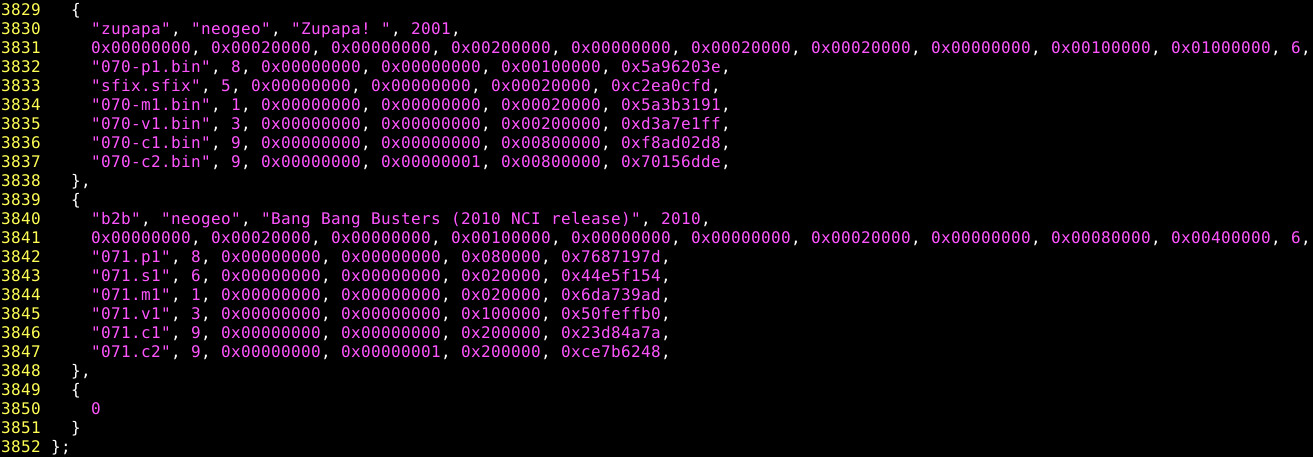
GNGEO目前使用的格式,雖然比較老舊,不過如果繼續維護,你需要知道他的格式是什麼~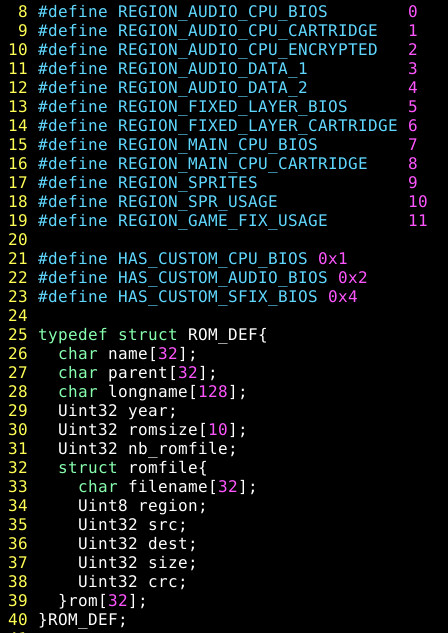
加好drv後,編譯就可以跑了,簡單測試一下,應該是沒有問題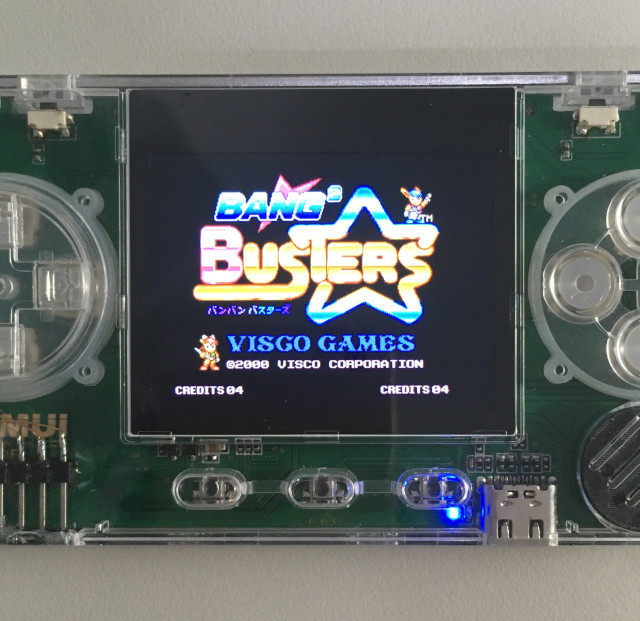
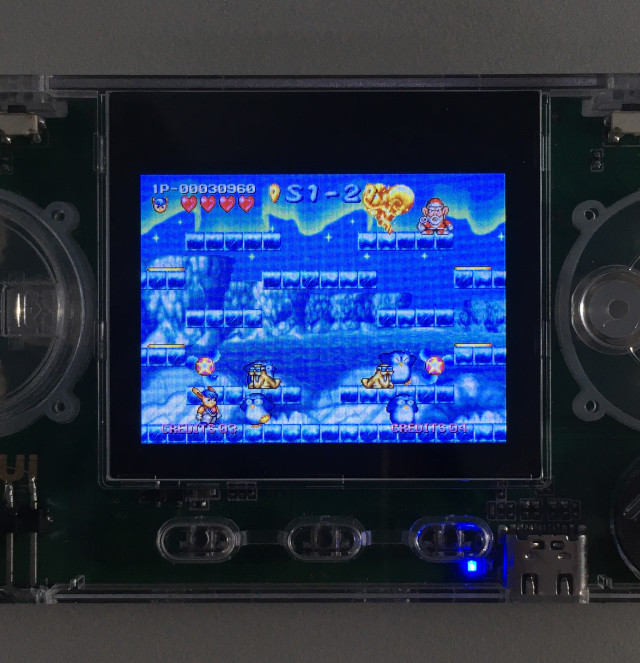
司徒已經把GNO檔案轉好了~大爺請笑納~
GNGEO GNO:https://github.com/steward-fu/neogeo/releases/tag/v1.1
#356 Re: 司徒开源 » 研究FC3000掌機的開源可行性 » 2021-07-29 20:42:56
#357 Re: 司徒开源 » 研究FC3000掌機的開源可行性 » 2021-07-29 17:31:16
#358 Re: 司徒开源 » 研究FC3000掌機的開源可行性 » 2021-07-28 17:32:44
#359 Re: 司徒开源 » 研究FC3000掌機的開源可行性 » 2021-07-28 16:58:54
@gamece
MENU + UP (亮度變亮)
MENU + DOWN (亮度變暗)
MENU + LEFT (聲音調小)
MENU + RIGHT (聲音調大)
@wotou
天注定~
司徒目前已經先把GNGEO KOF94~KOF2001的問題修正完畢,所以目前都可以正常遊玩~
GNGEO GNO 遊戲:https://github.com/steward-fu/neogeo/releases/tag/v1.1
GNGEO v20210728 模擬器:https://github.com/steward-fu/trimui/releases/download/v1.0/gngeo_v20210728.zip
司徒把全部238個遊戲,盡可能測試一輪,發現幾乎一半都無法玩,司徒整理如下(原圖1283x803)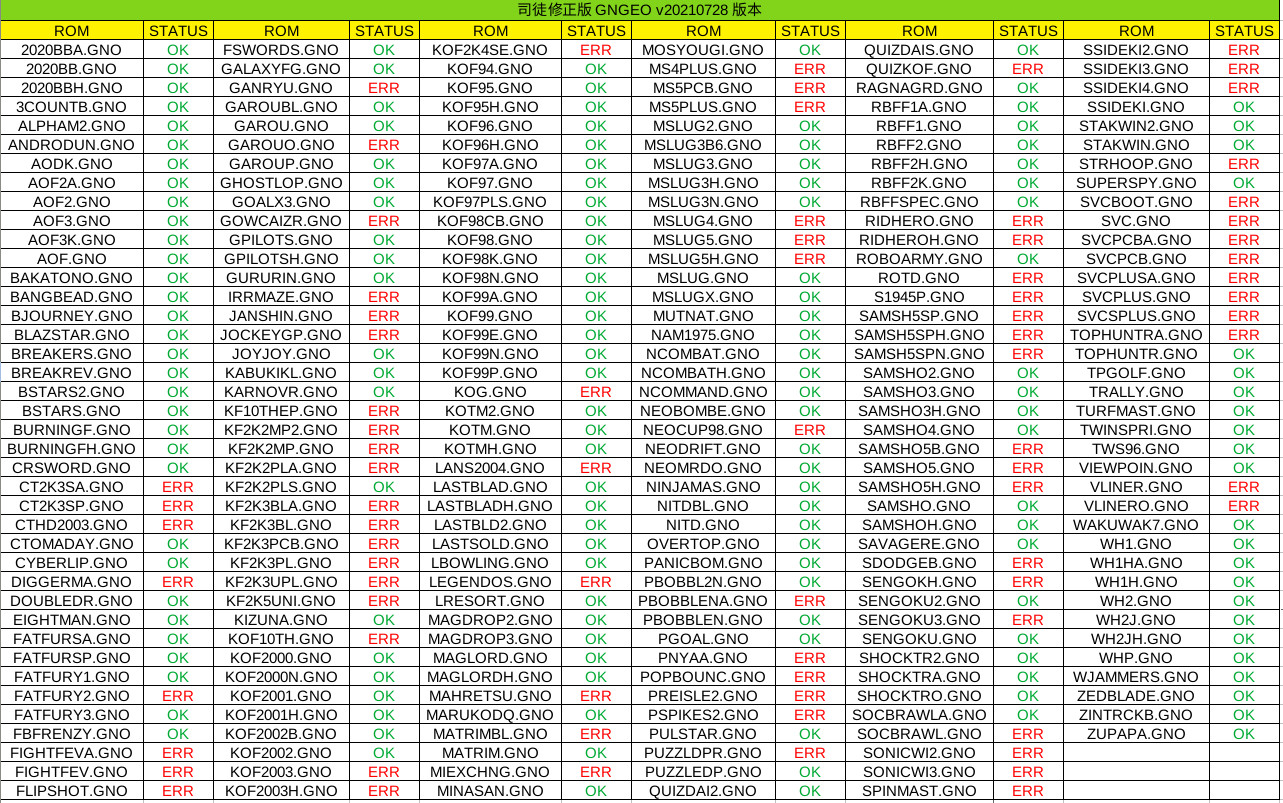
GNGEO整個源碼幾乎都快被司徒改掉了,因為,問題確實有點多,沒辦法,開源專案的魅力就是這樣~從這一版開始司徒刪除gngeo_data.zip,不在需要這個檔案,因為裡面的drv只是ROM的描述,相當不方便修改,這種格式太老舊了,司徒仿效MAME和FBA的作法,司徒將其全部轉換到代碼裡面,方便做CRC修正~
#360 Re: 司徒开源 » 研究FC3000掌機的開源可行性 » 2021-07-27 08:56:38
#361 Re: 司徒开源 » 研究FC3000掌機的開源可行性 » 2021-07-26 21:48:53
@时尚电子王
天意如此,那也沒辦法了~因為看不出問題在哪~
司徒算了一下目前GNGEO支援的ROM遊戲,一共有238個遊戲,司徒盡最大能力找出所有ROM並且轉換成GNO檔案格式,目前總共轉出212個GNO,轉完後,才發現,其實有蠻多特殊加密的遊戲是無法執行的~
GNGEO GNO檔案位置:https://github.com/steward-fu/neogeo/releases/tag/v1.1
所以接下來的兩大方向就是:
1. 優化卡頓問題
2. 修復無法執行的遊戲檔案
司徒相信這兩個項目如果可以做完,GNGEO應該就很完美,司徒也可以繼續往下一個模擬器邁進~只是目前看來,好像難度很高,哈~
#362 Re: 司徒开源 » 研究FC3000掌機的開源可行性 » 2021-07-26 15:20:30
@gamece
超過200RMB的機器就不建議入手了~
@qllbee
其實我在前面已經說過,在開發期間不開源,畢竟我也不想再次被誤會,不過,總是希望可以更多人參與開源,唉~兩難~
目前GNGEO源代碼GNGEO v20210726:https://github.com/steward-fu/trimui/releases/download/v1.2/gngeo_v20210726.tar.gz
#363 Re: 司徒开源 » 研究FC3000掌機的開源可行性 » 2021-07-26 10:11:37
#364 Re: 司徒开源 » 研究FC3000掌機的開源可行性 » 2021-07-26 09:17:40
#365 Re: 司徒开源 » 研究FC3000掌機的開源可行性 » 2021-07-25 22:34:02
@时尚电子王
OK
@gamece
OK
@skywalk00
屏反向是屏幕驅動的問題,按鍵每台機器不一樣,所以建議你先把所有按鍵量測出來,這樣些改驅動比較容易,我指的是你改,不是我改~
GNGEO模擬器支援LR按鍵設定(直接覆蓋就可以):https://github.com/steward-fu/trimui/releases/download/v1.0/gngeo_lr_mapping.zip
其實司徒不是很喜歡KOF的輔助系統,因為那個真的太婊了~司徒記得學生時期,當初流行KOF 99時,被人用全勳 + 八神連到死,差一點上演真人快打~不過,在掌機上,要按出輔助角色(B+C),應該是沒人可以快速按出來,就連司徒的加藤鷹之手也是辦不到,因此,司徒加入L、R按鍵的設定,可以把L、R設定成ABCD的組合鍵,Set L Button(設定L按鍵),Set R Button(設定R按鍵)
進去後,可以選擇想要的組合按鍵,None代表沒有做任何按鍵映射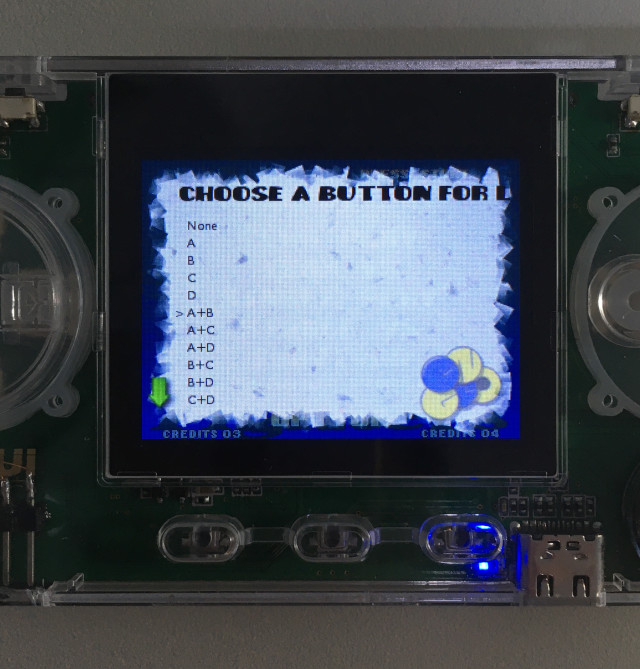
設定完成後,記得儲存,這樣下次啟動就可以讀取到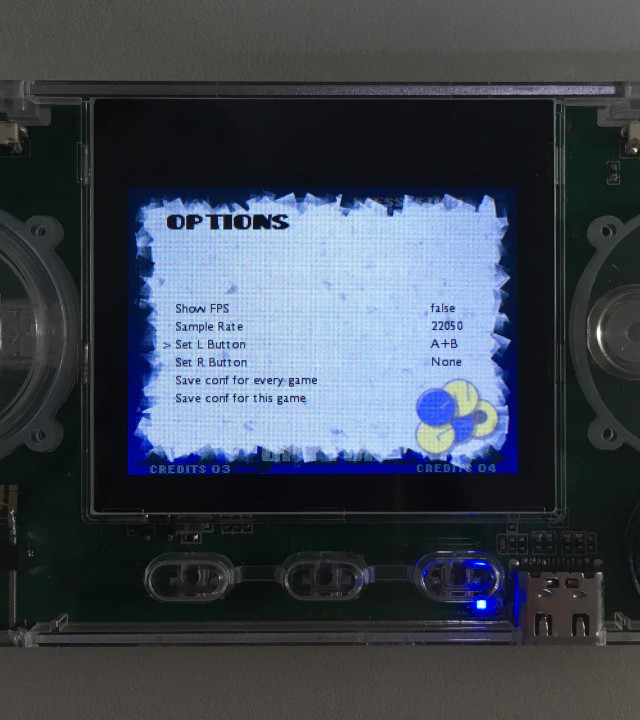
#366 Re: 司徒开源 » 研究FC3000掌機的開源可行性 » 2021-07-25 11:01:45
@lzgame02
小強無誤~生命力確實厲害~開發環境主要以Debian為主力~也許等之後有時間,在移植看看吧~感謝你的告知,請安息吧~
@gamece
TRIMUI如果可以多厚0.2cm,那整體會不錯~
@时尚电子王
RK3326的GBA是點對點拉伸,符合你的需求,建議你去玩RK3326
@yesiraperfect
哈~
@skywalk00
很抱歉,目前不會再支援任何機種~Q8資源正在整理中,整理完畢後會開源,你可以繼續研究~
@kit0072
GBA模擬器我最想做的就是等比拉伸不模糊,還有選單改進,同時ARM模擬器ARM不是我要的,有蠻多想改進的,不過,這個要等研究GBA模擬器時在討論~
@除恶务尽
我是在Linux PC上跑的,不要在F1C100S機器上跑,因為RAM不夠~你可以直接使用Miyoo gngeo.7z編譯測試
#367 Re: 司徒开源 » 研究FC3000掌機的開源可行性 » 2021-07-24 13:51:16
@yesiraperfect
我看了一下幽游白书:魔强统一战,它的ROM才4MB,RAM應該是夠用,所以可能模擬器要看一下問題,等整理SMD模擬器時,你在跟我提醒一下~
GNO檔案(司徒轉了一些常玩的遊戲):https://github.com/steward-fu/neogeo/releases/tag/v1.1
GNGEO模擬器支援GNO檔案(直接覆蓋就可以):https://github.com/steward-fu/trimui/releases/download/v1.0/gngeo_fix_gno_v20210724.zip
司徒先說一下結論,GNGEO模擬器使用GNO檔案,載入飛快,下表是載入ZIP和GNO的時間比較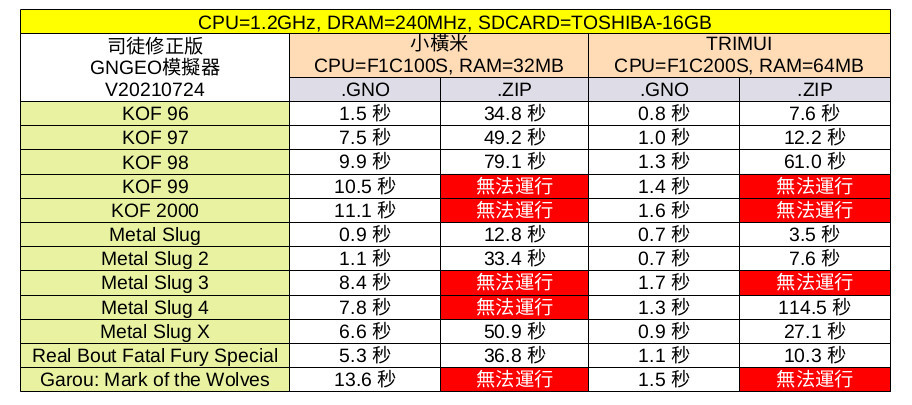
接下來說明一下過程,其實GNGEO模擬器本身是支援GNO檔案格式,只是不知道為何在載入ROM的時候,要做剔除副檔名的動作(src/main.c)
但是,後續處理ROM時卻又判斷是否有.GNO檔案
因此,司徒在一開始先判斷是否為.GNO副檔名,如果不是,才做剔除的動作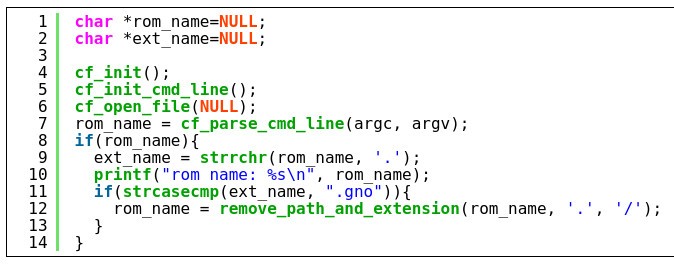
那接下來的問題是,什麼是GNO檔案呢?(src/rom.c)
int dr_save_gno(GAME_ROMS *r, char *filename) {
    FILE *gno;
    char *fid = "gnodmpv1";
    char fname[9];
    Uint8 nb_sec = 0;
    int i;

    gno = fopen(filename, "wb");
    if (!gno)
        return GN_FALSE;

    /* restore game vector */
    memcpy(memory.rom.cpu_m68k.p, memory.game_vector, 0x80);
    for (i = 0; i < 0x80; i++)
        printf("%02x ", memory.rom.cpu_m68k.p[i]);
    printf("\n");

    if (r->cpu_m68k.p)
        nb_sec++;
    if (r->cpu_z80.p)
        nb_sec++;
    if (r->adpcma.p)
        nb_sec++;
    if (r->adpcmb.p && (r->adpcmb.p != r->adpcma.p))
        nb_sec++;
    if (r->game_sfix.p)
        nb_sec++;
    if (r->tiles.p)
        nb_sec += 2; /* Sprite + Sprite usage */
    if (r->gfix_usage.p)
        nb_sec++;
    /* Do we need Custom Bios? */
    if ((r->info.flags & HAS_CUSTOM_CPU_BIOS)) {
        nb_sec++;
    }
    if ((r->info.flags & HAS_CUSTOM_SFIX_BIOS)) {
        nb_sec++;
    }


    /* Header information */
    fwrite(fid, 8, 1, gno);
    snprintf(fname, 9, "%-8s", r->info.name);
    fwrite(fname, 8, 1, gno);
    fwrite(&r->info.flags, sizeof (Uint32), 1, gno);
    fwrite(&nb_sec, sizeof (Uint8), 1, gno);

    /* Now each section */
    dump_region(gno, &r->cpu_m68k, REGION_MAIN_CPU_CARTRIDGE, 0, 0);
    dump_region(gno, &r->cpu_z80, REGION_AUDIO_CPU_CARTRIDGE, 0, 0);
    dump_region(gno, &r->adpcma, REGION_AUDIO_DATA_1, 0, 0);
    if (r->adpcma.p != r->adpcmb.p)
        dump_region(gno, &r->adpcmb, REGION_AUDIO_DATA_2, 0, 0);
    dump_region(gno, &r->game_sfix, REGION_FIXED_LAYER_CARTRIDGE, 0, 0);
    dump_region(gno, &r->spr_usage, REGION_SPR_USAGE, 0, 0);
    dump_region(gno, &r->gfix_usage, REGION_GAME_FIX_USAGE, 0, 0);
    if ((r->info.flags & HAS_CUSTOM_CPU_BIOS)) {
        dump_region(gno, &r->bios_m68k, REGION_MAIN_CPU_BIOS, 0, 0);
    }
    if ((r->info.flags & HAS_CUSTOM_SFIX_BIOS)) {
        dump_region(gno, &r->bios_sfix, REGION_FIXED_LAYER_BIOS, 0, 0);
    }
    /* TODO, there is a bug in the loading routine, only one compressed (type 1)
     * region can be present at the end of the file */
    dump_region(gno, &r->tiles, REGION_SPRITES, 1, 4096);


    fclose(gno);
    return GN_TRUE;
}
P.S. 其實就是儲存已經解完密的每個REGION資料,所以小橫米、TRIMUI掌機應該要使用這種格式
那另外一個問題是,如何DUMP呢?(src/main.c)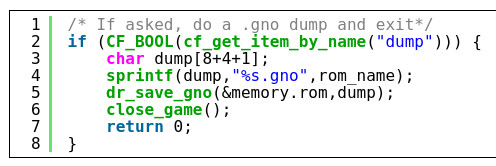
P.S. 只要在啟動gngeo時,使用--dump就可以做DUMP的動作
如下
$ ./gngeo --dump
P.S. 載入遊戲後,gngeo會自動離開並且產生(null).gno檔案,因為char dump並沒有被初始化
司徒把沒有用到的選項都刪除了,當然,看不懂、用不到的代碼也都刪除了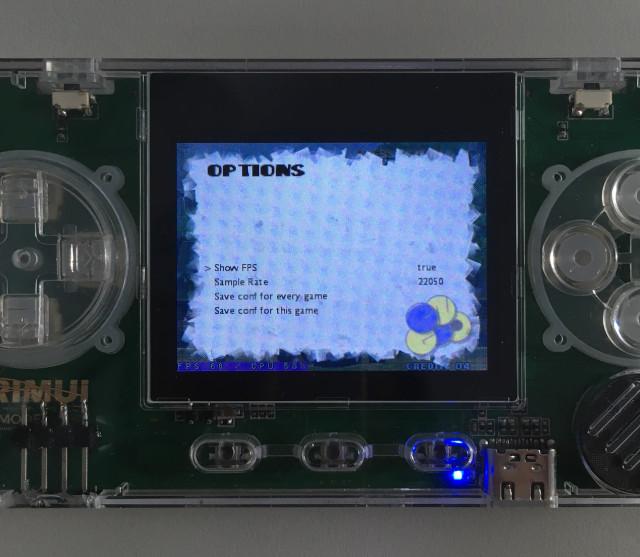
FPS顯示還包含CPU使用率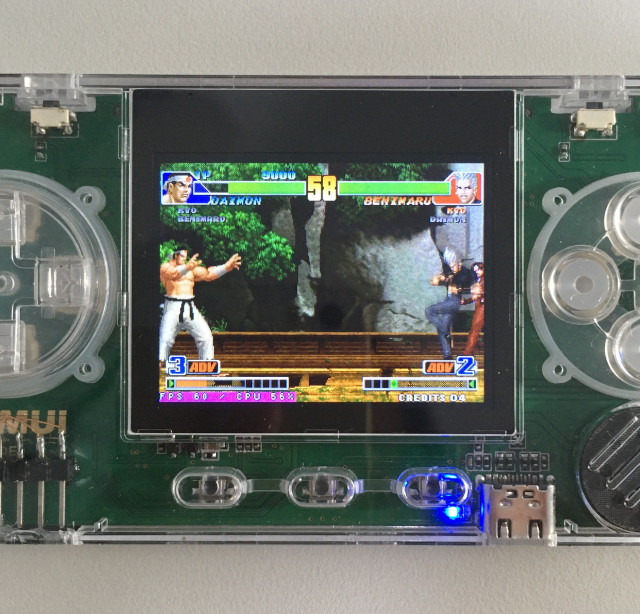
CPU使用率計算方式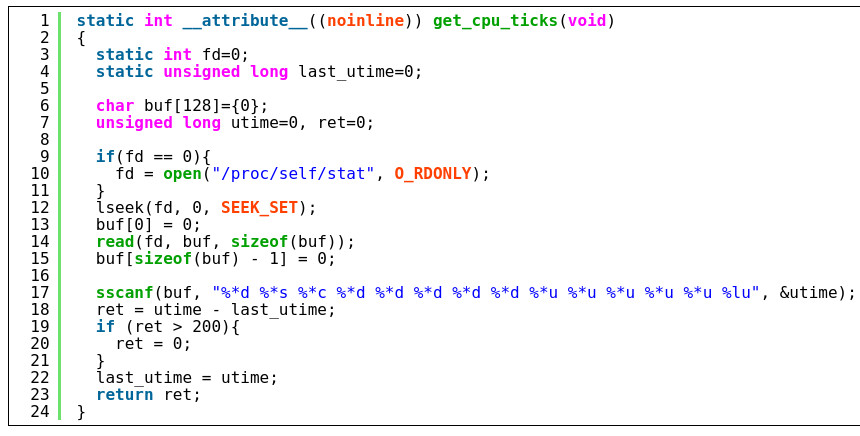
那最後的問題是,如何載入GNO檔案?其實就跟載入ZIP一樣,選擇GNO檔案就可以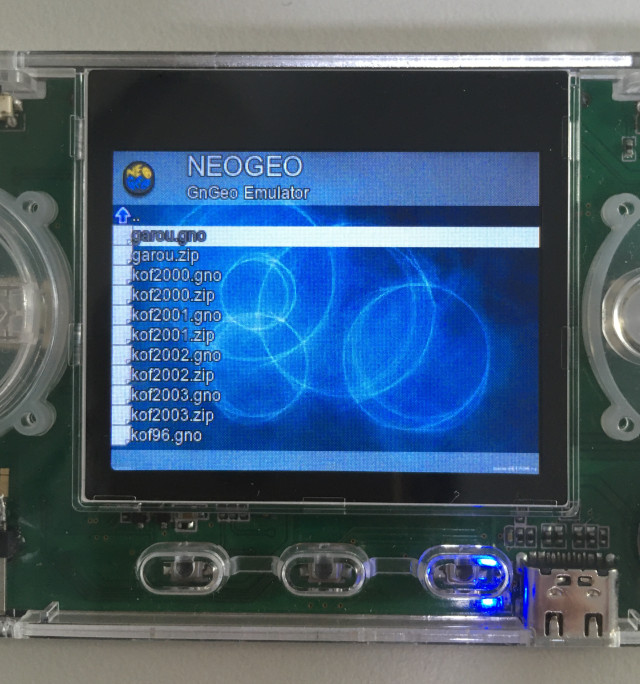
目前看來,如果小橫米可以換成F1C200S晶片,那玩GNGEO模擬器將會是一個很棒的體驗~
#368 Re: 司徒开源 » 研究FC3000掌機的開源可行性 » 2021-07-23 21:12:45
TRIMUI DRAM超頻補丁:https://github.com/steward-fu/trimui/releases/download/v1.0/trimui_dram_patch.zip
之前量測到的DRAM-VCC是2.48V
司徒使用120K搭配442K電阻,電壓:0.6 * (1 + (442K / 120K)) = 2.81V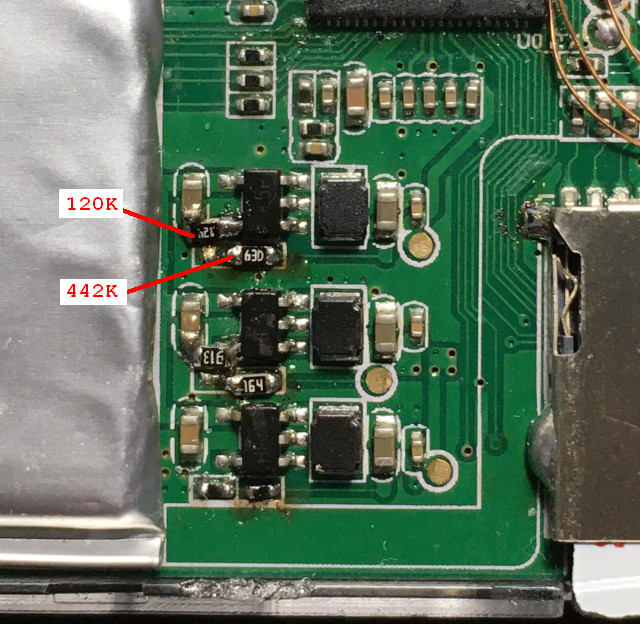
量測到的電壓是2.82V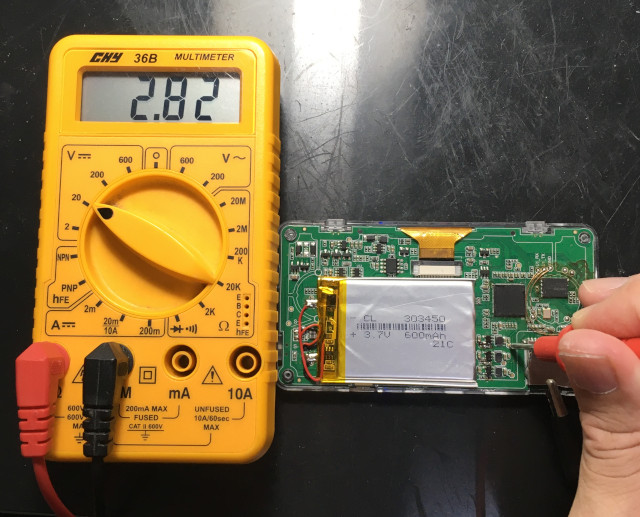
執行run.sh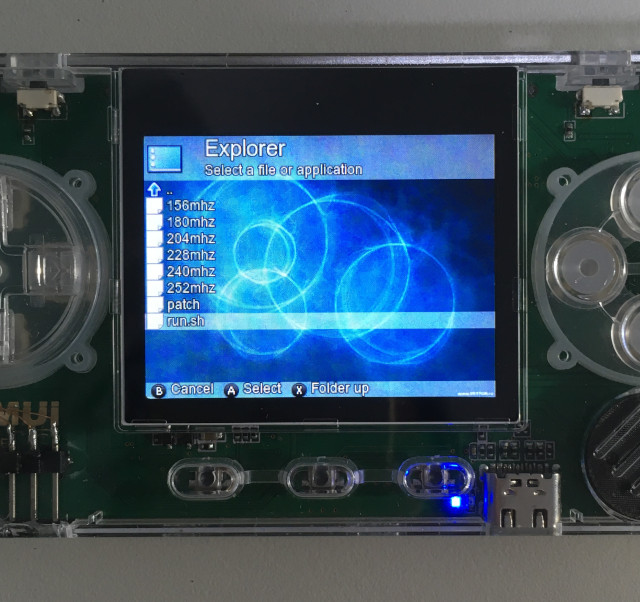
DRAM超頻可以選擇156MHz~252MHz,沒有改機的話,大部份機器(不是每一台都可以)應該是可以跑到204MHz
補丁更新中~不知道有多少人還記得這樣的圖片,司徒當初在選PS1和SS時,最後選擇SS主機,後來才發現玩KOF97竟然還需要買加速卡...
更新完成,重新開機即可生效,KOF97大流行時,比賽到最後都是看誰的積分最高,司徒只記得,大部分積分高的人都是考試很會作弊的人...
DRAM超頻速度會顯示在中下方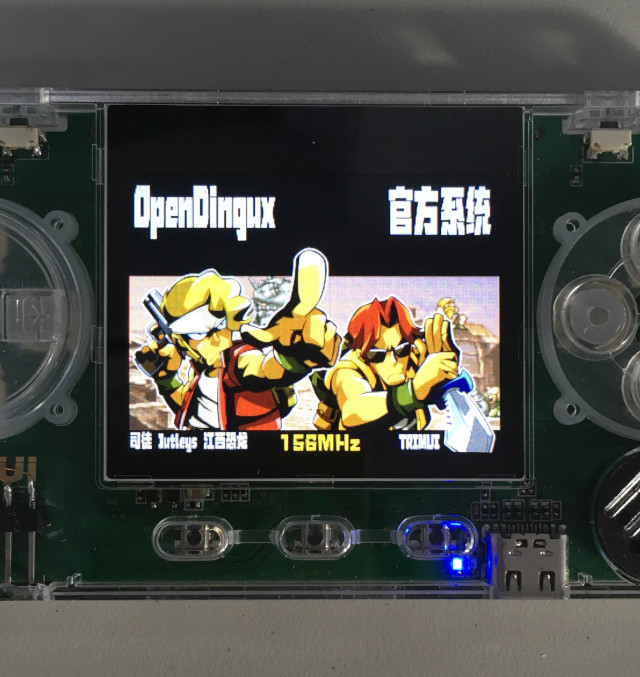

禁止商業用途
PocketSNES,新機動戰記,關閉FrameSkip,CPU=1.2GHZ,DRAM=156MHz,FPS=39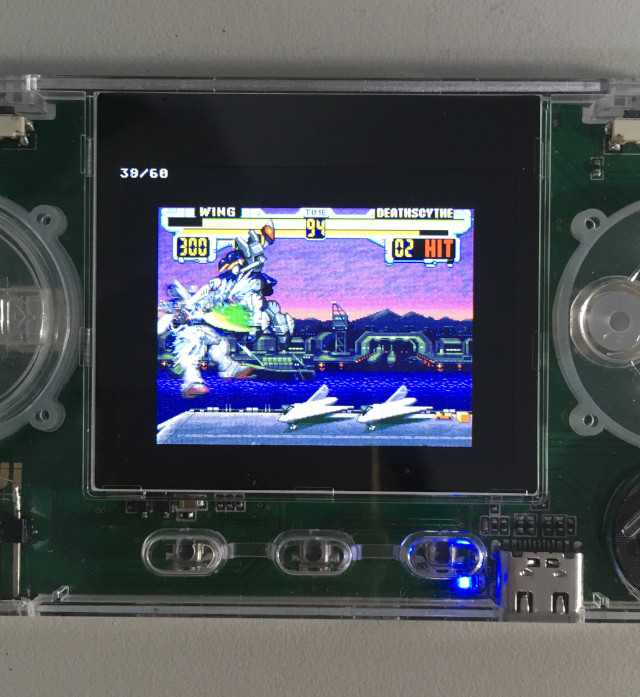
PCSX ReARMED,惡魔城,關閉FrameSkip,CPU=1.2GHZ,DRAM=156MHz,FPS=60,CPU使用率78%
PocketSNES,新機動戰記,關閉FrameSkip,CPU=1.2GHZ,DRAM=252MHz,FPS=56
PCSX ReARMED,惡魔城,關閉FrameSkip,CPU=1.2GHZ,DRAM=252MHz,FPS=60,CPU使用率58%
關於MicroSD部份,C10的MicroSD卡,在小橫米上跑出22MB/s,SD2.0理論值差不多是25MB/s,因此,這部份應該是很不錯了~所以司徒不會繼續MicroSD速度研究,司徒調整一下接下來的順序方向:
1. GNGEO如何載入大型遊戲,GNGEO支援GNO檔案,可以用來載入大型ROM,載入速度也很快,不過目前GNGEO模擬器似乎有問題~
2. GNGEO卡頓問題,雖然CPU使用率已經降到很低,不過在小橫米上,還是會有小卡頓問題,司徒想研究一下Tile以及Sound部份,看看是否有機會縮小
#369 Re: 司徒开源 » 研究FC3000掌機的開源可行性 » 2021-07-23 19:43:21
#370 Re: 司徒开源 » 研究FC3000掌機的開源可行性 » 2021-07-23 15:55:35
#371 Re: 司徒开源 » 研究FC3000掌機的開源可行性 » 2021-07-23 13:03:56
#372 Re: 司徒开源 » 研究FC3000掌機的開源可行性 » 2021-07-23 12:12:55
玩家如果沒有硬改DRAM電路,預設小橫米DRAM有機會跑到204MHz(不是每一台都可以),硬改後,DRAM可以跑到252MHz~
小橫米DRAM超頻工具:https://github.com/steward-fu/pocketgo/releases/download/v1.0/pocketgo_dram_patch.zip
小橫米的DRAM-VCC是使用LP3992,因此,無法使用電阻方式改機,不過,從電路圖上,可以發現AVCC是2.8V,因此,可以從這裡偷電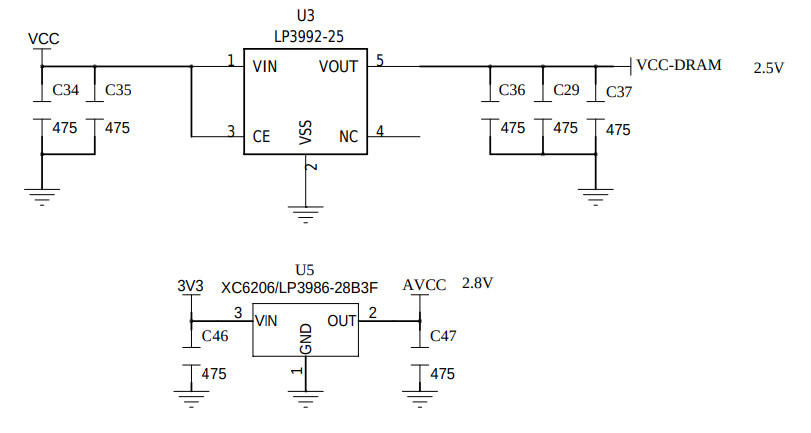
2.5V位置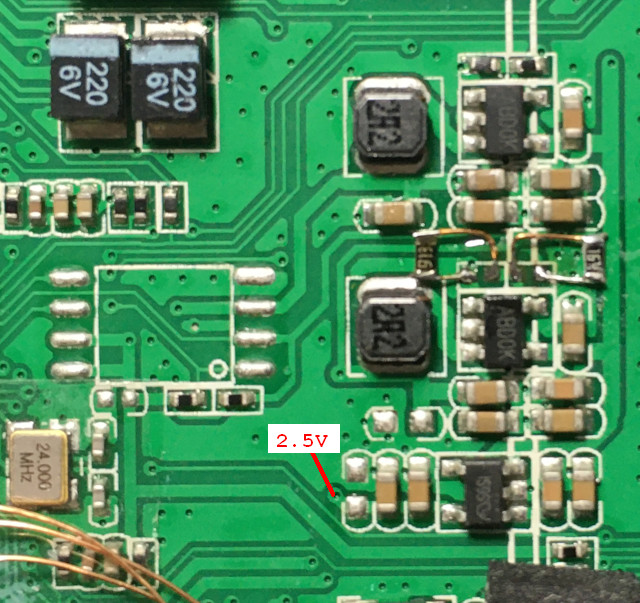
割線
連接到AVCC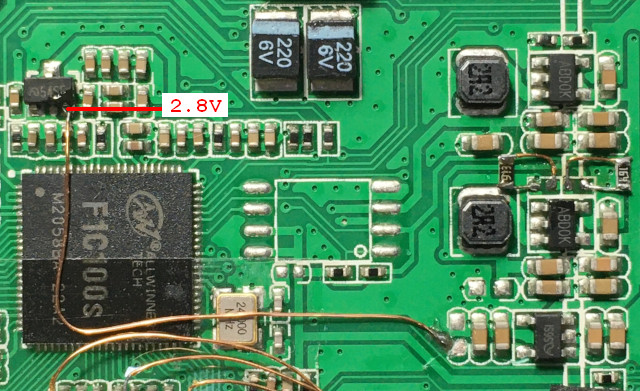
實際測得電壓2.78V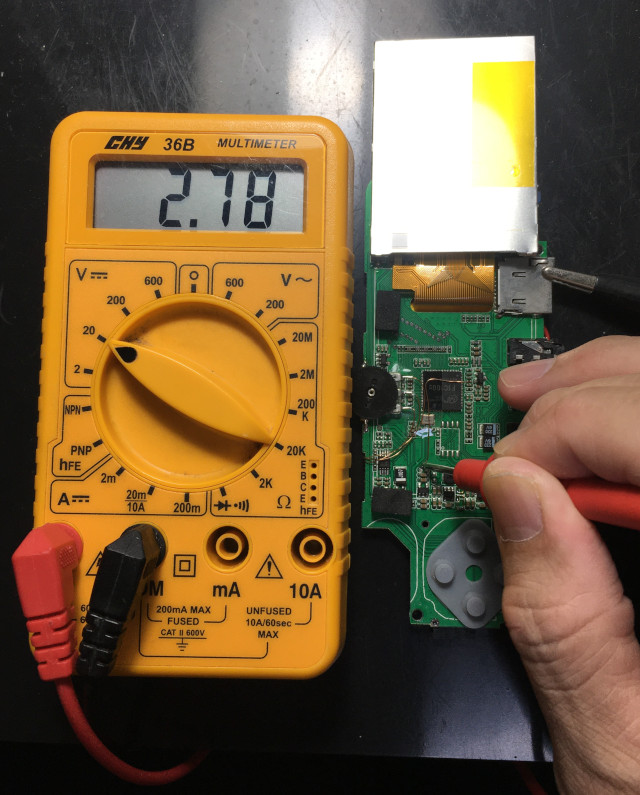
執行run.sh,DRAM超頻可以選擇156MHz~252MHz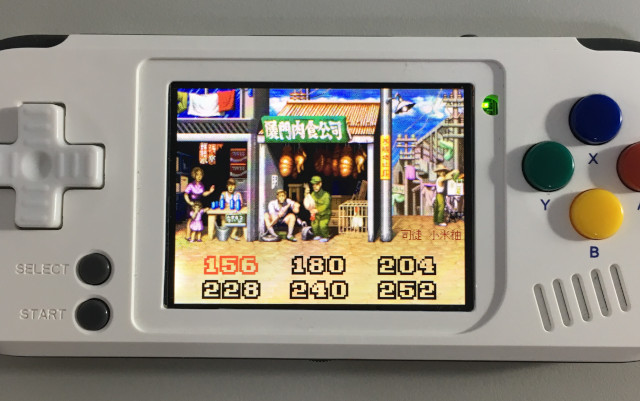
補丁更新中~司徒最懷念的降龍快打,司徒還記得在小學時期,中午都偷偷跑去街機廳打2局,1局5元新台幣,哈~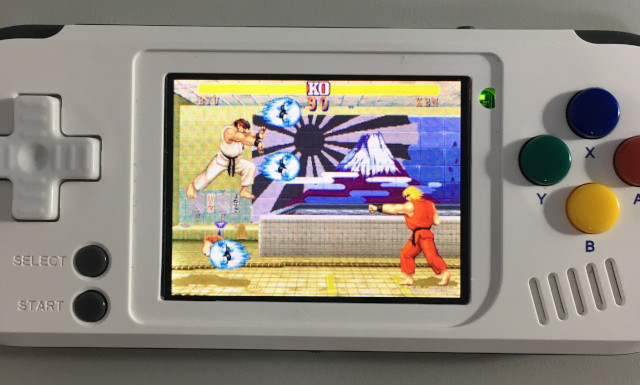
更新完成,重新開機就可以生效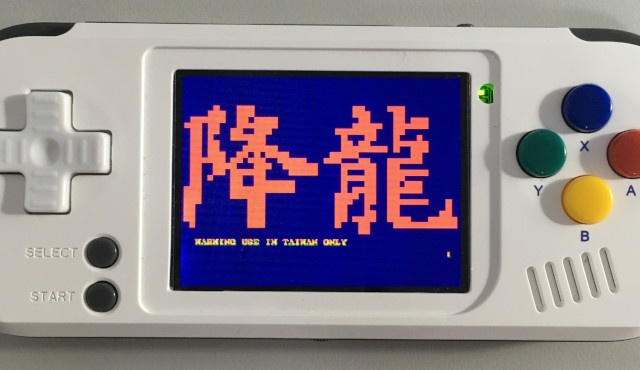
重新開機後,右上角會顯示目前DRAM超頻速度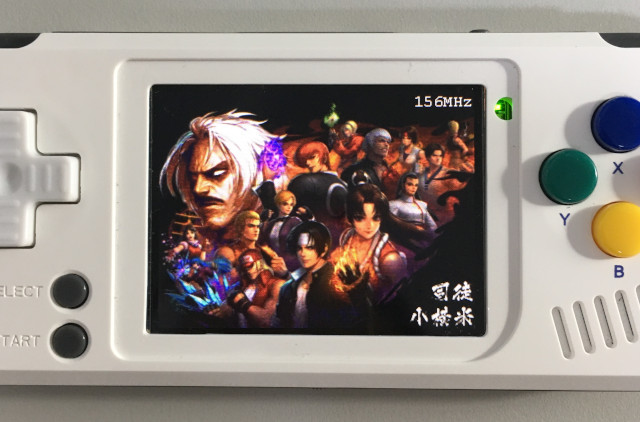

禁止使用於商業用途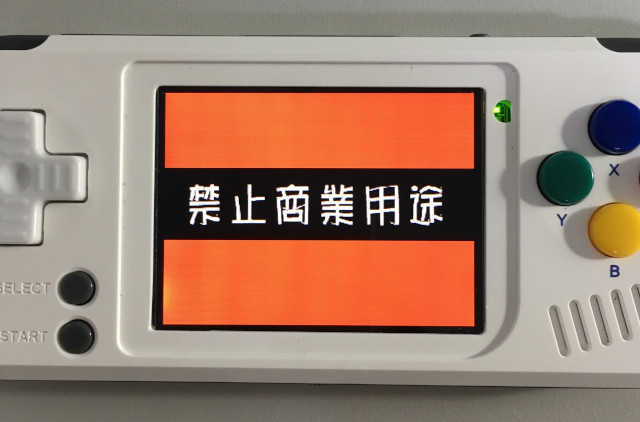
PocketSNES,新機動戰記,關閉FrameSkip,CPU=1.2GHZ,DRAM=156MHz,FPS=40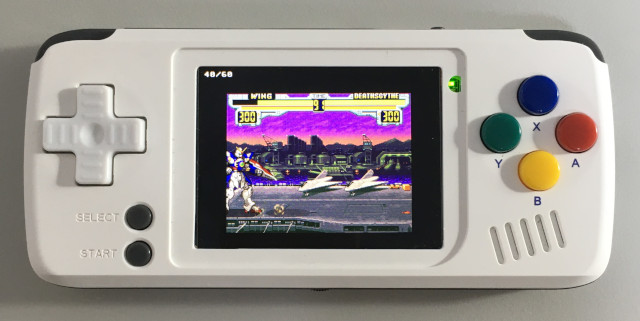
PCSX ReARMED,惡魔城,關閉FrameSkip,CPU=1.2GHZ,DRAM=156MHz,FPS=60,CPU使用率81%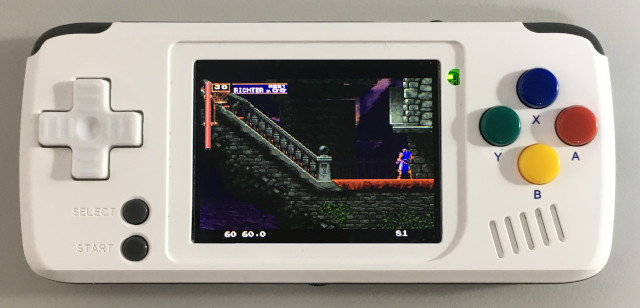
PocketSNES,新機動戰記,關閉FrameSkip,CPU=1.2GHZ,DRAM=252MHz,FPS=54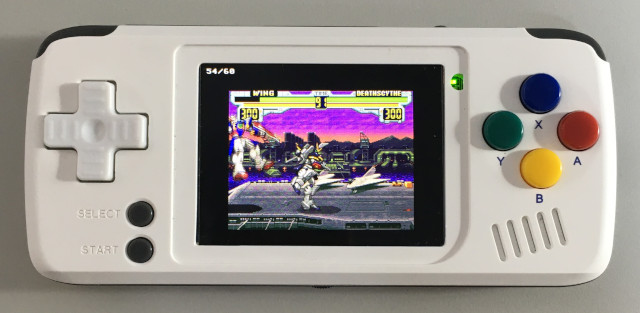
PCSX ReARMED,惡魔城,關閉FrameSkip,CPU=1.2GHZ,DRAM=252MHz,FPS=60,CPU使用率57%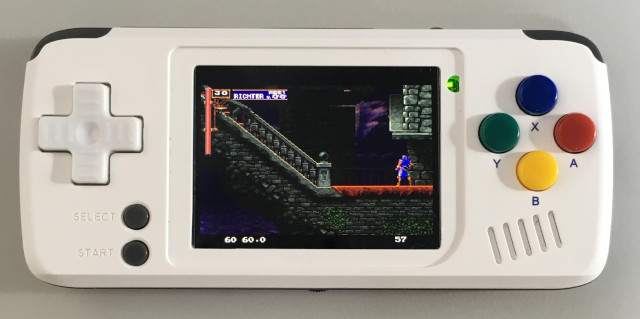
#373 Re: 司徒开源 » 研究FC3000掌機的開源可行性 » 2021-07-23 11:43:54
#374 Re: 司徒开源 » 研究FC3000掌機的開源可行性 » 2021-07-22 12:12:13
#375 Re: 司徒开源 » 研究FC3000掌機的開源可行性 » 2021-07-21 19:55:04
Q8掌機已經確定不會在更新,而FC3000掌機,沒意外的話,這是最後一次更新,在此次更新中,司徒把FC3000的按鍵連按問題也一併修掉,如果玩家打完補丁後,還是發現有問題,再麻煩回報給司徒,而停止更新的機器,司徒會開始著手整理源代碼,秉持開源的精神,於整理後發布在司徒的GitHub~司徒最後的重點就是放在小橫米和TRIMUI掌機~
FC3000 DRAM超頻補丁(包含Kernel補丁):https://github.com/steward-fu/fc3000/releases/download/v1.0/fc3000_dram_patch.zip
由於DRAM-VCC是使用固定2.5V輸出,因此,無法使用電阻方式改機,可以從如下位置割斷PCB,然後使用3.3V轉2.8V穩壓IC供電,因為DRAM超頻,必須確保DRAM-VCC有2.8V電壓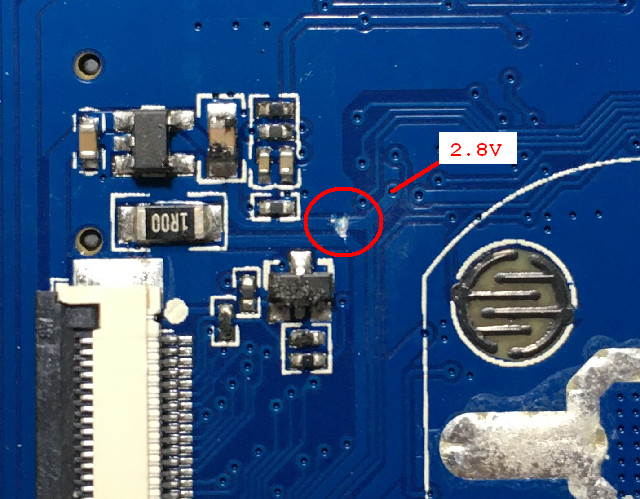
由於司徒目前手上沒有3.3V轉2.8V穩壓IC,因此,使用外部供電方式,不過,無法正確運作...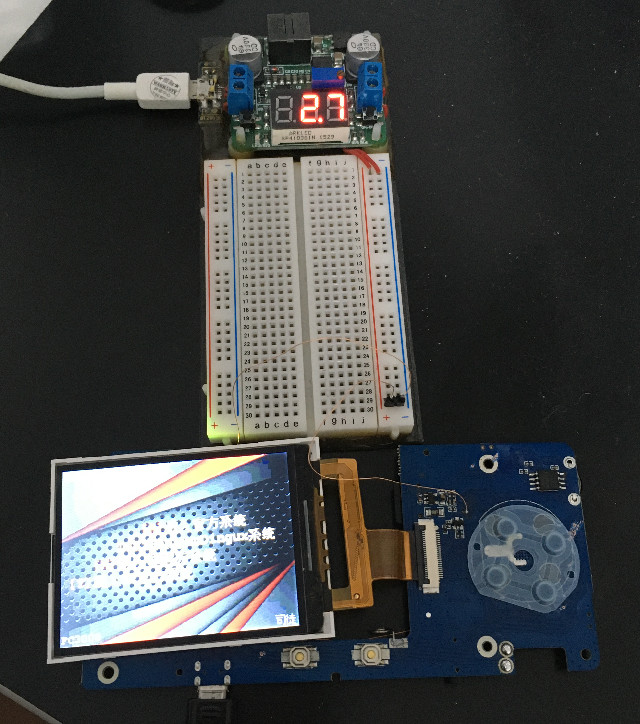
在沒有改機的狀態下,有些機器(不是每一台都可以)可以把DRAM超頻到204MHz,因此,司徒製作了一個補丁工具,玩家只要執行run.sh就可以打補丁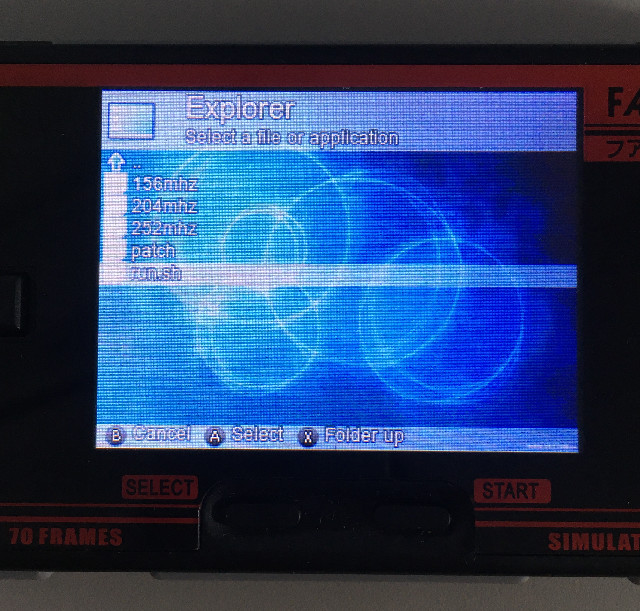
A:DRAM超頻到156MHz(按鍵連按問題也會一起更新)
B:DRAM超頻到204MHz(按鍵連按問題也會一起更新)
X:DRAM超頻到252MHz(按鍵連按問題也會一起更新)
Y:離開補丁工具
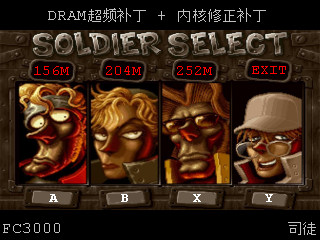
更新中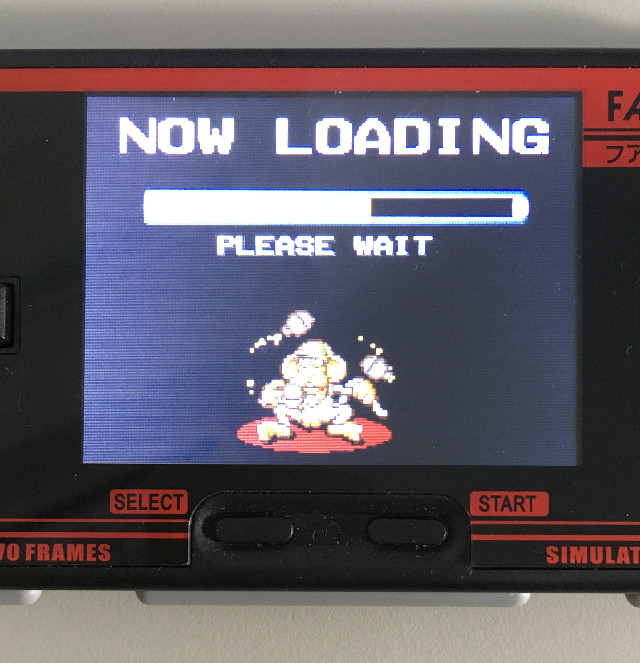
更新完成,重新開機就可以生效
左上角會顯示目前DRAM超頻速度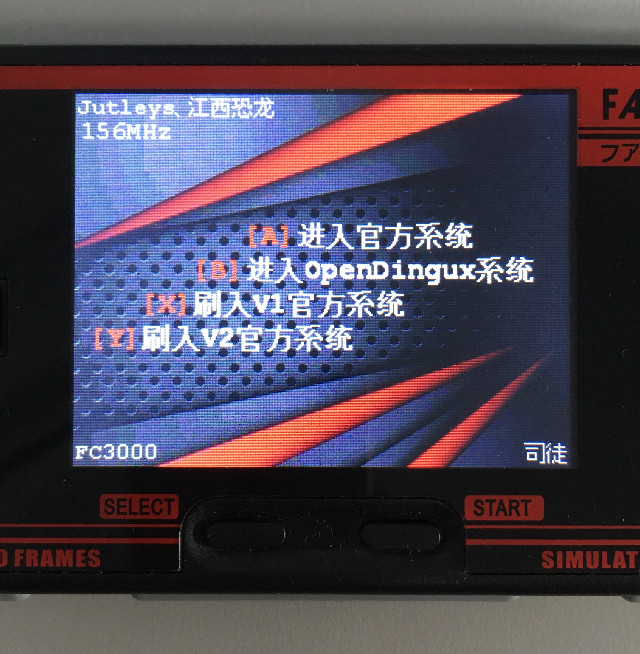
PocketSNES,新機動戰記,關閉FrameSkip,CPU=1.2GHZ,DRAM=156MHz,FPS=42
PCSX ReARMed,惡魔城,關閉FrameSkip,CPU=1.2GHZ,DRAM=156MHz,FPS=60,CPU使用率89%
GNGEO,KOF98,CPU=1.2GHZ,DRAM=156MHz,FPS=60,CPU使用率80%
PocketSNES,新機動戰記,關閉FrameSkip,CPU=1.2GHZ,DRAM=204MHz,FPS=51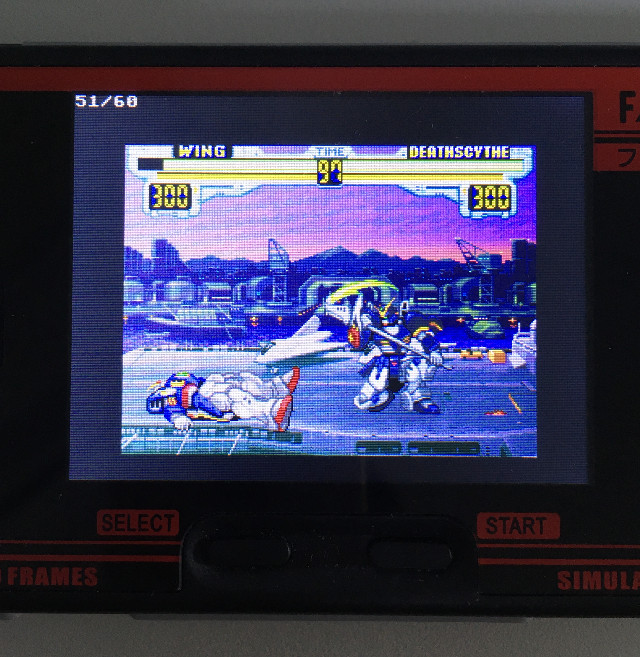
PCSX ReARMed,惡魔城,關閉FrameSkip,CPU=1.2GHZ,DRAM=204MHz,FPS=60,CPU使用率79%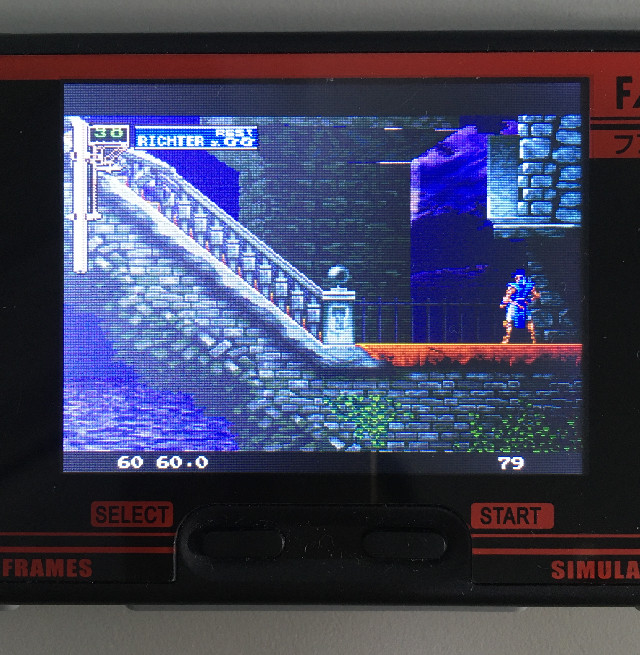
GNGEO,KOF98,CPU=1.2GHZ,DRAM=204MHz,FPS=60,CPU使用率68%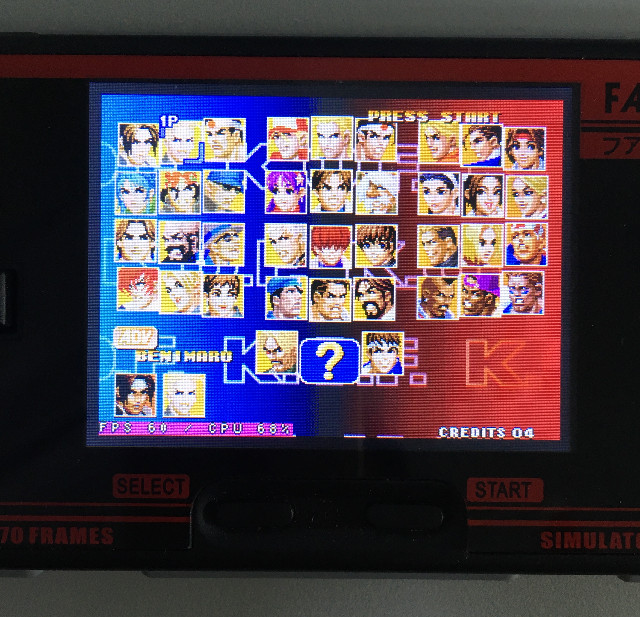
#376 Re: 司徒开源 » 研究FC3000掌機的開源可行性 » 2021-07-21 10:48:33
感謝xboot提供DRAM超頻資訊,司徒做了一些實驗測試,發現DRAM電壓2.8V,DRAM可以超頻到252MHz,這是可以穩定工作的電壓以及頻率,搭配CPU=1.2GHz,司徒只能說效果真是相當不可思議!測試GNGEO模擬器,使用CPU=1.2GHZ、DRAM=252MHz,測試KOF98,FPS可以穩定跑到60,而且CPU使用率降到55%,真是太神奇了傑克 !
預設電阻是14.8K和46.8K,電壓輸出:2.5V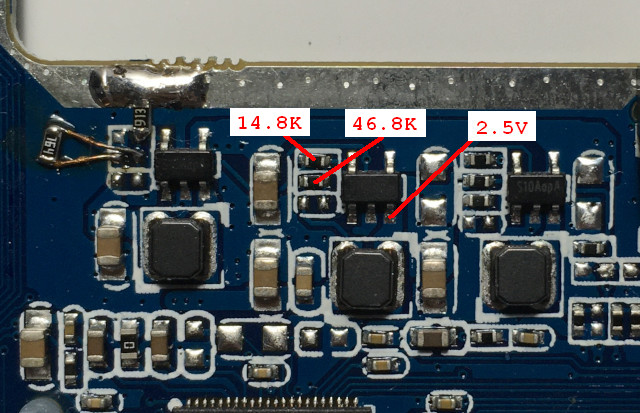
第1組測試登場,電阻120K搭配442K,電壓輸出:0.6 * (1 + (442K / 120K)) = 2.81V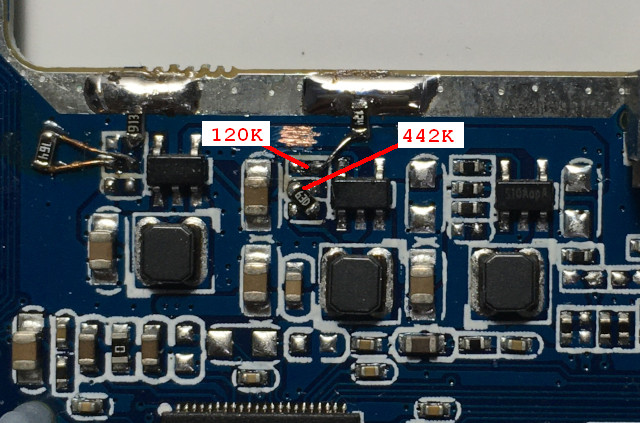
實際測得電壓2.78V,F1C100S溫度正常,DRAM可以超頻到252MHz,可以開機進入系統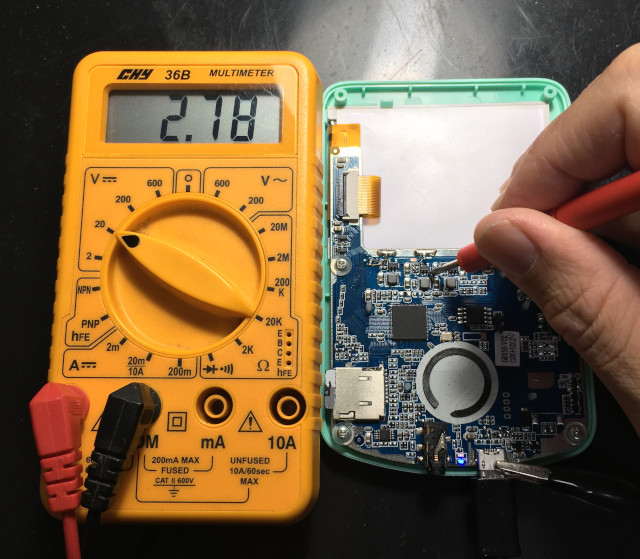
第2組測試登場,電阻120K搭配464K,電壓輸出:0.6 * (1 + (464K / 120K)) = 2.92V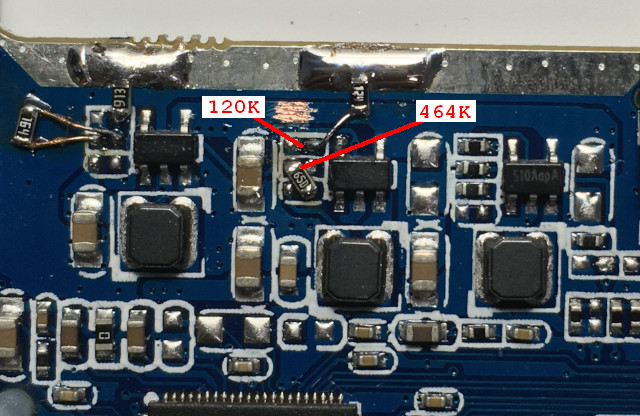
實際測得電壓2.89V,F1C100S溫度正常,DRAM已經開始不穩定,即使降頻到240MHz,依然不穩定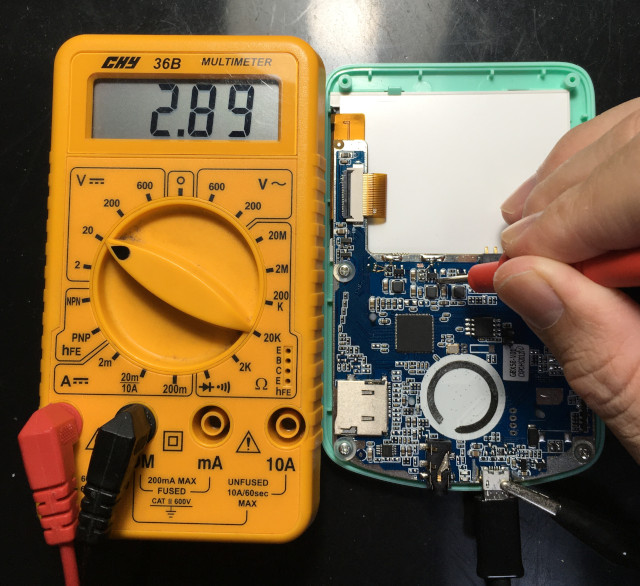
第3組測試登場,電阻105K搭配442K,電壓輸出:0.6 * (1 + (442K / 105K)) = 3.13V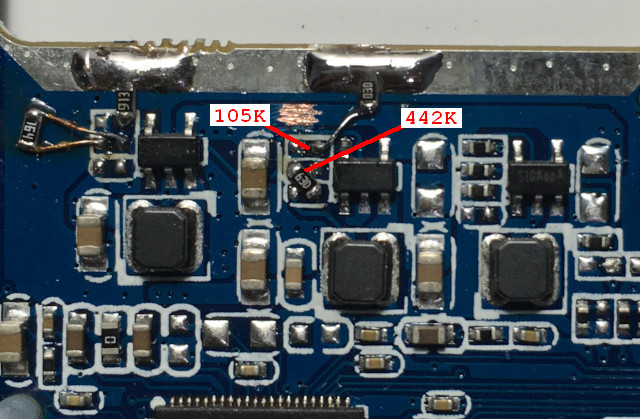
實際測得電壓3.12V,F1C100S溫度正常,DRAM已經無法工作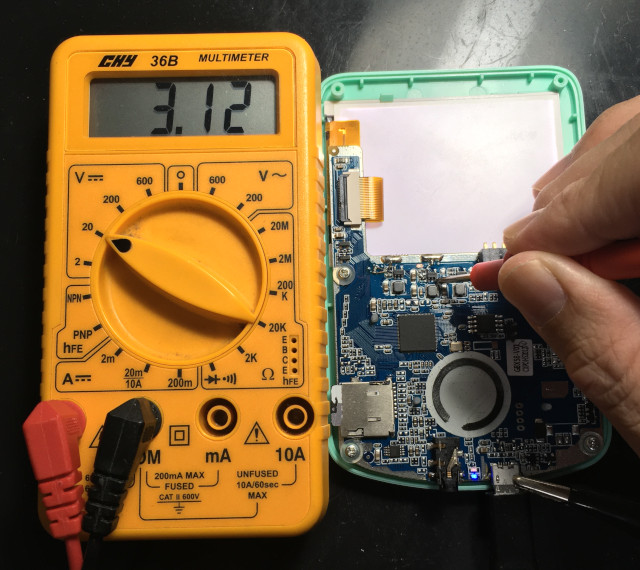
司徒接著會依序整理FC3000、小橫米、TRIMUI的超頻比較圖並且釋出補丁給玩家測試~
#377 Re: 司徒开源 » 研究FC3000掌機的開源可行性 » 2021-07-20 08:38:58
@lzgame02
你指的是GNGEO模擬器嗎?
雖身攜帶小橫米、TRIMUI出門,空閒時,拿出來搓兩把格鬥遊戲,這是司徒最想要的掌機,如果GNGEO模擬器都無法優化好,那等於是提早舉白旗放棄這兩台掌機,所以,即使花掉剩下的十個月時間優化GNGEO模擬器,司徒還是會做,盡力做到最好,而經由司徒測試,發現只要CPU使用率可以從目前的100%降到75%,可以有效壓制卡頓問題,所以硬件超頻、軟件優化同時進行下,司徒覺得一定有機會解決卡頓問題~
這個貼子相當混亂,什麼問題都混在一起,真是相當抱歉~因為都是同一系列CPU,加上,掌機怎麼玩就是那幾個模擬器,因此,司徒才想說就當作一個總貼研究,避免問題發散,然而,模擬器再不突破優化,恐怕只能停留在過去的美好,為了可以出門搓兩把格鬥遊戲,司徒只能盡力,能走多遠,但看天意~
所以結論就是,司徒不會再開其它專區討論,然後,會一直專研下去,直到GNGEO模擬器達到司徒的要求,如果玩家無法等待,請玩其它符合你需求的掌機~
#378 Re: 司徒开源 » 研究FC3000掌機的開源可行性 » 2021-07-19 19:50:03
司徒補一下tinymembench測試數據,供日後參考使用
測試機器:小橫米PocketGo (RAM: 32MB)
測試工具:tinymembench (Test Size: 8MB)
CPU=672MHz, DRAM=156MHz
=== Memory bandwidth tests ===
 C copy backwards                                     :     83.7 MB/s (4.4%)
 C copy backwards (32 byte blocks)                    :     95.5 MB/s
 C copy backwards (64 byte blocks)                    :     95.4 MB/s
 C copy                                               :     95.6 MB/s
 C copy prefetched (32 bytes step)                    :     95.2 MB/s
 C copy prefetched (64 bytes step)                    :     95.6 MB/s
 C 2-pass copy                                        :     80.9 MB/s
 C 2-pass copy prefetched (32 bytes step)             :     81.6 MB/s
 C 2-pass copy prefetched (64 bytes step)             :     80.6 MB/s (0.1%)
 C fill                                               :    283.7 MB/s
 C fill (shuffle within 16 byte blocks)               :    283.7 MB/s
 C fill (shuffle within 32 byte blocks)               :    283.7 MB/s
 C fill (shuffle within 64 byte blocks)               :    283.7 MB/s
 ---
 standard memcpy                                      :     97.4 MB/s
 standard memset                                      :    283.7 MB/s
 ---
 ARM fill (STRD)                                      :    283.7 MB/s
 ARM fill (STM with 8 registers)                      :    544.2 MB/s
 ARM fill (STM with 4 registers)                      :    544.2 MB/s
 ARM copy prefetched (incr pld)                       :    128.8 MB/s
 ARM copy prefetched (wrap pld)                       :    128.8 MB/s
 ARM 2-pass copy prefetched (incr pld)                :    111.9 MB/s
 ARM 2-pass copy prefetched (wrap pld)                :    111.9 MB/s

=== Framebuffer read tests ===
 ARM copy (from framebuffer)                          :    128.9 MB/s
 ARM 2-pass copy (from framebuffer)                   :    110.1 MB/s

=== Memory latency test ===

block size : single random read / dual random read
      1024 :    1.0 ns          /     1.9 ns
      2048 :    1.1 ns          /     2.3 ns
      4096 :    1.2 ns          /     2.5 ns
      8192 :    1.4 ns          /     2.7 ns
     16384 :    1.9 ns          /     3.6 ns
     32768 :  109.1 ns          /   226.5 ns
     65536 :  177.1 ns          /   364.7 ns
    131072 :  211.7 ns          /   434.9 ns
    262144 :  229.7 ns          /   471.3 ns
    524288 :  369.6 ns          /   751.2 ns
   1048576 :  458.2 ns          /   928.7 ns
   2097152 :  501.5 ns          /  1015.4 ns
   4194304 :  521.8 ns          /  1056.0 ns
   8388608 :  533.2 ns          /  1078.8 ns
  16777216 :  539.3 ns          /  1090.9 ns
CPU=1.2GHz, DRAM=156MHz
=== Memory bandwidth tests ===
 C copy backwards                                     :     86.8 MB/s (4.3%)
 C copy backwards (32 byte blocks)                    :     98.4 MB/s
 C copy backwards (64 byte blocks)                    :     98.4 MB/s
 C copy                                               :     98.4 MB/s
 C copy prefetched (32 bytes step)                    :     98.2 MB/s
 C copy prefetched (64 bytes step)                    :     98.4 MB/s
 C 2-pass copy                                        :     85.3 MB/s (0.2%)
 C 2-pass copy prefetched (32 bytes step)             :     86.0 MB/s
 C 2-pass copy prefetched (64 bytes step)             :     85.3 MB/s
 C fill                                               :    284.2 MB/s
 C fill (shuffle within 16 byte blocks)               :    284.2 MB/s
 C fill (shuffle within 32 byte blocks)               :    284.2 MB/s
 C fill (shuffle within 64 byte blocks)               :    284.2 MB/s
 ---
 standard memcpy                                      :    101.4 MB/s
 standard memset                                      :    284.1 MB/s
 ---
 ARM fill (STRD)                                      :    284.2 MB/s
 ARM fill (STM with 8 registers)                      :    547.4 MB/s
 ARM fill (STM with 4 registers)                      :    545.2 MB/s
 ARM copy prefetched (incr pld)                       :    136.7 MB/s
 ARM copy prefetched (wrap pld)                       :    136.7 MB/s
 ARM 2-pass copy prefetched (incr pld)                :    119.0 MB/s
 ARM 2-pass copy prefetched (wrap pld)                :    119.0 MB/s

=== Framebuffer read tests ===
 ARM copy (from framebuffer)                          :    136.3 MB/s
 ARM 2-pass copy (from framebuffer)                   :    117.0 MB/s

=== Memory latency test ===

block size : single random read / dual random read
      1024 :    0.5 ns          /     1.0 ns
      2048 :    0.6 ns          /     1.2 ns
      4096 :    0.7 ns          /     1.3 ns
      8192 :    0.7 ns          /     1.4 ns
     16384 :    1.0 ns          /     2.0 ns
     32768 :  114.6 ns          /   234.4 ns
     65536 :  181.0 ns          /   367.4 ns
    131072 :  214.6 ns          /   434.9 ns
    262144 :  232.1 ns          /   469.9 ns
    524288 :  363.2 ns          /   732.2 ns
   1048576 :  436.1 ns          /   878.0 ns
   2097152 :  487.8 ns          /   981.7 ns
   4194304 :  508.1 ns          /  1022.2 ns
   8388608 :  519.3 ns          /  1044.6 ns
  16777216 :  525.2 ns          /  1056.4 ns
CPU=672MHz, DRAM=204MHz
=== Memory bandwidth tests ===
 C copy backwards                                     :    110.1 MB/s (0.9%)
 C copy backwards (32 byte blocks)                    :    125.6 MB/s
 C copy backwards (64 byte blocks)                    :    125.6 MB/s
 C copy                                               :    125.6 MB/s
 C copy prefetched (32 bytes step)                    :    124.7 MB/s
 C copy prefetched (64 bytes step)                    :    125.6 MB/s
 C 2-pass copy                                        :    103.7 MB/s (0.1%)
 C 2-pass copy prefetched (32 bytes step)             :    104.9 MB/s
 C 2-pass copy prefetched (64 bytes step)             :    103.7 MB/s
 C fill                                               :    375.9 MB/s
 C fill (shuffle within 16 byte blocks)               :    375.7 MB/s
 C fill (shuffle within 32 byte blocks)               :    375.9 MB/s
 C fill (shuffle within 64 byte blocks)               :    375.8 MB/s
 ---
 standard memcpy                                      :    125.6 MB/s
 standard memset                                      :    375.8 MB/s
 ---
 ARM fill (STRD)                                      :    375.8 MB/s
 ARM fill (STM with 8 registers)                      :    717.0 MB/s
 ARM fill (STM with 4 registers)                      :    717.1 MB/s
 ARM copy prefetched (incr pld)                       :    165.6 MB/s
 ARM copy prefetched (wrap pld)                       :    165.6 MB/s
 ARM 2-pass copy prefetched (incr pld)                :    142.9 MB/s
 ARM 2-pass copy prefetched (wrap pld)                :    143.0 MB/s

=== Framebuffer read tests ===
 ARM copy (from framebuffer)                          :    165.3 MB/s
 ARM 2-pass copy (from framebuffer)                   :    141.0 MB/s

=== Memory latency test ===

block size : single random read / dual random read
      1024 :    1.0 ns          /     1.9 ns
      2048 :    1.1 ns          /     2.3 ns
      4096 :    1.2 ns          /     2.5 ns
      8192 :    1.3 ns          /     2.6 ns
     16384 :    1.8 ns          /     3.3 ns
     32768 :   80.6 ns          /   168.4 ns
     65536 :  133.0 ns          /   275.8 ns
    131072 :  159.6 ns          /   330.1 ns
    262144 :  173.5 ns          /   358.1 ns
    524288 :  280.7 ns          /   572.9 ns
   1048576 :  344.2 ns          /   700.1 ns
   2097152 :  382.2 ns          /   776.2 ns
   4194304 :  398.1 ns          /   808.0 ns
   8388608 :  407.0 ns          /   825.8 ns
  16777216 :  411.7 ns          /   835.2 ns
CPU=1.2GHz,DRAM=204MHz
=== Memory bandwidth tests ===
 C copy backwards                                     :    114.8 MB/s (0.5%)
 C copy backwards (32 byte blocks)                    :    129.9 MB/s
 C copy backwards (64 byte blocks)                    :    129.9 MB/s
 C copy                                               :    130.4 MB/s
 C copy prefetched (32 bytes step)                    :    129.5 MB/s
 C copy prefetched (64 bytes step)                    :    130.4 MB/s
 C 2-pass copy                                        :    110.9 MB/s (3.6%)
 C 2-pass copy prefetched (32 bytes step)             :    111.1 MB/s
 C 2-pass copy prefetched (64 bytes step)             :    110.9 MB/s
 C fill                                               :    376.5 MB/s
 C fill (shuffle within 16 byte blocks)               :    376.6 MB/s
 C fill (shuffle within 32 byte blocks)               :    376.7 MB/s
 C fill (shuffle within 64 byte blocks)               :    376.5 MB/s
 ---
 standard memcpy                                      :    130.7 MB/s
 standard memset                                      :    376.7 MB/s
 ---
 ARM fill (STRD)                                      :    376.5 MB/s
 ARM fill (STM with 8 registers)                      :    721.4 MB/s
 ARM fill (STM with 4 registers)                      :    720.4 MB/s
 ARM copy prefetched (incr pld)                       :    175.1 MB/s
 ARM copy prefetched (wrap pld)                       :    175.1 MB/s
 ARM 2-pass copy prefetched (incr pld)                :    152.9 MB/s
 ARM 2-pass copy prefetched (wrap pld)                :    152.9 MB/s

=== Framebuffer read tests ===
 ARM copy (from framebuffer)                          :    174.8 MB/s
 ARM 2-pass copy (from framebuffer)                   :    150.7 MB/s

=== Memory latency test ===

block size : single random read / dual random read
      1024 :    0.5 ns          /     1.0 ns
      2048 :    0.6 ns          /     1.2 ns
      4096 :    0.7 ns          /     1.3 ns
      8192 :    0.7 ns          /     1.4 ns
     16384 :    1.0 ns          /     1.8 ns
     32768 :   86.0 ns          /   177.0 ns
     65536 :  137.5 ns          /   280.5 ns
    131072 :  163.7 ns          /   333.1 ns
    262144 :  177.3 ns          /   360.1 ns
    524288 :  276.8 ns          /   559.5 ns
   1048576 :  338.0 ns          /   682.1 ns
   2097152 :  372.8 ns          /   752.0 ns
   4194304 :  387.7 ns          /   781.7 ns
   8388608 :  396.1 ns          /   798.5 ns
  16777216 :  400.6 ns          /   807.5 ns
測試後,司徒有兩個方向要進行:
1. DRAM=204MHz,會有崩潰的疑慮,因此,需要做一個實驗,找出適合使用的DRAM電壓
2. MicroSD高速卡是否有超頻潛能,需要研究一下
#379 Re: 司徒开源 » 研究FC3000掌機的開源可行性 » 2021-07-19 15:42:16
小橫米 (SanDISK 8GB C10),PocketSNES 新機動戰記 (關閉FrameSkip),CPU=1.2GHz,DRAM=156MHz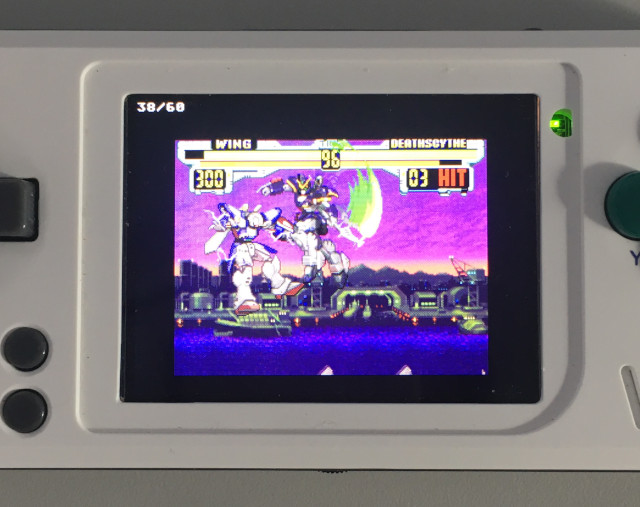
小橫米 (SanDISK 8GB C10),PocketSNES 新機動戰記 (關閉FrameSkip),CPU=1.2GHz,DRAM=204MHz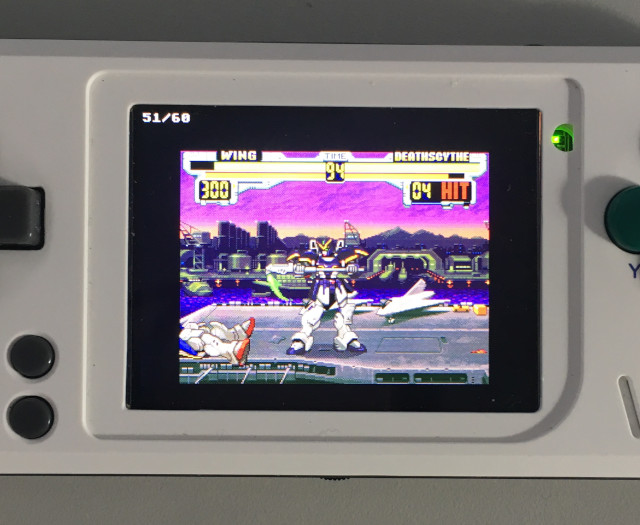
TRIMUI (TOSHIBA M203 16GB),PocketSNES 新機動戰記 (關閉FrameSkip),CPU=1.2GHz,DRAM=156MHz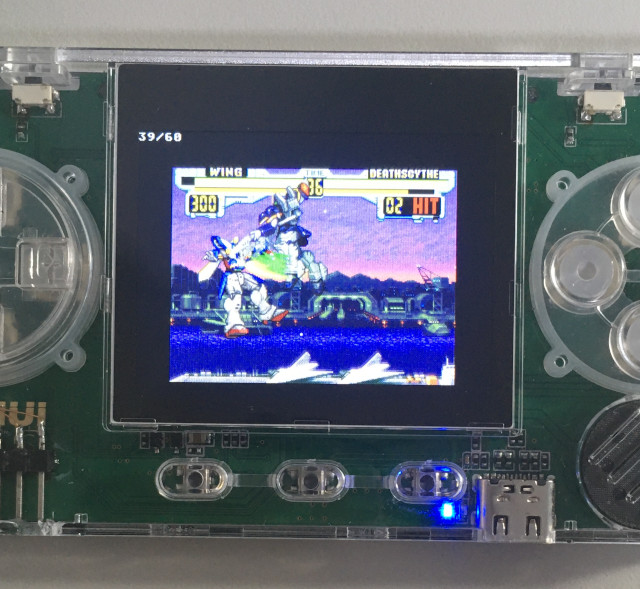
TRIMUI (TOSHIBA M203 16GB),PocketSNES 新機動戰記 (關閉FrameSkip),CPU=1.2GHz,DRAM=204MHz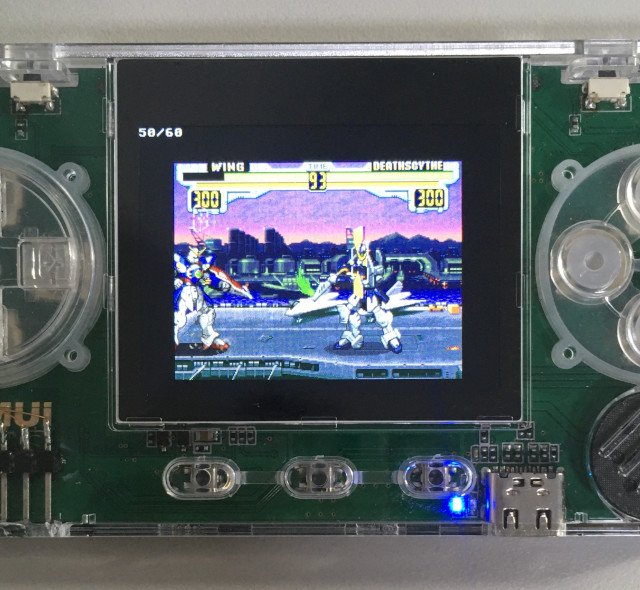
#380 Re: 司徒开源 » 研究FC3000掌機的開源可行性 » 2021-07-19 12:05:35
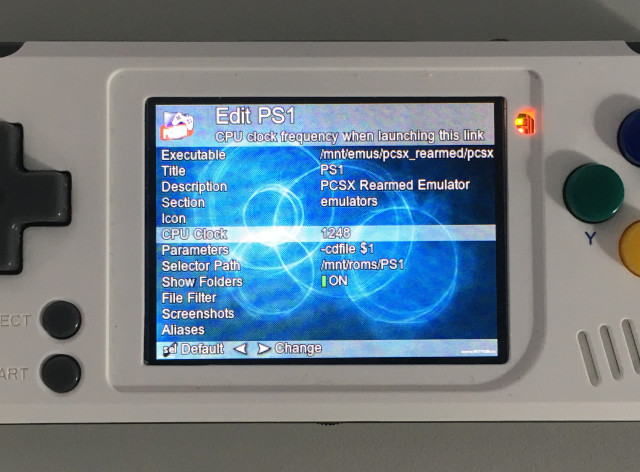
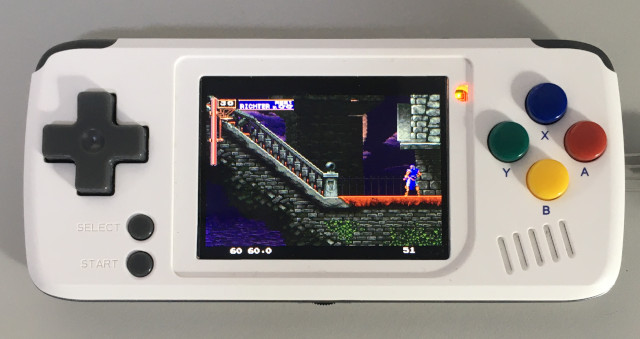
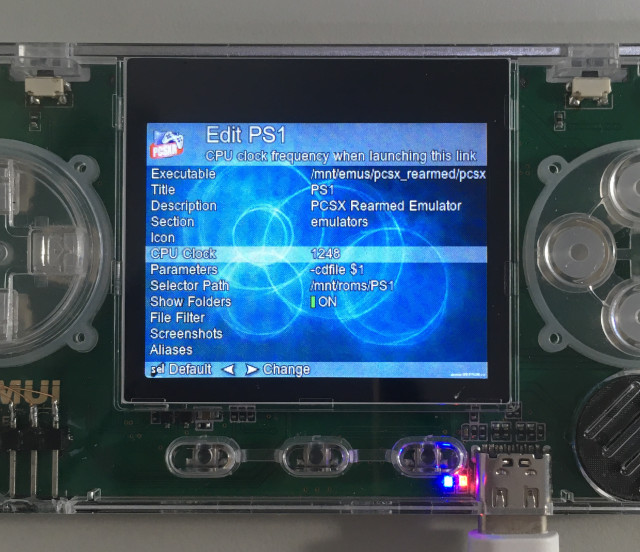
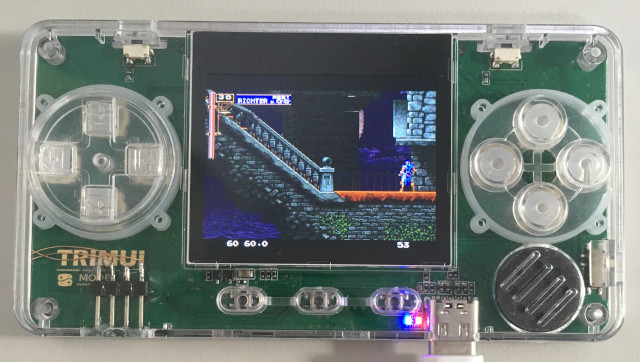
#381 Re: 司徒开源 » 研究FC3000掌機的開源可行性 » 2021-07-19 10:59:34
@怀旧堂
原理圖是不小心被我在XBOOT群放出來的~哈,因為,謝工希望我可以延遲六個月後才發布開源資料,只是當初不小心先把原理圖放出來,哈~我終於了解為何我會被黑了~哈
@xboot
薑果然是老的辣~你這個建議真的很有感覺~DRAM從156MHz提升到204MHz後,Kernel整體效能明顯提昇~另外,想請問一下,204MHz是如何測試出來的?我應該可以慢慢手動加大MHz測試,對吧?
DRAM 156MHz
[    0.900000] ALSA device list:
[    0.900000]   #0: pocketgo audio card
[    0.910000] Waiting for root device /dev/mmcblk0p1...
[    0.950000] mmc0: host does not support reading read-only switch, assuming write-enable
[    0.970000] mmc0: new high speed SDHC card at address aaaa
[    0.970000] mmcblk0: mmc0:aaaa SL08G 7.40 GiB
[    0.980000]  mmcblk0: p1 p2
[    1.020000] VFS: Mounted root (vfat filesystem) readonly on device 179:1.
[    1.030000] devtmpfs: mounted
[    1.030000] Freeing unused kernel memory: 1024K
[    1.550000] FAT-fs (mmcblk0p2): Volume was not properly unmounted. Some data may be corrupt. Please run fsck.
[    3.020000] Adding 262140k swap on /mnt/.swap.img.  Priority:-2 extents:2 across:1687476k SSFS
DRAM 204MHz
[    0.860000] ALSA device list:
[    0.860000]   #0: pocketgo audio card
[    0.870000] Waiting for root device /dev/mmcblk0p1...
[    0.910000] mmc0: host does not support reading read-only switch, assuming write-enable
[    0.930000] mmc0: new high speed SDHC card at address aaaa
[    0.930000] mmcblk0: mmc0:aaaa SL08G 7.40 GiB
[    0.940000]  mmcblk0: p1 p2
[    0.980000] VFS: Mounted root (vfat filesystem) readonly on device 179:1.
[    0.980000] devtmpfs: mounted
[    0.990000] Freeing unused kernel memory: 1024K
[    1.470000] FAT-fs (mmcblk0p2): Volume was not properly unmounted. Some data may be corrupt. Please run fsck.
[ 2.880000] Adding 262140k swap on /mnt/.swap.img. Priority:-2 extents:2 across:1687476k SSFS#382 Re: 司徒开源 » 研究FC3000掌機的開源可行性 » 2021-07-18 11:18:35

#383 Re: 司徒开源 » 研究FC3000掌機的開源可行性 » 2021-07-17 18:16:36
#384 Re: 司徒开源 » 研究FC3000掌機的開源可行性 » 2021-07-17 13:20:30
其實,司徒不是不玩RetroMini(RS90),是因為有一些因素存在,導致司徒沒有繼續玩RS90~
事情是這樣的,多年前,OpenDingux團隊發布RS90的OD系統,網友告訴司徒這一個好消息,於是,司徒馬上安裝測試,發現OD團隊還是蠻強的,竟然可以移植成功,不過,司徒發現沒有SWAP支援,於是,司徒加入SWAP支援並且重新編譯Kernel和Buildroot,接著發布,SWAP補丁、系統補丁、PS1模擬器,但是,OD團隊過沒多久又發布新系統,但是,還是一樣沒有支援SWAP,當然在發布之前,已經有很多人跟他們反應這個問題,但是就是不加入SWAP支援,只有選擇使用ZRAM選項,不過,這代表司徒又要重新做一次補丁,這...,司徒不可能一直花時間再做補丁吧~接著,他們開發者在IRC的聊天紀錄被人截圖傳到discord,意思是司徒搞亂了一些東西,所以最新的PCSX4ALL代碼不會上傳到GitHub公開,這不是擺明要封殺司徒嗎?當初RetroGame(RS97),司徒在移植PCSX4ALL時,你們開發人員還指導司徒關閉SHM選項,怎麼變成是我在搞亂一切呢?天意如此,我也只能順從~於是,我刪除所有RS90開發的東西,從此再也沒有去玩RS90~
不過,看你心心念念RS90超頻,司徒就來個番外篇吧~司徒看了一下JZ4725B手冊,發現有兩個電壓應該是跟超頻有關聯,那就是VDDPLL和VDDCORE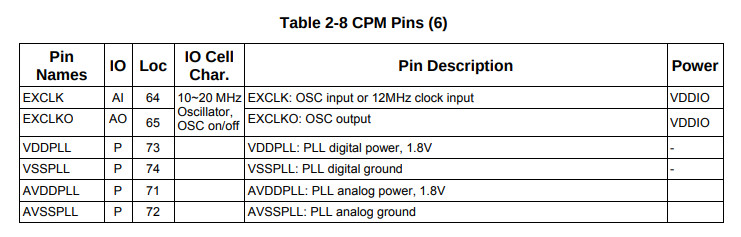
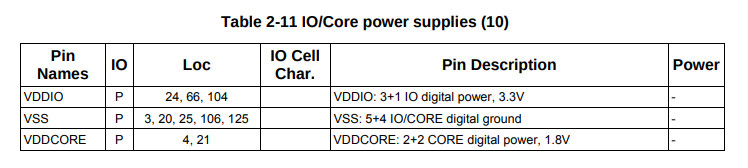
君正在手冊上寫建議電壓是1.8V,不過最大電壓則是寫上2.5V,這...,你是叫司徒操你的意思嗎?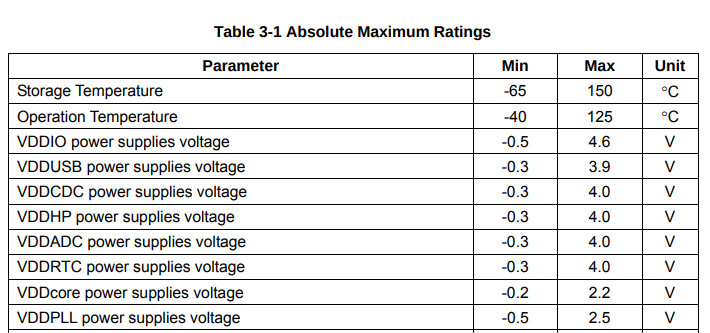
司徒確認一下RetroMini(RS90)的電壓腳位,都是連接到VCORE_1_8V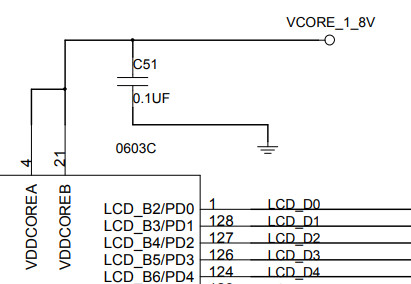
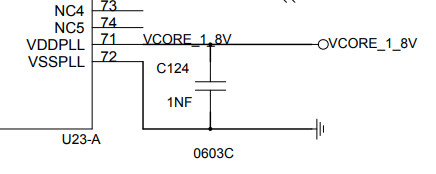
VCORE_1_8V則是由WD1011EA驅動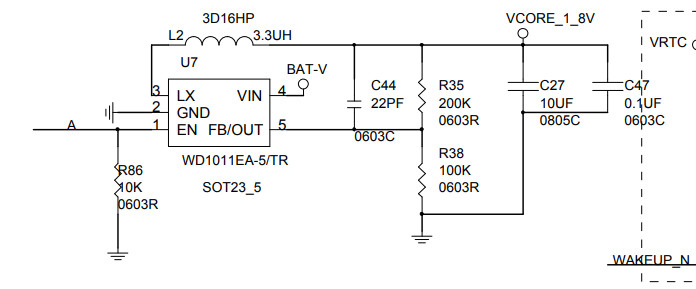
司徒翻了一下手冊,找出電壓計算公式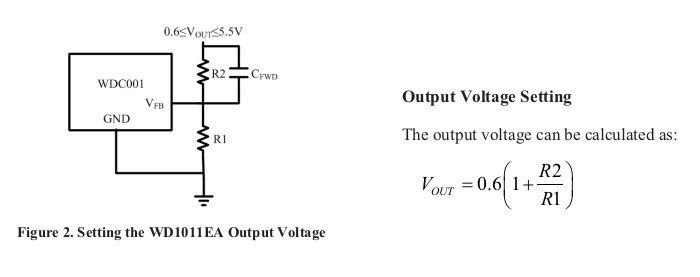
目前是200K和100K電阻,換算電壓則是:0.6 * (1 + (200K / 100K)) = 1.8V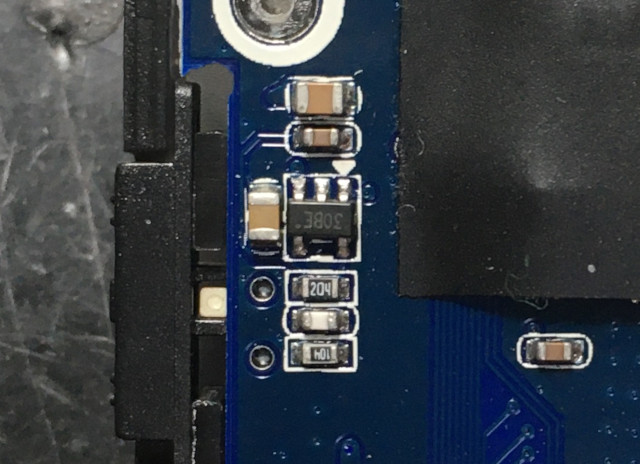
果然是精密電阻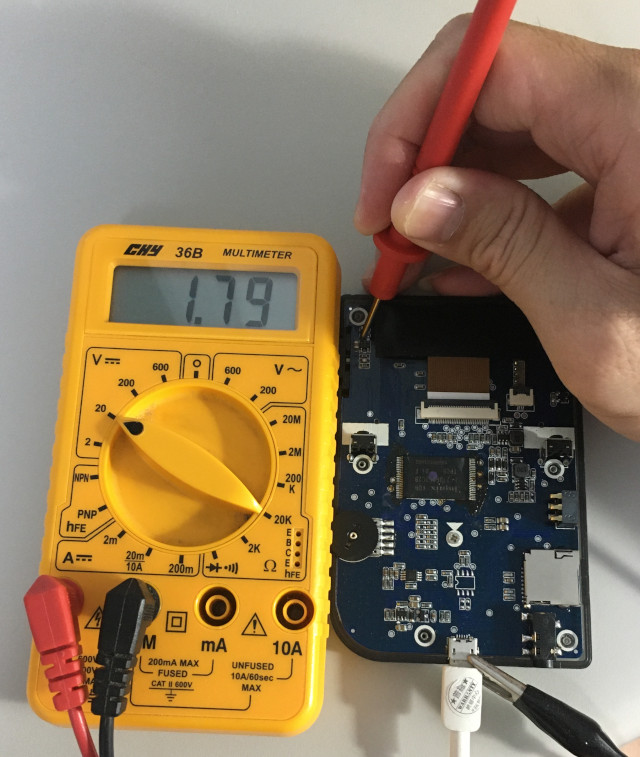
司徒手上剛好有7.5K和2.7K電阻,換算電壓則是:0.6 * (1 + (7.5K / 2.7K)) = 2.27V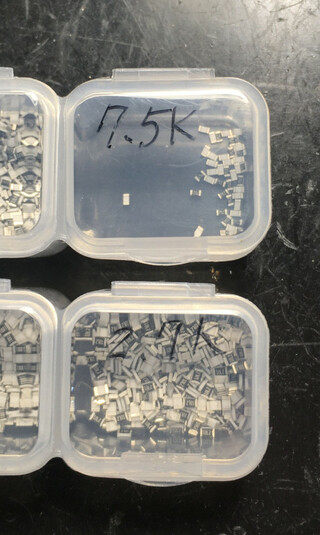
換裝完畢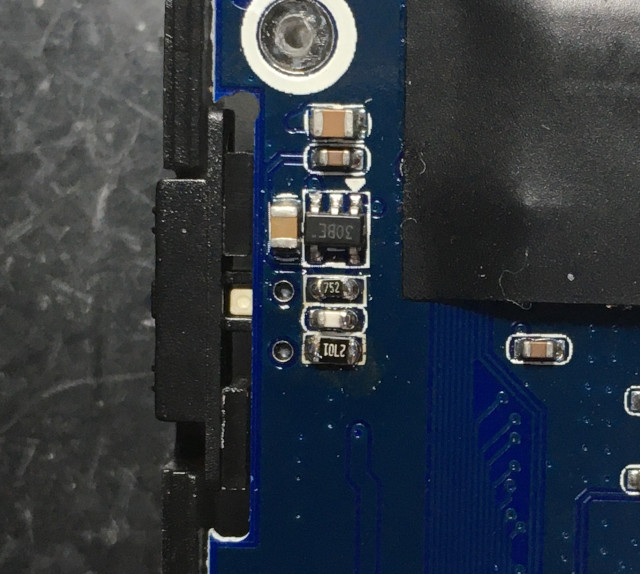
測量到的電壓則是2.25V
接著,司徒發現系統上沒有/dev/mem,這...
而且超頻選項只有到456MHz,這...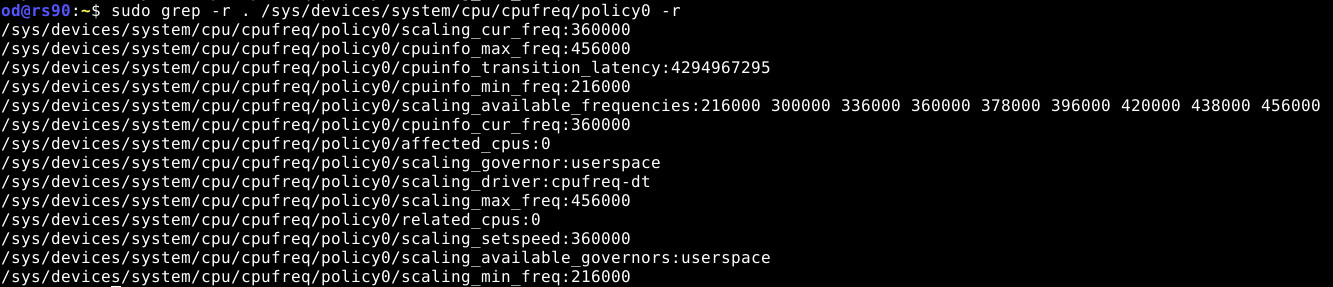
於是,司徒抓了OpenDingux Kernel 5.1.0並且加入/dev/mem的支援
但是,更新Kernel後,發現USB有問題,司徒無法登入RS90操作,於是司徒又補上RNDIS的配置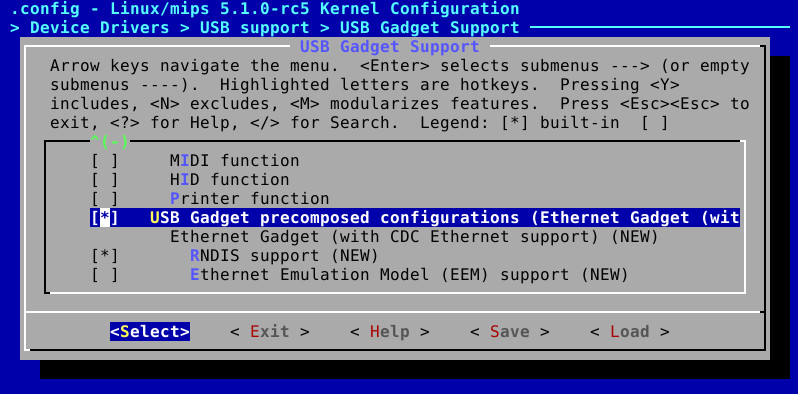
萬事具備只欠東風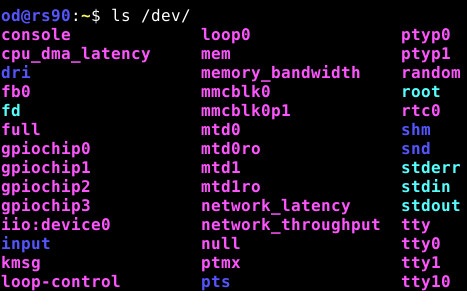
接著司徒查了一下PLL Register
CPU頻率的公式:(12MHz * (M + 2)) / (N + 2)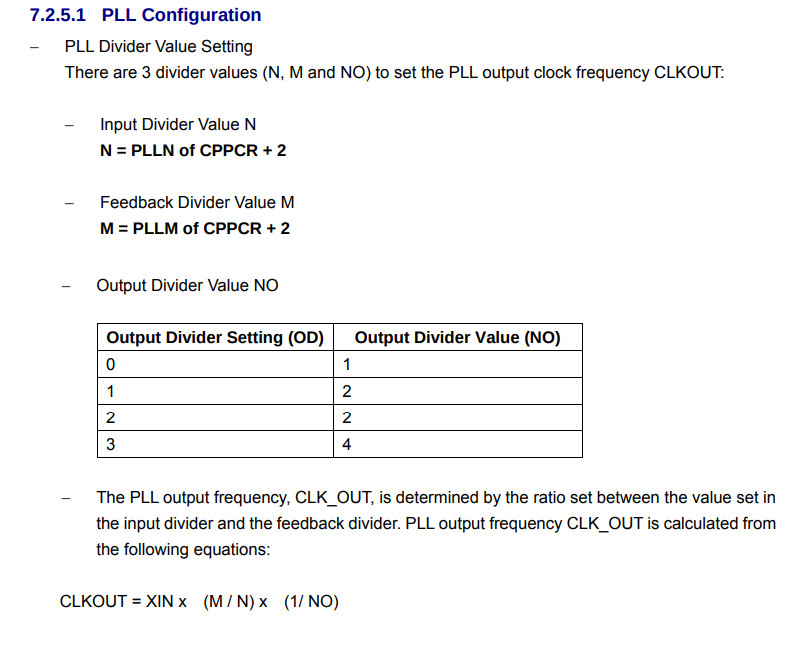
君正自己都說可以到500MHz...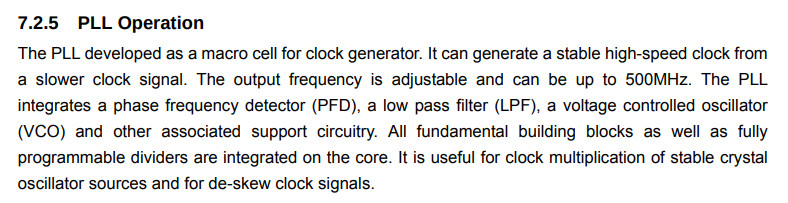
接著,司徒使用Snes9x4D模擬器並且把頻率設定到456MHz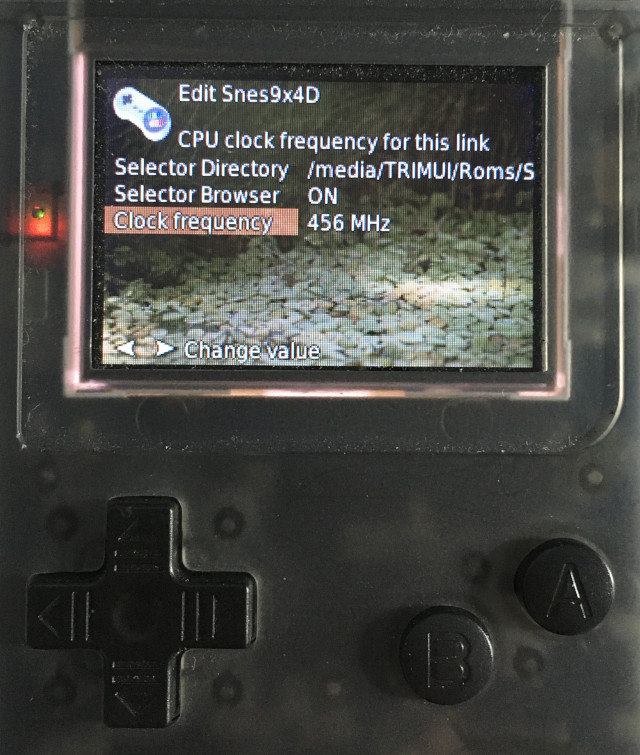
雖然Snes9x4D沒有關閉FrameSkip的選項,不過,還是勉強可以當作一個比較基準,CPU=456MHz時,FPS=21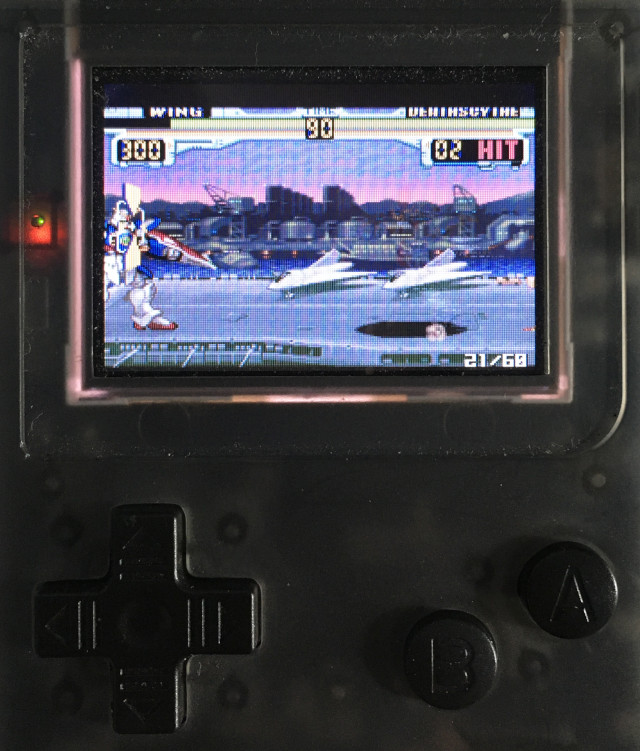
超頻程式
#include <stdio.h>
#include <stdint.h>
#include <stdlib.h>
#include <string.h>
#include <fcntl.h>
#include <sys/mman.h>
#include <unistd.h>
#include <time.h>

int main(int argc, char* argv[])
{
  int fd = open("/dev/mem", O_RDWR);
  if(fd < 0){
    printf("failed to open /dev/mem\n");
    return -1;
  }

  uint32_t M=0, N=0;
  uint8_t *mem = mmap(0, 4096, PROT_READ | PROT_WRITE, MAP_SHARED, fd, 0x10000000);
  if(mem == NULL){
    close(fd);
    printf("failed to mmap memory\n");
    return -1;
  }
  printf("MEM: 0x%08x\n", mem);
  printf("Cur CPCCR: 0x%08x\n", *((uint32_t*)(mem + 0x00)));
  printf("Cur CPPCR: 0x%08x\n", *((uint32_t*)(mem + 0x10)));
  printf("Cur CPPSR: 0x%08x\n", *((uint32_t*)(mem + 0x14)));

  // (12MHz * (84 + 2)) / (0 + 2) = 516MHz
  M = 84;
  N = 0;
  *((uint32_t*)(mem + 0x10)) = (M << 23) | (N < 18) | 0x00000520;
  printf("New CPCCR: 0x%08x\n", *((uint32_t*)(mem + 0x00)));
  printf("New CPPCR: 0x%08x\n", *((uint32_t*)(mem + 0x10)));
  printf("New CPPSR: 0x%08x\n", *((uint32_t*)(mem + 0x14)));

  munmap(mem, 4096);
  close(fd);
  return 0;
}
登入RS90後,啟動超頻程式,CPU從456MHz超頻到516MHz
P.S. 司徒測試後,發現516MHz是最大極限
CPU=516MHz時,FPS=30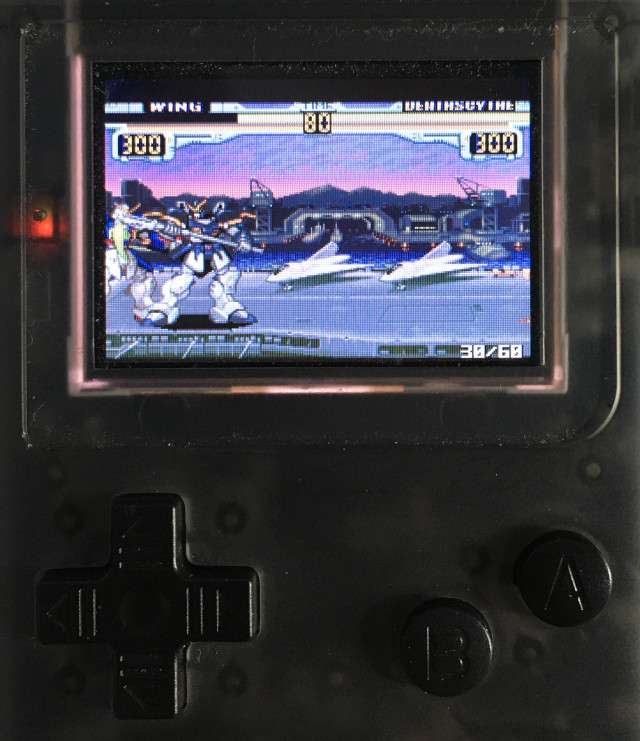
或許是電壓不足,導致CPU卡在516MHz,於是進階超頻登場,司徒使用4.7K和1.5K電阻,換算電壓則是:0.6 * (1 + (4.7K / 1.5K)) = 2.48V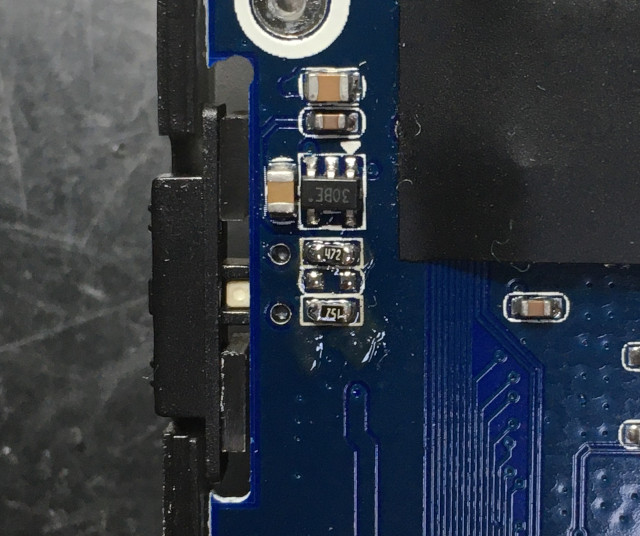
量測到的電壓是2.45V,不過,CPU頻率依舊卡在516MHz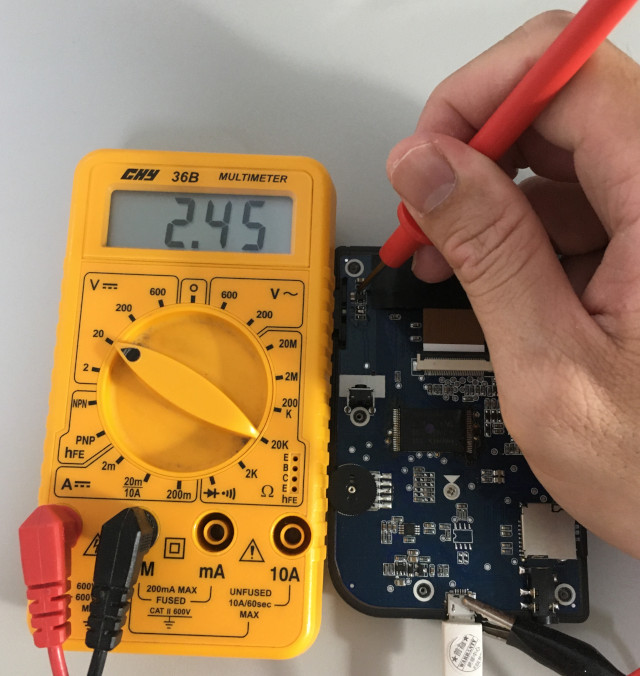
司徒心想,超級賽亞人也是慢慢變身,才達到終極型態,因此,可能又是電壓不足的原因造成,於是,442K和120K電阻登場,換算電壓則是:0.6 * (1 + (442K / 120K)) = 2.81V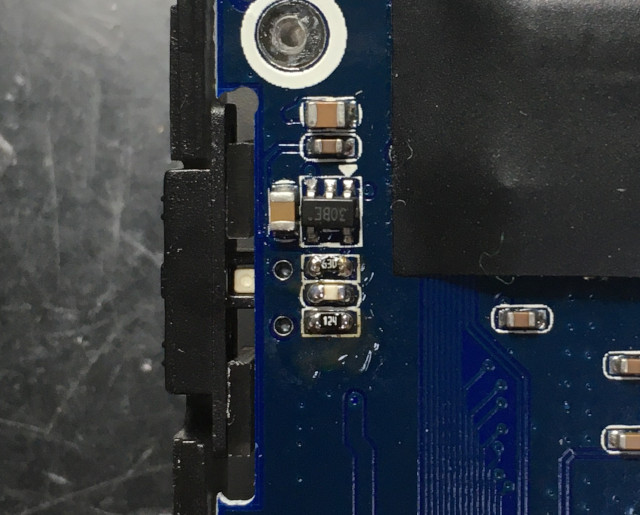
量測到的電壓是2.84V,不過,CPU頻率依舊卡在516MHz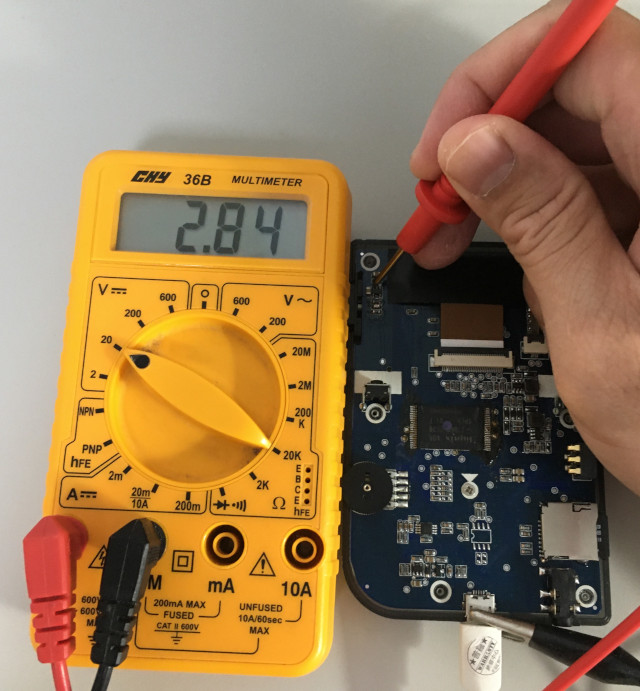
雖然從目前測試到的數據顯示,JZ4725B最高的CPU頻率就是516MHz,不過,司徒好奇,如果電壓再繼續加上去呢?搞不好,它真的可以變身成最強型態...,於是,442K和105K電阻登場,換算電壓則是:0.6 * (1 + (442K / 105K)) = 3.13V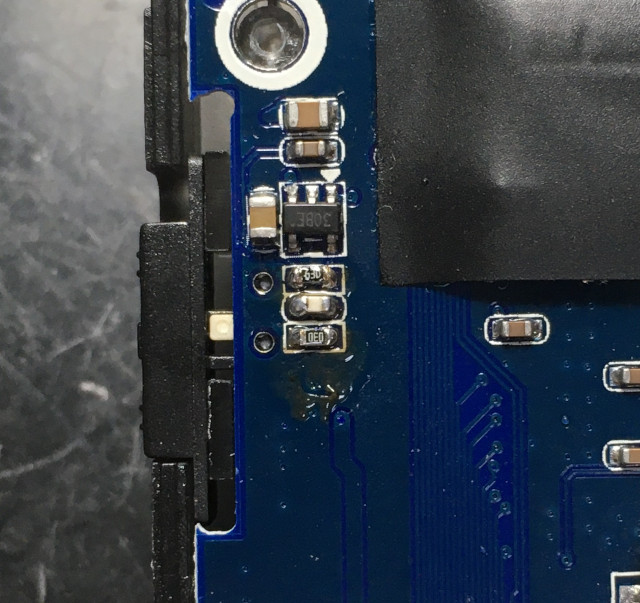
量測到的電壓是3.21V,不過,CPU頻率依舊卡在516MHz,因此,JZ4725B的最高CPU頻率應該就是516MHz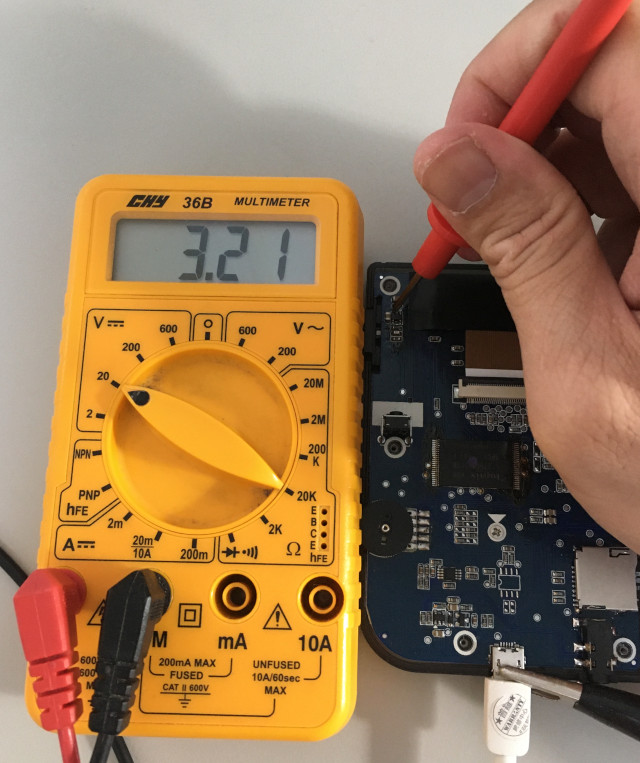
最後,司徒派出二姐量測溫度,發現MIPS果然沒有ARM來得激情...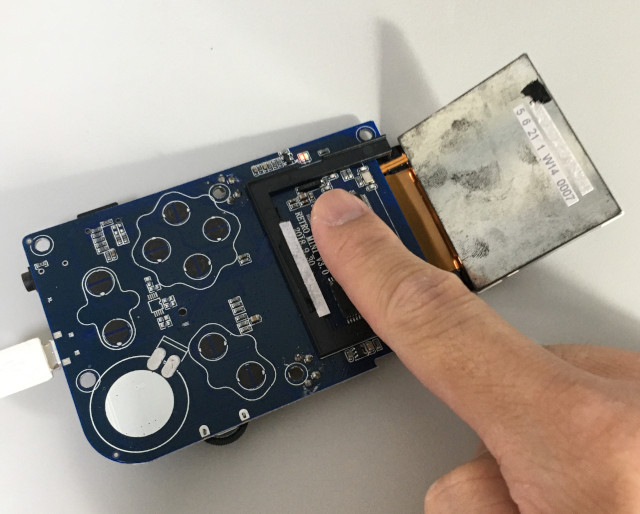
結論:
司徒只是藉由實驗說明JZ4725B還是可以繼續超頻到516MHz,OpenDingux團隊是否加入這些超頻選項,我無從插手~有任何需求,請建議給OpenDingux團隊,不要建議給司徒,感謝~
#385 Re: 司徒开源 » 研究FC3000掌機的開源可行性 » 2021-07-16 08:59:22
#386 Re: 司徒开源 » 研究FC3000掌機的開源可行性 » 2021-07-15 09:43:13
#387 Re: 司徒开源 » 研究FC3000掌機的開源可行性 » 2021-07-15 09:39:48
#388 Re: 司徒开源 » 研究FC3000掌機的開源可行性 » 2021-07-15 09:32:22
#389 Re: 司徒开源 » 研究FC3000掌機的開源可行性 » 2021-07-15 09:23:42
@除恶务尽
將圖片檔名改成border.png,接著進入選單Graphics and Sound options,改成unscaled 3:2就可以~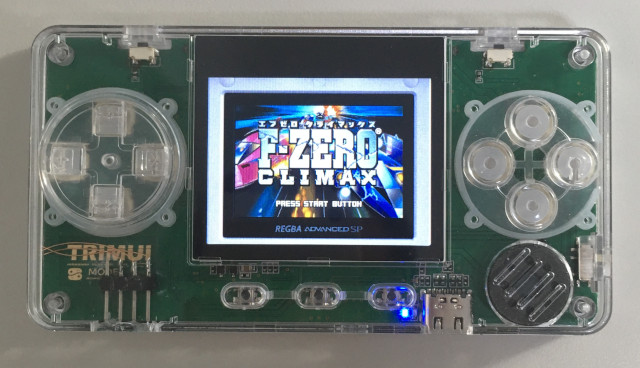
關於超頻部份,司徒花了一點時間尋找GMenu2X(支援GameShow主題)的GitHub,可惜司徒最後並沒有找到這個GitHub,司徒就當做是它是在一個目前我無法取得的地方~
所以司徒就直接用MiyooCFW GMenu2X做修改,順便改回以前那種簡潔的GUI~
GMenu2X修復超頻問題(直接覆蓋就可以):gmenunx_fix_overclock.zip
src/gmenu2x.cpp
#if defined(TARGET_MIYOO)
static uint32_t oc_table[] = {
  ((96 * 2) << 16) | ((1 << 8) | (3 << 4)),
  ((96 * 3) << 16) | ((2 << 8) | (3 << 4)),
  ((96 * 4) << 16) | ((3 << 8) | (3 << 4)),
  ((96 * 5) << 16) | ((4 << 8) | (3 << 4)),
  ((96 * 6) << 16) | ((5 << 8) | (3 << 4)),
  ((96 * 7) << 16) | ((6 << 8) | (3 << 4)),
  ((96 * 8) << 16) | ((7 << 8) | (3 << 4)),
  ((96 * 9) << 16) | ((8 << 8) | (3 << 4)),
  ((96 * 10) << 16) | ((9 << 8) | (3 << 4)),
  ((96 * 11) << 16) | ((10 << 8) | (3 << 4)),
  ((96 * 12) << 16) | ((11 << 8) | (3 << 4)),
  ((96 * 13) << 16) | ((12 << 8) | (3 << 4)),
  ((96 * 14) << 16) | ((13 << 8) | (3 << 4)),
  ((96 * 15) << 16) | ((14 << 8) | (3 << 4)),
};
int oc_choices[] = {(2*96), (3*96), (4*96), (5*96), (6*96), (7*96), (8*96), (9*96), (10*96), (11*96), (12*96), (13*96), (14*96), (15*96)};
int oc_choices_size = sizeof(oc_choices)/sizeof(int);
#endif
OR 0x80000000
#elif defined(TARGET_MIYOO)
    uint32_t x, v;
    uint32_t total=sizeof(oc_table)/sizeof(uint32_t);

    for(x=0; x<total; x++){
      if((oc_table[x] >> 16) >= mhz){
        memregs[0] = (1 << 31) | (oc_table[x] &  0x0000ffff);
        break;
      }
    }
    INFO("Set CPU clock: %d(0x%08x)", mhz, v);
#endif
回歸原本的純淨~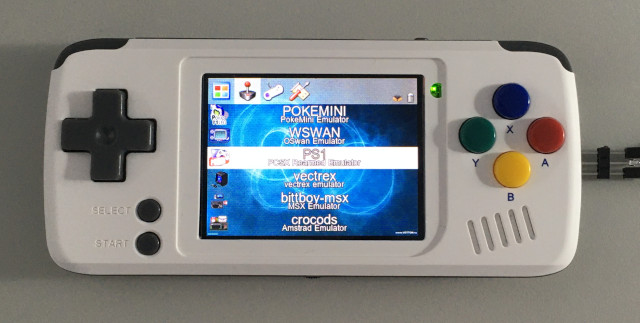
預設CPU跑672MHz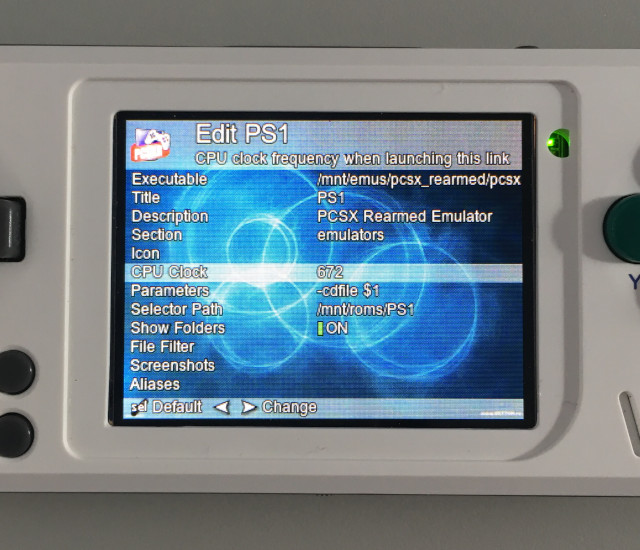
小橫米目前司徒是超頻到1.2GHz(最大可以設定到1.4GHz)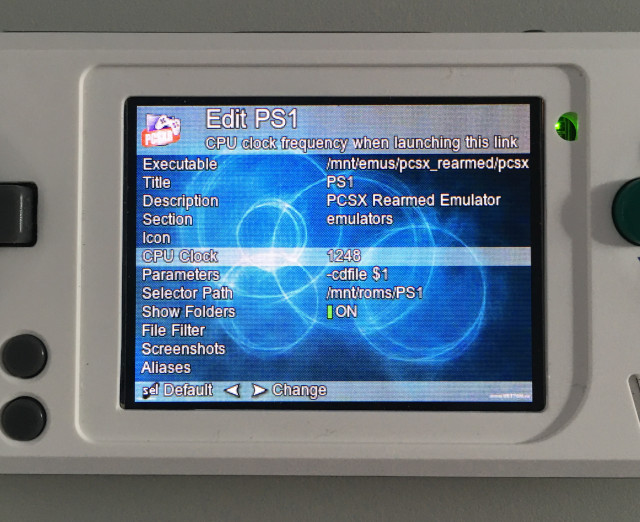
跑起來的效果應該是這樣,不過,因為RAM不足,跳動比較大,PS1預設是關閉FrameSkip的,測試完畢,建議開啟FrameSkip,玩遊戲比較順暢~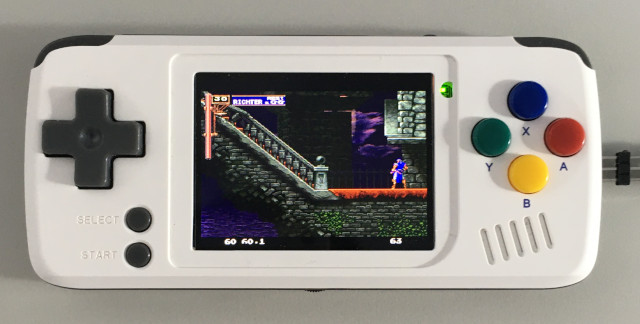
TRIMUI的純淨界面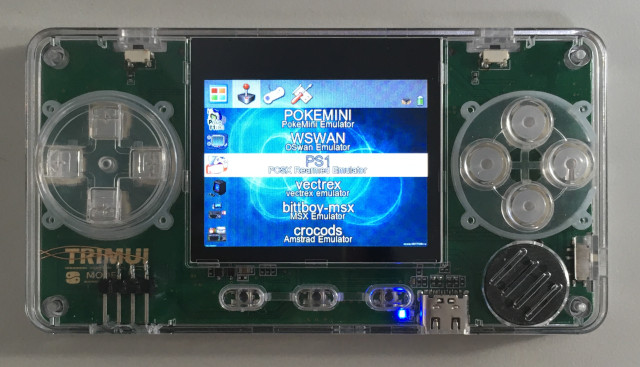
F1C200S的超頻效果只有1GHz(最大可以設定到1.4GHz)~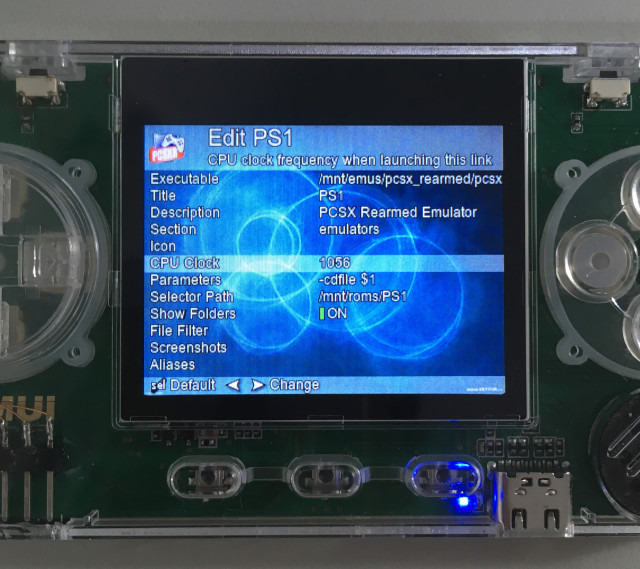
跑起來的效果應該是這樣,不過,因為RAM不足,跳動比較大,PS1預設是關閉FrameSkip的,測試完畢,建議開啟FrameSkip,玩遊戲比較順暢~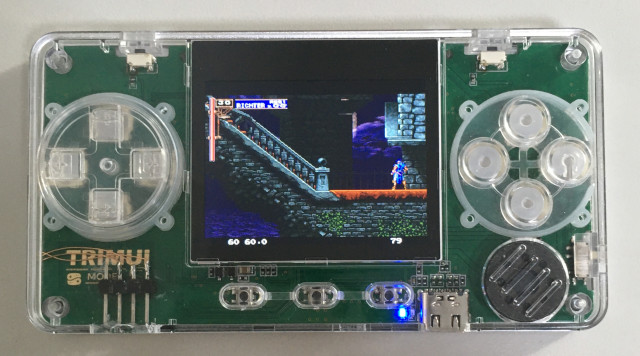
由於歷史因素,系統按鍵或者設定都是比較混亂,大家就先忍痛使用吧~等之後有時間,司徒在整理了~
#390 Re: 司徒开源 » 研究FC3000掌機的開源可行性 » 2021-07-14 22:42:51
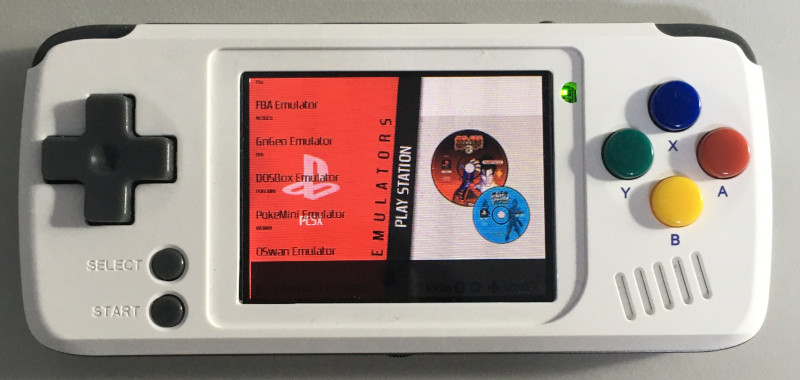
#391 Re: 司徒开源 » 研究FC3000掌機的開源可行性 » 2021-07-14 18:38:02
#392 Re: 司徒开源 » 研究FC3000掌機的開源可行性 » 2021-07-14 16:11:56
#393 Re: 全志 SOC » 求助,F1c100s 启动正常,但是一会儿就报错重启失败!? » 2021-07-14 16:07:13
如果問題是多樣化,那就真的很特別~
如果你擔心是數據傳輸問題,你可以進入fel模式,透過f1c100s_ddr_init.bin初始化RAM,接著寫個簡單的裸奔程序檢查RAM是否有讀取寫入問題,這樣可以排除是否是晶片問題或者是硬體Layout問題,一旦確定是RAM本身問題,那可以節省硬件Layout的花費
f1c100s_ddr_init.bin: https://whycan.com/t_1527.html
#394 Re: 全志 SOC » 求助,F1c100s 启动正常,但是一会儿就报错重启失败!? » 2021-07-14 15:31:11
#395 Re: 司徒开源 » 研究FC3000掌機的開源可行性 » 2021-07-14 12:13:44
@yesiraperfect
OK
機器價格過高就不建議入手,畢竟低價開源掌機才是趨勢~
目前司徒大約測試了一下GNGEO模擬器卡頓問題,司徒使用KOF98測試,發現小橫米、TRIMUI、RG280M都有這個問題,那個卡頓現象,似乎是模擬器陷入一個奇怪狀態,導致在那0.5~1秒之間,整個模擬器呈現卡住狀態,音效也停止輸出(underrun occurred),KOF98的配置記憶體需要大約RAM 160MB,如果RG280M(CPU:JZ4770 + RAM:512MB)都會卡,那代表是模擬器有問題,這部份司徒會繼續追下去,不過,可能會花上一些時間,所以司徒會先切到IPS FC3000這一部份,Dingoonity論壇有老外可以幫忙司徒測試IPS FC3000,司徒會先看看有無機會移植OpenDingux到IPS FC3000掌機,後續有消息時,司徒在更新了~
#396 Re: 司徒开源 » 研究FC3000掌機的開源可行性 » 2021-07-13 16:47:13
#397 Re: 司徒开源 » 研究FC3000掌機的開源可行性 » 2021-07-13 16:13:23
#398 Re: 司徒开源 » 研究FC3000掌機的開源可行性 » 2021-07-13 15:10:04
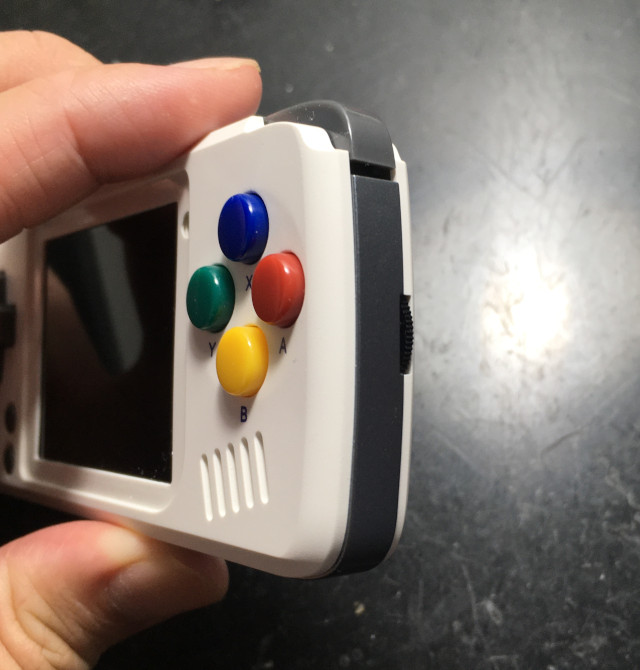
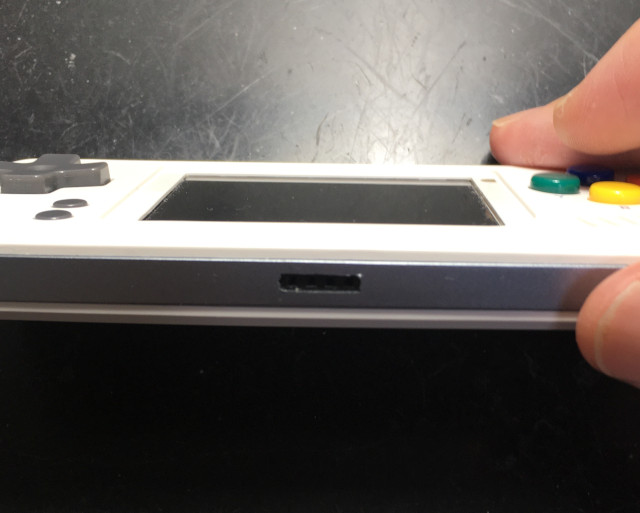
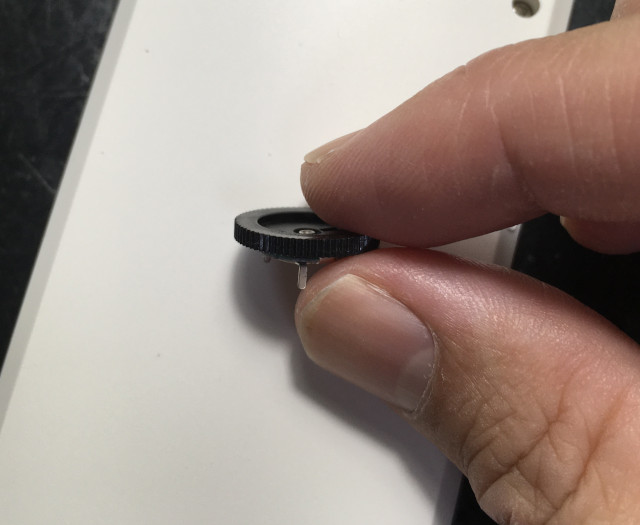
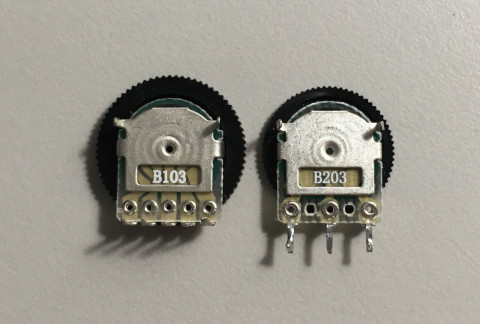
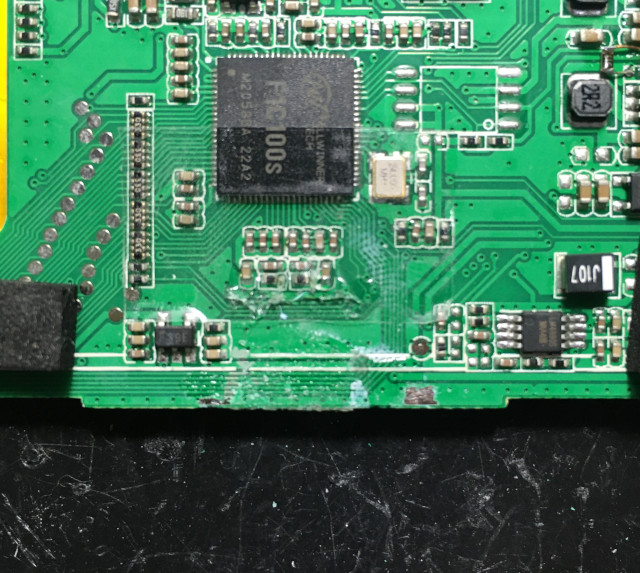
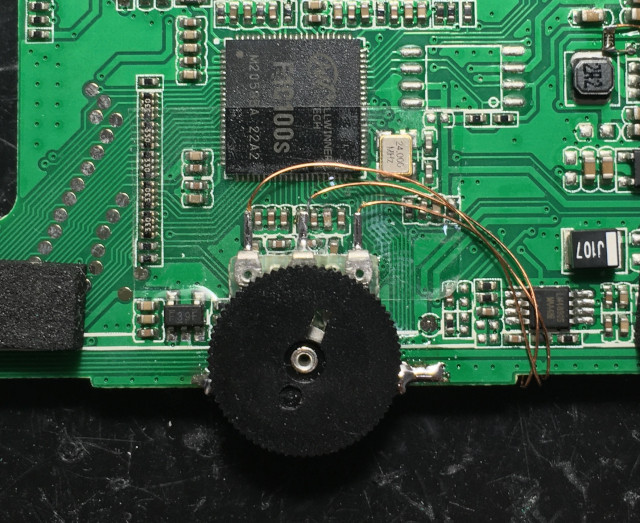

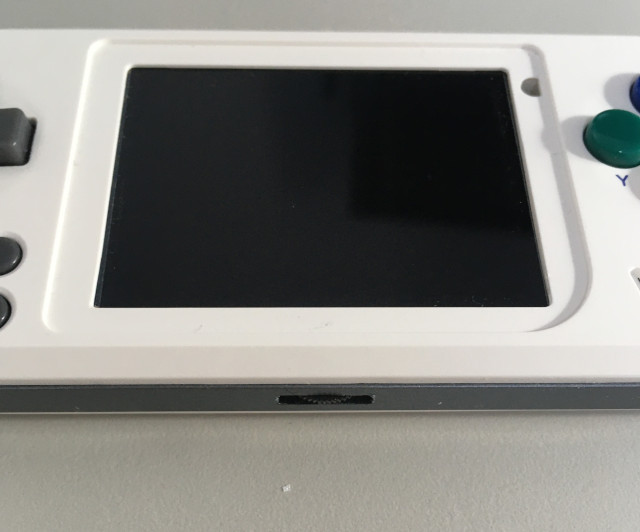
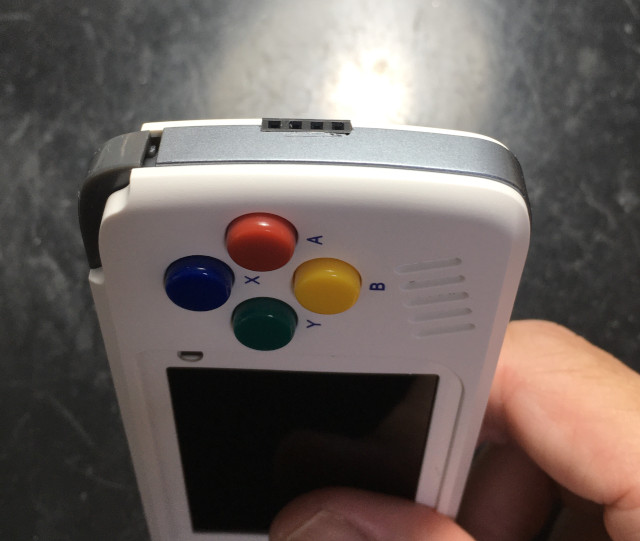
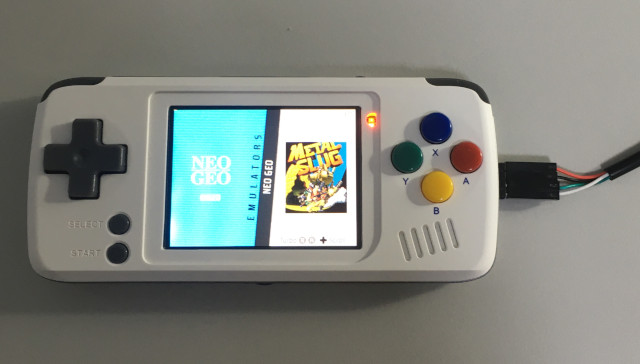
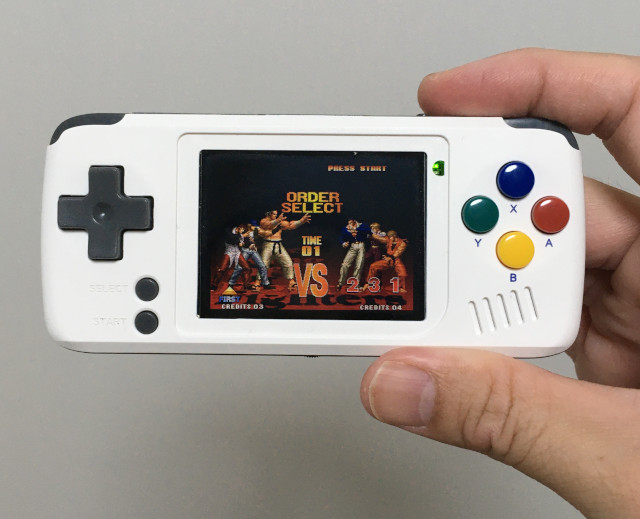
#399 Re: 司徒开源 » 研究FC3000掌機的開源可行性 » 2021-07-13 11:34:08
哈~造成閃屏的兇手就是司徒,果然司徒命中帶屎~過程如下分析
如果底層驅動可以確保沒有閃屏問題,上層模擬器只要開啟SDL_DOUBLEBUF就可以解決閃屏問題,於是司徒追了一下代碼,發現GNGEO本身就有支援這個選項,位於src/blitter/soft.c
vsync = CF_BOOL(cf_get_item_by_name("vsync"));
sdl_flags |= (vsync?SDL_DOUBLEBUF:0);選項預設是關閉的,位於src/conf.c
cf_create_bool_item("vsync", "Synchronise the display with VBLANK", 0, GN_FLASE);在模擬器頁面可以手動設置
但是,詭異的事情發生了~設置Vsync true後,模擬器就黑屏,這...,難道又是需要有智慧的人才看得到?於是,司徒再度追的一下代碼,發現一個奇怪的設定,位於src/blitter/soft.c
#ifdef DEVKIT8000
  SDL_Flip(screen);
#else
  if (vsync)
    SDL_Flip(screen);
  else
    SDL_UpdateRect(screen, 0, 0, 0, 0);
#endif
  SDL_Flip(screen);
#endif
vsync做SDL_Flip()合理,但是,為何下一步還再做一次呢?這種情形,司徒只有在丁果A320 Dingux(非OpenDingux)上才看過,因為當初底層有一些問題,所以Toggle兩次才可以正確顯示,可是目前PocketGo、TRIMUI顯示驅動是沒有這樣的問題,這個行為有點怪異
於是司徒找了一下GNGEO GitHub代碼
Ref 1: https://github.com/linuxlinks/gngeo
Ref 2: https://github.com/sflores12/gngeo
這才發現,第二個SDL_Flip()是註解掉的,哈,司徒也不知道為何當初移植Miyoo GNGEO時,將此行代碼反註解掉,所以Vsync黑屏的問題就是這一行造成,司徒另外看一下當初移植給RS97的代碼,並沒有Miyoo GNGEO這個問題,哈~
司徒目前將預設選項做比較好的配置,使用者不需要做任何修改就可以使用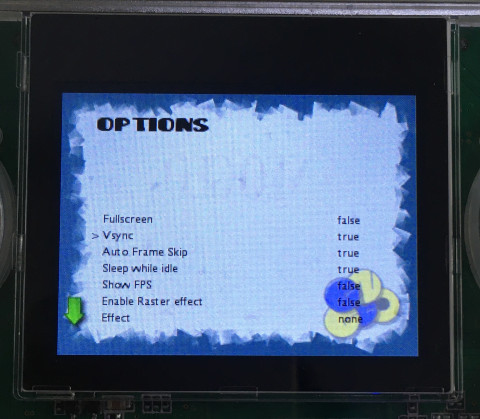
修復後的檔案(直接覆蓋掉原本檔案就可以):gngeo_fix_screentearing_20210713.zip
在PocketGo上測試,已經沒有閃屏問題
在TRIMUI上測試,已經沒有閃屏問題
另外,關於GNGEO家用版的使用,司徒大約說明一下,首先需要使用有支援的BIOS(司徒使用UBIOS v1.3),在顯示如下畫面時,同時按下A+B+C就可以做BIOS設定,Mode: CONSOLE就是家用機的意思
第一個選項設定
把Mode改成CONSOLE就可以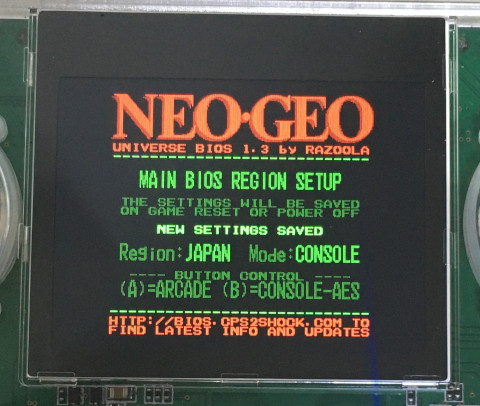
接著司徒就繼續找卡頓的問題,不過這個問題有點棘手,因為它跟RAM、SWAP有絕對關係...
#400 Re: 司徒开源 » 研究FC3000掌機的開源可行性 » 2021-07-12 19:28:20
#401 Re: 司徒开源 » 研究FC3000掌機的開源可行性 » 2021-07-12 15:58:50
#402 Re: 司徒开源 » 研究FC3000掌機的開源可行性 » 2021-07-12 11:59:35
#403 Re: 司徒开源 » 研究FC3000掌機的開源可行性 » 2021-07-12 11:14:04
#404 Re: 司徒开源 » 研究FC3000掌機的開源可行性 » 2021-07-12 10:46:20
#405 Re: 司徒开源 » 研究FC3000掌機的開源可行性 » 2021-07-12 10:29:04
@lzgame02
你不是說已經做完Binary Patch完成了嗎?為何還需要編譯?你的問題,司徒已經說過沒有環境,建議你去PSP相關論壇討論,如果你在這樣繼續發言,後果自負~
@littlehui
這樣阿~那我了解了~另外,關於你GitHub上面的東西,二流的人格做出來的東西還是屬於二流等級,對司徒來說,完全沒有任何參考價值,說白話一點,垃圾做出來的東西還是垃圾,你GitHub上面的東西,我司徒一個也不會使用,不過,很高興你還可以繼續玩你的機器,建議你遠離那些人,不然哪天被賣了都不知道~
關於FC3000和Q8刷機問題,這兩台機器的屏有相當多的差異,司徒只能就手上的機器做移植,如果你刷機後,開機後黑屏,代表是沒有支援的型號,或許可以換張MicroSD卡或者讀卡機試試,如果依然是黑屏,請不要繼續操作,否則機器可能變磚,司徒不負擔任何責任~
此篇文章已經快破一萬的點閱率,討論的人員越來越多,很高興能夠讓大家一起參與討論,也因為這樣,好人壞人已經很難分辨,如果抱持挑釁的心態前來搗亂,後果自己負責~
司徒慢慢熟悉TRIMUI掌機之後,發現用料確實不錯,加上有自己獨特的官方系統,價格基本上跟小橫米相當,確實是一台相當不錯的小掌機,加上是司徒喜愛的小掌機,為此,司徒特地花了一些時間製作雙系統,目前已經完成,特此,分享給玩家使用,此次,一樣是基於江西恐龍和Jutleys底包製作,請勿使用於商業用途
江西恐龍刷機包:https://github.com/steward-fu/trimui/releases/download/v1.0/trimui_od_jckl_no_roms.img.7z
Jutleys刷機包:https://github.com/steward-fu/trimui/releases/download/v1.0/trimui_od_jutleys_no_roms.img.7z
快捷鍵
屏變亮:MENU + UP
屏變暗:MENU + DOWN
聲音變小:MENU + LEFT
聲音變大:MENU + RIGHT
司徒首先介紹一下超頻改機,目前電阻都是6.3K,電壓是1.12V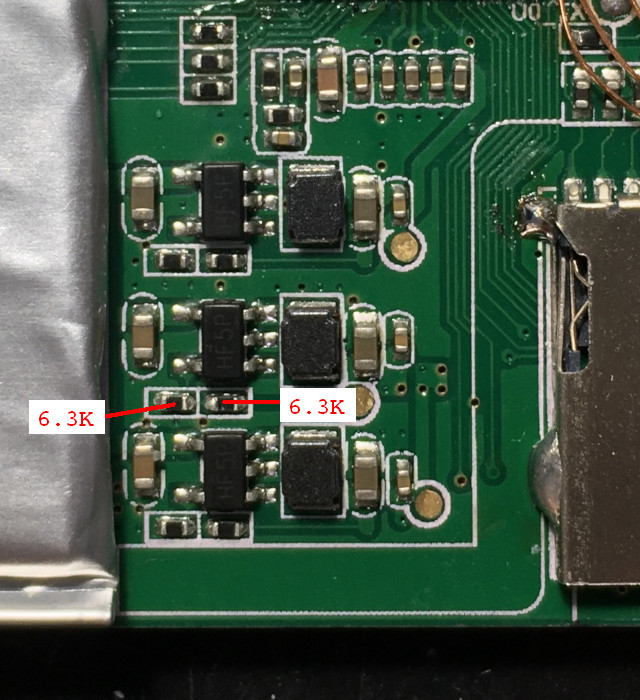
司徒把電阻改成如下160K和91K(必須使用1%精密電阻),可以超頻到1.2GHz,而且讓F1C200S的溫度保持正常,通過公式換算:(0.6 * (160K / 91K)) + 0.6 = 1.65V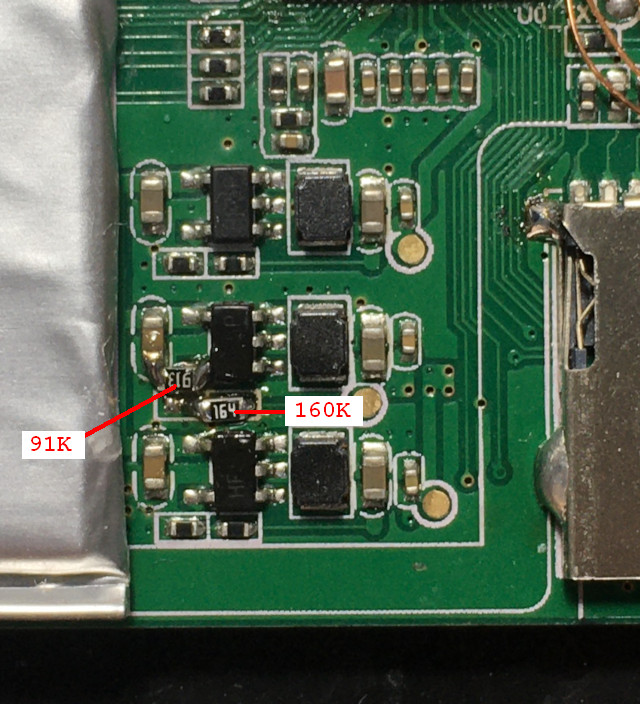
實際測得的電壓1.62V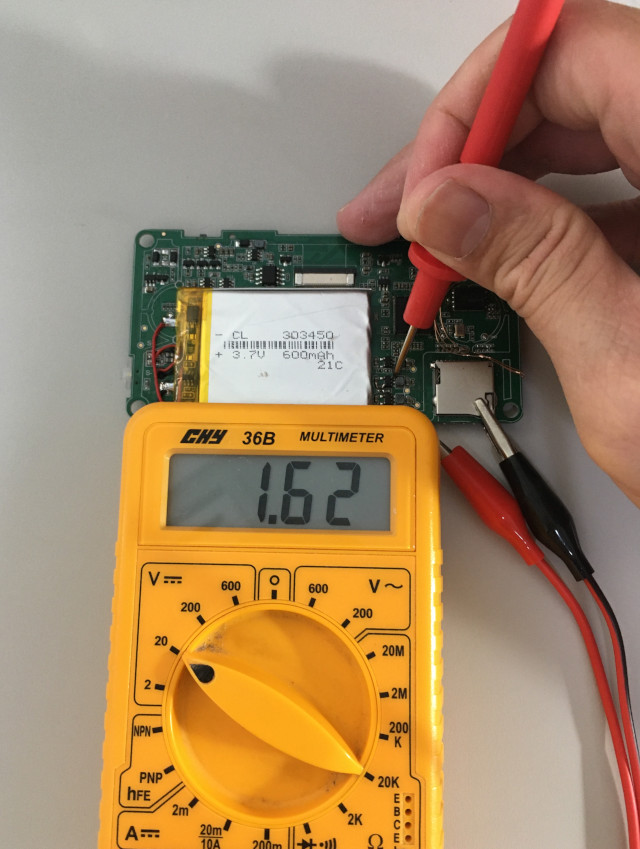
PS1 惡魔城,CPU=672MHz,關閉FrameSkip,55 FPS,CPU=91%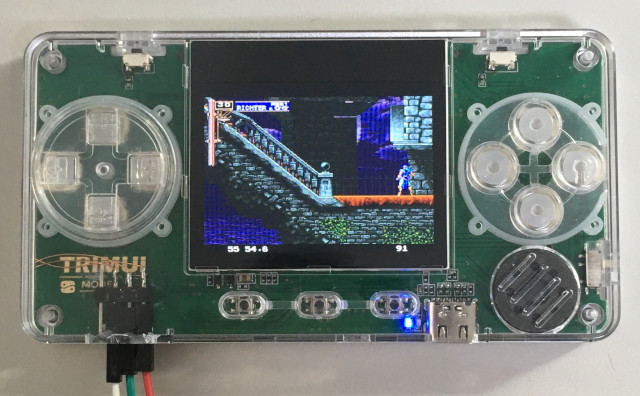
PS1 鐵拳3,CPU=672MHz,關閉FrameSkip,28 FPS,CPU=97%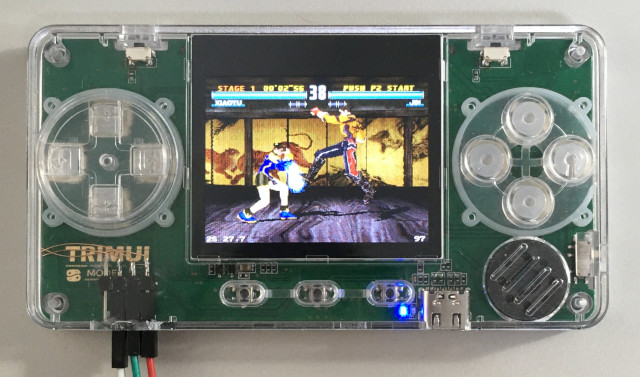
PS1 惡魔城,CPU=1248MHz,關閉FrameSkip,60 FPS,CPU=81%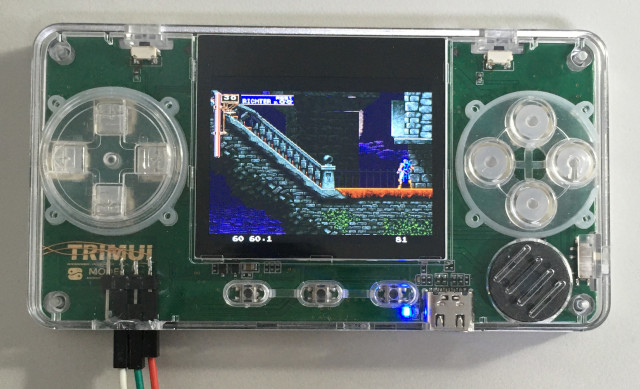
P.S. 從測試到的數據顯示,F1C200S超頻的效果,最高只有到1GHz,即使超頻到1.2GHz,效果依然只有1GHz的效能
原廠TRIMUI系統的閃屏問題
閃屏測試工具:https://github.com/steward-fu/trimui/releases/download/v1.0/TrimuiUpdateV9999_tearing.zip
OpenDingux系統保證沒有閃屏問題(驅動程式到硬體這段保證沒有閃屏問題)
閃屏測試工具:screen_tearing_test.zip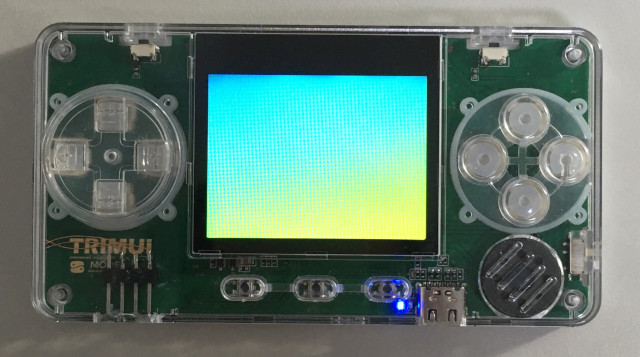
開機畫面(L鍵:OpenDingux系統,R鍵:原廠系統)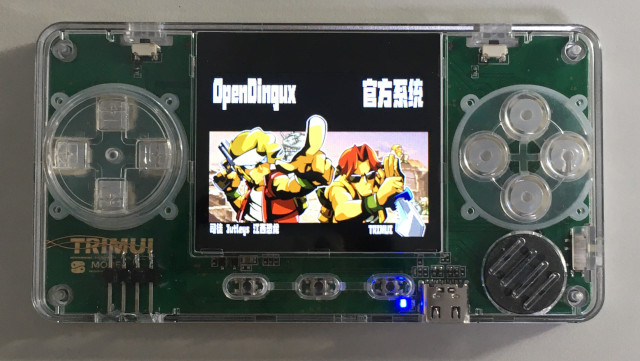

禁止商業用途
江西恐龍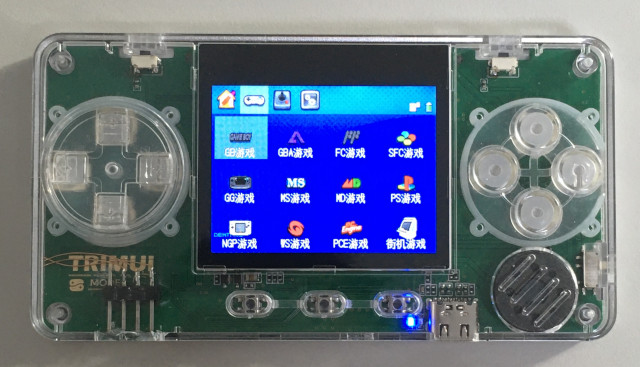
Jutleys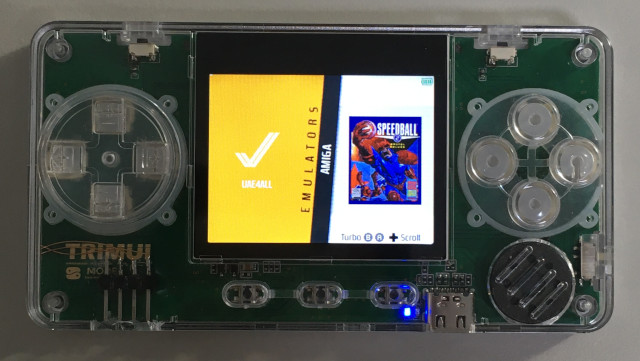
針對Jutleys包,司徒加入中文化字型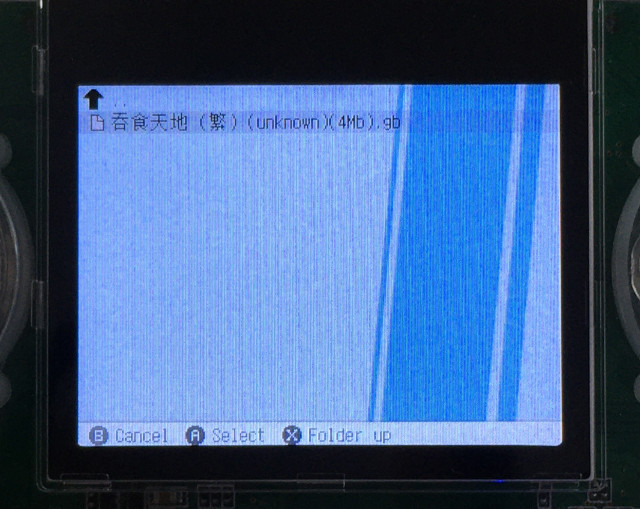
遊戲畫面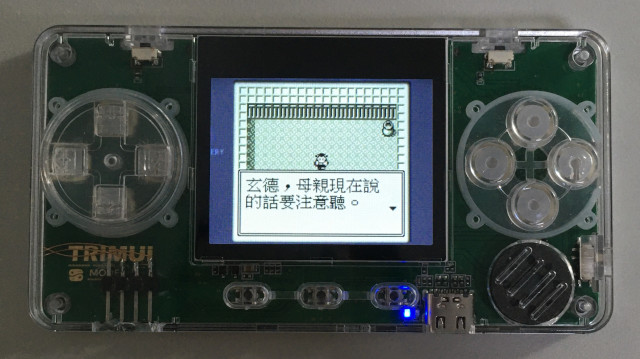

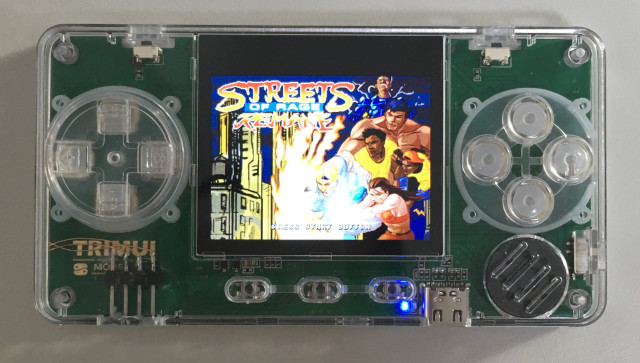
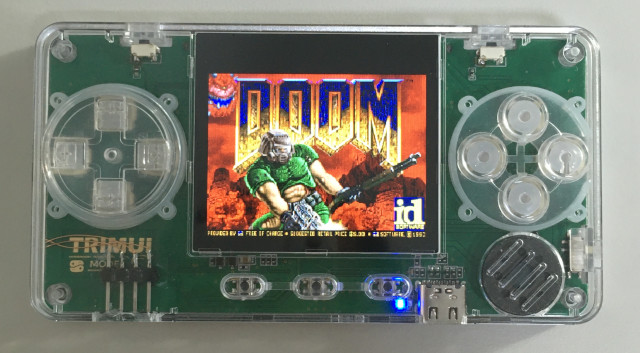
目前司徒已經完成四台F1C100S系列掌機的刷機包製作,司徒相當感謝各位的支持,在此至上謝意,另外也相當感謝whycan論壇提供一個這麼好的地方讓司徒撰寫文章,尤其是管理員:暈哥、xboot、哇酷小二都是相當優秀的人才,也願意幫大家解惑,在這個年代,確實是相當了不起,在此特別致謝~不過,網站總是需要營運成本,如果大家有閒錢,可以捐獻給whycan網站,讓一個好網站可以再戰10年~
接下來的重點除了新內核和草食系統之外,就是模擬器優化,目前司徒第一個鎖定的模擬器是GNGEO模擬器,目前司徒看到的問題有:
1. 閃屏
2. 間歇卡頓
3. 大型遊戲無法執行
司徒會朝這三個方向改進,如果玩家有遇到GNGEO模擬器的其它問題,歡迎回報,一次針對一個模擬器優化,目前是GNGEO模擬器,非GNGEO模擬器問題,請不要回報,感謝
#406 Re: 司徒开源 » 研究FC3000掌機的開源可行性 » 2021-07-10 17:11:31
#407 Re: 司徒开源 » 研究FC3000掌機的開源可行性 » 2021-07-10 10:28:09
@除恶务尽
fba-a320的a68k只有支援x86和MIPS,你可以註解掉或者去找a68k for ARM,編譯步驟如下說明
diff Makefile
7,8c7,8
< CHAINPREFIX := /opt/mipsel-RetroFW-linux-uclibc
< CROSS_COMPILE := $(CHAINPREFIX)/usr/bin/mipsel-linux-
---
> CHAINPREFIX := /opt/miyoo
> CROSS_COMPILE := $(CHAINPREFIX)/bin/arm-linux-
45c45
< BUILD_A68K = 1
---
> #BUILD_A68K = 1
276c276
< CFLAGS   = -fpermissive -O2 -G0 -march=mips32 -pipe -fno-builtin -fno-common -mno-shared -ffast-math \
---
> CFLAGS   = -fpermissive -O2 -pipe -fno-builtin -fno-common -ffast-math \
編譯
$ cd
$ wget https://github.com/steward-fu/miyoo/releases/download/v1.0/toolchain.7z
$ 7za x toolchain.7z
$ sudo mv miyoo /opt
$ export PATH=$PATH:/opt/miyoo/bin

$ git clone https://github.com/retrofw/fba-a320
$ cd fba-a320
$ make
@sanikoyes
於結束維護後,司徒會放出所有源代碼,可以關注司徒的TRIMUI GitHub,司徒預設維護開發週期為一年,因此,距離釋出還有11個月,為何要結束開發後才釋出源代碼呢?因為我可不想再被說偷偷賣掉其它開發者的東西,人在做、天在看,說話要憑良心,人為何總是要打壓他人來提高自己的聲望呢?司徒最後只能選擇自保,切斷跟所有開發者的關聯,源代碼盡量自己從頭做起,這樣在司徒開發的期間,就不會有人說我偷偷賣掉他的人東西,避免紛爭,人心可畏,人言更可畏!
#408 Re: 司徒开源 » 研究FC3000掌機的開源可行性 » 2021-07-09 21:39:33
#409 Re: 司徒开源 » 研究FC3000掌機的開源可行性 » 2021-07-09 20:28:35
#410 Re: 司徒开源 » 研究FC3000掌機的開源可行性 » 2021-07-09 18:36:10
#411 Re: 司徒开源 » 研究FC3000掌機的開源可行性 » 2021-07-09 17:36:55
#412 Re: 司徒开源 » 研究FC3000掌機的開源可行性 » 2021-07-09 11:04:26
#413 Re: 司徒开源 » 研究FC3000掌機的開源可行性 » 2021-07-09 10:55:34
#414 Re: 司徒开源 » 研究FC3000掌機的開源可行性 » 2021-07-09 10:55:14
@yesiraperfect
啟動黑屏是因為BIOS錯誤,隨意按一個按鍵就可以繼續
邊框閃爍問題,是因為開啟雙緩衝後,邊框只填到其中一個畫面,導致閃爍
我把邊框閃爍以及BIOS卡住問題都修掉了,檔案:gpsp_fix_border_tearing_bios.zip
現在畫面正常了~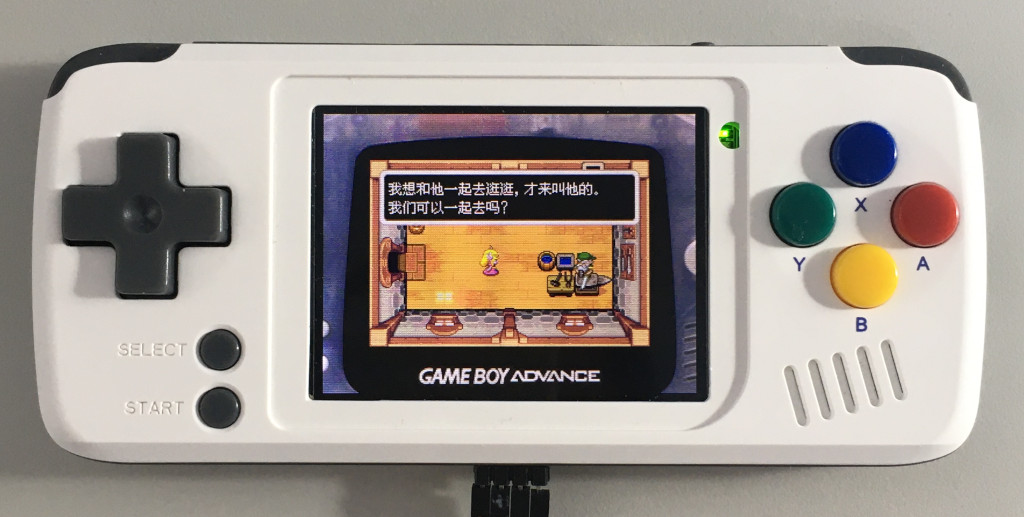
接下來我會先把TRIMUI掌機整頓好,模擬器相關問題,要等TRIMUI掌機整頓好再繼續處理~
有模擬器相關問題要回報的,請等我把TRIMUI整頓好在回報,感謝~
#415 Re: 司徒开源 » 研究FC3000掌機的開源可行性 » 2021-07-09 10:38:17
#416 Re: 司徒开源 » 研究FC3000掌機的開源可行性 » 2021-07-09 09:00:35
#417 Re: 司徒开源 » 研究FC3000掌機的開源可行性 » 2021-07-08 23:06:29
@lzgame02
你這個是要給PSP的吧?你這人...,我目前環境有問題,目前無法幫你編譯,不好意思~哈
@yesiraperfect
你這個問題我可以複製出來,我追了一下問題,發現是那個GPSP模擬器問題,它沒有開雙緩衝,然後又交給SDL處理,導致自己蓋自己的畫面,我測試當初移植給小橫米的GPSP也同樣有問題,於是,我基於當初小橫米的GPSP修了一下,目前看來可以,你在幫我測試一下,檔案:gpsp_sdl_doublebuf_fix.zip
P.S. 原來目前的GPSP模擬器也是那個死法國佬改的,這人的人品...真是...不敢恭維,而且這GBA模擬器畫面竟然糊成這樣...,這人就不能好好做事情嗎~哈
@fanelwin
全部都有問題~
#418 Re: 司徒开源 » 研究FC3000掌機的開源可行性 » 2021-07-08 20:32:37
#419 Re: 司徒开源 » 研究FC3000掌機的開源可行性 » 2021-07-08 19:30:11
#420 Re: 司徒开源 » 研究FC3000掌機的開源可行性 » 2021-07-08 17:50:16
按鍵部份,你修改gmenu2x/input.cfg,把306跟308對調就可以,按鍵現在很亂~
大家先不要刷這兩個包好了,我發現這兩個包的CPU超頻設定是有問題,沒有任何作用,我的測試方是自己寫一個超頻程序,啟動後直接執行並且跑PS1模擬器,但是,把我的超頻程序加到啟動模擬器之前執行,會當機,而且這兩個包都會有卡頓問題,就是間歇性卡頓,原因目前不知道,我決定放棄這兩個刷機底包~所以大家先不要用,不過如果只是要看閃屏問題,可以刷機測試,測試NEOGEO模擬器就可以感受到~
超頻代碼
#include <stdio.h>
#include <stdlib.h>
#include <stdint.h>
#include <string.h>
#include <fcntl.h>
#include <sys/mman.h>
#include <unistd.h>
#include <time.h>

int main(int argc, char* argv[])
{
  int fd = open("/dev/mem", O_RDWR);
  if(fd < 0){
    printf("failed to open /dev/mem\n");
    return -1;
  }
  uint32_t *mem = mmap(0, 4096, PROT_READ | PROT_WRITE, MAP_SHARED, fd, 0x01c20000);
  printf("mem ptr: 0x%x\n", mem);

  *mem = (1 << 31) | (12 << 8) | (3 << 4);
  close(fd);
  return 0;
}#421 Re: 司徒开源 » 研究FC3000掌機的開源可行性 » 2021-07-08 16:44:55
建議有玩小橫米的玩家刷Jutleys包,遇到亂碼問題,只要把如下font.ttf覆蓋掉原本的gmenu2x/skins/GameShow/font.ttf就可以
font.ttf.zip
完成後,爽度就差很多了,在加上超頻1.2GHz,小橫米已經是最強的低價開源掌機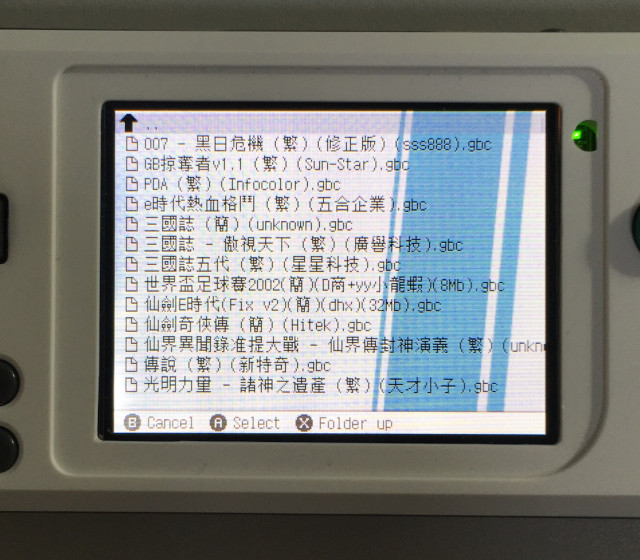
#422 Re: 司徒开源 » 研究FC3000掌機的開源可行性 » 2021-07-08 15:57:44
#423 Re: 司徒开源 » 研究FC3000掌機的開源可行性 » 2021-07-08 15:43:32
目前司徒已經將閃屏問題解決並且打包兩個刷機包,一個是基於江西恐龍包,另一個則是Jutleys刷機包,下圖是解決閃屏後的測試畫面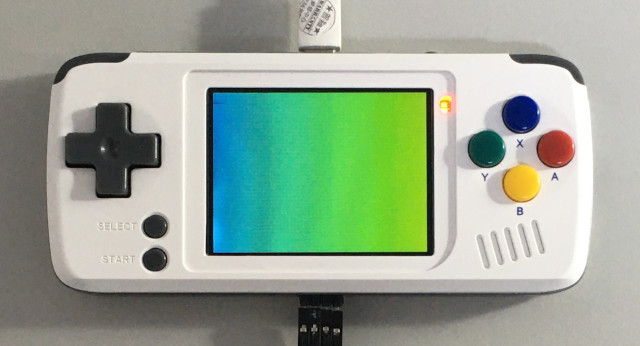
原本的閃屏畫面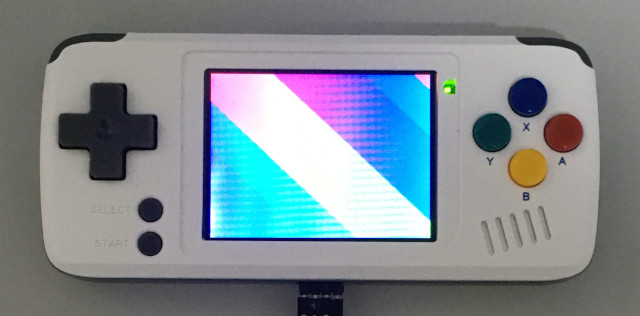
新的刷機包開機畫面
江西恐龍包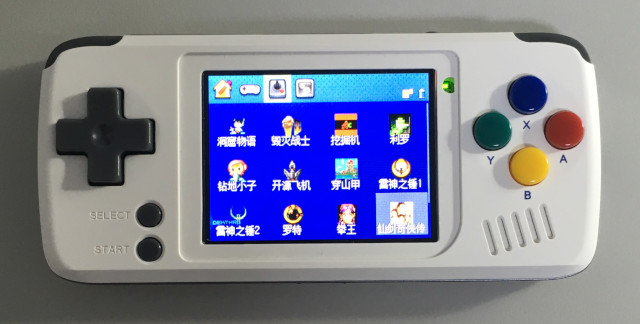
Jutley包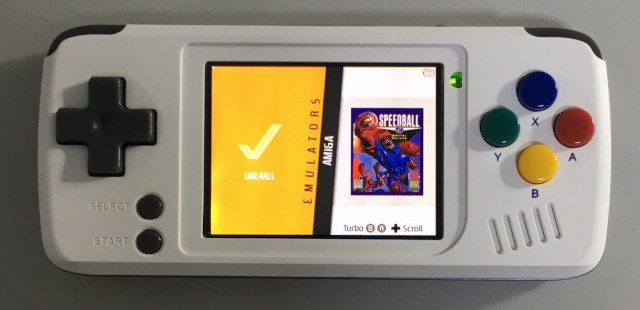
經典的KOF98,沒有閃屏的小橫米再配上超頻到1.2GHz的驚人潛力,相信玩家會更愛小橫米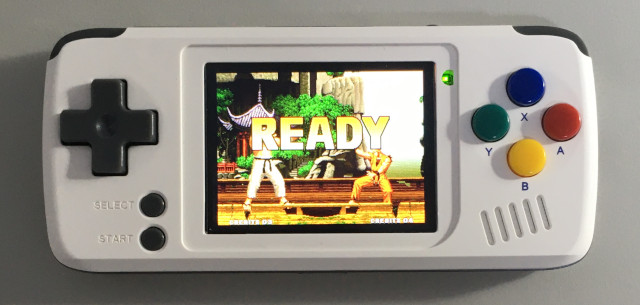
江西恐龍包:https://github.com/steward-fu/pocketgo/releases/download/v1.0/pocketgo_od_jckl_no_roms.img.7z
Jutleys包:https://github.com/steward-fu/pocketgo/releases/download/v1.0/pocketgo_od_jutleys_no_roms.img.7z
快速鍵:
MENU + UP (屏幕變亮)
MENU + DOWN (屏幕變暗)
#424 Re: 司徒开源 » 研究FC3000掌機的開源可行性 » 2021-07-08 13:39:43
小橫米2021版腳位如下:
UP		PE2
DOWN		PE3
LEFT		PE4
RIGHT		PE5
A		PE9
B		PE7
X		PD9
Y		PE8
L		PC1
R		PC2
START		PE0
SELECT		PD0
MENU		PE1
LCD BK		PE6
LCD TE		PE10
LCD RST		PE11
LCD CS		PD21
LCD RD		PD20
LCD RS		PD19
LCD WR		PD18
LCD DB11	PD13
LCD DB12	PD14
LCD DB13	PD15
LCD DB14	PD16
LCD DB15	PD17
LCD DB5		PD6
LCD DB6		PD7
LCD DB7		PD8
LCD DB8		PD10
LCD DB9		PD11
LCD DB10	PD12
LCD DB0		PD1
LCD DB1		PD2
LCD DB2		PD3
LCD DB3		PD4
LCD DB4		PD5
SPI Flash CS	PC1
SPI Flash MISO	PC2
SPI Flash MOSI	PC3
SPI Flash SCK	PC0
MicroSD D0	PF1
MicroSD D1	PF0
MicroSD D2	PF5
MicroSD D3	PF4
MicroSD CLK	PF2
MicroSD CMD PF3#425 Re: 司徒开源 » 研究FC3000掌機的開源可行性 » 2021-07-08 11:49:24
從司徒做過這麼多的實驗來看,CPU 1.2GHz是一個臨界值,超過1.2GHz後,效能沒有明顯改善,同時,為了保持正常晶片溫度,1.65V的CORE-VDD電壓是最適合使用,因此,司徒把小橫米的電阻改成160K和91K(必須使用1%精密電阻),可以超頻到1.2GHz,而且讓F1C100S的溫度保持正常,通過公式換算:(0.6 * (161K / 91K)) + 0.6 = 1.65V,這個改造是相當安全的改機,司徒已經使用10姊妹測試過,沒有問題~建議玩家可以手動改造,相信CPU 1.2GHz的小橫米相當有看頭~
兩顆電阻都是25K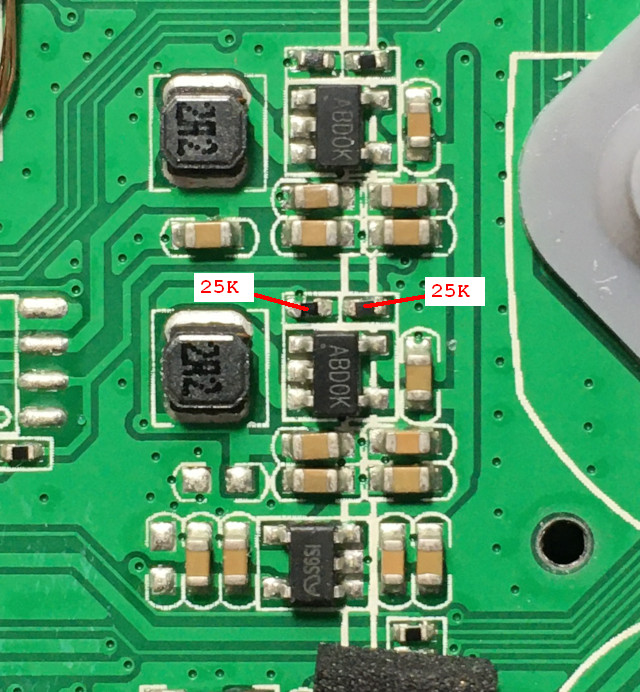
電壓1.13V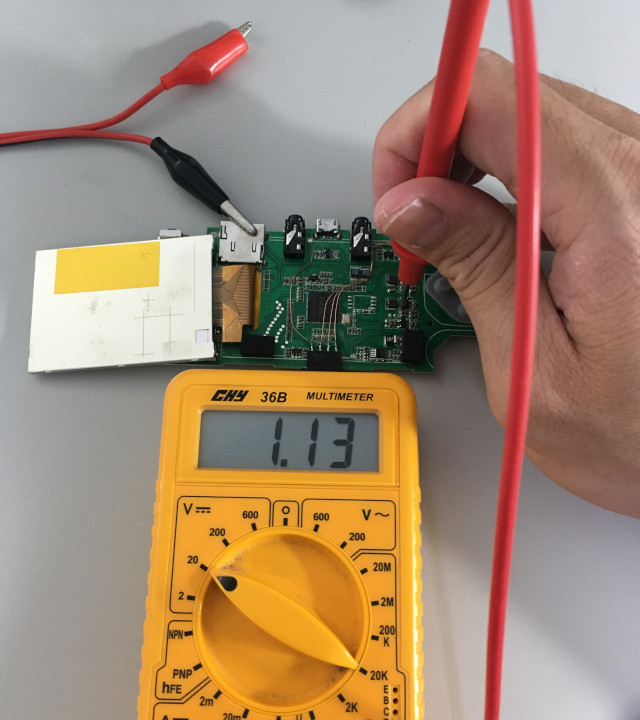
改成160K和91K(必須使用1%精密電阻)
實際電壓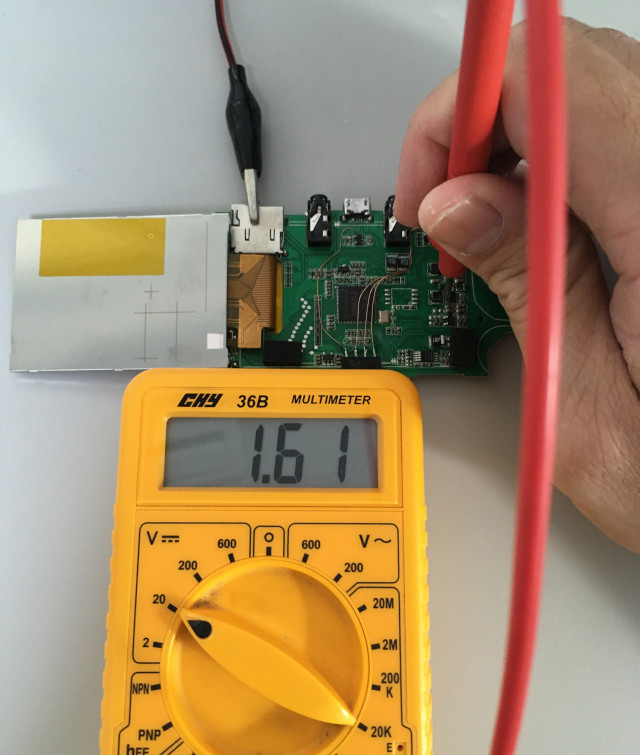
#426 Re: 司徒开源 » 研究FC3000掌機的開源可行性 » 2021-07-08 11:06:16
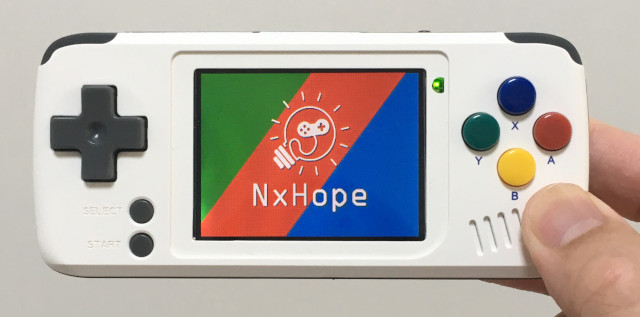
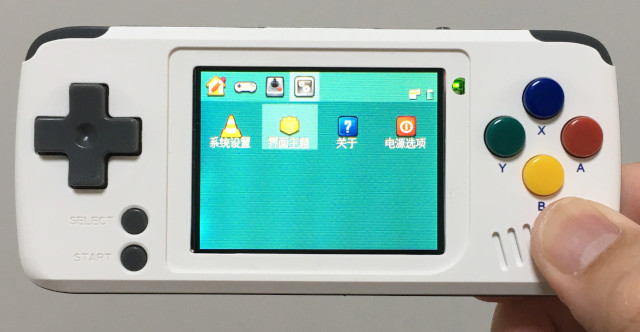
#427 Re: 司徒开源 » 研究FC3000掌機的開源可行性 » 2021-07-08 10:54:38
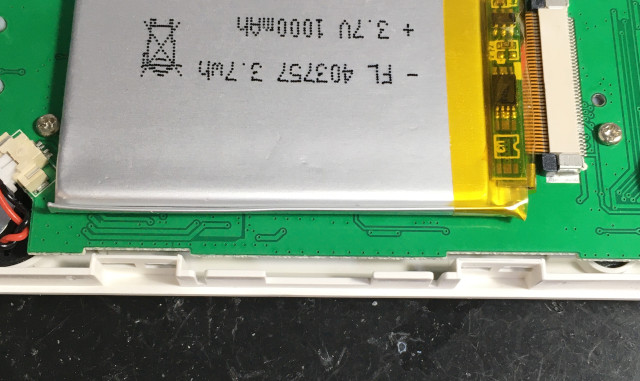
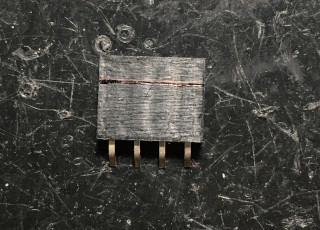
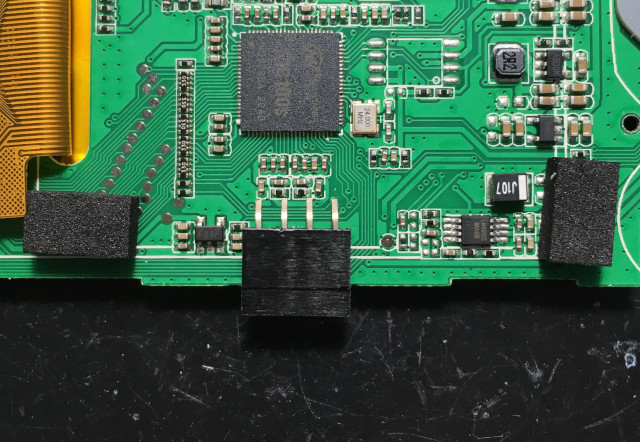
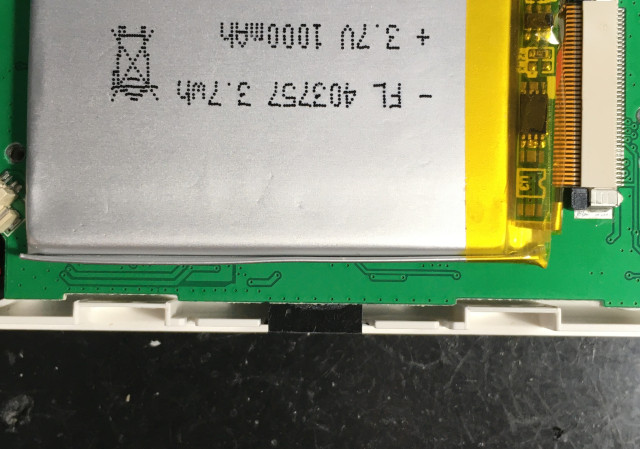
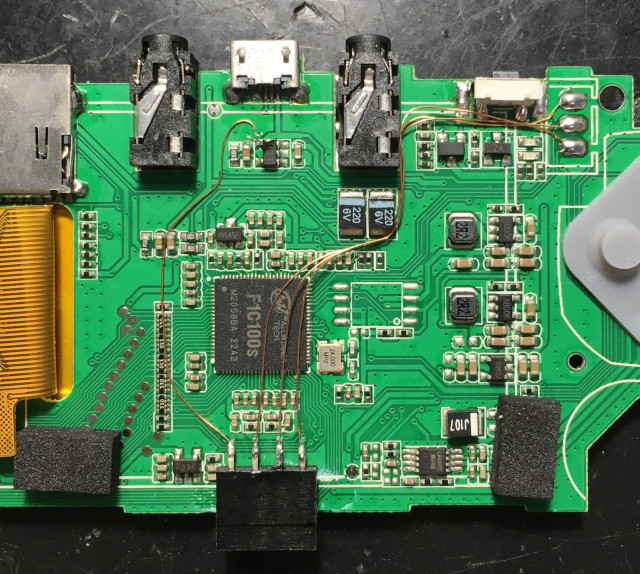
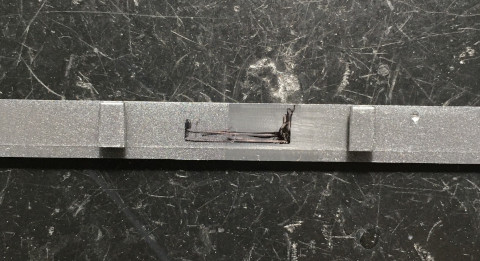
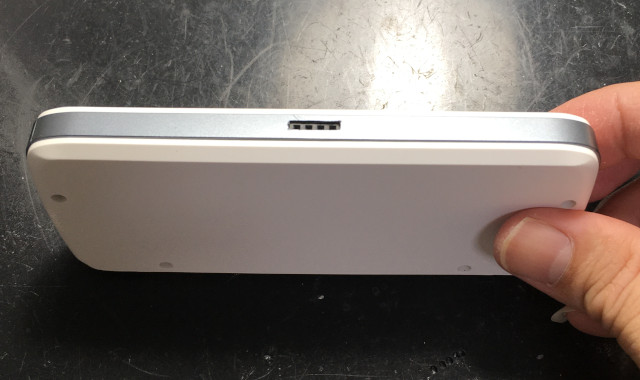
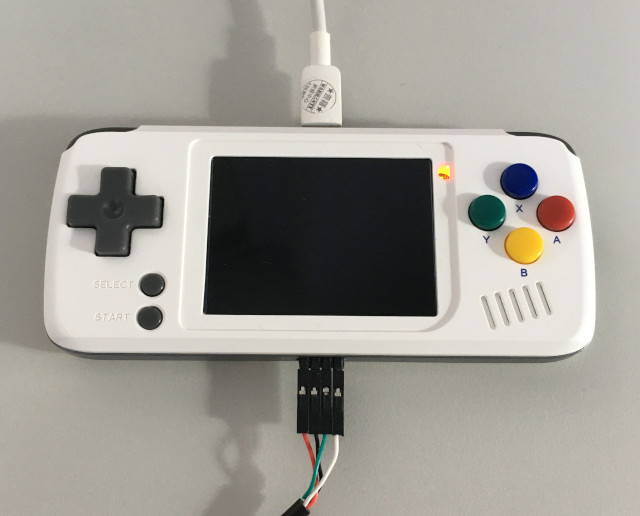
#428 Re: 司徒开源 » 研究FC3000掌機的開源可行性 » 2021-07-08 10:51:00
終於來到小橫米(PocketGo)了~司徒覺得目前最可以拿來玩遊戲的機器,應該就屬TRIMUI和小橫米兩台,因此,後續的重心都會放在這兩台機器上,雖然司徒相當看好小橫米,畢竟它是可以用來玩格鬥遊戲,搓招相對容易,TRIMUI在這方面就比較不適合玩格鬥遊戲,但是,當司徒收到購買的小橫米時,那屏幕真的讓司徒蠻失望的,不過,比起其它F1C100S系列掌機,小橫米還是可以甩掉他們幾條街,因此,司徒調整一下順序,先把小橫米整頓一下,最後在整頓TRIMUI
小橫米2021版的屏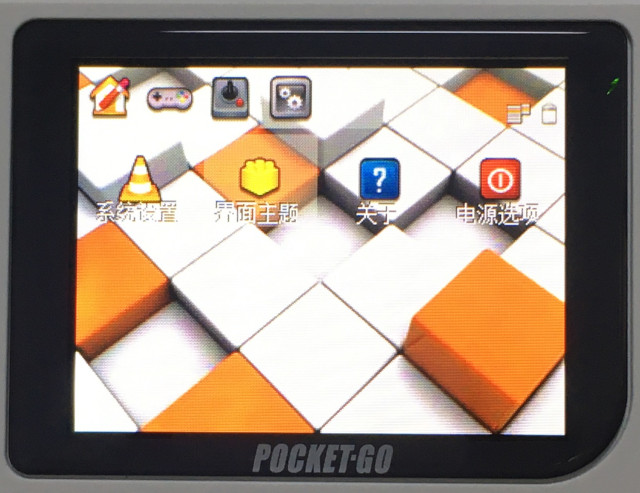
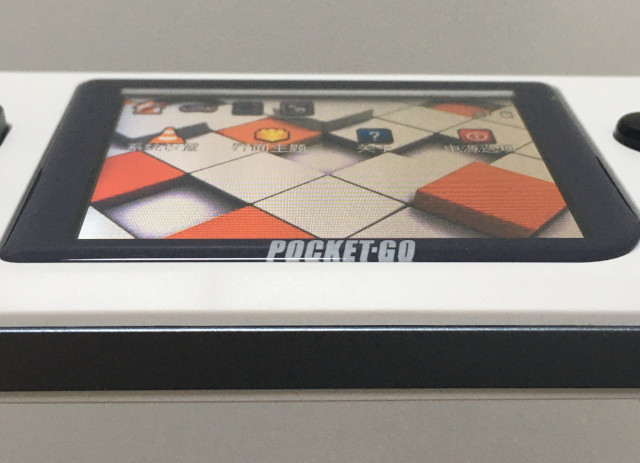
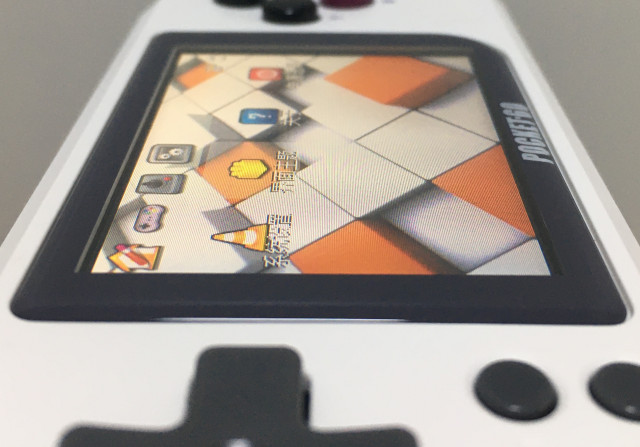
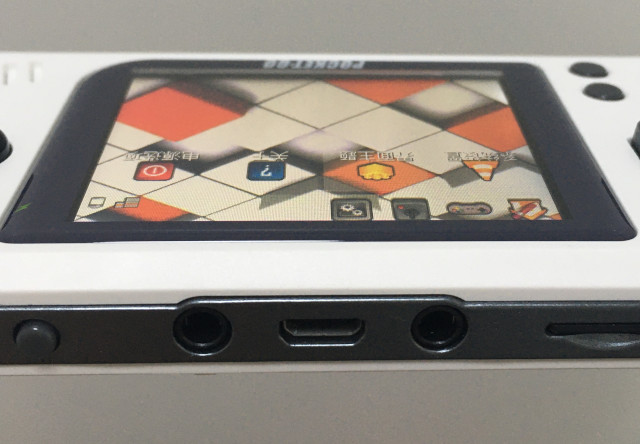
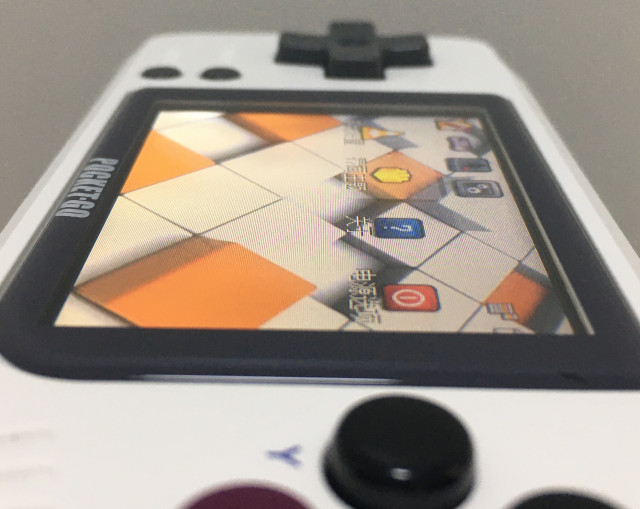
小橫米2021版的拆機
包裝
附贈的東西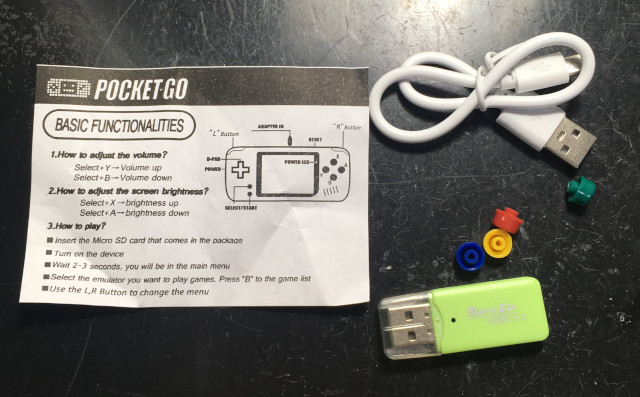
屏幕越來越爛,左下角露光,下方有四條明顯露光的條紋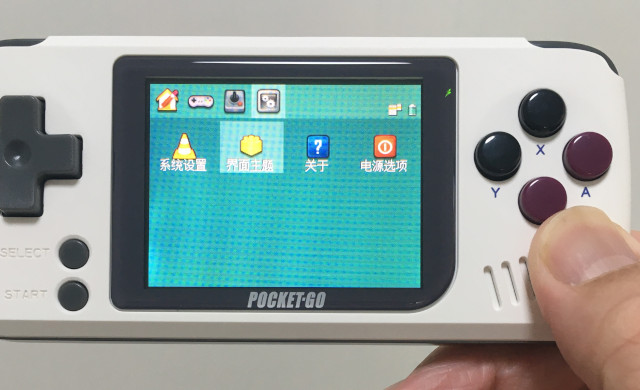
司徒換一張背景圖片測試,果真是屏幕問題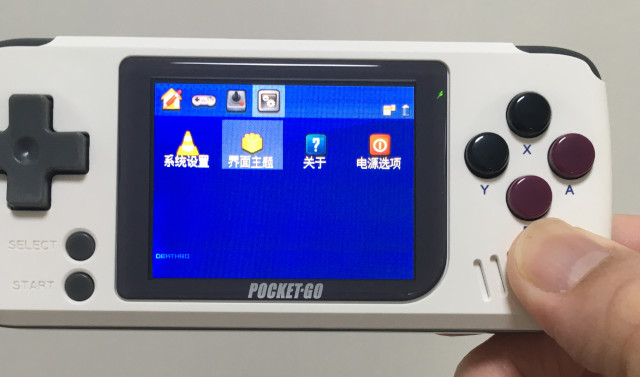
肉雞就定位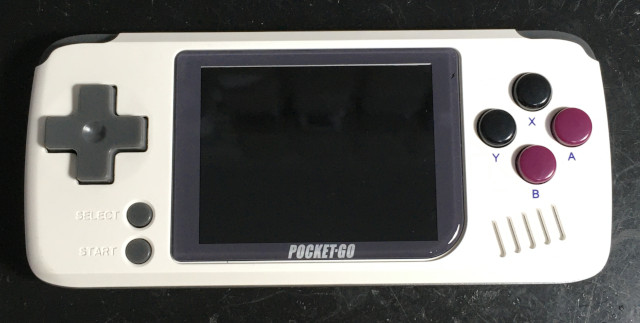
上方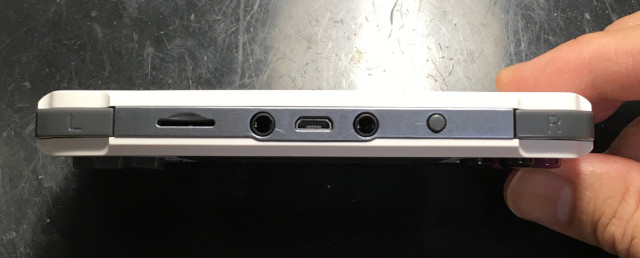
側邊
下邊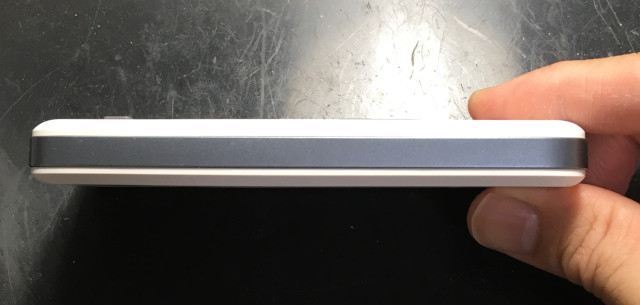
側邊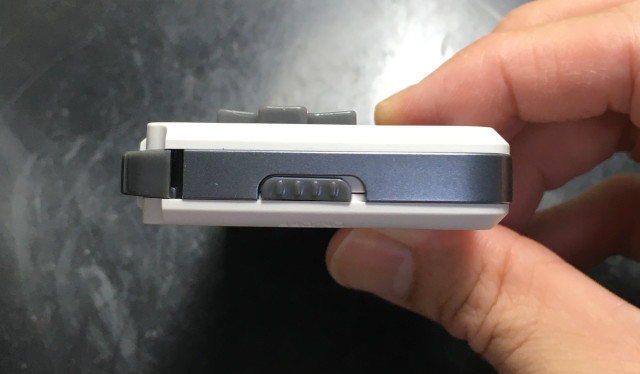
背面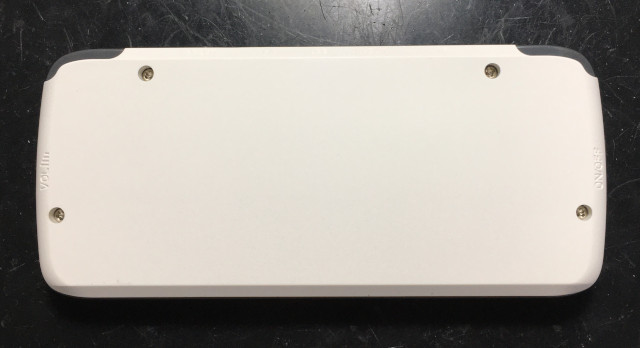
背蓋
終於使用比較正常一點的電池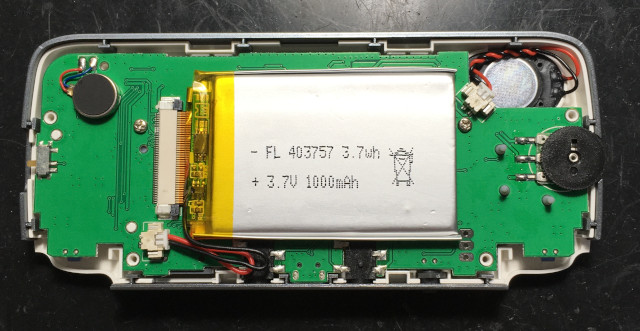
前蓋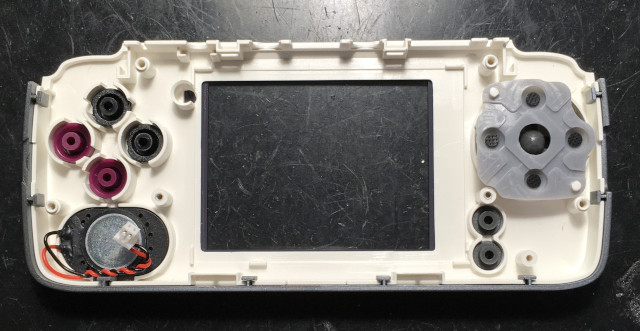
主要零件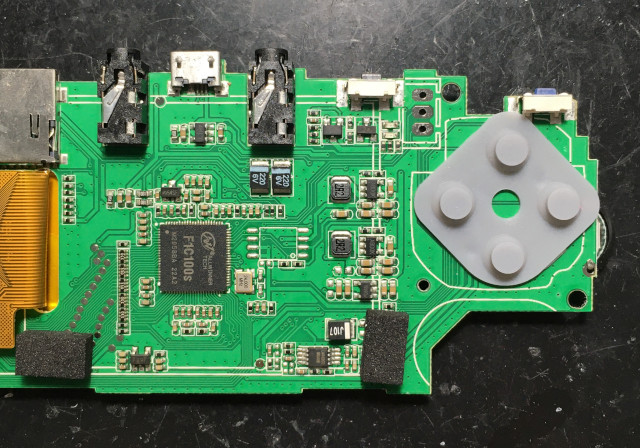
F1C100S、LM4809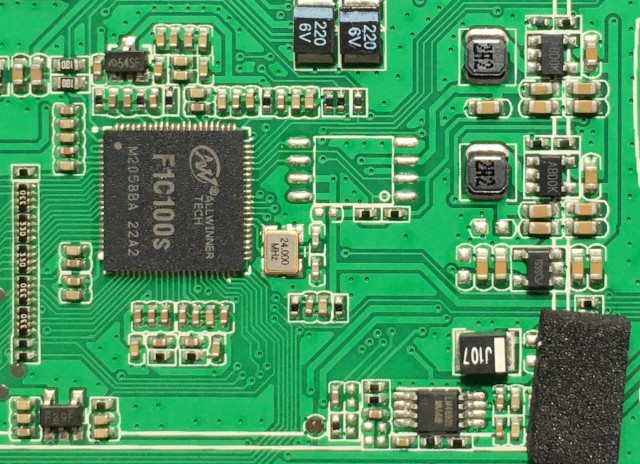
屏的型號是ST7789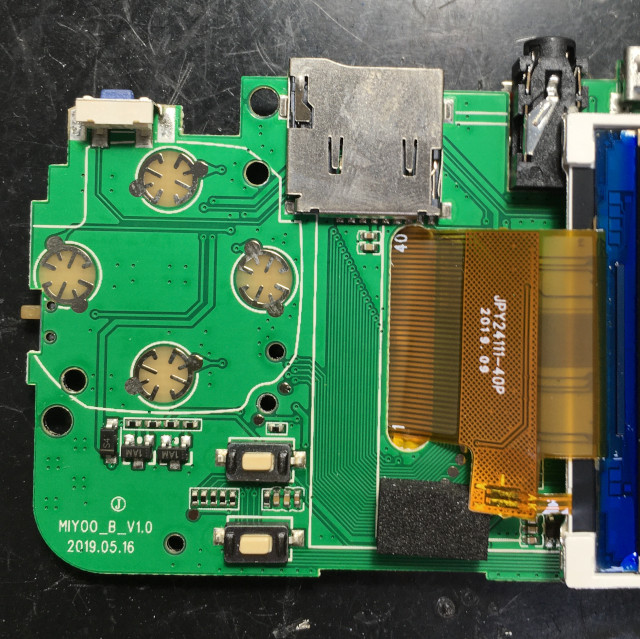
#429 Re: 司徒开源 » 研究FC3000掌機的開源可行性 » 2021-07-07 22:53:28
#430 Re: 司徒开源 » 研究FC3000掌機的開源可行性 » 2021-07-07 22:32:57
#431 Re: 司徒开源 » 研究FC3000掌機的開源可行性 » 2021-07-07 20:51:43
#432 Re: 司徒开源 » 研究FC3000掌機的開源可行性 » 2021-07-07 19:33:39
@akting
很抱歉目前沒有辦法
目前基於FC3000的資源,司徒幫Q8掌機製作了兩個客製化系統,不過,不建議拿來玩遊戲,比較適合研究使用...
江西恐龍刷機包:https://github.com/steward-fu/q8/releases/download/v1.0/q8_od_jckl_no_roms.img.7z
Jutleys刷機包:https://github.com/steward-fu/q8/releases/download/v1.0/q8_od_jutleys_no_roms.img.7z
燒錄到MicroSD即可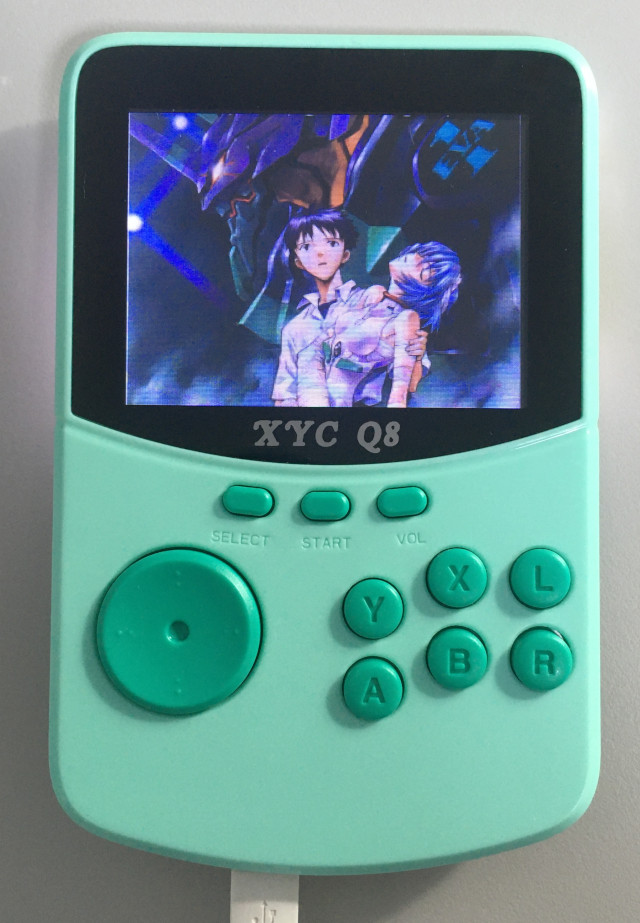
江西恐龍底包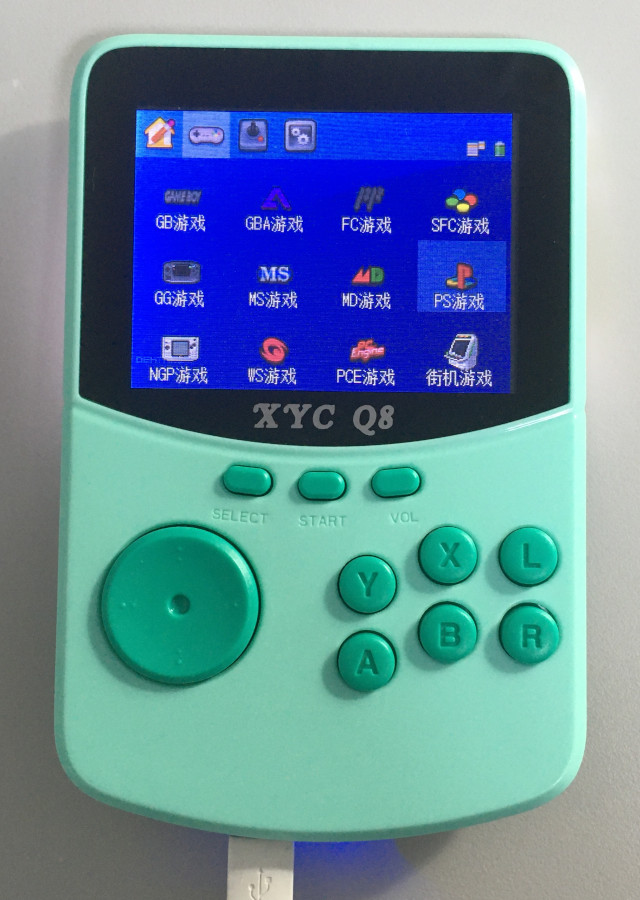
Jutleys底包
仙劍奇俠傳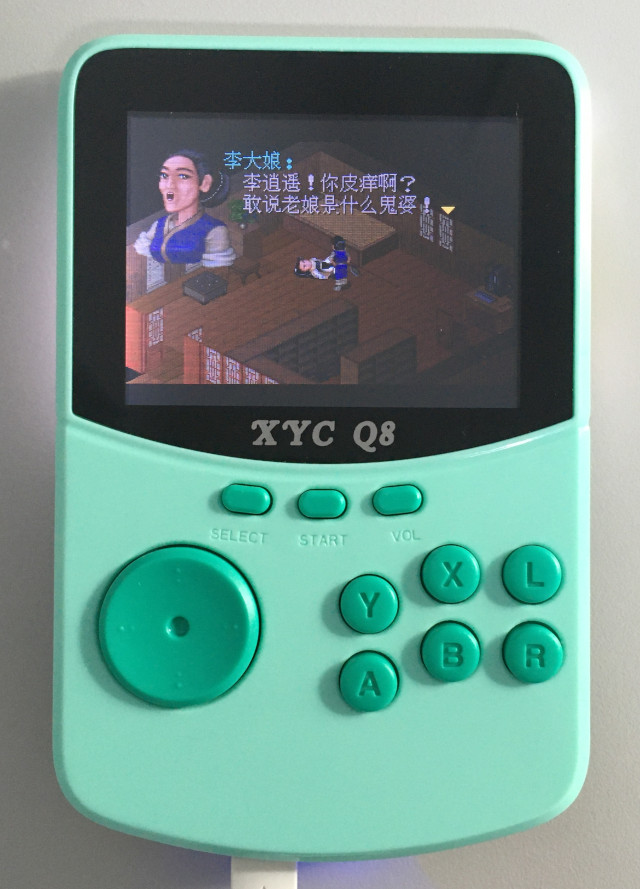
怒鐵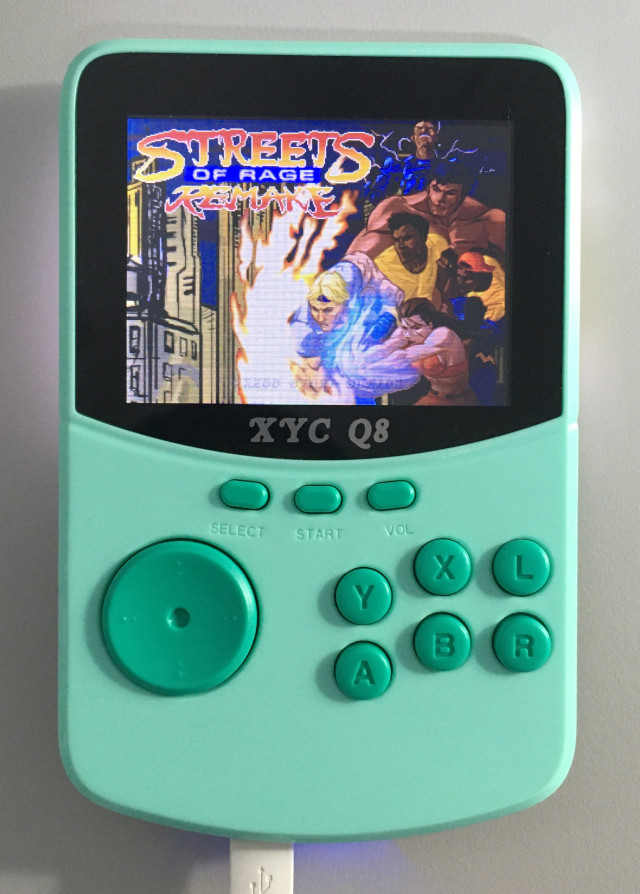
相信大家一定很好奇,司徒都說Q8只適合研究不適合玩遊戲,那為何司徒還要幫Q8做刷機包呢?此奶天生我才必有用,Q8就是在幫小橫米鋪路,因為比較恐怖的測試,司徒不敢在小橫米上測試,畢竟司徒可不想再下單一台,因為那又要等一個月了...,因此,勇敢的Q8再度佔了出來,司徒幫它量一下身高體重,果然是標準的1.14V
兩顆電阻都是156K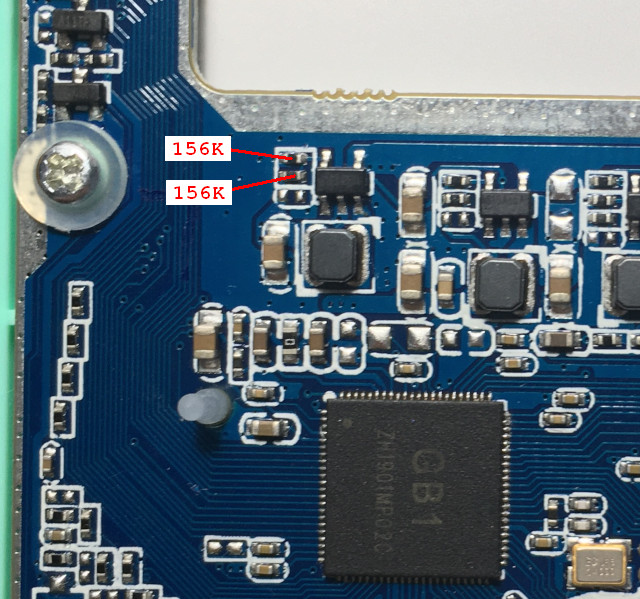
替換成160K和442K電阻
電壓2.23V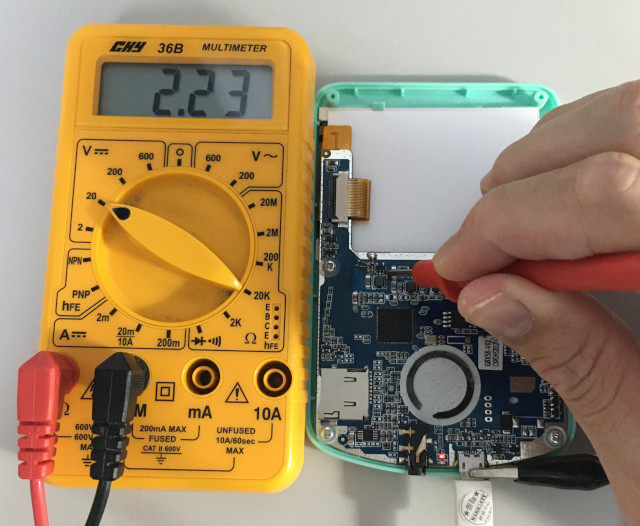
PS1 惡魔城,CPU=672MHz,關閉FrameSkip,54 FPS,CPU=95%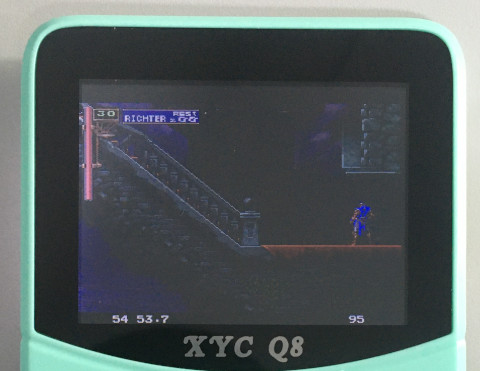
PS1 鐵拳3,CPU=672MHz,關閉FrameSkip,36 FPS,CPU=96%
PS1 惡魔城,CPU=1536MHz,關閉FrameSkip,60 FPS,CPU=75%
PS1 鐵拳3,CPU=1536MHz,關閉FrameSkip,40 FPS,CPU=94%
PS1 惡魔城,CPU=1632MHz,關閉FrameSkip,60 FPS,CPU=59%
PS1 鐵拳3,CPU=1632MHz,關閉FrameSkip,44 FPS,CPU=96%
CORE-VDD電壓是影響溫度的關鍵,司徒即使跑960MHz,還是感覺有點溫熱...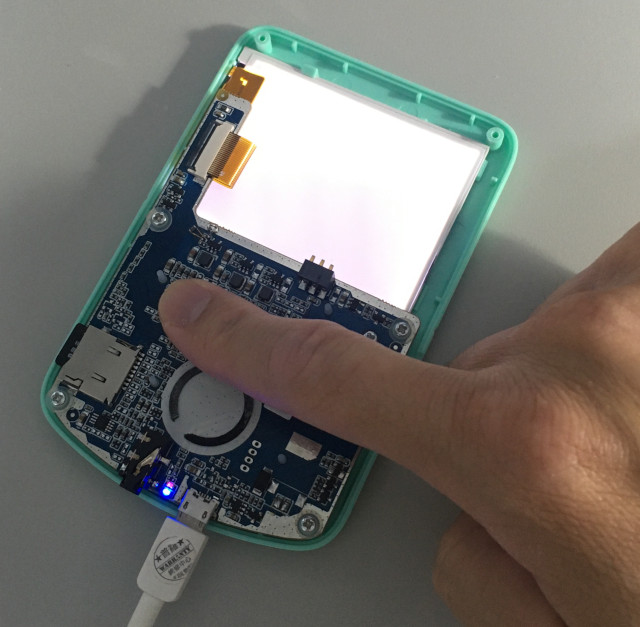
結論:經由FC3000和Q8測試得到的數據,顯示RAM不足是一個問題,即使Q8已經是MicroSD 4 bits速度,跑出來的效果跟FC3000差別不大,而CPU速度再往上超頻時,FPS漂移更嚴重,代表SWAP已經不敷使用,因此,如何優化算法,在這種低階CPU更顯重要
#433 Re: 司徒开源 » 研究FC3000掌機的開源可行性 » 2021-07-07 12:45:29
Q8點屏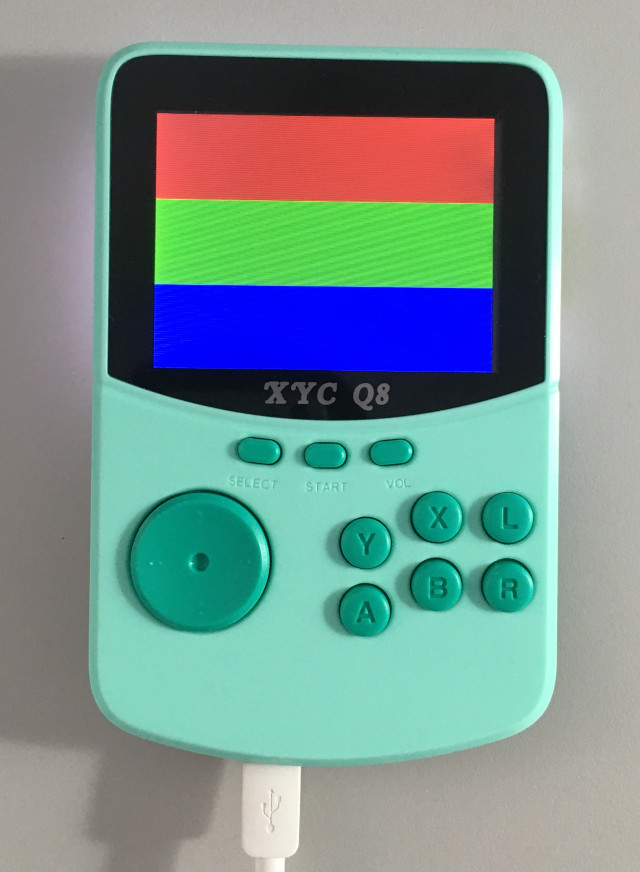
測試代碼
  .global _start

  .equiv PIO_BASE,  0x01c20800
  .equiv PD,        (0x24 * 3)
  .equiv PE,        (0x24 * 4)
  .equiv PIO_CFG0,  0x00
  .equiv PIO_CFG1,  0x04
  .equiv PIO_CFG2,  0x08
  .equiv PIO_DATA,  0x10

  .equiv LCD_CS,    (1 << 21)
  .equiv LCD_RD,    (1 << 20)
  .equiv LCD_RS,    (1 << 19)
  .equiv LCD_WR,    (1 << 18)
  .equiv LCD_RST,   (1 << 11)
  .equiv LCD_BL,    (1 << 6)

  .arm
  .text
_start:
  .long 0xea000016
  .byte 'e', 'G', 'O', 'N', '.', 'B', 'T', '0'
  .long 0, __spl_size
  .byte 'S', 'P', 'L', 2
  .long 0, 0
  .long 0, 0, 0, 0, 0, 0, 0, 0
  .long 0, 0, 0, 0, 0, 0, 0, 0

_vector:
  b reset
  b .
  b .
  b .
  b .
  b .
  b .
  b .

reset:
  ldr r4, =PIO_BASE + PD
  ldr r1, =0x11111111
  str r1, [r4, #PIO_CFG0]
  str r1, [r4, #PIO_CFG1]
  ldr r1, =0x00111111
  str r1, [r4, #PIO_CFG2]

  ldr r4, =PIO_BASE + PE
  ldr r1, [r4, #PIO_CFG0]
  bic r1, #0xf000000
  orr r1, #0x1000000
  str r1, [r4, #PIO_CFG0]

  ldr r1, [r4, #PIO_CFG1]
  bic r1, #0xf000
  orr r1, #0x1000
  str r1, [r4, #PIO_CFG1]

  ldr r4, =PIO_BASE + PD
  ldr r1, =0xffffffff
  str r1, [r4, #PIO_DATA]

  ldr r4, =PIO_BASE + PE
  ldr r1, =0xffffffff
  str r1, [r4, #PIO_DATA]

  bl lcd_rst

  ldr r0, =0xb9
  bl lcd_cmd
  ldr r0, =0xff
  bl lcd_dat
  ldr r0, =0x83
  bl lcd_dat
  ldr r0, =0x57
  bl lcd_dat

  ldr r0, =1000
  bl delay

  ldr r0, =0xb6
  bl lcd_cmd
  ldr r0, =0x2c
  bl lcd_dat

  ldr r0, =0x11
  bl lcd_cmd

  ldr r0, =1000
  bl delay

  ldr r0, =0x35
  bl lcd_cmd

  ldr r0, =0x3a
  bl lcd_cmd
  ldr r0, =0x05
  bl lcd_dat

  ldr r0, =0x36
  bl lcd_cmd
  ldr r0, =0x38
  bl lcd_dat

  ldr r0, =0xb0
  bl lcd_cmd
  ldr r0, =0x68
  bl lcd_dat

  ldr r0, =0x2b
  bl lcd_cmd
  ldr r0, =0x00
  bl lcd_dat
  ldr r0, =0x00
  bl lcd_dat
  ldr r0, =0x01
  bl lcd_dat
  ldr r0, =0x3f
  bl lcd_dat

  ldr r0, =0x2a
  bl lcd_cmd
  ldr r0, =0x00
  bl lcd_dat
  ldr r0, =0x00
  bl lcd_dat
  ldr r0, =0x01
  bl lcd_dat
  ldr r0, =0xdf
  bl lcd_dat

  ldr r0, =0x29
  bl lcd_cmd
  ldr r0, =0x2c
  bl lcd_cmd

  ldr r4, =320*80
  ldr r5, =0xf800
0:
  mov r0, r5
  bl lcd_dat
  subs r4, #1
  bne 0b

  ldr r4, =320*80
  ldr r5, =0x7e0
0:
  mov r0, r5
  bl lcd_dat
  subs r4, #1
  bne 0b

  ldr r4, =320*80
  ldr r5, =0x1f
0:
  mov r0, r5
  bl lcd_dat
  subs r4, #1
  bne 0b
  b .

delay:
  push {lr}
0:
  subs r0, #1
  bne 0b
  pop {pc}

lcd_rst:
  push {r4, r5, lr}
  ldr r4, =PIO_BASE + PE
  ldr r5, =0xffffffff

  bic r5, #LCD_RST
  str r5, [r4, #PIO_DATA]
  ldr r0, =10000
  bl delay

  orr r5, #LCD_RST
  str r5, [r4, #PIO_DATA]
  ldr r0, =10000
  bl delay
  pop {r4, r5, pc}

lcd_wr:
  push {r4, r5, lr}
  ldr r4, =PIO_BASE + PD

  and r2, r0, #0x00ff
  and r3, r0, #0xff00
  lsl r2, #1
  lsl r3, #2

  eor r5, r5
  orr r5, r1
  orr r5, r2
  orr r5, r3
  orr r5, #LCD_RD
  str r5, [r4, #PIO_DATA]

  orr r5, #LCD_WR
  str r5, [r4, #PIO_DATA]
  pop {r4, r5, pc}

lcd_dat:
  push {lr}
  mov r1, #LCD_RS
  bl lcd_wr
  pop {pc}

lcd_cmd:
  push {lr}
  mov r1, #0
  bl lcd_wr
  pop {pc}
.end#434 Re: 司徒开源 » 研究FC3000掌機的開源可行性 » 2021-07-07 11:49:03
Q8掌機的腳位如下
UP		PE10
DOWN		PE9
LEFT		PE8
RIGHT		PE7
A		PE2
B		PA0
X		PE3
Y		PD0
SELECT		PA1(1V)
START		PA1(0V)
L		PE12
R		PD9
VOL		PA1(2V)
LCD BK		PE6
LCD RST		PE11
LCD CS		PD21
LCD RD		PD20
LCD RS		PD19
LCD WR		PD18
LCD DB11	PD13
LCD DB12	PD14
LCD DB13	PD15
LCD DB14	PD16
LCD DB15	PD17
LCD DB5		PD6
LCD DB6		PD7
LCD DB7		PD8
LCD DB8		PD10
LCD DB9		PD11
LCD DB10	PD12
LCD DB0		PD1
LCD DB1		PD2
LCD DB2		PD3
LCD DB3		PD4
LCD DB4		PD5
SPI Flash CS	PC1
SPI Flash MISO	PC2
SPI Flash MOSI	PC3
SPI Flash SCK	PC0
MicroSD D0	PF1
MicroSD D1	PF0
MicroSD D2	PF5
MicroSD D3	PF4
MicroSD CLK	PF2
MicroSD CMD PF3#435 Re: 司徒开源 » 研究FC3000掌機的開源可行性 » 2021-07-07 10:13:36
司徒的小橫米(PocketGo)終於到貨了,下單一個月後,終於到司徒手上,不知道的人還以為是從火星發過來的~可惜,屏越來越差了~還有漏光問題,司徒有點失望,不過,路還是要繼續往下走,於是,接著登場的則是Q8掌機,這掌機的硬件,基本上跟小橫米很相似,是一台適合研究學習的機器,但是,不是一台可以拿來玩遊戲的機器,所以司徒會盡量簡單帶過,司徒會把重心放在TRIMUI和小橫米身上,畢竟這兩台是比較可以拿來玩遊戲的掌機~
屏視角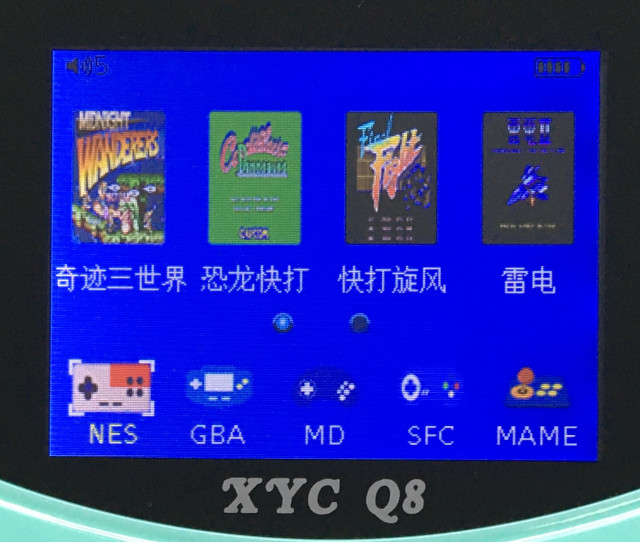
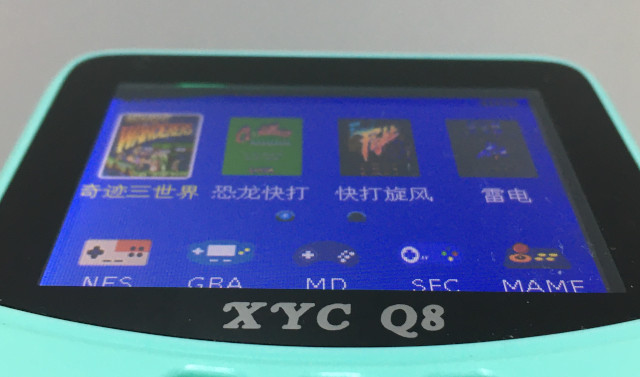
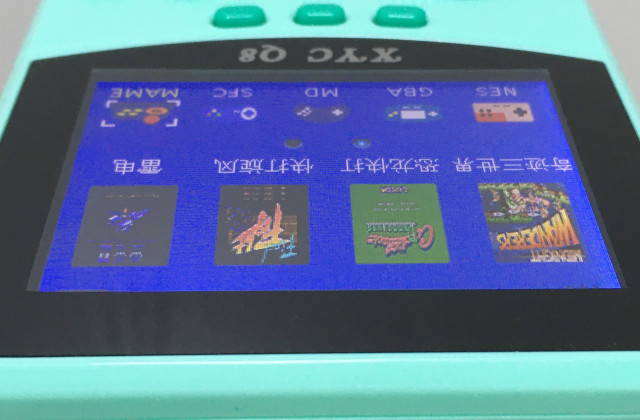
拆機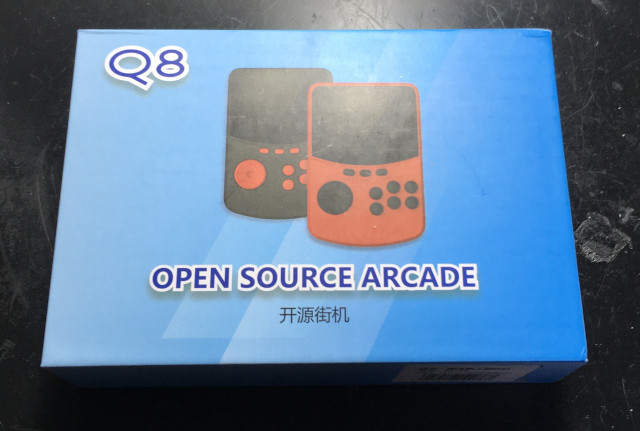

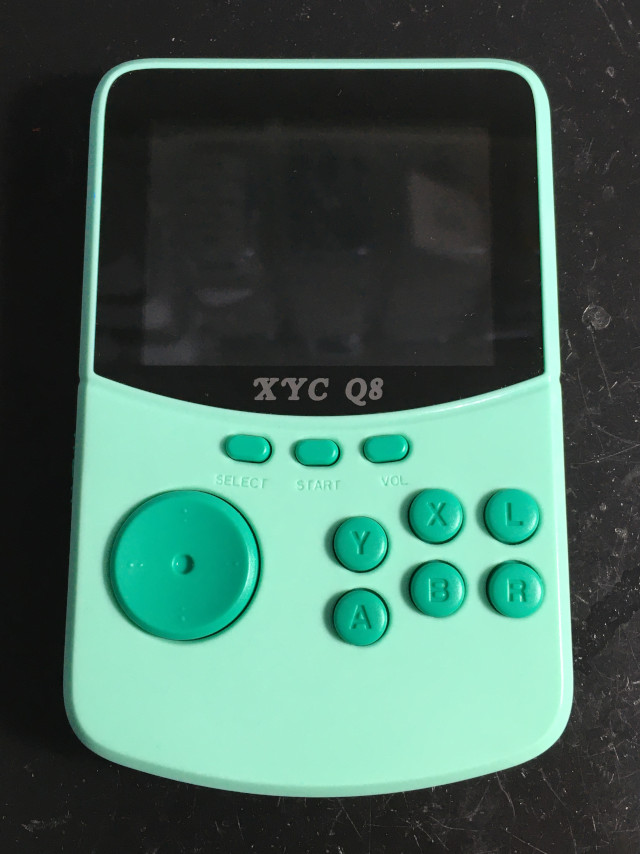
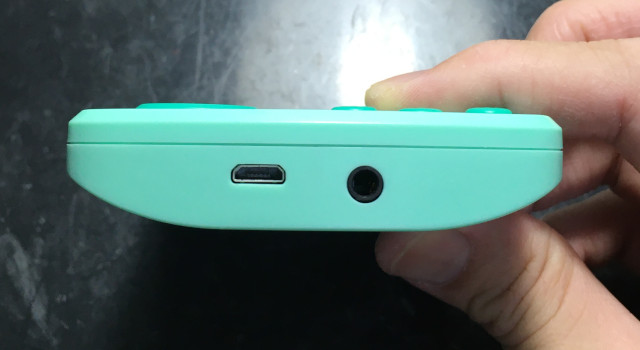
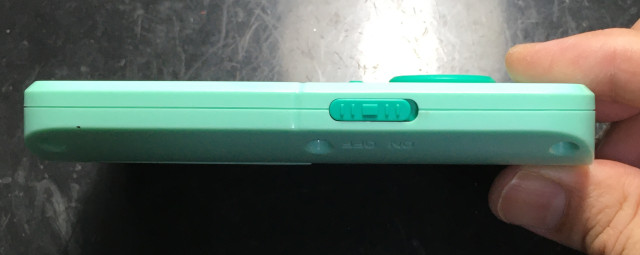
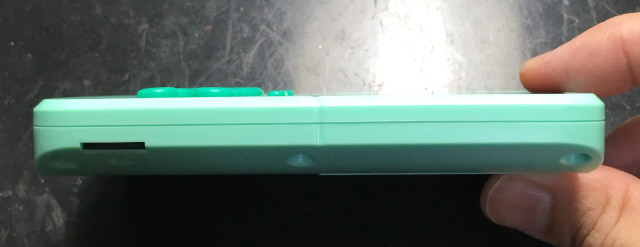
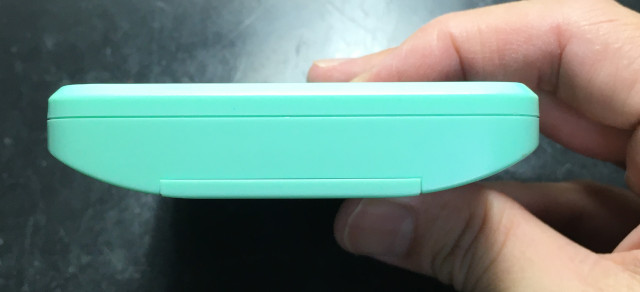
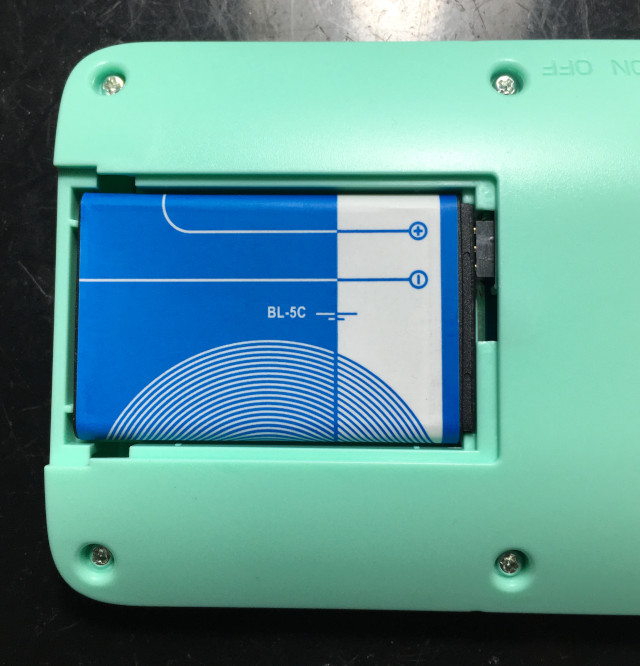
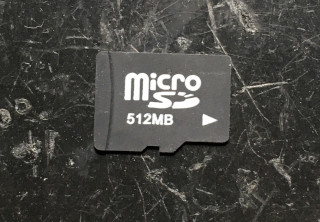
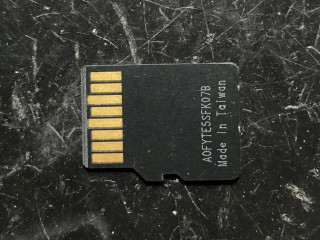
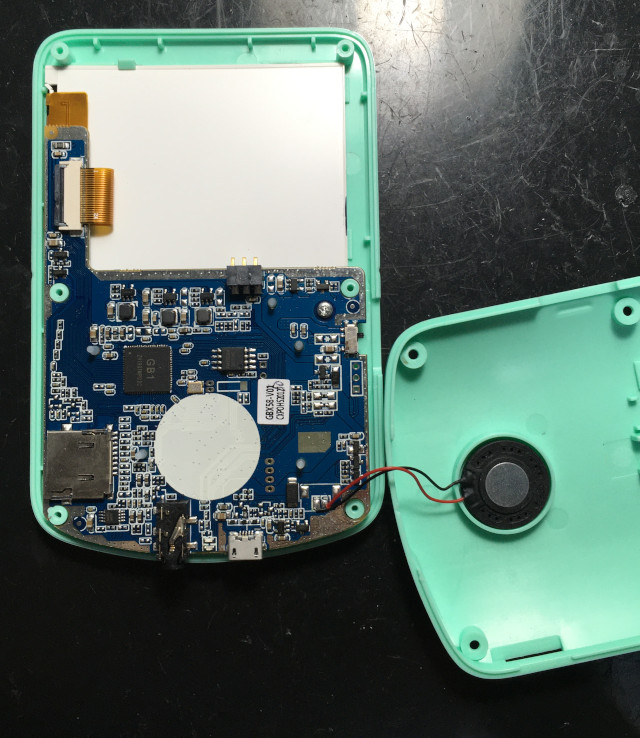

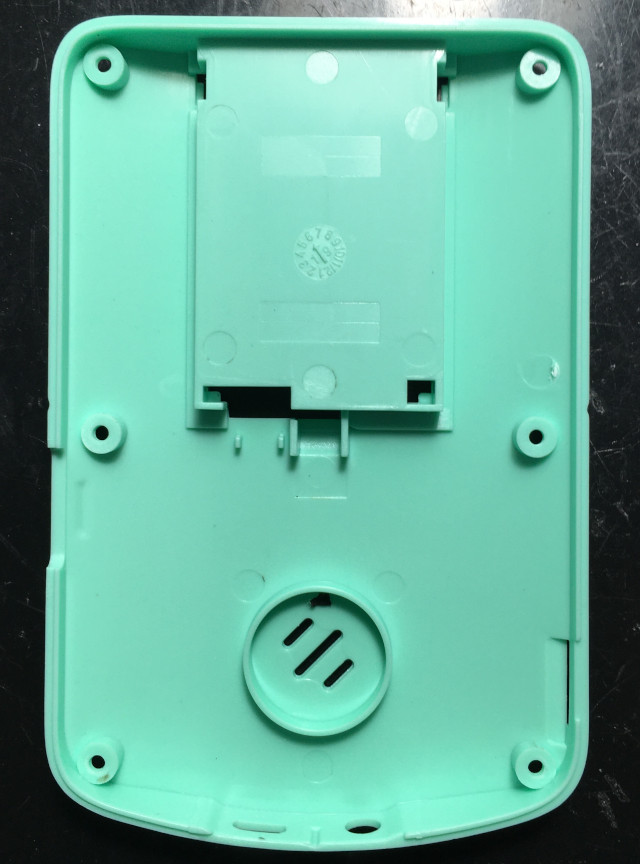
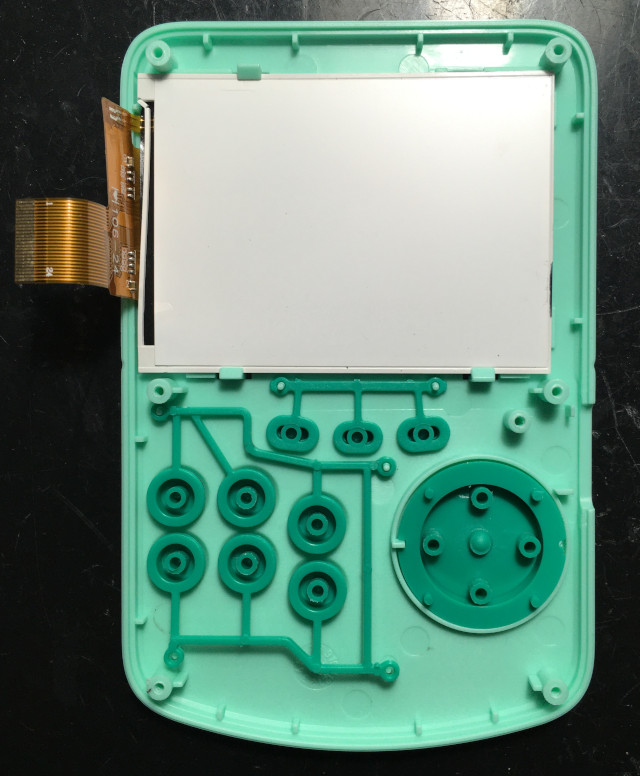
這個屏的腳位跟FC3000一樣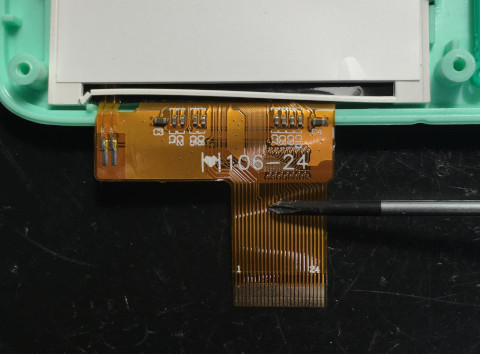
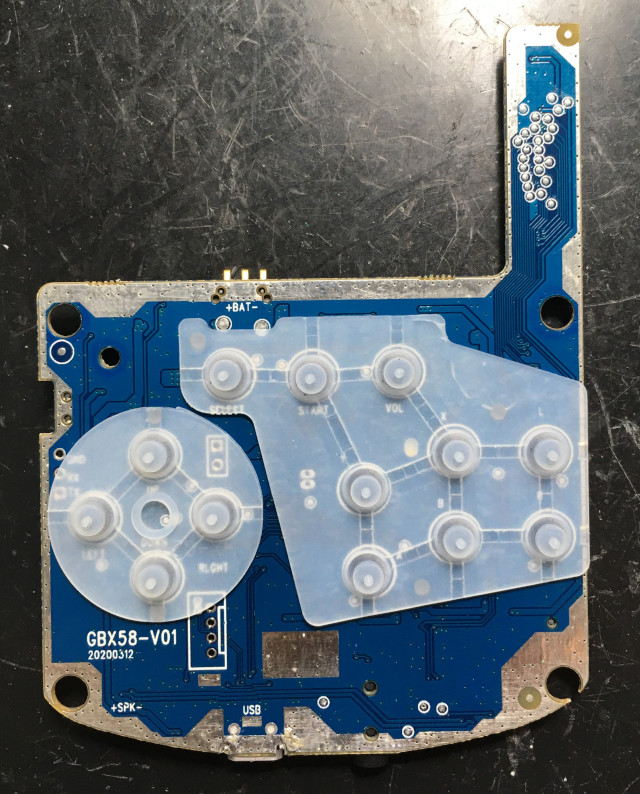
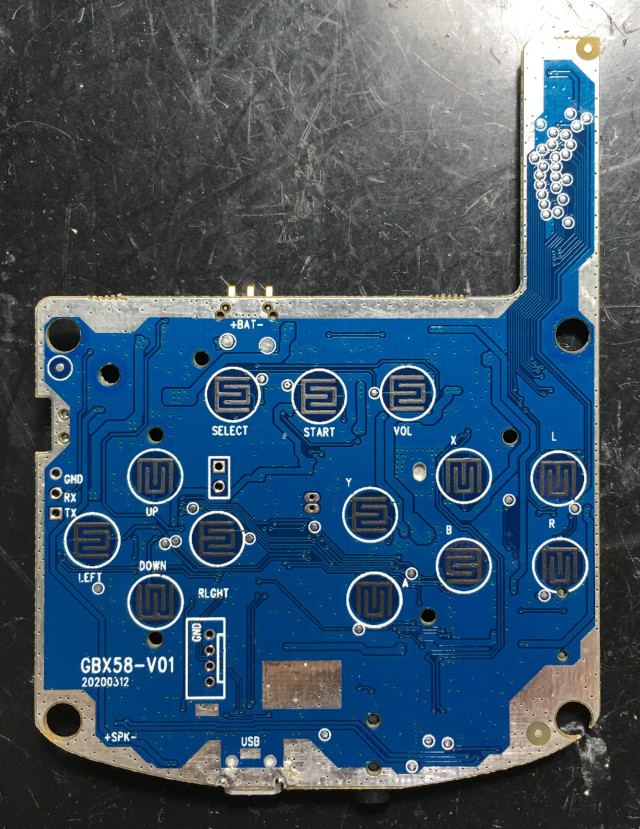
GB1 ZH1901MP02C,其實就是F1C100S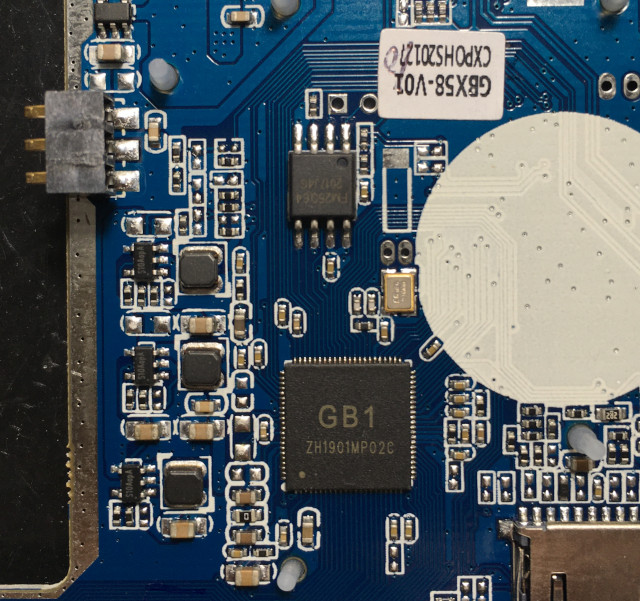
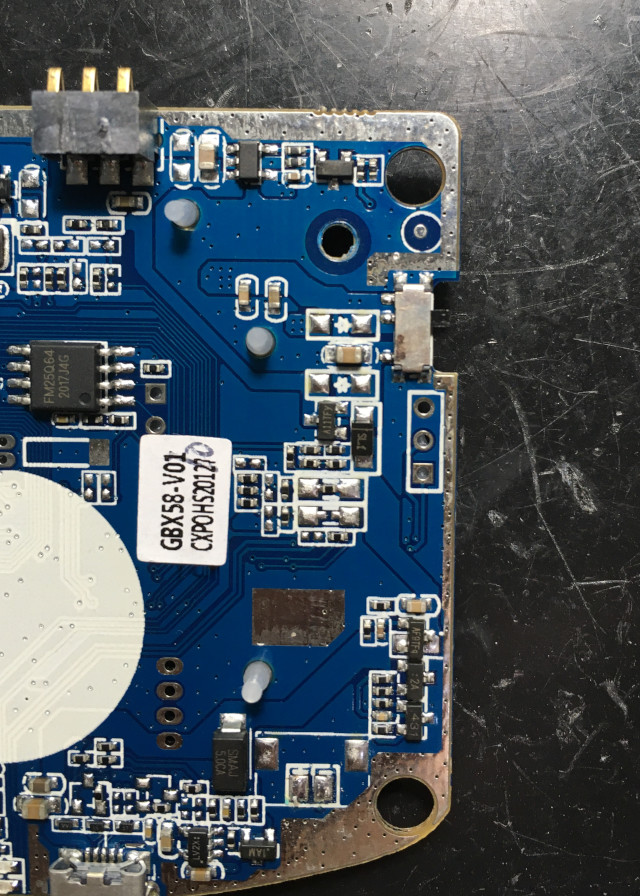
為了可以透過USB燒錄,需要修復電路,USB預設並沒有連接,而且有一些下拉電阻
移除兩顆下拉電阻後,短路DM、DP的接線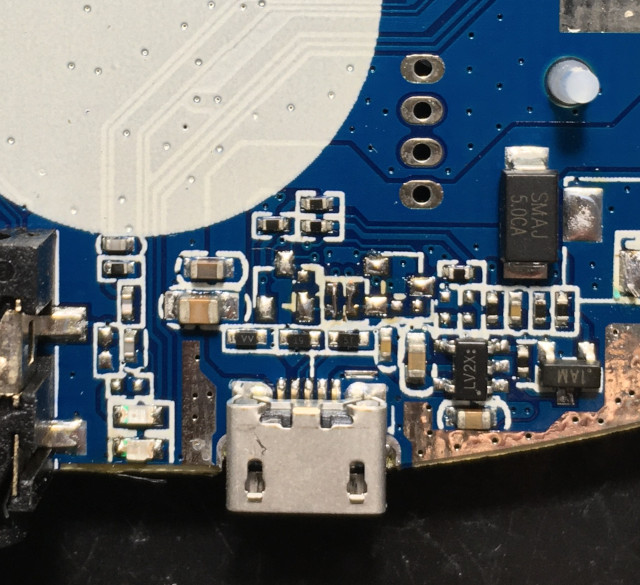
短路SPI Flash第一腳位和第二腳位,接著連接USB
$ lsusb
  Bus 001 Device 074: ID 1f3a:efe8 Onda (unverified) V972 tablet in flashing mode
UART1位置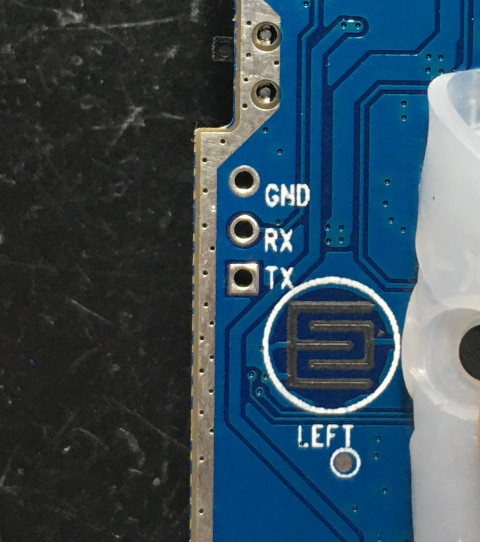
#436 Re: 司徒开源 » 研究FC3000掌機的開源可行性 » 2021-07-07 09:50:13
#437 Re: 司徒开源 » 研究FC3000掌機的開源可行性 » 2021-07-06 17:34:28
@zpyws
找一台自己喜愛的外觀就可以,不好意思,我無法給你建議~
正所謂:有志者、事竟成,經過幾天糞戰後,第一版TFT FC3000刷機包終於出爐,由於FC3000官方系統的模擬器還不錯,司徒為了保留這項特色,特別設計了多重開機選單,結果搞死自己~不知為何,始終無法在MicroSD啟動狀態下,再去啟動SPI官方系統,也感謝暈哥提供很多協助以及資訊,不過,最終還是失敗,終於有一天司徒在夢境之中,夢到司徒小時候的哺乳畫面~這...,聽說夢境跟現實是相反的,難道這是叫司徒去吃屎的意思嗎?最後,司徒終於領悟了,必須用力使出吃奶的力氣,這才發現,在MicroSD啟動下,可以直接呼叫BROM去載入SPI Flash (ldr pc, =0xffff4110),藉此跳轉從SPI啟動
.try_boot_SPINOR:
ffff4110:   eb0006e6    bl  load_from_spinor    ; load SPL from SPI NOR-flash
ffff4114:   e1a04000    mov r4, r0          ; r4 = load_from_spinor();
ffff4118:   e3540000    cmp r4, #0x0        ; see if load_from_spinor returned 0
ffff411c:   1a000000    bne .none_found     ; if load_from_spinor returned 0 boot from FEL mode (via .none_found)
ffff4120:   ea000003    b   .boot           ; else skip to .boot_spl
目前小橫米系統有兩個主要底包,一個是中文化系統,由江西恐龍製作,雖然這人不好相處,不過倒是蠻熱心,另一個則是Jutleys製作,該包主要以英文語言為主,相當感謝兩位的熱心付出,在此,給予最高敬意,也感謝社群的協助,因此,司徒基於這兩個底包,幫FC3000掌機製作了兩個刷機包
江西恐龍刷機包:https://github.com/steward-fu/fc3000/releases/download/v1.0/fc3000_tft_od_jckl_no_roms.img.7z
Jutleys刷機包:https://github.com/steward-fu/fc3000/releases/download/v1.0/fc3000_tft_od_jutleys_no_roms.img.7z
P.S. 第一分割區目前只有256MB,第二個分割區有1.7GB,使用者可以都自己調整,只要把檔案先複製出來,調整後,在複製回去就好,記得最前面的32MB檔頭不能刪除,第一個分割區放官方系統遊戲,第二個分割區放OpenDingux系統的東西以及遊戲
刷入MicroSD後,開機畫面如下,可以:A鍵.進入原廠系統、B鍵.進入OpenDingux系統、X鍵.刷入V1官方系統、Y鍵.刷入V2官方系統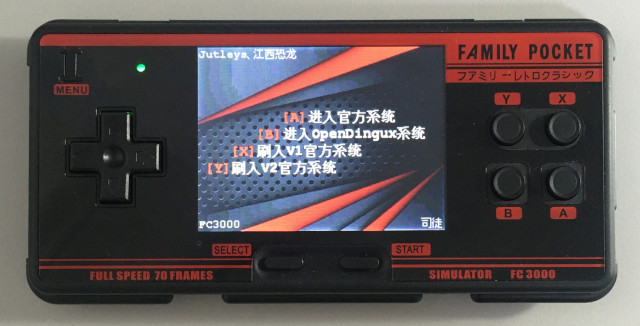
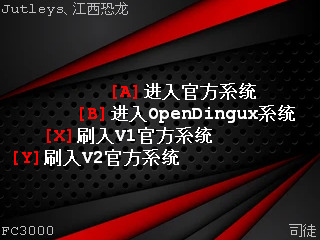
此刷機包是司徒利用空閒時間製作,嚴禁使用於商業用途,無法同意者,請不要使用
江西恐龍刷機包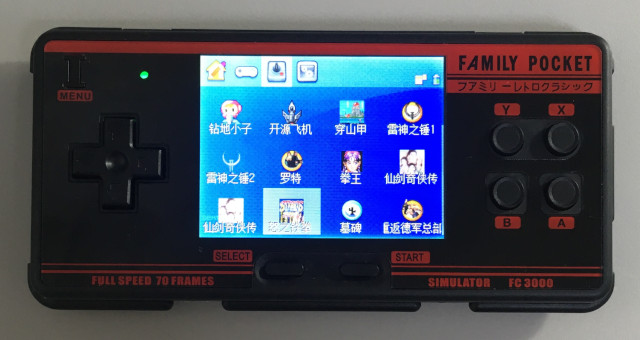
Jutleys刷機包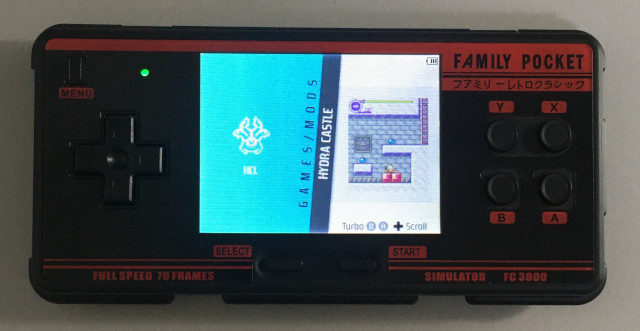
仙劍奇俠傳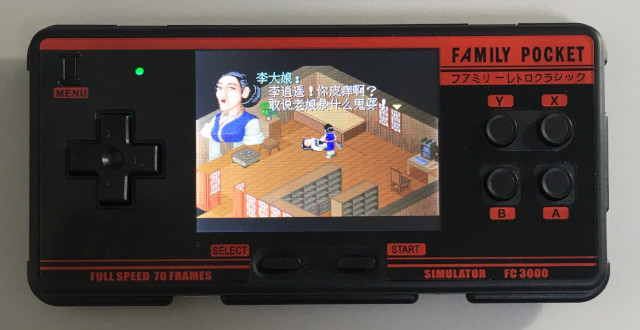
怒鐵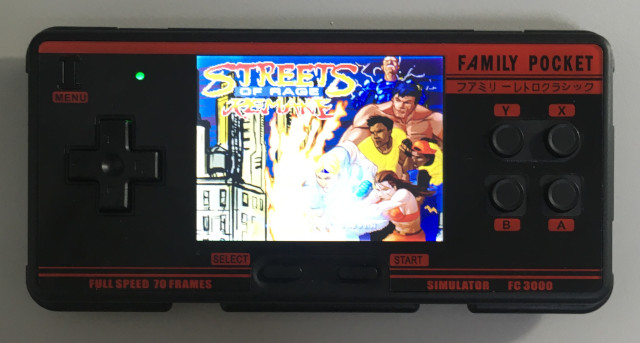
DOOM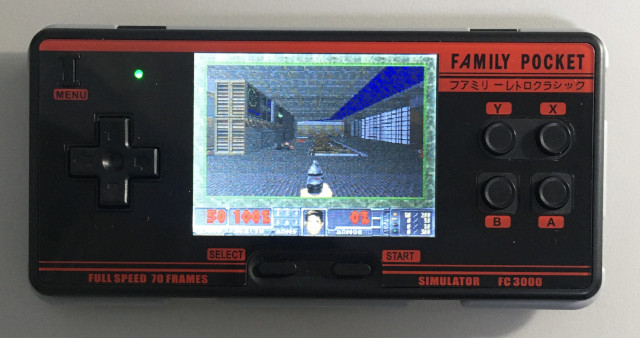
究竟怎樣的系統才可以稱呼OpenDingux呢?這問題司徒也不知道,不過,司徒這一次把系統製作成SQUASHFS,避免容易發生卡崩的問題,使用的Loader則是OpenDingux的Mininit,因此,司徒稱呼這個系統為OpenDingux系統,應該是可以的~由於,小橫米的按鍵雜亂,這問題目前也發生在FC3000身上,不過,作為折騰的機器,應該是可以接受的,接著,如果熱愛超頻的玩家,可以好好把玩看看,測試一下PS1鐵拳3,最高可以跑到多少FPS~
快速按鍵:
MENU + Y(亮度變暗)
MENU + X(亮度變亮)
#438 Re: 司徒开源 » 研究FC3000掌機的開源可行性 » 2021-07-05 09:37:19
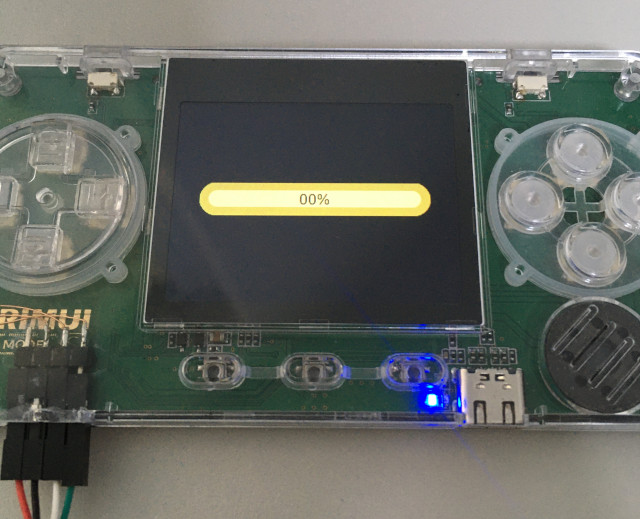
#439 Re: 司徒开源 » 研究FC3000掌機的開源可行性 » 2021-07-04 20:22:19
#440 Re: 司徒开源 » 研究FC3000掌機的開源可行性 » 2021-07-02 15:13:20
#441 Re: 司徒开源 » 研究FC3000掌機的開源可行性 » 2021-07-02 14:22:50
既然XBOOT大佬都說有加密IC在I2C-2上面,司徒只好找一下,給個交待,於是故事繼續往下走...
XBOOT大佬說有一顆加密IC而且是透過I2C介面傳輸,於是搜尋一下I2C字眼
$ grep -i i2c usr/trimui/ -r
  Binary file usr/trimui/bin/MainUI matches
  Binary file usr/trimui/apps/cdogs/music/game/space_dimensions_8bit.ogg matches
  Binary file usr/trimui/lib/libarelink.so matches
P.S. 原來是Arelink安瑞易连,哈
接著開啟libarelink.so,果真有I2C副程式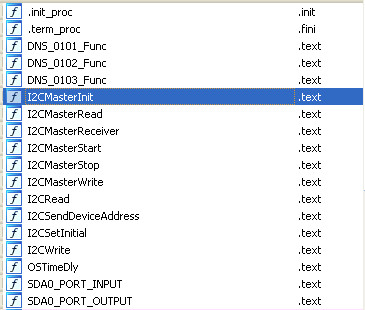
發現寶庫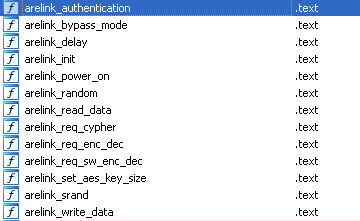
開啟MainUI去找尋arelink_req_enc_dec就可以看到關鍵字/tmp/.cmdenc
再度搜尋一下
$ grep cmdenc . -r
  Binary file ./usr/trimui/bin/MainUI matches
  Binary file ./root/gameloader matches
  ./etc/init.d/main:      if [ -f /tmp/.cmdenc ] ; then
  ./main:      if [ -f /tmp/.cmdenc ] ; then
P.S. /etc/init.d/main
/etc/init.d/main
if [ -f /tmp/.cmdenc ] ; then
    /root/gameloader
elif [ -f /tmp/cmd_to_run.sh ] ; then
   chmod a+x /tmp/cmd_to_run.sh
   /tmp/cmd_to_run.sh
   rm /tmp/cmd_to_run.sh
fi
P.S. 原來是透過gameloader做後續的動作,哈
開啟gameloader就可以看到/tmp/.cmdenc相關資訊,而且長度是256,哈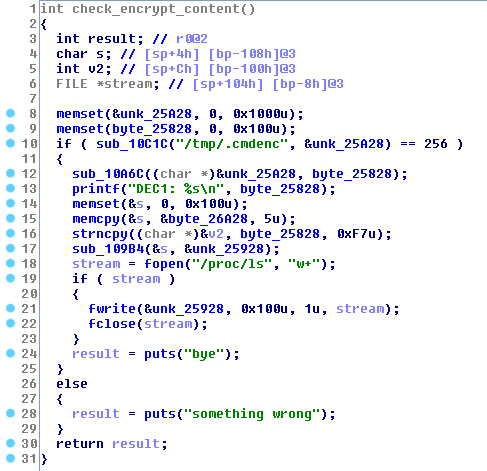
於是,司徒修改測試
if [ -f /tmp/.cmdenc ] ; then
    dd if=/dev/urandom of=/tmp/.cmdenc bs=1 count=256
    /root/gameloader
接著,司徒使用FC 1942遊戲測試
trimui_sunxi_gpio_init: ver Aug  1 2020
serial: 00000002ED
file /tmp/.cmdenc len=256
DEC1: Nz1=v.N>ZTOZ>F੨R.u
[   17.423914] write len=256
[   17.820278] exec! there result of call_usermodehelper is 0
[   17.826401] exec! the process is "gameloader", pid is 183.
[   17.832694] BASE64:0wiSJBoxSQ/reYr9IPNlu0XPhZ3kv6xh0WwuWz36EDlzvzxTFL+JUQCWXtSWVLJQ1rwI+4Ul3yGYusGOe9GNvWf+X46ZmNg7J8xXuYcc1BNn/l+OmZjYOyfMV7mHHNQTZ/5fjpmY2DsnzFe5hxzUE2f+X46ZmNg7J8xXuYc=
bye
P.S. 加密禁忌就是輸出挑戰的訊息,哈
拿掉測試那行,重新載入FC 1942遊戲,則顯示如下
trimui_sunxi_gpio_init: ver Aug  1 2020
serial: 00000002ED
file /tmp/.cmdenc len=256
DEC1: cd /usr/trimui/bin/;HOME=/mnt/SDCARD/Roms/FC/  /usr/trimui/bin/fceux "/mnt/SDCARD/Roms/FC//1942[MS漢化](JU)[STG](0.31Mb).nes"
[   25.267101] write len=256
/tmp/.cmdenc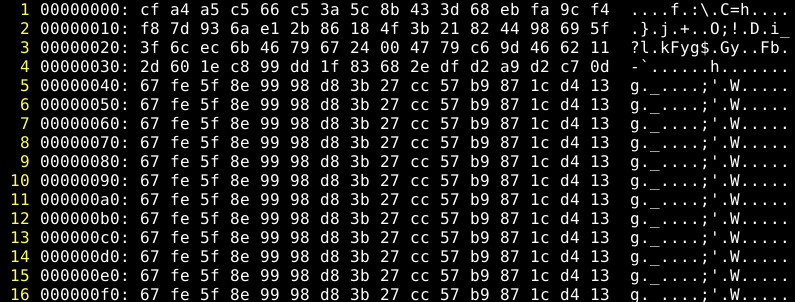
於是,司徒找了一下MainUI,再度發現了寶庫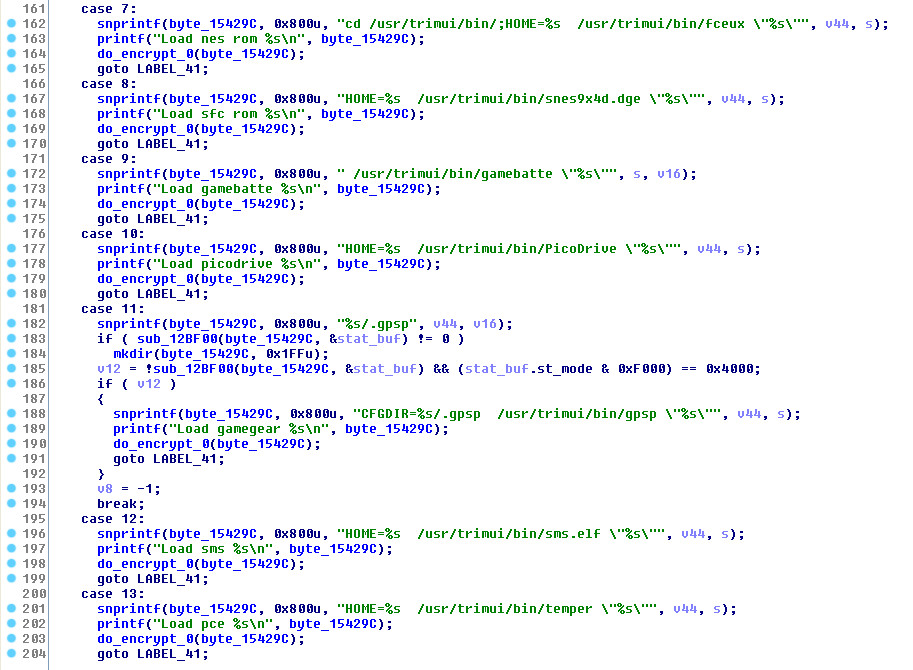
接著把呼叫加解密Patch成NOP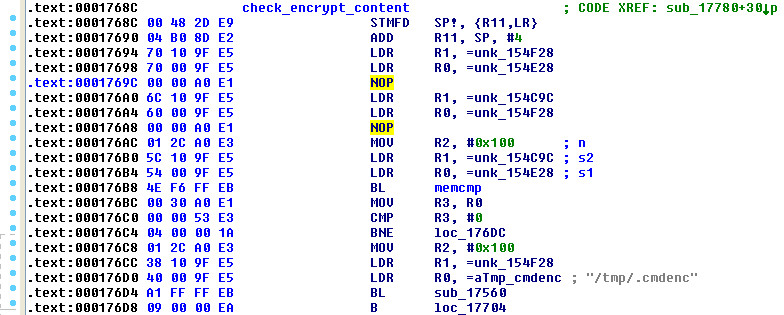
接著測試一下
Load nes rom cd /usr/trimui/bin/;HOME=/mnt/SDCARD/Roms/FC/  /usr/trimui/bin/fceux "/mnt/SDCARD/Roms/FC//1942[MS漢化](JU)[STG](0.31Mb).nes"
sth wrong, encoded != decoded !!!!
接著看一下MainUI寫出的檔案
# ls -al
  drwxrwxrwt    3 root     root           120 Jan  1 00:00 .
  drwxr-xr-x   19 root     root          4096 Jan  1 00:00 ..
  -rw-r--r--    1 root     root           256 Jan  1 00:00 decode
  -rw-r--r--    1 root     root           256 Jan  1 00:00 encode
  -rw-r--r--    1 root     root           424 Jan  1 00:00 game_output.txt
  drwxr-xr-x    2 root     root            60 Jan  1 00:00 log

# cat /tmp/encode
  g_;'Wg_;'Wg_;'Wg_;'Wg_;'Wg_;'Wg_;'Wg_;'Wg_;'Wg_;'Wg_;'Wg_;'W

# cat /tmp/decode
  /mnt/SDCARD/Roms/FC//1942[MS漢化](JU)[STG](0.31Mb).nes
接著修改一下
if [ -f /tmp/.cmdenc ] ; then
    echo "#!/bin/sh" > /tmp/run.sh
    echo "cd /usr/trimui/bin/;HOME=/mnt/SDCARD/Roms/FC/  /usr/trimui/bin/fceux \"" >> /tmp/run.sh
    cat /tmp/decode >> /tmp/run.sh
    echo "\"" >> /tmp/run.sh
    chmod +x /tmp/run.sh
    /tmp/run.sh

    #/root/gameloader
elif [ -f /tmp/cmd_to_run.sh ] ; then
   chmod a+x /tmp/cmd_to_run.sh
   /tmp/cmd_to_run.sh
   rm /tmp/cmd_to_run.sh
fi
接著,再度載入FC 1942遊戲,成功繞過加密IC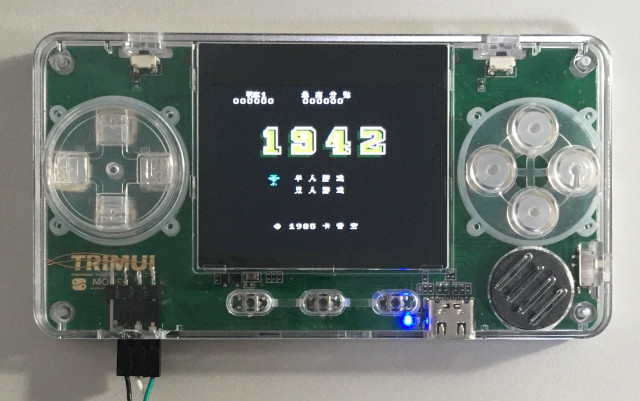
#442 Re: 司徒开源 » 研究FC3000掌機的開源可行性 » 2021-07-02 10:05:40
#443 Re: 司徒开源 » 研究FC3000掌機的開源可行性 » 2021-07-02 09:30:33
#445 Re: 司徒开源 » 研究FC3000掌機的開源可行性 » 2021-07-02 09:02:17
#446 Re: 司徒开源 » 研究FC3000掌機的開源可行性 » 2021-07-02 08:55:58
@xboot
大佬你一出手,果然厲害,TRIMUI瞬間變成超級賽亞人~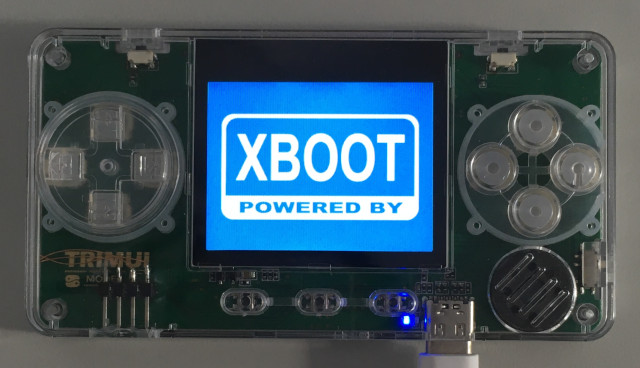
把back_porch縮小就可以~感謝你的XBOOT
  "fb-f1c200s@0": {
    "clock-name-defe": "link-defe",
    "clock-name-debe": "link-debe",
    "clock-name-tcon": "link-tcon",
    "reset-defe": 46,
    "reset-debe": 44,
    "reset-tcon": 36,
    "width": 320,
    "height": 240,
    "physical-width": 41,
    "physical-height": 31,
    "clock-frequency": 19000000,
    "hfront-porch": 749,
    "hback-porch": 2,
    "hsync-len": 18,
    "vfront-porch": 36,
    "vback-porch": 0,
    "vsync-len": 4,
    "hsync-active": false,
    "vsync-active": false,
    "den-active": true,
    "clk-active": true,
    "backlight": "led-pwm-bl.0"
},#447 Re: 司徒开源 » 研究FC3000掌機的開源可行性 » 2021-07-02 08:33:05
#448 Re: 司徒开源 » 研究FC3000掌機的開源可行性 » 2021-07-01 22:12:41
#449 Re: 司徒开源 » 研究FC3000掌機的開源可行性 » 2021-07-01 21:43:28
#450 Re: 司徒开源 » 研究FC3000掌機的開源可行性 » 2021-07-01 20:39:42
#451 Re: 司徒开源 » 研究FC3000掌機的開源可行性 » 2021-07-01 20:29:29
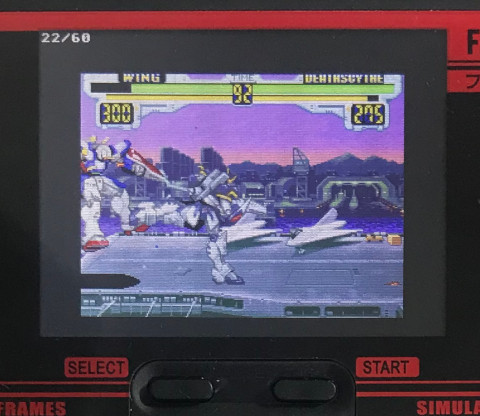
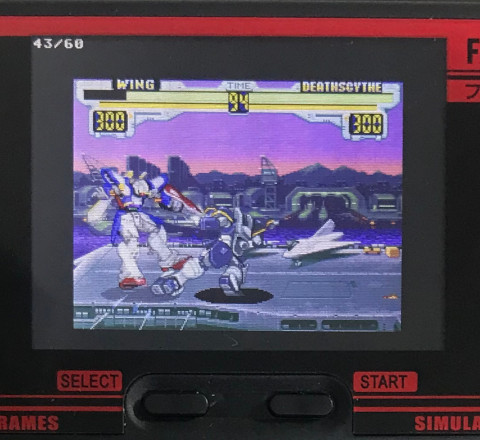
#452 Re: 司徒开源 » 研究FC3000掌機的開源可行性 » 2021-07-01 19:01:58

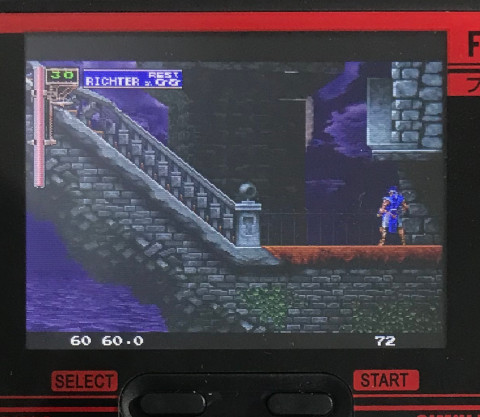
#453 Re: 司徒开源 » 研究FC3000掌機的開源可行性 » 2021-07-01 18:16:26
為了感謝芒果兄弟的慘烈付出,司徒決定也幫FC3000超渡一下,於是,文章繼續往下走
目前兩顆電阻都是25K,因此,電壓:0.6 * (25K / 25K) + 0.6 = 1.2V
解焊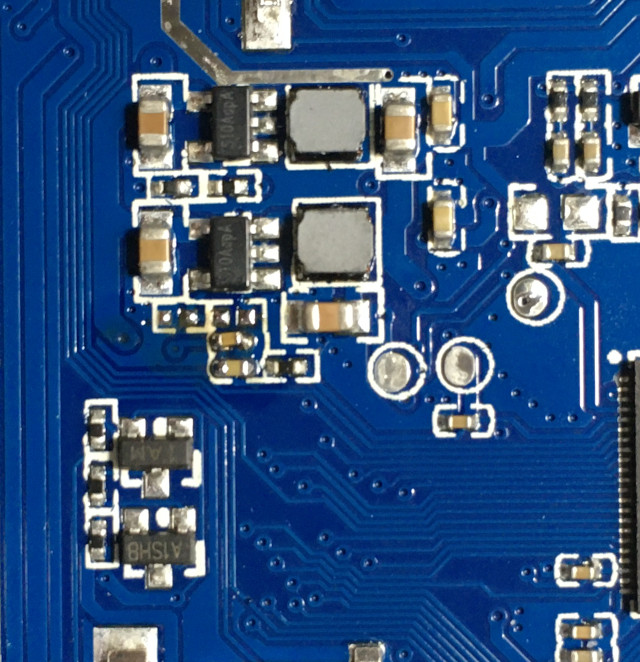
司徒換上,如下電阻,電壓:0.6 * (442K / 160K) + 0.6 = 2.2575V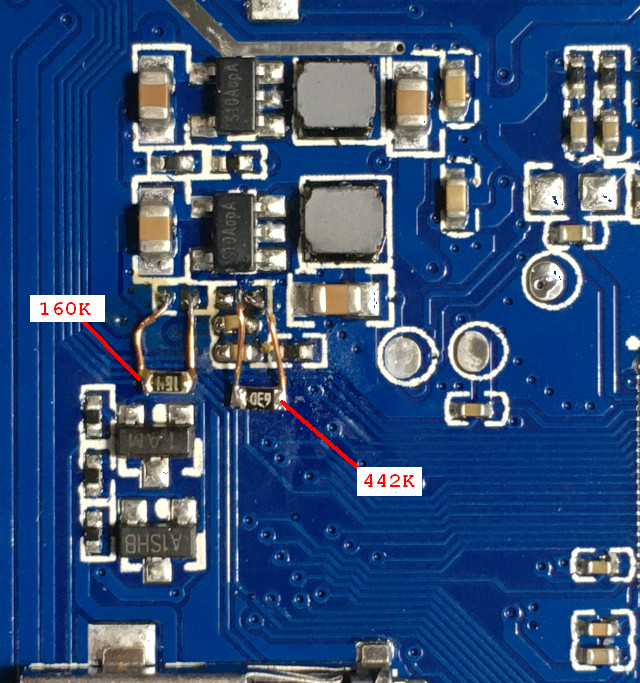
量測後,竟然差了0.2V
CPU=672MHz (39 fps, CPU=98%),PS1 鐵拳3 (關閉FramesSkip)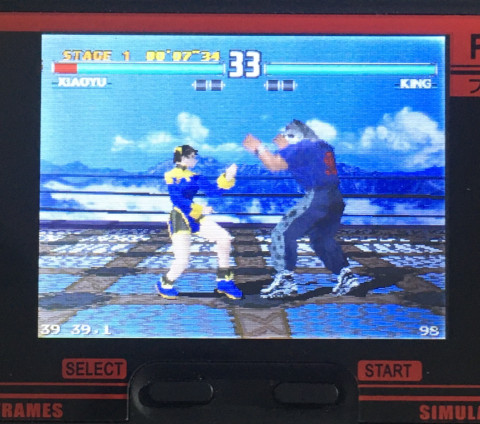
CPU=1500MHz (50 fps, CPU=97%),PS1 鐵拳3 (關閉FramesSkip),相較於672MHz,提昇11 fps,不過3D遊戲,沒有參考價值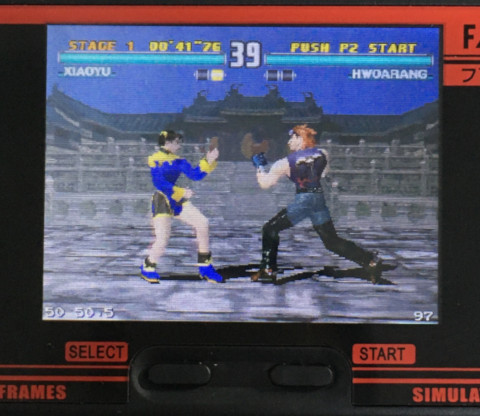
CPU=672MHz (40 fps, CPU=96%),PS1 機器人大戰F (關閉FramesSkip)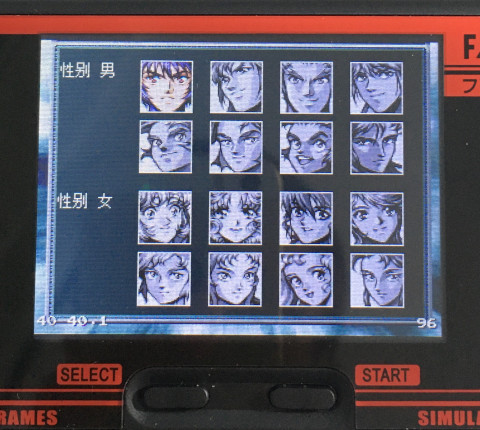
CPU=1500MHz (56 fps, CPU=94%),PS1 機器人大戰F (關閉FramesSkip),相較於672MHz,提昇16 fps,具有參考價值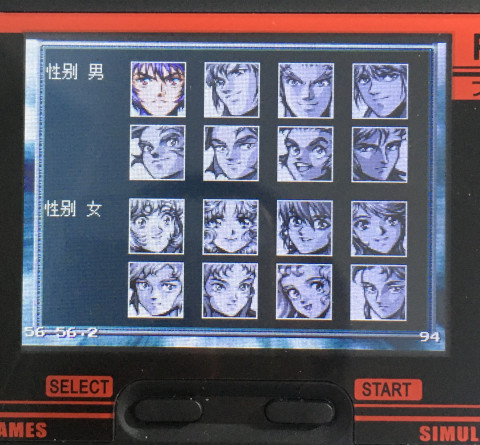
結論:
2.05V下,目前司徒最高只能讓FC3000超頻到1536MHz,機器不會燙,對於PS1 2D遊戲明顯提昇,相信對於其它模擬器,也是會有相當提昇
#454 Re: 司徒开源 » 研究FC3000掌機的開源可行性 » 2021-07-01 17:09:05
#455 Re: 司徒开源 » 研究FC3000掌機的開源可行性 » 2021-07-01 15:42:18
#456 Re: 司徒开源 » 研究FC3000掌機的開源可行性 » 2021-07-01 14:58:53
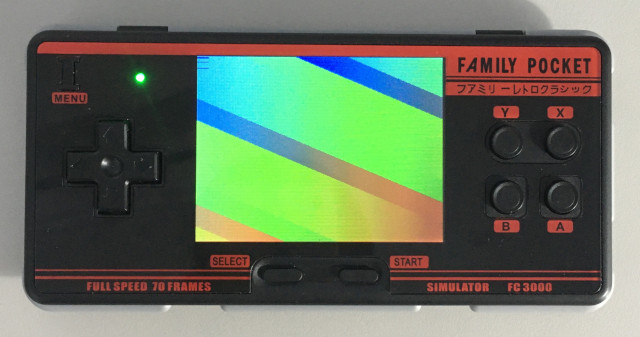

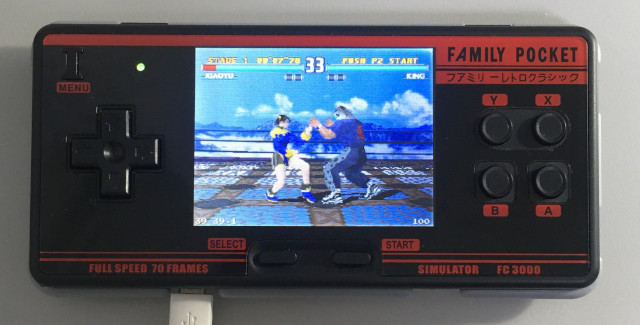
#457 Re: 司徒开源 » 研究FC3000掌機的開源可行性 » 2021-07-01 11:55:16
#458 Re: 司徒开源 » 研究FC3000掌機的開源可行性 » 2021-07-01 11:46:05
@xboot
我把TCON Dump出來比對了一下,只有差在FRM的設定,補了上去,還是無法顯示正確的顏色,於是,我看了一下DEFE,沒有使用,接著查一下DEBE,TRIMUI只有使用一個Layer3並且設定成COLOR-RGB565,我也跟著設定,但是,結果還是一樣無法顯示正確的顏色,HWC PALETTE我也補上,但是,還是無法顯示正確的顏色,這...,可能需要有智慧的人去做,司徒沒有智慧,哈,等回頭整理顯示驅動時,我在研究看看,或許從GC9308改設定會比較快一點,哈~
TCON
0x0000: 0x80000000
0x0004: 0x80000000
0x0008: 0x00000000
0x000c: 0x00000000
0x0010: 0x80000000
0x0014: 0x00000001
0x0018: 0x00000003
0x001c: 0x00000005
0x0020: 0x00000007
0x0024: 0x0000000b
0x0028: 0x0000000d
0x002c: 0x01010000
0x0030: 0x15151111
0x0034: 0x57575555
0x0038: 0x7f7f7777
0x003c: 0x00000000
0x0040: 0x800001f0
0x0044: 0xf000000f
0x0048: 0x013f00ef
0x004c: 0x04640025
0x0050: 0x023c0005
0x0054: 0x00110003
0x0058: 0x80000000
0x005c: 0x00000000
0x0060: 0x00000000
0x0064: 0x00000000
0x0068: 0x00000000
0x006c: 0x00000000
0x0070: 0x00000000
0x0074: 0x00000000
0x0078: 0x00000000
0x007c: 0x00000000
0x0080: 0x00000000
0x0084: 0x00000000
0x0088: 0x00000000
0x008c: 0xe0000000
0x0090: 0x00000000
0x0094: 0x00000000
0x0098: 0x00000000
0x009c: 0x00000000
0x00a0: 0x00000000
0x00a4: 0x00000000
0x00a8: 0x00000000
0x00ac: 0x00000000
0x00b0: 0x00000000
0x00b4: 0x00000000
0x00b8: 0x00000000
0x00bc: 0x00000000
0x00c0: 0x00000000
0x00c4: 0x00000000
0x00c8: 0x00000000
0x00cc: 0x00000000
0x00d0: 0x00000000
0x00d4: 0x00000000
0x00d8: 0x00000000
0x00dc: 0x00000000
0x00e0: 0x00000000
0x00e4: 0x00000000
0x00e8: 0x00000000
0x00ec: 0x00000000
0x00f0: 0x00000000
0x00f4: 0xffffffff
0x00f8: 0x00000000
0x00fc: 0x10f10000
DEFE
0x0000: 0x00000000
0x0004: 0x00000000
0x0008: 0x00000000
0x000c: 0x00000000
0x0010: 0x00000000
0x0014: 0x00000000
0x0018: 0x00000000
0x001c: 0x16190478
0x0020: 0x00000000
0x0024: 0x00000000
0x0028: 0x00000000
0x002c: 0x00000000
0x0030: 0x00000000
0x0034: 0x00000000
0x0038: 0x00000000
0x003c: 0x20101013
0x0040: 0x00000000
0x0044: 0x00000000
0x0048: 0x00000000
0x004c: 0x00000000
0x0050: 0x00000000
0x0054: 0x00000000
0x0058: 0x00000000
0x005c: 0x00000000
0x0060: 0x00000000
0x0064: 0x00000000
0x0068: 0x00000000
0x006c: 0x00000000
0x0070: 0x00000000
0x0074: 0x00000000
0x0078: 0x00000000
0x007c: 0x00000000
0x0080: 0x00000000
0x0084: 0x00000000
0x0088: 0x00000000
0x008c: 0x00000000
0x0090: 0x00000000
0x0094: 0x00000000
0x0098: 0x00000000
0x009c: 0x00000000
0x00a0: 0x00000000
0x00a4: 0x00000000
0x00a8: 0x00000000
0x00ac: 0x00000000
0x00b0: 0x00000000
0x00b4: 0x00000000
0x00b8: 0x00000000
0x00bc: 0x00000000
0x00c0: 0x00000000
0x00c4: 0x00000000
0x00c8: 0x00000000
0x00cc: 0x00000000
0x00d0: 0x00000000
0x00d4: 0x00000000
0x00d8: 0x00000000
0x00dc: 0x00000000
0x00e0: 0x00000000
0x00e4: 0x00000000
0x00e8: 0x00000000
0x00ec: 0x00000000
0x00f0: 0x00000000
0x00f4: 0x00000000
0x00f8: 0x00000000
0x00fc: 0x00000000
DEBE
0x0800: 0x00000803
0x0804: 0x00000000
0x0808: 0x00ef013f
0x080c: 0x00000000
0x0810: 0xffffffff
0x0814: 0xffffffff
0x0818: 0xffffffff
0x081c: 0x00ef013f
0x0820: 0x00000000
0x0824: 0x00000000
0x0828: 0x00000000
0x082c: 0x00000000
0x0830: 0x00000000
0x0834: 0x00000000
0x0838: 0x00000000
0x083c: 0x00000000
0x0840: 0x00000000
0x0844: 0x00000000
0x0848: 0x00000000
0x084c: 0x00001400
0x0850: 0x00000000
0x0854: 0x00000000
0x0858: 0x00000000
0x085c: 0x1c400000
0x0860: 0x04000000
0x0864: 0x00000000
0x0868: 0x00000000
0x086c: 0x00000000
0x0870: 0x00000002
0x0874: 0x00000000
0x0878: 0x00000000
0x087c: 0x00000000
0x0880: 0x00000000
0x0884: 0x00000000
0x0888: 0x00000000
0x088c: 0x00000000
0x0890: 0x00000000
0x0894: 0x00000400
0x0898: 0x00000800
0x089c: 0x00008c00
0x08a0: 0x00000a00
0x08a4: 0x00000a00
0x08a8: 0x00000a00
0x08ac: 0x00000500
0x08b0: 0x00000000
0x08b4: 0x00000000
0x08b8: 0x00000000
0x08bc: 0x00000000
0x08c0: 0x00000002
0x08c4: 0x00000001
0x08c8: 0x00000000
0x08cc: 0x00000000
0x08d0: 0x00000000
0x08d4: 0x00000000
0x08d8: 0x00000000
0x08dc: 0x00000000
0x08e0: 0x00000000
0x08e4: 0x00000000
0x08e8: 0x00000000
0x08ec: 0x00000000
0x08f0: 0x00000000
0x08f4: 0x00000000
0x08f8: 0x00000000
0x08fc: 0x00000000
0x0900: 0x00000000
0x0904: 0x00000000
0x0908: 0x00000000
0x090c: 0x00000000
0x0910: 0x00000000
0x0914: 0x00000000
0x0918: 0x00000000
0x091c: 0x00000000
0x0920: 0x00000000
0x0924: 0x00000000
0x0928: 0x00000000
0x092c: 0x00000000
0x0930: 0x00000000
0x0934: 0x00000000
0x0938: 0x00000000
0x093c: 0x00000000
0x0940: 0x00000000
0x0944: 0x00000000
0x0948: 0x00000000
0x094c: 0x00000000
0x0950: 0x00000000
0x0954: 0x00000000
0x0958: 0x00000000
0x095c: 0x00000000
0x0960: 0x00000000
0x0964: 0x00000000
0x0968: 0x00000000
0x096c: 0x00000000
0x0970: 0x00000000
0x0974: 0x00000000
0x0978: 0x00000000
0x097c: 0x00000000
0x0980: 0x00000000
0x0984: 0x00000000
0x0988: 0x00000000
0x098c: 0x00000000
0x0990: 0x00000000
0x0994: 0x00000000
0x0998: 0x00000000
0x099c: 0x00000000
0x09a0: 0x00000000
0x09a4: 0x00000000
0x09a8: 0x00000000
0x09ac: 0x00000000
0x09b0: 0x00000000
0x09b4: 0x00000000
0x09b8: 0x00000000
0x09bc: 0x00000000
0x09c0: 0x00000001
0x09c4: 0x00000000
0x09c8: 0x00000000
0x09cc: 0x00000000
0x09d0: 0x000003c4
0x09d4: 0x00000000
0x09d8: 0x00000000
0x09dc: 0x0000000c
0x09e0: 0x00000000
0x09e4: 0x000003c4
0x09e8: 0x00000000
0x09ec: 0x0000000c
0x09f0: 0x00000000
0x09f4: 0x00000000
0x09f8: 0x000003c4
0x09fc: 0x0000000c
0x0a00: 0x00000000
0x0a04: 0x00000000
0x0a08: 0x00000000
0x0a0c: 0x00000000
0x0a10: 0x00000000
0x0a14: 0x00000000
0x0a18: 0x00000000
0x0a1c: 0x00000000
0x0a20: 0x00000000
0x0a24: 0x00000000
0x0a28: 0x00000000
0x0a2c: 0x00000000
0x0a30: 0x00000000
0x0a34: 0x00000000
0x0a38: 0x00000000
0x0a3c: 0x00000000
0x0a40: 0x00000000
0x0a44: 0x00000000
0x0a48: 0x00000000
0x0a4c: 0x00000000
0x0a50: 0x00000000
0x0a54: 0x00000000
0x0a58: 0x00000000
0x0a5c: 0x00000000
0x0a60: 0x00000000
0x0a64: 0x00000000
0x0a68: 0x00000000
0x0a6c: 0x00000000
0x0a70: 0x00000000
0x0a74: 0x00000000
0x0a78: 0x00000000
0x0a7c: 0x00000000
0x0a80: 0x00000000
0x0a84: 0x00000000
0x0a88: 0x00000000
0x0a8c: 0x00000000
0x0a90: 0x00000000
0x0a94: 0x00000000
0x0a98: 0x00000000
0x0a9c: 0x00000000
0x0aa0: 0x00000000
0x0aa4: 0x00000000
0x0aa8: 0x00000000
0x0aac: 0x00000000
0x0ab0: 0x00000000
0x0ab4: 0x00000000
0x0ab8: 0x00000000
0x0abc: 0x00000000
0x0ac0: 0x00000000
0x0ac4: 0x00000000
0x0ac8: 0x00000000
0x0acc: 0x00000000
0x0ad0: 0x00000000
0x0ad4: 0x00000000
0x0ad8: 0x00000000
0x0adc: 0x00000000
0x0ae0: 0x00000000
0x0ae4: 0x00000000
0x0ae8: 0x00000000
0x0aec: 0x00000000
0x0af0: 0x00000000
0x0af4: 0x00000000
0x0af8: 0x00000000
0x0afc: 0x00000000
0x0b00: 0x00000000
0x0b04: 0x00000000
0x0b08: 0x00000000
0x0b0c: 0x00000000
0x0b10: 0x00000000
0x0b14: 0x00000000
0x0b18: 0x00000000
0x0b1c: 0x00000000
0x0b20: 0x00000000
0x0b24: 0x00000000
0x0b28: 0x00000000
0x0b2c: 0x00000000
0x0b30: 0x00000000
0x0b34: 0x00000000
0x0b38: 0x00000000
0x0b3c: 0x00000000
0x0b40: 0x00000000
0x0b44: 0x00000000
0x0b48: 0x00000000
0x0b4c: 0x00000000
0x0b50: 0x00000000
0x0b54: 0x00000000
0x0b58: 0x00000000
0x0b5c: 0x00000000
0x0b60: 0x00000000
0x0b64: 0x00000000
0x0b68: 0x00000000
0x0b6c: 0x00000000
0x0b70: 0x00000000
0x0b74: 0x00000000
0x0b78: 0x00000000
0x0b7c: 0x00000000
0x0b80: 0x00000000
0x0b84: 0x00000000
0x0b88: 0x00000000
0x0b8c: 0x00000000
0x0b90: 0x00000000
0x0b94: 0x00000000
0x0b98: 0x00000000
0x0b9c: 0x00000000
0x0ba0: 0x00000000
0x0ba4: 0x00000000
0x0ba8: 0x00000000
0x0bac: 0x00000000
0x0bb0: 0x00000000
0x0bb4: 0x00000000
0x0bb8: 0x00000000
0x0bbc: 0x00000000
0x0bc0: 0x00000000
0x0bc4: 0x00000000
0x0bc8: 0x00000000
0x0bcc: 0x00000000
0x0bd0: 0x00000000
0x0bd4: 0x00000000
0x0bd8: 0x00000000
0x0bdc: 0x00000000
0x0be0: 0x00000000
0x0be4: 0x00000000
0x0be8: 0x00000000
0x0bec: 0x00000000
0x0bf0: 0x00000000
0x0bf4: 0x00000000
0x0bf8: 0x00000000
0x0bfc: 0x00000000
0x0c00: 0x00000000
0x0c04: 0x00000000
0x0c08: 0x00000000
0x0c0c: 0x00000000
0x0c10: 0x00000000
0x0c14: 0x00000000
0x0c18: 0x00000000
0x0c1c: 0x00000000
0x0c20: 0x00000000
0x0c24: 0x00000000
0x0c28: 0x00000000
0x0c2c: 0x00000000
0x0c30: 0x00000000
0x0c34: 0x00000000
0x0c38: 0x00000000
0x0c3c: 0x00000000
0x0c40: 0x00000000
0x0c44: 0x00000000
0x0c48: 0x00000000
0x0c4c: 0x00000000
0x0c50: 0x00000000
0x0c54: 0x00000000
0x0c58: 0x00000000
0x0c5c: 0x00000000
0x0c60: 0x00000000
0x0c64: 0x00000000
0x0c68: 0x00000000
0x0c6c: 0x00000000
0x0c70: 0x00000000
0x0c74: 0x00000000
0x0c78: 0x00000000
0x0c7c: 0x00000000
0x0c80: 0x00000000
0x0c84: 0x00000000
0x0c88: 0x00000000
0x0c8c: 0x00000000
0x0c90: 0x00000000
0x0c94: 0x00000000
0x0c98: 0x00000000
0x0c9c: 0x00000000
0x0ca0: 0x00000000
0x0ca4: 0x00000000
0x0ca8: 0x00000000
0x0cac: 0x00000000
0x0cb0: 0x00000000
0x0cb4: 0x00000000
0x0cb8: 0x00000000
0x0cbc: 0x00000000
0x0cc0: 0x00000000
0x0cc4: 0x00000000
0x0cc8: 0x00000000
0x0ccc: 0x00000000
0x0cd0: 0x00000000
0x0cd4: 0x00000000
0x0cd8: 0x00000000
0x0cdc: 0x00000000
0x0ce0: 0x00000000
0x0ce4: 0x00000000
0x0ce8: 0x00000000
0x0cec: 0x00000000
0x0cf0: 0x00000000
0x0cf4: 0x00000000
0x0cf8: 0x00000000
0x0cfc: 0x00000000
0x0d00: 0x00000000
0x0d04: 0x00000000
0x0d08: 0x00000000
0x0d0c: 0x00000000
0x0d10: 0x00000000
0x0d14: 0x00000000
0x0d18: 0x00000000
0x0d1c: 0x00000000
0x0d20: 0x00000000
0x0d24: 0x00000000
0x0d28: 0x00000000
0x0d2c: 0x00000000
0x0d30: 0x00000000
0x0d34: 0x00000000
0x0d38: 0x00000000
0x0d3c: 0x00000000
0x0d40: 0x00000000
0x0d44: 0x00000000
0x0d48: 0x00000000
0x0d4c: 0x00000000
0x0d50: 0x00000000
0x0d54: 0x00000000
0x0d58: 0x00000000
0x0d5c: 0x00000000
0x0d60: 0x00000000
0x0d64: 0x00000000
0x0d68: 0x00000000
0x0d6c: 0x00000000
0x0d70: 0x00000000
0x0d74: 0x00000000
0x0d78: 0x00000000
0x0d7c: 0x00000000
0x0d80: 0x00000000
0x0d84: 0x00000000
0x0d88: 0x00000000
0x0d8c: 0x00000000
0x0d90: 0x00000000
0x0d94: 0x00000000
0x0d98: 0x00000000
0x0d9c: 0x00000000
0x0da0: 0x00000000
0x0da4: 0x00000000
0x0da8: 0x00000000
0x0dac: 0x00000000
0x0db0: 0x00000000
0x0db4: 0x00000000
0x0db8: 0x00000000
0x0dbc: 0x00000000
0x0dc0: 0x00000000
0x0dc4: 0x00000000
0x0dc8: 0x00000000
0x0dcc: 0x00000000
0x0dd0: 0x00000000
0x0dd4: 0x00000000
0x0dd8: 0x00000000
0x0ddc: 0x00000000
0x0de0: 0x00000000
0x0de4: 0x00000000
0x0de8: 0x00000000
0x0dec: 0x00000000
0x0df0: 0x00000000
0x0df4: 0x00000000
0x0df8: 0x00000000
0x0dfc: 0x00000000
0x0e00: 0x00000000
0x0e04: 0x00000000
0x0e08: 0x00000000
0x0e0c: 0x00000000
0x0e10: 0x00000000
0x0e14: 0x00000000
0x0e18: 0x00000000
0x0e1c: 0x00000000
0x0e20: 0x00000000
0x0e24: 0x00000000
0x0e28: 0x00000000
0x0e2c: 0x00000000
0x0e30: 0x00000000
0x0e34: 0x00000000
0x0e38: 0x00000000
0x0e3c: 0x00000000
0x0e40: 0x00000000
0x0e44: 0x00000000
0x0e48: 0x00000000
0x0e4c: 0x00000000
0x0e50: 0x00000000
0x0e54: 0x00000000
0x0e58: 0x00000000
0x0e5c: 0x00000000
0x0e60: 0x00000000
0x0e64: 0x00000000
0x0e68: 0x00000000
0x0e6c: 0x00000000
0x0e70: 0x00000000
0x0e74: 0x00000000
0x0e78: 0x00000000
0x0e7c: 0x00000000
0x0e80: 0x00000000
0x0e84: 0x00000000
0x0e88: 0x00000000
0x0e8c: 0x00000000
0x0e90: 0x00000000
0x0e94: 0x00000000
0x0e98: 0x00000000
0x0e9c: 0x00000000
0x0ea0: 0x00000000
0x0ea4: 0x00000000
0x0ea8: 0x00000000
0x0eac: 0x00000000
0x0eb0: 0x00000000
0x0eb4: 0x00000000
0x0eb8: 0x00000000
0x0ebc: 0x00000000
0x0ec0: 0x00000000
0x0ec4: 0x00000000
0x0ec8: 0x00000000
0x0ecc: 0x00000000
0x0ed0: 0x00000000
0x0ed4: 0x00000000
0x0ed8: 0x00000000
0x0edc: 0x00000000
0x0ee0: 0x00000000
0x0ee4: 0x00000000
0x0ee8: 0x00000000
0x0eec: 0x00000000
0x0ef0: 0x00000000
0x0ef4: 0x00000000
0x0ef8: 0x00000000
0x0efc: 0x00000000
0x0f00: 0x00000000
0x0f04: 0x00000000
0x0f08: 0x00000000
0x0f0c: 0x00000000
0x0f10: 0x00000000
0x0f14: 0x00000000
0x0f18: 0x00000000
0x0f1c: 0x00000000
0x0f20: 0x00000000
0x0f24: 0x00000000
0x0f28: 0x00000000
0x0f2c: 0x00000000
0x0f30: 0x00000000
0x0f34: 0x00000000
0x0f38: 0x00000000
0x0f3c: 0x00000000
0x0f40: 0x00000000
0x0f44: 0x00000000
0x0f48: 0x00000000
0x0f4c: 0x00000000
0x0f50: 0x00000000
0x0f54: 0x00000000
0x0f58: 0x00000000
0x0f5c: 0x00000000
0x0f60: 0x00000000
0x0f64: 0x00000000
0x0f68: 0x00000000
0x0f6c: 0x00000000
0x0f70: 0x00000000
0x0f74: 0x00000000
0x0f78: 0x00000000
0x0f7c: 0x00000000
0x0f80: 0x00000000
0x0f84: 0x00000000
0x0f88: 0x00000000
0x0f8c: 0x00000000
0x0f90: 0x00000000
0x0f94: 0x00000000
0x0f98: 0x00000000
0x0f9c: 0x00000000
0x0fa0: 0x00000000
0x0fa4: 0x00000000
0x0fa8: 0x00000000
0x0fac: 0x00000000
0x0fb0: 0x00000000
0x0fb4: 0x00000000
0x0fb8: 0x00000000
0x0fbc: 0x00000000
0x0fc0: 0x00000000
0x0fc4: 0x00000000
0x0fc8: 0x00000000
0x0fcc: 0x00000000
0x0fd0: 0x00000000
0x0fd4: 0x00000000
0x0fd8: 0x00000000
0x0fdc: 0x00000000
0x0fe0: 0x00000000
0x0fe4: 0x00000000
0x0fe8: 0x00000000
0x0fec: 0x00000000
0x0ff0: 0x00000000
0x0ff4: 0x00000000
0x0ff8: 0x00000000
0x0ffc: 0x00000000
0x1000: 0x50e0de97
0x1004: 0xef3a0091
0x1008: 0xd8b0f68a
0x100c: 0x9df63d6c
0x1010: 0x488a6b5d
0x1014: 0x85bfe200
0x1018: 0x6eec3257
0x101c: 0x89d5c141
0x1020: 0xa5fdc96e
0x1024: 0xbcc19c7c
0x1028: 0xff8a61fc
0x102c: 0x7adb81d9
0x1030: 0xa452e561
0x1034: 0xede6d524
0x1038: 0xbc2433a3
0x103c: 0xa7571596
0x1040: 0x18a7afb7
0x1044: 0x26e6b65b
0x1048: 0x20a77112
0x104c: 0x2eb7a1c2
0x1050: 0xa0051e75
0x1054: 0xf6d5ed10
0x1058: 0x8824f3ea
0x105c: 0x30458add
0x1060: 0x6be2576b
0x1064: 0x5bdd4b10
0x1068: 0xa0b55bdf
0x106c: 0x5dc75f02
0x1070: 0xd236f76e
0x1074: 0x6b44fc0c
0x1078: 0x22ec6e7c
0x107c: 0x937b16b9
0x1080: 0x04346dd0
0x1084: 0xa7b9dbc0
0x1088: 0xf02f18bf
0x108c: 0x11cba753
0x1090: 0x0ffc6db6
0x1094: 0x4ccca56d
0x1098: 0x0ec4f73c
0x109c: 0xf27640ec
0x10a0: 0xc224767a
0x10a4: 0xcc688366
0x10a8: 0x2547449b
0x10ac: 0xbb3e3058
0x10b0: 0x4243dc83
0x10b4: 0xa5596310
0x10b8: 0x467c1e6d
0x10bc: 0xe7c6bb14
0x10c0: 0x3e0465dd
0x10c4: 0x565a04b1
0x10c8: 0xd016799f
0x10cc: 0xd499cd96
0x10d0: 0xc3ef58e7
0x10d4: 0x0f911c31
0x10d8: 0x481784d5
0x10dc: 0xbfc45a88
0x10e0: 0x31474aa3
0x10e4: 0x365b08c8
0x10e8: 0x53f094b4
0x10ec: 0x67ce18c0
0x10f0: 0x285001f7
0x10f4: 0x185f3d3a
0x10f8: 0x34d43f0a
0x10fc: 0x55b39521
0x1100: 0xd040d92b
0x1104: 0xf9e236ea
0x1108: 0x83aaaeac
0x110c: 0x2fe702dd
0x1110: 0x48c18fee
0x1114: 0x4ed3ada4
0x1118: 0xc0651a30
0x111c: 0xc9522870
0x1120: 0x912e212a
0x1124: 0x0c2045b0
0x1128: 0xa12211c1
0x112c: 0xeb279368
0x1130: 0xd974ccdc
0x1134: 0xf1bacaac
0x1138: 0x751982c3
0x113c: 0x854a0538
0x1140: 0xce94f686
0x1144: 0xeecdbb10
0x1148: 0x4cd87f50
0x114c: 0x1e8b0a52
0x1150: 0x08f67d9a
0x1154: 0xf5431b1d
0x1158: 0xac2d957e
0x115c: 0x99d01e85
0x1160: 0x4d237fc8
0x1164: 0xdc51c5e8
0x1168: 0x78993875
0x116c: 0xd736183c
0x1170: 0x7c2dd8be
0x1174: 0x9b111d99
0x1178: 0x5294e7ce
0x117c: 0xecdb1ea9
0x1180: 0x4324ff9d
0x1184: 0xf5ff0359
0x1188: 0x70a7b7d1
0x118c: 0xd1c3bc22
0x1190: 0xc3d411f3
0x1194: 0x37cc4c9c
0x1198: 0x4e94b489
0x119c: 0xc42d601e
0x11a0: 0x0a008bcc
0x11a4: 0xfeeda434
0x11a8: 0xac57c6af
0x11ac: 0x5b0f5f8b
0x11b0: 0x85717c48
0x11b4: 0x9ff58003
0x11b8: 0x6a51ee86
0x11bc: 0x38dee85e
0x11c0: 0x4b05ff83
0x11c4: 0xbf223520
0x11c8: 0x9abc1833
0x11cc: 0xab9f2834
0x11d0: 0x800c9ede
0x11d4: 0x7cafe4dc
0x11d8: 0x541fd9d7
0x11dc: 0x2caf9d29
0x11e0: 0x0173ffcc
0x11e4: 0x5cfc1ac6
0x11e8: 0x4f92eeee
0x11ec: 0x949d9538
0x11f0: 0x5c3e827e
0x11f4: 0xb9e4204c
0x11f8: 0x04454a6d
0x11fc: 0x15a84969
0x1200: 0x3396e4db
0x1204: 0x96bb0618
0x1208: 0x464ababf
0x120c: 0xbfb9c033
0x1210: 0x27fcdfde
0x1214: 0x532226b2
0x1218: 0x8541336c
0x121c: 0x42b74278
0x1220: 0x282866be
0x1224: 0x82960fe6
0x1228: 0x4a603d70
0x122c: 0x26db8c40
0x1230: 0xc210cd9f
0x1234: 0x1bda3246
0x1238: 0xcf01743e
0x123c: 0xa1d708ca
0x1240: 0x64356366
0x1244: 0x3499ae57
0x1248: 0x2ca3c237
0x124c: 0x8b39a051
0x1250: 0xe90cb5e7
0x1254: 0xae7405d0
0x1258: 0xa7c8ed0f
0x125c: 0xd996a001
0x1260: 0x87018103
0x1264: 0x8fd1b1b8
0x1268: 0xd3398d06
0x126c: 0xdb8d102a
0x1270: 0x4284d9d2
0x1274: 0x7afd9710
0x1278: 0xdc58f459
0x127c: 0x7b1f696f
0x1280: 0xb868ac73
0x1284: 0xcc8e237a
0x1288: 0x4990ca89
0x128c: 0x486e7908
0x1290: 0x73e83da9
0x1294: 0x3e390c68
0x1298: 0x2213a0a6
0x129c: 0xd8561188
0x12a0: 0x30c66ffc
0x12a4: 0x76f70475
0x12a8: 0x00912ccd
0x12ac: 0x715e1837
0x12b0: 0x083a1bb1
0x12b4: 0xdb73c785
0x12b8: 0x5310acec
0x12bc: 0xb634a49e
0x12c0: 0x99c06d4c
0x12c4: 0xf492842a
0x12c8: 0x6f128cab
0x12cc: 0xfaff393e
0x12d0: 0x6e9c3c3b
0x12d4: 0xffb3f05c
0x12d8: 0x870e2ed3
0x12dc: 0x55162cb3
0x12e0: 0x015777cf
0x12e4: 0x976009ca
0x12e8: 0x143eb066
0x12ec: 0x97f8cba2
0x12f0: 0xe6fc7f2e
0x12f4: 0x9d7bc5bd
0x12f8: 0xf8f1bfdf
0x12fc: 0x0dcd0160
0x1300: 0x0524689b
0x1304: 0x28bf19e4
0x1308: 0x1d736989
0x130c: 0x551e3b71
0x1310: 0x81f18d48
0x1314: 0xdf6b0a89
0x1318: 0x088cb783
0x131c: 0x7ed9cb3e
0x1320: 0xe51cfa1c
0x1324: 0xa362c0a1
0x1328: 0x11e1b56f
0x132c: 0x381e3d4b
0x1330: 0x2b7cff7e
0x1334: 0x7e2fa425
0x1338: 0x5622b979
0x133c: 0xc65ada84
0x1340: 0x3049c23d
0x1344: 0x535fd2c4
0x1348: 0xc3a49ab6
0x134c: 0x6dde3260
0x1350: 0x9ec4e7db
0x1354: 0xbf6b44d2
0x1358: 0x4614d0a0
0x135c: 0x5d3b4d08
0x1360: 0x1d1b3cd4
0x1364: 0xb2c19e70
0x1368: 0x083dd29f
0x136c: 0xfab97f49
0x1370: 0x6d2c7208
0x1374: 0x5f6765d9
0x1378: 0x58bbba94
0x137c: 0x56f512c7
0x1380: 0x8fbed947
0x1384: 0xf39b35e3
0x1388: 0xa605928d
0x138c: 0x03bf9830
0x1390: 0x6c97628e
0x1394: 0xa9b4004d
0x1398: 0x4aa8fff4
0x139c: 0xa9a089c6
0x13a0: 0xd71eff65
0x13a4: 0x7f1170c7
0x13a8: 0xe778e704
0x13ac: 0x66e414e3
0x13b0: 0x6c21be59
0x13b4: 0xa7ffa52a
0x13b8: 0x14212e7b
0x13bc: 0x063afb3f
0x13c0: 0xf758aa93
0x13c4: 0x71b7603c
0x13c8: 0x8d14e5c2
0x13cc: 0xaf776fdd
0x13d0: 0xcc5031d9
0x13d4: 0x46f13000
0x13d8: 0x1158d3bd
0x13dc: 0xd4f3e199
0x13e0: 0xc947f6eb
0x13e4: 0xc50b0e89
0x13e8: 0x2a909ac2
0x13ec: 0x370d044e
0x13f0: 0xda8ab710
0x13f4: 0x3554100e
0x13f8: 0x5e547a96
0x13fc: 0x320a1113
0x1400: 0xe0022c6d
0x1404: 0xc586bba9
0x1408: 0x9c48824d
0x140c: 0xe7bc144d
0x1410: 0xd189bb93
0x1414: 0x50263001
0x1418: 0xf648ceae
0x141c: 0x0873c9b5
0x1420: 0x4c513bef
0x1424: 0xffbcc6cd
0x1428: 0xae42a992
0x142c: 0x09be284f
0x1430: 0x08c6a8fd
0x1434: 0x997537f8
0x1438: 0x8accaad4
0x143c: 0x18a89f56
0x1440: 0x10b67d04
0x1444: 0xbdd61d4e
0x1448: 0x694c56fb
0x144c: 0x1e77c4e7
0x1450: 0xbf82c964
0x1454: 0xb5ef5f30
0x1458: 0x517a78a6
0x145c: 0x16f8aae5
0x1460: 0x3a7fd367
0x1464: 0xf4ddf0d6
0x1468: 0x62498b89
0x146c: 0xbfd7225d
0x1470: 0x7d8b5717
0x1474: 0x3fe4a544
0x1478: 0x87d9d1b7
0x147c: 0x961b6120
0x1480: 0xe0c38fd3
0x1484: 0xcfd12b8b
0x1488: 0x22033a1d
0x148c: 0x6ae2ae68
0x1490: 0xa9a05bc7
0x1494: 0x4ca982e9
0x1498: 0xf34f7da8
0x149c: 0xfec53001
0x14a0: 0x875a35dc
0x14a4: 0x76b36971
0x14a8: 0xb42310d6
0x14ac: 0xf10ed060
0x14b0: 0x4037e6e2
0x14b4: 0x46159884
0x14b8: 0x5774fa66
0x14bc: 0xdbca12c5
0x14c0: 0x14e0fab4
0x14c4: 0xdeac6e5e
0x14c8: 0x1442b54f
0x14cc: 0xf42860a0
0x14d0: 0x5108b3dc
0x14d4: 0x1fa97442
0x14d8: 0x88149ff6
0x14dc: 0xebd99c94
0x14e0: 0xc713f9b3
0x14e4: 0xbeb12dab
0x14e8: 0x12fc203e
0x14ec: 0xb5a20e3d
0x14f0: 0xd163ba72
0x14f4: 0x4e55f9b8
0x14f8: 0x31457ba2
0x14fc: 0x4b668119
0x1500: 0xc6b1b777
0x1504: 0xafe3eab8
0x1508: 0xce62a363
0x150c: 0xef0cb506
0x1510: 0xd6fe6fcf
0x1514: 0x6cfa9633
0x1518: 0x980cb59b
0x151c: 0xcbf0659d
0x1520: 0x3800f7ff
0x1524: 0x81e96d8a
0x1528: 0x04959c1a
0x152c: 0xebfe6621
0x1530: 0x093056fe
0x1534: 0x7e658078
0x1538: 0x14dc64f8
0x153c: 0xc9e1e13a
0x1540: 0x0c247693
0x1544: 0x69ffed50
0x1548: 0xc3369d9d
0x154c: 0xa8e50786
0x1550: 0x25cf495f
0x1554: 0x998b641c
0x1558: 0x21f05e32
0x155c: 0xf3fb0498
0x1560: 0x0dacbd2f
0x1564: 0x63382d43
0x1568: 0x1222ef4a
0x156c: 0x6bed32c4
0x1570: 0x66a36179
0x1574: 0xcec98f37
0x1578: 0x9f9aa06e
0x157c: 0x1b0e5c03
0x1580: 0x1d3d0bdd
0x1584: 0xa0233333
0x1588: 0x4a863f86
0x158c: 0xc9896245
0x1590: 0x1ca09b1f
0x1594: 0xc9892316
0x1598: 0x20d8d2cb
0x159c: 0xc8eb7907
0x15a0: 0x5ba0b3ee
0x15a4: 0xd15b84aa
0x15a8: 0x209bcb60
0x15ac: 0xfce9e022
0x15b0: 0x089dda0e
0x15b4: 0x3c4b4c61
0x15b8: 0xeb650d7e
0x15bc: 0xda355cc9
0x15c0: 0x38f82dec
0x15c4: 0x54eb956f
0x15c8: 0x019773b7
0x15cc: 0xe24bd865
0x15d0: 0x548bf16b
0x15d4: 0x9adf67e4
0x15d8: 0x01a4fcf0
0x15dc: 0x88bbfab0
0x15e0: 0x580fca6c
0x15e4: 0xf9e2d4d0
0x15e8: 0xdb42c877
0x15ec: 0x7da42f01
0x15f0: 0xade01f1d
0x15f4: 0x5b4f2188
0x15f8: 0x206899ec
0x15fc: 0x87d802fe
0x1600: 0x00000000
0x1604: 0x00000000
0x1608: 0x00000000
0x160c: 0x00000000
0x1610: 0x00000000
0x1614: 0x00000000
0x1618: 0x00000000
0x161c: 0x00000000
0x1620: 0x00000000
0x1624: 0x00000000
0x1628: 0x00000000
0x162c: 0x00000000
0x1630: 0x00000000
0x1634: 0x00000000
0x1638: 0x00000000
0x163c: 0x00000000
0x1640: 0x00000000
0x1644: 0x00000000
0x1648: 0x00000000
0x164c: 0x00000000
0x1650: 0x00000000
0x1654: 0x00000000
0x1658: 0x00000000
0x165c: 0x00000000
0x1660: 0x00000000
0x1664: 0x00000000
0x1668: 0x00000000
0x166c: 0x00000000
0x1670: 0x00000000
0x1674: 0x00000000
0x1678: 0x00000000
0x167c: 0x00000000
0x1680: 0x00000000
0x1684: 0x00000000
0x1688: 0x00000000
0x168c: 0x00000000
0x1690: 0x00000000
0x1694: 0x00000000
0x1698: 0x00000000
0x169c: 0x00000000
0x16a0: 0x00000000
0x16a4: 0x00000000
0x16a8: 0x00000000
0x16ac: 0x00000000
0x16b0: 0x00000000
0x16b4: 0x00000000
0x16b8: 0x00000000
0x16bc: 0x00000000
0x16c0: 0x00000000
0x16c4: 0x00000000
0x16c8: 0x00000000
0x16cc: 0x00000000
0x16d0: 0x00000000
0x16d4: 0x00000000
0x16d8: 0x00000000
0x16dc: 0x00000000
0x16e0: 0x00000000
0x16e4: 0x00000000
0x16e8: 0x00000000
0x16ec: 0x00000000
0x16f0: 0x00000000
0x16f4: 0x00000000
0x16f8: 0x00000000
0x16fc: 0x00000000
0x1700: 0x00000000
0x1704: 0x00000000
0x1708: 0x00000000
0x170c: 0x00000000
0x1710: 0x00000000
0x1714: 0x00000000
0x1718: 0x00000000
0x171c: 0x00000000
0x1720: 0x00000000
0x1724: 0x00000000
0x1728: 0x00000000
0x172c: 0x00000000
0x1730: 0x00000000
0x1734: 0x00000000
0x1738: 0x00000000
0x173c: 0x00000000
0x1740: 0x00000000
0x1744: 0x00000000
0x1748: 0x00000000
0x174c: 0x00000000
0x1750: 0x00000000
0x1754: 0x00000000
0x1758: 0x00000000
0x175c: 0x00000000
0x1760: 0x00000000
0x1764: 0x00000000
0x1768: 0x00000000
0x176c: 0x00000000
0x1770: 0x00000000
0x1774: 0x00000000
0x1778: 0x00000000
0x177c: 0x00000000
0x1780: 0x00000000
0x1784: 0x00000000
0x1788: 0x00000000
0x178c: 0x00000000
0x1790: 0x00000000
0x1794: 0x00000000
0x1798: 0x00000000
0x179c: 0x00000000
0x17a0: 0x00000000
0x17a4: 0x00000000
0x17a8: 0x00000000
0x17ac: 0x00000000
0x17b0: 0x00000000
0x17b4: 0x00000000
0x17b8: 0x00000000
0x17bc: 0x00000000
0x17c0: 0x00000000
0x17c4: 0x00000000
0x17c8: 0x00000000
0x17cc: 0x00000000
0x17d0: 0x00000000
0x17d4: 0x00000000
0x17d8: 0x00000000
0x17dc: 0x00000000
0x17e0: 0x00000000
0x17e4: 0x00000000
0x17e8: 0x00000000
0x17ec: 0x00000000
0x17f0: 0x00000000
0x17f4: 0x00000000
0x17f8: 0x00000000
0x17fc: 0x00000000
0x1800: 0x00000000
0x1804: 0x00000000
0x1808: 0x00000000
0x180c: 0x00000000
0x1810: 0x00000000
0x1814: 0x00000000
0x1818: 0x00000000
0x181c: 0x00000000
0x1820: 0x00000000
0x1824: 0x00000000
0x1828: 0x00000000
0x182c: 0x00000000
0x1830: 0x00000000
0x1834: 0x00000000
0x1838: 0x00000000
0x183c: 0x00000000
0x1840: 0x00000000
0x1844: 0x00000000
0x1848: 0x00000000
0x184c: 0x00000000
0x1850: 0x00000000
0x1854: 0x00000000
0x1858: 0x00000000
0x185c: 0x00000000
0x1860: 0x00000000
0x1864: 0x00000000
0x1868: 0x00000000
0x186c: 0x00000000
0x1870: 0x00000000
0x1874: 0x00000000
0x1878: 0x00000000
0x187c: 0x00000000
0x1880: 0x00000000
0x1884: 0x00000000
0x1888: 0x00000000
0x188c: 0x00000000
0x1890: 0x00000000
0x1894: 0x00000000
0x1898: 0x00000000
0x189c: 0x00000000
0x18a0: 0x00000000
0x18a4: 0x00000000
0x18a8: 0x00000000
0x18ac: 0x00000000
0x18b0: 0x00000000
0x18b4: 0x00000000
0x18b8: 0x00000000
0x18bc: 0x00000000
0x18c0: 0x00000000
0x18c4: 0x00000000
0x18c8: 0x00000000
0x18cc: 0x00000000
0x18d0: 0x00000000
0x18d4: 0x00000000
0x18d8: 0x00000000
0x18dc: 0x00000000
0x18e0: 0x00000000
0x18e4: 0x00000000
0x18e8: 0x00000000
0x18ec: 0x00000000
0x18f0: 0x00000000
0x18f4: 0x00000000
0x18f8: 0x00000000
0x18fc: 0x00000000
0x1900: 0x00000000
0x1904: 0x00000000
0x1908: 0x00000000
0x190c: 0x00000000
0x1910: 0x00000000
0x1914: 0x00000000
0x1918: 0x00000000
0x191c: 0x00000000
0x1920: 0x00000000
0x1924: 0x00000000
0x1928: 0x00000000
0x192c: 0x00000000
0x1930: 0x00000000
0x1934: 0x00000000
0x1938: 0x00000000
0x193c: 0x00000000
0x1940: 0x00000000
0x1944: 0x00000000
0x1948: 0x00000000
0x194c: 0x00000000
0x1950: 0x00000000
0x1954: 0x00000000
0x1958: 0x00000000
0x195c: 0x00000000
0x1960: 0x00000000
0x1964: 0x00000000
0x1968: 0x00000000
0x196c: 0x00000000
0x1970: 0x00000000
0x1974: 0x00000000
0x1978: 0x00000000
0x197c: 0x00000000
0x1980: 0x00000000
0x1984: 0x00000000
0x1988: 0x00000000
0x198c: 0x00000000
0x1990: 0x00000000
0x1994: 0x00000000
0x1998: 0x00000000
0x199c: 0x00000000
0x19a0: 0x00000000
0x19a4: 0x00000000
0x19a8: 0x00000000
0x19ac: 0x00000000
0x19b0: 0x00000000
0x19b4: 0x00000000
0x19b8: 0x00000000
0x19bc: 0x00000000
0x19c0: 0x00000000
0x19c4: 0x00000000
0x19c8: 0x00000000
0x19cc: 0x00000000
0x19d0: 0x00000000
0x19d4: 0x00000000
0x19d8: 0x00000000
0x19dc: 0x00000000
0x19e0: 0x00000000
0x19e4: 0x00000000
0x19e8: 0x00000000
0x19ec: 0x00000000
0x19f0: 0x00000000
0x19f4: 0x00000000
0x19f8: 0x00000000
0x19fc: 0x00000000
0x1a00: 0x00000000
0x1a04: 0x00000000
0x1a08: 0x00000000
0x1a0c: 0x00000000
0x1a10: 0x00000000
0x1a14: 0x00000000
0x1a18: 0x00000000
0x1a1c: 0x00000000
0x1a20: 0x00000000
0x1a24: 0x00000000
0x1a28: 0x00000000
0x1a2c: 0x00000000
0x1a30: 0x00000000
0x1a34: 0x00000000
0x1a38: 0x00000000
0x1a3c: 0x00000000
0x1a40: 0x00000000
0x1a44: 0x00000000
0x1a48: 0x00000000
0x1a4c: 0x00000000
0x1a50: 0x00000000
0x1a54: 0x00000000
0x1a58: 0x00000000
0x1a5c: 0x00000000
0x1a60: 0x00000000
0x1a64: 0x00000000
0x1a68: 0x00000000
0x1a6c: 0x00000000
0x1a70: 0x00000000
0x1a74: 0x00000000
0x1a78: 0x00000000
0x1a7c: 0x00000000
0x1a80: 0x00000000
0x1a84: 0x00000000
0x1a88: 0x00000000
0x1a8c: 0x00000000
0x1a90: 0x00000000
0x1a94: 0x00000000
0x1a98: 0x00000000
0x1a9c: 0x00000000
0x1aa0: 0x00000000
0x1aa4: 0x00000000
0x1aa8: 0x00000000
0x1aac: 0x00000000
0x1ab0: 0x00000000
0x1ab4: 0x00000000
0x1ab8: 0x00000000
0x1abc: 0x00000000
0x1ac0: 0x00000000
0x1ac4: 0x00000000
0x1ac8: 0x00000000
0x1acc: 0x00000000
0x1ad0: 0x00000000
0x1ad4: 0x00000000
0x1ad8: 0x00000000
0x1adc: 0x00000000
0x1ae0: 0x00000000
0x1ae4: 0x00000000
0x1ae8: 0x00000000
0x1aec: 0x00000000
0x1af0: 0x00000000
0x1af4: 0x00000000
0x1af8: 0x00000000
0x1afc: 0x00000000
0x1b00: 0x00000000
0x1b04: 0x00000000
0x1b08: 0x00000000
0x1b0c: 0x00000000
0x1b10: 0x00000000
0x1b14: 0x00000000
0x1b18: 0x00000000
0x1b1c: 0x00000000
0x1b20: 0x00000000
0x1b24: 0x00000000
0x1b28: 0x00000000
0x1b2c: 0x00000000
0x1b30: 0x00000000
0x1b34: 0x00000000
0x1b38: 0x00000000
0x1b3c: 0x00000000
0x1b40: 0x00000000
0x1b44: 0x00000000
0x1b48: 0x00000000
0x1b4c: 0x00000000
0x1b50: 0x00000000
0x1b54: 0x00000000
0x1b58: 0x00000000
0x1b5c: 0x00000000
0x1b60: 0x00000000
0x1b64: 0x00000000
0x1b68: 0x00000000
0x1b6c: 0x00000000
0x1b70: 0x00000000
0x1b74: 0x00000000
0x1b78: 0x00000000
0x1b7c: 0x00000000
0x1b80: 0x00000000
0x1b84: 0x00000000
0x1b88: 0x00000000
0x1b8c: 0x00000000
0x1b90: 0x00000000
0x1b94: 0x00000000
0x1b98: 0x00000000
0x1b9c: 0x00000000
0x1ba0: 0x00000000
0x1ba4: 0x00000000
0x1ba8: 0x00000000
0x1bac: 0x00000000
0x1bb0: 0x00000000
0x1bb4: 0x00000000
0x1bb8: 0x00000000
0x1bbc: 0x00000000
0x1bc0: 0x00000000
0x1bc4: 0x00000000
0x1bc8: 0x00000000
0x1bcc: 0x00000000
0x1bd0: 0x00000000
0x1bd4: 0x00000000
0x1bd8: 0x00000000
0x1bdc: 0x00000000
0x1be0: 0x00000000
0x1be4: 0x00000000
0x1be8: 0x00000000
0x1bec: 0x00000000
0x1bf0: 0x00000000
0x1bf4: 0x00000000
0x1bf8: 0x00000000
0x1bfc: 0x00000000
0x1c00: 0x00000000
0x1c04: 0x00000000
0x1c08: 0x00000000
0x1c0c: 0x00000000
0x1c10: 0x00000000
0x1c14: 0x00000000
0x1c18: 0x00000000
0x1c1c: 0x00000000
0x1c20: 0x00000000
0x1c24: 0x00000000
0x1c28: 0x00000000
0x1c2c: 0x00000000
0x1c30: 0x00000000
0x1c34: 0x00000000
0x1c38: 0x00000000
0x1c3c: 0x00000000
0x1c40: 0x00000000
0x1c44: 0x00000000
0x1c48: 0x00000000
0x1c4c: 0x00000000
0x1c50: 0x00000000
0x1c54: 0x00000000
0x1c58: 0x00000000
0x1c5c: 0x00000000
0x1c60: 0x00000000
0x1c64: 0x00000000
0x1c68: 0x00000000
0x1c6c: 0x00000000
0x1c70: 0x00000000
0x1c74: 0x00000000
0x1c78: 0x00000000
0x1c7c: 0x00000000
0x1c80: 0x00000000
0x1c84: 0x00000000
0x1c88: 0x00000000
0x1c8c: 0x00000000
0x1c90: 0x00000000
0x1c94: 0x00000000
0x1c98: 0x00000000
0x1c9c: 0x00000000
0x1ca0: 0x00000000
0x1ca4: 0x00000000
0x1ca8: 0x00000000
0x1cac: 0x00000000
0x1cb0: 0x00000000
0x1cb4: 0x00000000
0x1cb8: 0x00000000
0x1cbc: 0x00000000
0x1cc0: 0x00000000
0x1cc4: 0x00000000
0x1cc8: 0x00000000
0x1ccc: 0x00000000
0x1cd0: 0x00000000
0x1cd4: 0x00000000
0x1cd8: 0x00000000
0x1cdc: 0x00000000
0x1ce0: 0x00000000
0x1ce4: 0x00000000
0x1ce8: 0x00000000
0x1cec: 0x00000000
0x1cf0: 0x00000000
0x1cf4: 0x00000000
0x1cf8: 0x00000000
0x1cfc: 0x00000000
0x1d00: 0x00000000
0x1d04: 0x00000000
0x1d08: 0x00000000
0x1d0c: 0x00000000
0x1d10: 0x00000000
0x1d14: 0x00000000
0x1d18: 0x00000000
0x1d1c: 0x00000000
0x1d20: 0x00000000
0x1d24: 0x00000000
0x1d28: 0x00000000
0x1d2c: 0x00000000
0x1d30: 0x00000000
0x1d34: 0x00000000
0x1d38: 0x00000000
0x1d3c: 0x00000000
0x1d40: 0x00000000
0x1d44: 0x00000000
0x1d48: 0x00000000
0x1d4c: 0x00000000
0x1d50: 0x00000000
0x1d54: 0x00000000
0x1d58: 0x00000000
0x1d5c: 0x00000000
0x1d60: 0x00000000
0x1d64: 0x00000000
0x1d68: 0x00000000
0x1d6c: 0x00000000
0x1d70: 0x00000000
0x1d74: 0x00000000
0x1d78: 0x00000000
0x1d7c: 0x00000000
0x1d80: 0x00000000
0x1d84: 0x00000000
0x1d88: 0x00000000
0x1d8c: 0x00000000
0x1d90: 0x00000000
0x1d94: 0x00000000
0x1d98: 0x00000000
0x1d9c: 0x00000000
0x1da0: 0x00000000
0x1da4: 0x00000000
0x1da8: 0x00000000
0x1dac: 0x00000000
0x1db0: 0x00000000
0x1db4: 0x00000000
0x1db8: 0x00000000
0x1dbc: 0x00000000
0x1dc0: 0x00000000
0x1dc4: 0x00000000
0x1dc8: 0x00000000
0x1dcc: 0x00000000
0x1dd0: 0x00000000
0x1dd4: 0x00000000
0x1dd8: 0x00000000
0x1ddc: 0x00000000
0x1de0: 0x00000000
0x1de4: 0x00000000
0x1de8: 0x00000000
0x1dec: 0x00000000
0x1df0: 0x00000000
0x1df4: 0x00000000
0x1df8: 0x00000000
0x1dfc: 0x00000000
0x1e00: 0x00000000
0x1e04: 0x00000000
0x1e08: 0x00000000
0x1e0c: 0x00000000
0x1e10: 0x00000000
0x1e14: 0x00000000
0x1e18: 0x00000000
0x1e1c: 0x00000000
0x1e20: 0x00000000
0x1e24: 0x00000000
0x1e28: 0x00000000
0x1e2c: 0x00000000
0x1e30: 0x00000000
0x1e34: 0x00000000
0x1e38: 0x00000000
0x1e3c: 0x00000000
0x1e40: 0x00000000
0x1e44: 0x00000000
0x1e48: 0x00000000
0x1e4c: 0x00000000
0x1e50: 0x00000000
0x1e54: 0x00000000
0x1e58: 0x00000000
0x1e5c: 0x00000000
0x1e60: 0x00000000
0x1e64: 0x00000000
0x1e68: 0x00000000
0x1e6c: 0x00000000
0x1e70: 0x00000000
0x1e74: 0x00000000
0x1e78: 0x00000000
0x1e7c: 0x00000000
0x1e80: 0x00000000
0x1e84: 0x00000000
0x1e88: 0x00000000
0x1e8c: 0x00000000
0x1e90: 0x00000000
0x1e94: 0x00000000
0x1e98: 0x00000000
0x1e9c: 0x00000000
0x1ea0: 0x00000000
0x1ea4: 0x00000000
0x1ea8: 0x00000000
0x1eac: 0x00000000
0x1eb0: 0x00000000
0x1eb4: 0x00000000
0x1eb8: 0x00000000
0x1ebc: 0x00000000
0x1ec0: 0x00000000
0x1ec4: 0x00000000
0x1ec8: 0x00000000
0x1ecc: 0x00000000
0x1ed0: 0x00000000
0x1ed4: 0x00000000
0x1ed8: 0x00000000
0x1edc: 0x00000000
0x1ee0: 0x00000000
0x1ee4: 0x00000000
0x1ee8: 0x00000000
0x1eec: 0x00000000
0x1ef0: 0x00000000
0x1ef4: 0x00000000
0x1ef8: 0x00000000
0x1efc: 0x00000000
0x1f00: 0x00000000
0x1f04: 0x00000000
0x1f08: 0x00000000
0x1f0c: 0x00000000
0x1f10: 0x00000000
0x1f14: 0x00000000
0x1f18: 0x00000000
0x1f1c: 0x00000000
0x1f20: 0x00000000
0x1f24: 0x00000000
0x1f28: 0x00000000
0x1f2c: 0x00000000
0x1f30: 0x00000000
0x1f34: 0x00000000
0x1f38: 0x00000000
0x1f3c: 0x00000000
0x1f40: 0x00000000
0x1f44: 0x00000000
0x1f48: 0x00000000
0x1f4c: 0x00000000
0x1f50: 0x00000000
0x1f54: 0x00000000
0x1f58: 0x00000000
0x1f5c: 0x00000000
0x1f60: 0x00000000
0x1f64: 0x00000000
0x1f68: 0x00000000
0x1f6c: 0x00000000
0x1f70: 0x00000000
0x1f74: 0x00000000
0x1f78: 0x00000000
0x1f7c: 0x00000000
0x1f80: 0x00000000
0x1f84: 0x00000000
0x1f88: 0x00000000
0x1f8c: 0x00000000
0x1f90: 0x00000000
0x1f94: 0x00000000
0x1f98: 0x00000000
0x1f9c: 0x00000000
0x1fa0: 0x00000000
0x1fa4: 0x00000000
0x1fa8: 0x00000000
0x1fac: 0x00000000
0x1fb0: 0x00000000
0x1fb4: 0x00000000
0x1fb8: 0x00000000
0x1fbc: 0x00000000
0x1fc0: 0x00000000
0x1fc4: 0x00000000
0x1fc8: 0x00000000
0x1fcc: 0x00000000
0x1fd0: 0x00000000
0x1fd4: 0x00000000
0x1fd8: 0x00000000
0x1fdc: 0x00000000
0x1fe0: 0x00000000
0x1fe4: 0x00000000
0x1fe8: 0x00000000
0x1fec: 0x00000000
0x1ff0: 0x00000000
0x1ff4: 0x00000000
0x1ff8: 0x00000000
0x1ffc: 0x00000000#459 Re: 司徒开源 » 研究FC3000掌機的開源可行性 » 2021-06-30 22:20:04
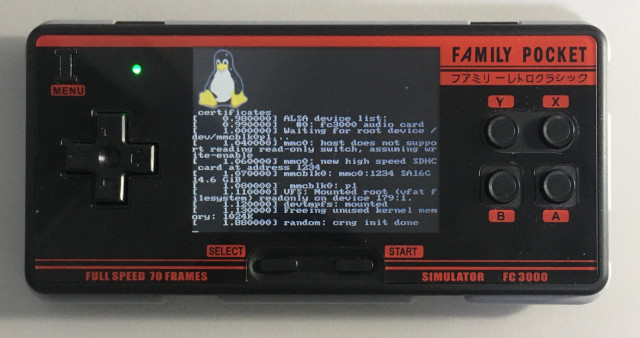
#460 Re: 司徒开源 » 研究FC3000掌機的開源可行性 » 2021-06-30 18:30:40
哈,司徒目前使用電錶把TRIMUI掌機比較重要的腳位量測出來了,這樣的話TRIMUI掌機就進入備戰狀態了~
腳位
UP			PA0
DOWN			PE2
LEFT			PE4
RIGHT			PE8
A			PD19
B			PD12
X			PD2
Y			PD17
L			PD0
R			PD1
SELECT			PD14
MENU			PE11
START			PD13
LED RED			PE5
LED BLUE		+3.3v
SPI FLASH CS		PC1
SPI FLASH DO		PC2
SPI FLASH DI		PC3
SPI FLASH CLK		PC0
LCD TE			NC
LCD RESET		4.7K RC
LCD BL			PE6
LCD D0			PD3
LCD D1			PD4
LCD D2			PD5
LCD D3			PD6
LCD D4			PD7
LCD D5			PD8
LCD CS			PD11
LCD SCL			PD9
LCD DCLK		PD18
LCD HS			PD20
LCD VS			PD21
LCD SDA			PD10
MicroSD D0		PF1
MicroSD D1		PF0
MicroSD D2		PF5
MicroSD D3		PF4
MicroSD CLK		PF2
MicroSD CMD		PF3
MicroSD CD PE4#461 Re: 司徒开源 » 研究FC3000掌機的開源可行性 » 2021-06-30 17:21:33
#462 Re: 司徒开源 » 研究FC3000掌機的開源可行性 » 2021-06-30 15:09:28
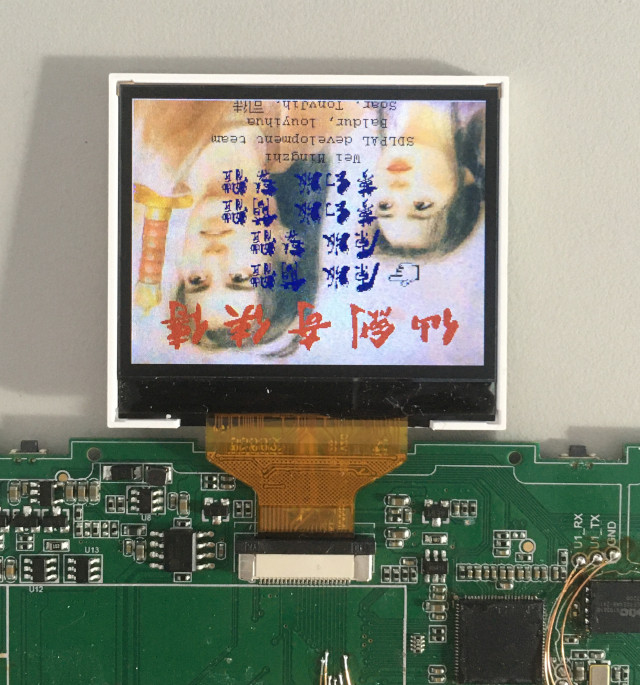
#463 Re: 司徒开源 » 研究FC3000掌機的開源可行性 » 2021-06-30 14:46:52
俗語說的好:麻雀雖小、五臟俱全,這或許就是XBOOT的最佳寫照,於是,司徒就先用XBOOT來測試一下,如果可以把屏點亮,那TRIMUI掌機距離備戰狀態不遠已!
xboot/src/arch/arm32/mach-f1c500s/driver/fb-f1c500s.c
/*
 * driver/fb-f1c500s.c
 *
 * Copyright(c) 2007-2021 Jianjun Jiang <8192542@qq.com>
 * Official site: http://xboot.org
 * Mobile phone: +86-18665388956
 * QQ: 8192542
 *
 * Permission is hereby granted, free of charge, to any person obtaining a copy
 * of this software and associated documentation files (the "Software"), to deal
 * in the Software without restriction, including without limitation the rights
 * to use, copy, modify, merge, publish, distribute, sublicense, and/or sell
 * copies of the Software, and to permit persons to whom the Software is
 * furnished to do so, subject to the following conditions:
 *
 * The above copyright notice and this permission notice shall be included in all
 * copies or substantial portions of the Software.
 *
 * THE SOFTWARE IS PROVIDED "AS IS", WITHOUT WARRANTY OF ANY KIND, EXPRESS OR
 * IMPLIED, INCLUDING BUT NOT LIMITED TO THE WARRANTIES OF MERCHANTABILITY,
 * FITNESS FOR A PARTICULAR PURPOSE AND NONINFRINGEMENT. IN NO EVENT SHALL THE
 * AUTHORS OR COPYRIGHT HOLDERS BE LIABLE FOR ANY CLAIM, DAMAGES OR OTHER
 * LIABILITY, WHETHER IN AN ACTION OF CONTRACT, TORT OR OTHERWISE, ARISING FROM,
 * OUT OF OR IN CONNECTION WITH THE SOFTWARE OR THE USE OR OTHER DEALINGS IN THE
 * SOFTWARE.
 *
 */

#include <xboot.h>
#include <dma/dma.h>
#include <clk/clk.h>
#include <reset/reset.h>
#include <gpio/gpio.h>
#include <led/led.h>
#include <interrupt/interrupt.h>
#include <framebuffer/framebuffer.h>
#include <f1c500s-gpio.h>
#include <f1c500s/reg-tcon.h>
#include <f1c500s/reg-debe.h>
#include <f1c500s/reg-defe.h>

#define F1C500S_GPIO_BASE   (0x01c20800)
#define F1C500S_GPIOD_CFG0  ((3 * 0x24) + 0x00)
#define F1C500S_GPIOD_DATA  ((3 * 0x24) + 0x10)

struct fb_f1c500s_pdata_t
{
    virtual_addr_t virtdefe;
    virtual_addr_t virtdebe;
    virtual_addr_t virttcon;
    virtual_addr_t virtgpio;

    char * clkdefe;
    char * clkdebe;
    char * clktcon;
    int rstdefe;
    int rstdebe;
    int rsttcon;
    int width;
    int height;
    int pwidth;
    int pheight;
    int bits_per_pixel;
    int bytes_per_pixel;
    int pixlen;
    int index;
    void * vram[2];
    struct region_list_t * nrl, * orl;

    struct {
        int pixel_clock_hz;
        int h_front_porch;
        int h_back_porch;
        int h_sync_len;
        int v_front_porch;
        int v_back_porch;
        int v_sync_len;
        int h_sync_active;
        int v_sync_active;
        int den_active;
        int clk_active;
    } timing;

    struct led_t * backlight;
    int brightness;
};

static inline void spi_9bits_write(struct fb_f1c500s_pdata_t * pdat, u32_t val)
{
  uint8_t cnt=0;
  uint32_t tmp=read32(pdat->virtgpio + F1C500S_GPIOD_DATA);

  tmp&= ~(1 << 11);
    write32(pdat->virtgpio + F1C500S_GPIOD_DATA, tmp);
  for(cnt=0; cnt<9; cnt++){
    tmp&= ~(1 << 10);
    if(val & 0x100){
      tmp|= (1 << 10);
    }
    val<<= 1;

    tmp&= ~(1 << 9);
      write32(pdat->virtgpio + F1C500S_GPIOD_DATA, tmp);
    tmp|= (1 << 9);
      write32(pdat->virtgpio + F1C500S_GPIOD_DATA, tmp);
  }
  tmp|= (1 << 11);
    write32(pdat->virtgpio + F1C500S_GPIOD_DATA, tmp);
}

static inline void gc9308_init(struct fb_f1c500s_pdata_t * pdat)
{
  spi_9bits_write(pdat, 0x00fe);
  spi_9bits_write(pdat, 0x00ef);
  spi_9bits_write(pdat, 0x0036);
  spi_9bits_write(pdat, 0x0140);
  spi_9bits_write(pdat, 0x003a);
  spi_9bits_write(pdat, 0x0155);
  spi_9bits_write(pdat, 0x0084);
  spi_9bits_write(pdat, 0x0104);
  spi_9bits_write(pdat, 0x0086);
  spi_9bits_write(pdat, 0x01fb);
  spi_9bits_write(pdat, 0x0087);
  spi_9bits_write(pdat, 0x0179);
  spi_9bits_write(pdat, 0x0089);
  spi_9bits_write(pdat, 0x010b);
  spi_9bits_write(pdat, 0x008a);
  spi_9bits_write(pdat, 0x0120);
  spi_9bits_write(pdat, 0x008b);
  spi_9bits_write(pdat, 0x0180);
  spi_9bits_write(pdat, 0x008d);
  spi_9bits_write(pdat, 0x013b);
  spi_9bits_write(pdat, 0x008e);
  spi_9bits_write(pdat, 0x01cf);
  spi_9bits_write(pdat, 0x00ec);
  spi_9bits_write(pdat, 0x0133);
  spi_9bits_write(pdat, 0x0102);
  spi_9bits_write(pdat, 0x014c);
  spi_9bits_write(pdat, 0x0098);
  spi_9bits_write(pdat, 0x013e);
  spi_9bits_write(pdat, 0x009c);
  spi_9bits_write(pdat, 0x014b);
  spi_9bits_write(pdat, 0x0099);
  spi_9bits_write(pdat, 0x013e);
  spi_9bits_write(pdat, 0x009d);
  spi_9bits_write(pdat, 0x014b);
  spi_9bits_write(pdat, 0x009b);
  spi_9bits_write(pdat, 0x0155);
  spi_9bits_write(pdat, 0x00e8);
  spi_9bits_write(pdat, 0x0111);
  spi_9bits_write(pdat, 0x0100);
  spi_9bits_write(pdat, 0x00ff);
  spi_9bits_write(pdat, 0x0162);
  spi_9bits_write(pdat, 0x00c3);
  spi_9bits_write(pdat, 0x0120);
  spi_9bits_write(pdat, 0x00c4);
  spi_9bits_write(pdat, 0x0103);
  spi_9bits_write(pdat, 0x00c9);
  spi_9bits_write(pdat, 0x010a);
  spi_9bits_write(pdat, 0x003a);
  spi_9bits_write(pdat, 0x0155);
  spi_9bits_write(pdat, 0x0084);
  spi_9bits_write(pdat, 0x0161);
  spi_9bits_write(pdat, 0x008a);
  spi_9bits_write(pdat, 0x0140);
  spi_9bits_write(pdat, 0x00f6);
  spi_9bits_write(pdat, 0x01c7);
  spi_9bits_write(pdat, 0x00b0);
  spi_9bits_write(pdat, 0x0163);
  spi_9bits_write(pdat, 0x00b5);
  spi_9bits_write(pdat, 0x0102);
  spi_9bits_write(pdat, 0x0102);
  spi_9bits_write(pdat, 0x0114);
  spi_9bits_write(pdat, 0x00f0);
  spi_9bits_write(pdat, 0x014a);
  spi_9bits_write(pdat, 0x0110);
  spi_9bits_write(pdat, 0x010a);
  spi_9bits_write(pdat, 0x010a);
  spi_9bits_write(pdat, 0x0126);
  spi_9bits_write(pdat, 0x0139);
  spi_9bits_write(pdat, 0x00f2);
  spi_9bits_write(pdat, 0x014a);
  spi_9bits_write(pdat, 0x0110);
  spi_9bits_write(pdat, 0x010a);
  spi_9bits_write(pdat, 0x010a);
  spi_9bits_write(pdat, 0x0126);
  spi_9bits_write(pdat, 0x0139);
  spi_9bits_write(pdat, 0x00f1);
  spi_9bits_write(pdat, 0x0150);
  spi_9bits_write(pdat, 0x018f);
  spi_9bits_write(pdat, 0x01af);
  spi_9bits_write(pdat, 0x013b);
  spi_9bits_write(pdat, 0x013f);
  spi_9bits_write(pdat, 0x017f);
  spi_9bits_write(pdat, 0x00f3);
  spi_9bits_write(pdat, 0x0150);
  spi_9bits_write(pdat, 0x018f);
  spi_9bits_write(pdat, 0x01af);
  spi_9bits_write(pdat, 0x013b);
  spi_9bits_write(pdat, 0x013f);
  spi_9bits_write(pdat, 0x017f);
  spi_9bits_write(pdat, 0x00ba);
  spi_9bits_write(pdat, 0x010a);
  spi_9bits_write(pdat, 0x0035);
  spi_9bits_write(pdat, 0x0100);
  spi_9bits_write(pdat, 0x0021);
  spi_9bits_write(pdat, 0x00fe);
  spi_9bits_write(pdat, 0x00ee);
  spi_9bits_write(pdat, 0x0011);
  spi_9bits_write(pdat, 0x0029);
  spi_9bits_write(pdat, 0x002c);
}

static inline void r61520_write(struct fb_f1c500s_pdata_t * pdat, u32_t isdat, u32_t val)
{
    u32_t tmp;

    tmp = (val & 0x00ff) << 1;
    tmp |= (val & 0xff00) << 2;
    tmp |= isdat ? 0x80000 : 0;
    tmp |= 0x100000;
    write32(pdat->virtgpio + F1C500S_GPIOD_DATA, tmp);
    tmp |= 0x40000;
    write32(pdat->virtgpio + F1C500S_GPIOD_DATA, tmp);
}

static void r61520_write_cmd(struct fb_f1c500s_pdata_t * pdat, u32_t val)
{
    r61520_write(pdat, 0, val);
}

static void r61520_write_dat(struct fb_f1c500s_pdata_t * pdat, u32_t val)
{
    r61520_write(pdat, 1, val);
}

static inline void r61520_init(struct fb_f1c500s_pdata_t * pdat)
{
    r61520_write_cmd(pdat, 0xb0);
    r61520_write_dat(pdat, 0x00);

    r61520_write_cmd(pdat, 0xb1);
    r61520_write_dat(pdat, 0x00);

    r61520_write_cmd(pdat, 0xb3);
    r61520_write_dat(pdat, 0x02);
    r61520_write_dat(pdat, 0x00);
    r61520_write_dat(pdat, 0x00);
    r61520_write_dat(pdat, 0x00);

    r61520_write_cmd(pdat, 0xb4);
    r61520_write_dat(pdat, 0x00);

    r61520_write_cmd(pdat, 0xc0);
    r61520_write_dat(pdat, 0x07);
    r61520_write_dat(pdat, 0x4f);
    r61520_write_dat(pdat, 0x00);
    r61520_write_dat(pdat, 0x00);
    r61520_write_dat(pdat, 0x00);
    r61520_write_dat(pdat, 0x00);
    r61520_write_dat(pdat, 0x01);
    r61520_write_dat(pdat, 0x33);

    r61520_write_cmd(pdat, 0xc1);
    r61520_write_dat(pdat, 0x01);
    r61520_write_dat(pdat, 0x00);
    r61520_write_dat(pdat, 0x1a);
    r61520_write_dat(pdat, 0x08);
    r61520_write_dat(pdat, 0x08);

    r61520_write_cmd(pdat, 0xc3);
    r61520_write_dat(pdat, 0x01);
    r61520_write_dat(pdat, 0x00);
    r61520_write_dat(pdat, 0x1a);
    r61520_write_dat(pdat, 0x08);
    r61520_write_dat(pdat, 0x08);

    r61520_write_cmd(pdat, 0xc4);
    r61520_write_dat(pdat, 0x11);
    r61520_write_dat(pdat, 0x01);
    r61520_write_dat(pdat, 0x43);
    r61520_write_dat(pdat, 0x01);

    r61520_write_cmd(pdat, 0xc8);
    r61520_write_dat(pdat, 0x00);
    r61520_write_dat(pdat, 0x0a);
    r61520_write_dat(pdat, 0x08);
    r61520_write_dat(pdat, 0x8a);
    r61520_write_dat(pdat, 0x08);
    r61520_write_dat(pdat, 0x09);
    r61520_write_dat(pdat, 0x05);
    r61520_write_dat(pdat, 0x10);
    r61520_write_dat(pdat, 0x00);
    r61520_write_dat(pdat, 0x23);
    r61520_write_dat(pdat, 0x10);
    r61520_write_dat(pdat, 0x05);
    r61520_write_dat(pdat, 0x05);
    r61520_write_dat(pdat, 0x60);
    r61520_write_dat(pdat, 0x0a);
    r61520_write_dat(pdat, 0x08);
    r61520_write_dat(pdat, 0x05);
    r61520_write_dat(pdat, 0x00);
    r61520_write_dat(pdat, 0x10);
    r61520_write_dat(pdat, 0x00);

    r61520_write_cmd(pdat, 0xc9);
    r61520_write_dat(pdat, 0x00);
    r61520_write_dat(pdat, 0x0a);
    r61520_write_dat(pdat, 0x08);
    r61520_write_dat(pdat, 0x8a);
    r61520_write_dat(pdat, 0x08);
    r61520_write_dat(pdat, 0x09);
    r61520_write_dat(pdat, 0x05);
    r61520_write_dat(pdat, 0x10);
    r61520_write_dat(pdat, 0x00);
    r61520_write_dat(pdat, 0x23);
    r61520_write_dat(pdat, 0x10);
    r61520_write_dat(pdat, 0x05);
    r61520_write_dat(pdat, 0x09);
    r61520_write_dat(pdat, 0x88);
    r61520_write_dat(pdat, 0x0a);
    r61520_write_dat(pdat, 0x08);
    r61520_write_dat(pdat, 0x0a);
    r61520_write_dat(pdat, 0x00);
    r61520_write_dat(pdat, 0x23);
    r61520_write_dat(pdat, 0x00);

    r61520_write_cmd(pdat, 0xca);
    r61520_write_dat(pdat, 0x00);
    r61520_write_dat(pdat, 0x0a);
    r61520_write_dat(pdat, 0x08);
    r61520_write_dat(pdat, 0x8a);
    r61520_write_dat(pdat, 0x08);
    r61520_write_dat(pdat, 0x09);
    r61520_write_dat(pdat, 0x05);
    r61520_write_dat(pdat, 0x10);
    r61520_write_dat(pdat, 0x00);
    r61520_write_dat(pdat, 0x23);
    r61520_write_dat(pdat, 0x10);
    r61520_write_dat(pdat, 0x05);
    r61520_write_dat(pdat, 0x09);
    r61520_write_dat(pdat, 0x88);
    r61520_write_dat(pdat, 0x0a);
    r61520_write_dat(pdat, 0x08);
    r61520_write_dat(pdat, 0x0a);
    r61520_write_dat(pdat, 0x00);
    r61520_write_dat(pdat, 0x23);
    r61520_write_dat(pdat, 0x00);

    r61520_write_cmd(pdat, 0xd0);
    r61520_write_dat(pdat, 0x07);
    r61520_write_dat(pdat, 0xc6);
    r61520_write_dat(pdat, 0xdc);

    r61520_write_cmd(pdat, 0xd1);
    r61520_write_dat(pdat, 0x54);
    r61520_write_dat(pdat, 0x0d);
    r61520_write_dat(pdat, 0x02);

    r61520_write_cmd(pdat, 0xd2);
    r61520_write_dat(pdat, 0x63);
    r61520_write_dat(pdat, 0x24);

    r61520_write_cmd(pdat, 0xd4);
    r61520_write_dat(pdat, 0x63);
    r61520_write_dat(pdat, 0x24);

    r61520_write_cmd(pdat, 0xd8);
    r61520_write_dat(pdat, 0x07);
    r61520_write_dat(pdat, 0x07);

    r61520_write_cmd(pdat, 0xe0);
    r61520_write_dat(pdat, 0x00);
    r61520_write_dat(pdat, 0x00);

    r61520_write_cmd(pdat, 0x13);

    r61520_write_cmd(pdat, 0x20);

    r61520_write_cmd(pdat, 0x35);
    r61520_write_dat(pdat, 0x00);

    r61520_write_cmd(pdat, 0x44);
    r61520_write_dat(pdat, 0x00);
    r61520_write_dat(pdat, 0x30);

    r61520_write_cmd(pdat, 0x36);
    r61520_write_dat(pdat, 0xe0);

    r61520_write_cmd(pdat, 0x3a);
    r61520_write_dat(pdat, 0x55);

    r61520_write_cmd(pdat, 0x2a);
    r61520_write_dat(pdat, 0x00);
    r61520_write_dat(pdat, 0x00);
    r61520_write_dat(pdat, 0x01);
    r61520_write_dat(pdat, 0x3f);

    r61520_write_cmd(pdat, 0x2b);
    r61520_write_dat(pdat, 0x00);
    r61520_write_dat(pdat, 0x00);
    r61520_write_dat(pdat, 0x00);
    r61520_write_dat(pdat, 0xef);

    r61520_write_cmd(pdat, 0x11);
    r61520_write_cmd(pdat, 0x29);
    r61520_write_cmd(pdat, 0x2c);
}

static inline void f1c500s_debe_set_mode(struct fb_f1c500s_pdata_t * pdat)
{
    struct f1c500s_debe_reg_t * debe = (struct f1c500s_debe_reg_t *)(pdat->virtdebe);
    u32_t val;

    val = read32((virtual_addr_t)&debe->mode);
    val |= (1 << 0);
    write32((virtual_addr_t)&debe->mode, val);

    write32((virtual_addr_t)&debe->disp_size, (((pdat->height) - 1) << 16) | (((pdat->width) - 1) << 0));
    write32((virtual_addr_t)&debe->layer0_size, (((pdat->height) - 1) << 16) | (((pdat->width) - 1) << 0));
    write32((virtual_addr_t)&debe->layer0_stride, ((pdat->width) << 5));
    write32((virtual_addr_t)&debe->layer0_addr_low32b, (u32_t)(pdat->vram[pdat->index]) << 3);
    write32((virtual_addr_t)&debe->layer0_addr_high4b, (u32_t)(pdat->vram[pdat->index]) >> 29);
    write32((virtual_addr_t)&debe->layer0_attr1_ctrl, 9 << 8);

    val = read32((virtual_addr_t)&debe->mode);
    val |= (1 << 8);
    write32((virtual_addr_t)&debe->mode, val);

    val = read32((virtual_addr_t)&debe->reg_ctrl);
    val |= (1 << 0);
    write32((virtual_addr_t)&debe->reg_ctrl, val);

    val = read32((virtual_addr_t)&debe->mode);
    val |= (1 << 1);
    write32((virtual_addr_t)&debe->mode, val);
}

static inline void f1c500s_debe_set_address(struct fb_f1c500s_pdata_t * pdat, void * vram)
{
    struct f1c500s_debe_reg_t * debe = (struct f1c500s_debe_reg_t *)(pdat->virtdebe);

    write32((virtual_addr_t)&debe->layer0_addr_low32b, (u32_t)vram << 3);
    write32((virtual_addr_t)&debe->layer0_addr_high4b, (u32_t)vram >> 29);
}

static inline void f1c500s_tcon_enable(struct fb_f1c500s_pdata_t * pdat)
{
    struct f1c500s_tcon_reg_t * tcon = (struct f1c500s_tcon_reg_t *)pdat->virttcon;
    u32_t val;

    val = read32((virtual_addr_t)&tcon->ctrl);
    val |= (1 << 31);
    write32((virtual_addr_t)&tcon->ctrl, val);

    val = read32((virtual_addr_t)&tcon->tcon0_cpu_intf);
    val |= (1 << 28);
    write32((virtual_addr_t)&tcon->tcon0_cpu_intf, val);
}

static inline void f1c500s_tcon_disable(struct fb_f1c500s_pdata_t * pdat)
{
    struct f1c500s_tcon_reg_t * tcon = (struct f1c500s_tcon_reg_t *)pdat->virttcon;
    u32_t val;

    write32((virtual_addr_t)&tcon->ctrl, 0);
    write32((virtual_addr_t)&tcon->int0, 0);

    val = read32((virtual_addr_t)&tcon->tcon0_dclk);
    val &= ~(0xf << 28);
    write32((virtual_addr_t)&tcon->tcon0_dclk, val);

    write32((virtual_addr_t)&tcon->tcon0_io_tristate, 0xffffffff);
    write32((virtual_addr_t)&tcon->tcon1_io_tristate, 0xffffffff);
}

static inline void f1c500s_tcon_set_mode(struct fb_f1c500s_pdata_t * pdat)
{
    struct f1c500s_tcon_reg_t * tcon = (struct f1c500s_tcon_reg_t *)pdat->virttcon;
    int bp, total;
    u32_t val;

    val = read32((virtual_addr_t)&tcon->ctrl);
    val &= ~(0x1 << 0);
    write32((virtual_addr_t)&tcon->ctrl, val);

    val = (pdat->timing.v_front_porch + pdat->timing.v_back_porch + pdat->timing.v_sync_len);
    write32((virtual_addr_t)&tcon->tcon0_ctrl, (1 << 31) | ((val & 0x1f) << 4));
    val = clk_get_rate(pdat->clktcon) / pdat->timing.pixel_clock_hz;
    write32((virtual_addr_t)&tcon->tcon0_dclk, (0xf << 28) | (val << 0));
    write32((virtual_addr_t)&tcon->tcon0_timing_active, ((pdat->width - 1) << 16) | ((pdat->height - 1) << 0));

    bp = pdat->timing.h_sync_len + pdat->timing.h_back_porch;
    total = pdat->width * 3 + pdat->timing.h_front_porch + bp;
    write32((virtual_addr_t)&tcon->tcon0_timing_h, ((total - 1) << 16) | ((bp - 1) << 0));
    bp = pdat->timing.v_sync_len + pdat->timing.v_back_porch;
    total = pdat->height + pdat->timing.v_front_porch + bp;
    write32((virtual_addr_t)&tcon->tcon0_timing_v, ((total * 2) << 16) | ((bp - 1) << 0));
    write32((virtual_addr_t)&tcon->tcon0_timing_sync, ((pdat->timing.h_sync_len - 1) << 16) | ((pdat->timing.v_sync_len - 1) << 0));

    write32((virtual_addr_t)&tcon->tcon0_hv_intf, (1 << 31));
    write32((virtual_addr_t)&tcon->tcon0_cpu_intf, 0);

    write32((virtual_addr_t)&tcon->tcon0_io_polarity, (1 << 28));
    write32((virtual_addr_t)&tcon->tcon0_io_tristate, 0);
}

static inline void fb_f1c500s_cfg_gpios(int base, int n, int cfg, enum gpio_pull_t pull, enum gpio_drv_t drv)
{
    for(; n > 0; n--, base++)
    {
        gpio_set_cfg(base, cfg);
        gpio_set_pull(base, pull);
        gpio_set_drv(base, drv);
    }
}

static inline void fb_f1c500s_init(struct fb_f1c500s_pdata_t * pdat)
{
    fb_f1c500s_cfg_gpios(F1C500S_GPIOD9, 3, 1, GPIO_PULL_NONE, GPIO_DRV_STRONG);
    write32(pdat->virtgpio + F1C500S_GPIOD_DATA, 0xffffffff);
    //r61520_init(pdat);
  gc9308_init(pdat);
    fb_f1c500s_cfg_gpios(F1C500S_GPIOD1, 7, 2, GPIO_PULL_NONE, GPIO_DRV_STRONG);
    fb_f1c500s_cfg_gpios(F1C500S_GPIOD10, 12, 2, GPIO_PULL_NONE, GPIO_DRV_STRONG);

    f1c500s_tcon_disable(pdat);
    f1c500s_debe_set_mode(pdat);
    f1c500s_tcon_set_mode(pdat);
    f1c500s_tcon_enable(pdat);
}

static void fb_setbl(struct framebuffer_t * fb, int brightness)
{
    struct fb_f1c500s_pdata_t * pdat = (struct fb_f1c500s_pdata_t *)fb->priv;
    led_set_brightness(pdat->backlight, brightness);
}

static int fb_getbl(struct framebuffer_t * fb)
{
    struct fb_f1c500s_pdata_t * pdat = (struct fb_f1c500s_pdata_t *)fb->priv;
    return led_get_brightness(pdat->backlight);
}

static struct surface_t * fb_create(struct framebuffer_t * fb)
{
    struct fb_f1c500s_pdata_t * pdat = (struct fb_f1c500s_pdata_t *)fb->priv;
    return surface_alloc(pdat->width, pdat->height, NULL);
}

static void fb_destroy(struct framebuffer_t * fb, struct surface_t * s)
{
    surface_free(s);
}

static void fb_present(struct framebuffer_t * fb, struct surface_t * s, struct region_list_t * rl)
{
    struct fb_f1c500s_pdata_t * pdat = (struct fb_f1c500s_pdata_t *)fb->priv;
    struct region_list_t * nrl = pdat->nrl;

    region_list_clear(nrl);
    region_list_merge(nrl, pdat->orl);
    region_list_merge(nrl, rl);
    region_list_clone(pdat->orl, rl);

    pdat->index = (pdat->index + 1) & 0x1;
    if(nrl->count > 0)
        present_surface(pdat->vram[pdat->index], s, nrl);
    else
        memcpy(pdat->vram[pdat->index], s->pixels, s->pixlen);
    dma_cache_sync(pdat->vram[pdat->index], pdat->pixlen, DMA_TO_DEVICE);
    f1c500s_debe_set_address(pdat, pdat->vram[pdat->index]);
}

static struct device_t * fb_f1c500s_probe(struct driver_t * drv, struct dtnode_t * n)
{
    struct fb_f1c500s_pdata_t * pdat;
    struct framebuffer_t * fb;
    struct device_t * dev;
    char * clkdefe = dt_read_string(n, "clock-name-defe", NULL);
    char * clkdebe = dt_read_string(n, "clock-name-debe", NULL);
    char * clktcon = dt_read_string(n, "clock-name-tcon", NULL);
    int i;

    if(!search_clk(clkdefe) || !search_clk(clkdebe) || !search_clk(clktcon))
        return NULL;

    pdat = malloc(sizeof(struct fb_f1c500s_pdata_t));
    if(!pdat)
        return NULL;

    fb = malloc(sizeof(struct framebuffer_t));
    if(!fb)
    {
        free(pdat);
        return NULL;
    }

    pdat->virtdefe = phys_to_virt(F1C500S_DEFE_BASE);
    pdat->virtdebe = phys_to_virt(F1C500S_DEBE_BASE);
    pdat->virttcon = phys_to_virt(F1C500S_TCON_BASE);
    pdat->virtgpio = phys_to_virt(F1C500S_GPIO_BASE);
    pdat->clkdefe = strdup(clkdefe);
    pdat->clkdebe = strdup(clkdebe);
    pdat->clktcon = strdup(clktcon);
    pdat->rstdefe = dt_read_int(n, "reset-defe", -1);
    pdat->rstdebe = dt_read_int(n, "reset-debe", -1);
    pdat->rsttcon = dt_read_int(n, "reset-tcon", -1);
    pdat->width = dt_read_int(n, "width", 320);
    pdat->height = dt_read_int(n, "height", 240);
    pdat->pwidth = dt_read_int(n, "physical-width", 216);
    pdat->pheight = dt_read_int(n, "physical-height", 135);
    pdat->bits_per_pixel = 18;
    pdat->bytes_per_pixel = 4;
    pdat->pixlen = pdat->width * pdat->height * pdat->bytes_per_pixel;
    pdat->index = 0;
    pdat->vram[0] = dma_alloc_noncoherent(pdat->pixlen);
    pdat->vram[1] = dma_alloc_noncoherent(pdat->pixlen);
    pdat->nrl = region_list_alloc(0);
    pdat->orl = region_list_alloc(0);

    pdat->timing.pixel_clock_hz = dt_read_long(n, "clock-frequency", 8000000);
    pdat->timing.h_front_porch = dt_read_int(n, "hfront-porch", 40);
    pdat->timing.h_back_porch = dt_read_int(n, "hback-porch", 87);
    pdat->timing.h_sync_len = dt_read_int(n, "hsync-len", 1);
    pdat->timing.v_front_porch = dt_read_int(n, "vfront-porch", 13);
    pdat->timing.v_back_porch = dt_read_int(n, "vback-porch", 31);
    pdat->timing.v_sync_len = dt_read_int(n, "vsync-len", 1);
    pdat->timing.h_sync_active = dt_read_bool(n, "hsync-active", 0);
    pdat->timing.v_sync_active = dt_read_bool(n, "vsync-active", 0);
    pdat->timing.den_active = dt_read_bool(n, "den-active", 0);
    pdat->timing.clk_active = dt_read_bool(n, "clk-active", 0);
    pdat->backlight = search_led(dt_read_string(n, "backlight", NULL));

    fb->name = alloc_device_name(dt_read_name(n), dt_read_id(n));
    fb->width = pdat->width;
    fb->height = pdat->height;
    fb->pwidth = pdat->pwidth;
    fb->pheight = pdat->pheight;
    fb->setbl = fb_setbl;
    fb->getbl = fb_getbl;
    fb->create = fb_create;
    fb->destroy = fb_destroy;
    fb->present = fb_present;
    fb->priv = pdat;

    clk_enable(pdat->clkdefe);
    clk_enable(pdat->clkdebe);
    clk_enable(pdat->clktcon);
    if(pdat->rstdefe >= 0)
        reset_deassert(pdat->rstdefe);
    if(pdat->rstdebe >= 0)
        reset_deassert(pdat->rstdebe);
    if(pdat->rsttcon >= 0)
        reset_deassert(pdat->rsttcon);
    for(i = 0x0800; i < 0x1000; i += 4)
        write32(pdat->virtdebe + i, 0);
    fb_f1c500s_init(pdat);

    if(!(dev = register_framebuffer(fb, drv)))
    {
        clk_disable(pdat->clkdefe);
        clk_disable(pdat->clkdebe);
        clk_disable(pdat->clktcon);
        free(pdat->clkdefe);
        free(pdat->clkdebe);
        free(pdat->clktcon);
        dma_free_noncoherent(pdat->vram[0]);
        dma_free_noncoherent(pdat->vram[1]);
        region_list_free(pdat->nrl);
        region_list_free(pdat->orl);
        free_device_name(fb->name);
        free(fb->priv);
        free(fb);
        return NULL;
    }
    return dev;
}

static void fb_f1c500s_remove(struct device_t * dev)
{
    struct framebuffer_t * fb = (struct framebuffer_t *)dev->priv;
    struct fb_f1c500s_pdata_t * pdat = (struct fb_f1c500s_pdata_t *)fb->priv;

    if(fb)
    {
        unregister_framebuffer(fb);
        clk_disable(pdat->clkdefe);
        clk_disable(pdat->clkdebe);
        clk_disable(pdat->clktcon);
        free(pdat->clkdefe);
        free(pdat->clkdebe);
        free(pdat->clktcon);
        dma_free_noncoherent(pdat->vram[0]);
        dma_free_noncoherent(pdat->vram[1]);
        region_list_free(pdat->nrl);
        region_list_free(pdat->orl);
        free_device_name(fb->name);
        free(fb->priv);
        free(fb);
    }
}

static void fb_f1c500s_suspend(struct device_t * dev)
{
    struct framebuffer_t * fb = (struct framebuffer_t *)dev->priv;
    struct fb_f1c500s_pdata_t * pdat = (struct fb_f1c500s_pdata_t *)fb->priv;

    pdat->brightness = led_get_brightness(pdat->backlight);
    led_set_brightness(pdat->backlight, 0);
}

static void fb_f1c500s_resume(struct device_t * dev)
{
    struct framebuffer_t * fb = (struct framebuffer_t *)dev->priv;
    struct fb_f1c500s_pdata_t * pdat = (struct fb_f1c500s_pdata_t *)fb->priv;

    led_set_brightness(pdat->backlight, pdat->brightness);
}

static struct driver_t fb_f1c500s = {
    .name       = "fb-f1c500s",
    .probe      = fb_f1c500s_probe,
    .remove     = fb_f1c500s_remove,
    .suspend    = fb_f1c500s_suspend,
    .resume     = fb_f1c500s_resume,
};

static __init void fb_f1c500s_driver_init(void)
{
    register_driver(&fb_f1c500s);
}

static __exit void fb_f1c500s_driver_exit(void)
{
    unregister_driver(&fb_f1c500s);
}

driver_initcall(fb_f1c500s_driver_init);
driver_exitcall(fb_f1c500s_driver_exit);
xboot/src/arch/arm32/mach-f1c500s/romdisk/boot/miyoo.json
  "fb-f1c500s@0": {
    "clock-name-defe": "link-defe",
    "clock-name-debe": "link-debe",
    "clock-name-tcon": "link-tcon",
    "reset-defe": 46,
    "reset-debe": 44,
    "reset-tcon": 36,
    "width": 320,
    "height": 240,
    "physical-width": 216,
    "physical-height": 135,
    "clock-frequency": 18000000,
    "hfront-porch": 32,
    "hback-porch": 20,
    "hsync-len": 10,
    "vfront-porch": 1,
    "vback-porch": 1,
    "vsync-len": 10,
    "hsync-active": false,
    "vsync-active": false,
    "den-active": true,
    "clk-active": true,
    "backlight": "led-pwm-bl.0"
  },
當初司徒在Miyoo上面移植的顏色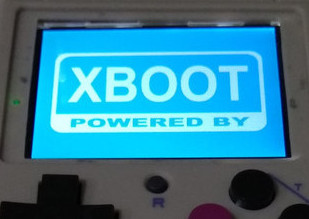
TRIMUI掌機的顏色,這...,難道是司徒的120Hz鷹眼有問題?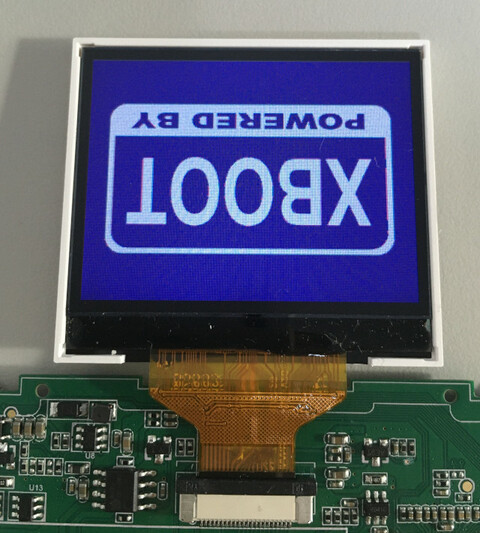
但是,測試紅色,看起來正常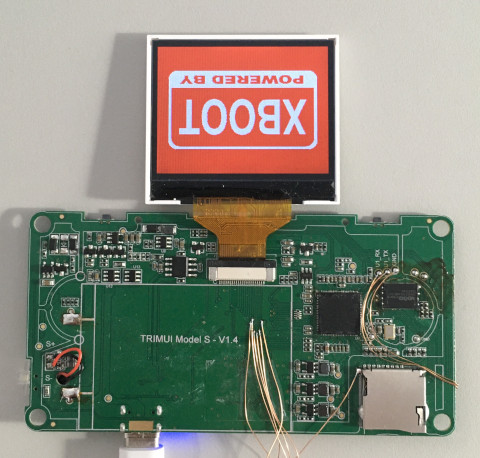
綠色也是
藍色也是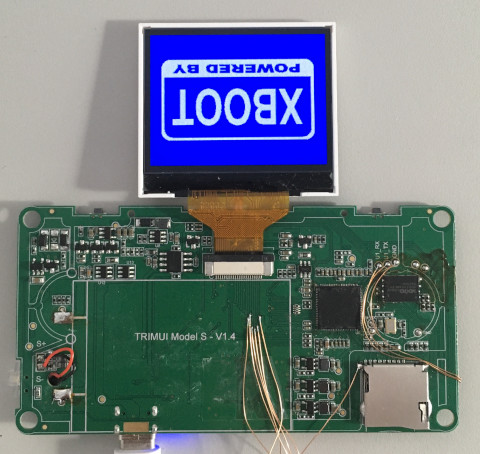
於是,司徒再把仙劍的顏色拿出來比較一下,這是電腦上的畫面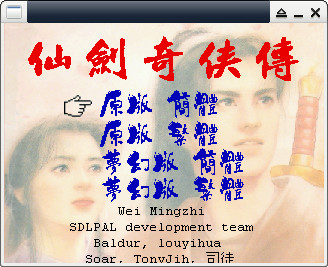
這個是TRIMUI掌機顯示的顏色,這...,難道又是國王的顏色,有智慧才看得出來?不知大家的智慧如何?哈哈
#464 Re: 司徒开源 » 研究FC3000掌機的開源可行性 » 2021-06-30 09:33:26
@shauninman
got it, thanks to share your experiences to me ![]()
looking at the results, you have find out all of information or settings you want from trimui handheld already.
it is highly recommended to create a new rootfs based your applications, not just improve original trimui system.
because I noticed that it has performances drop issue in original trimui system when you play your lovely game.
so, if you keep to improve it, I guess some unexpected issues might come out soon.
so, tweaking existing pseudo_init file in nandd and then boot from usb or microsd (from your new rootfs) is good choice.
but it depends on you, anyway, thanks all of your works and the others contributed to trimui-toolchain project, Thanks ![]()
#465 Re: 司徒开源 » 研究FC3000掌機的開源可行性 » 2021-06-29 16:15:46
@xboot
閣下果然是有智慧的人才~遵照你的方式,我讓分析儀再往後取一位,把8Bits改成9Bits,就對了,感謝啦~
重新解析後的命令,最後是0x29 0x2c命令,這個就很熟悉了~
0x00FE
0x00EF
0x0036
0x0140
0x003A
0x0155
0x0084
0x0104
0x0086
0x01FB
0x0087
0x0179
0x0089
0x010B
0x008A
0x0120
0x008B
0x0180
0x008D
0x013B
0x008E
0x01CF
0x00EC
0x0133
0x0102
0x014C
0x0098
0x013E
0x009C
0x014B
0x0099
0x013E
0x009D
0x014B
0x009B
0x0155
0x00E8
0x0111
0x0100
0x00FF
0x0162
0x00C3
0x0120
0x00C4
0x0103
0x00C9
0x010A
0x003A
0x0155
0x0084
0x0161
0x008A
0x0140
0x00F6
0x01C7
0x00B0
0x0163
0x00B5
0x0102
0x0102
0x0114
0x00F0
0x014A
0x0110
0x010A
0x010A
0x0126
0x0139
0x00F2
0x014A
0x0110
0x010A
0x010A
0x0126
0x0139
0x00F1
0x0150
0x018F
0x01AF
0x013B
0x013F
0x017F
0x00F3
0x0150
0x018F
0x01AF
0x013B
0x013F
0x017F
0x00BA
0x010A
0x0035
0x0100
0x0021
0x00FE
0x00EE
0x0011
0x0029
0x002C#466 Re: 司徒开源 » 研究FC3000掌機的開源可行性 » 2021-06-29 15:58:39
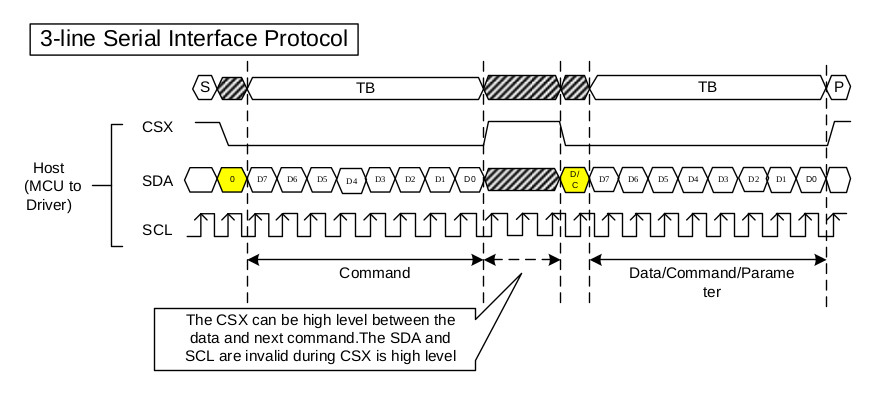
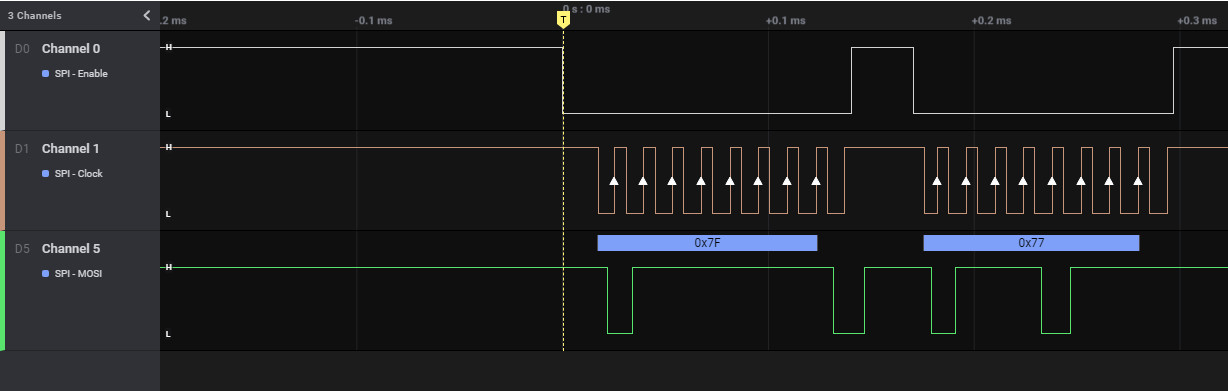
#467 Re: 司徒开源 » 研究FC3000掌機的開源可行性 » 2021-06-29 15:18:12
@xboot
哈,真想不到,這鬼東西竟然有這一款相當特別的屏~
昨晚司徒在夢境之中,又再度看到TRIMUI歡樂的模樣,司徒心中真是相當高興,只是司徒不好意思跟它說,那是你的最後一餐,記得吃飽上路...,於是,手術台上...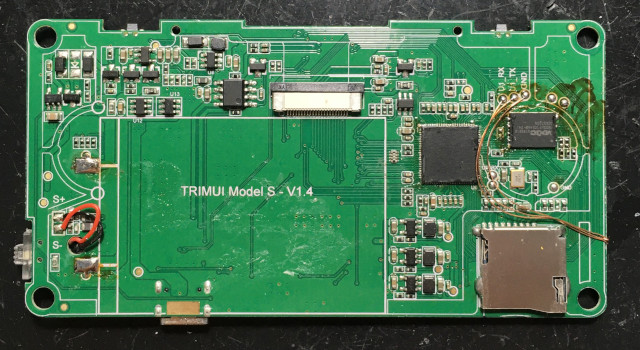
LCD腳位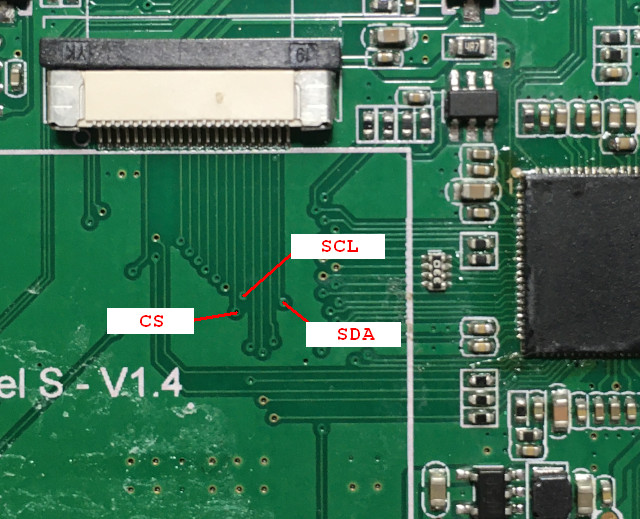
焊接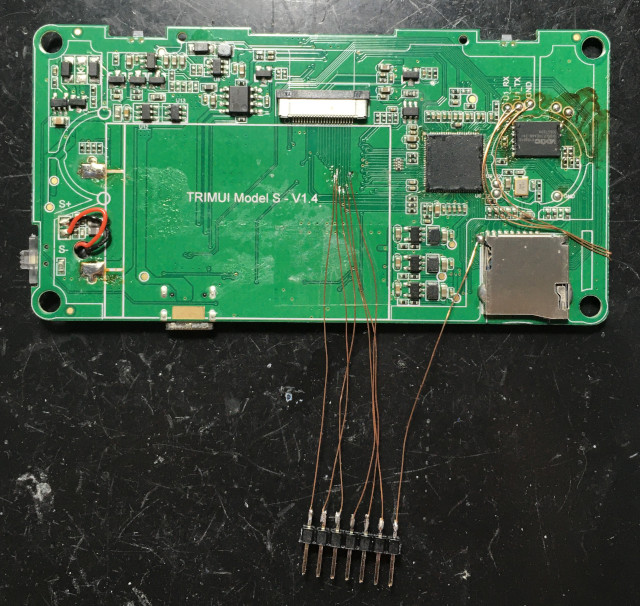
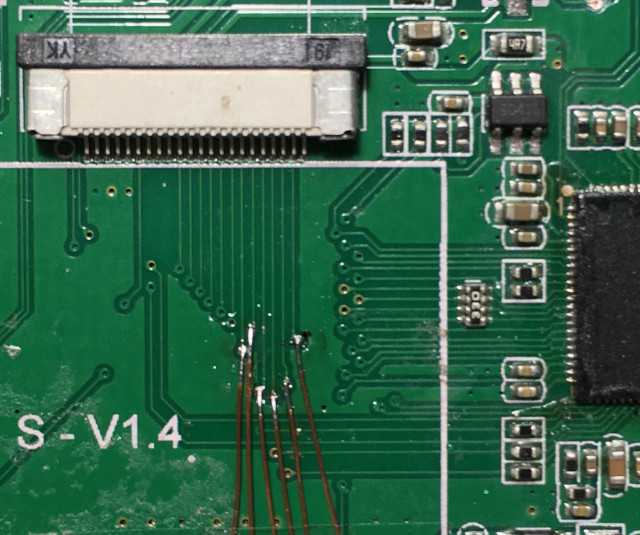
山寨邏輯分析儀出場...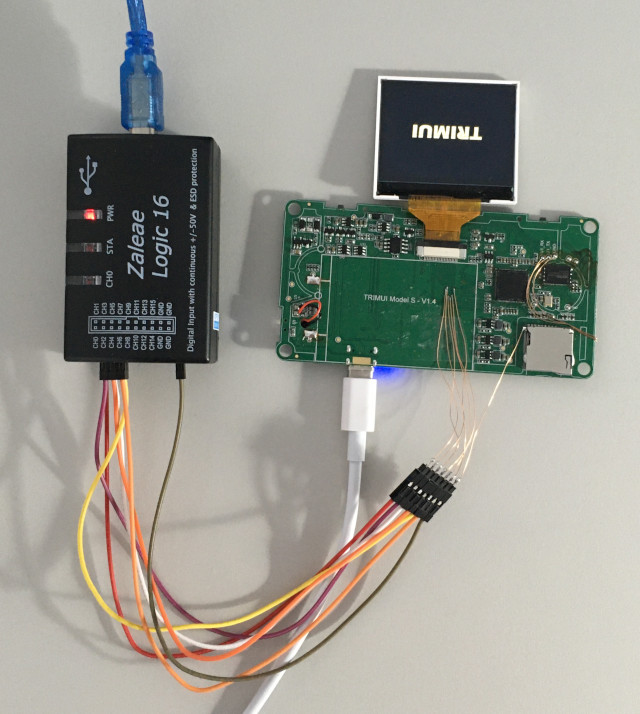
取得的命令
0x7F
0x77
0x1B
0xA0
0x1D
0xAA
0x42
0x82
0x43
0xFD
0x43
0xBC
0x44
0x85
0x45
0x90
0x45
0xC0
0x46
0x9D
0x47
0xE7
0x76
0x99
0x81
0xA6
0x4C
0x9F
0x4E
0xA5
0x4C
0x9F
0x4E
0xA5
0x4D
0xAA
0x74
0x88
0x80
0x7F
0xB1
0x61
0x90
0x62
0x81
0x64
0x85
0x1D
0xAA
0x42
0xB0
0x45
0xA0
0x7B
0xE3
0x58
0xB1
0x5A
0x81
0x81
0x8A
0x78
0xA5
0x88
0x85
0x85
0x93
0x9C
0x79
0xA5
0x88
0x85
0x85
0x93
0x9C
0x78
0xA8
0xC7
0xD7
0x9D
0x9F
0xBF
0x79
0xA8
0xC7
0xD7
0x9D
0x9F
0xBF
0x5D
0x85
0x1A
0x80
0x10
0x7F
0x77
0x08
0x14
0x16
第一個指令是0x7F,於是,司徒翻了一下手冊,這...,我怎麼沒有看到0x7F的說明,難道是國王的初始化命令?有智慧才可以看到?看來司徒...沒有智慧~
#468 Re: 司徒开源 » 研究FC3000掌機的開源可行性 » 2021-06-29 14:19:53
@fanelwin
不客氣
@xboot
我目前沒有LCD初始化代碼,我正在用邏輯分析儀抓取,我目前有的資訊如下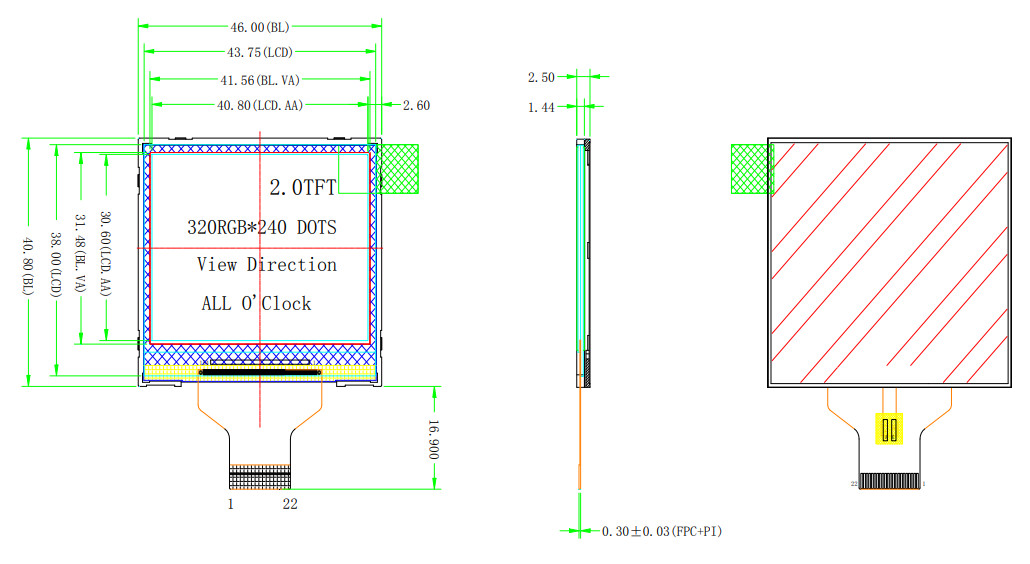

我使用電錶量測出來的腳位
LCD TE		NC
LCD RESET	4.7K RC
LCD K		N-CHANNEL MOSFET D (AO3416 AE9T)
LCD A		90416 PIN-6
LCD D0		PD3
LCD D1		PD4
LCD D2		PD5
LCD D3		PD6
LCD D4		PD7
LCD D5		PD8
LCD CS		PD11
LCD SCL		PD9
LCD DCLK	PD18
LCD HS		PD20
LCD VS		PD21
LCD SDA PD10#469 Re: 司徒开源 » 研究FC3000掌機的開源可行性 » 2021-06-29 12:41:39
@shauninman
ha ha, it is amazing ! amazing !
firstly, thanks for your information, it helps me a lot
based on your link, now, I can build trimui toolchain from scratch and the application built from my toolchain works on trimui handheld
amazing !
since the GmenuNX source are put on DropBox, it might be broken soon
I will put them in my gtihub, if it is not permitted to do this, please tell me, thanks
honestly, it is very weird because nothing can be found from google by using keyword: trimui toolchain, even though trimui-toolchain, ha ha
anyway, it helps me a lot to port some emulators or games into trimui handheld later
thanks for your information ![]()
but I am very curious why do you know such more detailed configuration in buildroot ? ha ha, even it is glibc library ? ha
感謝許多朋友幫忙傳遞司徒找不到trimui toolchain的訊息, 哈, 小弟在此感謝啦!
#470 Re: 司徒开源 » 研究FC3000掌機的開源可行性 » 2021-06-28 17:28:33
@kofjin @除恶务尽
恭喜買到還不錯的機器,如果有發現IPS FC3000機器,麻煩告知司徒,司徒也希望可以移植Linux系統到IPS FC3000
@george5497
哈,真是很高興可以買到你的機器,丁果320 2P功能,我還記得,等回頭整理丁果A320,在一起製作了~
秉持熱誠研究開源掌機,能走多遠,但看天意了~
感謝每一位支持司徒的朋友,小弟在此至上謝意
接著,司徒來談談TRIMUI掌機,TRIMUI是唯一可以跟小橫米對打的低價優質機種,小橫米經過幾代演進,硬件已經達到可玩的程度,TRIMUI也很接近,只可惜很多資料並沒有公佈,至於反骨仔的機器,那種垃圾就不需要比較了~直接歸類到Q8掌機等級去,所以,司徒還是很看好TRIMUI掌機,哈,相信大家應該是看不出來,司徒正為不小心把閃屏問題說出來而圓謊,哈~
昨晚在夢境之中,司徒竟然看到TRIMUI在哭泣,一個人默默坐在河邊,這場景...,讓司徒真是相當不捨,為了補償,司徒最後決定移植仙劍奇俠傳給TRIMUI掌機,但是,司徒手上並沒有TRIMUI toolchain可以做移植編譯,這...,真是難為司徒了~
目前TRIMUI只有三款移植遊戲,司徒查了一下才發現是Hardcode在程式裡面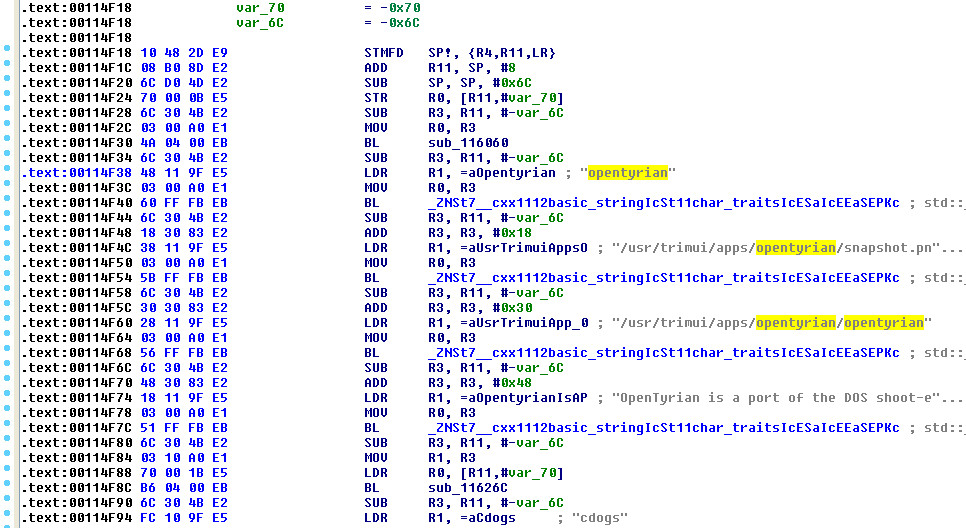
Binary Patch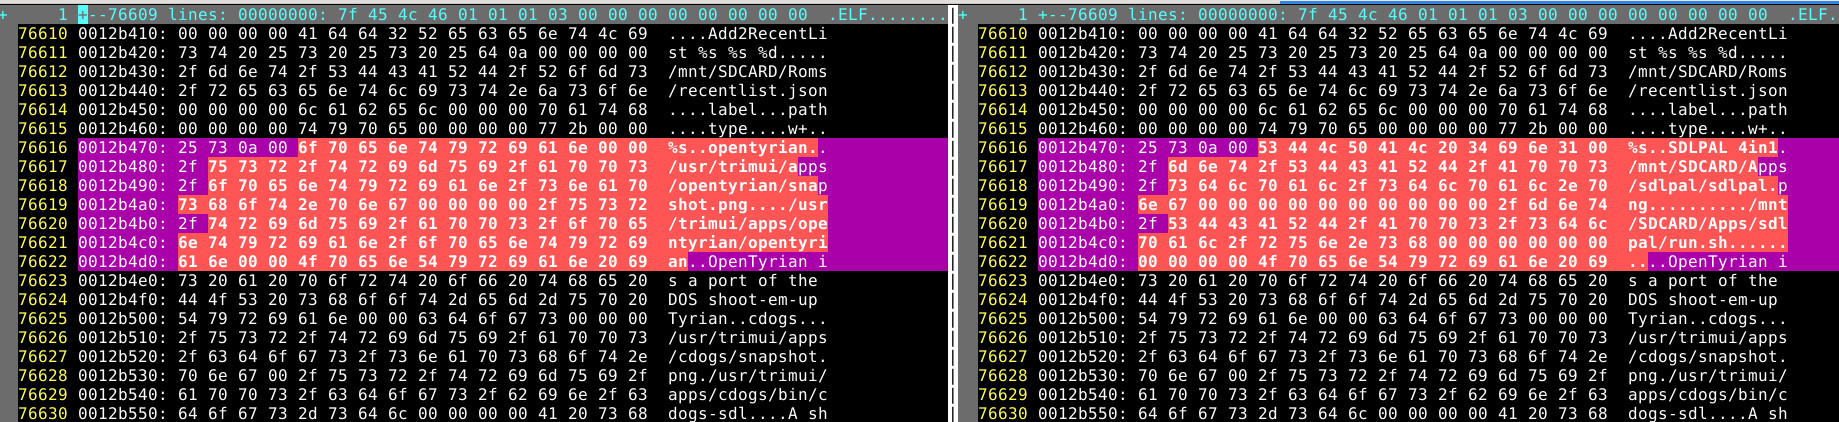
這才發現顯示驅動不支援8Bits顯示,只好關掉仙劍的淡化效果...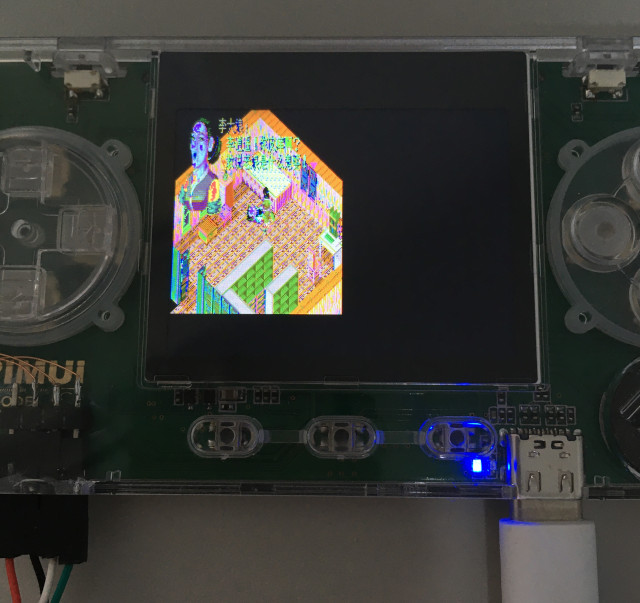
安裝包
https://github.com/steward-fu/trimui/releases/download/v1.0/trimui_sdlpal_20210628.7z
下載安裝包並解壓縮到MicroSD,接著安裝TrimuiUpdateV20210628_sdlpal.zip,安裝後系統自動重新啟動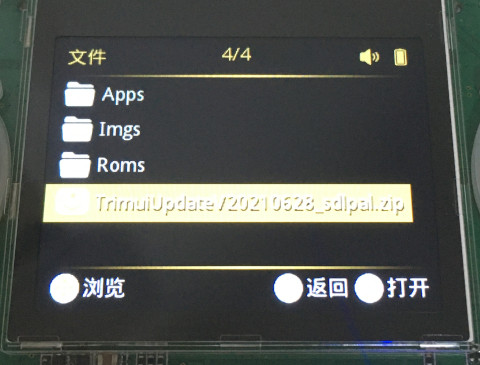
進入其他遊戲就可以看到仙劍奇俠傳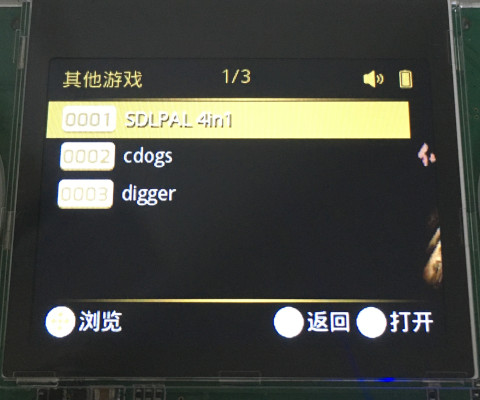
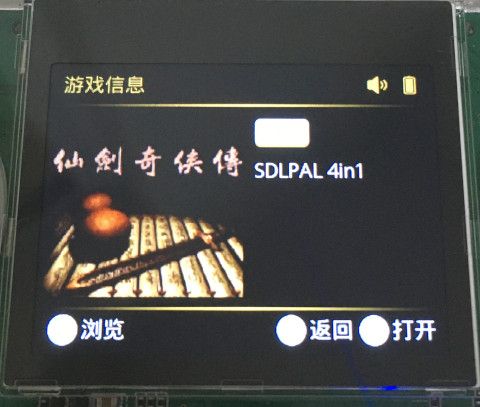
仙劍奇俠傳 四合一版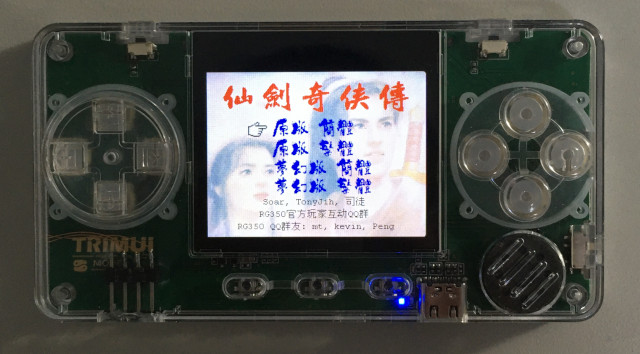
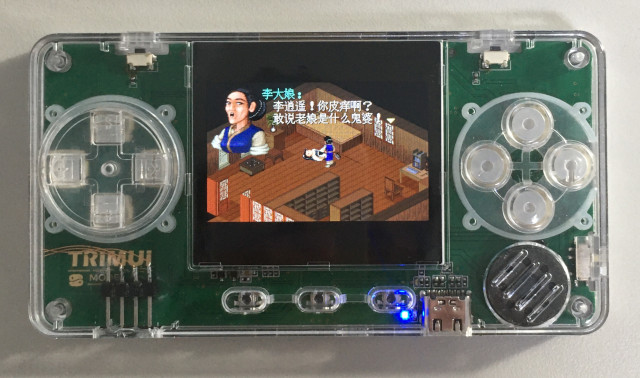
其實,司徒一開始就說沒有內核代碼,移植會有很多問題,像是很多不支援的配置,或者按鍵鍵位亂配置,當然更多問題是,你永遠不知道還有多少地雷,只可惜大家只想到我就是不要給別人抄襲~
#471 Re: 司徒开源 » 研究FC3000掌機的開源可行性 » 2021-06-27 22:34:23
ips_fc3000_dump_0627_1.img 燒入測試狀況和上次一樣,開機後背光沒亮,最後背光也沒有閃爍,完全黑屏,一樣等到十分鐘後才關機取出dump rom
dump rom 檔案如附件,請查收
不好意思,我漏看訊息,後來老外有幫忙提取,感謝你的測試
#472 Re: 司徒开源 » 研究FC3000掌機的開源可行性 » 2021-06-27 21:51:39
好吧~接下來的話,說出來可能會很傷人,但是,司徒最初只是想知道目前TRIMUI掌機是否會有閃屏問題,沒有要得罪人的意思,請不要誤會我~為何司徒想要知道是否有閃屏的問題呢?因為閃屏是決定這台掌機是否可以拿來玩遊戲的衡量指標,所以,結論:目前TRIMUI(trimui_model_S_dark_V0.105_en.img)還是存在閃屏問題,過程如下說明
司徒找了許久,還是沒有找到GMenuNX的toolchain,當然TRIMUI的toolchain更不用說,一定沒有,司徒真好奇,那些外國人怎麼拿到的,不過,那也沒關係,反正,那也只是Link問題而已,小問題,於是,司徒寫了一個閃屏測試程式
#include <stdio.h>
#include <stdlib.h>
#include <SDL.h>

int main(int argc, char** argv)
{
  uint32_t cnt=0;
  SDL_Surface* screen=NULL;
  uint32_t col[]={0xf800, 0x7e0, 0x1f};

  SDL_Init(SDL_INIT_VIDEO);
  screen = SDL_SetVideoMode(320, 240, 16, SDL_SWSURFACE | SDL_DOUBLEBUF);
  while(cnt < 600){
    cnt+= 1;
    SDL_FillRect(screen, &screen->clip_rect, col[cnt % 3]);
    SDL_Flip(screen);
    SDL_Delay(1000 / 60);
  }
  SDL_Quit();
  return 0;
}
updater
#!/bin/sh
dir=`dirname $0`
cd $dir

killall updateui
killall keymon
LD_LIBRARY_PATH=/usr/trimui/lib ./main
編譯
$ arm-linux-gnueabi-gcc main.c -o main -I/usr/include/SDL /xxx/usr/trimui/lib/libSDL-1.2.so.0P.S. libSDL-1.2.so.0是從機器複製出來的
打包
$ zip TrimuiUpdateV9999_tearing.zip updater mainhttps://github.com/steward-fu/trimui/releases/download/v1.0/TrimuiUpdateV9999_tearing.zip
刷入TrimuiUpdateV9999_tearing.zip就可以測試閃屏問題,可以看出目前TRIMUI(trimui_model_S_dark_V0.105_en.img)還是存在閃屏問題,使用者可以拿司徒的測試包測試,看看你是否可以察覺出來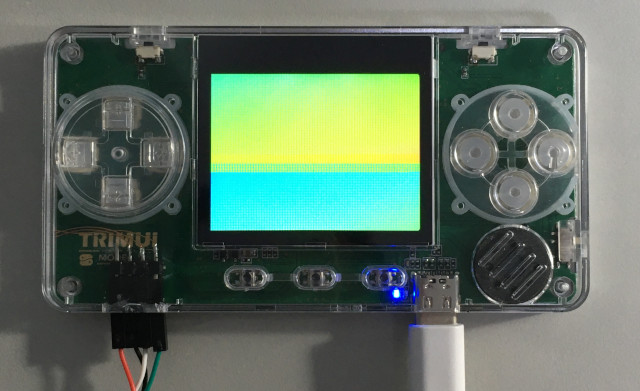
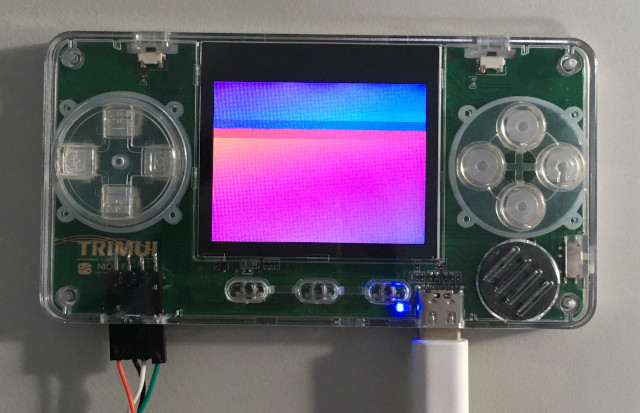
從上面的測試,可以發現在單一畫面顯示時,出現兩個畫面,一個是目前,另外一個則是上一個畫面,這種現象就是閃屏,為何會有這樣的現象呢?司徒從幾個角度說明一下:
上層應用程式(或模擬器)
模擬器一般顯示設定在60fps,因此,模擬器會保證畫完一個畫面後,往驅動程式傳送,所以傳送當下是保證是一個單一畫面,接著第二個畫面...依此類推
中層驅動程式
驅動程式收到模擬器的畫面資料後,會往硬件(屏)送出,但是,如果沒有Double Buffer,在往硬件傳送中,會被模擬器再次傳送的資料覆蓋,導致兩個畫面重疊
下層硬體顯示
CPU屏:由LCD Driver負責畫面更新,一般不會有Double RAM,因此,會靠TE腳位通知驅動程式,目前在掃屏,請不要傳送資料給我,等空閒在送資料
RGB屏:如果是直寫RAM,那掃屏由驅動程式負責,這一般不會有問題,有問題的是,透過RAM掃屏,那一樣會有覆蓋問題
從這個測試結果可以看到畫面是水平分割,而非斜角,水平分割一般是驅動程式處理的問題,而斜角一般則是硬件刷新同步問題,驅動程式在處理PAN_DISPLAY跟中斷時,一般考慮由中斷優先取得,但是,從結果看來,缺少判斷PAN_DISPLAY是否更新完畢,這是司徒猜測的問題,因為司徒手上也沒有驅動程式可以參考修改,不過,你現在給我內核代碼,我也不想要了~哈
有Double Buffer就有Triple Buffer或者更多,不過,一般是用於加速,因為SDL在做SDL_Flip時,是靠複製資料給驅動程式,這個複製(320*240*2)是很耗時的,因此,像PCSX-ReARMed就是用DMA Mapping方式,省掉複製的時間,WIZ的PCSX就是這樣加速的,司徒當初幫RG、小橫米移植PS1模擬器時,也是這樣加速PS1模擬效能
#473 Re: 司徒开源 » 研究FC3000掌機的開源可行性 » 2021-06-27 17:39:59
哈~正所謂有志者、事竟成,總有一天會迴光返照~
司徒一直苦惱,為何我的TRIMUI掌機就是無法使用PhoenixSuit軟件燒錄,終於,司徒突然領悟了~原來我當初焊接使用的是芒果派的NAND Flash,並不是原廠的NAND Flash(MX35LF1GE4AB-241),於是,司徒購買新的焊接回去後,終於可以使用PhoenixSuit軟件燒錄了~原來司徒命中帶屎,哈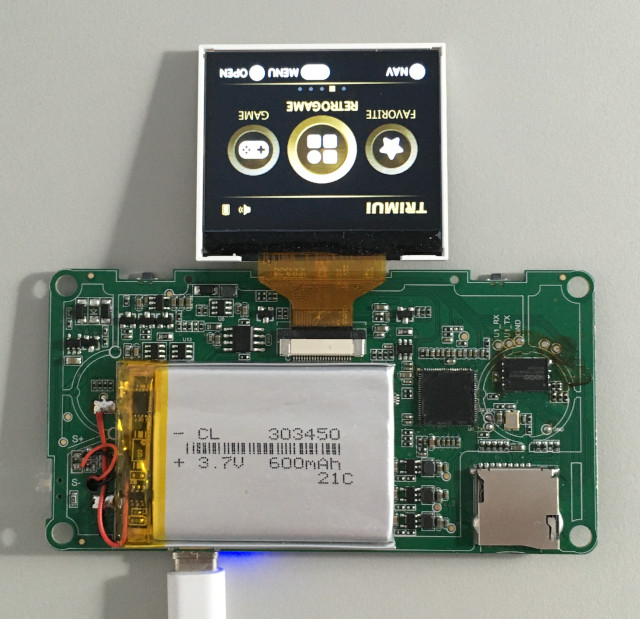
接著,司徒就想再度看看許久未見的TRIMUI系統,結果UART Login需要密碼,這...,擺明叫司徒搞你,司徒真是不得已...
updater
#!/bin/sh
dir=`dirname $0`
cd $dir

mount -o remount,rw /
cp inittab /etc/
sync
reboot
inittab
null::sysinit:/bin/mount -o remount,rw /
null::sysinit:/bin/mkdir -p /dev/pts
null::sysinit:/bin/mount -a
::sysinit:/etc/init.d/rcS boot
/dev/console::respawn:-/bin/sh
::ctrlaltdel:/sbin/reboot
null::shutdown:/bin/umount -a -r
打包成TrimuiUpdateV9999_root_login.zip
$ zip TrimuiUpdateV9999_root_login.zip updater inittab接著刷入TrimuiUpdateV9999_root_login.zip,開機就會以root帳號登入(baudrate: 115200bps)
BusyBox v1.27.2 () built-in shell (ash)

 _____  _              __     _
|_   _||_| ___  _ _   |  |   |_| ___  _ _  _ _
  | |   _ |   ||   |  |  |__ | ||   || | ||_'_|
  | |  | || | || _ |  |_____||_||_|_||___||_,_|
  |_|  |_||_|_||_|_|  Tina is Based on OpenWrt!
 ----------------------------------------------
 Tina Linux (Neptune, 5C1C9C53)
 ----------------------------------------------
root@Linux:/#
原來是全志的Tina Linux,哈~難怪我要不到內核代碼
接著司徒想要測試一下閃屏問題,確定一下TRIMUI是否會閃屏,司徒從ext2 rootfs找到官方閃屏測試檔案lcdteartest
root@Linux:/usr/trimui/bin# ./lcdteartest 60
================= lcd_fb_init ===============
fb width:320 height:240 bpp:16
render fps 63
render fps 62
render fps 62
render fps 62
render fps 62
render fps 62
render fps 62
render fps 62
render fps 62
不過,官方測試是白色區塊位移,一般司徒不這樣測試,司徒要整面畫面RGB依序切換,才能看出所有像素點是否有被重疊,因此,司徒想到稍早有位熱心朋友告知GMenuNx的消息,於是,司徒找了一下GMenuNx的toolchain,想要自己寫一個測試閃屏程式,但是,這個toolchain並沒有被釋出?這...真是難為司徒了~
#474 Re: 司徒开源 » 研究FC3000掌機的開源可行性 » 2021-06-27 11:41:28
#475 Re: 司徒开源 » 研究FC3000掌機的開源可行性 » 2021-06-27 10:08:12
如果有時間,可以在幫忙測試一下這一版嗎?
https://github.com/steward-fu/fc3000/releases/download/v1.0/ips_fc3000_dump_0627_1.img.7z
步驟:
1. 解壓縮後,寫到MicroSD
2. 插入MicroSD到IPS FC3000
3. 上電 (黑屏)
4. 開始Dump Stock ROM (還是黑屏狀態)
5. 五分鐘後,背光要開始閃爍
6. 關機,把v1rom.img給我
#476 Re: 司徒开源 » 研究FC3000掌機的開源可行性 » 2021-06-27 08:55:34
#477 Re: 司徒开源 » 研究FC3000掌機的開源可行性 » 2021-06-26 22:07:49
台灣!真高興能夠在此遇到~
能夠幫我一個忙嗎?把這個fc300_ips_dump.img.7z解壓縮後,寫到MicroSD,然後插入你的機器,開機後會黑屏,然後開始dump spi flash,大約五分鐘後,屏的背光會開始閃爍,此時,代表完成dump,關機後,把MicroSD裡面的v1com.img傳給我,感謝~
https://github.com/steward-fu/fc3000/releases/download/v1.0/fc300_ips_dump.img.7z
#478 Re: 司徒开源 » 研究FC3000掌機的開源可行性 » 2021-06-26 20:27:18
#479 Re: 司徒开源 » 研究FC3000掌機的開源可行性 » 2021-06-26 18:56:57
#480 Re: 司徒开源 » 研究FC3000掌機的開源可行性 » 2021-06-26 11:35:08
目前司徒的TRIMUI掌機是無法進入系統的,其實更正確的說,應該是司徒把它搞掛了~司徒嘗試使用官方建議方式,安裝燒錄軟體進行燒錄,可惜,司徒一直無法燒錄成功,於是,司徒心想,那就寫一個Bootloadert程式,用來把官方固件寫回NAND Flash就好,但是,司徒看了一下官方固件,發現格式怪怪的,於是開始挖掘這口乾枯的深井....
Ref:
https://github.com/Ithamar/awutils
https://stackoverflow.com/questions/48872746/what-is-an-imagewty-firmware-format
官方燒錄檔案 trimui_model_S_dark_V0.105_en.img
$ xxd trimui_model_S_dark_V0.105_en.img | head
  00000000: 494d 4147 4557 5459 0003 0000 6000 0000  IMAGEWTY....`...
  00000010: 0000 d004 3402 1000 00c8 5606 0000 0000  ....4.....V.....
  00000020: 0004 0000 3412 0000 4387 0000 0001 0000  ....4...C.......
  00000030: 0001 0000 0100 0000 0004 0000 1c00 0000  ................
  00000040: 0004 0000 0000 0000 0000 0000 0000 0000  ................
  00000050: 0000 0000 0000 0000 0000 0000 0000 0000  ................
  00000060: 00c1 8449 10d9 a471 4011 e4b9 9069 4421  ...I...q@....iD!
  00000070: 00e1 c4a9 9079 6451 4031 2419 1009 0401  .....ydQ@1$.....
  00000080: 0001 0409 1019 2431 4051 6479 90a9 c4e1  ......$1@Qdy....
  00000090: 0021 4469 90b9 e411 4071 a4d9 1049 84c1  .!Di....@q...I..
官方固件是IMAGEWTY格式,於是司徒找到awutils工具,可以用來拆解
$ cd
$ git clone https://github.com/Ithamar/awutils
$ cd awutils
$ gcc parsecfg.c twofish.c rc6.c awimage.c -o awimage -I.
解開 trimui_model_S_dark_V0.105_en.img
$ ./awimage ../trimui_model_S_dark_V0.105_en.img
  ./awimage: unpacking ../trimui_model_S_dark_V0.105_en.img to ../trimui_model_S_dark_V0.105_en.img.dump
  Extracting: COMMON   SYS_CONFIG100000 (45841, 45856)
  Extracting: COMMON   SYS_CONFIG_BIN00 (28672, 28672)
  Extracting: COMMON   SPLIT_0000000000 (512, 512)
  Extracting: COMMON   SYS_CONFIG000000 (3119, 3120)
  Extracting: COMMON   DTB_CONFIG000000 (50176, 50176)
  Extracting: BOOT     BOOT0_0000000000 (16384, 16384)
  Extracting: 12345678 1234567890BOOT_0 (32768, 32768)
  Extracting: 12345678 UBOOT_0000000000 (671744, 671744)
  Extracting: 12345678 TOC1_00000000000 (8, 16)
  Extracting: 12345678 TOC0_00000000000 (8, 16)
  Extracting: FES      FES_1-0000000000 (11648, 11648)
  Extracting: 12345678 BOOTPKG-00000000 (753664, 753664)
  Extracting: PXTOOLSB XXXXXXXXXXXXXXXX (147968, 147968)
  Extracting: UPFLYTLS XXXXXXXXXXXXXXXX (165019, 165024)
  Extracting: UPFLTL32 XXXXXXXXXXXXXXXX (150847, 150848)
  Extracting: 12345678 1234567890CARDTL (73216, 73216)
  Extracting: 12345678 1234567890SCRIPT (1758, 1760)
  Extracting: 12345678 1234567890___MBR (65536, 65536)
  Extracting: 12345678 1234567890DLINFO (16384, 16384)
  Extracting: 12345678 1234567890ARISC (15, 16)
  Extracting: RFSFAT16 BOOTLOGO_FEX0000 (153738, 153744)
  Extracting: RFSFAT16 VBOOTLOGO_FEX000 (4, 16)
  Extracting: RFSFAT16 ENV_FEX000000000 (131072, 131072)
  Extracting: RFSFAT16 VENV_FEX00000000 (4, 16)
  Extracting: RFSFAT16 BOOT_FEX00000000 (3124088, 3124096)
  Extracting: RFSFAT16 VBOOT_FEX0000000 (4, 16)
  Extracting: RFSFAT16 ROOTFS_FEX000000 (100663296, 100663296)
  Extracting: RFSFAT16 VROOTFS_FEX00000 (4, 16)
結果竟然不小心發現了 uImage 和 DTB,哈~感謝老天的恩賜!
$ file * | grep -i Linux
  RFSFAT16_BOOT_FEX00000000:     u-boot legacy uImage, ARM OpenWrt Linux-3.10.65, Linux/ARM, OS Kernel Image (Not compressed), 3124024 bytes, Thu Jan  1 00:00:00 1970, Load Address: 0x80008000, Entry Point: 0x80008000, Header CRC: 0x1877E4E2, Data CRC: 0x8DD5320A
  RFSFAT16_ROOTFS_FEX000000:     Linux rev 1.0 ext2 filesystem data, UUID=57f8f4bc-abf4-655f-bf67-946fc0f9f25b (extents) (large files)

$ strings RFSFAT16_BOOT_FEX00000000 | grep Linux
  ARM OpenWrt Linux-3.10.65
  Uncompressing Linux...
   Linux Documentah
  Linux
OpenWRT 3.10.65 ? 真假,哈~
提取 zImage
$ dd if=RFSFAT16_BOOT_FEX00000000 of=zImage bs=1 skip=64
  3124024+0 records in
  3124024+0 records out
  3124024 bytes (3.1 MB, 3.0 MiB) copied, 5.43237 s, 575 kB/s

$ file zImage
  zImage: Linux kernel ARM boot executable zImage (little-endian)
這個zImage似乎有點怪怪的,因為並沒有找到gzip的Header
接著看一下DTB
$ file "COMMON  _DTB_CONFIG000000"
  COMMON  _DTB_CONFIG000000: Device Tree Blob version 17, size=45683, boot CPU=0, string block size=7371, DT structure block size=38240

$ cp "COMMON  _DTB_CONFIG000000" dtb
$ dtc -I dtb -O dts -f dtb -o trimui.dts
$ vim trimui.dts
  lcd0@0 {
    allwinner,pins = "PD3\0PD4\0PD5\0PD6\0PD7\0PD8\0PD18\0PD20\0PD21";
    allwinner,function = "lcd0";
    allwinner,pname = "lcdd5\0lcdd6\0lcdd7\0lcdd10\0lcdd11\0lcdd12\0lcdclk\0lcdhsync\0lcdvsync";

  sdc0@0 {
    allwinner,pins = "PF0\0PF1\0PF2\0PF3\0PF4\0PF5";

  lcd0@01c0c000 {
    lcd_x = < 0x140 >;
    lcd_y = < 0xf0 >;
    lcd_width = < 0x32 >;
    lcd_height = < 0x25 >;
    lcd_pwm_used = < 0x01 >;
    lcd_pwm_ch = < 0x01 >;
    lcd_hbp = < 0x26 >;
    lcd_ht = < 0x465 >;
    lcd_hspw = < 0x12 >;
    lcd_vbp = < 0x06 >;
    lcd_vt = < 0x11e >;
    lcd_vspw = < 0x04 >;
    lcd_cpu_if = < 0x00 >;

  keyboard {
    compatible = "allwinner,keyboard_2000mv";

  chosen {
    bootargs = "earlyprintk=sunxi-uart,0x01c25000 loglevel=8 initcall_debug=1 console=ttyS0 init=/init";
lcd_cpu_if = < 0x00 >,不是CPU屏?哈~有趣有趣,司徒越來越激情了~哈
#481 Re: 司徒开源 » 研究FC3000掌機的開源可行性 » 2021-06-25 23:04:04
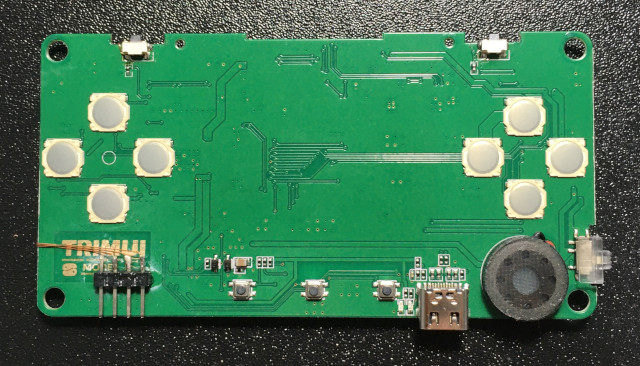
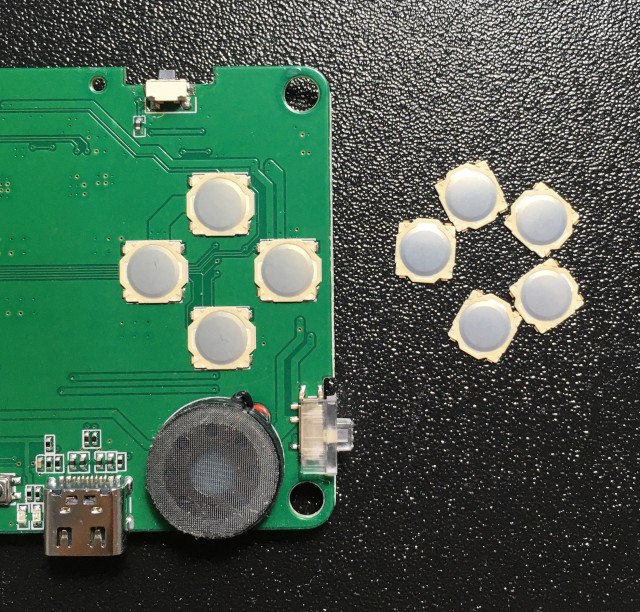
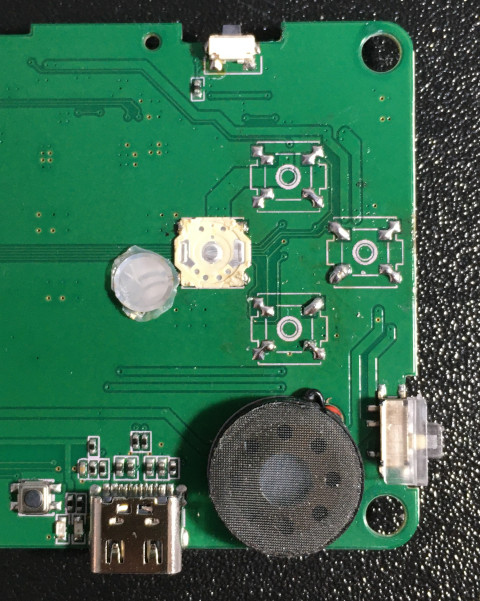

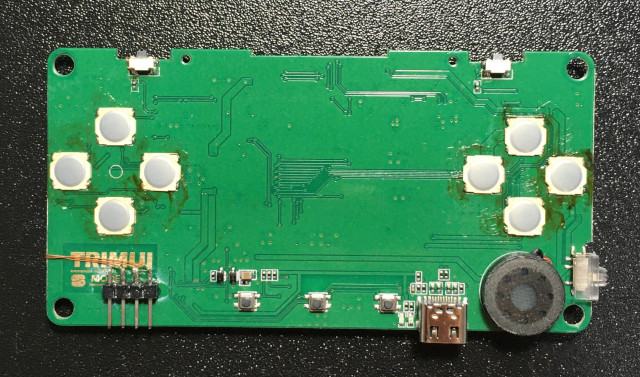
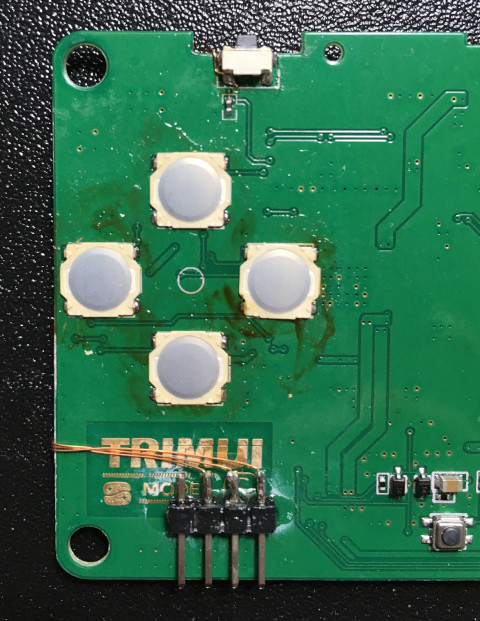
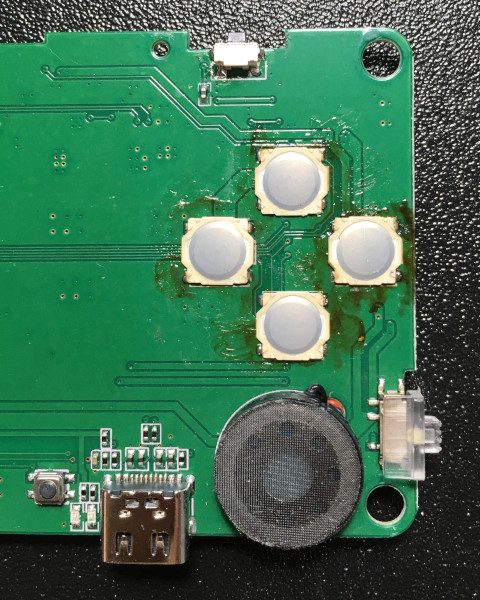
#482 Re: 司徒开源 » 研究FC3000掌機的開源可行性 » 2021-06-25 22:59:02
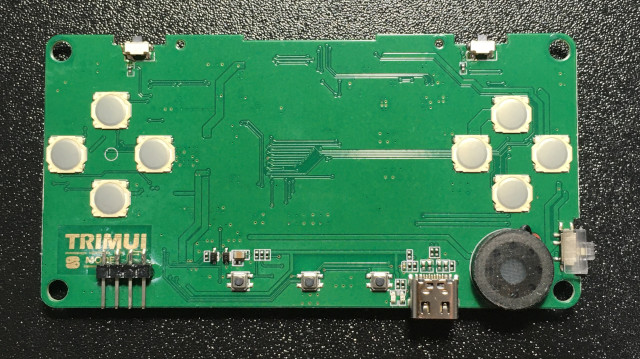
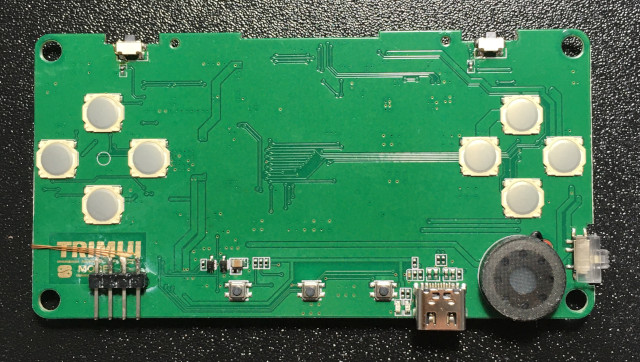

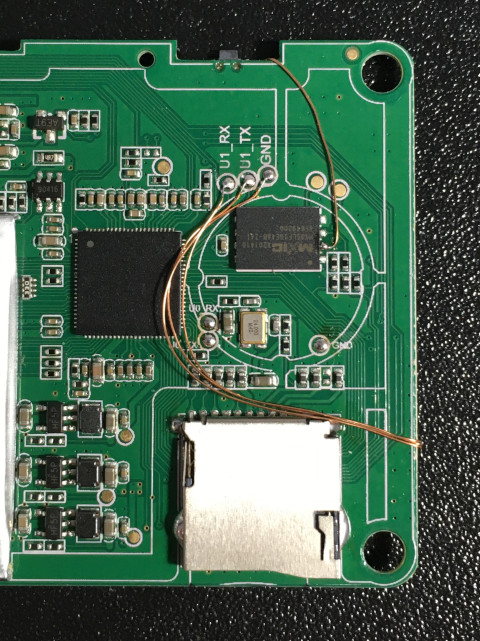
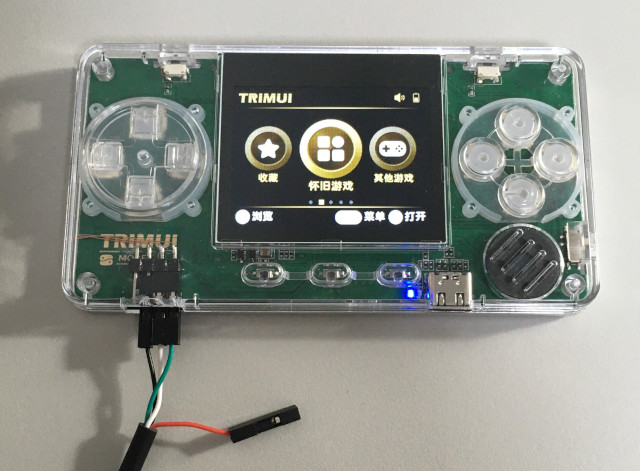
#483 Re: 司徒开源 » 研究FC3000掌機的開源可行性 » 2021-06-25 22:37:56
司徒接下來除了把重點鎖定在移植Linux Kernel之外,也同時鎖定另一台機器,那就是TRIMUI掌機,這台掌機使用F1C200S當作CPU,不過,司徒比較喜愛的是他的大小尺寸,相當便攜,可惜的是,司徒曾經試著聯繫廠商提供源代碼,一直沒有得到回覆(預期結果),當然,司徒只想知道TRIMUI掌機是否會閃屏,因為就司徒手上的資料,這台掌機應該也是有閃屏問題(8Bits BUS,沒有TE),為了解決這個好奇心,司徒又開始折騰...
四台F1C100S系列掌機比較
價格便宜:Q8 > FC3000 > TRIMUI > PocketGo
容易攜帶:TRIMUI > PocketGo > Q8 > FC3000
實際可玩:PocketGo > TRIMUI > FC3000 > Q8
有閃屏問題:FC3000、Q8
沒有閃屏問題:PocketGo
全視角屏幕:PocketGo、TRIMUI
司徒的目標很明確,就是要確定TRIMUI掌機是否有閃屏問題,而PocketGo掌機已經由司徒確定可以解決閃屏問題,只是司徒目前手上沒有PocketGo掌機,因此,重新下單,所以Q8掌機、PocektGo掌機的研究順序排位在最後
TRIMUI屏視角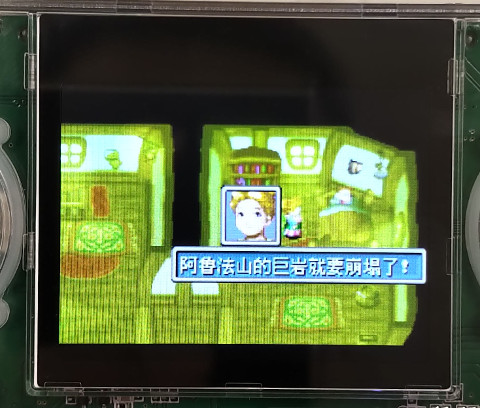
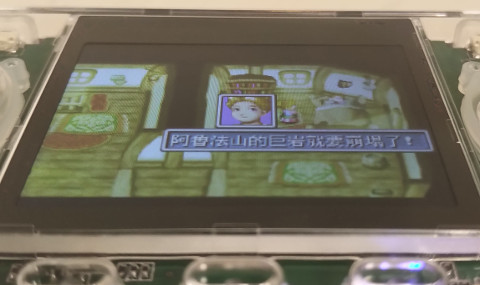
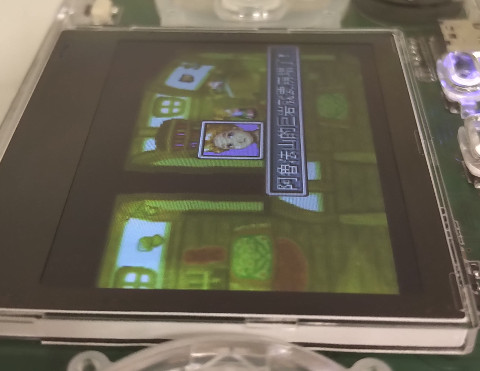
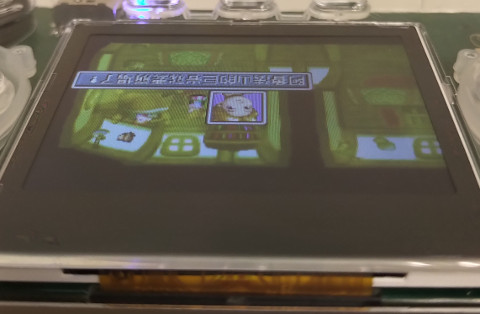
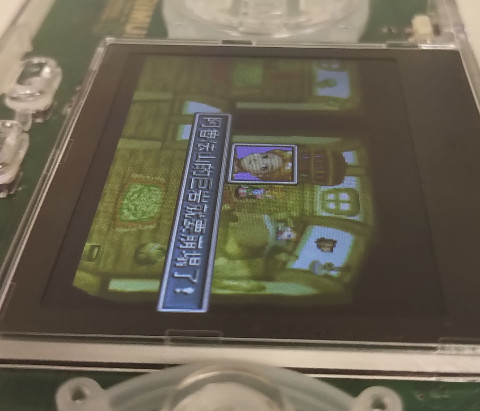
TRIMUI大小比較
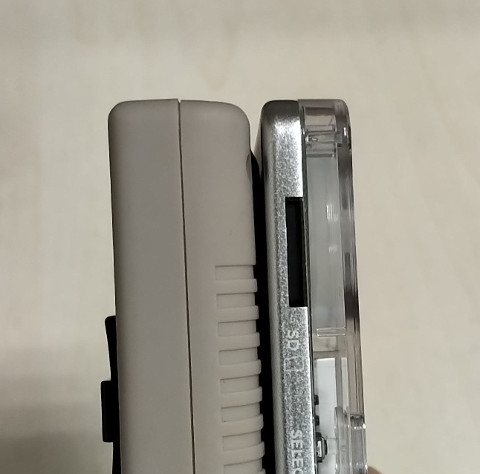
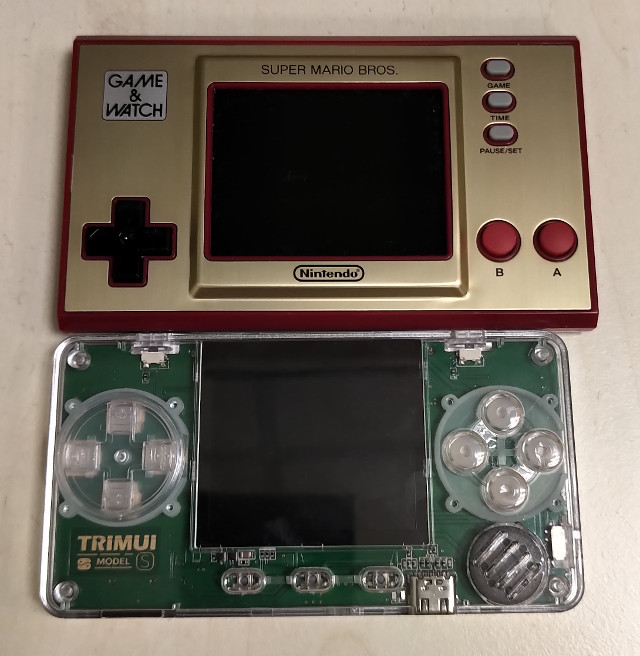
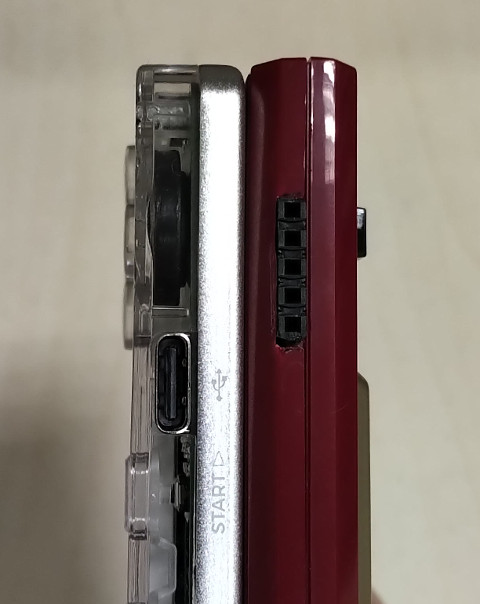
TRIMUI拆機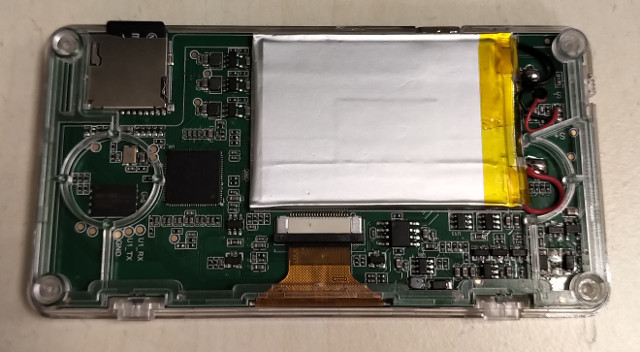
磨掉型號的IC(F1C200S)、MX35LF1GE4AB-241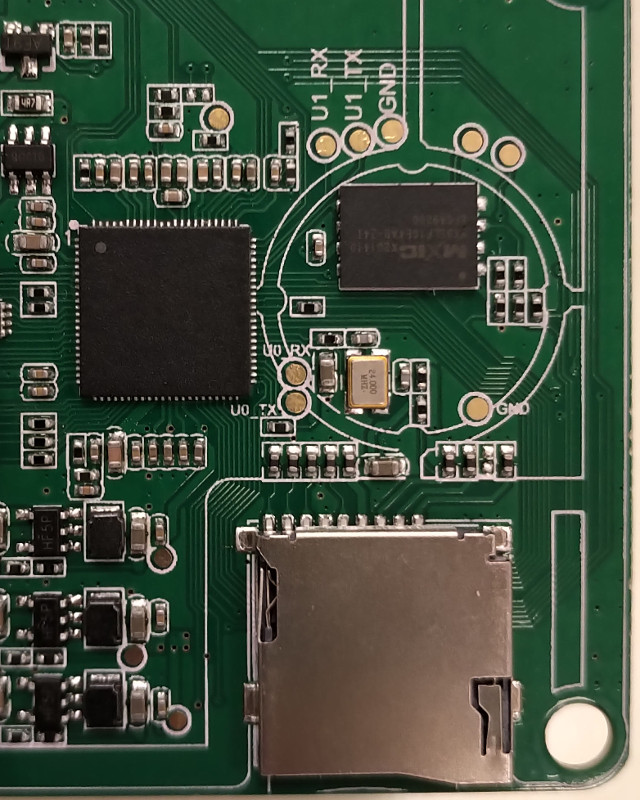
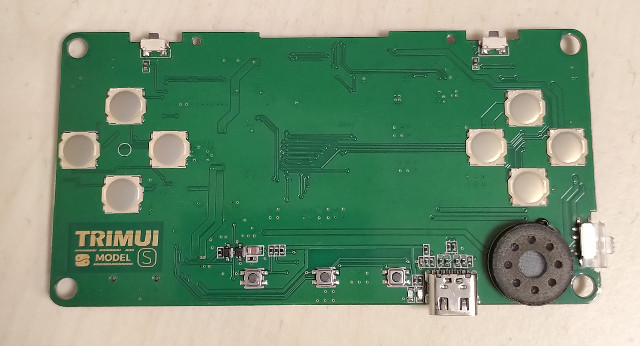
INANBO-T20CR6I-V20 2.0" IPS 320x240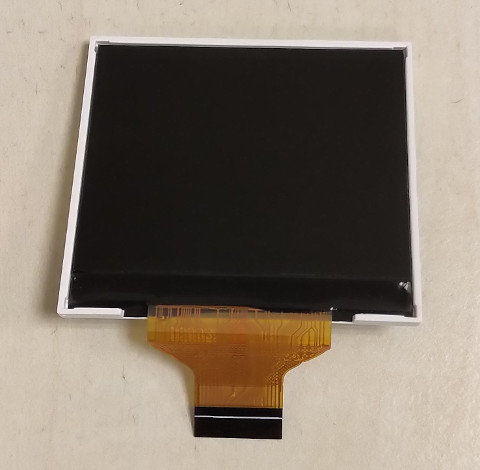

#484 Re: 司徒开源 » 研究FC3000掌機的開源可行性 » 2021-06-25 17:10:37
#485 Re: 君正Ingenic/X1000/X2000/T10/T20/T30 » 有没有哪位大佬能够提供君正4760的数据手册,谢谢! » 2021-06-25 16:29:39
我偷了很多user manual放在我的GitHub: https://github.com/steward-fu/mcu-pdf
請不要跟別人說~
#486 Re: 司徒开源 » 研究FC3000掌機的開源可行性 » 2021-06-25 15:25:13
#487 Re: 司徒开源 » 研究FC3000掌機的開源可行性 » 2021-06-25 15:20:08
我重新上傳了一份:https://github.com/steward-fu/fc3000/releases/download/v1.0/fc3000_v1_v2_flash.img
你可以使用SHA1工具算一下檔案
fc3000_v1_v2_flash.img: a9d34ff94169f5a3f2afa768345540156c99d501
如果還是無法一樣進入燒錄選單的話,那~就遵照老天的旨意吧~
#488 Re: 司徒开源 » 研究FC3000掌機的開源可行性 » 2021-06-25 13:46:04
#489 Re: 司徒开源 » 研究FC3000掌機的開源可行性 » 2021-06-25 13:42:33
#490 Re: 司徒开源 » 研究FC3000掌機的開源可行性 » 2021-06-25 11:57:35
#491 Re: 司徒开源 » 研究FC3000掌機的開源可行性 » 2021-06-25 10:27:13
哈!真是相當對不起有改機的玩家,因為,經過司徒測試,FC3000掌機其實不需要改機就可以安裝Linux系統,因為F1C100S支援MicroSD 1bit/SPI模式開機
經過幾天奮戰,司徒的自幹Bootloader已經差不多了,然而,司徒這才發現FC3000 V2版本的機器,硬件跟V1版本一模一樣,只有SPI Flash不一樣,所以,司徒決定先來幹一件事情,那就是製作V1、V2系統升級程序,哈,有點擋人財路的感覺,司徒只是個人興趣愛好研究,請勿將此程序作為商業用途
步驟如下:
1. 下載fc3000_v1_v2_flash.img.7z
2. 解壓縮後,將fc3000_v1_v2_flash.img直接燒錄到MicroSD
$ sudo dd if=fc3000_v1_v2_flash.img of=/dev/sdX bs=1M && sync && sync
  64+0 records in
  64+0 records out
  67108864 bytes (67 MB, 64 MiB) copied, 6.40316 s, 10.5 MB/s
P.S. sdX為當下的MicroSD位置
司徒目前只有測試SanDisk記憶卡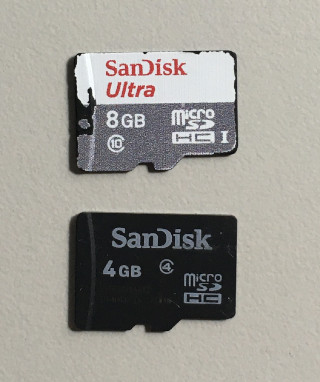
3. 移除卡帶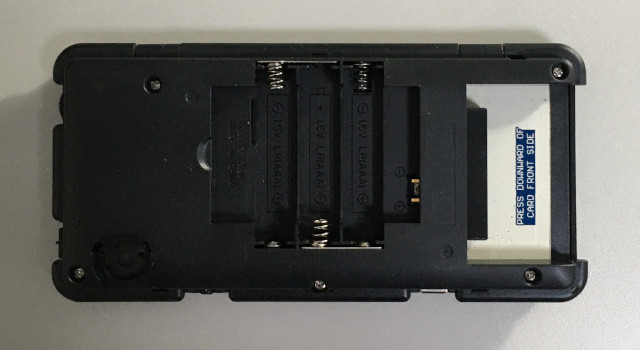
4. 插入剛剛燒錄完成的MicroSD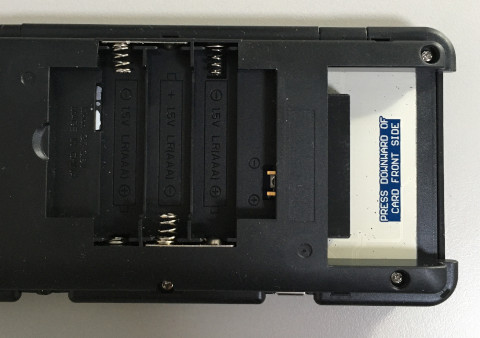
5. 插入電池,開機上電
按下SELECT:刷入v1版本官方系統(8大模擬器)
按下START:刷入v2版本官方系統(10大模擬器)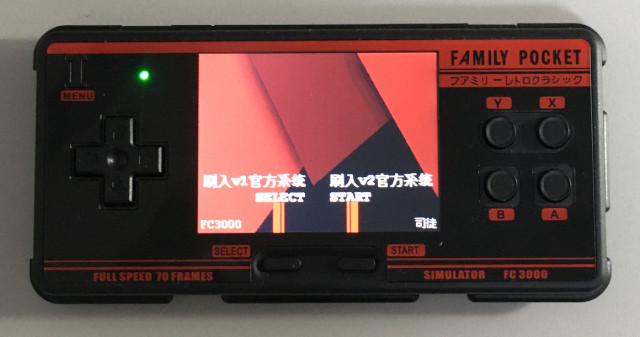
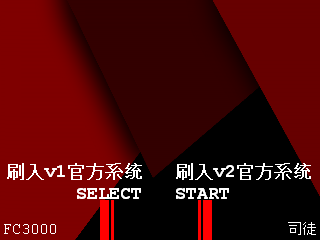
6. 更新時間大約3分鐘
7. 完成
v1版本系統(8大模擬器)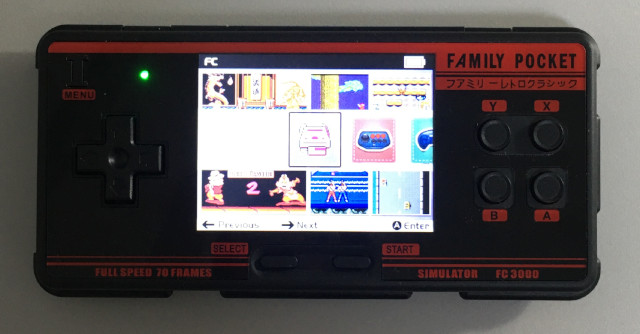
v2版本系統(10大模擬器)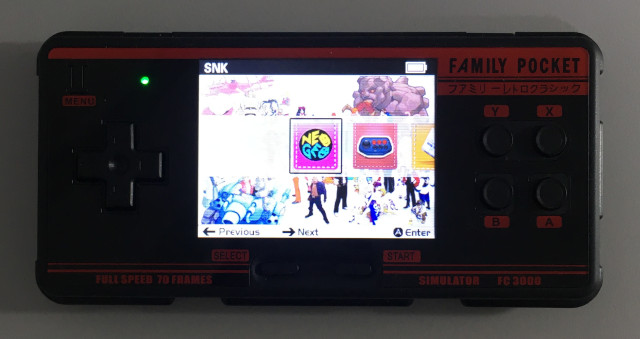
既然Bootloader都自幹完畢了,那司徒接下來就準備要開始移植Linux Kernel,目前有三種可行方式:
1. 使用當初司徒移植給Miyoo的Linux Kernel (Linux Kernel 4.14.0)
2. 從荔枝派GitHub官網Clone移植 (Linux Kernel 5.2)
3. 從目前最新的Linux Kernel從頭移植 (Linux Kernel 5.12.9)
為了榨乾F1C100S效能,司徒最後決定從目前最新的Linux Kernel 5.12.9從頭移植,所以可能幾個月後,司徒才會在更新了!哈哈~
不過,移植Linux Kernel需要一些時間,因此,司徒也會把預定的四台掌機(FC3000、Q8、TRIMUI、PocketGo)做整理,因此,當移植累了,司徒就會整理這四台掌機,讓這四台掌機都處於備戰狀態(硬體都解析出來),所以接下來,可能是混亂的開始,哈~
#492 Re: 司徒开源 » 研究FC3000掌機的開源可行性 » 2021-06-19 12:03:51
司徒原本沈浸在雙飛的感覺之中,心情愉悅,於是爽爽的寫FC3000程式,結果,竟然吃土了!
今天就來分享一下遇到的問題
目前FC3000掌機已經可以從MicroSD開機執行,於是,司徒依照個人慣例,都會把一些基本I/O程式練習一遍
所以,第一個測試就是點屏,這個沒有問題,第二個測試程式則是UART,結果竟然卡關...
但是,一樣的程式燒到SPI Flash竟然可以執行,司徒編譯後的Binary程式大小只有512 Bytes
後來交叉測試,發現F1C100S只會從MicroSD載入大於512 Bytes的Binary程式,意思就是寫到MicroSD的程式必須大於等於1024 Bytes,這也是為何司徒的短小測試程式無法從MicroSD執行的原因,SPI Flash就沒有這個限制,跟大家分享一下~
#493 Re: 司徒开源 » 研究FC3000掌機的開源可行性 » 2021-06-19 10:43:22
#494 Re: 司徒开源 » 研究FC3000掌機的開源可行性 » 2021-06-18 21:10:51
確實有飛龍在天的感覺,難怪司徒昨晚在夢境之中有雙飛的感覺,雙龍飛舞的意思,不要誤會
能夠走到這一步,小弟在此感謝所有幫助過的人
FC3000掌機的目標很明確,就是要跑Linux Kernel,因此,司徒需要一個Bootloader用來載入Kernel,
而這個Bootloader的動作也很明確,就是初始化DRAM,然後從MicroSD載入Kernel,跳轉Kernel,
司徒要訂一個很嚴格的目標:FC3000掌機上電後,執行完Kernel,UART顯示Login畫面,必須在一秒內,執行完畢
看似不太可能,不過總是要試試才知道~
目前在應用上,最熱門就是UBoot,不過,UBoot真的太肥、太大了,XBoot也需要瘦身,司徒在whycan有看到一些人,自己做精簡版Bootloader,不過,司徒最後決定自己幹一個超精簡Bootloader給FC3000掌機專用,所以,可能幾個月後,才會在更新了~哈
#495 Re: 司徒开源 » 研究FC3000掌機的開源可行性 » 2021-06-18 17:52:23
#496 Re: 司徒开源 » 研究FC3000掌機的開源可行性 » 2021-06-18 14:42:57
如果有玩家想要讓FC3000掌機跑Linux系統,需要飛三根線,這是最少的改機步驟
接著需要改機,否則無法從MicroSD開機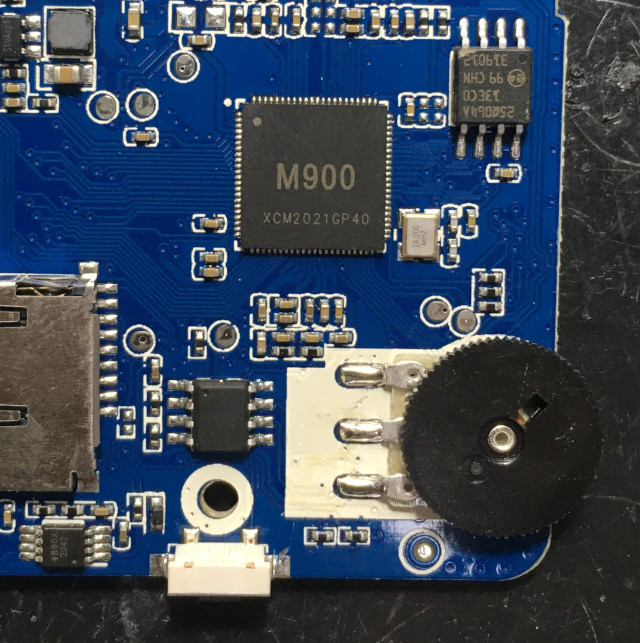
需要跳三根線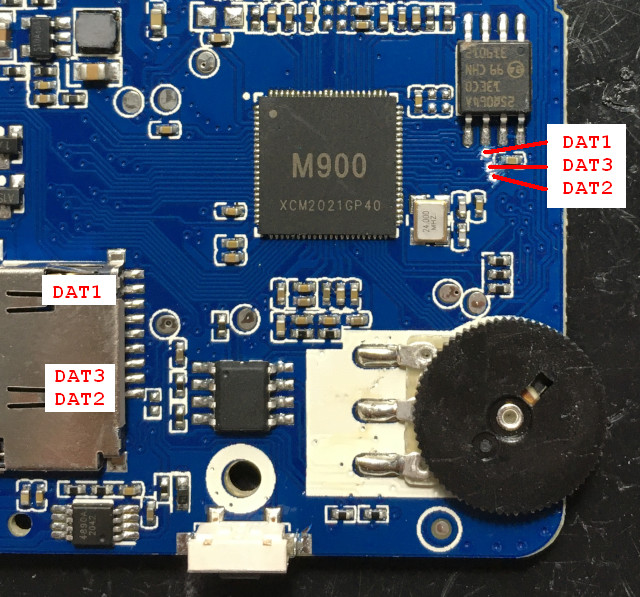
這樣就可以從MicroSD開機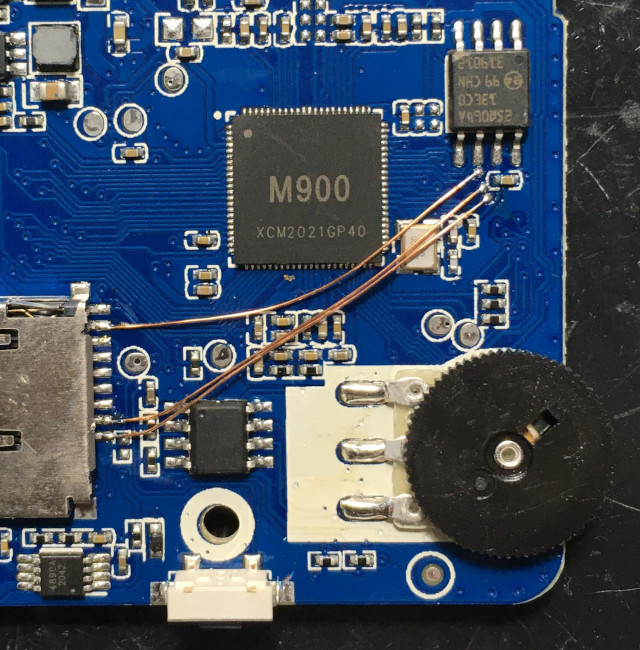
不要插入卡帶,MicroSD卡的位置很方便替換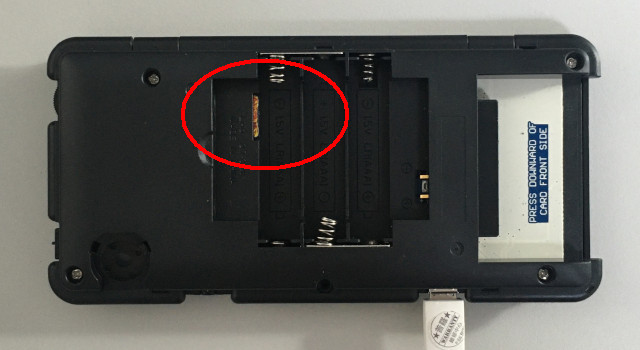
fc3000_lcd_test.img
下載fc3000_lcd_test.img,直接DD到MicroSD即可,插入MicroSD卡後,開機上電,這樣就可以測試是否改機完成,屏會一直換顏色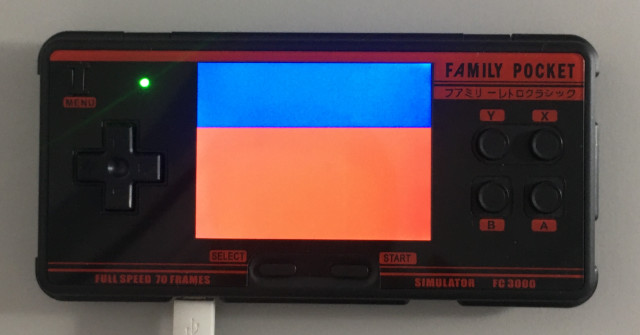
使用原本官方MicroSD開機,則可以進入原本系統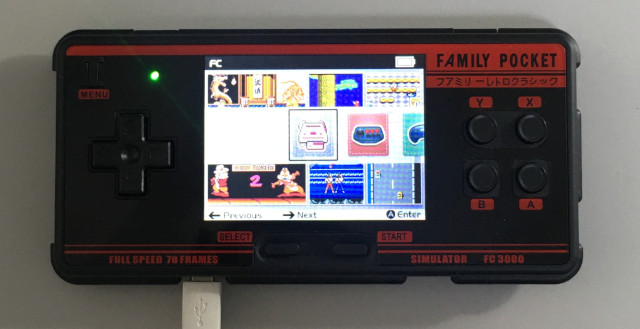
插入卡帶
則開機進入NES遊戲畫面,做到這一步,FC3000掌機已經具備跑Linux系統的能力,因此,一般玩家想要讓FC3000掌機可以具備跑Linux的能力,只要跳三根線即可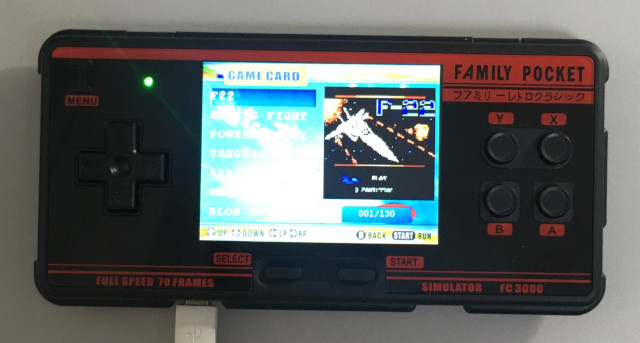
#497 Re: 司徒开源 » 研究FC3000掌機的開源可行性 » 2021-06-18 14:34:33
#498 Re: 司徒开源 » 研究FC3000掌機的開源可行性 » 2021-06-18 14:22:59
接著司徒花了一些時間,把腳位找了出來,這樣FC3000掌機就進入備戰狀態了~
UP                  PF0
DOWN                PF5
LEFT                PF4
RIGHT               PE2
A                   PE3
B                   PE4
X                   PE5
Y                   PA3
I                   BTA54C(Pin3)
BAT54C(Pin1)PA2
R                   PA2, 1AM-C(Pin3)
L                   PA1, 1AM-C(Pin3)
START               PE12, BAT54C(Pin2)
SELECT              PE12, BAT54C(Pin1)
Encrypt IC(Pin6)    I2C_SCK PE0
Encrypt IC(Pin7)    I2C_SDA PE1
Encrypt IC(Pin2)    Blue LED-
LTH7 CHRG           Red LED-
MicroSD D0          PF1
MicroSD CLK         PF2
MicroSD CMD         PF3
Boot SPI Flash CS   PC1
Boot SPI Flash MISO PC2
Boot SPI Flash MOSI PC3
Boot SPI Flash SCK  PC0
SPI Flash CS        PE7
SPI Flash MISO      PE10
SPI Flash MOSI      PE8
SPI Flash CLK       PE9
LCD BK              PE6
LCD RST	            PE11
LCD CS              PD21
LCD RS              PD19
LCD WR              PD18
LCD DB11            PD13
LCD DB12            PD14
LCD DB13            PD15
LCD DB14            PD16
LCD DB15            PD17
LCD DB5             PD6
LCD DB6             PD7
LCD DB7             PD8
LCD DB8             PD10
LCD DB9             PD11
LCD DB10            PD12
LCD DB0             PD1
LCD DB1             PD2
LCD DB2             PD3
LCD DB3             PD4
LCD DB4 PD5#499 Re: 司徒开源 » 研究FC3000掌機的開源可行性 » 2021-06-18 11:54:14
司徒買一台山寨Saleae Logic 16,體積很迷你
不過,同時開啟16通道時,取樣率只有16MS/s...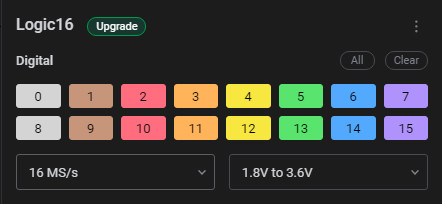
在測試過16通道16MS/s取樣率後,司徒發現每次取的資料都有變動,資料不一致性有點大,這邏輯分析儀...,於是,司徒改成使用12通道25MS/s的取樣率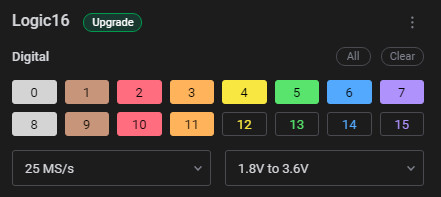
測試幾次後,發現資料不一致性還是有,不過已經好很多了,不過LCD是16Bits,在加上LCD_WR、LCD_RS,需要18通道才行,於是司徒分兩次擷取
低位元資料(取5次):LCD_RS、LCD_WR、LCD_DB0~LCD_DB9
高位元資料(取5次):LCD_RS、LCD_WR、LCD_DB6~LCD_DB15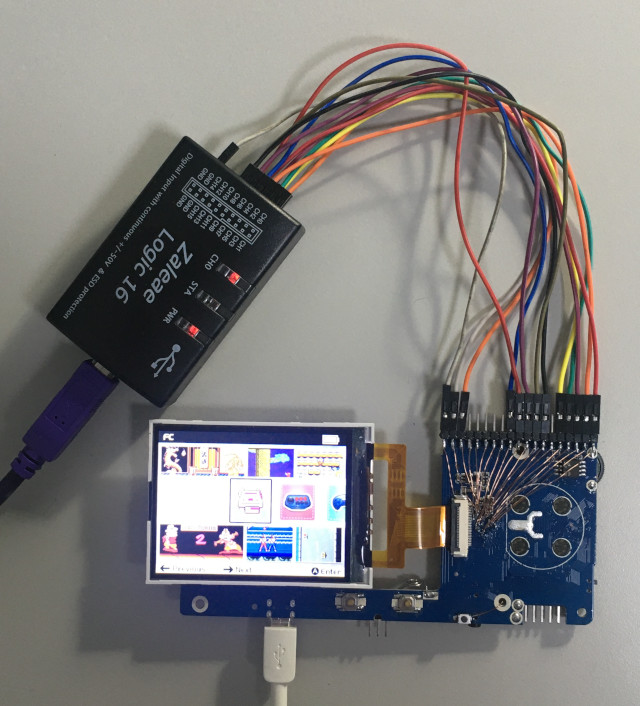
擷取後,把高位元資料進行排列,假定這些多餘的資料為雜訊,手動濾掉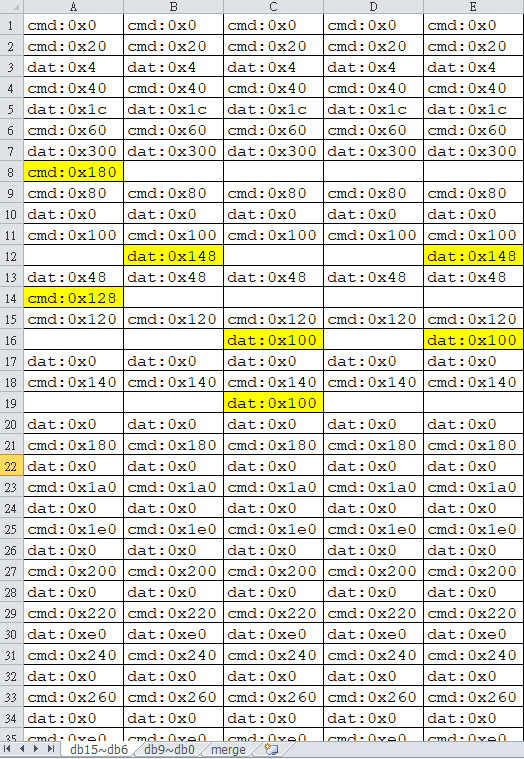
低位元資料進行排列,假定這些多餘的資料為雜訊,手動濾掉
再做合併時,發現低位元資料少一筆,這...,不過,仔細一看,資料都是一筆CMD、一筆DAT,然後LCD_DB6~LCD_DB9是疊加取樣,因此,交叉比對後,發現第一筆高位元資料是雜訊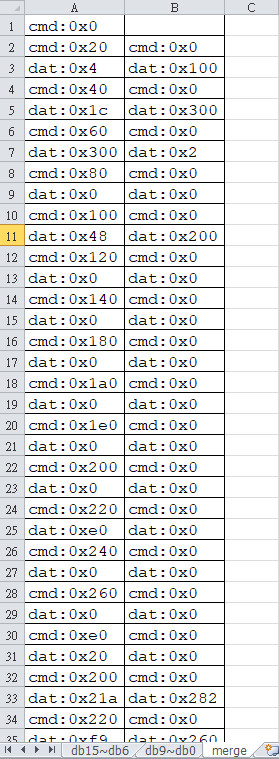
合併後的初始化命令
CMD:0x800
DAT:0x100
CMD:0x1000
DAT:0x700
CMD:0x1800
DAT:0xc002
CMD:0x2000
DAT:0x0
CMD:0x4000
DAT:0x1200
CMD:0x4800
DAT:0x0
CMD:0x5000
DAT:0x0
CMD:0x6000
DAT:0x0
CMD:0x6800
DAT:0x0
CMD:0x7800
DAT:0x0
CMD:0x8000
DAT:0x0
CMD:0x8800
DAT:0x3800
CMD:0x9000
DAT:0x0
CMD:0x9800
DAT:0x0
CMD:0x3800
DAT:0x800
CMD:0x8000
DAT:0x8682
CMD:0x8800
DAT:0x3e60
CMD:0x9000
DAT:0xc080
CMD:0x9800
DAT:0x603
CMD:0x4820
DAT:0xf000
CMD:0x5820
DAT:0x7000
CMD:0x20
DAT:0x0
CMD:0x820
DAT:0x0
CMD:0x8020
DAT:0x0
CMD:0x8820
DAT:0x3d00
CMD:0x9020
DAT:0x2000
CMD:0xa820
DAT:0x2a00
CMD:0xb020
DAT:0x2000
CMD:0xb820
DAT:0x3b00
CMD:0xc020
DAT:0x1000
CMD:0xc820
DAT:0x3f00
CMD:0xe020
DAT:0x1500
CMD:0xe820
DAT:0x2000
CMD:0x8040
DAT:0x0
CMD:0x8840
DAT:0x78e0
CMD:0x9040
DAT:0x0
CMD:0x9840
DAT:0xf920
CMD:0x60
DAT:0x714
CMD:0x860
DAT:0x800
CMD:0x5060
DAT:0x0
CMD:0x80
DAT:0x0
CMD:0x880
DAT:0x0
CMD:0x1080
DAT:0x0
CMD:0x1880
DAT:0x0
CMD:0x2080
DAT:0x0
CMD:0x2880
DAT:0x0
CMD:0x8080
DAT:0x8000
CMD:0x9080
DAT:0x600
CMD:0x1800
DAT:0x4020
CMD:0x3800
DAT:0x9920
CMD:0x8040
DAT:0x0
CMD:0x8840
DAT:0x78e0
CMD:0x9040
DAT:0x0
CMD:0x9840
DAT:0xf920
CMD:0x20
DAT:0x78e0
CMD:0x820
DAT:0x0
CMD:0x1020
DAT:0x0
測試程式
  .global _start

  .equiv PIO_BASE,  0x01c20800
  .equiv PD,        (0x24 * 3)
  .equiv PE,        (0x24 * 4)
  .equiv PIO_CFG0,  0x00
  .equiv PIO_CFG1,  0x04
  .equiv PIO_CFG2,  0x08
  .equiv PIO_DATA,  0x10

  .equiv LCD_CS,    (1 << 21)
  .equiv LCD_RD,    (1 << 20)
  .equiv LCD_RS,    (1 << 19)
  .equiv LCD_WR,    (1 << 18)
  .equiv LCD_RST,   (1 << 11)
  .equiv LCD_BL,    (1 << 6)

  .arm
  .text
_start:
  .long 0xea000016
  .byte 'e', 'G', 'O', 'N', '.', 'B', 'T', '0'
  .long 0, __spl_size
  .byte 'S', 'P', 'L', 2
  .long 0, 0
  .long 0, 0, 0, 0, 0, 0, 0, 0
  .long 0, 0, 0, 0, 0, 0, 0, 0

_vector:
  b reset
  b .
  b .
  b .
  b .
  b .
  b .
  b .

reset:
  ldr r4, =PIO_BASE + PD
  ldr r1, =0x11111111
  str r1, [r4, #PIO_CFG0]
  str r1, [r4, #PIO_CFG1]
  ldr r1, =0x00111111
  str r1, [r4, #PIO_CFG2]

  ldr r4, =PIO_BASE + PE
  ldr r1, [r4, #PIO_CFG0]
  bic r1, #0xf000000
  orr r1, #0x1000000
  str r1, [r4, #PIO_CFG0]

  ldr r1, [r4, #PIO_CFG1]
  bic r1, #0xf000
  orr r1, #0x1000
  str r1, [r4, #PIO_CFG1]

  ldr r4, =PIO_BASE + PD
  ldr r1, =0xffffffff
  str r1, [r4, #PIO_DATA]

  ldr r4, =PIO_BASE + PE
  ldr r1, =0xffffffff
  str r1, [r4, #PIO_DATA]

  bl lcd_rst

  ldr r0, =0x800
  bl lcd_cmd

  ldr r0, =0x100
  bl lcd_dat

  ldr r0, =0x1000
  bl lcd_cmd

  ldr r0, =0x700
  bl lcd_dat

  ldr r0, =0x1800
  bl lcd_cmd

  ldr r0, =0xc002
  bl lcd_dat

  ldr r0, =0x2000
  bl lcd_cmd

  ldr r0, =0x0
  bl lcd_dat

  ldr r0, =0x4000
  bl lcd_cmd

  ldr r0, =0x1200
  bl lcd_dat

  ldr r0, =0x4800
  bl lcd_cmd

  ldr r0, =0x0
  bl lcd_dat

  ldr r0, =0x5000
  bl lcd_cmd

  ldr r0, =0x0
  bl lcd_dat

  ldr r0, =0x6000
  bl lcd_cmd

  ldr r0, =0x0
  bl lcd_dat

  ldr r0, =0x6800
  bl lcd_cmd

  ldr r0, =0x0
  bl lcd_dat

  ldr r0, =0x7800
  bl lcd_cmd

  ldr r0, =0x0
  bl lcd_dat

  ldr r0, =0x8000
  bl lcd_cmd

  ldr r0, =0x0
  bl lcd_dat

  ldr r0, =0x8800
  bl lcd_cmd

  ldr r0, =0x3800
  bl lcd_dat

  ldr r0, =0x9000
  bl lcd_cmd

  ldr r0, =0x0
  bl lcd_dat

  ldr r0, =0x9800
  bl lcd_cmd

  ldr r0, =0x0
  bl lcd_dat

  ldr r0, =0x3800
  bl lcd_cmd

  ldr r0, =0x800
  bl lcd_dat

  ldr r0, =0x8000
  bl lcd_cmd

  ldr r0, =0x8682
  bl lcd_dat

  ldr r0, =0x8800
  bl lcd_cmd

  ldr r0, =0x3e60
  bl lcd_dat

  ldr r0, =0x9000
  bl lcd_cmd

  ldr r0, =0xc080
  bl lcd_dat

  ldr r0, =0x9800
  bl lcd_cmd

  ldr r0, =0x603
  bl lcd_dat

  ldr r0, =0x4820
  bl lcd_cmd

  ldr r0, =0xf000
  bl lcd_dat

  ldr r0, =0x5820
  bl lcd_cmd

  ldr r0, =0x7000
  bl lcd_dat

  ldr r0, =0x20
  bl lcd_cmd

  ldr r0, =0x0
  bl lcd_dat

  ldr r0, =0x820
  bl lcd_cmd

  ldr r0, =0x0
  bl lcd_dat

  ldr r0, =0x8020
  bl lcd_cmd

  ldr r0, =0x0
  bl lcd_dat

  ldr r0, =0x8820
  bl lcd_cmd

  ldr r0, =0x3d00
  bl lcd_dat

  ldr r0, =0x9020
  bl lcd_cmd

  ldr r0, =0x2000
  bl lcd_dat

  ldr r0, =0xa820
  bl lcd_cmd

  ldr r0, =0x2a00
  bl lcd_dat

  ldr r0, =0xb020
  bl lcd_cmd

  ldr r0, =0x2000
  bl lcd_dat

  ldr r0, =0xb820
  bl lcd_cmd

  ldr r0, =0x3b00
  bl lcd_dat

  ldr r0, =0xc020
  bl lcd_cmd

  ldr r0, =0x1000
  bl lcd_dat

  ldr r0, =0xc820
  bl lcd_cmd

  ldr r0, =0x3f00
  bl lcd_dat

  ldr r0, =0xe020
  bl lcd_cmd

  ldr r0, =0x1500
  bl lcd_dat

  ldr r0, =0xe820
  bl lcd_cmd

  ldr r0, =0x2000
  bl lcd_dat

  ldr r0, =0x8040
  bl lcd_cmd

  ldr r0, =0x0
  bl lcd_dat

  ldr r0, =0x8840
  bl lcd_cmd

  ldr r0, =0x78e0
  bl lcd_dat

  ldr r0, =0x9040
  bl lcd_cmd

  ldr r0, =0x0
  bl lcd_dat

  ldr r0, =0x9840
  bl lcd_cmd

  ldr r0, =0xf920
  bl lcd_dat

  ldr r0, =0x60
  bl lcd_cmd

  ldr r0, =0x714
  bl lcd_dat

  ldr r0, =0x860
  bl lcd_cmd

  ldr r0, =0x800
  bl lcd_dat

  ldr r0, =0x5060
  bl lcd_cmd

  ldr r0, =0x0
  bl lcd_dat

  ldr r0, =0x80
  bl lcd_cmd

  ldr r0, =0x0
  bl lcd_dat

  ldr r0, =0x880
  bl lcd_cmd

  ldr r0, =0x0
  bl lcd_dat

  ldr r0, =0x1080
  bl lcd_cmd

  ldr r0, =0x0
  bl lcd_dat

  ldr r0, =0x1880
  bl lcd_cmd

  ldr r0, =0x0
  bl lcd_dat

  ldr r0, =0x2080
  bl lcd_cmd

  ldr r0, =0x0
  bl lcd_dat

  ldr r0, =0x2880
  bl lcd_cmd

  ldr r0, =0x0
  bl lcd_dat

  ldr r0, =0x8080
  bl lcd_cmd

  ldr r0, =0x8000
  bl lcd_dat

  ldr r0, =0x9080
  bl lcd_cmd

  ldr r0, =0x600
  bl lcd_dat

  ldr r0, =0x1800
  bl lcd_cmd

  ldr r0, =0x4020
  bl lcd_dat

  ldr r0, =0x3800
  bl lcd_cmd

  ldr r0, =0x9920
  bl lcd_dat

  ldr r0, =0x8040
  bl lcd_cmd

  ldr r0, =0x0
  bl lcd_dat

  ldr r0, =0x8840
  bl lcd_cmd

  ldr r0, =0x78e0
  bl lcd_dat

  ldr r0, =0x9040
  bl lcd_cmd

  ldr r0, =0x0
  bl lcd_dat

  ldr r0, =0x9840
  bl lcd_cmd

  ldr r0, =0xf920
  bl lcd_dat

  ldr r0, =0x20
  bl lcd_cmd

  ldr r0, =0x78e0
  bl lcd_dat

  ldr r0, =0x820
  bl lcd_cmd

  ldr r0, =0x0
  bl lcd_dat

  ldr r0, =0x1020
  bl lcd_cmd

  ldr r4, =320*80
  ldr r5, =0x1f
0:
  mov r0, r5
  bl lcd_dat
  subs r4, #1
  bne 0b

  ldr r4, =320*80
  ldr r5, =0x7e0
0:
  mov r0, r5
  bl lcd_dat
  subs r4, #1
  bne 0b

  ldr r4, =320*80
  ldr r5, =0xf800
0:
  mov r0, r5
  bl lcd_dat
  subs r4, #1
  bne 0b
  b .

delay:
  push {lr}
0:
  subs r0, #1
  bne 0b
  pop {pc}

lcd_rst:
  push {r4, r5, lr}
  ldr r4, =PIO_BASE + PE
  ldr r5, =0xffffffff

  bic r5, #LCD_RST
  str r5, [r4, #PIO_DATA]
  ldr r0, =10000
  bl delay

  orr r5, #LCD_RST
  str r5, [r4, #PIO_DATA]
  ldr r0, =10000
  bl delay
  pop {r4, r5, pc}

lcd_wr:
  push {r4, r5, lr}
  ldr r4, =PIO_BASE + PD

  and r2, r0, #0x00ff
  and r3, r0, #0xff00
  lsl r2, #1
  lsl r3, #2

  eor r5, r5
  orr r5, r1
  orr r5, r2
  orr r5, r3
  orr r5, #LCD_RD
  str r5, [r4, #PIO_DATA]

  orr r5, #LCD_WR
  str r5, [r4, #PIO_DATA]
  pop {r4, r5, pc}

lcd_dat:
  push {lr}
  mov r1, #LCD_RS
  bl lcd_wr
  pop {pc}

lcd_cmd:
  push {lr}
  mov r1, #0
  bl lcd_wr
  pop {pc}
  .end
感動的一刻
#500 Re: 司徒开源 » 研究FC3000掌機的開源可行性 » 2021-06-16 18:35:37
@shawn.d
好,我找時間試試,感謝
荔枝姐詢問司徒,為何最近都在搞芒果哥?這問題...,司徒如何啟齒...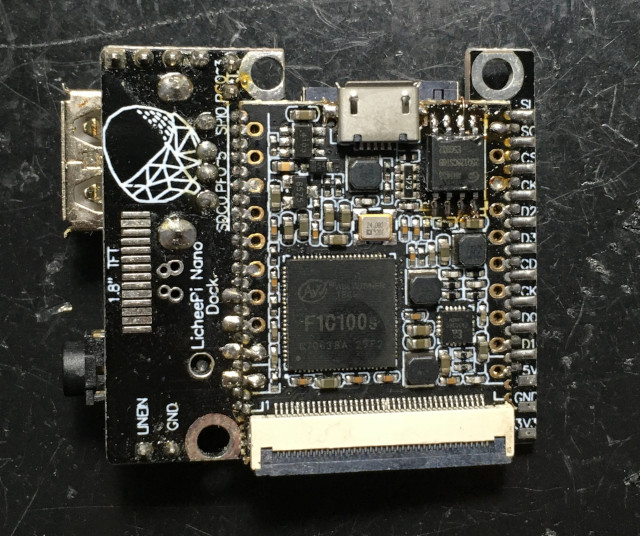
目前VCC_CORE=1.1V,超頻首要工作就是加大電壓,電壓公式:0.6 * (R47 / R48) + 0.6)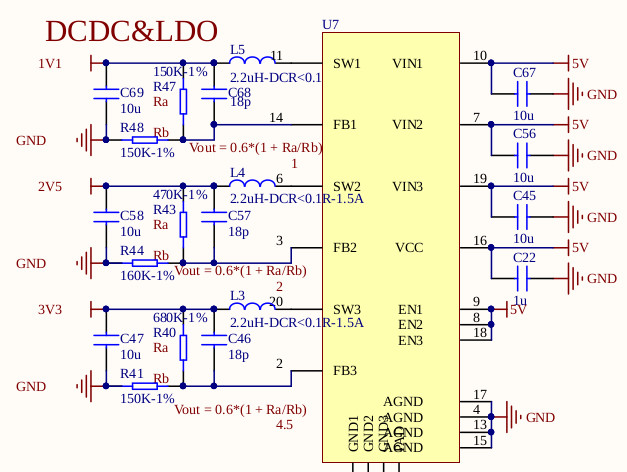
R47、R48位置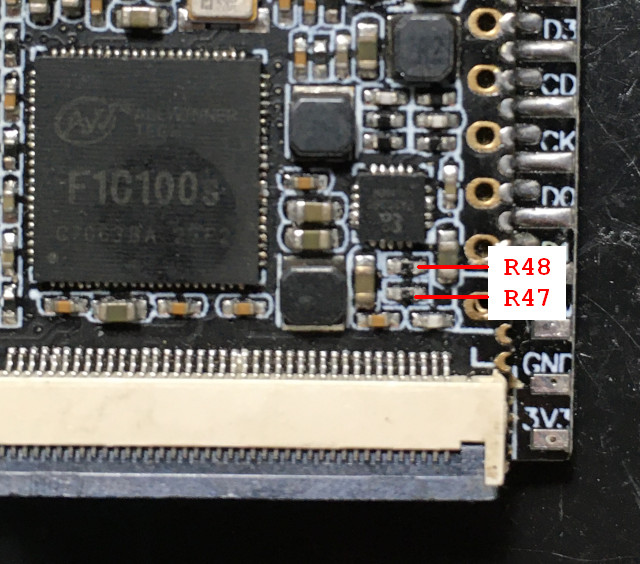
移除R47、R48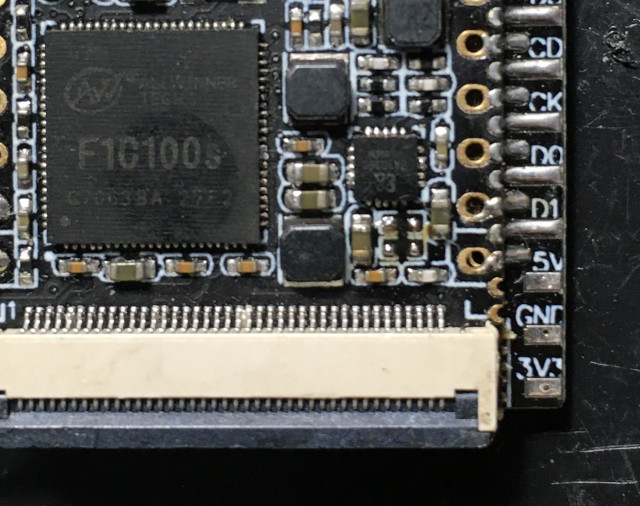
R47=442K、R48=160K,0.6 * (442K / 160K) + 0.6 = 2.2575V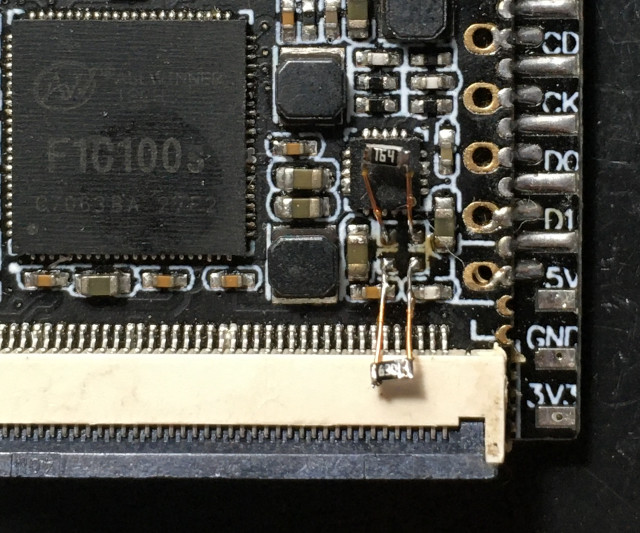
CPU=2016MHz,三秒就掛了,於是,電風扇伺候,CPU=1920MHz,可以跑I/O Toggle了...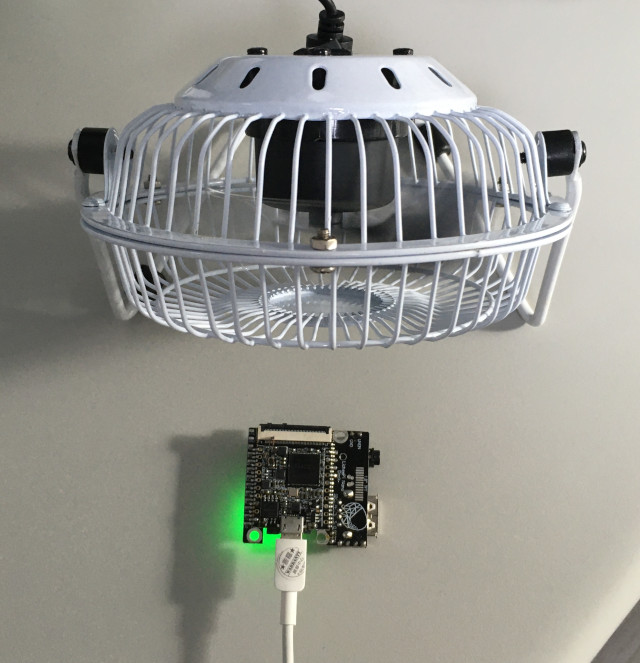
司徒一摸荔枝姐,這...溫度怎麼比芒果哥還要激情...
測試程式
  .global _start

  .equiv CCU_BASE,              0x01c20000
  .equiv GPIO_BASE,             0x01c20800

  .equiv PLL_CPU_CTRL_REG,      0x0000
  .equiv PLL_PERIPH_CTRL_REG,   0x0028
  .equiv AHB_APB_HCLKC_CFG_REG, 0x0054
  .equiv BUS_CLK_GATING_REG2,   0x0068
  .equiv BUS_SOFT_RST_REG2,     0x02d0

  .equiv PE,                    (0x24 * 4)
  .equiv PORT_CFG0,             0x00
  .equiv PORT_DATA,             0x10

  .arm
  .text
_start:
  .long 0xea000016
  .byte 'e', 'G', 'O', 'N', '.', 'B', 'T', '0'
  .long 0, __spl_size
  .byte 'S', 'P', 'L', 2
  .long 0, 0
  .long 0, 0, 0, 0, 0, 0, 0, 0
  .long 0, 0, 0, 0, 0, 0, 0, 0

_vector:
  b reset
  b .
  b .
  b .
  b .
  b .
  b .
  b .

reset:
  ldr r4, =CCU_BASE
  ldr r1, =(1 << 31) | (19 << 8) | (3 << 4)
  str r1, [r4, #PLL_CPU_CTRL_REG]
0:
  ldr r1, [r4, #PLL_CPU_CTRL_REG]
  tst r1, #(1 << 28)
  beq 0b

  ldr r0, =GPIO_BASE
  ldr r1, =0x10000
  str r1, [r0, #(PE + PORT_CFG0)]

0:
  eor r1, #0x10
  str r1, [r0, #(PE + PORT_DATA)]
  ldr r2, =500000
1:
  subs r2, #1
  bne 1b
  b 0b
  .end
結論:
荔枝派一樣可以超頻到1.9GHz,只是溫度感覺比芒果派稍微高一點,錯覺?